एक्सप्रेसजेएस - त्वरित गाइड
एक्सप्रेसजेएस एक वेब एप्लीकेशन फ्रेमवर्क है जो आपको वेबसाइट, वेब एप और बैक एंड बनाने के लिए एक साधारण एपीआई प्रदान करता है। एक्सप्रेसजेएस के साथ, आपको निम्न स्तर के प्रोटोकॉल, प्रक्रियाओं आदि के बारे में चिंता करने की आवश्यकता नहीं है।
एक्सप्रेस क्या है?
एक्सप्रेस हमारे अनुप्रयोगों के निर्माण के लिए एक न्यूनतम इंटरफ़ेस प्रदान करता है। यह हमें हमारे ऐप बनाने के लिए आवश्यक उपकरण प्रदान करता है। यह लचीला है क्योंकि इसमें कई मॉड्यूल उपलब्ध हैंnpm, जिसे सीधे एक्सप्रेस में प्लग किया जा सकता है।
एक्सप्रेस द्वारा विकसित किया गया था TJ Holowaychukऔर Node.js फाउंडेशन और कई ओपन सोर्स योगदानकर्ताओं द्वारा बनाए रखा जाता है ।
एक्सप्रेस क्यों?
रेल और Django जैसे अपने प्रतिद्वंद्वियों के विपरीत, जिनके पास अनुप्रयोगों के निर्माण का एक राय है, एक्सप्रेस के पास कुछ करने के लिए कोई "सबसे अच्छा तरीका" नहीं है। यह बहुत लचीला और प्लगेबल है।
बंदर
पग (पहले जेड के रूप में जाना जाता है) HTML टेम्प्लेट लिखने के लिए एक कठिन भाषा है। यह -
- HTML का निर्माण करता है
- डायनेमिक कोड का समर्थन करता है
- पुन: प्रयोज्यता का समर्थन करता है (DRY)
यह एक्सप्रेस के साथ उपयोग की जाने वाली सबसे लोकप्रिय टेम्पलेट भाषा में से एक है।
MongoDB और Mongoose
MongoDB एक खुला-स्रोत, दस्तावेज़ डेटाबेस है जिसे विकास और स्केलिंग में आसानी के लिए डिज़ाइन किया गया है। इस डेटाबेस का उपयोग डाटा स्टोर करने के लिए भी किया जाता है।
Mongoose के लिए एक क्लाइंट एपीआई है node.js जो हमारे एक्सप्रेस एप्लिकेशन से हमारे डेटाबेस तक पहुंचना आसान बनाता है।
इस अध्याय में, हम सीखेंगे कि एक्सप्रेस फ्रेमवर्क का विकास और उपयोग कैसे शुरू करें। शुरू करने के लिए, आपके पास नोड और एनपीएम (नोड पैकेज मैनेजर) स्थापित होना चाहिए। यदि आपके पास पहले से ये नहीं हैं, तो अपने स्थानीय सिस्टम पर नोड स्थापित करने के लिए नोड सेटअप पर जाएं। पुष्टि करें कि नोड और पीपीएम आपके टर्मिनल में निम्नलिखित कमांड चलाकर स्थापित किए गए हैं।
node --version
npm --version
आपको निम्न के समान आउटपुट प्राप्त करना चाहिए।
v5.0.0
3.5.2
अब जब हमारे पास नोड है और npm सेट अप करें, हम क्या समझते हैं npm है और इसका उपयोग कैसे करें।
नोड पैकेज मैनेजर (npm)
npm नोड के लिए पैकेज प्रबंधक है। Npm रजिस्ट्री Node.js, फ्रंट-एंड वेब ऐप, मोबाइल ऐप, रोबोट, राउटर और जावास्क्रिप्ट समुदाय की अनगिनत अन्य जरूरतों के लिए ओपन-सोर्स कोड के पैकेज का एक सार्वजनिक संग्रह है। npm हमें इन सभी पैकेजों तक पहुँचने और उन्हें स्थानीय स्तर पर स्थापित करने की अनुमति देता है। आप npmJS पर npm पर उपलब्ध पैकेजों की सूची के माध्यम से ब्राउज़ कर सकते हैं ।
एनपीएम का उपयोग कैसे करें?
Npm का उपयोग करके एक पैकेज स्थापित करने के दो तरीके हैं: विश्व स्तर पर और स्थानीय रूप से।
Globally- इस पद्धति का उपयोग आमतौर पर विकास उपकरण और सीएलआई आधारित पैकेजों को स्थापित करने के लिए किया जाता है। विश्व स्तर पर पैकेज स्थापित करने के लिए, निम्न कोड का उपयोग करें।
npm install -g <package-name>Locally- इस पद्धति का उपयोग आमतौर पर फ्रेमवर्क और लाइब्रेरी स्थापित करने के लिए किया जाता है। एक स्थानीय रूप से स्थापित पैकेज का उपयोग केवल उस निर्देशिका के भीतर किया जा सकता है जो इसे स्थापित किया गया है। पैकेज को स्थानीय रूप से स्थापित करने के लिए, ऊपर दिए गए कमांड का उपयोग करें-g झंडा।
npm install <package-name>जब भी हम npm का उपयोग करके एक प्रोजेक्ट बनाते हैं, हमें एक प्रदान करने की आवश्यकता होती है package.jsonफ़ाइल, जिसमें हमारी परियोजना के बारे में सभी विवरण हैं। npm हमारे लिए इस फ़ाइल को सेट करना आसान बनाता है। आइए हम अपनी विकास परियोजना स्थापित करें।
Step 1 - अपने टर्मिनल / cmd को प्रारंभ करें, इसमें एक नया फ़ोल्डर बनाएं जिसका नाम hello-world और cd (create directory) है -

Step 2 - अब npm का उपयोग करके package.json फ़ाइल बनाने के लिए, निम्न कोड का उपयोग करें।
npm initयह आपसे निम्नलिखित जानकारी मांगेगा।
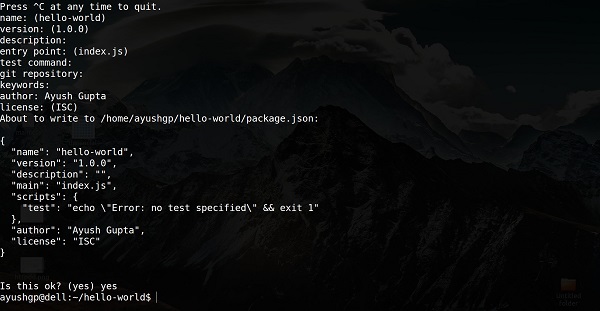
बस एंटर दबाए रखें, और "लेखक नाम" फ़ील्ड में अपना नाम दर्ज करें।
Step 3- अब हमारे पास हमारा पैकेज है। जसन फ़ाइल सेट है, हम आगे एक्सप्रेस स्थापित करेंगे। एक्सप्रेस को स्थापित करने और इसे हमारे पैकेज में जोड़ने के लिए। Json फ़ाइल, निम्न कमांड का उपयोग करें -
npm install --save expressयह पुष्टि करने के लिए कि एक्सप्रेस ने सही तरीके से स्थापित किया है, निम्न कोड चलाएँ।
ls node_modules #(dir node_modules for windows)Tip - - -save ध्वज को प्रतिस्थापित किया जा सकता है -Sझंडा। यह ध्वज सुनिश्चित करता है कि एक्सप्रेस को हमारे लिए एक निर्भरता के रूप में जोड़ा गया हैpackage.jsonफ़ाइल। इसका एक फायदा है, अगली बार जब हमें अपनी परियोजना की सभी निर्भरताएं स्थापित करने की आवश्यकता होती है, तो हम केवल कमांड एनपीएम इंस्टॉल कर सकते हैं और यह इस फाइल में निर्भरताएं ढूंढेगा और उन्हें हमारे लिए स्थापित करेगा।
यह हम सभी को एक्सप्रेस फ्रेमवर्क का उपयोग करके विकास शुरू करने की आवश्यकता है। हमारी विकास प्रक्रिया को बहुत आसान बनाने के लिए, हम npm, nodemon से एक उपकरण स्थापित करेंगे। जैसे ही हम अपनी किसी फाइल में बदलाव करते हैं, वैसे ही यह टूल हमारे सर्वर को रिस्टार्ट कर देता है, अन्यथा हमें प्रत्येक फाइल मॉडिफिकेशन के बाद सर्वर को मैन्युअल रूप से रिस्टार्ट करना होगा। Nodemon स्थापित करने के लिए, निम्नलिखित कमांड का उपयोग करें -
npm install -g nodemonअब आप एक्सप्रेस पर काम करना शुरू कर सकते हैं।
हमने विकास की स्थापना की है, अब एक्सप्रेस का उपयोग करके अपना पहला ऐप विकसित करना शुरू करने का समय आ गया है। नामक एक नई फ़ाइल बनाएँindex.js और इसमें निम्नलिखित टाइप करें।
var express = require('express');
var app = express();

app.get('/', function(req, res){
   res.send("Hello world!");
});

app.listen(3000);
फ़ाइल सहेजें, अपने टर्मिनल पर जाएं और निम्नलिखित टाइप करें।
nodemon index.jsइससे सर्वर शुरू हो जाएगा। इस ऐप का परीक्षण करने के लिए, अपना ब्राउज़र खोलें और पर जाएंhttp://localhost:3000 और एक संदेश निम्न स्क्रीनशॉट के रूप में प्रदर्शित किया जाएगा।

ऐप कैसे काम करता है?
हमारी फ़ाइल में पहली पंक्ति आयात एक्सप्रेस है, हम चर एक्सप्रेस के माध्यम से इसके लिए उपयोग करते हैं। हम इसका उपयोग एप्लिकेशन बनाने और इसे var ऐप में असाइन करने के लिए करते हैं।
app.get (मार्ग, कॉलबैक)
यह फ़ंक्शन बताता है कि जब क्या करना है getदिए गए मार्ग पर अनुरोध कहा जाता है। कॉलबैक फ़ंक्शन के 2 पैरामीटर हैं,request(req) तथा response(res)। अनुरोधobject(req) HTTP अनुरोध का प्रतिनिधित्व करता है और इसमें अनुरोध क्वेरी स्ट्रिंग, पैरामीटर, बॉडी, HTTP हेडर इत्यादि के लिए गुण होते हैं। इसी तरह, प्रतिक्रिया ऑब्जेक्ट HTTP प्रतिक्रिया का प्रतिनिधित्व करता है जो एक HTTP अनुरोध प्राप्त होने पर एक्सप्रेस ऐप भेजता है।
res.send ()
यह फ़ंक्शन इनपुट के रूप में एक ऑब्जेक्ट लेता है और यह अनुरोध करने वाले क्लाइंट को भेजता है। यहाँ हम स्ट्रिंग भेज रहे हैं "हैलो वर्ल्ड!" ।
app.listen (बंदरगाह, [मेजबान], [बैकलॉग], [कॉलबैक]])
यह फ़ंक्शन निर्दिष्ट होस्ट और पोर्ट पर कनेक्शन के लिए बाइंड और सुनता है। पोर्ट यहां केवल आवश्यक पैरामीटर है।
| क्र.सं. | तर्क और विवरण |
|---|---|
| 1 | port एक पोर्ट संख्या जिस पर सर्वर को आने वाले अनुरोधों को स्वीकार करना चाहिए। |
| 2 | host डोमेन का नाम। जब आप अपने एप्लिकेशन को क्लाउड पर वितरित करते हैं, तो आपको इसे सेट करना होगा। |
| 3 | backlog कतारबद्ध लंबित कनेक्शनों की अधिकतम संख्या। डिफ़ॉल्ट 511 है। |
| 4 | callback एक अतुल्यकालिक फ़ंक्शन जिसे सर्वर अनुरोधों के लिए सुनना शुरू करता है, उसे कहा जाता है। |
वेब फ्रेमवर्क विभिन्न मार्गों पर HTML पृष्ठ, स्क्रिप्ट, चित्र आदि जैसे संसाधन प्रदान करते हैं।
एक्सप्रेस फ़ंक्शन में मार्गों को परिभाषित करने के लिए निम्नलिखित फ़ंक्शन का उपयोग किया जाता है -
app.method (पथ, हैंडलर)
यह METHOD HTTP क्रियाओं में से किसी एक पर लागू किया जा सकता है - प्राप्त करें, सेट करें, डालें, हटाएं। एक वैकल्पिक विधि भी मौजूद है, जो अनुरोध प्रकार से स्वतंत्र निष्पादित करती है।
पथ वह मार्ग है जिस पर अनुरोध चलेगा।
हैंडलर एक कॉलबैक फ़ंक्शन है जो संबंधित मार्ग पर मिलान अनुरोध प्रकार मिलने पर निष्पादित करता है। उदाहरण के लिए,
var express = require('express');
var app = express();

app.get('/hello', function(req, res){
   res.send("Hello World!");
});

app.listen(3000);
यदि हम अपना एप्लिकेशन चलाते हैं और जाते हैं localhost:3000/helloसर्वर मार्ग पर एक अनुरोध प्राप्त करता है "/hello", हमारे एक्सप्रेस एप्लिकेशन को निष्पादित करता है callback इस मार्ग से जुड़े समारोह और भेजता है "Hello World!" प्रतिक्रिया के रूप में।
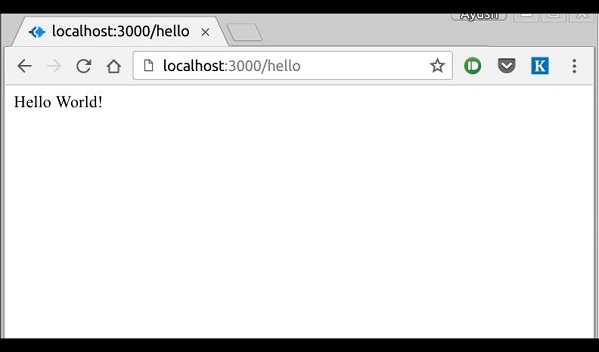
हमारे पास एक ही मार्ग पर कई अलग-अलग विधियाँ हो सकती हैं। उदाहरण के लिए,
var express = require('express');
var app = express();

app.get('/hello', function(req, res){
   res.send("Hello World!");
});

app.post('/hello', function(req, res){
   res.send("You just called the post method at '/hello'!\n");
});

app.listen(3000);
इस अनुरोध का परीक्षण करने के लिए, अपने टर्मिनल को खोलें और निम्नलिखित अनुरोध को निष्पादित करने के लिए cURL का उपयोग करें -
curl -X POST "http://localhost:3000/hello"
एक विशेष विधि, all, एक ही फ़ंक्शन का उपयोग करके किसी विशेष मार्ग पर सभी प्रकार के http तरीकों को संभालने के लिए एक्सप्रेस द्वारा प्रदान किया जाता है। इस विधि का उपयोग करने के लिए, निम्नलिखित प्रयास करें।
app.all('/test', function(req, res){
   res.send("HTTP method doesn't have any effect on this route!");
});
यह विधि आम तौर पर मिडलवेयर को परिभाषित करने के लिए उपयोग की जाती है, जिसे हम मिडलवेयर अध्याय में चर्चा करेंगे।
राउटर्स
ऊपर की तरह परिभाषित मार्गों को बनाए रखने के लिए बहुत थकाऊ है। हमारे मुख्य से मार्गों को अलग करने के लिएindex.js फ़ाइल, हम उपयोग करेंगे Express.Router। नामक एक नई फ़ाइल बनाएँthings.js और इसमें निम्नलिखित टाइप करें।
var express = require('express');
var router = express.Router();

router.get('/', function(req, res){
   res.send('GET route on things.');
});
router.post('/', function(req, res){
   res.send('POST route on things.');
});

//export this router to use in our index.js
module.exports = router;
अब हमारे इस राउटर का उपयोग करने के लिए index.js, निम्नलिखित से पहले टाइप करें app.listen फ़ंक्शन कॉल।
var express = require('Express');
var app = express();

var things = require('./things.js');

//both index.js and things.js should be in same directory
app.use('/things', things);

app.listen(3000);
app.use मार्ग में फ़ंक्शन कॉल '/things' संलग्न करता है thingsइस मार्ग के साथ राउटर। अब जो कुछ भी हमारे ऐप को '/' चीजों के लिए अनुरोध करता है, वह हमारी चीजों द्वारा नियंत्रित किया जाएगा। रूटर। '/'चीजों में मार्ग। वास्तव में '/ चीजों' का एक उप-समूह है। लोकलहोस्ट पर जाएँ: 3000 / चीजें / और आपको निम्न आउटपुट दिखाई देगा।
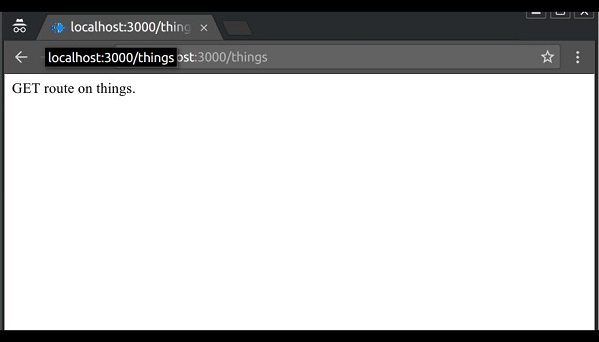
राउटर चिंताओं को अलग करने और हमारे कोड के प्रासंगिक भागों को एक साथ रखने में बहुत सहायक होते हैं। वे बनाए रखने योग्य कोड बनाने में मदद करते हैं। आपको एक फ़ाइल में एक इकाई से संबंधित अपने मार्गों को परिभाषित करना चाहिए और इसे अपने में उपरोक्त विधि का उपयोग करके शामिल करना चाहिएindex.js फ़ाइल।
HTTP विधि अनुरोध में आपूर्ति की जाती है और क्लाइंट द्वारा अनुरोधित ऑपरेशन को निर्दिष्ट करता है। निम्न तालिका सबसे अधिक उपयोग की जाने वाली HTTP विधियों को सूचीबद्ध करती है -
| क्र.सं. | विधि और विवरण |
|---|---|
| 1 | GET GET विधि निर्दिष्ट संसाधन के प्रतिनिधित्व का अनुरोध करती है। GET का उपयोग करने वाले अनुरोधों को केवल डेटा पुनर्प्राप्त करना चाहिए और कोई अन्य प्रभाव नहीं होना चाहिए। |
| 2 | POST POST विधि अनुरोध करती है कि सर्वर URI द्वारा पहचाने गए संसाधन की एक नई वस्तु / इकाई के रूप में अनुरोध में संलग्न डेटा को स्वीकार करता है। |
| 3 | PUT PUT विधि अनुरोध करती है कि सर्वर URI द्वारा पहचान की गई मौजूदा वस्तु में संशोधन के रूप में अनुरोध में संलग्न डेटा को स्वीकार करता है। यदि यह मौजूद नहीं है तो PUT विधि को एक बनाना चाहिए। |
| 4 | DELETE DELETE विधि अनुरोध करती है कि सर्वर निर्दिष्ट संसाधन को हटा दें। |
ये सबसे सामान्य HTTP तरीके हैं। विधियों के बारे में अधिक जानने के लिए, पर जाएँhttp://www.tutorialspoint.com/http/http_methods.htm।
अब हम मार्गों को परिभाषित कर सकते हैं, लेकिन वे स्थिर या निश्चित हैं। गतिशील मार्गों का उपयोग करने के लिए, हम विभिन्न प्रकार के मार्ग प्रदान करते हैं। गतिशील मार्गों का उपयोग करने से हमें उनके आधार पर मापदंडों और प्रक्रिया को पारित करने की अनुमति मिलती है।
यहाँ एक गतिशील मार्ग का एक उदाहरण दिया गया है -
var express = require('express');
var app = express();

app.get('/:id', function(req, res){
   res.send('The id you specified is ' + req.params.id);
});
app.listen(3000);
इसका परीक्षण करने के लिए http://localhost:3000/123। निम्नलिखित प्रतिक्रिया प्रदर्शित की जाएगी।
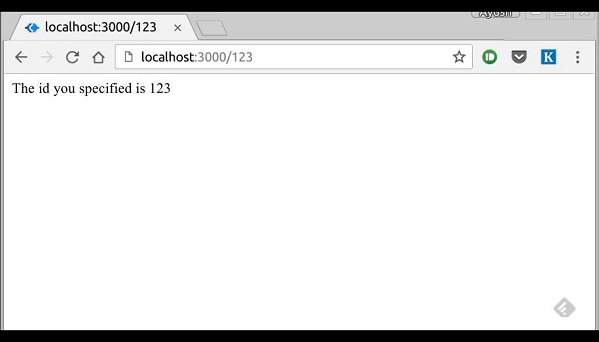
आप URL में '123' को किसी अन्य चीज़ से बदल सकते हैं और परिवर्तन प्रतिक्रिया में प्रतिबिंबित होगा। उपरोक्त का एक और अधिक जटिल उदाहरण है -
var express = require('express');
var app = express();

app.get('/things/:name/:id', function(req, res) {
   res.send('id: ' + req.params.id + ' and name: ' + req.params.name);
});
app.listen(3000);
उपरोक्त कोड का परीक्षण करने के लिए, पर जाएं http://localhost:3000/things/tutorialspoint/12345।
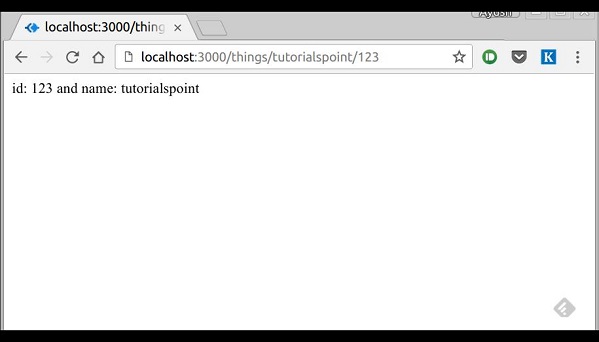
आप उपयोग कर सकते हैं req.paramsयूआरएल में आपके द्वारा पास किए गए सभी मापदंडों का उपयोग करने के लिए ऑब्जेक्ट। ध्यान दें कि उपरोक्त 2 अलग-अलग पथ हैं। वे कभी भी ओवरलैप नहीं होंगे। यदि आप कोड प्राप्त करना चाहते हैं तो भी'/things' फिर आपको इसे अलग से परिभाषित करने की आवश्यकता है।
पैटर्न मिलान मार्गों
आप भी उपयोग कर सकते हैं regexURL पैरामीटर मिलान को प्रतिबंधित करने के लिए। हमें लगता है कि आप की जरूरत हैid5-अंकीय लंबी संख्या होना। आप निम्नलिखित मार्ग परिभाषा का उपयोग कर सकते हैं -
var express = require('express');
var app = express();

app.get('/things/:id([0-9]{5})', function(req, res){
   res.send('id: ' + req.params.id);
});

app.listen(3000);
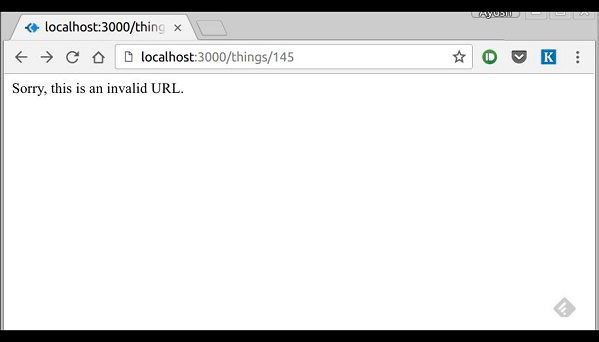
ध्यान दें कि यह होगा only उन अनुरोधों से मिलान करें जिनके पास 5-अंकीय लंबा है id। आप अपने मार्गों के मिलान / सत्यापन के लिए अधिक जटिल रीजेक्स का उपयोग कर सकते हैं। यदि आपका कोई भी मार्ग अनुरोध से मेल नहीं खाता है, तो आपको मिल जाएगा"Cannot GET <your-request-route>"प्रतिक्रिया के रूप में संदेश। इस संदेश को इस सरल मार्ग का उपयोग करके 404 नहीं मिला पृष्ठ द्वारा प्रतिस्थापित किया जाना चाहिए -
var express = require('express');
var app = express();

//Other routes here
app.get('*', function(req, res){
   res.send('Sorry, this is an invalid URL.');
});
app.listen(3000);
Important - यह आपके सभी मार्गों के बाद रखा जाना चाहिए, क्योंकि एक्सप्रेस शुरू से अंत तक मार्गों से मेल खाता है index.js फ़ाइल, आपको आवश्यक बाहरी राउटर सहित।
उदाहरण के लिए, यदि हम एक मान्य URL के साथ अनुरोध करने पर उपरोक्त मार्गों को परिभाषित करते हैं, तो निम्न आउटपुट प्रदर्शित होता है। -
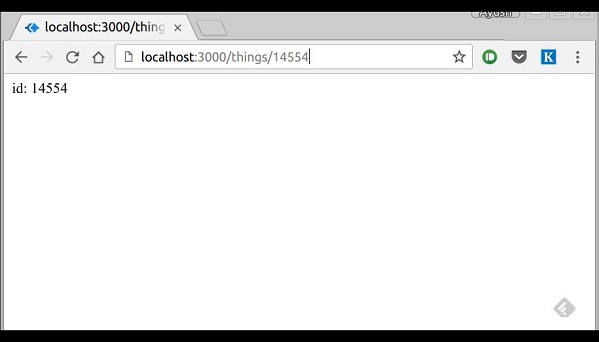
गलत URL अनुरोध के लिए, निम्न आउटपुट प्रदर्शित होता है।
मिडलवेयर फ़ंक्शंस ऐसे फ़ंक्शंस होते हैं जिनकी एक्सेस है request object (req), को response object (res), और अनुप्रयोग के अनुरोध-प्रतिक्रिया चक्र में अगले मिडलवेयर फ़ंक्शन। इन कार्यों को संशोधित करने के लिए उपयोग किया जाता हैreq तथा res अनुरोध निकायों को पार्स करने, प्रतिक्रिया हेडर जोड़ने आदि जैसे कार्यों के लिए ऑब्जेक्ट।
यहां एक्शन में मिडलवेयर फ़ंक्शन का एक सरल उदाहरण है -
var express = require('express');
var app = express();

//Simple request time logger
app.use(function(req, res, next){
   console.log("A new request received at " + Date.now());

   //This function call is very important. It tells that more processing is
   //required for the current request and is in the next middleware
   function/route handler.
   next();
});

app.listen(3000);
उपरोक्त मिडलवेयर को सर्वर पर प्रत्येक अनुरोध के लिए कहा जाता है। इसलिए हर अनुरोध के बाद, हमें कंसोल में निम्नलिखित संदेश मिलेगा -
A new request received at 1467267512545इसे किसी विशिष्ट मार्ग (और इसके सभी उपग्रहों) तक सीमित रखने के लिए, उस मार्ग को पहले तर्क के रूप में प्रदान करें app.use()। उदाहरण के लिए,
var express = require('express');
var app = express();

//Middleware function to log request protocol
app.use('/things', function(req, res, next){
   console.log("A request for things received at " + Date.now());
   next();
});

// Route handler that sends the response
app.get('/things', function(req, res){
   res.send('Things');
});

app.listen(3000);
अब जब भी आप '/' चीजों के किसी भी उप-अनुरोध का अनुरोध करते हैं, तभी वह समय लॉग करेगा।
मिडिलवेयर कॉल का क्रम
एक्सप्रेस में मिडलवेयर के बारे में सबसे महत्वपूर्ण चीजों में से एक वह क्रम है जिसमें उन्हें आपकी फ़ाइल में लिखा / शामिल किया गया है; जिस क्रम में उन्हें निष्पादित किया जाता है, उसे देखते हुए रूट के मैचों पर भी विचार करने की आवश्यकता होती है।
उदाहरण के लिए, निम्नलिखित कोड स्निपेट में, पहला फ़ंक्शन पहले निष्पादित करता है, फिर मार्ग हैंडलर और फिर अंतिम फ़ंक्शन। यह उदाहरण बताता है कि रूट हैंडलर के पहले और बाद में मिडलवेयर का उपयोग कैसे किया जाए; यह भी कि कैसे एक मिडलवेयर के रूप में एक रूट हैंडलर का उपयोग किया जा सकता है।
var express = require('express');
var app = express();

//First middleware before response is sent
app.use(function(req, res, next){
   console.log("Start");
   next();
});

//Route handler
app.get('/', function(req, res, next){
   res.send("Middle");
   next();
});

app.use('/', function(req, res){
   console.log('End');
});

app.listen(3000);
जब हम इस कोड को चलाने के बाद '/' पर जाते हैं, तो हमें प्रतिक्रिया मिलती है Middle और हमारे कंसोल पर -
Start
End
निम्नलिखित चित्र संक्षेप में बताते हैं कि हमने मिडलवेयर के बारे में क्या सीखा है -
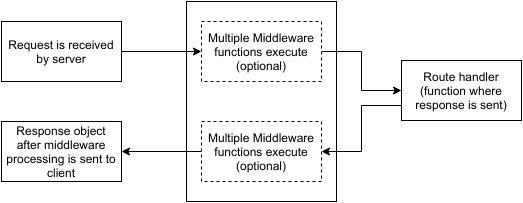
अब जब हमने कवर कर लिया है कि हम अपना मिडलवेयर कैसे बनायें, तो आइए कुछ सबसे अधिक इस्तेमाल होने वाले समुदाय के बारे में चर्चा करते हैं जो मिडलवेयर बनाया जाता है।
थर्ड पार्टी मिडिलवेयर
एक्सप्रेस के लिए थर्ड पार्टी मिडलवेयर की एक सूची यहाँ उपलब्ध है । निम्नलिखित सबसे अधिक उपयोग किए जाने वाले मिडलवेयर में से कुछ हैं; हम यह भी सीखेंगे कि इनका उपयोग / माउंट कैसे करें -
शरीर-पार्सर
इसका उपयोग उन अनुरोधों के निकाय को पार्स करने के लिए किया जाता है, जिनके पास पेलोड हैं। बॉडी पार्सर को माउंट करने के लिए, हमें इसका उपयोग करके इंस्टॉल करना होगाnpm install बॉडी-पार्सर और इसे माउंट करने के लिए, अपने index.js में निम्नलिखित पंक्तियों को शामिल करें -
var bodyParser = require('body-parser');

//To parse URL encoded data
app.use(bodyParser.urlencoded({ extended: false }))

//To parse json data
app.use(bodyParser.json())
बॉडी-पार्सर के लिए सभी उपलब्ध विकल्पों को देखने के लिए, इसके github पेज पर जाएँ।
कुकी-पार्सर
यह कुकी हेडर को पार्स करता है और कुकी के नाम के आधार पर ऑब्जेक्ट के साथ req.cookies को पॉप्युलेट करता है। कुकी पार्सर को माउंट करने के लिए, हमें इसे npm स्थापित - कुकी कुकी-पार्सर का उपयोग करके इंस्टॉल करना होगा और इसे माउंट करने के लिए, अपने index.js में निम्नलिखित लाइनें शामिल करें -
var cookieParser = require('cookie-parser');
app.use(cookieParser())
एक्सप्रेस-सत्र
यह दिए गए विकल्पों के साथ एक सत्र मिडलवेयर बनाता है। हम सत्र अनुभाग में इसके उपयोग पर चर्चा करेंगे।
ExpressJS में हमारे पास कई अन्य थर्ड पार्टी मिडलवेयर हैं। हालाँकि, हमने यहाँ केवल कुछ महत्वपूर्ण चर्चा की है।
पग एक्सप्रेस के लिए एक अस्थायी इंजन है। HTML के साथ हमारे सर्वर कोड की अव्यवस्था को हटाने के लिए टेंपलेटिंग इंजन का उपयोग किया जाता है, मौजूदा HTML टेम्प्लेट में बेतहाशा तार को घुसाया जाता है। पग एक बहुत शक्तिशाली टेम्पलेटिंग इंजन है जिसमें विभिन्न प्रकार की विशेषताएं शामिल हैंfilters, includes, inheritance, interpolation, आदि इस पर कवर करने के लिए बहुत जमीन है।
एक्सप्रेस के साथ पग का उपयोग करने के लिए, हमें इसे स्थापित करने की आवश्यकता है,
npm install --save pugअब पग स्थापित हो गया है, इसे अपने ऐप के लिए टेम्प्लेटिंग इंजन के रूप में सेट करें। आपdon'tइसे 'आवश्यक' करने की आवश्यकता है। निम्नलिखित कोड को अपने में जोड़ेंindex.js फ़ाइल।
app.set('view engine', 'pug');
app.set('views','./views');
अब एक नई निर्देशिका बनाएं जिसे व्यू कहा जाता है। इसके अंदर एक फाइल बनाई जाती है, जिसका नाम हैfirst_view.pug, और इसमें निम्नलिखित डेटा दर्ज करें।
doctype html
html
   head
      title = "Hello Pug"
   body
      p.greetings#people Hello World!
इस पृष्ठ को चलाने के लिए, अपने ऐप में निम्न मार्ग जोड़ें -
app.get('/first_template', function(req, res){
   res.render('first_view');
});
आपको आउटपुट इस प्रकार मिलेगा - Hello World!पग इस बहुत ही सरल दिखने वाले मार्कअप को html में परिवर्तित करता है। हमें अपने टैग बंद करने की आवश्यकता नहीं है, कक्षा और आईडी कीवर्ड का उपयोग करने की आवश्यकता नहीं है, बल्कि 'का उपयोग करें।' तथा'#'उन्हें परिभाषित करने के लिए। उपरोक्त कोड पहली बार में परिवर्तित हो जाता है -
<!DOCTYPE html>
<html>
   <head>
      <title>Hello Pug</title>
   </head>

   <body>
      <p class = "greetings" id = "people">Hello World!</p>
   </body>
</html>
पग HTML मार्कअप को सरल बनाने की तुलना में बहुत अधिक करने में सक्षम है।
पग की महत्वपूर्ण विशेषताएं
आइए अब पग की कुछ महत्वपूर्ण विशेषताओं का पता लगाएं।
सरल टैग
टैग उनके इंडेंटेशन के अनुसार नेस्टेड हैं। उपरोक्त उदाहरण की तरह,<title> भीतर इंडेंट किया गया था <head>टैग, तो यह उसके अंदर था। लेकिन वो<body> टैग उसी इंडेंटेशन पर था, इसलिए यह एक भाई-बहन था <head> टैग।
हमें टैग बंद करने की आवश्यकता नहीं है, जैसे ही पग अगले टैग को समान या बाहरी इंडेंटेशन स्तर पर सामना करता है, यह हमारे लिए टैग को बंद कर देता है।
किसी टैग के अंदर टेक्स्ट डालने के लिए, हमारे पास 3 तरीके हैं -
Space seperated
h1 Welcome to PugPiped text
div
   | To insert multiline text,
   | You can use the pipe operator.
Block of text
div.
   But that gets tedious if you have a lot of text.
   You can use "." at the end of tag to denote block of text.
   To put tags inside this block, simply enter tag in a new line and
   indent it accordingly.
टिप्पणियाँ
पग के रूप में एक ही वाक्यविन्यास का उपयोग करता है JavaScript(//)टिप्पणी बनाने के लिए। इन टिप्पणियों को HTML टिप्पणियों (<! - टिप्पणी ->) में बदल दिया जाता है। उदाहरण के लिए,
//This is a Pug commentयह टिप्पणी निम्नलिखित में परिवर्तित हो जाती है।
<!--This is a Pug comment-->गुण
विशेषताओं को परिभाषित करने के लिए, हम कोष्ठक में, अल्पविराम से अलग की गई विशेषताओं की सूची का उपयोग करते हैं। क्लास और आईडी विशेषताओं का विशेष प्रतिनिधित्व है। एक HTML कोड के लिए कोड की निम्नलिखित पंक्ति परिभाषित विशेषताओं, कक्षाओं और आईडी को कवर करती है।
div.container.column.main#division(width = "100", height = "100")कोड की यह लाइन, निम्न में परिवर्तित हो जाती है। -
<div class = "container column main" id = "division" width = "100" height = "100"></div>टेंपरेचर पर पासिंग वैल्यू
जब हम एक पग टेम्पलेट प्रदान करते हैं, तो हम वास्तव में इसे हमारे मार्ग हैंडलर से एक मान दे सकते हैं, जिसे हम बाद में अपने टेम्पलेट में उपयोग कर सकते हैं। निम्नलिखित के साथ एक नया मार्ग हैंडलर बनाएं।
var express = require('express');
var app = express();

app.get('/dynamic_view', function(req, res){
   res.render('dynamic', {
      name: "TutorialsPoint",
      url:"http://www.tutorialspoint.com"
   });
});

app.listen(3000);
और व्यू डायरेक्टरी में एक नई व्यू फाइल बनाएं, जिसे कहते हैं dynamic.pug, निम्नलिखित कोड के साथ -
html
   head
      title=name
   body
      h1=name
      a(href = url) URL
ओपन लोकलहोस्ट: आपके ब्राउज़र में 3000 / डायनामिक_व्यू; आपको निम्न आउटपुट प्राप्त करने चाहिए -

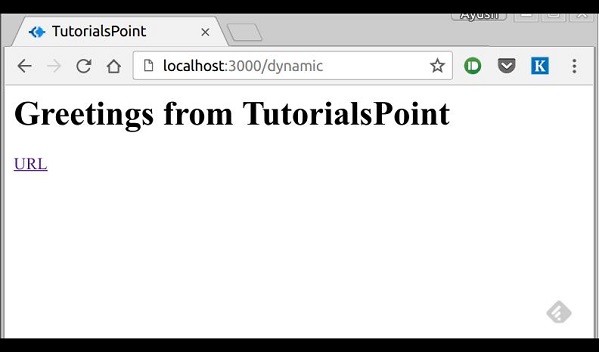
हम पाठ के भीतर इन पारित चर का भी उपयोग कर सकते हैं। किसी टैग के पाठ के बीच में पारित चर डालने के लिए, हम उपयोग करते हैं#{variableName}वाक्य - विन्यास। उदाहरण के लिए, उपरोक्त उदाहरण में, यदि हम TutorialsPoint से अभिवादन करना चाहते हैं, तो हम निम्नलिखित कार्य कर सकते थे।
html
   head
      title = name
   body
      h1 Greetings from #{name}
      a(href = url) URL
मूल्यों का उपयोग करने की इस विधि को कहा जाता है interpolation। उपरोक्त कोड निम्न आउटपुट प्रदर्शित करेगा। -
सशर्त,
हम सशर्त बयान और लूपिंग निर्माण का भी उपयोग कर सकते हैं।
निम्नलिखित पर विचार करें -
यदि कोई उपयोगकर्ता लॉग इन है, तो पृष्ठ प्रदर्शित होना चाहिए "Hi, User" और यदि नहीं, तो "Login/Sign Up"संपर्क। इसे प्राप्त करने के लिए, हम एक सरल टेम्पलेट को परिभाषित कर सकते हैं जैसे -
html
   head
      title Simple template
   body
      if(user)
         h1 Hi, #{user.name}
      else
         a(href = "/sign_up") Sign Up
जब हम अपने मार्गों का उपयोग करके इसे प्रस्तुत करते हैं, तो हम निम्नलिखित कार्यक्रम में एक वस्तु को पास कर सकते हैं -
res.render('/dynamic',{
   user: {name: "Ayush", age: "20"}
});
आपको एक संदेश प्राप्त होगा - Hi, Ayush। लेकिन अगर हम किसी भी ऑब्जेक्ट को पास नहीं करते हैं या किसी उपयोगकर्ता कुंजी के साथ पास नहीं करते हैं, तो हमें एक साइनअप लिंक मिलेगा।
शामिल करें और घटक
पग एक वेब पेज के लिए घटक बनाने के लिए एक बहुत ही सहज तरीका प्रदान करता है। उदाहरण के लिए, यदि आप एक समाचार वेबसाइट देखते हैं, तो लोगो और श्रेणियों के साथ शीर्ष लेख हमेशा तय होता है। इसके बजाय कि हम हर दृश्य को कॉपी करते हैं, हम इसका उपयोग कर सकते हैंincludeसुविधा। निम्नलिखित उदाहरण से पता चलता है कि हम इस सुविधा का उपयोग कैसे कर सकते हैं -
निम्नलिखित कोड के साथ 3 विचार बनाएं -
HEADER.PUG
div.header.
   I'm the header for this website.
CONTENT.PUG
html
   head
      title Simple template
   body
      include ./header.pug
      h3 I'm the main content
      include ./footer.pug
FOOTER.PUG
div.footer.
   I'm the footer for this website.
इसके लिए एक मार्ग बनाएँ:
var express = require('express');
var app = express();

app.get('/components', function(req, res){
    res.render('content');
});

app.listen(3000);
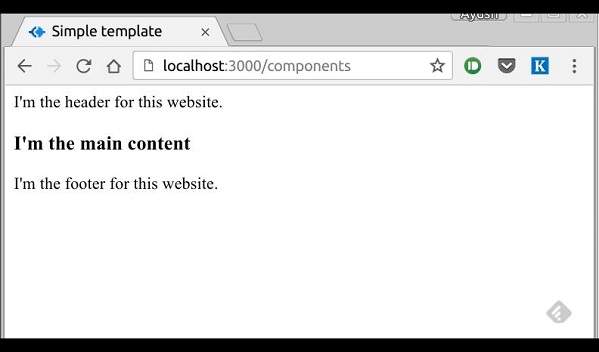
लोकलहोस्ट पर जाएं: 3000 / घटक, आपको निम्न आउटपुट प्राप्त होंगे -
include प्लेनटेक्स्ट, सीएसएस और जावास्क्रिप्ट को शामिल करने के लिए भी इस्तेमाल किया जा सकता है।
पग की कई और विशेषताएं हैं। लेकिन वे इस ट्यूटोरियल के दायरे से बाहर हैं। आप आगे पग में पग का पता लगा सकते हैं ।
स्टेटिक फाइलें वे फाइलें होती हैं जो क्लाइंट सर्वर से डाउनलोड करते हैं। एक नई निर्देशिका बनाएँ,public। एक्सप्रेस, डिफ़ॉल्ट रूप से आपको स्थिर फ़ाइलों की सेवा करने की अनुमति नहीं देता है। आपको निम्न अंतर्निहित मिडलवेयर का उपयोग करके इसे सक्षम करने की आवश्यकता है।
app.use(express.static('public'));Note - एक्सप्रेस स्थिर निर्देशिका के सापेक्ष फाइलों को देखता है, इसलिए स्थैतिक निर्देशिका का नाम URL का हिस्सा नहीं है।
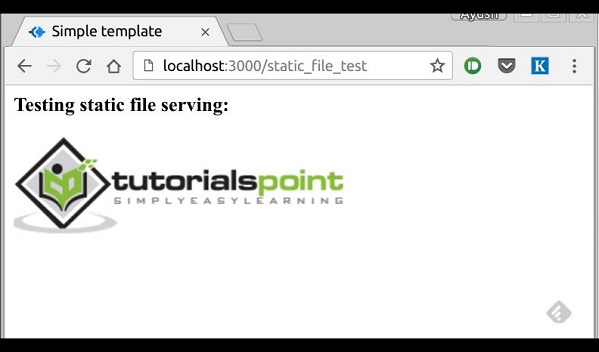
ध्यान दें कि रूट रूट अब आपके सार्वजनिक डायर पर सेट है, इसलिए आपके द्वारा लोड की जाने वाली सभी स्थिर फाइलें सार्वजनिक रूप से रूट के रूप में विचार करेंगी। यह परीक्षण करने के लिए कि यह ठीक काम कर रहा है, अपने नए में कोई छवि फ़ाइल जोड़ेंpublic dir और इसका नाम बदलकर "testimage.jpg"। आपके विचारों में, एक नया दृश्य बनाएं और इस फ़ाइल को शामिल करें -
html
   head
   body
      h3 Testing static file serving:
      img(src = "/testimage.jpg", alt = "Testing Image
आपको निम्न आउटपुट प्राप्त करने चाहिए -
एकाधिक स्थैतिक निर्देशिकाएँ
हम निम्नलिखित प्रोग्राम का उपयोग करके कई स्थिर संपत्ति निर्देशिका भी सेट कर सकते हैं -
var express = require('express');
var app = express();

app.use(express.static('public'));
app.use(express.static('images'));

app.listen(3000);
आभासी पथ उपसर्ग
हम स्थैतिक फ़ाइलों की सेवा के लिए एक उपसर्ग भी प्रदान कर सकते हैं। उदाहरण के लिए, यदि आप एक उपसर्ग प्रदान करना चाहते हैं जैसे'/static', आपको निम्न कोड को अपने में शामिल करना होगा index.js फ़ाइल -
var express = require('express');
var app = express();

app.use('/static', express.static('public'));

app.listen(3000);
अब जब भी आपको एक फ़ाइल शामिल करने की आवश्यकता होती है, उदाहरण के लिए, एक स्क्रिप्ट फ़ाइल जिसे main.js कहा जाता है, जो आपकी सार्वजनिक निर्देशिका में रहती है, निम्न स्क्रिप्ट का उपयोग करें -
<script src = "/static/main.js" />स्थैतिक फ़ाइलों के रूप में कई निर्देशिकाएं प्रदान करते समय यह तकनीक काम में आ सकती है। ये उपसर्ग कई निर्देशिकाओं के बीच अंतर करने में मदद कर सकते हैं।
प्रपत्र वेब का एक अभिन्न अंग हैं। हमारे द्वारा देखी जाने वाली लगभग हर वेबसाइट हमें ऐसे फ़ॉर्म प्रदान करती है जो हमारे लिए कुछ जानकारी जमा करते हैं या लाते हैं। प्रपत्रों के साथ आरंभ करने के लिए, हम पहले बॉडी-पार्सर (JSON और url- एन्कोडेड डेटा पार्स करने के लिए) और multer (मल्टीपार्ट / फॉर्म डेटा पार्स करने के लिए) मिडलवेयर स्थापित करेंगे।
बॉडी-पार्सर और मल्टर को स्थापित करने के लिए , अपने टर्मिनल पर जाएं और उपयोग करें -
npm install --save body-parser multerअपने को बदलें index.js निम्नलिखित कोड के साथ फ़ाइल सामग्री -
var express = require('express');
var bodyParser = require('body-parser');
var multer = require('multer');
var upload = multer();
var app = express();

app.get('/', function(req, res){
   res.render('form');
});

app.set('view engine', 'pug');
app.set('views', './views');

// for parsing application/json
app.use(bodyParser.json());

// for parsing application/xwww-
app.use(bodyParser.urlencoded({ extended: true }));
//form-urlencoded

// for parsing multipart/form-data
app.use(upload.array());
app.use(express.static('public'));

app.post('/', function(req, res){
   console.log(req.body);
   res.send("recieved your request!");
});
app.listen(3000);
शरीर पार्सर और मल्टर आयात करने के बाद, हम इसका उपयोग करेंगे body-parser जर्सन और एक्स-www-फॉर्म-यूरलेंकोडेड हेडर अनुरोधों के लिए, जबकि हम उपयोग करेंगे multer मल्टीपार्ट / फॉर्म-डेटा पार्स करने के लिए।
आइए हम इसका परीक्षण करने के लिए HTML फॉर्म बनाते हैं। नामक एक नया दृश्य बनाएँform.pug निम्नलिखित कोड के साथ -
html
html
   head
      title Form Tester
   body
      form(action = "/", method = "POST")
         div
            label(for = "say") Say:
            input(name = "say" value = "Hi")
         br
         div
            label(for = "to") To:
            input(name = "to" value = "Express forms")
         br
         button(type = "submit") Send my greetings
निम्नलिखित का उपयोग करके अपना सर्वर चलाएं।
nodemon index.jsअब लोकलहोस्ट पर जाएं: 3000 / और जैसा चाहें वैसा फॉर्म भरें और सबमिट करें। निम्नलिखित प्रतिक्रिया प्रदर्शित की जाएगी -
अपने कंसोल पर एक नज़र रखना; यह आपको निम्नलिखित स्क्रीनशॉट में जावास्क्रिप्ट ऑब्जेक्ट के रूप में आपके अनुरोध का शरीर दिखाएगा -

req.bodyऑब्जेक्ट में आपका पार्स अनुरोध अनुरोध शामिल है। उस ऑब्जेक्ट से फ़ील्ड का उपयोग करने के लिए, उन्हें सामान्य जेएस ऑब्जेक्ट्स की तरह उपयोग करें।
अनुरोध भेजने के लिए यह सबसे अनुशंसित तरीका है। कई अन्य तरीके हैं, लेकिन वे यहां कवर करने के लिए अप्रासंगिक हैं, क्योंकि हमारा एक्सप्रेस ऐप उसी तरह से उन सभी अनुरोधों को संभाल लेगा। अनुरोध करने के विभिन्न तरीकों के बारे में अधिक पढ़ने के लिए, इस पृष्ठ पर एक नज़र डालें ।
हम अनुरोध प्राप्त करते रहते हैं, लेकिन उन्हें कहीं भी संग्रहीत नहीं करते हैं। डेटा स्टोर करने के लिए हमें एक डेटाबेस की आवश्यकता होती है। इसके लिए, हम NoSQL डेटाबेस का उपयोग करेंगे जिसे कहा जाता हैMongoDB।
Mongo के बारे में स्थापित करने और पढ़ने के लिए, इस लिंक का अनुसरण करें।
एक्सप्रेस के साथ मोंगो का उपयोग करने के लिए, हमें नोड के लिए एक क्लाइंट एपीआई की आवश्यकता है। वहाँ हमारे लिए कई विकल्प हैं, लेकिन इस ट्यूटोरियल के लिए, हम करने के लिए छड़ी जाएगा नेवला । Mongoose का उपयोग किया जाता हैdocument ModelingMongoDB के लिए नोड में। दस्तावेज़ मॉडलिंग के लिए, हम एक बनाते हैंModel (बहुत पसंद है class दस्तावेज़ उन्मुख प्रोग्रामिंग में), और फिर हम उत्पादन करते हैं documents इस मॉडल का उपयोग करना (जैसे हम बनाते हैं documents of a classOOP में)। हमारे सभी प्रसंस्करण इन "दस्तावेजों" पर किए जाएंगे, फिर अंत में, हम इन दस्तावेजों को अपने डेटाबेस में लिखेंगे।
मानगो की स्थापना
अब जब आपने Mongo स्थापित कर लिया है, तो हम Mongoose को स्थापित करते हैं, उसी तरह हम अपने अन्य नोड पैकेजों को स्थापित कर रहे हैं -
npm install --save mongooseइससे पहले कि हम आम का उपयोग करना शुरू करें, हमें मोंगो शेल का उपयोग करके एक डेटाबेस बनाना होगा। एक नया डेटाबेस बनाने के लिए, अपना टर्मिनल खोलें और "मोंगो" डालें। एक मैंगो शेल शुरू होगा, निम्नलिखित कोड दर्ज करें -
use my_dbA new database will be created for you. Whenever you open up the mongo shell, it will default to "test" db and you will have to change to your database using the same command as above.
To use Mongoose, we will require it in our index.js file and then connect to the mongodb service running on mongodb://localhost.
var mongoose = require('mongoose');
mongoose.connect('mongodb://localhost/my_db');
Now our app is connected to our database, let us create a new Model. This model will act as a collection in our database. To create a new Model, use the following code, before defining any route −
var personSchema = mongoose.Schema({
   name: String,
   age: Number,
   nationality: String
});
var Person = mongoose.model("Person", personSchema);
The above code defines the schema for a person and is used to create a Mongoose Mode Person.
Saving Documents
Now, we will create a new html form; this form will help you get the details of a person and save it to our database. To create the form, create a new view file called person.pug in views directory with the following content −
html
head
   title Person
   body
      form(action = "/person", method = "POST")
      div
         label(for = "name") Name:
         input(name = "name")
      br
      div
         label(for = "age") Age:
         input(name = "age")
      br
      div
         label(for = "nationality") Nationality:
         input(name = "nationality")
      br
      button(type = "submit") Create new person
Also add a new get route in index.js to render this document −
app.get('/person', function(req, res){
   res.render('person');
});
Go to "localhost:3000/person" to check if the form is displaying the correct output. Note that this is just the UI, it is not working yet. The following screenshot shows how the form is displayed −
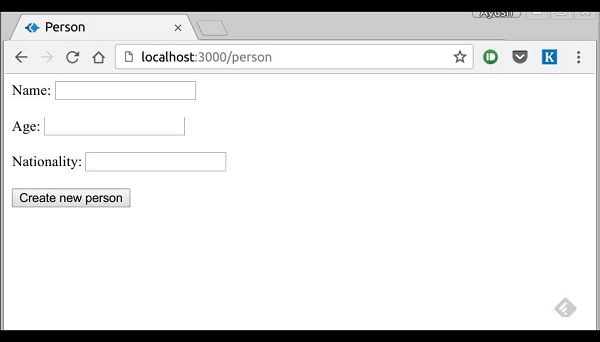
We will now define a post route handler at '/person' which will handle this request
app.post('/person', function(req, res){
   var personInfo = req.body; //Get the parsed information

   if(!personInfo.name || !personInfo.age || !personInfo.nationality){
      res.render('show_message', {
         message: "Sorry, you provided worng info", type: "error"});
   } else {
      var newPerson = new Person({
         name: personInfo.name,
         age: personInfo.age,
         nationality: personInfo.nationality
      });

      newPerson.save(function(err, Person){
         if(err)
            res.render('show_message', {message: "Database error", type: "error"});
         else
            res.render('show_message', {
               message: "New person added", type: "success", person: personInfo});
      });
   }
});
In the above code, if we receive any empty field or do not receive any field, we will send an error response. But if we receive a well-formed document, then we create a newPerson document from Person model and save it to our DB using the newPerson.save() function. This is defined in Mongoose and accepts a callback as argument. This callback has 2 arguments – error and response. These arguments will render the show_message view.
To show the response from this route, we will also need to create a show_message view. Create a new view with the following code −
html
   head
      title Person
   body
      if(type == "error")
         h3(style = "color:red") #{message}
      else
         h3 New person,
            name: #{person.name},
            age: #{person.age} and
            nationality: #{person.nationality} added!
We will receive the following response on successfully submitting the form(show_message.pug) −
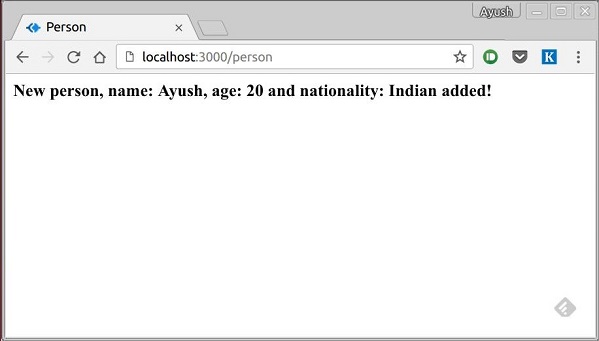
We now have an interface to create persons.
Retrieving Documents
Mongoose provides a lot of functions for retrieving documents, we will focus on 3 of those. All these functions also take a callback as the last parameter, and just like the save function, their arguments are error and response. The three functions are as follows −
Model.find(conditions, callback)
This function finds all the documents matching the fields in conditions object. Same operators used in Mongo also work in mongoose. For example,
Person.find(function(err, response){
   console.log(response);
});
This will fetch all the documents from the person's collection.
Person.find({name: "Ayush", age: 20},
   function(err, response){
      console.log(response);
});
This will fetch all documents where field name is "Ayush" and age is 20.
We can also provide projection we need, i.e., the fields we need. For example, if we want only the names of people whose nationality is "Indian", we use −
Person.find({nationality: "Indian"}, "name", function(err, response){
   console.log(response);
});
Model.findOne(conditions, callback)
This function always fetches a single, most relevant document. It has the same exact arguments as Model.find().
Model.findById(id, callback)
This function takes in the _id(defined by mongo) as the first argument, an optional projection string and a callback to handle the response. For example,
Person.findById("507f1f77bcf86cd799439011", function(err, response){
   console.log(response);
});
Let us now create a route to view all people records −
var express = require('express');
var app = express();

var mongoose = require('mongoose');
mongoose.connect('mongodb://localhost/my_db');

var personSchema = mongoose.Schema({
   name: String,
   age: Number,
   nationality: String
});

var Person = mongoose.model("Person", personSchema);

app.get('/people', function(req, res){
   Person.find(function(err, response){
      res.json(response);
   });
});

app.listen(3000);
Updating Documents
Mongoose provides 3 functions to update documents. The functions are described below −
Model.update(condition, updates, callback)
This function takes a conditions and updates an object as input and applies the changes to all the documents matching the conditions in the collection. For example, following code will update the nationality "American" in all Person documents −
Person.update({age: 25}, {nationality: "American"}, function(err, response){
   console.log(response);
});
Model.findOneAndUpdate(condition, updates, callback)
It finds one document based on the query and updates that according to the second argument. It also takes a callback as last argument. Let us perform the following example to understand the function
Person.findOneAndUpdate({name: "Ayush"}, {age: 40}, function(err, response) {
   console.log(response);
});
Model.findByIdAndUpdate(id, updates, callback)
This function updates a single document identified by its id. For example,
Person.findByIdAndUpdate("507f1f77bcf86cd799439011", {name: "James"},
   function(err, response){
      console.log(response);
});
Let us now create a route to update people. This will be a PUT route with the id as a parameter and details in the payload.
var express = require('express');
var app = express();

var mongoose = require('mongoose');
mongoose.connect('mongodb://localhost/my_db');

var personSchema = mongoose.Schema({
   name: String,
   age: Number,
   nationality: String
});

var Person = mongoose.model("Person", personSchema);

app.put('/people/:id', function(req, res){
   Person.findByIdAndUpdate(req.params.id, req.body, function(err, response){
      if(err) res.json({message: "Error in updating person with id " + req.params.id});
      res.json(response);
   });
});

app.listen(3000);
To test this route, enter the following in your terminal (replace the id with an id from your created people) −
curl -X PUT --data "name = James&age = 20&nationality = American
"http://localhost:3000/people/507f1f77bcf86cd799439011
This will update the document associated with the id provided in the route with the above details.
Deleting Documents
We have covered Create, Read and Update, now we will see how Mongoose can be used to Delete documents. We have 3 functions here, exactly like update.
Model.remove(condition, [callback])
This function takes a condition object as input and removes all documents matching the conditions. For example, if we need to remove all people aged 20, use the following syntax −
Person.remove({age:20});Model.findOneAndRemove(condition, [callback])
This functions removes a single, most relevant document according to conditions object. Let us execute the following code to understand the same.
Person.findOneAndRemove({name: "Ayush"});Model.findByIdAndRemove(id, [callback])
This function removes a single document identified by its id. For example,
Person.findByIdAndRemove("507f1f77bcf86cd799439011");Let us now create a route to delete people from our database.
var express = require('express');
var app = express();

var mongoose = require('mongoose');
mongoose.connect('mongodb://localhost/my_db');

var personSchema = mongoose.Schema({
   name: String,
   age: Number,
   nationality: String
});

var Person = mongoose.model("Person", personSchema);

app.delete('/people/:id', function(req, res){
   Person.findByIdAndRemove(req.params.id, function(err, response){
      if(err) res.json({message: "Error in deleting record id " + req.params.id});
      else res.json({message: "Person with id " + req.params.id + " removed."});
   });
});

app.listen(3000);
To check the output, use the following curl command −
curl -X DELETE http://localhost:3000/people/507f1f77bcf86cd799439011This will remove the person with given id producing the following message −
{message: "Person with id 507f1f77bcf86cd799439011 removed."}This wraps up how we can create simple CRUD applications using MongoDB, Mongoose and Express. To explore Mongoose further, read the API docs.
Cookies are simple, small files/data that are sent to client with a server request and stored on the client side. Every time the user loads the website back, this cookie is sent with the request. This helps us keep track of the user’s actions.
The following are the numerous uses of the HTTP Cookies −
- Session management
- Personalization(Recommendation systems)
- User tracking
To use cookies with Express, we need the cookie-parser middleware. To install it, use the following code −
npm install --save cookie-parserNow to use cookies with Express, we will require the cookie-parser. cookie-parser is a middleware which parses cookies attached to the client request object. To use it, we will require it in our index.js file; this can be used the same way as we use other middleware. Here, we will use the following code.
var cookieParser = require('cookie-parser');
app.use(cookieParser());
cookie-parser parses Cookie header and populates req.cookies with an object keyed by the cookie names. To set a new cookie, let us define a new route in your Express app like −
var express = require('express');
var app = express();

app.get('/', function(req, res){
   res.cookie('name', 'express').send('cookie set'); //Sets name = express
});

app.listen(3000);
To check if your cookie is set or not, just go to your browser, fire up the console, and enter −
console.log(document.cookie);You will get the output like (you may have more cookies set maybe due to extensions in your browser) −
"name = express"The browser also sends back cookies every time it queries the server. To view cookies from your server, on the server console in a route, add the following code to that route.
console.log('Cookies: ', req.cookies);Next time you send a request to this route, you will receive the following output.
Cookies: { name: 'express' }Adding Cookies with Expiration Time
You can add cookies that expire. To add a cookie that expires, just pass an object with property 'expire' set to the time when you want it to expire. For example,
//Expires after 360000 ms from the time it is set.
res.cookie(name, 'value', {expire: 360000 + Date.now()});
Another way to set expiration time is using 'maxAge' property. Using this property, we can provide relative time instead of absolute time. Following is an example of this method.
//This cookie also expires after 360000 ms from the time it is set.
res.cookie(name, 'value', {maxAge: 360000});
मौजूदा कुकीज़ हटाना
कुकी को हटाने के लिए, ClearCookie फ़ंक्शन का उपयोग करें। उदाहरण के लिए, यदि आपको नाम की कुकी को साफ़ करने की आवश्यकता हैfoo, निम्न कोड का उपयोग करें।
var express = require('express');
var app = express();

app.get('/clear_cookie_foo', function(req, res){
   res.clearCookie('foo');
   res.send('cookie foo cleared');
});

app.listen(3000);
अगले अध्याय में, हम देखेंगे कि सत्रों को प्रबंधित करने के लिए कुकीज़ का उपयोग कैसे करें।
HTTP स्टेटलेस है; किसी अन्य अनुरोध के लिए एक अनुरोध को संबद्ध करने के लिए, आपको HTTP अनुरोधों के बीच उपयोगकर्ता डेटा को संग्रहीत करने का एक तरीका चाहिए। कुकीज़ और URL पैरामीटर क्लाइंट और सर्वर के बीच डेटा परिवहन के लिए उपयुक्त तरीके हैं। लेकिन वे दोनों पठनीय और क्लाइंट पक्ष पर हैं। सत्र इस समस्या को हल करते हैं। आप क्लाइंट को एक आईडी प्रदान करते हैं और यह उस आईडी का उपयोग करके आगे सभी अनुरोध करता है। क्लाइंट से जुड़ी जानकारी इस आईडी से जुड़े सर्वर पर संग्रहीत होती है।
हमें एक्सप्रेस-सत्र की आवश्यकता होगी , इसलिए निम्न कोड का उपयोग करके इसे स्थापित करें।
npm install --save express-sessionहम डाल देंगे session तथा cookie-parserजगह में मिडलवेयर। इस उदाहरण में, हम स्टोरिंग सत्र के लिए डिफ़ॉल्ट स्टोर का उपयोग करेंगे, अर्थात, मेमोरीस्टोर। उत्पादन वातावरण में इसका उपयोग कभी न करें। सत्र मिडलवेयर हमारे लिए सभी चीजों को संभालता है, अर्थात, सत्र बनाना, सत्र कुकी को सेट करना और सत्र ऑब्जेक्ट को अंदर बनानाreq वस्तु।
जब भी हम फिर से उसी क्लाइंट से अनुरोध करते हैं, तो हमारे पास उनके सत्र की जानकारी हमारे पास संग्रहीत होगी (यह देखते हुए कि सर्वर को पुनरारंभ नहीं किया गया था)। हम सत्र ऑब्जेक्ट में अधिक गुण जोड़ सकते हैं। निम्नलिखित उदाहरण में, हम एक ग्राहक के लिए एक दृश्य काउंटर बनाएंगे।
var express = require('express');
var cookieParser = require('cookie-parser');
var session = require('express-session');

var app = express();

app.use(cookieParser());
app.use(session({secret: "Shh, its a secret!"}));

app.get('/', function(req, res){
   if(req.session.page_views){
      req.session.page_views++;
      res.send("You visited this page " + req.session.page_views + " times");
   } else {
      req.session.page_views = 1;
      res.send("Welcome to this page for the first time!");
   }
});
app.listen(3000);
उपरोक्त कोड क्या है, जब कोई उपयोगकर्ता साइट पर जाता है, तो यह उपयोगकर्ता के लिए एक नया सत्र बनाता है और उन्हें एक कुकी प्रदान करता है। अगली बार जब उपयोगकर्ता आता है, तो कुकी की जाँच की जाती है औरpage_view सत्र चर तदनुसार अद्यतन किया जाता है।
अब अगर आप ऐप चलाते हैं और जाते हैं localhost:3000निम्नलिखित आउटपुट प्रदर्शित किया जाएगा।
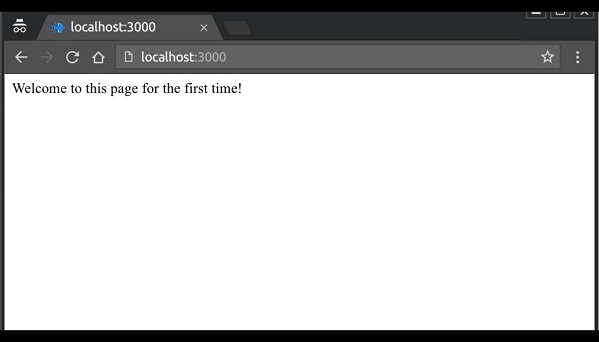
यदि आप पृष्ठ को फिर से देखते हैं, तो पृष्ठ काउंटर बढ़ जाएगा। निम्नलिखित स्क्रीनशॉट में पृष्ठ 42 बार ताज़ा किया गया था।
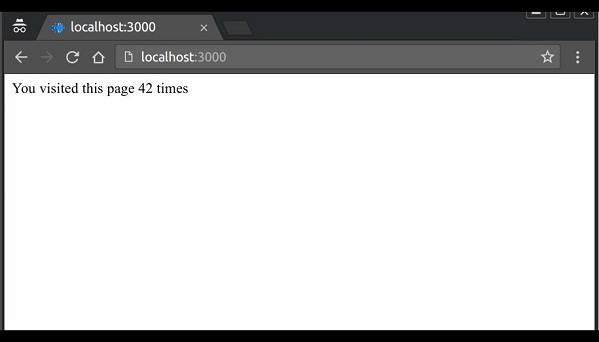
प्रमाणीकरण एक प्रक्रिया है जिसमें प्रदान की गई क्रेडेंशियल्स की तुलना स्थानीय ऑपरेटिंग सिस्टम या अधिकृत सर्वर के भीतर अधिकृत उपयोगकर्ताओं की जानकारी के डेटाबेस में फ़ाइल पर की जाती है। यदि क्रेडेंशियल मेल खाते हैं, तो प्रक्रिया पूरी हो जाती है और उपयोगकर्ता को एक्सेस के लिए प्राधिकरण प्रदान किया जाता है।
हमारे लिए एक प्रमाणीकरण प्रणाली बनाने के लिए, हमें एक साइन अप पृष्ठ और उपयोगकर्ता-पासवर्ड स्टोर बनाना होगा। निम्नलिखित कोड हमारे लिए एक खाता बनाता है और इसे मेमोरी में संग्रहीत करता है। यह केवल डेमो के उद्देश्य के लिए है; यह अनुशंसा की जाती है कि उपयोगकर्ता की जानकारी संग्रहीत करने के लिए एक निरंतर भंडारण (डेटाबेस या फ़ाइलें) का उपयोग हमेशा किया जाता है।
var express = require('express');
var app = express();
var bodyParser = require('body-parser');
var multer = require('multer');
var upload = multer();
var session = require('express-session');
var cookieParser = require('cookie-parser');

app.set('view engine', 'pug');
app.set('views','./views');

app.use(bodyParser.json());
app.use(bodyParser.urlencoded({ extended: true }));
app.use(upload.array());
app.use(cookieParser());
app.use(session({secret: "Your secret key"}));

var Users = [];

app.get('/signup', function(req, res){
   res.render('signup');
});

app.post('/signup', function(req, res){
   if(!req.body.id || !req.body.password){
      res.status("400");
      res.send("Invalid details!");
   } else {
      Users.filter(function(user){
         if(user.id === req.body.id){
            res.render('signup', {
               message: "User Already Exists! Login or choose another user id"});
         }
      });
      var newUser = {id: req.body.id, password: req.body.password};
      Users.push(newUser);
      req.session.user = newUser;
      res.redirect('/protected_page');
   }
});

app.listen(3000);
अब साइनअप फॉर्म के लिए, एक नया दृश्य बनाएं जिसे कहा जाता है signup.jade.
SIGNUP.JADE
html
   head
      title Signup
   body
      if(message)
         h4 #{message}
         form(action = "/signup" method = "POST")
         input(name = "id" type = "text" required placeholder = "User ID")
         input(name = "password" type = "password" required placeholder = "Password")
         button(type = "Submit") Sign me up!
जांचें कि क्या यह पेज लोकलहोस्ट: 3000 / साइनअप पर जाकर लोड होता है।
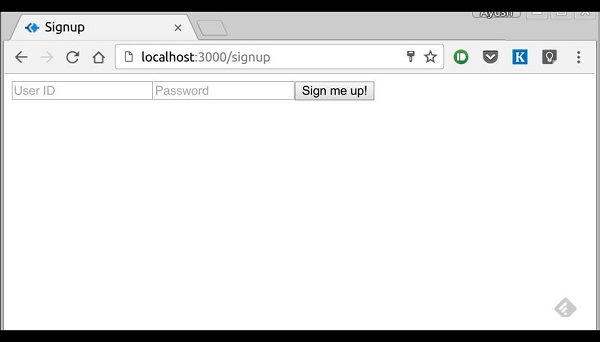
हमने दोनों क्षेत्रों के लिए आवश्यक विशेषता निर्धारित की है, इसलिए HTML5 सक्षम ब्राउज़र हमें यह फ़ॉर्म सबमिट नहीं करने देंगे, जब तक हम दोनों आईडी और पासवर्ड प्रदान नहीं करते हैं। यदि कोई उपयोगकर्ता आईडी या पासवर्ड के बिना कर्ल अनुरोध का पंजीकरण करने का प्रयास करता है, तो एक त्रुटि प्रदर्शित की जाएगी। नामक एक नई फ़ाइल बनाएँprotected_page.pug निम्नलिखित सामग्री के साथ विचारों में -
html
   head
      title Protected page
   body
      div Hey #{id}, How are you doing today?
      div Want to log out?
      div Logout
यह पृष्ठ केवल तभी दिखाई दे सकता है यदि उपयोगकर्ता ने अभी साइन अप किया है या लॉग इन किया है। आइए अब हम इसका मार्ग निर्धारित करते हैं और लॉग इन करने और लॉग इन करने के मार्ग भी -
var express = require('express');
var app = express();
var bodyParser = require('body-parser');
var multer = require('multer');
var upload = multer();
var session = require('express-session');
var cookieParser = require('cookie-parser');

app.set('view engine', 'pug');
app.set('views','./views');

app.use(bodyParser.json());
app.use(bodyParser.urlencoded({ extended: true }));
app.use(upload.array());
app.use(cookieParser());
app.use(session({secret: "Your secret key"}));

var Users = [];

app.get('/signup', function(req, res){
   res.render('signup');
});

app.post('/signup', function(req, res){
   if(!req.body.id || !req.body.password){
      res.status("400");
      res.send("Invalid details!");
   } else {
      Users.filter(function(user){
         if(user.id === req.body.id){
            res.render('signup', {
               message: "User Already Exists! Login or choose another user id"});
         }
      });
      var newUser = {id: req.body.id, password: req.body.password};
      Users.push(newUser);
      req.session.user = newUser;
      res.redirect('/protected_page');
   }
});
function checkSignIn(req, res){
   if(req.session.user){
      next();     //If session exists, proceed to page
   } else {
      var err = new Error("Not logged in!");
      console.log(req.session.user);
      next(err);  //Error, trying to access unauthorized page!
   }
}
app.get('/protected_page', checkSignIn, function(req, res){
   res.render('protected_page', {id: req.session.user.id})
});

app.get('/login', function(req, res){
   res.render('login');
});

app.post('/login', function(req, res){
   console.log(Users);
   if(!req.body.id || !req.body.password){
      res.render('login', {message: "Please enter both id and password"});
   } else {
      Users.filter(function(user){
         if(user.id === req.body.id && user.password === req.body.password){
            req.session.user = user;
            res.redirect('/protected_page');
         }
      });
      res.render('login', {message: "Invalid credentials!"});
   }
});

app.get('/logout', function(req, res){
   req.session.destroy(function(){
      console.log("user logged out.")
   });
   res.redirect('/login');
});

app.use('/protected_page', function(err, req, res, next){
console.log(err);
   //User should be authenticated! Redirect him to log in.
   res.redirect('/login');
});

app.listen(3000);
उपयोगकर्ता ने साइन इन किया है या नहीं यह जाँचने के लिए हमने एक मिडलवेयर फंक्शन checkSignIn बनाया हैprotected_pageइस फ़ंक्शन का उपयोग करता है। उपयोगकर्ता को लॉग आउट करने के लिए, हम सत्र को नष्ट कर देते हैं।
अब हम लॉगिन पेज बनाते हैं। के रूप में देखें नामlogin.pug और सामग्री दर्ज करें -
html
   head
      title Signup
   body
      if(message)
         h4 #{message}
         form(action = "/login" method = "POST")
         input(name = "id" type = "text" required placeholder = "User ID")
         input(name = "password" type = "password" required placeholder = "Password")
         button(type = "Submit") Log in
हमारा सरल प्रमाणीकरण आवेदन अब पूरा हो गया है; आइए अब हम एप्लिकेशन का परीक्षण करते हैं। Nodemon index.js का उपयोग करके ऐप चलाएं , और स्थानीयहोस्ट के लिए आगे बढ़ें: 3000 / साइनअप।
एक उपयोगकर्ता नाम और एक पासवर्ड दर्ज करें और साइन अप पर क्लिक करें। आप पर पुनर्निर्देशित किया जाएगाprotected_page यदि विवरण मान्य / अद्वितीय हैं -
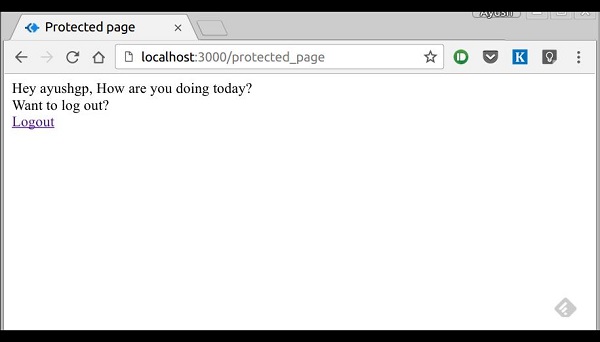
अब ऐप से लॉग आउट करें। यह हमें लॉगिन पृष्ठ पर पुनर्निर्देशित करेगा -
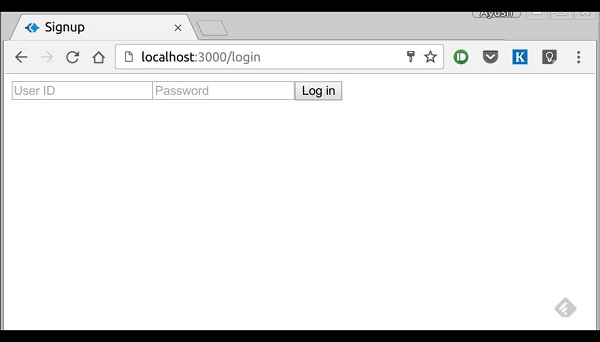
इस मार्ग को ऐसे संरक्षित किया गया है कि अगर कोई अनहोनी व्यक्ति इसे देखने की कोशिश करता है, तो उसे हमारे लॉगिन पृष्ठ पर भेज दिया जाएगा। यह सब बुनियादी उपयोगकर्ता प्रमाणीकरण के बारे में था। यह हमेशा अनुशंसा की जाती है कि हम एक निरंतर सत्र प्रणाली का उपयोग करें और पासवर्ड परिवहन के लिए हैश का उपयोग करें। अब JSON टोकन का लाभ उठाने के लिए उपयोगकर्ताओं को प्रमाणित करने के बहुत बेहतर तरीके हैं।
मोबाइल एप्लिकेशन, सिंगल पेज एप्लिकेशन, AJAX कॉल का उपयोग करने और ग्राहकों को डेटा प्रदान करने के लिए एक एपीआई की हमेशा आवश्यकता होती है। इन APIs और समापन बिंदुओं की संरचना और नाम कैसे करें की एक लोकप्रिय स्थापत्य शैली कहा जाता हैREST(Representational Transfer State)। HTTP 1.1REST सिद्धांतों को ध्यान में रखते हुए डिजाइन किया गया था। द्वारा शुरू किया गया थाRoy Fielding 2000 में अपने पेपर फील्डिंग शोध प्रबंध में।
RESTful URI और विधियाँ हमें लगभग सभी जानकारी प्रदान करती हैं जिन्हें हमें अनुरोध करने की आवश्यकता होती है। नीचे दी गई तालिका संक्षेप में बताती है कि विभिन्न क्रियाओं का उपयोग कैसे किया जाना चाहिए और यूआरआई का नाम कैसे होना चाहिए। हम अंत में एक मूवी एपीआई बना रहे हैं; आइए अब चर्चा करते हैं कि इसे कैसे संरचित किया जाएगा।
| तरीका | यूआरआई | विवरण | समारोह |
|---|---|---|---|
| प्राप्त | /चलचित्र | सुरक्षित, कछुआ | सभी फिल्मों की सूची और उनका विवरण प्राप्त करता है |
| प्राप्त | / फिल्मों / 1234 | सुरक्षित, कछुआ | मूवी आईडी 1234 का विवरण मिलता है |
| पद | /चलचित्र | एन / ए | प्रदान की गई जानकारी के साथ एक नई फिल्म बनाता है। प्रतिक्रिया में इस नए बनाए गए संसाधन के लिए URI शामिल है। |
| डाल | / फिल्मों / 1234 | idempotent | मूवी आईडी 1234 को संशोधित करता है (यदि यह पहले से मौजूद नहीं है तो एक बनाता है)। प्रतिक्रिया में इस नए बनाए गए संसाधन के लिए URI शामिल है। |
| हटाएँ | / फिल्मों / 1234 | idempotent | मूवी आईडी 1234 को हटा दिया जाना चाहिए, अगर यह मौजूद है। प्रतिक्रिया में अनुरोध का दर्जा होना चाहिए। |
| DELETE या PUT | /चलचित्र | अमान्य | अमान्य होना चाहिए। DELETE तथा PUT निर्दिष्ट करना चाहिए कि वे किस संसाधन पर काम कर रहे हैं। |
अब हम एक्सप्रेस में इस एपीआई को बनाते हैं। हम JSON का उपयोग अपने परिवहन डेटा प्रारूप के रूप में करेंगे क्योंकि यह जावास्क्रिप्ट में काम करना आसान है और इसके अन्य लाभ हैं। अपने को बदलेंindex.js के साथ फाइल करें movies.js निम्नलिखित कार्यक्रम के रूप में फ़ाइल।
index.js
var express = require('express');
var bodyParser = require('body-parser');
var multer = require('multer');
var upload = multer();

var app = express();

app.use(cookieParser());
app.use(bodyParser.json());
app.use(bodyParser.urlencoded({ extended: true }));
app.use(upload.array());

//Require the Router we defined in movies.js
var movies = require('./movies.js');

//Use the Router on the sub route /movies
app.use('/movies', movies);

app.listen(3000);
अब हमारे पास अपना एप्लिकेशन सेट अप हो गया है, आइए हम एपीआई बनाने पर ध्यान केंद्रित करें।
Movies.js फ़ाइल सेट करके प्रारंभ करें। हम फिल्मों को स्टोर करने के लिए डेटाबेस का उपयोग नहीं कर रहे हैं, लेकिन उन्हें मेमोरी में स्टोर कर रहे हैं; इसलिए हर बार सर्वर के पुनरारंभ होने पर, हमारे द्वारा जोड़ी गई फिल्में गायब हो जाएंगी। यह आसानी से डेटाबेस या फ़ाइल (नोड एफएस मॉड्यूल का उपयोग करके) का उपयोग करके नकल की जा सकती है।
एक बार जब आप एक्सप्रेस आयात करते हैं, तो एक राउटर बनाएं और मॉड्यूल.एक्सपोर्ट का उपयोग करके इसे निर्यात करें -
var express = require('express');
var router = express.Router();
var movies = [
   {id: 101, name: "Fight Club", year: 1999, rating: 8.1},
   {id: 102, name: "Inception", year: 2010, rating: 8.7},
   {id: 103, name: "The Dark Knight", year: 2008, rating: 9},
   {id: 104, name: "12 Angry Men", year: 1957, rating: 8.9}
];

//Routes will go here
module.exports = router;
मार्ग मिलते हैं
आइए हम सभी फिल्मों को प्राप्त करने के लिए GET मार्ग को परिभाषित करते हैं -
router.get('/', function(req, res){
   res.json(movies);
});
यह जांचने के लिए कि क्या यह ठीक काम कर रहा है, अपना ऐप चलाएं, फिर अपना टर्मिनल खोलें और दर्ज करें -
curl -i -H "Accept: application/json" -H "Content-Type: application/json" -X GET
localhost:3000/movies
निम्नलिखित प्रतिक्रिया प्रदर्शित की जाएगी -
[{"id":101,"name":"Fight Club","year":1999,"rating":8.1},
{"id":102,"name":"Inception","year":2010,"rating":8.7},
{"id":103,"name":"The Dark Knight","year":2008,"rating":9},
{"id":104,"name":"12 Angry Men","year":1957,"rating":8.9}]
हमारे पास सभी फिल्मों को पाने के लिए एक रास्ता है। आइये अब हम अपनी id के द्वारा एक विशिष्ट फिल्म प्राप्त करने के लिए एक मार्ग बनाते हैं।
router.get('/:id([0-9]{3,})', function(req, res){
   var currMovie = movies.filter(function(movie){
      if(movie.id == req.params.id){
         return true;
      }
   });
   if(currMovie.length == 1){
      res.json(currMovie[0])
   } else {
      res.status(404);//Set status to 404 as movie was not found
      res.json({message: "Not Found"});
   }
});
यह हमें हमारे द्वारा प्रदान की गई आईडी के अनुसार फिल्में मिलेंगी। आउटपुट की जाँच करने के लिए, अपने टर्मिनल में निम्न कमांड का उपयोग करें -
curl -i -H "Accept: application/json" -H "Content-Type: application/json" -X GET
localhost:3000/movies/101
आपको निम्न प्रतिक्रिया मिलेगी -
{"id":101,"name":"Fight Club","year":1999,"rating":8.1}यदि आप किसी अमान्य मार्ग पर जाते हैं, तो यह उत्पादन करेगा cannot GET error यदि आप किसी ऐसे आईडी वाले वैध मार्ग पर जाते हैं जो मौजूद नहीं है, तो यह 404 त्रुटि उत्पन्न करेगा।
हमें जीईटी मार्गों के साथ किया जाता है, आइए अब हम आगे बढ़ते हैं POST मार्ग।
पोस्ट मार्ग
निम्नलिखित मार्ग का उपयोग करें POSTed डेटा -
router.post('/', function(req, res){
   //Check if all fields are provided and are valid:
   if(!req.body.name ||
      !req.body.year.toString().match(/^[0-9]{4}$/g) || !req.body.rating.toString().match(/^[0-9]\.[0-9]$/g)){

      res.status(400);
      res.json({message: "Bad Request"});
   } else {
      var newId = movies[movies.length-1].id+1;
      movies.push({
         id: newId,
         name: req.body.name,
         year: req.body.year,
         rating: req.body.rating
      });
      res.json({message: "New movie created.", location: "/movies/" + newId});
   }
});
यह एक नई फिल्म बनाएगा और इसे मूवी चर में संग्रहीत करेगा। इस मार्ग की जाँच करने के लिए, अपने टर्मिनल में निम्न कोड दर्ज करें -
curl -X POST --data "name = Toy%20story&year = 1995&rating = 8.5" http://localhost:3000/moviesनिम्नलिखित प्रतिक्रिया प्रदर्शित की जाएगी -
{"message":"New movie created.","location":"/movies/105"}यह परीक्षण करने के लिए कि क्या यह फ़िल्म ऑब्जेक्ट में जोड़ा गया है, के लिए अनुरोध प्राप्त करें चलाएँ /movies/105फिर। निम्नलिखित प्रतिक्रिया प्रदर्शित की जाएगी -
{"id":105,"name":"Toy story","year":"1995","rating":"8.5"}हमें PUT और DELETE रूट बनाने के लिए आगे बढ़ना है।
PUT मार्ग
PUT मार्ग लगभग POST मार्ग के समान है। हम आईडी को उस ऑब्जेक्ट के लिए निर्दिष्ट करेंगे जो अपडेट / बनाया जाएगा। निम्नलिखित तरीके से मार्ग बनाएं।
router.put('/:id', function(req, res){
   //Check if all fields are provided and are valid:
   if(!req.body.name ||
      !req.body.year.toString().match(/^[0-9]{4}$/g) || !req.body.rating.toString().match(/^[0-9]\.[0-9]$/g) ||
      !req.params.id.toString().match(/^[0-9]{3,}$/g)){

      res.status(400);
      res.json({message: "Bad Request"});
   } else {
      //Gets us the index of movie with given id.
      var updateIndex = movies.map(function(movie){
         return movie.id;
      }).indexOf(parseInt(req.params.id));

      if(updateIndex === -1){
         //Movie not found, create new
         movies.push({
            id: req.params.id,
            name: req.body.name,
            year: req.body.year,
            rating: req.body.rating
         });
         res.json({message: "New movie created.", location: "/movies/" + req.params.id});
      } else {
         //Update existing movie
         movies[updateIndex] = {
            id: req.params.id,
            name: req.body.name,
            year: req.body.year,
            rating: req.body.rating
         };
         res.json({message: "Movie id " + req.params.id + " updated.",
            location: "/movies/" + req.params.id});
      }
   }
});
यह मार्ग उपरोक्त तालिका में निर्दिष्ट कार्य करेगा। यह मौजूद होने पर नए विवरण के साथ ऑब्जेक्ट को अपडेट करेगा। यदि यह मौजूद नहीं है, तो यह एक नई वस्तु बनाएगा। मार्ग की जांच करने के लिए, निम्नलिखित कर्ल कमांड का उपयोग करें। यह एक मौजूदा फिल्म को अपडेट करेगा। एक नई मूवी बनाने के लिए, बस आईडी को गैर-मौजूदा आईडी में बदलें।
curl -X PUT --data "name = Toy%20story&year = 1995&rating = 8.5"
http://localhost:3000/movies/101
Response
{"message":"Movie id 101 updated.","location":"/movies/101"}DELETE मार्ग
डिलीट रूट बनाने के लिए निम्न कोड का उपयोग करें। -
router.delete('/:id', function(req, res){
   var removeIndex = movies.map(function(movie){
      return movie.id;
   }).indexOf(req.params.id); //Gets us the index of movie with given id.

   if(removeIndex === -1){
      res.json({message: "Not found"});
   } else {
      movies.splice(removeIndex, 1);
      res.send({message: "Movie id " + req.params.id + " removed."});
   }
});
जिस तरह से हमने अन्य मार्गों की जाँच की उसी तरह से मार्ग की जाँच करें। सफल विलोपन पर (उदाहरण के लिए आईडी 105), आपको निम्न आउटपुट मिलेगा -
{message: "Movie id 105 removed."}अंत में, हमारे movies.js फ़ाइल निम्न की तरह दिखाई देगी।
var express = require('express');
var router = express.Router();
var movies = [
   {id: 101, name: "Fight Club", year: 1999, rating: 8.1},
   {id: 102, name: "Inception", year: 2010, rating: 8.7},
   {id: 103, name: "The Dark Knight", year: 2008, rating: 9},
   {id: 104, name: "12 Angry Men", year: 1957, rating: 8.9}
];
router.get('/:id([0-9]{3,})', function(req, res){
   var currMovie = movies.filter(function(movie){
      if(movie.id == req.params.id){
         return true;
      }
   });

   if(currMovie.length == 1){
      res.json(currMovie[0])
   } else {
      res.status(404);  //Set status to 404 as movie was not found
      res.json({message: "Not Found"});
   }
});
router.post('/', function(req, res){
   //Check if all fields are provided and are valid:
   if(!req.body.name ||
      !req.body.year.toString().match(/^[0-9]{4}$/g) ||
      !req.body.rating.toString().match(/^[0-9]\.[0-9]$/g)){ res.status(400); res.json({message: "Bad Request"}); } else { var newId = movies[movies.length-1].id+1; movies.push({ id: newId, name: req.body.name, year: req.body.year, rating: req.body.rating }); res.json({message: "New movie created.", location: "/movies/" + newId}); } }); router.put('/:id', function(req, res) { //Check if all fields are provided and are valid: if(!req.body.name || !req.body.year.toString().match(/^[0-9]{4}$/g) ||
      !req.body.rating.toString().match(/^[0-9]\.[0-9]$/g) || !req.params.id.toString().match(/^[0-9]{3,}$/g)){
      res.status(400);
      res.json({message: "Bad Request"});
   } else {
      //Gets us the index of movie with given id.
      var updateIndex = movies.map(function(movie){
         return movie.id;
      }).indexOf(parseInt(req.params.id));

      if(updateIndex === -1){
         //Movie not found, create new
         movies.push({
            id: req.params.id,
            name: req.body.name,
            year: req.body.year,
            rating: req.body.rating
         });
         res.json({
            message: "New movie created.", location: "/movies/" + req.params.id});
      } else {
         //Update existing movie
         movies[updateIndex] = {
            id: req.params.id,
            name: req.body.name,
            year: req.body.year,
            rating: req.body.rating
         };
         res.json({message: "Movie id " + req.params.id + " updated.",
            location: "/movies/" + req.params.id});
      }
   }
});

router.delete('/:id', function(req, res){
   var removeIndex = movies.map(function(movie){
      return movie.id;
   }).indexOf(req.params.id); //Gets us the index of movie with given id.

   if(removeIndex === -1){
      res.json({message: "Not found"});
   } else {
      movies.splice(removeIndex, 1);
      res.send({message: "Movie id " + req.params.id + " removed."});
   }
});
module.exports = router;
यह हमारे REST API को पूरा करता है। अब आप इस सरल वास्तुशिल्प शैली और एक्सप्रेस का उपयोग करके बहुत अधिक जटिल एप्लिकेशन बना सकते हैं।
मचान हमें आसानी से एक बनाने की अनुमति देता है skeleton for a web application। हम मैन्युअल रूप से अपनी सार्वजनिक निर्देशिका बनाते हैं, मिडलवेयर को जोड़ते हैं, अलग-अलग मार्ग फ़ाइलें बनाते हैं, आदि एक मचान उपकरण हमारे लिए इन सभी चीजों को सेट करता है ताकि हम सीधे अपने आवेदन के निर्माण के साथ शुरू कर सकें।
हम जिस स्कैफ़ोल्डर का उपयोग करेंगे, उसे कहा जाता है Yeoman। यह एक मचान उपकरण के लिए बनाया गया हैNode.jsलेकिन कई अन्य चौखटे (जैसे फ्लास्क, रेल, django, आदि) के लिए जनरेटर भी हैं। येओमान स्थापित करने के लिए, अपने टर्मिनल में निम्न कमांड दर्ज करें -
npm install -g yeomanयेओमान अनुप्रयोगों का उपयोग करने के लिए जनरेटर का उपयोग करता है। पर उपलब्ध जनरेटर की जाँच करने के लिएnpmयेओमान के साथ उपयोग करने के लिए, आप इस लिंक पर क्लिक कर सकते हैं । इस ट्यूटोरियल में, हम 'जनरेटर-एक्सप्रेस-सिंपल' का उपयोग करेंगे । इस जनरेटर को स्थापित करने के लिए, अपने टर्मिनल में निम्न कमांड दर्ज करें -
npm install -g generator-express-simpleइस जनरेटर का उपयोग करने के लिए, निम्नलिखित कमांड दर्ज करें -
yo express-simple test-appआपसे कुछ सरल प्रश्न पूछे जाएंगे जैसे आप अपने ऐप के साथ किन चीजों का उपयोग करना चाहते हैं। निम्नलिखित उत्तरों का चयन करें, या यदि आप पहले से ही इन तकनीकों के बारे में जानते हैं, तो चुनने के बारे में जाने कि आप उन्हें कैसे चाहते हैं।
express-simple comes with bootstrap and jquery
[?] Select the express version you want: 4.x
[?] Do you want an mvc express app: Yes
[?] Select the css preprocessor you would like to use: sass
[?] Select view engine you would like to use: jade
[?] Select the build tool you want to use for this project: gulp
[?] Select the build tool you want to use for this project: gulp
[?] Select the language you want to use for the build tool: javascript
   create public/sass/styles.scss
   create public/js/main.js
   create views/layout.jade
   create views/index.jade
   create views/404.jade
   create app.js
   create config.js
   create routes/index.js
   create package.json
   create bower.json
identical .bowerrc
identical .editorconfig
identical .gitignore
identical .jshintrc
   create gulpfile.js

I'm all done. Running bower install & npm install for you to install the
required dependencies. If this fails, try running the command yourself.
यह तब आपके लिए एक नया एप्लिकेशन बनाएगा, सभी निर्भरताएं स्थापित करेगा, आपके आवेदन में कुछ पृष्ठ जोड़ेगा (होम पेज, 404 नहीं मिला पेज, आदि) और आपको काम करने के लिए एक निर्देशिका संरचना प्रदान करेगा।
यह जनरेटर हमारे लिए एक बहुत ही सरल संरचना बनाता है। एक्सप्रेस के लिए उपलब्ध कई जनरेटर का अन्वेषण करें और जो आपको सही लगे उसे चुनें। सभी जनरेटर के साथ काम करने के चरण समान हैं। आपको जनरेटर स्थापित करने की आवश्यकता होगी, इसे योमन का उपयोग करके चलाएं; यह आपसे कुछ प्रश्न पूछेगा और फिर आपके उत्तरों के आधार पर आपके आवेदन के लिए एक कंकाल तैयार करेगा।
एक्सप्रेसवेयर में एरर हैंडलिंग को मिडलवेयर का उपयोग करके किया जाता है। लेकिन इस मिडलवेयर में विशेष गुण हैं। मिडिलवेयर से निपटने में त्रुटि उसी तरह से परिभाषित की जाती है जैसे कि अन्य मिडलवेयर फ़ंक्शंस, उस त्रुटि-हैंडलिंग फ़ंक्शंस को छोड़करMUST have four arguments तीन के बजाय - err, req, res, next। उदाहरण के लिए, किसी भी त्रुटि पर प्रतिक्रिया भेजने के लिए, हम उपयोग कर सकते हैं -
app.use(function(err, req, res, next) {
   console.error(err.stack);
   res.status(500).send('Something broke!');
});
अब तक हम मार्गों में ही त्रुटियों को संभाल रहे थे। मिडलवेयर से निपटने में त्रुटि हमें अपनी त्रुटि तर्क को अलग करने और तदनुसार प्रतिक्रिया भेजने की अनुमति देती है। मिडिलवेयर में चर्चा की गई अगली () विधि हमें अगले तक ले जाती हैmiddleware/route handler।
त्रुटि से निपटने के लिए, हमारे पास है next(err)समारोह। इस फ़ंक्शन के लिए एक कॉल सभी मिडलवेयर को छोड़ देता है और हमें उस रूट के लिए अगली त्रुटि हैंडलर से मिलाता है। इसे एक उदाहरण के माध्यम से समझते हैं।
var express = require('express');
var app = express();

app.get('/', function(req, res){
   //Create an error and pass it to the next function
   var err = new Error("Something went wrong");
   next(err);
});

/*
 * other route handlers and middleware here
 * ....
 */

//An error handling middleware
app.use(function(err, req, res, next) {
   res.status(500);
   res.send("Oops, something went wrong.")
});

app.listen(3000);
मिडलवेयर से निपटने वाली इस त्रुटि को रणनीतिक रूप से मार्गों के बाद रखा जा सकता है या इसमें त्रुटि प्रकारों का पता लगाने और तदनुसार ग्राहकों को प्रतिक्रिया देने के लिए स्थितियां हो सकती हैं। उपरोक्त कार्यक्रम निम्न आउटपुट प्रदर्शित करेगा।
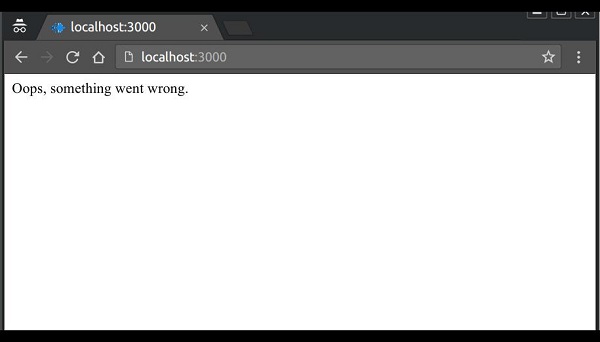
एक्सप्रेस मार्ग मिलान, मिडलवेयर फ़ंक्शंस, एप्लिकेशन मोड आदि के बारे में आंतरिक रूप से लॉग इन करने के लिए एक्सप्रेस डिबग मॉड्यूल का उपयोग करता है ।
एक्सप्रेस में उपयोग किए जाने वाले सभी आंतरिक लॉग देखने के लिए, DEBUG पर्यावरण चर को सेट करें Express:* एप्लिकेशन शुरू करते समय -
DEBUG = express:* node index.jsनिम्न आउटपुट प्रदर्शित किया जाएगा।
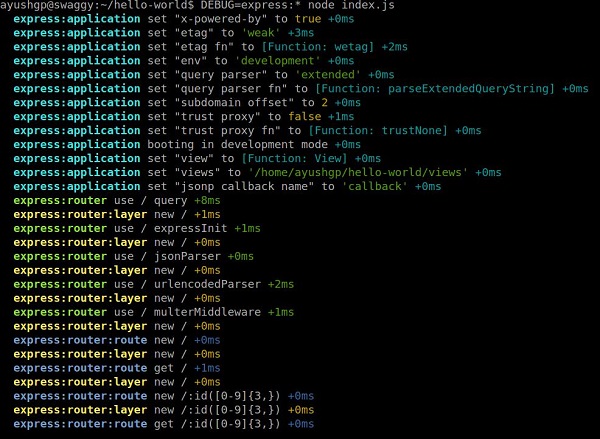
जब आपके ऐप का कोई घटक सही काम नहीं कर रहा हो तो ये लॉग बहुत मददगार होते हैं। यह क्रिया आउटपुट थोड़ा भारी हो सकता है। आप लॉग किए जाने वाले विशिष्ट क्षेत्र में DEBUG चर को भी प्रतिबंधित कर सकते हैं। उदाहरण के लिए, यदि आप लकड़हारे को आवेदन और राउटर तक सीमित करना चाहते हैं, तो आप निम्न कोड का उपयोग कर सकते हैं।
DEBUG = express:application,express:router node index.jsडिबग डिफ़ॉल्ट रूप से बंद हो जाता है और स्वचालित रूप से उत्पादन वातावरण में चालू होता है। डिबग को अपनी आवश्यकताओं को पूरा करने के लिए भी बढ़ाया जा सकता है, आप इसके बारे में इसके npm पेज पर पढ़ सकते हैं ।
Django और रेल्स के विपरीत जो चीजों को करने का एक परिभाषित तरीका है, फ़ाइल संरचना, आदि, एक्सप्रेस परिभाषित तरीके का पालन नहीं करता है। इसका मतलब है कि आप जिस तरह से चाहें आवेदन को संरचना कर सकते हैं। लेकिन जैसे-जैसे आपका एप्लिकेशन आकार में बढ़ता है, इसे बनाए रखना बहुत मुश्किल होता है, अगर इसमें एक अच्छी तरह से परिभाषित संरचना नहीं है। इस अध्याय में, हम अपने अनुप्रयोगों के निर्माण के लिए आमतौर पर उपयोग की जाने वाली निर्देशिका संरचनाओं और चिंताओं को अलग करने पर ध्यान देंगे।
सबसे पहले, हम नोड और एक्सप्रेस एप्लिकेशन बनाने के लिए सर्वोत्तम प्रथाओं पर चर्चा करेंगे।
हमेशा एक नोड परियोजना का उपयोग शुरू करें npm init।
हमेशा एक के साथ निर्भरता स्थापित करें --save या --save-dev। यह सुनिश्चित करेगा कि यदि आप किसी भिन्न प्लेटफ़ॉर्म पर जाते हैं, तो आप सभी निर्भरताएँ स्थापित करने के लिए बस npm इंस्टाल चला सकते हैं ।
लोअरकेस फ़ाइल नाम और कैमलकेस चर के साथ छड़ी। यदि आप किसी npm मॉड्यूल को देखते हैं, तो इसका नाम लोअरकेस में रखा गया है और डैश के साथ अलग किया गया है। जब भी आपको इन मॉड्यूल की आवश्यकता होती है, तो camelCase का उपयोग करें।
अपने रिपॉजिटरी में नोड_मॉड्यूल्स को धक्का न दें। इसके बजाय एनपीएम विकास मशीनों पर सब कुछ स्थापित करता है।
का उपयोग config चर स्टोर करने के लिए फ़ाइल
समूह और अपनी खुद की फ़ाइल के लिए मार्गों को अलग। उदाहरण के लिए, उन फिल्मों के उदाहरण में CRUD ऑपरेशन लें, जिन्हें हमने REST API पेज में देखा था।
निर्देशिका संरचना
आइए अब एक्सप्रेस 'डायरेक्टरी स्ट्रक्चर' पर चर्चा करते हैं।
वेबसाइटें
एक्सप्रेस में एप्लिकेशन बनाने के लिए सामुदायिक परिभाषित संरचना नहीं है। निम्नलिखित एक वेबसाइट के लिए एक प्रमुख रूप से इस्तेमाल परियोजना संरचना है।
test-project/
   node_modules/
   config/
      db.js                //Database connection and configuration
      credentials.js       //Passwords/API keys for external services used by your app
      config.js            //Other environment variables
   models/                 //For mongoose schemas
      users.js
      things.js
   routes/                 //All routes for different entities in different files
      users.js
      things.js
   views/
      index.pug
      404.pug
        ...
   public/                 //All static content being served
      images/
      css/
      javascript/
   app.js
   routes.js               //Require all routes in this and then require this file in
   app.js
   package.json
एक्सप्रेस के साथ वेबसाइट बनाने के लिए अन्य दृष्टिकोण भी हैं। आप MVC डिज़ाइन पैटर्न का उपयोग करके एक वेबसाइट बना सकते हैं। अधिक जानकारी के लिए, आप निम्न लिंक पर जा सकते हैं।
https://code.tutsplus.com/tutorials/build-a-complete-mvc-website-with-expressjs--net-34168
तथा,
https://www.terlici.com/2014/08/25/best-practices-express-structure.html।
रेस्टफुल एपीआई
एपीआई डिजाइन करने के लिए सरल हैं; उन्हें एक सार्वजनिक या एक दृश्य निर्देशिका की आवश्यकता नहीं है। API बनाने के लिए निम्न संरचना का उपयोग करें -
test-project/
   node_modules/
   config/
      db.js                //Database connection and configuration
      credentials.js       //Passwords/API keys for external services used by your app
   models/                 //For mongoose schemas
      users.js
      things.js
   routes/                 //All routes for different entities in different files
      users.js
      things.js
   app.js
   routes.js               //Require all routes in this and then require this file in
   app.js
   package.json
आप एक समान संरचना प्राप्त करने के लिए एक तुर्क जनरेटर का उपयोग भी कर सकते हैं ।
यह अध्याय इस ट्यूटोरियल के लिए हमारे द्वारा उपयोग किए जाने वाले विभिन्न संसाधनों को सूचीबद्ध करता है।
सबसे महत्वपूर्ण लिंक जाहिर है एक्सप्रेस एपीआई डॉक्स - https://expressjs.com/en/4x/api.html
विभिन्न पहलुओं पर एक्सप्रेस वेबसाइट पर दिए गए गाइड भी काफी मददगार हैं -
Routing
Middleware
गलती संभालना
Debugging
एक्सप्रेस पर उपयोगी पुस्तकों और ब्लॉगों की एक सूची उपलब्ध है https://expressjs.com/en/resources/books-blogs.html
एक्सप्रेस के साथ ज्यादातर उपयोग किए जाने वाले मिडलवेयर की सूची उपलब्ध है https://expressjs.com/en/resources/middleware.html
एक्सप्रेस टिप्स और ट्रिक्स वाला ये ब्लॉग मददगार साबित हो सकता है -
https://derickbailey.com/categories/tips-and-tricks/
https://scotch.io/tutorials/learn-to-use-the-new-router-in+-expressjs-4
आवेदन संरचना - https://www.terlici.com/2014/08/25/best-practices-express-structure.html
प्रतिष्ठित एपीआई -
https://www.thepolyglotdeveloper.com/2015/10/create-a-simple-restful-api-with-node-js/
https://scotch.io/tutorials/build-a-restful-api-using-node-and-express-4
https://devcenter.heroku.com/articles/mean-apps-restful-api
https://pixelhandler.com/posts/develop-a-restful-api-using-nodejs-with-express-and-mongoose
http://cwbuecheler.com/web/tutorials/2014/restful-web-app-node-express-mongodb/
उन्नत प्रमाणीकरण के लिए, PassportJS का उपयोग करें - http://passportjs.org