ApacheFlink-Flinkアプリケーションの作成
この章では、Flinkアプリケーションを作成する方法を学習します。
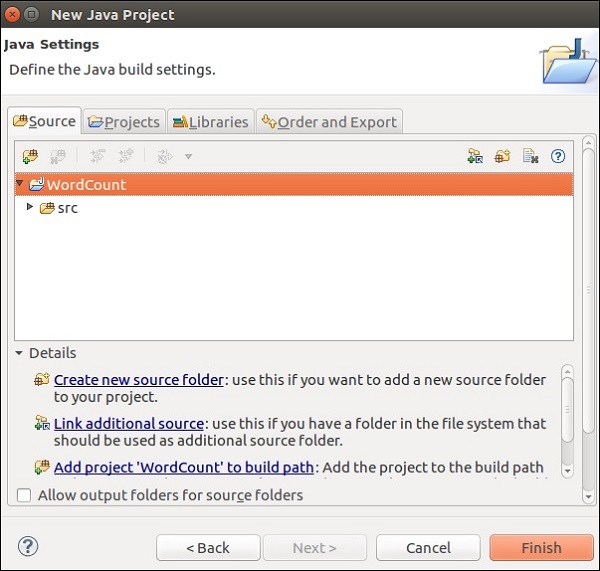
Eclipse IDEを開き、「新規プロジェクト」をクリックして「Javaプロジェクト」を選択します。

プロジェクト名を付けて、[完了]をクリックします。

次のスクリーンショットに示すように、[完了]をクリックします。
次に、右クリックします src 新規>>クラスに移動します。

クラス名を付けて、[完了]をクリックします。

以下のコードをコピーしてエディターに貼り付けます。
import org.apache.flink.api.common.functions.FlatMapFunction;
import org.apache.flink.api.java.DataSet;
import org.apache.flink.api.java.ExecutionEnvironment;
import org.apache.flink.api.java.tuple.Tuple2;
import org.apache.flink.api.java.utils.ParameterTool;
import org.apache.flink.util.Collector;
public class WordCount {

   // *************************************************************************
   // PROGRAM
   // *************************************************************************
   public static void main(String[] args) throws Exception {
      final ParameterTool params = ParameterTool.fromArgs(args);
      // set up the execution environment
      final ExecutionEnvironment env = ExecutionEnvironment.getExecutionEnvironment();
      // make parameters available in the web interface
      env.getConfig().setGlobalJobParameters(params);
      // get input data
      DataSet<String> text = env.readTextFile(params.get("input"));
      DataSet<Tuple2<String, Integer>> counts =
      // split up the lines in pairs (2-tuples) containing: (word,1)
      text.flatMap(new Tokenizer())
      // group by the tuple field "0" and sum up tuple field "1"
      .groupBy(0)
      .sum(1);
      // emit result
      if (params.has("output")) {
         counts.writeAsCsv(params.get("output"), "\n", " ");
         // execute program
         env.execute("WordCount Example");
      } else {
         System.out.println("Printing result to stdout. Use --output to specify output path.");
         counts.print();
      }
   }

   // *************************************************************************
   // USER FUNCTIONS
   // *************************************************************************
   public static final class Tokenizer implements FlatMapFunction<String, Tuple2<String, Integer>> {
      public void flatMap(String value, Collector<Tuple2<String, Integer>> out) {
         // normalize and split the line
         String[] tokens = value.toLowerCase().split("\\W+");
         // emit the pairs
         for (String token : tokens) {
            if (token.length() > 0) {
               out.collect(new Tuple2<>(token, 1));
            }
         }
      }
   }
}
Flinkライブラリをこのプロジェクトに追加する必要があるため、エディタで多くのエラーが発生します。

プロジェクトを右クリック>> [ビルドパス] >> [ビルドパスの構成]。
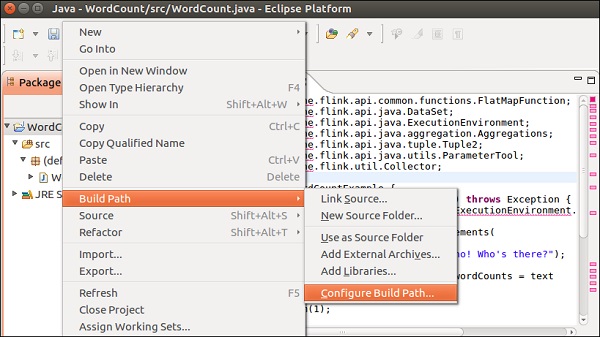
「ライブラリー」タブを選択し、「外部JARの追加」をクリックします。

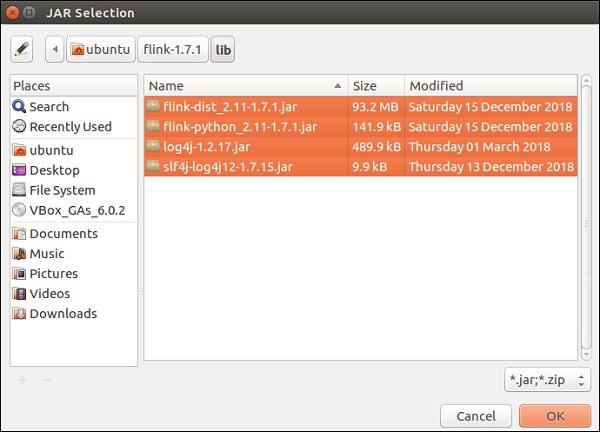
Flinkのlibディレクトリに移動し、4つのライブラリをすべて選択して、[OK]をクリックします。
[注文とエクスポート]タブに移動し、すべてのライブラリを選択して、[OK]をクリックします。
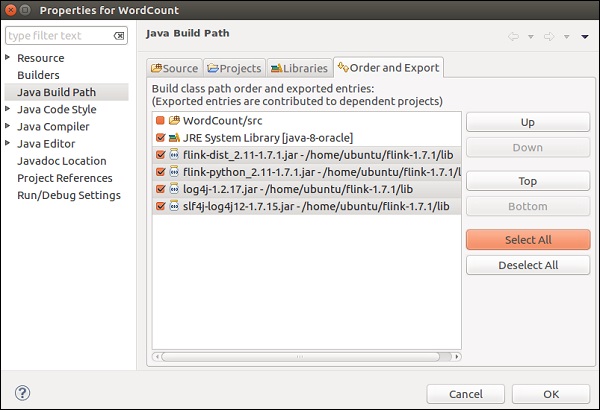
エラーがなくなっていることがわかります。
それでは、このアプリケーションをエクスポートしましょう。プロジェクトを右クリックし、[エクスポート]をクリックします。

JARファイルを選択し、[次へ]をクリックします

宛先パスを指定して、[次へ]をクリックします

[次へ]をクリックします>
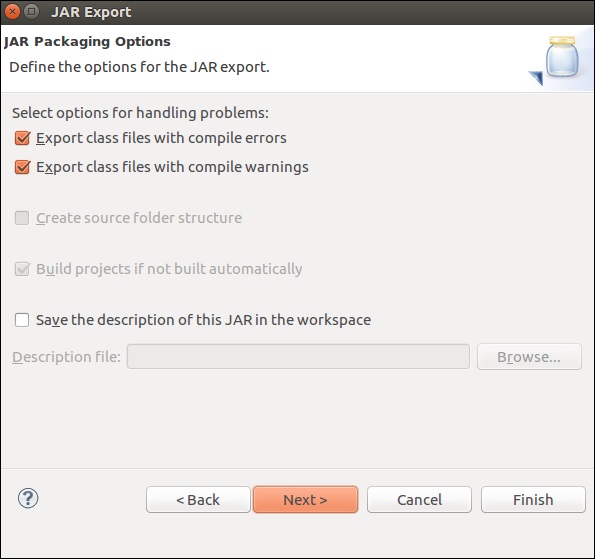
[参照]をクリックし、メインクラス(WordCount)を選択して、[完了]をクリックします。

Note −警告が表示された場合は、[OK]をクリックします。
以下のコマンドを実行します。作成したFlinkアプリケーションがさらに実行されます。
./bin/flink run /home/ubuntu/wordcount.jar --input README.txt --output /home/ubuntu/output