SpringWS-静的WSDL
前の章「Spring-WS-最初のアプリケーション」では、SpringWS構成を使用してWSDLを自動的に生成しました。この場合、SpringWSを使用して既存のWSDLを公開する方法を示します。
| ステップ | 説明 |
|---|---|
| 1 | Spring WS-First Applicationの章で説明されているように、パッケージcom.tutorialspointの下にleaveServiceという名前のプロジェクトを作成します。 |
| 2 | / WEB-INF / wsdlサブフォルダーの下にWSDLleave.wsdlを作成します。 |
| 3 | / WEB-INFサブフォルダーの下のspring-ws-servlet.xmlを更新します。ここでは、dynamic-wsdlの代わりにstatic-wsdlタグを使用しています。 |
| 4 | 最後のステップは、以下で説明するように、すべてのソースファイルと構成ファイルのコンテンツを作成し、アプリケーションをエクスポートすることです。 |
/WEB-INF/spring-ws-servlet.xml
<wsdl:definitions xmlns:wsdl = "http://schemas.xmlsoap.org/wsdl/"
   xmlns:soap = "http://schemas.xmlsoap.org/wsdl/soap/"
   xmlns:schema = "http://tutorialspoint.com/hr/schemas"
   xmlns:tns = "http://tutorialspoint.com/hr/definitions"
   targetNamespace = "http://tutorialspoint.com/hr/definitions">

   <wsdl:types>
      <xsd:schema xmlns:xsd = "http://www.w3.org/2001/XMLSchema">
         <xsd:import namespace = "http://tutorialspoint.com/hr/schemas"
            schemaLocation = "hr.xsd"/>
      </xsd:schema>
   </wsdl:types>

   <wsdl:message name = "LeaveRequest">
      <wsdl:part element = "schema:LeaveRequest" name = "LeaveRequest"/>
   </wsdl:message>

   <wsdl:portType name = "HumanResource">
      <wsdl:operation name = "Leave">
         <wsdl:input message = "tns:LeaveRequest" name = "LeaveRequest"/>
      </wsdl:operation>
   </wsdl:portType>

   <wsdl:binding name = "HumanResourceBinding" type = "tns:HumanResource">
      <soap:binding style = "document"
         transport = "http://schemas.xmlsoap.org/soap/http"/>
      <wsdl:operation name = "Leave">
         <soap:operation soapAction = "http://mycompany.com/RequestLeave"/>
         <wsdl:input name = "LeaveRequest">
            <soap:body use = "literal"/>
         </wsdl:input>
      </wsdl:operation>
   </wsdl:binding>

   <wsdl:service name = "HumanResourceService">
      <wsdl:port binding = "tns:HumanResourceBinding" name = "HumanResourcePort">
         <soap:address location = "http://localhost:8080/leaveService/"/>
      </wsdl:port>
   </wsdl:service>
</wsdl:definitions>
/WEB-INF/spring-ws-servlet.xml
<beans xmlns = "http://www.springframework.org/schema/beans"
   xmlns:xsi = "http://www.w3.org/2001/XMLSchema-instance"
   xmlns:context = "http://www.springframework.org/schema/context"
   xmlns:sws = "http://www.springframework.org/schema/web-services"
   xsi:schemaLocation = "http://www.springframework.org/schema/beans

   http://www.springframework.org/schema/beans/spring-beans-3.0.xsd
   http://www.springframework.org/schema/web-services
   http://www.springframework.org/schema/web-services/web-services-2.0.xsd
   http://www.springframework.org/schema/context
   http://www.springframework.org/schema/context/spring-context-3.0.xsd">

   <context:component-scan base-package = "com.tutorialspoint.hr"/>
   <sws:annotation-driven/>
   <sws:static-wsdl id = "leave" location = "/WEB-INF/wsdl/leave.wsdl"/>
</beans>
プロジェクトを実行する
ソースファイルと構成ファイルの作成が完了したら、アプリケーションをエクスポートする必要があります。アプリケーションを右クリックし、「エクスポート」→「WARファイル」オプションを使用して、LeaveService.warファイルをTomcatのwebappsフォルダーに保存します。
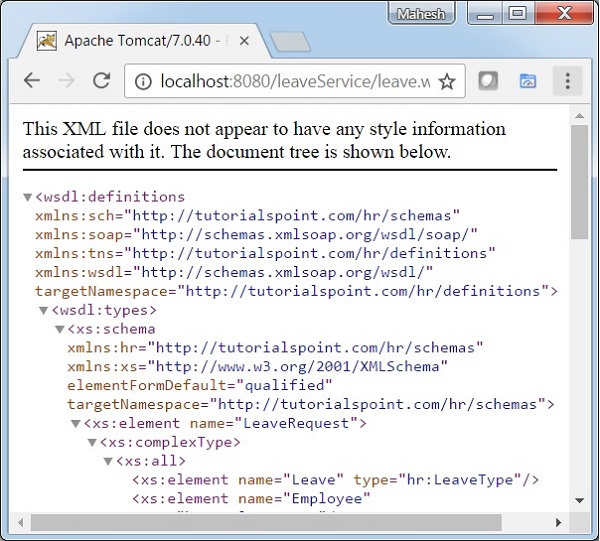
ここで、Tomcatサーバーを起動し、標準のブラウザーを使用してwebappsフォルダーから他のWebページにアクセスできることを確認します。URL – http:// localhost:8080 / LeaveService / Leave.wsdlにアクセスしてみてください。SpringWebアプリケーションですべて問題がなければ、次の画面が表示されます。
