JSF-스프링 통합
Spring은 JSF와 Spring을 완벽하게 통합하기 위해 특별한 클래스 DelegatingVariableResolver를 제공합니다.
JSF에서 Spring Dependency Injection (IOC) 기능을 통합하려면 다음 단계가 필요합니다.
1 단계 : DelegatingVariableResolver 추가
spring 클래스를 가리 키도록 faces-config.xml에 변수 해석기 항목을 추가합니다. DelegatingVariableResolver.
<faces-config>
   <application>
   <variable-resolver>
      org.springframework.web.jsf.DelegatingVariableResolver
   </variable-resolver>
   ...
</faces-config>
2 단계 : 컨텍스트 리스너 추가
더하다 ContextLoaderListener 과 RequestContextListener web.xml의 spring framework에서 제공하는 리스너.
<web-app>
   ...
   <!-- Add Support for Spring -->
   <listener>
      <listener-class>
         org.springframework.web.context.ContextLoaderListener
      </listener-class>
   </listener>

   <listener>
      <listener-class>
         org.springframework.web.context.request.RequestContextListener
      </listener-class>
   </listener>
   ...
</web-app>
3 단계 : 종속성 정의
관리 Bean에서 종속성으로 사용할 bean을 applicationContext.xml에 정의하십시오.
<beans>
   <bean id = "messageService"
      class = "com.tutorialspoint.test.MessageServiceImpl">
      <property name = "message" value = "Hello World!" />
   </bean>
</beans>
4 단계 : 종속성 추가
DelegatingVariableResolver먼저 값 조회를 JSF의 기본 해석기에 위임 한 다음 Spring의 WebApplicationContext에 위임합니다. 이를 통해 스프링 기반 종속성을 JSF 관리 빈에 쉽게 주입 할 수 있습니다.
여기에 스프링 기반 종속성으로 messageService를 삽입했습니다.
<faces-config>
   ...
   <managed-bean>
      <managed-bean-name>userData</managed-bean-name>
      <managed-bean-class>com.tutorialspoint.test.UserData</managed-bean-class>
      <managed-bean-scope>request</managed-bean-scope>

      <managed-property>
         <property-name>messageService</property-name>
         <value>#{messageService}</value>
      </managed-property>
   </managed-bean>
</faces-config>
5 단계 : 종속성 사용
//jsf managed bean
public class UserData {

   //spring managed dependency
   private MessageService messageService;

   public void setMessageService(MessageService messageService) {
      this.messageService = messageService;
   }

   public String getGreetingMessage() {
      return messageService.getGreetingMessage();
   }
}
예제 애플리케이션
스프링 통합을 테스트하기 위해 테스트 JSF 애플리케이션을 만들어 보겠습니다.
| 단계 | 기술 |
|---|---|
| 1 | JSF-First Application 장에 설명 된대로 com.tutorialspoint.test 패키지 아래에 helloworld 라는 이름의 프로젝트를 만듭니다 . |
| 2 | 아래에 설명 된대로 pom.xml 을 수정 합니다. |
| 삼 | 아래 설명과 같이 WEB-INF 폴더 에 faces-config.xml 을 생성 합니다. |
| 4 | 아래 설명 된대로 web.xml 을 수정 합니다. |
| 5 | 아래 설명과 같이 WEB-INF 폴더에 applicationContext.xml 을 생성 합니다. |
| 6 | 아래에 설명 된대로 com.tutorialspoint.test 패키지 아래에 MessageService.java 를 만듭니다 . |
| 7 | 아래 설명 된대로 com.tutorialspoint.test 패키지 아래에 MessageServiceImpl.java 를 만듭니다 . |
| 8 | 아래에 설명 된대로 com.tutorialspoint.test 패키지 아래에 UserData.java 를 만듭니다 . |
| 9 | 아래에 설명 된대로 home.xhtml 을 수정 합니다. 나머지 파일은 변경하지 마십시오. |
| 10 | 애플리케이션을 컴파일하고 실행하여 비즈니스 로직이 요구 사항에 따라 작동하는지 확인합니다. |
| 11 | 마지막으로 애플리케이션을 war 파일 형식으로 빌드하고 Apache Tomcat 웹 서버에 배포합니다. |
| 12 | 마지막 단계에서 아래에 설명 된대로 적절한 URL을 사용하여 웹 애플리케이션을 시작하십시오. |
pom.xml
<project xmlns = "http://maven.apache.org/POM/4.0.0"
   xmlns:xsi = "http://www.w3.org/2001/XMLSchema-instance"
   xsi:schemaLocation = "http://maven.apache.org/POM/4.0.0
   http://maven.apache.org/maven-v4_0_0.xsd">

   <modelVersion>4.0.0</modelVersion>
   <groupId>com.tutorialspoint.test</groupId>
   <artifactId>helloworld</artifactId>
   <packaging>war</packaging>
   <version>1.0-SNAPSHOT</version>
   <name>helloworld Maven Webapp</name>
   <url>http://maven.apache.org</url>

   <dependencies>
      <dependency>
         <groupId>junit</groupId>
         <artifactId>junit</artifactId>
         <version>3.8.1</version>
         <scope>test</scope>
      </dependency>

      <dependency>
         <groupId>com.sun.faces</groupId>
         <artifactId>jsf-api</artifactId>
         <version>2.1.7</version>
      </dependency>

      <dependency>
         <groupId>com.sun.faces</groupId>
         <artifactId>jsf-impl</artifactId>
         <version>2.1.7</version>
      </dependency>

      <dependency>
         <groupId>javax.servlet</groupId>
         <artifactId>jstl</artifactId>
         <version>1.2</version>
      </dependency>

      <dependency>
         <groupId>org.springframework</groupId>
         <artifactId>spring-core</artifactId>
         <version>3.1.2.RELEASE</version>
      </dependency>

      <dependency>
         <groupId>org.springframework</groupId>
         <artifactId>spring-web</artifactId>
         <version>3.1.2.RELEASE</version>
      </dependency>
   </dependencies>

   <build>
      <finalName>helloworld</finalName>
      <plugins>
         <plugin>
            <groupId>org.apache.maven.plugins</groupId>
            <artifactId>maven-compiler-plugin</artifactId>
            <version>2.3.1</version>
            <configuration>
               <source>1.6</source>
               <target>1.6</target>
            </configuration>
         </plugin>

         <plugin>
            <artifactId>maven-resources-plugin</artifactId>
            <version>2.6</version>

            <executions>
               <execution>
                  <id>copy-resources</id>
                  <phase>validate</phase>
                  <goals>
                     <goal>copy-resources</goal>
                  </goals>

                  <configuration>
                     <outputDirectory>${basedir}/target/helloworld/resources
                        </outputDirectory>
                     <resources>
                        <resource>
                           <directory>src/main/resources</directory>
                           <filtering>true</filtering>
                        </resource>
                     </resources>
                  </configuration>
               </execution>
            </executions>

         </plugin>
      </plugins>
   </build>
</project>
faces-config.xml
<?xml version = "1.0" encoding = "UTF-8"?>
<faces-config
   xmlns = "http://java.sun.com/xml/ns/javaee"
   xmlns:xsi = "http://www.w3.org/2001/XMLSchema-instance"
   xsi:schemaLocation = "http://java.sun.com/xml/ns/javaee
   http://java.sun.com/xml/ns/javaee/web-facesconfig_2_0.xsd"
   version = "2.0">

   <application>
      <variable-resolver>
         org.springframework.web.jsf.DelegatingVariableResolver
      </variable-resolver>
   </application>

   <managed-bean>
      <managed-bean-name>userData</managed-bean-name>
      <managed-bean-class>com.tutorialspoint.test.UserData</managed-bean-class>
      <managed-bean-scope>request</managed-bean-scope>
      <managed-property>
         <property-name>messageService</property-name>
         <value>#{messageService}</value>
      </managed-property>
   </managed-bean>
</faces-config>
web.xml
<!DOCTYPE web-app PUBLIC
   "-//Sun Microsystems, Inc.//DTD Web Application 2.3//EN"
   "http://java.sun.com/dtd/web-app_2_3.dtd" >

<web-app>
   <display-name>Archetype Created Web Application</display-name>

   <context-param>
      <param-name>javax.faces.PROJECT_STAGE</param-name>
      <param-value>Development</param-value>
   </context-param>

   <!-- Add Support for Spring -->
   <listener>
      <listener-class>
         org.springframework.web.context.ContextLoaderListener
      </listener-class>
   </listener>

   <listener>
      <listener-class>
         org.springframework.web.context.request.RequestContextListener
      </listener-class>
   </listener>

   <servlet>
      <servlet-name>Faces Servlet</servlet-name>
      <servlet-class>javax.faces.webapp.FacesServlet</servlet-class>
   </servlet>

   <servlet-mapping>
      <servlet-name>Faces Servlet</servlet-name>
      <url-pattern>*.jsf</url-pattern>
   </servlet-mapping>
</web-app>
applicationContext.xml
<?xml version = "1.0" encoding = "UTF-8"?>
<!DOCTYPE beans PUBLIC "-//SPRING//DTD BEAN 2.0//EN"
   "http://www.springframework.org/dtd/spring-beans-2.0.dtd">

<beans>
   <bean id = "messageService"
      class = "com.tutorialspoint.test.MessageServiceImpl">
      <property name = "message" value = "Hello World!" />
   </bean>
</beans>
MessageService.java
package com.tutorialspoint.test;

public interface MessageService {
   String getGreetingMessage();
}
MessageServiceImpl.java
package com.tutorialspoint.test;

public class MessageServiceImpl implements MessageService {
   private String message;

   public String getGreetingMessage() {
      return message;
   }

   public String getMessage() {
      return message;
   }
   public void setMessage(String message) {
      this.message = message;
   }
}
UserData.java
package com.tutorialspoint.test;

import java.io.Serializable;

public class UserData implements Serializable {

   private static final long serialVersionUID = 1L;
	private MessageService messageService;

   public MessageService getMessageService() {
      return messageService;
   }

   public void setMessageService(MessageService messageService) {
      this.messageService = messageService;
   }

   public String getGreetingMessage() {
      return messageService.getGreetingMessage();
   }
}
home.xhtml
<?xml version = "1.0" encoding = "UTF-8"?>
<!DOCTYPE html PUBLIC "-//W3C//DTD XHTML 1.0 Transitional//EN"
"http://www.w3.org/TR/xhtml1/DTD/xhtml1-transitional.dtd">

<html xmlns = "http://www.w3.org/1999/xhtml"
   xmlns:f = "http://java.sun.com/jsf/core"
   xmlns:h = "http://java.sun.com/jsf/html">

   <h:head>
      <title>JSF Tutorial!</title>
   </h:head>

   <h:body>
      <h2>Spring Integration Example</h2>
      #{userData.greetingMessage}
   </h:body>
</html>
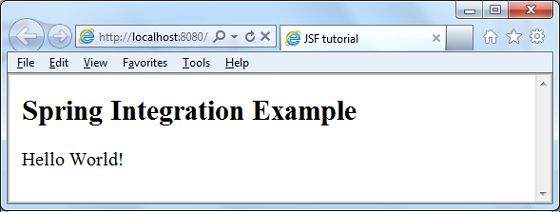
모든 변경이 완료되면 JSF-First Application 장에서했던 것처럼 애플리케이션을 컴파일하고 실행 해 보겠습니다. 응용 프로그램에 문제가 없으면 다음과 같은 결과가 생성됩니다.
