LeafletJS-컨트롤
Leaflet은 확대 / 축소, 속성, 배율 등과 같은 다양한 컨트롤을 제공합니다.
Zoom− 기본적으로이 컨트롤은지도의 왼쪽 상단에 있습니다. 두 개의 버튼이 있습니다"+" 과 "–",지도를 확대 또는 축소 할 수 있습니다. 다음을 설정하여 기본 확대 / 축소 컨트롤을 제거 할 수 있습니다.zoomControl 지도 옵션의 옵션 false.
Attribution− 기본적으로이 컨트롤은지도의 오른쪽 하단에 있습니다. 작은 텍스트 상자에 속성 데이터를 표시합니다. 기본적으로 텍스트를 표시합니다. 다음을 설정하여 기본 속성 제어를 제거 할 수 있습니다.attributionControl 지도 옵션의 옵션 false.
Scale− 기본적으로이 컨트롤은지도의 왼쪽 하단에 있습니다. 현재 화면 중앙을 표시합니다.
이 장에서는 Leaflet JavaScript 라이브러리를 사용하여 이러한 세 가지 컨트롤을 모두 만들고지도에 추가하는 방법을 설명합니다.
줌
Leaflet JavaScript 라이브러리를 사용하여지도에 자신의 확대 / 축소 컨트롤을 추가하려면 아래 단계를 따르십시오.
Step 1 − 만들기 Map 요소 (문자열 또는 개체) 및지도 옵션 (선택 사항)을 전달하여 개체.
Step 2 − 만들기 Layer 원하는 타일의 URL을 전달하여 개체.
Step 3 −지도에 레이어 개체를 추가하려면 addLayer() 의 방법 Map 수업.
Step 4 − zoomOptions 변수를 생성하고 기본 옵션 (+ 및-) 대신 확대 및 축소 옵션에 대한 고유 한 텍스트 값을 정의합니다.
그런 다음 zoomOptions 변수를 다음 위치에 전달하여 확대 / 축소 컨트롤을 만듭니다. L.control.zoom() 아래 그림과 같이.
// zoom control options
var zoomOptions = {
   zoomInText: '1',
   zoomOutText: '0',
};
// Creating zoom control
var zoom = L.control.zoom(zoomOptions);
Step 5 − 이전 단계에서 생성 한 확대 / 축소 제어 개체를 addTo() 방법.
// Adding zoom control to the map
zoom.addTo(map);
예
다음은 기본 확대 / 축소 컨트롤 대신지도에 고유 한 확대 / 축소 컨트롤을 추가하는 코드입니다. 여기서 1을 누르면지도가 확대되고 0을 누르면지도가 축소됩니다.
<!DOCTYPE html>
<html>
   <head>
      <title>Zoom Example</title>
      <link rel = "stylesheet" href = "http://cdn.leafletjs.com/leaflet-0.7.3/leaflet.css"/>
      <script src = "http://cdn.leafletjs.com/leaflet-0.7.3/leaflet.js"></script>
   </head>

   <body>
      <div id = "map" style = "width:900px; height:580px"></div>
      <script>
         // Creating map options
         var mapOptions = {
            center: [17.385044, 78.486671],
            zoom: 10,
            zoomControl: false
         }
         var map = new L.map('map', mapOptions); // Creating a map object

         // Creating a Layer object
         var layer = new L.TileLayer('http://{s}.tile.openstreetmap.org/{z}/{x}/{y}.png');
         map.addLayer(layer);   // Adding layer to the map

         // zoom control options
         var zoomOptions = {
            zoomInText: '1',
            zoomOutText: '0',
         };
         var zoom = L.control.zoom(zoomOptions);   // Creating zoom control
         zoom.addTo(map);   // Adding zoom control to the map
      </script>
   </body>

</html>
다음 출력을 생성합니다-

속성
Leaflet JavaScript 라이브러리를 사용하여지도에 자신의 속성을 추가하려면 아래 단계를 따르십시오.
Step 1 − 만들기 Map< div > 요소 (문자열 또는 개체) 및지도 옵션 (선택 사항) 을 전달하여 개체.
Step 2 − 만들기 Layer 원하는 타일의 URL을 전달하여 개체.
Step 3 −지도에 레이어 개체를 추가하려면 addLayer() 의 방법 Map 수업.
Step 4 − 생성 attrOptions 변수를 사용하고 기본 값 (리플릿) 대신 고유 한 접두사 값을 정의합니다.
그런 다음 attrOptions 변수 L.control.attribution() 아래 그림과 같이.
// Attribution options
var attrOptions = {
   prefix: 'attribution sample'
};

// Creating an attribution
var attr = L.control.attribution(attrOptions);
Step 5 − 추가 attribution control 이전 단계에서 만든 개체를 사용하여지도에 addTo() 방법.
// Adding attribution to the map
attr.addTo(map);
예
다음 코드는 기본 속성 대신 자체 속성 컨트롤을지도에 추가합니다. 여기에는 대신 텍스트 속성 샘플 이 표시됩니다.
<!DOCTYPE html>
<html>
   <head>
      <title>Attribution Example</title>
      <link rel = "stylesheet" href = "http://cdn.leafletjs.com/leaflet-0.7.3/leaflet.css"/>
      <script src = "http://cdn.leafletjs.com/leaflet-0.7.3/leaflet.js"></script>
   </head>

   <body>
      <div id = "map" style = "width: 900px; height: 580px"></div>
      <script>
         // Creating map options
         var mapOptions = {
            center: [17.385044, 78.486671],
            zoom: 10,
            attributionControl: false
         }
         var map = new L.map('map', mapOptions); // Creating a map object

         // Creating a Layer object
         var layer = new L.TileLayer('http://{s}.tile.openstreetmap.org/{z}/{x}/{y}.png');
         map.addLayer(layer);    // Adding layer to the map

         // Attribution options
         var attrOptions = {
            prefix: 'attribution sample'
         };

         // Creating an attribution
         var attr = L.control.attribution(attrOptions);
         attr.addTo(map);  // Adding attribution to the map
      </script>
   </body>

</html>>
다음 출력을 생성합니다-

규모
Leaflet JavaScript 라이브러리를 사용하여지도에 자신의 축척 컨트롤을 추가하려면 아래 단계를 따르십시오.
Step 1 − 만들기 Map< div > 요소 (문자열 또는 개체) 및지도 옵션 (선택 사항) 을 전달하여 개체.
Step 2 − 만들기 Layer 원하는 타일의 URL을 전달하여 개체.
Step 3 − 추가 layer 개체를 사용하여지도에 addLayer() 의 방법 Map 수업.
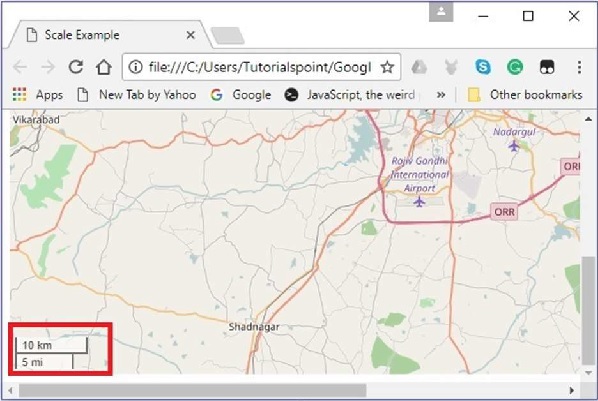
Step 4 − 사용을 전달하여 스케일 제어를 생성합니다. L.control.scale() 아래 그림과 같이.
// Creating scale control
var scale = L.control.scale();
Step 5 − 추가 scale control 이전 단계에서 만든 개체를 사용하여지도에 addTo() 방법은 아래와 같습니다.
// Adding scale control to the map
scale.addTo(map);
예
다음 코드는지도에 축척 제어를 추가합니다.
<!DOCTYPE html>
<html>
   <head>
      <title>Scale Example</title>
      <link rel = "stylesheet" href = "http://cdn.leafletjs.com/leaflet-0.7.3/leaflet.css" />
      <script src = "http://cdn.leafletjs.com/leaflet-0.7.3/leaflet.js"></script>
   </head>

   <body>
      <div id = "map" style = "width:900px; height:580px"></div>
      <script>
         // Creating map options
         var mapOptions = {
            center: [17.385044, 78.486671],
            zoom: 10
         }
         // Creating a map object
         var map = new L.map('map', mapOptions);

         // Creating a Layer object
         var layer = new L.TileLayer('http://{s}.tile.openstreetmap.org/{z}/{x}/{y}.png');
         map.addLayer(layer); // Adding layer to the map
         var scale = L.control.scale(); // Creating scale control
         scale.addTo(map); // Adding scale control to the map
      </script>
   </body>

</html>
다음 출력을 생성합니다-