.NET Core - สร้างแอพ UWP
ในบทนี้เราจะพูดถึงวิธีการสร้างแอปพลิเคชัน UWP โดยใช้. NET Core UWP เรียกอีกอย่างว่าแอปพลิเคชัน Windows 10 UWP แอปพลิเคชันนี้ไม่ทำงานบน Windows เวอร์ชันก่อนหน้า แต่จะทำงานบน Windows เวอร์ชันอนาคตเท่านั้น
ต่อไปนี้เป็นข้อยกเว้นบางประการที่ UWP จะทำงานได้อย่างราบรื่น
หากคุณต้องการเรียกใช้ภายในเครื่องคุณต้องมี Windows 10 คุณสามารถพัฒนาบน Windows 8 ได้จากนั้นคุณจะต้องเรียกใช้บน Emulator แต่ขอแนะนำให้ใช้ Windows 10
สำหรับแอปพลิเคชัน UWP คุณจะต้องมี Windows 10 SDK ด้วย ให้เราเปิดการตั้งค่า Visual Studio 2015 จากนั้นแก้ไข Visual Studio
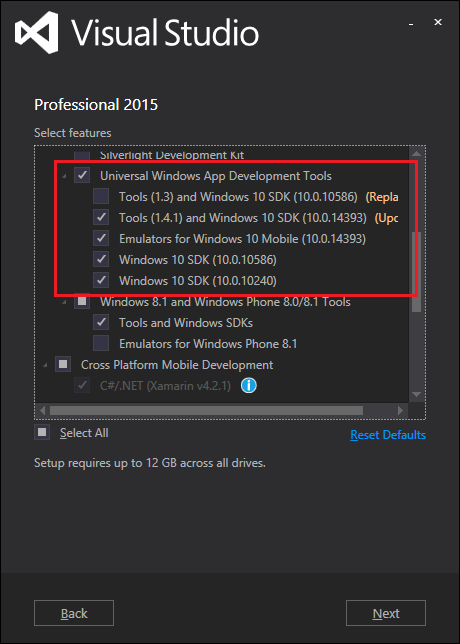
ในหน้าคุณสมบัติที่เลือกให้เลื่อนลงและคุณจะเห็น Universal Windows App Development Tools ตรวจสอบตัวเลือกนั้นตามที่แสดงด้านล่าง
ที่นี่คุณสามารถดู SDK เวอร์ชันต่างๆและการอัปเดตล่าสุดเกี่ยวกับเครื่องมือได้เช่นกันคลิกถัดไป
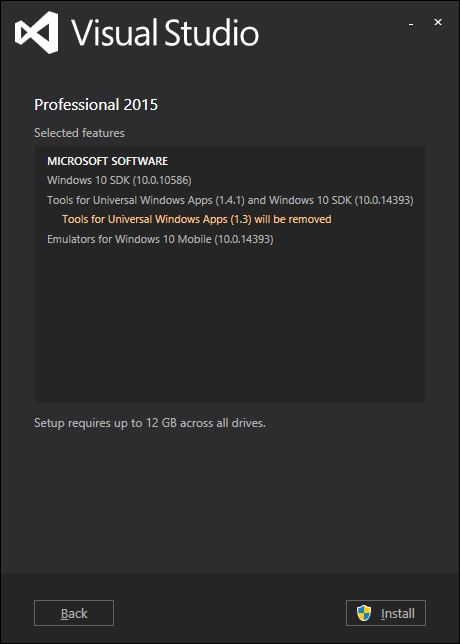
ตอนนี้คลิกไฟล์ Install ปุ่ม.
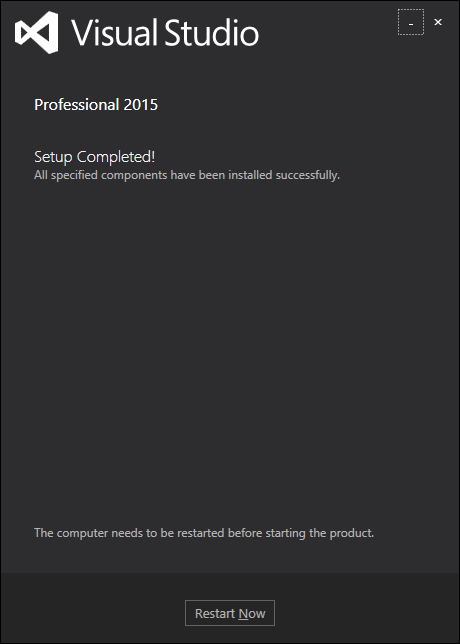
เมื่อการติดตั้งเสร็จสิ้นคุณจะต้องรีสตาร์ทระบบของคุณ
ตอนนี้ให้เราใช้ UWP โดยทำตามขั้นตอนเหล่านี้
ขั้นแรกให้เปิด Visual Studio 2015
คลิกที่เมนูไฟล์และเลือกใหม่→โครงการ; กล่องโต้ตอบโครงการใหม่จะปรากฏขึ้น คุณสามารถดูเทมเพลตประเภทต่างๆได้ที่บานหน้าต่างด้านซ้ายของกล่องโต้ตอบ

ในบานหน้าต่างด้านซ้ายคุณจะเห็นมุมมองแบบต้นไม้ตอนนี้เลือกเทมเพลตสากลจากเทมเพลต→ Visual C # → Windows
จากบานหน้าต่างตรงกลางให้เลือกเทมเพลต Blank App (Universal Windows)
ตั้งชื่อโครงการโดยพิมพ์ UWPFirstApp ในฟิลด์ชื่อและคลิกตกลง
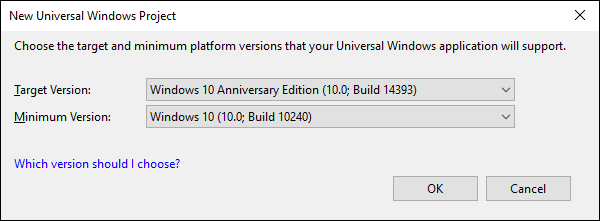
กล่องโต้ตอบเวอร์ชันเป้าหมาย / เวอร์ชันขั้นต่ำจะปรากฏขึ้น การตั้งค่าเริ่มต้นใช้ได้ดีสำหรับบทช่วยสอนนี้ดังนั้นให้เลือกตกลงเพื่อสร้างโครงการ
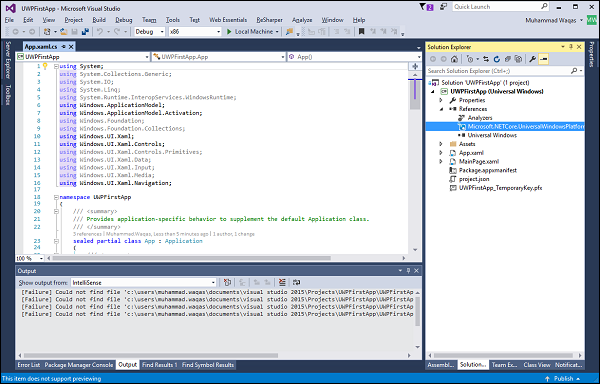
ที่นี่เรามีโครงการเดียวที่สามารถกำหนดเป้าหมายอุปกรณ์ Windows 10 ทั้งหมดและคุณจะสังเกตเห็นว่าทั้ง. NET Core และ UWP นั้นทำให้การกำหนดเป้าหมายหลายเป้าหมายง่ายขึ้น
เมื่อโปรเจ็กต์ใหม่เปิดขึ้นไฟล์ของโปรเจ็กต์จะแสดงทางด้านขวามือของบานหน้าต่าง Solution Explorer คุณอาจต้องเลือกแท็บ Solution Explorer แทนแท็บคุณสมบัติเพื่อดูไฟล์ของคุณ
แม้ว่า Blank App (Universal Window) จะเป็นเทมเพลตขั้นต่ำ แต่ก็ยังมีไฟล์จำนวนมาก ไฟล์เหล่านี้จำเป็นสำหรับแอป UWP ทั้งหมดที่ใช้ C # ทุกโครงการที่คุณสร้างใน Visual Studio มีไฟล์
หากต้องการดูตัวอย่างการทำงานให้เราเปิด MainPage.XAML และเพิ่มรหัสต่อไปนี้
<Page
   x:Class = "UWPFirstApp.MainPage"
   xmlns = "http://schemas.microsoft.com/winfx/2006/xaml/presentation"
   xmlns:x = "http://schemas.microsoft.com/winfx/2006/xaml"
   xmlns:local = "using:UWPFirstApp"
   xmlns:d = "http://schemas.microsoft.com/expression/blend/2008"
   xmlns:mc = "http://schemas.openxmlformats.org/markup-compatibility/2006"
   mc:Ignorable = "d">

   <Grid Background = "{ThemeResource ApplicationPageBackgroundThemeBrush}">
      <StackPanel HorizontalAlignment = "Center">
         <TextBlock Text = "Hello, world!"
            Margin = "20"
            Width = "200"
            HorizontalAlignment = "Left"/>
         <TextBlock Text = "Write your name."
            Margin = "20"
            Width = "200"
            HorizontalAlignment = "Left"/>
         <TextBox x:Name = "txtbox"
            Width = "280"
            Margin = "20"
            HorizontalAlignment = "Left"/>
         <Button x:Name = "button" Content = "Click Me"
            Margin = "20"
            Click = "button_Click"/>
         <TextBlock x:Name = "txtblock"
            HorizontalAlignment = "Left"
            Margin = "20"/>
      </StackPanel>
   </Grid>

</Page>
ด้านล่างนี้คือเหตุการณ์การคลิกของปุ่มใน C #
using System;
using System.Collections.Generic;
using System.IO;
using System.Linq;
using System.Runtime.InteropServices.WindowsRuntime;

using Windows.Foundation;
using Windows.Foundation.Collections;

using Windows.UI.Xaml;
using Windows.UI.Xaml.Controls;
using Windows.UI.Xaml.Controls.Primitives;
using Windows.UI.Xaml.Data;
using Windows.UI.Xaml.Input;
using Windows.UI.Xaml.Media;
using Windows.UI.Xaml.Navigation;

// The Blank Page item template is documented at
// http://go.microsoft.com/fwlink/?LinkId=402352&clcid=0x409

namespace UWPHellowWorld {
   /// <summary>
   /// An empty page that can be used on its own or navigated to within a Frame.
   /// </summary>
   public sealed partial class MainPage : Page {
      public MainPage() {
         this.InitializeComponent();
      }
      private void button_Click(object sender, RoutedEventArgs e) {
         if (txtbox.Text != "")
            txtblock.Text = "Hello: " + txtbox.Text;
         else
            txtblock.Text = "You have not write your name";
      }
   }
}
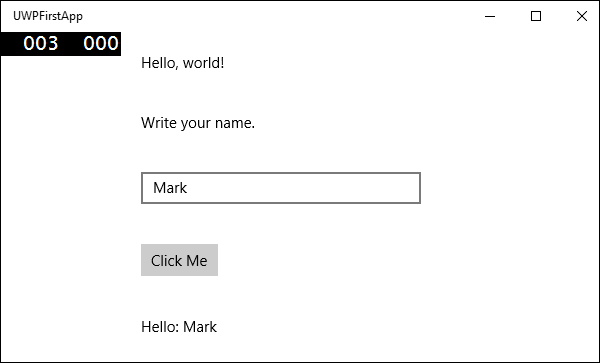
ตอนนี้ให้เราเรียกใช้รหัสด้านบนบนเครื่องท้องถิ่นและคุณจะเห็นหน้าต่างต่อไปนี้ ตอนนี้พิมพ์ชื่อใด ๆ ในกล่องข้อความแล้วกดClick Me ปุ่ม.
