Laravel - อาคาร
ซุ้มให้ staticอินเทอร์เฟซกับคลาสที่มีอยู่ในคอนเทนเนอร์บริการของแอปพลิเคชัน ลาราเวลfacades ทำหน้าที่เป็น static proxies ไปยังคลาสพื้นฐานในที่เก็บบริการโดยให้ประโยชน์ของไวยากรณ์ที่สั้นและแสดงออกในขณะที่ยังคงความสามารถในการทดสอบและความยืดหยุ่นได้มากกว่าวิธีการคงที่แบบเดิม
วิธีสร้าง Facade
ต่อไปนี้เป็นขั้นตอนในการสร้าง Facade ใน Laravel -
Step 1 - สร้างไฟล์คลาส PHP
Step 2 - ผูกคลาสนั้นกับผู้ให้บริการ
Step 3 - ลงทะเบียน ServiceProvider เพื่อ
กำหนดค่า \ app.php เป็นผู้ให้บริการ
Step 4 - สร้างคลาสซึ่งคลาสนี้ขยายไปถึง
ส่องสว่าง \ Support \ Facades \ Facade
Step 5 - ลงทะเบียนจุดที่ 4 เพื่อ Config \ app.php เป็นนามแฝง
การอ้างอิงชั้น Facade
Laravel มาพร้อมกับ Facades มากมาย ตารางต่อไปนี้แสดงการอ้างอิงคลาส Facade ในตัว -
| ซุ้ม | คลาส | บริการเข้าเล่มคอนเทนเนอร์ |
|---|---|---|
| แอป | Illuminate \ Foundation \ Application | แอป |
| ช่าง | Illuminate \ Contracts \ Console \ Kernel | ช่าง |
| Auth | Illuminate \ Auth \ AuthManager | รับรองความถูกต้อง |
| Auth (อินสแตนซ์) | ส่องสว่าง \ Auth \ Guard | |
| ใบมีด | Illuminate \ View \ Compilers \ BladeCompiler | blade.compiler |
| รถบัส | Illuminate \ Contracts \ Bus \ Dispatcher | |
| แคช | Illuminate \ Cache \ Repository | แคช |
| Config | ส่องสว่าง \ Config \ Repository | config |
| คุกกี้ | Illuminate \ Cookie \ CookieJar | คุกกี้ |
| Crypt | ส่องสว่าง \ Encryption \ Encrypter | ผู้เข้ารหัส |
| DB | Illuminate \ Database \ DatabaseManager | db |
| DB (อินสแตนซ์) | ส่องสว่าง \ Database \ Connection | |
| เหตุการณ์ | Illuminate \ Events \ Dispatcher | เหตุการณ์ |
| ไฟล์ | ส่องสว่าง \ Filesystem \ Filesystem | ไฟล์ |
| ประตู | Illuminate \ Contracts \ Auth \ Access \ Gate | |
| กัญชา | Illuminate \ Contracts \ Hashing \ Hasher | กัญชา |
| อินพุต | ส่องสว่าง \ Http \ ขอ | คำขอ |
| หรั่ง | Illuminate \ Translation \ Translator | นักแปล |
| บันทึก | Illuminate \ Log \ Writer | บันทึก |
| จดหมาย | ส่องสว่าง \ Mail \ Mailer | จดหมาย |
| รหัสผ่าน | ส่องสว่าง \ Auth \ Passwords \ PasswordBroker | auth.password |
| คิว | Illuminate \ Queue \ QueueManager | คิว |
| คิว (อินสแตนซ์) | Illuminate \ Queue \ QueueInterface | |
| คิว (คลาสฐาน) | ส่องสว่าง \ Queue \ Queue | |
| เปลี่ยนเส้นทาง | ส่องสว่าง \ Routing \ Redirector | เปลี่ยนเส้นทาง |
| Redis | ส่องสว่าง \ Redis \ Database | redis |
| ขอ | ส่องสว่าง \ Http \ ขอ | คำขอ |
| การตอบสนอง | Illuminate \ Contracts \ Routing \ ResponseFactory | |
| เส้นทาง | ส่องสว่าง \ Routing \ Router | เราเตอร์ |
| สคีมา | Illuminate \ Database \ Schema \ Blueprint | |
| เซสชัน | Illuminate \ Session \ SessionManager | เซสชัน |
| เซสชัน (อินสแตนซ์) | Illuminate \ Session \ Store | |
| การจัดเก็บ | Illuminate \ Contracts \ Filesystem \ Factory | ระบบไฟล์ |
| URL | Illuminate \ Routing \ UrlGenerator | url |
| Validator | ส่องสว่าง \ Validation \ Factory | ตัวตรวจสอบความถูกต้อง |
| Validator (อินสแตนซ์) | ส่องสว่าง \ Validation \ Validator | |
| ดู | ส่องสว่างดูโรงงาน | ดู |
| ดู (อินสแตนซ์) | สว่าง \ View \ View |
ตัวอย่าง
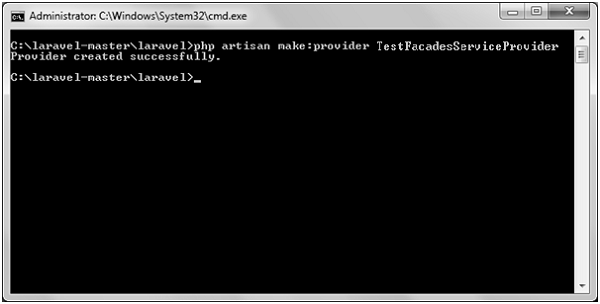
Step 1 - สร้างผู้ให้บริการที่เรียกว่า TestFacadesServiceProvider โดยดำเนินการคำสั่งต่อไปนี้
php artisan make:provider TestFacadesServiceProviderStep 2 - หลังจากดำเนินการสำเร็จคุณจะได้รับผลลัพธ์ต่อไปนี้ -
Step 3 - สร้างคลาสที่เรียกว่า TestFacades.php ที่ App/Test.
App/Test/TestFacades.php
<?php
   namespace App\Test;
   class TestFacades{
      public function testingFacades() {
         echo "Testing the Facades in Laravel.";
      }
   }
?>
Step 4 - สร้างคลาส Facade ที่เรียกว่า “TestFacades.php” ที่ “App/Test/Facades”.
App/Test/Facades/TestFacades.php
<?php

namespace app\Test\Facades;

use Illuminate\Support\Facades\Facade;

class TestFacades extends Facade {
   protected static function getFacadeAccessor() { return 'test'; }
}
Step 5 - สร้างคลาส Facade ที่เรียกว่า TestFacadesServiceProviders.php ที่ App/Test/Facades.
App/Providers/TestFacadesServiceProviders.php
<?php

namespace App\Providers;

use App;
use Illuminate\Support\ServiceProvider;

class TestFacadesServiceProvider extends ServiceProvider {
   public function boot() {
      //
   }
   public function register() {
      App::bind('test',function() {
         return new \App\Test\TestFacades;
      });
   }
}
Step 6 - เพิ่มผู้ให้บริการในไฟล์ config/app.php ดังแสดงในรูปด้านล่าง
config/app.php

Step 7 - เพิ่มนามแฝงในไฟล์ config/app.php ดังแสดงในรูปด้านล่าง
config/app.php

Step 8 - เพิ่มบรรทัดต่อไปนี้ใน app/Http/routes.php.
app/Http/routes.php
Route::get('/facadeex', function() {
   return TestFacades::testingFacades();
});
Step 9 - ไปที่ URL ต่อไปนี้เพื่อทดสอบ Facade
http://localhost:8000/facadeexStep 10 - หลังจากเข้าไปที่ URL คุณจะได้รับผลลัพธ์ต่อไปนี้ -
