Python Pillow - การเพิ่มฟิลเตอร์ให้กับรูปภาพ
ImageFilter module มีคำจำกัดความสำหรับชุดตัวกรองที่กำหนดไว้ล่วงหน้าซึ่งเราใช้กับ Image.filter()วิธี. ตัวกรองเหล่านี้ใช้เพื่อเปลี่ยนรูปลักษณ์และความรู้สึกของรูปภาพ
ตัวอย่าง
ตัวอย่างด้านล่างนี้คือการกรองภาพ -
from PIL import Image, ImageFilter

im = Image.open('jungleSaf2.jpg')

im1 = im.filter(ImageFilter.BLUR)
im1.show()

im2 = im.filter(ImageFilter.MinFilter(3))
im2.show()

im3 = im.filter(ImageFilter.MinFilter) # same as MinFilter(3)
im3.show()
ในโปรแกรมข้างต้นเราได้ใช้ไฟล์ MinFilter()วิธีการซึ่งใช้ในการสร้างตัวกรองขั้นต่ำ เลือกค่าพิกเซลต่ำสุดในหน้าต่างที่มีขนาดที่กำหนด
ImageFilter.MinFilter(size=3)ที่ไหน
size - ขนาดเคอร์เนลเป็นพิกเซล
เอาต์พุต
หากคุณบันทึกโปรแกรมข้างต้นและดำเนินการโปรแกรมจะแสดงภาพต้นฉบับภาพเบลอและภาพเบลอด้วย MinFilter โดยใช้ยูทิลิตี้การแสดงผล PNG มาตรฐานดังต่อไปนี้ -
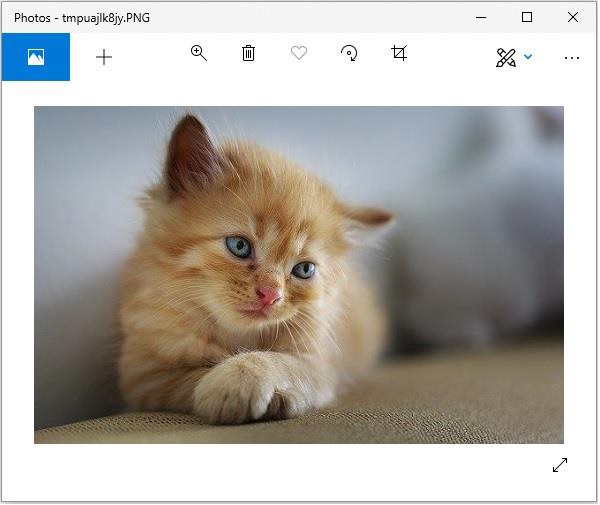
Original Image

Blurred Image
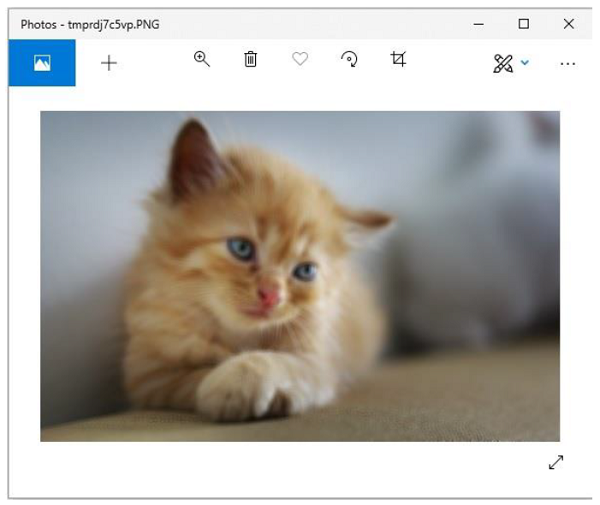
Image blurred with mini filter
ฟิลเตอร์
ไลบรารีหมอนเวอร์ชันปัจจุบันมีชุดฟิลเตอร์ปรับแต่งภาพที่กำหนดไว้ล่วงหน้าที่ระบุไว้ด้านล่าง
BLUR
CONTOUR
DETAIL
EDGE_ENHANCE
EDGE_ENHANCE_MORE
EMBOSS
FIND_EDGES
SHARPEN
SMOOTH
SMOOTH_MORE
ตัวอย่าง
ตัวอย่าง python ต่อไปนี้ใช้ฟิลเตอร์เบลอในรูปภาพจะบันทึกและแสดงโดยใช้ยูทิลิตี้การแสดงผล PNG มาตรฐาน -
#Import required image modules
from PIL import Image, ImageFilter

#Import all the enhancement filter from pillow

from PIL.ImageFilter import (
   BLUR, CONTOUR, DETAIL, EDGE_ENHANCE, EDGE_ENHANCE_MORE,
   EMBOSS, FIND_EDGES, SMOOTH, SMOOTH_MORE, SHARPEN
)

#Create image object
img = Image.open('images/cat.jpg')
#Applying the blur filter
img1 = img.filter(BLUR)
img1.save('images/ImageFilter_blur.jpg')
img1.show()
เอาต์พุต

ในทำนองเดียวกันไปยังไฟล์ image.filter() วิธีการที่คุณสามารถส่งผ่านพารามิเตอร์ต่อไปนี้เพื่อรับผลลัพธ์ตามลำดับ -
CONTOUR
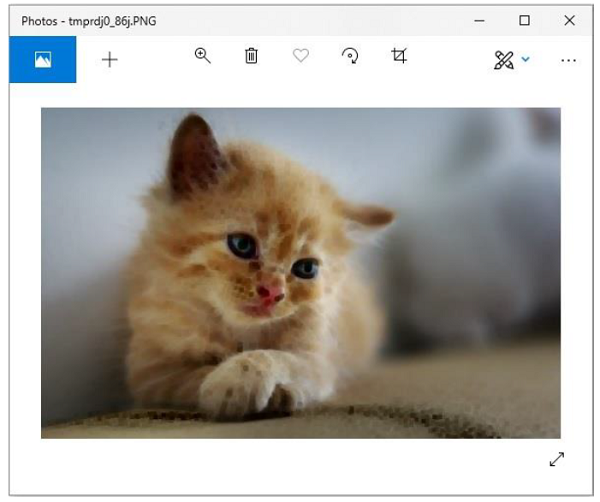
DETAIL
EDGE_ENHANCE
EDGE_ENHANCE_MORE
EMBOSS
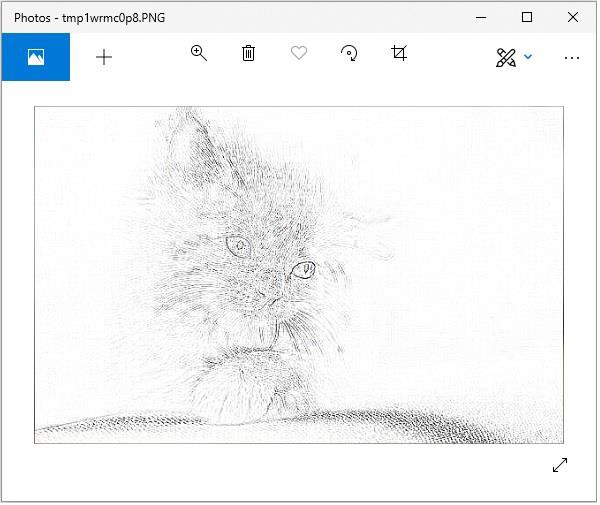
FIND_EDGES
SMOOTH
SMOOTH_MORE
SHARPEN
Python img.filter (CONTOUR) วิธีการ
ตัวอย่าง python ต่อไปนี้ใช้ตัวกรอง CONTOUR กับรูปภาพที่กำหนด
ตัวอย่าง
#Import required image modules
from PIL import Image, ImageFilter

#Import all the enhancement filter from pillow
from PIL.ImageFilter import (
   BLUR, CONTOUR, DETAIL, EDGE_ENHANCE, EDGE_ENHANCE_MORE,
   EMBOSS, FIND_EDGES, SMOOTH, SMOOTH_MORE, SHARPEN
)
#Create image object
img = Image.open('images/cat.jpg')
#Applying the blur filter
img1 = img.filter(CONTOUR)
img1.save('images/ImageFilter_blur.jpg')
img1.show()
เอาต์พุต
หากคุณบันทึกโปรแกรมด้านบนและดำเนินการโปรแกรมจะแสดงภาพต้นฉบับและภาพที่กรองโดยใช้ยูทิลิตี้การแสดงผล PNG มาตรฐานดังต่อไปนี้ -
Original image
Filtered image
Python img.filter (DETAIL) วิธีการ
ตัวอย่าง python ต่อไปนี้ใช้ตัวกรองรายละเอียดกับรูปภาพที่กำหนด
ตัวอย่าง
#Import required image modules
from PIL import Image, ImageFilter

#Import all the enhancement filter from pillow
from PIL.ImageFilter import (
   BLUR, CONTOUR, DETAIL, EDGE_ENHANCE, EDGE_ENHANCE_MORE,
   EMBOSS, FIND_EDGES, SMOOTH, SMOOTH_MORE, SHARPEN
)
#Create image object
img = Image.open('images/cat.jpg')
#Applying the blur filter
img1 = img.filter(DETAIL)
img1.save('images/ImageFilter_blur.jpg')
img1.show()
เอาต์พุต
หากคุณบันทึกโปรแกรมด้านบนและดำเนินการโปรแกรมจะแสดงภาพต้นฉบับและภาพที่กรองโดยใช้ยูทิลิตี้การแสดงผล PNG มาตรฐานดังต่อไปนี้ -
Original image
Filtered image
Python img.filter (EDGE_ENHANCE) วิธีการ
ตัวอย่าง python ต่อไปนี้ใช้ตัวกรอง EDGE_ENHANCE กับภาพที่กำหนด -
ตัวอย่าง
#Import required image modules
from PIL import Image, ImageFilter

#Import all the enhancement filter from pillow
from PIL.ImageFilter import (
   BLUR, CONTOUR, DETAIL, EDGE_ENHANCE, EDGE_ENHANCE_MORE,
   EMBOSS, FIND_EDGES, SMOOTH, SMOOTH_MORE, SHARPEN
)
#Create image object
img = Image.open('images/cat.jpg')
#Applying the blur filter
img1 = img.filter(EDGE_ENHANCE)
img1.save('images/ImageFilter_blur.jpg')
img1.show()
เอาต์พุต
หากคุณบันทึกโปรแกรมด้านบนและดำเนินการโปรแกรมจะแสดงภาพต้นฉบับและภาพที่กรองโดยใช้ยูทิลิตี้การแสดงผล PNG มาตรฐานดังต่อไปนี้ -
Original image
Filtered image

Python img.filter (EDGE_ENHANCE_MORE) วิธีการ
ตัวอย่าง python ต่อไปนี้ใช้ตัวกรอง EDGE_ENHANCE_MORE กับรูปภาพที่กำหนด
ตัวอย่าง
#Import required image modules
from PIL import Image, ImageFilter

#Import all the enhancement filter from pillow
from PIL.ImageFilter import (
   BLUR, CONTOUR, DETAIL, EDGE_ENHANCE, EDGE_ENHANCE_MORE,
   EMBOSS, FIND_EDGES, SMOOTH, SMOOTH_MORE, SHARPEN
)
#Create image object
img = Image.open('images/cat.jpg')
#Applying the blur filter
img1 = img.filter(EDGE_ENHANCE_MORE)
img1.save('images/ImageFilter_blur.jpg')
img1.show()
เอาต์พุต
หากคุณบันทึกโปรแกรมด้านบนและดำเนินการโปรแกรมจะแสดงภาพต้นฉบับและภาพที่กรองโดยใช้ยูทิลิตี้การแสดงผล PNG มาตรฐานดังต่อไปนี้ -
Original image
Filtered image

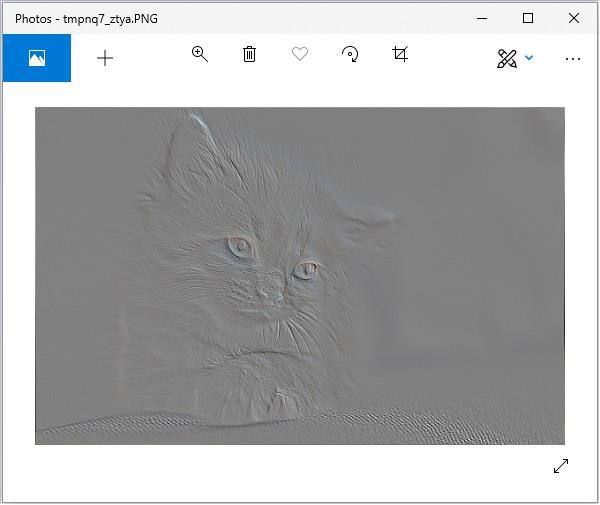
Python img.filter (EMBOSS) วิธีการ
ตัวอย่าง python ต่อไปนี้ใช้ฟิลเตอร์ EMBOSS กับรูปภาพที่กำหนด
ตัวอย่าง
#Import required image modules
from PIL import Image, ImageFilter

#Import all the enhancement filter from pillow
from PIL.ImageFilter import (
   BLUR, CONTOUR, DETAIL, EDGE_ENHANCE, EDGE_ENHANCE_MORE,
   EMBOSS, FIND_EDGES, SMOOTH, SMOOTH_MORE, SHARPEN
)
#Create image object
img = Image.open('images/cat.jpg')
#Applying the blur filter
img1 = img.filter(EMBOSS)
img1.save('images/ImageFilter_blur.jpg')
img1.show()
เอาต์พุต
หากคุณบันทึกโปรแกรมด้านบนและดำเนินการโปรแกรมจะแสดงภาพต้นฉบับและภาพที่กรองโดยใช้ยูทิลิตี้การแสดงผล PNG มาตรฐานดังต่อไปนี้ -
Original image
Filtered image
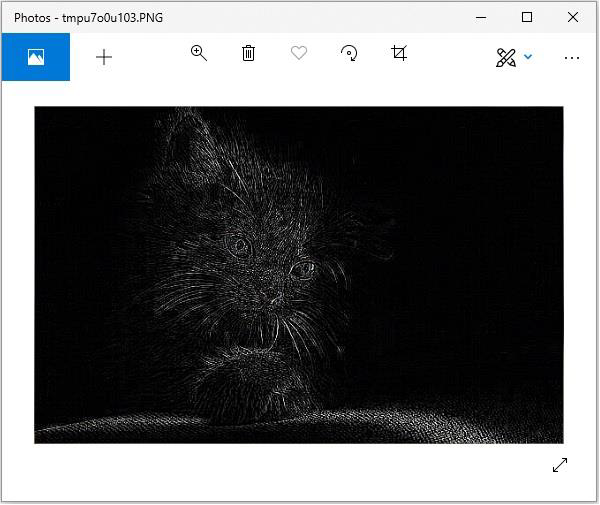
Python img.filter (FIND_EDGES) วิธีการ
ตัวอย่าง python ต่อไปนี้ใช้ฟิลเตอร์ FIND_EDGES กับรูปภาพที่กำหนด
ตัวอย่าง
#Import required image modules
from PIL import Image, ImageFilter

#Import all the enhancement filter from pillow
from PIL.ImageFilter import (
   BLUR, CONTOUR, DETAIL, EDGE_ENHANCE, EDGE_ENHANCE_MORE,
   EMBOSS, FIND_EDGES, SMOOTH, SMOOTH_MORE, SHARPEN
)
#Create image object
img = Image.open('images/cat.jpg')
#Applying the blur filter
img1 = img.filter(FIND_EDGES)
img1.save('images/ImageFilter_blur.jpg')
img1.show()
เอาต์พุต
หากคุณบันทึกโปรแกรมด้านบนและดำเนินการโปรแกรมจะแสดงภาพต้นฉบับและภาพที่กรองโดยใช้ยูทิลิตี้การแสดงผล PNG มาตรฐานดังต่อไปนี้ -
Original image
Filtered image
Python img.filter (SMOOTH) วิธีการ
ตัวอย่าง python ต่อไปนี้ใช้ตัวกรอง SMOOTH กับภาพที่กำหนด
ตัวอย่าง
#Import required image modules
from PIL import Image, ImageFilter

#Import all the enhancement filter from pillow
from PIL.ImageFilter import (
   BLUR, CONTOUR, DETAIL, EDGE_ENHANCE, EDGE_ENHANCE_MORE,
   EMBOSS, FIND_EDGES, SMOOTH, SMOOTH_MORE, SHARPEN
)
#Create image object
img = Image.open('images/cat.jpg')
#Applying the blur filter
img1 = img.filter(SMOOTH)
img1.save('images/ImageFilter_blur.jpg')
img1.show()
เอาต์พุต
หากคุณบันทึกโปรแกรมด้านบนและดำเนินการโปรแกรมจะแสดงภาพต้นฉบับและภาพที่กรองโดยใช้ยูทิลิตี้การแสดงผล PNG มาตรฐานดังต่อไปนี้ -
Original image
Filtered image

Python img.filter (SHARPEN) วิธีการ
ตัวอย่าง python ต่อไปนี้ใช้ตัวกรอง SHARPEN กับรูปภาพที่กำหนด
ตัวอย่าง
#Import required image modules
from PIL import Image, ImageFilter

#Import all the enhancement filter from pillow
from PIL.ImageFilter import (
   BLUR, CONTOUR, DETAIL, EDGE_ENHANCE, EDGE_ENHANCE_MORE,
   EMBOSS, FIND_EDGES, SMOOTH, SMOOTH_MORE, SHARPEN
)
#Create image object
img = Image.open('images/cat.jpg')
#Applying the blur filter
img1 = img.filter(SHARPEN)
img1.save('images/ImageFilter_blur.jpg')
img1.show()
เอาต์พุต
หากคุณบันทึกโปรแกรมด้านบนและดำเนินการโปรแกรมจะแสดงภาพต้นฉบับและภาพที่กรองโดยใช้ยูทิลิตี้การแสดงผล PNG มาตรฐานดังต่อไปนี้ -
Original image
Filtered image

ตัวอย่าง python ต่อไปนี้ใช้ตัวกรอง SHARPEN กับรูปภาพที่กำหนด
ตัวอย่าง
#Import required image modules
from PIL import Image, ImageFilter
#Import all the enhancement filter from pillow
from PIL.ImageFilter import (
   BLUR, CONTOUR, DETAIL, EDGE_ENHANCE, EDGE_ENHANCE_MORE,
   EMBOSS, FIND_EDGES, SMOOTH, SMOOTH_MORE, SHARPEN
)
#Create image object
img = Image.open('images/cat.jpg')
#Applying the blur filter
img1 = img.filter(SHARPEN)
img1.save('images/ImageFilter_blur.jpg')
img1.show()
เอาต์พุต
หากคุณบันทึกโปรแกรมด้านบนและดำเนินการโปรแกรมจะแสดงภาพต้นฉบับและภาพที่กรองโดยใช้ยูทิลิตี้การแสดงผล PNG มาตรฐานดังต่อไปนี้ -
Original image
Filtered image
