Spring WS - WSDL แบบคงที่
ในบทก่อนหน้าSpring -WS - First Applicationเราได้สร้าง WSDL โดยอัตโนมัติโดยใช้ Spring WS Configuration ในกรณีนี้เราจะแสดงวิธีการแสดง WSDL ที่มีอยู่โดยใช้ Spring WS
| ขั้นตอน | คำอธิบาย |
|---|---|
| 1 | สร้างโปรเจ็กต์โดยใช้ชื่อ leaveService ภายใต้แพ็คเกจ com.tutorialspoint ตามที่อธิบายไว้ในบท Spring WS - First Application |
| 2 | สร้าง WSDL leave.wsdl ภายใต้โฟลเดอร์ย่อย / WEB-INF / wsdl |
| 3 | อัพเดต spring-ws-servlet.xml ภายใต้โฟลเดอร์ย่อย / WEB-INF เรากำลังใช้แท็ก static-wsdl ที่นี่แทน dynamic-wsdl |
| 4 | ขั้นตอนสุดท้ายคือการสร้างเนื้อหาของไฟล์ต้นทางและไฟล์คอนฟิกูเรชันทั้งหมดและส่งออกแอปพลิเคชันตามที่อธิบายด้านล่าง |
/WEB-INF/spring-ws-servlet.xml
<wsdl:definitions xmlns:wsdl = "http://schemas.xmlsoap.org/wsdl/"
   xmlns:soap = "http://schemas.xmlsoap.org/wsdl/soap/"
   xmlns:schema = "http://tutorialspoint.com/hr/schemas"
   xmlns:tns = "http://tutorialspoint.com/hr/definitions"
   targetNamespace = "http://tutorialspoint.com/hr/definitions">

   <wsdl:types>
      <xsd:schema xmlns:xsd = "http://www.w3.org/2001/XMLSchema">
         <xsd:import namespace = "http://tutorialspoint.com/hr/schemas"
            schemaLocation = "hr.xsd"/>
      </xsd:schema>
   </wsdl:types>

   <wsdl:message name = "LeaveRequest">
      <wsdl:part element = "schema:LeaveRequest" name = "LeaveRequest"/>
   </wsdl:message>

   <wsdl:portType name = "HumanResource">
      <wsdl:operation name = "Leave">
         <wsdl:input message = "tns:LeaveRequest" name = "LeaveRequest"/>
      </wsdl:operation>
   </wsdl:portType>

   <wsdl:binding name = "HumanResourceBinding" type = "tns:HumanResource">
      <soap:binding style = "document"
         transport = "http://schemas.xmlsoap.org/soap/http"/>
      <wsdl:operation name = "Leave">
         <soap:operation soapAction = "http://mycompany.com/RequestLeave"/>
         <wsdl:input name = "LeaveRequest">
            <soap:body use = "literal"/>
         </wsdl:input>
      </wsdl:operation>
   </wsdl:binding>

   <wsdl:service name = "HumanResourceService">
      <wsdl:port binding = "tns:HumanResourceBinding" name = "HumanResourcePort">
         <soap:address location = "http://localhost:8080/leaveService/"/>
      </wsdl:port>
   </wsdl:service>
</wsdl:definitions>
/WEB-INF/spring-ws-servlet.xml
<beans xmlns = "http://www.springframework.org/schema/beans"
   xmlns:xsi = "http://www.w3.org/2001/XMLSchema-instance"
   xmlns:context = "http://www.springframework.org/schema/context"
   xmlns:sws = "http://www.springframework.org/schema/web-services"
   xsi:schemaLocation = "http://www.springframework.org/schema/beans

   http://www.springframework.org/schema/beans/spring-beans-3.0.xsd
   http://www.springframework.org/schema/web-services
   http://www.springframework.org/schema/web-services/web-services-2.0.xsd
   http://www.springframework.org/schema/context
   http://www.springframework.org/schema/context/spring-context-3.0.xsd">

   <context:component-scan base-package = "com.tutorialspoint.hr"/>
   <sws:annotation-driven/>
   <sws:static-wsdl id = "leave" location = "/WEB-INF/wsdl/leave.wsdl"/>
</beans>
เรียกใช้โครงการ
เมื่อเราสร้างซอร์สและไฟล์การกำหนดค่าเสร็จแล้วเราควรส่งออกแอปพลิเคชัน คลิกขวาที่แอปพลิเคชันใช้ตัวเลือก Export → WAR File และบันทึกไฟล์ leaveService.war ของคุณในโฟลเดอร์ webapps ของ Tomcat
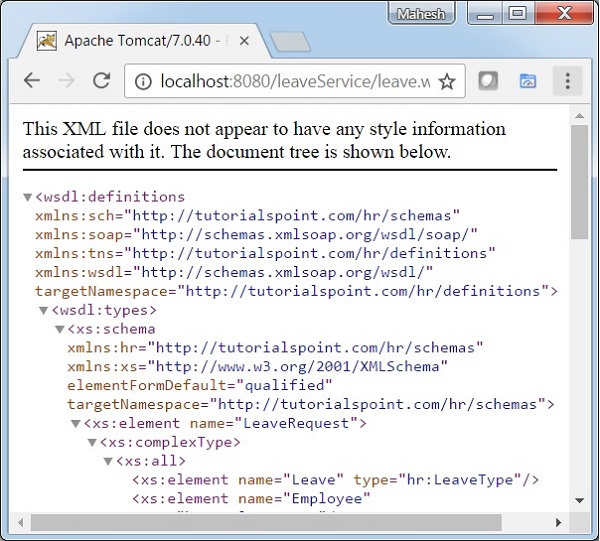
ตอนนี้เริ่มเซิร์ฟเวอร์ Tomcat และตรวจสอบให้แน่ใจว่าเราสามารถเข้าถึงหน้าเว็บอื่น ๆ จากโฟลเดอร์ webapps โดยใช้เบราว์เซอร์มาตรฐาน ลองเข้าไปที่ URL - http: // localhost: 8080 / leaveService / leave.wsdl หากทุกอย่างเรียบร้อยกับ Spring Web Application เราจะเห็นหน้าจอต่อไปนี้
