Spring Boot - Sichern von Webanwendungen
Wenn dem Klassenpfad eine Spring Boot-Sicherheitsabhängigkeit hinzugefügt wird, erfordert die Spring Boot-Anwendung automatisch die Basisauthentifizierung für alle HTTP-Endpunkte. Die Endpunkte "/" und "/ home" erfordern keine Authentifizierung. Alle anderen Endpunkte erfordern eine Authentifizierung.
Um Ihrer Spring Boot-Anwendung eine Spring Boot-Sicherheit hinzuzufügen, müssen Sie die Spring Boot Starter-Sicherheitsabhängigkeit in unsere Build-Konfigurationsdatei aufnehmen.
Maven-Benutzer können der Datei pom.xml die folgende Abhängigkeit hinzufügen.
<dependency>
   <groupId>org.springframework.boot</groupId>
   <artifactId>spring-boot-starter-security</artifactId>
</dependency>
Gradle-Benutzer können der Datei build.gradle die folgende Abhängigkeit hinzufügen.
compile("org.springframework.boot:spring-boot-starter-security")Sichern einer Webanwendung
Erstellen Sie zunächst eine unsichere Webanwendung mithilfe von Thymeleaf-Vorlagen.
Erstellen Sie dann eine home.html-Datei unter src/main/resources/templates Verzeichnis.
<!DOCTYPE html>
<html xmlns = "http://www.w3.org/1999/xhtml"
xmlns:th = "http://www.thymeleaf.org"
xmlns:sec = "http://www.thymeleaf.org/thymeleaf-extras-springsecurity3">
<head>
<title>Spring Security Example</title>
</head>
<body>
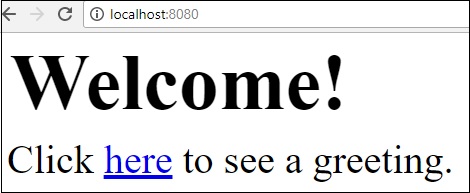
<h1>Welcome!</h1>
<p>Click <a th:href = "@{/hello}">here</a> to see a greeting.</p>
</body>
</html>Die einfache Ansicht /hello in der HTML-Datei mithilfe von Thymeleaf-Vorlagen definiert.
Erstellen Sie jetzt eine hello.html unter src/main/resources/templates Verzeichnis.
<!DOCTYPE html>
<html xmlns = "http://www.w3.org/1999/xhtml"
   xmlns:th = "http://www.thymeleaf.org"
   xmlns:sec = "http://www.thymeleaf.org/thymeleaf-extras-springsecurity3">

   <head>
      <title>Hello World!</title>
   </head>
   <body>
      <h1>Hello world!</h1>
   </body>

</html>
Jetzt müssen wir den Spring MVC - View Controller für Privat- und Hallo-Ansichten einrichten.
Erstellen Sie dazu eine MVC-Konfigurationsdatei, die WebMvcConfigurerAdapter erweitert.
package com.tutorialspoint.websecuritydemo;

import org.springframework.context.annotation.Configuration;
import org.springframework.web.servlet.config.annotation.ViewControllerRegistry;
import org.springframework.web.servlet.config.annotation.WebMvcConfigurerAdapter;

@Configuration
public class MvcConfig extends WebMvcConfigurerAdapter {
   @Override
   public void addViewControllers(ViewControllerRegistry registry) {
      registry.addViewController("/home").setViewName("home");
      registry.addViewController("/").setViewName("home");
      registry.addViewController("/hello").setViewName("hello");
      registry.addViewController("/login").setViewName("login");
   }
}
Fügen Sie nun die Sicherheitsabhängigkeit von Spring Boot Starter zu Ihrer Build-Konfigurationsdatei hinzu.
Maven-Benutzer können der Datei pom.xml die folgende Abhängigkeit hinzufügen.
<dependency>
   <groupId>org.springframework.boot</groupId>
   <artifactId>spring-boot-starter-security</artifactId>
</dependency>
Gradle-Benutzer können der Datei build.gradle die folgende Abhängigkeit hinzufügen.
compile("org.springframework.boot:spring-boot-starter-security")Erstellen Sie jetzt eine Web Security-Konfigurationsdatei, mit der Sie Ihre Anwendung für den Zugriff auf die HTTP-Endpunkte mithilfe der Basisauthentifizierung sichern.
package com.tutorialspoint.websecuritydemo;
import org.springframework.beans.factory.annotation.Autowired;
import org.springframework.context.annotation.Configuration;
import org.springframework.security.config.annotation.authentication.builders.AuthenticationManagerBuilder;
import org.springframework.security.config.annotation.web.builders.HttpSecurity;
import org.springframework.security.config.annotation.web.configuration.WebSecurityConfigurerAdapter;
import org.springframework.security.config.annotation.web.configuration.EnableWebSecurity;
@Configuration
@EnableWebSecurity
public class WebSecurityConfig extends WebSecurityConfigurerAdapter {
@Override
protected void configure(HttpSecurity http) throws Exception {
http
.authorizeRequests()
.antMatchers("/", "/home").permitAll()
.anyRequest().authenticated()
.and()
.formLogin()
.loginPage("/login")
.permitAll()
.and()
.logout()
.permitAll();
}
@Autowired
public void configureGlobal(AuthenticationManagerBuilder auth) throws Exception {
auth
.inMemoryAuthentication()
.withUser("user").password("password").roles("USER");
}
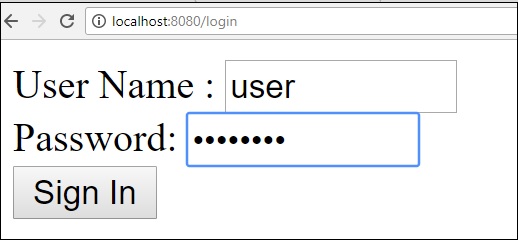
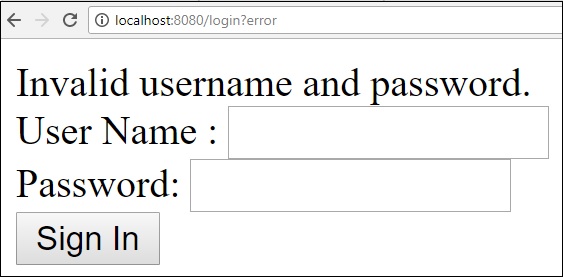
}Erstellen Sie nun eine login.html-Datei unter der src/main/resources Verzeichnis, damit der Benutzer über den Anmeldebildschirm auf den HTTP-Endpunkt zugreifen kann.
<!DOCTYPE html>
<html xmlns = "http://www.w3.org/1999/xhtml" xmlns:th = "http://www.thymeleaf.org"
xmlns:sec = "http://www.thymeleaf.org/thymeleaf-extras-springsecurity3">
<head>
<title>Spring Security Example </title>
</head>
<body>
<div th:if = "${param.error}">
Invalid username and password.
</div>
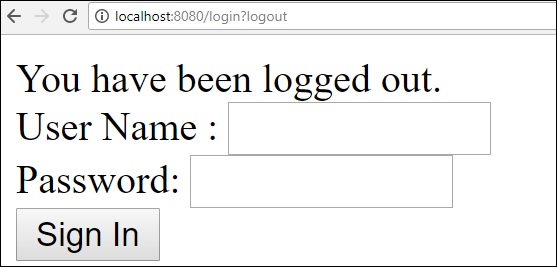
<div th:if = "${param.logout}">
You have been logged out.
</div>
<form th:action = "@{/login}" method = "post">
<div>
<label> User Name : <input type = "text" name = "username"/> </label>
</div>
<div>
<label> Password: <input type = "password" name = "password"/> </label>
</div>
<div>
<input type = "submit" value = "Sign In"/>
</div>
</form>
</body>
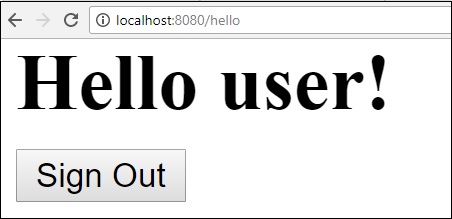
</html>Aktualisieren Sie abschließend die Datei hello.html, damit sich der Benutzer von der Anwendung abmelden und den aktuellen Benutzernamen wie unten gezeigt anzeigen kann.
<!DOCTYPE html>
<html xmlns = "http://www.w3.org/1999/xhtml" xmlns:th = "http://www.thymeleaf.org"
   xmlns:sec = "http://www.thymeleaf.org/thymeleaf-extras-springsecurity3">

   <head>
      <title>Hello World!</title>
   </head>
   <body>
      <h1 th:inline = "text">Hello [[${#httpServletRequest.remoteUser}]]!</h1>
      <form th:action = "@{/logout}" method = "post">
         <input type = "submit" value = "Sign Out"/>
      </form>
   </body>

</html>
Der Code für die Hauptanwendung von Spring Boot ist unten angegeben -
package com.tutorialspoint.websecuritydemo;

import org.springframework.boot.SpringApplication;
import org.springframework.boot.autoconfigure.SpringBootApplication;

@SpringBootApplication
public class WebsecurityDemoApplication {
   public static void main(String[] args) {
      SpringApplication.run(WebsecurityDemoApplication.class, args);
   }
}
Der vollständige Code für die Build-Konfigurationsdatei ist unten angegeben.
Maven – pom.xml
<?xml version  =  "1.0" encoding  =  "UTF-8"?>
<project xmlns = "http://maven.apache.org/POM/4.0.0"
   xmlns:xsi = "http://www.w3.org/2001/XMLSchema-instance"
   xsi:schemaLocation = "http://maven.apache.org/POM/4.0.0
   http://maven.apache.org/xsd/maven-4.0.0.xsd">

   <modelVersion>4.0.0</modelVersion>
   <groupId>com.tutorialspoint</groupId>
   <artifactId>websecurity-demo</artifactId>
   <version>0.0.1-SNAPSHOT</version>
   <packaging>jar</packaging>
   <name>websecurity-demo</name>
   <description>Demo project for Spring Boot</description>

   <parent>
      <groupId>org.springframework.boot</groupId>
      <artifactId>spring-boot-starter-parent</artifactId>
      <version>1.5.9.RELEASE</version>
      <relativePath/> <!-- lookup parent from repository -->
   </parent>

   <properties>
      <project.build.sourceEncoding>UTF-8</project.build.sourceEncoding>
      <project.reporting.outputEncoding>UTF-8</project.reporting.outputEncoding>
      <java.version>1.8</java.version>
   </properties>

   <dependencies>
      <dependency>
         <groupId>org.springframework.boot</groupId>
         <artifactId>spring-boot-starter-security</artifactId>
      </dependency>

      <dependency>
         <groupId>org.springframework.boot</groupId>
         <artifactId>spring-boot-starter-thymeleaf</artifactId>
      </dependency>

      <dependency>
         <groupId>org.springframework.boot</groupId>
         <artifactId>spring-boot-starter-web</artifactId>
      </dependency>

      <dependency>
         <groupId>org.springframework.boot</groupId>
         <artifactId>spring-boot-starter-test</artifactId>
         <scope>test</scope>
      </dependency>

      <dependency>
         <groupId>org.springframework.security</groupId>
         <artifactId>spring-security-test</artifactId>
         <scope>test</scope>
      </dependency>
   </dependencies>

   <build>
      <plugins>
         <plugin>
            <groupId>org.springframework.boot</groupId>
            <artifactId>spring-boot-maven-plugin</artifactId>
         </plugin>
      </plugins>
   </build>

</project>
Gradle – build.gradle
buildscript {
   ext {
      springBootVersion = '1.5.9.RELEASE'
   }
   repositories {
      mavenCentral()
   }
   dependencies {
      classpath("org.springframework.boot:spring-boot-gradle-plugin:${springBootVersion}")
   }
}

apply plugin: 'java'
apply plugin: 'eclipse'
apply plugin: 'org.springframework.boot'

group = 'com.tutorialspoint'
version = '0.0.1-SNAPSHOT'
sourceCompatibility = 1.8

repositories {
   mavenCentral()
}
dependencies {
   compile('org.springframework.boot:spring-boot-starter-security')
   compile('org.springframework.boot:spring-boot-starter-thymeleaf')
   compile('org.springframework.boot:spring-boot-starter-web')

   testCompile('org.springframework.boot:spring-boot-starter-test')
   testCompile('org.springframework.security:spring-security-test')
}
Erstellen Sie nun eine ausführbare JAR-Datei und führen Sie die Spring Boot-Anwendung mit den folgenden Maven- oder Gradle-Befehlen aus.
Maven-Benutzer können den folgenden Befehl verwenden:
mvn clean installNach "BUILD SUCCESS" finden Sie die JAR-Datei im Zielverzeichnis.
Gradle-Benutzer können den Befehl wie folgt verwenden:
gradle clean buildNach "BUILD SUCCESSFUL" finden Sie die JAR-Datei im Verzeichnis build / libs.
Führen Sie nun die JAR-Datei mit dem unten gezeigten Befehl aus -
java –jar <JARFILE>Klicken Sie auf die URL http://localhost:8080/in Ihrem Webbrowser. Sie können die Ausgabe wie gezeigt sehen.