Google AMP - Page Html vers page Amp
Dans ce chapitre, nous allons comprendre comment convertir une page html normale en une page amp. Nous validerons également la page pour ampli et vérifierons enfin la sortie.
Pour commencer, prenons la page html normale comme indiqué ci-dessous -
test.html
<!DOCTYPE html>
<html>
   <head>
      <meta charset = "utf-8">
      <title>Tutorials</title>
      <link href = "style.css" rel = "stylesheet" />
      <meta name = "viewport" content = "width = device-width, initial-scale = 1.0">
      <script src = "js/jquery.js"></script>
   </head>
   <body>
      <header role = "banner">
         <h2>Tutorials</h2>
      </header>
      <h2>Some Important Tutorials List</h2>
      <article>
         <section>
            <img src = "images/tut1.png" width="90%" height = "90%"/>
         </section>
         <section>
            <img src = "images/tut2.png" width="90%" height = "90%"/>
         </section>
         <section>
            <img src = "images/tut3.png" width="90%" height = "90%"/>
         </section>
         <section>
            <img src = "images/tut4.png" width="90%" height = "90%"/>
         </section>
      </article>
      <footer>
         <p>For More tutorials Visit <a href =
         "https://tutorialspoint.com/">Tutorials Point</a></p>
      </footer>
   </body>
</html>
Notez que nous utilisons style.css dedans et les détails du fichier css sont comme donnés ici -
h1 {color: blue;text-align: center;}
   h2 {text-align: center;}
      img {
         border: 1px solid #ddd;
         border-radius: 4px;
         padding: 5px;
      }
      article {
         text-align: center;
      }
      header{
         width: 100%;
         height: 50px;
         margin: 5px auto;
         border: 1px solid #000000;
         text-align: center;
         background-color: #ccc;
      }
      footer {
         width: 100%;
         height: 35px;
         margin: 5px auto;
         border: 1px solid #000000;
         text-align: center;
         background-color: yellow;
      }
Notez que nous avons également utilisé le fichier jquery.js dans le fichier .html répertorié ci-dessus.
Maintenant, hébergez test.html localement et voyez la sortie vue dans le lien donné ici -
http://localhost:8080/googleamp/test.html
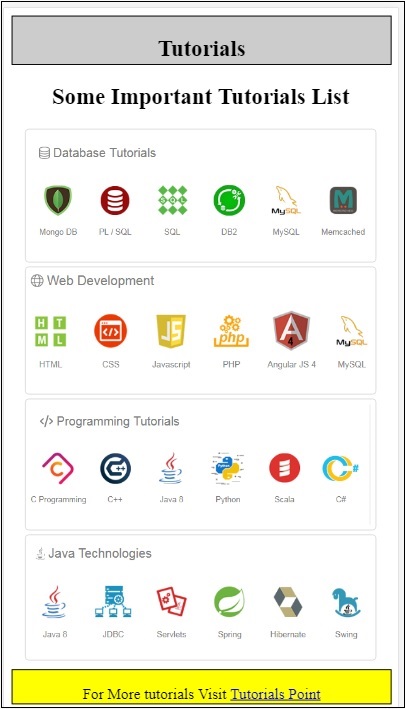
Maintenant, passons étape par étape pour changer le fichier test.html ci-dessus en fichier test_amp.html.
Tout d'abord, nous devons enregistrer test.html en tant que test_amp.html et suivre les étapes ci-dessous.
Step 1 - Ajoutez la bibliothèque d'amplis dans la section head comme indiqué ci-dessous -
<script async src = "https://cdn.ampproject.org/v0.js">
</script>
Par exemple, une fois ajouté à test_amp.html, ce sera comme suit -
<head>
   <meta charset = "utf-8">
   <title>Tutorials</title>
   <script async src = "https://cdn.ampproject.org/v0.js">
   </script>
   <link href = "style.css" rel = "stylesheet" />
   <meta name = "viewport" content = "width = device-width, initial-scale = 1.0">
      <script src = "js/jquery.js"></script>
</head>
Exécutez maintenant la page test_amp.html dans le navigateur et ouvrez la console du navigateur. Il affichera le message de la console comme indiqué ci-dessous -

Pour savoir si votre fichier html est un amp valide, ajoutez # development = 1 à l'url de votre page html à la fin comme indiqué ci-dessous -
http://localhost:8080/googleamp/test_amp.html#development=1Cliquez sur l'url ci-dessus dans le navigateur et dans la console Google Chrome. Il vous listera les erreurs que l'ampli considère comme invalides du point de vue de la spécification de l'ampli.
Les erreurs que nous avons pour test_amp.html sont affichées ici -
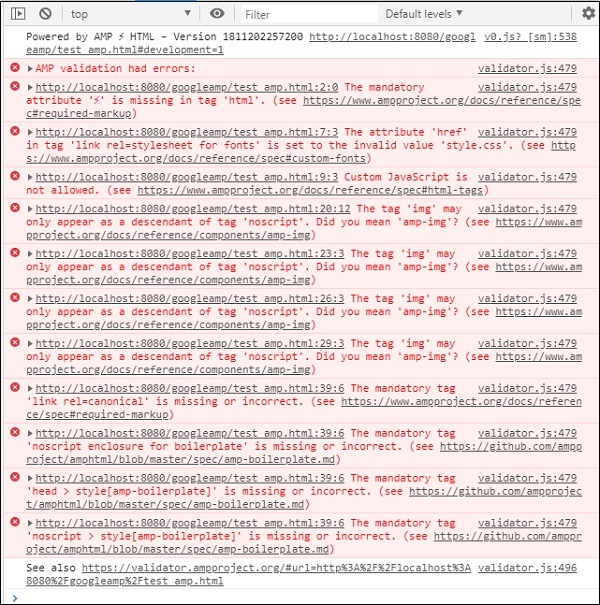
Laissez-nous maintenant les réparer un par un jusqu'à ce que nous obtenions un message de réussite de l'ampli.
Step 2 - On peut voir l'erreur suivante dans la console -

Nous pouvons corriger cela en ajoutant ⚡ ou amp pour la balise html. Nous ajouterons amp à la balise html comme indiqué ci-dessous -
<html amp>Step 3 - Veuillez vous assurer que vous avez la balise Meta avec charset et name = "viewport" dans la balise head comme indiqué ci-dessous -
<head>
   <meta charset = "utf-8">
   <meta name = "viewport" content = "width = device-width, initial-scale = 1.0">
</head>
Step 4 - La prochaine erreur que nous avons est affichée ici -

Il dit href dans le lien rel = feuille de style, c'est-à-dire que le lien suivant génère une erreur. C'est parce que amp ne permet pas de placer une feuille de style externe utilisant un lien avec href à l'intérieur des pages.
<link href = "style.css" rel = "stylesheet" />We can add the all the css in style.css as follows −<style amp-custom>
/*All styles from style.css please add here */
</style>Ainsi, les données css présentes dans style.css doivent être ajoutées avec style avec l'attribut amp-custom.
<style amp-custom>
   h1 {color: blue;text-align: center;}
   h2 {text-align: center;}
      img {
         border: 1px solid #ddd;
         border-radius: 4px;
         padding: 5px;
      }
      article {
         text-align: center;
      }
      header{
         width: 100%;
         height: 50px;
         margin: 5px auto;
         border: 1px solid #000000;
         text-align: center;
         background-color: #ccc;
      }
      footer {
         width: 100%;
         height: 35px;
         margin: 5px auto;
         border: 1px solid #000000;
         text-align: center;
         background-color: yellow;
      }
</style>
Ajoutez la balise de style à votre page amp. Testons maintenant la même chose avec la balise de style ci-dessus dans le navigateur. Les modifications que nous avons apportées jusqu'à présent à test_amp.html sont affichées ici -
<!DOCTYPE html>
<html amp>
   <head>
      <meta charset = "utf-8">
      <title>Tutorials</title>
      <script async src = "https://cdn.ampproject.org/v0.js">
      </script>
      <meta name = "viewport" content = "width = device-width, initial-scale = 1.0">
      <script src = "js/jquery.js"></script>
      <style amp-custom>
         h1 {color: blue;text-align: center;}
         h2 {text-align: center;}
            img {
               border: 1px solid #ddd;
               border-radius: 4px;
               padding: 5px;
            }

            article {
               text-align: center;
            }
            header{
               width: 100%;
               height: 50px;
               margin: 5px auto;
               border: 1px solid #000000;
               text-align: center;
               background-color: #ccc;
            }
            footer {
               width: 100%;
               height: 35px;
               margin: 5px auto;
               border: 1px solid #000000;
               text-align: center;
               background-color: yellow;
            }
      </style>
   </head>
   <body>
      <header role = "banner">
         <h2>Tutorials</h2>
      </header>
      <h2>Some Important Tutorials List</h2>
      <article>
         <section>
            <img src = "images/tut1.png" width = "90%" height = "90%"/>
         </section>
         <section>
            <img src = "images/tut2.png" width = "90%" height = "90%"/>
         </section>
         <section>
            <img src = "images/tut3.png" width = "90%" height = "90%"/>
         </section>
         <section>
            <img src = "images/tut4.png" width="90%" height = "90%"/>
         </section>
      </article>
      <footer>
         <p>For More tutorials Visit <a href =
         "https://tutorialspoint.com/">Tutorials Point</a></p>
      </footer>
   </body>
</html>
Voyons la sortie et les erreurs dans la console pour la page ci-dessus. Observez la capture d'écran suivante -
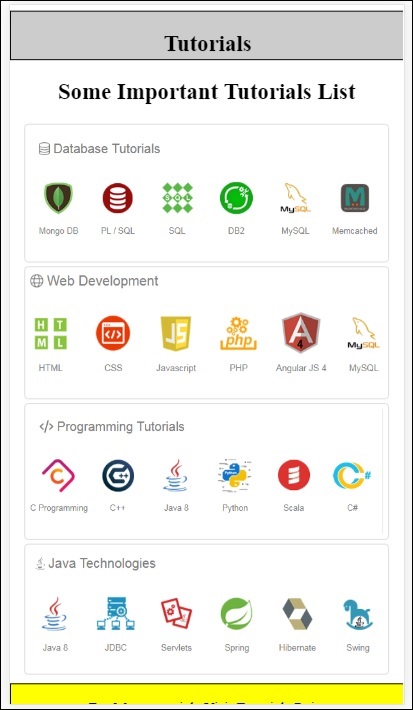
L'erreur affichée dans la console est la suivante -
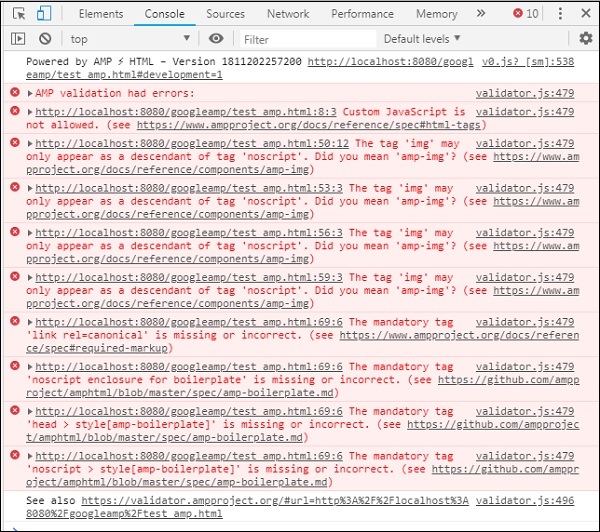
Maintenant, vous pouvez voir que pour certaines des erreurs d'ampli, le style est supprimé. Corrigeons maintenant les erreurs restantes.
Step 5 - La prochaine erreur que nous voyons dans la liste est la suivante -

Nous avons ajouté la balise de script appelant le fichier jquery. Notez que les pages amp n'autorisent aucun javascript personnalisé dans la page. Nous devrons le supprimer et nous assurer d'utiliser amp-component qui est disponible.
Par exemple, nous avons amp-animation si une animation est requise, amp-analytics si nous voulons ajouter du code google analytics à la page. De même, nous avons un composant amp-ad pour afficher des annonces à afficher sur la page. Il existe également un composant amp-iframe sur lequel nous pouvons pointer le src vers la même origine et appeler n'importe quel javascript personnalisé si nécessaire dans l'amp-iframe.
Maintenant, supprimons la balise de script de la page.
Step 6 - L'erreur suivante affichée est affichée ici -

Les erreurs ci-dessus pointent vers la balise d'image que nous avons utilisée sur la page. Amp n'autorise pas l'utilisation des balises <img src = ”” /> à l'intérieur de la page. Notez que nous devons utiliser la balise amp-img à la place.
Remplaçons la balise <img> par <amp-img> comme indiqué ici -
<section>
   <amp-img alt = "Beautiful Flower"
      src = "images/tut1.png"
      width = "500"
      height = "160"
      layout = "responsive">
   </amp-img>
</section>
<section>
   <amp-img alt = "Beautiful Flower"
      src = "images/tut2.png"
      width = "500"
      height = "160"
      layout = "responsive">
   </amp-img>
</section>
<section>
   <amp-img alt = "Beautiful Flower"
      src = "images/tut3.png"
      width = "500"
      height = "160"
      layout = "responsive">
   </amp-img>
</section>
<section>
   <amp-img alt = "Beautiful Flower"
      src = "images/tut4.png"
      width = "500"
      height = "160"
      layout = "responsive">
   </amp-img>
</section>
Nous avons remplacé toute la balise <img> par <amp-img> comme indiqué ci-dessus. Maintenant, exécutons la page dans le navigateur pour voir la sortie et les erreurs -
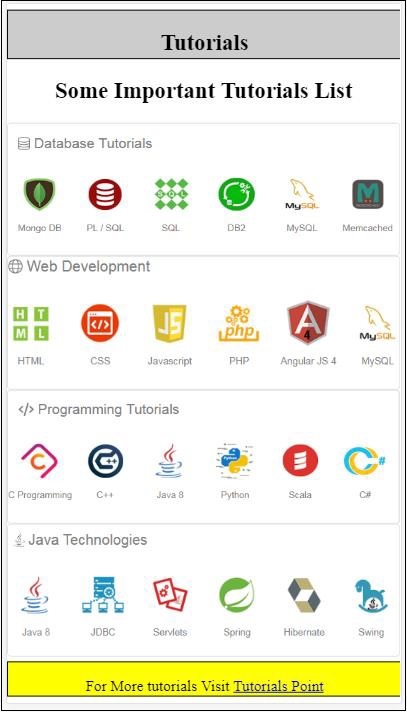
les erreurs
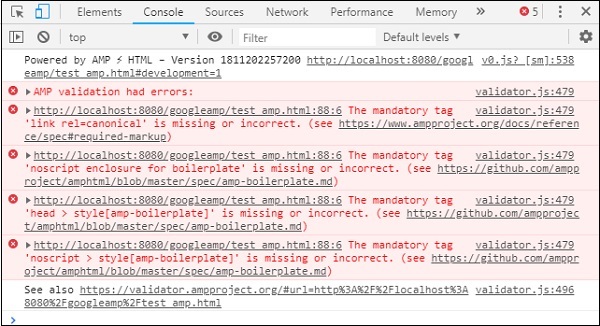
Observez que les erreurs diminuent maintenant.
Step 7 - La prochaine erreur affichée dans la console est la suivante -

Nous devons ajouter la balise link rel = canonical dans la section head. Veuillez noter que cette balise est obligatoire et doit toujours être ajoutée dans la tête comme suit -
<link rel = "canonical" href =
   "http://example.ampproject.org/article-metadata.html">
Step 8 - La prochaine erreur affichée pour manquant noscript tag dans la console comme indiqué ici -

Nous devons ajouter la balise <noscript> incluse avec amp-passe-partout dans la section principale comme suit -
<noscript>
   <style amp-boilerplate>
      body{
         -webkit-animation:none;
         -moz-animation:none;
         -ms-animation:none;
         animation:none}
   </style>
</noscript>
Step 9 - La prochaine erreur affichée est donnée ci-dessous -

Une autre balise obligatoire est la balise de style avec amp-passe-partout et doit être placée avant la balise noscript. La balise de style avec amp-passe-partout est affichée ici -
<style amp-boilerplate>
   body{
      -webkit-animation:
      -amp-start 8s steps(1,end) 0s 1 normal both;-moz-animation:
      -amp-start 8s steps(1,end) 0s 1 normal both;-ms-animation:
      -amp-start 8s steps(1,end) 0s 1 normal both;animation:
      -amp-start 8s steps(1,end) 0s 1 normal both
   }
   @-webkit-keyframes
   -amp-start{from{visibility:hidden}to{visibility:visible}}@-moz-keyframes
   -amp-start{from{visibility:hidden}to{visibility:visible}}@-ms-keyframes
   -amp-start{from{visibility:hidden}to{visibility:visible}}@-o-keyframes
   -amp-start{from{visibility:hidden}to{visibility:visible}}@keyframes
   -amp-start{from{visibility:hidden}to{visibility:visible}}
</style>
Ajoutez la balise de style ci-dessus à la page test_amp.html.
Une fois terminé, testez la page dans le navigateur pour voir la sortie et la console -

Les détails de la console sont affichés ici -

Ainsi, nous avons enfin résolu toutes les erreurs et maintenant la page test_amp.html est une page amp valide.
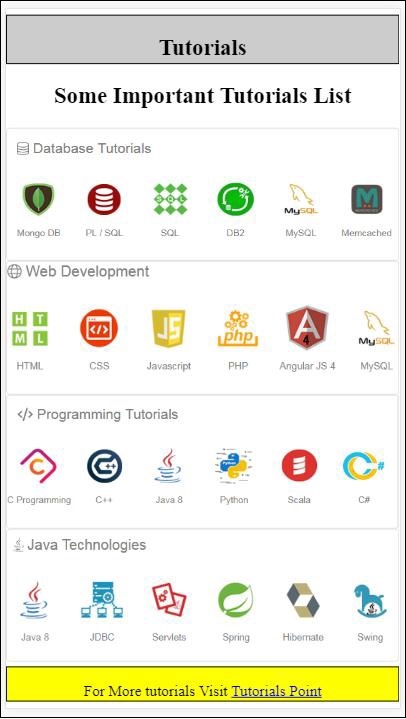
Il y a un style à ajouter car l'en-tête et le pied de page sont tronqués, nous pouvons mettre à jour le même style que nous avons ajouté. Nous avons donc supprimé la largeur: 100% de l'en-tête et du pied de page.
Voici la sortie finale -
Fichier test_amp.html final
<!DOCTYPE html>
<html amp>
   <head>
      <meta charset = "utf-8">
      <title>Tutorials</title>
      <link rel = "canonical" href=
      "http://example.ampproject.org/article-metadata.html">
      <script async src = "https://cdn.ampproject.org/v0.js">
      </script>
      <meta name = "viewport" content = "width = device-width,
      initial-scale = 1.0">

      <style amp-boilerplate>
         body{
            -webkit-animation:
            -amp-start 8s steps(1,end) 0s 1 normal both;-moz-animation:
            -amp-start 8s steps(1,end) 0s 1 normal both;-ms-animation:
            -amp-start 8s steps(1,end) 0s 1 normal both;animation:
            -amp-start 8s steps(1,end) 0s 1 normal both
         }
         @-webkit-keyframes
         -amp-start{from{visibility:hidden}to{visibility:visible}}@-moz-keyframes
         -amp-start{from{visibility:hidden}to{visibility:visible}}@-ms-keyframes
         -amp-start{from{visibility:hidden}to{visibility:visible}}@-o-keyframes
         -amp-start{from{visibility:hidden}to{visibility:visible}}@keyframes
         -amp-start{from{visibility:hidden}to{visibility:visible}}
      </style>
      <noscript>
         <style amp-boilerplate>
            body{
               -webkit-animation:none;
               -moz-animation:none;
               -ms-animation:none;
               animation:none}
         </style>
      </noscript>
      <style amp-custom>
         h1 {color: blue;text-align: center;}
         h2 {text-align: center;}
            amp-img {
               border: 1px solid #ddd;
               border-radius: 4px;
               padding: 5px;
            }
            article {
               text-align: center;
            }
            header{
               height: 50px;
               margin: 5px auto;
               border: 1px solid #000000;
               text-align: center;
               background-color: #ccc;
            }
            footer {
               height: 35px;
               margin: 5px auto;
               border: 1px solid #000000;
               text-align: center;
               background-color: yellow;
            }
      </style>
   </head>
   <body>
      <header role = "banner">
         <h2>Tutorials</h2>
      </header>
      <h2>Some Important Tutorials List</h2>
      <article>
         <section>
            <amp-img
               alt = "Beautiful Flower"
               src = "images/tut1.png"
               width = "500"
               height = "160"
               layout = "responsive">
            </amp-img>
         </section>
         <section>
            <amp-img
               alt = "Beautiful Flower"
               src = "images/tut2.png"
               width = "500"
               height = "160"
               layout = "responsive">
            </amp-img>
         </section>
         <section>
            <amp-img
               alt = "Beautiful Flower"
               src = "images/tut3.png"
               width = "500"
               height = "160"
               layout = "responsive">
            </amp-img>
         </section>
         <section>
            <amp-img
               alt = "Beautiful Flower"
               src = "images/tut4.png"
               width = "500"
               height = "160"
               layout = "responsive">
            </amp-img>
         </section>
      </article>
      <footer>
         <p>For More tutorials Visit <a href =
         "https://tutorialspoint.com/">
            Tutorials Point</a>
         </p>
      </footer>
   </body>
</html>
Ainsi, nous en avons finalement terminé avec la conversion d'un fichier html normal en amp.