Google AMP - Histoire
Amp-story est un composant d'ampli utilisé pour afficher du contenu en gardant l'utilisateur engagé dans l'histoire. Par exemple, utiliser une série d'images racontant une marque.
Pour commencer à travailler avec amp-story, nous devons inclure le script comme indiqué ci-dessous -
<script async custom-element = "amp-story"
   src = "https://cdn.ampproject.org/v0/amp-story-1.0.js">
</script>
Dans ce chapitre, voyons ce qu'est amp-story et comment cela fonctionne. Supposons que nous ayons une galerie d'images et que nous souhaitons l'afficher sur la page. Dans la page amp, nous pouvons le rendre beau et interactif pour l'utilisateur à l'aide du composant amp-story.
Le format de la balise amp-story ressemble à celui ci-dessous -
<amp-story standalone> ---> Main story Tag
   <amp-story-page id = "page-1"> ---> Pages inside the story e.g page1
      <amp-story-grid-layer template = "fill"> -->
         Layers for the page1.You can have more than one layer.
         //Add html elements here or amp components
      </amp-story-grid-layer>
      <amp-story-grid-layer template = "fill"> -->
         Layers for the page1.You can have more than one layer.
         //Add html elements here or amp components
      </amp-story-grid-layer>
      ...
   </amp-story-page>

   <amp-story-page id = "page-2"> ---> Pages inside the story e.g page2
      <amp-story-grid-layer template = "fill"> -->
         Layers for the page2.You can have more than one layer.
         //Add html elements here or amp components
      </amp-story-grid-layer>
      ...
   </amp-story-page>
   ...
</amp-story>
Il y a quelques attributs supplémentaires ajoutés pour amp-story comme suit -
<amp-story standalone title = "My Story"
   publisher = "The AMP Team"
   publisher-logo-src = "publisherlogo image here"
   poster-portrait-src = "poster portrait here"
   poster-square-src = "poster square image here"
   poster-landscape-src = "poster landscape image here">
Cette fonctionnalité rend la narration à l'aide d'ampli très interactive.
Le code suivant montre un exemple fonctionnel pour amp-story. La sortie pour le même est affichée pour le bureau ainsi que le mode mobile.
Exemple
<!doctype html>
<html amp lang = "en">
   <head>
      <meta charset = "utf-8">
      <script async src = "https://cdn.ampproject.org/v0.js"></script>
      <script async custom-element = "amp-story" src = "https://cdn.ampproject.org/v0/amp-story-1.0.js"></script>
      <title>Google AMP - Story</title>
      <meta name = "viewport" content = "width = device-width,minimum-scale = 1,initial-scale=1">
      <link rel = "canonical" href = "/stories/introduction/amp_story_hello_world/">

      <style amp-boilerplate>
         body{
            -webkit-animation:
            -amp-start 8s steps(1,end) 0s 1 normal both;-moz-animation:
            -amp-start 8s steps(1,end) 0s 1 normal both;-ms-animation:
            -amp-start 8s steps(1,end) 0s 1 normal both;animation:
            -amp-start 8s steps(1,end) 0s 1 normal both
         }
         @-webkit-keyframes
         -amp-start{from{visibility:hidden}to{visibility:visible}}@-moz-keyframes
         -amp-start{from{visibility:hidden}to{visibility:visible}}@-ms-keyframes
         -amp-start{from{visibility:hidden}to{visibility:visible}}@-o-keyframes
         -amp-start{from{visibility:hidden}to{visibility:visible}}@keyframes
         -amp-start{from{visibility:hidden}to{visibility:visible}}
      </style>

      <noscript>
         <style amp-boilerplate>
            body{
               -webkit-animation:
               none;-moz-animation:none;
               -ms-animation:none;
               animation:none}
         </style>
      </noscript>

      <style amp-custom>
         amp-story {
            font-family: Roboto, Helvetica, Arial, sans-serif;
         }
         amp-story-page * {
            color: white;
            text-align: center;
         }
      </style>
   </head>
   <body>
      <amp-story standalone title = "Stories in AMP - Hello World" publisher = "AMP Project">
         <amp-story-page id = "page-1">
            <amp-story-grid-layer template = "fill">
               <amp-img src = "images/christmas1.jpg"
                  width = "300" height = "250"
                  layout = "responsive">
               </amp-img>
            </amp-story-grid-layer>
               <amp-story-grid-layer template = "vertical">
                  <h1>Hello World</h1>
                  <p>This is an AMP Story.</p>
               </amp-story-grid-layer>
            </amp-story-page>

            <amp-story-page id = "page-2">
               <amp-story-grid-layer template = "fill">
                  <amp-img src = "images/christmas5.jpg"
                     width = "300" height = "250"
                     layout = "responsive">
                  </amp-img>
               </amp-story-grid-layer>
               <amp-story-grid-layer template = "vertical">
                  <h1>Hello World</h1>
                  <p>This is an AMP Story.</p>
               </amp-story-grid-layer>
            </amp-story-page>

            <amp-story-page id = "page-3">
               <amp-story-grid-layer template = "fill">
                  <amp-img src = "images/christmas3.jpg"
                     width = "300" height = "250"
                     layout = "responsive">
                  </amp-img>
               </amp-story-grid-layer>
               <amp-story-grid-layer template = "vertical">
                  <h1>Hello World</h1>
                  <p>This is an AMP Story.</p>
               </amp-story-grid-layer>
            </amp-story-page>

            <amp-story-page id = "page-4">
               <amp-story-grid-layer template = "fill">
                  <amp-img src = "images/christmas4.jpg"
                     width = "300" height="250"
                     layout = "responsive">
                  </amp-img>
               </amp-story-grid-layer>
               <amp-story-grid-layer template = "vertical">
                  <h1>Hello World</h1>
                  <p>This is an AMP Story.</p>
              </amp-story-grid-layer>
            </amp-story-page>

            <amp-story-bookend src = "ampstory.json" layout = "nodisplay">
         </amp-story-bookend>
      </amp-story>
   <body>
</html>
ampstory.json
{
   "bookendVersion": "v1.0",
   "shareProviders": [
      "email",
      "twitter",
      "tumblr",
      {
         "provider": "facebook",
         "app_id": "254325784911610"
      }
   ],
      "components": [
      {
         "type": "heading",
         "text": "Introduction"
      },
      {
         "type": "small",
         "title": "Next Story is on Car Brands",
         "url": "ampcarbrand.html",
         "image": "images/audi.jpg"
      }
   ]
}
Sortie sur le bureau


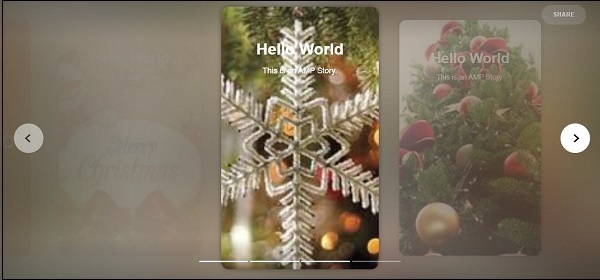
Voici comment la section histoire est affichée. Vous pouvez également ajouter des vidéos ou tout autre composant d'ampli pour rendre l'histoire plus interactive.
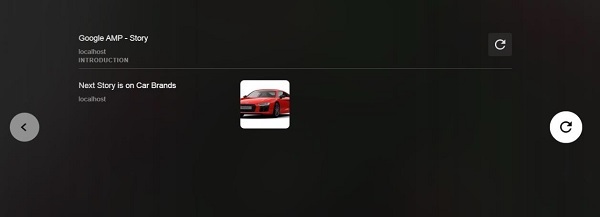
Une fois qu'il atteint la fin de l'histoire, il montrera ce qui est donné dans le livre amp-bookend comme indiqué ci-dessous -
<amp-story-bookend
   src = "ampstory.json" layout = "nodisplay">
</amp-story-bookend>
Nous avons donné un fichier ampstory.json à amp-bookend. Le fichier json contient les détails de l'aperçu de l'histoire suivante comme indiqué ci-dessous. Lorsqu'un utilisateur clique sur les trois points affichés à droite, l'écran suivant s'affiche -

Il donne un bouton de relecture qui chargera à nouveau l'histoire. Vous pouvez cliquer sur l'image de la voiture qui affichera l'histoire des marques de voitures.
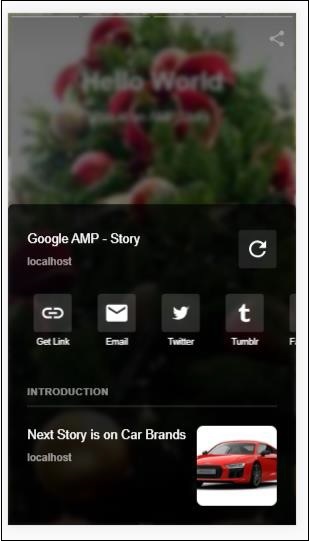
La sortie en mode mobile est la suivante -


