Spring Boot - Sécurisation des applications Web
Si une dépendance Spring Boot Security est ajoutée au chemin de classe, l'application Spring Boot requiert automatiquement l'authentification de base pour tous les points de terminaison HTTP. Les points de terminaison «/» et «/ home» ne nécessitent aucune authentification. Tous les autres points de terminaison nécessitent une authentification.
Pour ajouter une sécurité Spring Boot à votre application Spring Boot, nous devons ajouter la dépendance Spring Boot Starter Security dans notre fichier de configuration de construction.
Les utilisateurs Maven peuvent ajouter la dépendance suivante dans le fichier pom.xml.
<dependency>
   <groupId>org.springframework.boot</groupId>
   <artifactId>spring-boot-starter-security</artifactId>
</dependency>
Les utilisateurs Gradle peuvent ajouter la dépendance suivante dans le fichier build.gradle.
compile("org.springframework.boot:spring-boot-starter-security")Sécuriser une application Web
Tout d'abord, créez une application Web non sécurisée à l'aide de modèles Thymeleaf.
Ensuite, créez un fichier home.html sous src/main/resources/templates annuaire.
<!DOCTYPE html>
<html xmlns = "http://www.w3.org/1999/xhtml"
   xmlns:th = "http://www.thymeleaf.org"
   xmlns:sec = "http://www.thymeleaf.org/thymeleaf-extras-springsecurity3">

   <head>
      <title>Spring Security Example</title>
   </head>
   <body>
      <h1>Welcome!</h1>
      <p>Click <a th:href = "@{/hello}">here</a> to see a greeting.</p>
   </body>

</html>
La vue simple /hello défini dans le fichier HTML à l'aide de modèles Thymeleaf.
Maintenant, créez un hello.html sous src/main/resources/templates annuaire.
<!DOCTYPE html>
<html xmlns = "http://www.w3.org/1999/xhtml"
   xmlns:th = "http://www.thymeleaf.org"
   xmlns:sec = "http://www.thymeleaf.org/thymeleaf-extras-springsecurity3">

   <head>
      <title>Hello World!</title>
   </head>
   <body>
      <h1>Hello world!</h1>
   </body>

</html>
Maintenant, nous devons configurer le contrôleur Spring MVC - View pour les vues home et Hello.
Pour cela, créez un fichier de configuration MVC qui étend WebMvcConfigurerAdapter.
package com.tutorialspoint.websecuritydemo;

import org.springframework.context.annotation.Configuration;
import org.springframework.web.servlet.config.annotation.ViewControllerRegistry;
import org.springframework.web.servlet.config.annotation.WebMvcConfigurerAdapter;

@Configuration
public class MvcConfig extends WebMvcConfigurerAdapter {
   @Override
   public void addViewControllers(ViewControllerRegistry registry) {
      registry.addViewController("/home").setViewName("home");
      registry.addViewController("/").setViewName("home");
      registry.addViewController("/hello").setViewName("hello");
      registry.addViewController("/login").setViewName("login");
   }
}
Maintenant, ajoutez la dépendance de sécurité Spring Boot Starter à votre fichier de configuration de construction.
Les utilisateurs Maven peuvent ajouter la dépendance suivante dans votre fichier pom.xml.
<dependency>
   <groupId>org.springframework.boot</groupId>
   <artifactId>spring-boot-starter-security</artifactId>
</dependency>
Les utilisateurs Gradle peuvent ajouter la dépendance suivante dans le fichier build.gradle.
compile("org.springframework.boot:spring-boot-starter-security")Maintenant, créez un fichier de configuration de sécurité Web, qui est utilisé pour sécuriser votre application pour accéder aux points de terminaison HTTP à l'aide de l'authentification de base.
package com.tutorialspoint.websecuritydemo;

import org.springframework.beans.factory.annotation.Autowired;
import org.springframework.context.annotation.Configuration;
import org.springframework.security.config.annotation.authentication.builders.AuthenticationManagerBuilder;
import org.springframework.security.config.annotation.web.builders.HttpSecurity;
import org.springframework.security.config.annotation.web.configuration.WebSecurityConfigurerAdapter;
import org.springframework.security.config.annotation.web.configuration.EnableWebSecurity;

@Configuration
@EnableWebSecurity
public class WebSecurityConfig extends WebSecurityConfigurerAdapter {
   @Override
   protected void configure(HttpSecurity http) throws Exception {
      http
         .authorizeRequests()
            .antMatchers("/", "/home").permitAll()
            .anyRequest().authenticated()
            .and()
         .formLogin()
            .loginPage("/login")
            .permitAll()
            .and()
            .logout()
            .permitAll();
   }
   @Autowired
   public void configureGlobal(AuthenticationManagerBuilder auth) throws Exception {
      auth
         .inMemoryAuthentication()
         .withUser("user").password("password").roles("USER");
   }
}
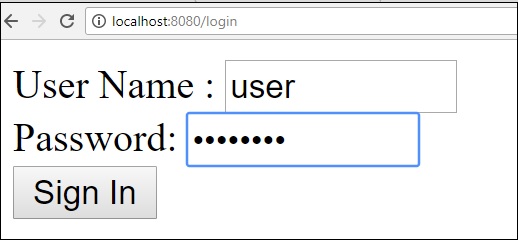
Maintenant, créez un fichier login.html sous le src/main/resources répertoire pour permettre à l'utilisateur d'accéder à HTTP Endpoint via l'écran de connexion.
<!DOCTYPE html>
<html xmlns = "http://www.w3.org/1999/xhtml" xmlns:th = "http://www.thymeleaf.org"
   xmlns:sec = "http://www.thymeleaf.org/thymeleaf-extras-springsecurity3">

   <head>
      <title>Spring Security Example </title>
   </head>
   <body>
      <div th:if = "${param.error}">
         Invalid username and password.
      </div>
      <div th:if = "${param.logout}">
         You have been logged out.
      </div>

      <form th:action = "@{/login}" method = "post">
         <div>
            <label> User Name : <input type = "text" name = "username"/> </label>
         </div>
         <div>
            <label> Password: <input type = "password" name = "password"/> </label>
         </div>
         <div>
            <input type = "submit" value = "Sign In"/>
         </div>
      </form>

   </body>
</html>
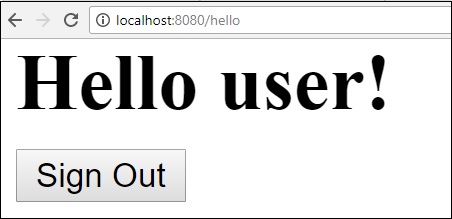
Enfin, mettez à jour le fichier hello.html - pour permettre à l'utilisateur de se déconnecter de l'application et d'afficher le nom d'utilisateur actuel comme indiqué ci-dessous -
<!DOCTYPE html>
<html xmlns = "http://www.w3.org/1999/xhtml" xmlns:th = "http://www.thymeleaf.org"
   xmlns:sec = "http://www.thymeleaf.org/thymeleaf-extras-springsecurity3">

   <head>
      <title>Hello World!</title>
   </head>
   <body>
      <h1 th:inline = "text">Hello [[${#httpServletRequest.remoteUser}]]!</h1>
      <form th:action = "@{/logout}" method = "post">
         <input type = "submit" value = "Sign Out"/>
      </form>
   </body>

</html>
Le code de l'application principale Spring Boot est donné ci-dessous -
package com.tutorialspoint.websecuritydemo;

import org.springframework.boot.SpringApplication;
import org.springframework.boot.autoconfigure.SpringBootApplication;

@SpringBootApplication
public class WebsecurityDemoApplication {
   public static void main(String[] args) {
      SpringApplication.run(WebsecurityDemoApplication.class, args);
   }
}
Le code complet du fichier de configuration de construction est donné ci-dessous.
Maven – pom.xml
<?xml version  =  "1.0" encoding  =  "UTF-8"?>
<project xmlns = "http://maven.apache.org/POM/4.0.0"
   xmlns:xsi = "http://www.w3.org/2001/XMLSchema-instance"
   xsi:schemaLocation = "http://maven.apache.org/POM/4.0.0
   http://maven.apache.org/xsd/maven-4.0.0.xsd">

   <modelVersion>4.0.0</modelVersion>
   <groupId>com.tutorialspoint</groupId>
   <artifactId>websecurity-demo</artifactId>
   <version>0.0.1-SNAPSHOT</version>
   <packaging>jar</packaging>
   <name>websecurity-demo</name>
   <description>Demo project for Spring Boot</description>

   <parent>
      <groupId>org.springframework.boot</groupId>
      <artifactId>spring-boot-starter-parent</artifactId>
      <version>1.5.9.RELEASE</version>
      <relativePath/> <!-- lookup parent from repository -->
   </parent>

   <properties>
      <project.build.sourceEncoding>UTF-8</project.build.sourceEncoding>
      <project.reporting.outputEncoding>UTF-8</project.reporting.outputEncoding>
      <java.version>1.8</java.version>
   </properties>

   <dependencies>
      <dependency>
         <groupId>org.springframework.boot</groupId>
         <artifactId>spring-boot-starter-security</artifactId>
      </dependency>

      <dependency>
         <groupId>org.springframework.boot</groupId>
         <artifactId>spring-boot-starter-thymeleaf</artifactId>
      </dependency>

      <dependency>
         <groupId>org.springframework.boot</groupId>
         <artifactId>spring-boot-starter-web</artifactId>
      </dependency>

      <dependency>
         <groupId>org.springframework.boot</groupId>
         <artifactId>spring-boot-starter-test</artifactId>
         <scope>test</scope>
      </dependency>

      <dependency>
         <groupId>org.springframework.security</groupId>
         <artifactId>spring-security-test</artifactId>
         <scope>test</scope>
      </dependency>
   </dependencies>

   <build>
      <plugins>
         <plugin>
            <groupId>org.springframework.boot</groupId>
            <artifactId>spring-boot-maven-plugin</artifactId>
         </plugin>
      </plugins>
   </build>

</project>
Gradle – build.gradle
buildscript {
   ext {
      springBootVersion = '1.5.9.RELEASE'
   }
   repositories {
      mavenCentral()
   }
   dependencies {
      classpath("org.springframework.boot:spring-boot-gradle-plugin:${springBootVersion}")
   }
}

apply plugin: 'java'
apply plugin: 'eclipse'
apply plugin: 'org.springframework.boot'

group = 'com.tutorialspoint'
version = '0.0.1-SNAPSHOT'
sourceCompatibility = 1.8

repositories {
   mavenCentral()
}
dependencies {
   compile('org.springframework.boot:spring-boot-starter-security')
   compile('org.springframework.boot:spring-boot-starter-thymeleaf')
   compile('org.springframework.boot:spring-boot-starter-web')

   testCompile('org.springframework.boot:spring-boot-starter-test')
   testCompile('org.springframework.security:spring-security-test')
}
Maintenant, créez un fichier JAR exécutable et exécutez l'application Spring Boot à l'aide des commandes Maven ou Gradle suivantes.
Les utilisateurs de Maven peuvent utiliser la commande comme indiqué ci-dessous -
mvn clean installAprès «BUILD SUCCESS», vous pouvez trouver le fichier JAR dans le répertoire cible.
Les utilisateurs de Gradle peuvent utiliser la commande comme indiqué -
gradle clean buildAprès «BUILD SUCCESSFUL», vous pouvez trouver le fichier JAR dans le répertoire build / libs.
Maintenant, exécutez le fichier JAR en utilisant la commande ci-dessous -
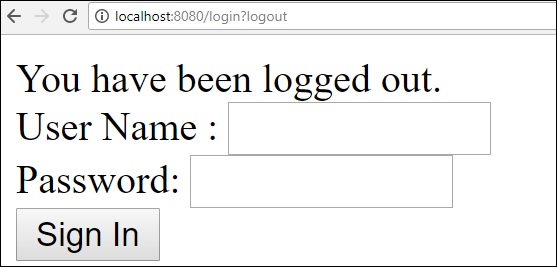
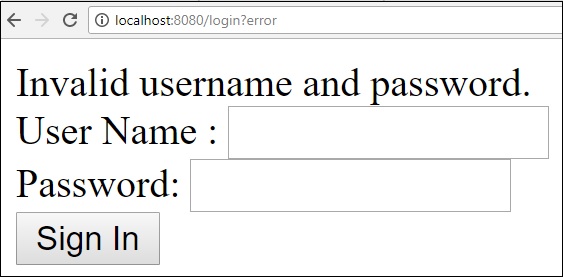
java –jar <JARFILE>Frapper l'URL http://localhost:8080/dans votre navigateur Web. Vous pouvez voir la sortie comme indiqué.


