परीक्षण और बिल्डिंग एंगुलर 7 प्रोजेक्ट्स
इस अध्याय में निम्नलिखित विषयों पर चर्चा करेंगे -
- कोणीय 7 परियोजना का परीक्षण करने के लिए
- कोणीय 7 परियोजना का निर्माण करना
परीक्षण कोणीय 7 परियोजना
प्रोजेक्ट सेटअप के दौरान, परीक्षण के लिए आवश्यक पैकेज पहले से ही स्थापित हैं। वहां एक है.spec.ts हर नए घटक, सेवा, निर्देश, आदि के लिए बनाई गई फ़ाइल हम अपने परीक्षण मामलों को लिखने के लिए चमेली का उपयोग करने जा रहे हैं।
आपके घटक, सेवाओं, निर्देशों या बनाई गई किसी भी अन्य फ़ाइलों में जोड़े गए परिवर्तनों के लिए, आप संबंधित .spec .ts फ़ाइलों में अपने परीक्षण मामलों को शामिल कर सकते हैं। इसलिए अधिकांश यूनिट परीक्षण को शुरुआत में ही कवर किया जा सकता है।
परीक्षण मामलों को चलाने के लिए, कमांड का उपयोग निम्नानुसार है
ng testनीचे app.component.spec.ts फ़ाइल है app.component.ts -
import { TestBed, async } from '@angular/core/testing';
import { RouterTestingModule } from '@angular/router/testing';
import { AppComponent } from './app.component';

describe('AppComponent', () => {
   beforeEach(async(() => {
      TestBed.configureTestingModule({
         imports: [
            RouterTestingModule
         ],
         declarations: [
            AppComponent
         ],
      }).compileComponents();
   }));
   it('should create the app', () => {
      const fixture = TestBed.createComponent(AppComponent);
      const app = fixture.debugElement.componentInstance;
      expect(app).toBeTruthy();
   });
   it(`should have as title 'angular7-app'`, () => {
      const fixture = TestBed.createComponent(AppComponent);
      const app = fixture.debugElement.componentInstance;
      expect(app.title).toEqual('angular7-app');
   });
   it('should render title in a h1 tag', () => {
      const fixture = TestBed.createComponent(AppComponent);
      fixture.detectChanges();
      const compiled = fixture.debugElement.nativeElement;
      expect(compiled.querySelector('h1').textContent).toContain(
         'Welcome to angular7-app!');
   })
});
app.component.ts
import { Component } from '@angular/core';
@Component({
   selector: 'app-root',
   templateUrl: './app.component.html',
   styleUrls: ['./app.component.css']
})
export class AppComponent {
   title = 'angular7-app';
}
अब हम परीक्षण मामलों को देखने के लिए कमांड चलाते हैं।
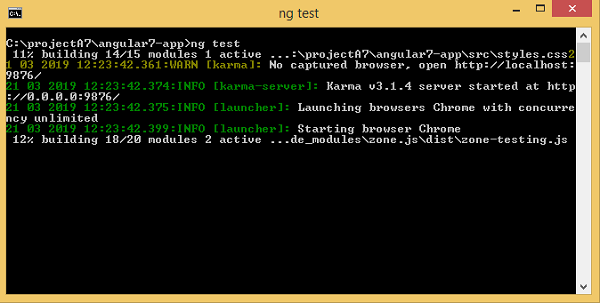
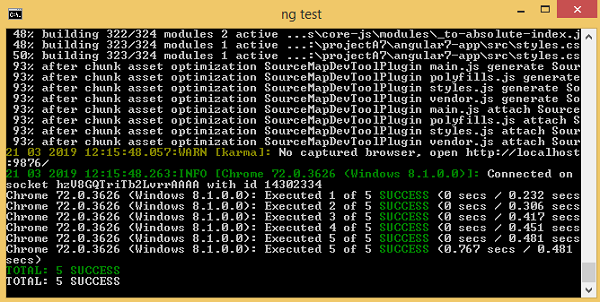
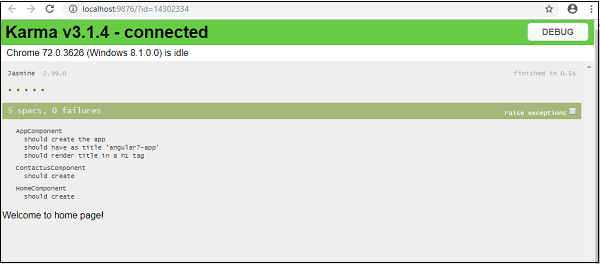
परीक्षण मामलों की स्थिति कमांड लाइन में दिखाई गई है जैसा कि ऊपर दिखाया गया है और नीचे दिखाए गए अनुसार ब्राउज़र में भी खुलेगा -
किसी भी विफलता के कारण, यह विवरण निम्नानुसार दिखाएगा -
ऐसा करने के लिए, हम app.component.spec.ts को निम्नानुसार बदलते हैं -
import { TestBed, async } from '@angular/core/testing';
import { RouterTestingModule } from '@angular/router/testing';
import { AppComponent } from './app.component';

describe('AppComponent', () => {
   beforeEach(async(() => {
      TestBed.configureTestingModule({
         imports: [
            RouterTestingModule
         ],
         declarations: [
            AppComponent
         ],
      }).compileComponents();
   }));
   it('should create the app', () => {
      const fixture = TestBed.createComponent(AppComponent);
      const app = fixture.debugElement.componentInstance;
      expect(app).toBeTruthy();
   });
   it(`should have as title 'angular7-app'`, () => {
      const fixture = TestBed.createComponent(AppComponent);
      const app = fixture.debugElement.componentInstance;
      expect(app.title).toEqual('Angular 7'); // change the
      title from angular7-app to Angular 7
   });
   it('should render title in a h1 tag', () => {
      const fixture = TestBed.createComponent(AppComponent);
      fixture.detectChanges();
      const compiled = fixture.debugElement.nativeElement;
      expect(compiled.querySelector('h1').textContent).toContain(
         'Welcome to angular7-app!');
   });
});
उपरोक्त फ़ाइल में, परीक्षण के मामले शीर्षक के लिए जाँच करते हैं, Angular 7। लेकिन app.component.ts में, हमारे पास शीर्षक है,angular7-app जैसा कि नीचे दिखाया गया है -
import { Component } from '@angular/core';
@Component({
   selector: 'app-root',
   templateUrl: './app.component.html',
   styleUrls: ['./app.component.css']
})
export class AppComponent {
   title = 'angular7-app';
}
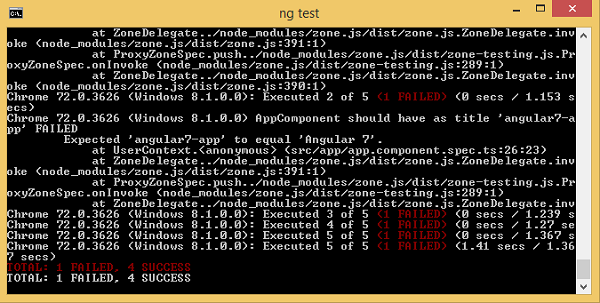
यहां परीक्षण का मामला विफल हो जाएगा और नीचे कमांड लाइन और ब्राउज़र में दिखाए गए विवरण हैं।
कमांड लाइन में
निम्न स्क्रीन कमांड लाइन में प्रदर्शित होती है -
ब्राउजर में
निम्न स्क्रीन ब्राउज़र में प्रदर्शित होती है -
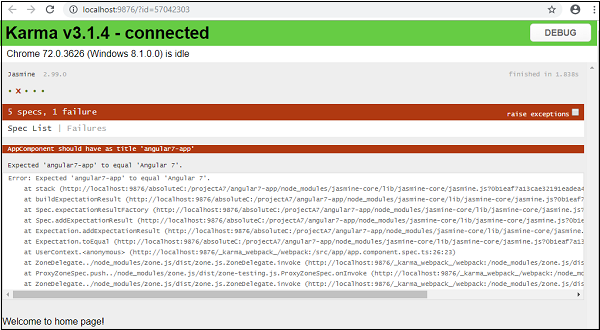
आपके प्रोजेक्ट के सभी विफल परीक्षण-मामलों को कमांड लाइन और ब्राउज़र में ऊपर दिखाया गया है।
इसी तरह, आप अपनी सेवाओं, निर्देशों और नए घटकों के लिए परीक्षण मामलों को लिख सकते हैं जिन्हें आपकी परियोजना में जोड़ा जाएगा।
बिल्डिंग एंगुलर 7 प्रोजेक्ट
एक बार जब आप कोणीय में परियोजना के साथ कर रहे हैं, तो हमें इसे बनाने की आवश्यकता है ताकि इसका उपयोग उत्पादन या मंचन में किया जा सके।
निर्माण, अर्थात्, उत्पादन, मंचन, विकास, परीक्षण के लिए कॉन्फ़िगरेशन को आपके में परिभाषित करने की आवश्यकता है src/environments।
वर्तमान में, हमारे पास src / पर्यावरण में परिभाषित निम्नलिखित वातावरण हैं -
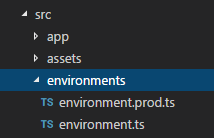
आप अपनी बिल्ड के आधार पर src / पर्यावरण, यानी, environment.staging.ts, enviornment.testing .ts, आदि पर फ़ाइलों को जोड़ सकते हैं।
वर्तमान में, हम उत्पादन पर्यावरण के लिए निर्माण करने का प्रयास करेंगे। फ़ाइलenvironment.ts डिफ़ॉल्ट पर्यावरण सेटिंग्स और फ़ाइल का विवरण निम्नानुसार है -
export const environment = {
   production: false
};
उत्पादन के लिए फ़ाइल बनाने के लिए, हमें बनाने की आवश्यकता है production: true पर्यावरण में इस प्रकार है -
export const environment = {
   production: true
};
डिफ़ॉल्ट पर्यावरण फ़ाइल को निम्नानुसार घटकों के अंदर आयात किया जाना है -
app.component.ts
import { Component } from '@angular/core';
import { environment } from './../environments/environment';

@Component({
   selector: 'app-root',
   templateUrl: './app.component.html',
   styleUrls: ['./app.component.css']
})
export class AppComponent {
   title = 'angular7-app';
}
डिफ़ॉल्ट रूप से उत्पादन से पर्यावरण प्रतिस्थापन जो हम करने की कोशिश कर रहे हैं, कोणीय.जसन के अंदर परिभाषित किया गया है fileReplacements अनुभाग इस प्रकार है -
"production": {
   "fileReplacements": [
      {
         "replace": "src/environments/environment.ts",
         "with": "src/environments/environment.prod.ts"
      }
   ],
}
जब निर्माण के लिए कमांड चलता है, तो फ़ाइल को बदल दिया जाता है src/environments/environment.prod.ts। मंचन या परीक्षण जैसे अतिरिक्त विन्यास को यहाँ जोड़ा जा सकता है जैसा कि नीचे दिए गए उदाहरण में दिखाया गया है -
"configurations": {
   "production": { ... },
   "staging": {
      "fileReplacements": [
         {
            "replace": "src/environments/environment.ts",
            "with": "src/environments/environment.staging.ts"
         }
      ]
   }
}
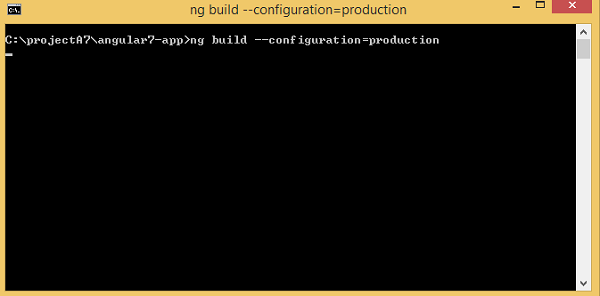
तो निर्माण चलाने के लिए आदेश निम्नानुसार है -
ng build --configuration = production // for production environmnet
ng build --configuration = staging // for stating enviroment
अब हम निर्माण के लिए निर्माण कमांड चलाते हैं, कमांड हमारे प्रोजेक्ट के अंदर एक डिस्टर्ब फोल्डर बनाएगी जिसमें बिल्ड के बाद अंतिम फाइलें होंगी।
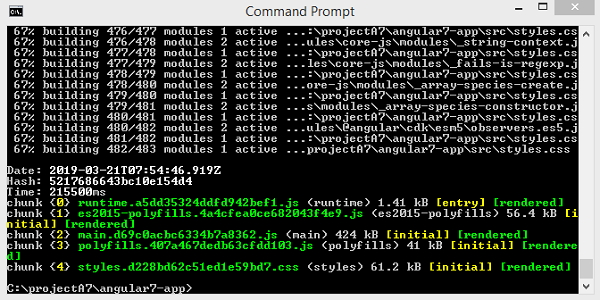
अंतिम फाइलें डिस्ट / फोल्डर के अंदर निर्मित होती हैं जिन्हें आपके अंत में उत्पादन सर्वर पर होस्ट किया जा सकता है।
