स्प्रिंग एमवीसी - मल्टी एक्शन कंट्रोलर उदाहरण
निम्न उदाहरण दिखाता है कि स्प्रिंग वेब एमवीसी ढांचे का उपयोग करके मल्टी एक्शन कंट्रोलर का उपयोग कैसे किया जाए। MultiActionController क्लास एक ही कंट्रोलर में उनके तरीकों के साथ कई यूआरएल को मैप करने में मदद करता है।
package com.tutorialspoint;

import javax.servlet.http.HttpServletRequest;
import javax.servlet.http.HttpServletResponse;

import org.springframework.web.servlet.ModelAndView;
import org.springframework.web.servlet.mvc.multiaction.MultiActionController;

public class UserController extends MultiActionController{

   public ModelAndView home(HttpServletRequest request,
      HttpServletResponse response) throws Exception {
      ModelAndView model = new ModelAndView("home");
      model.addObject("message", "Home");
      return model;
   }

   public ModelAndView add(HttpServletRequest request,
      HttpServletResponse response) throws Exception {
      ModelAndView model = new ModelAndView("user");
      model.addObject("message", "Add");
      return model;
   }

   public ModelAndView remove(HttpServletRequest request,
      HttpServletResponse response) throws Exception {
      ModelAndView model = new ModelAndView("user");
      model.addObject("message", "Remove");
      return model;
   }
}
<bean class = "org.springframework.web.servlet.handler.BeanNameUrlHandlerMapping"/>
<bean name = "/home.htm" class = "com.tutorialspoint.UserController" />
<bean name = "/user/*.htm" class = "com.tutorialspoint.UserController" />उदाहरण के लिए, उपरोक्त कॉन्फ़िगरेशन का उपयोग करते हुए, यदि यूआरआई -
/home.htm का अनुरोध किया गया है, डिस्पैचर सेलेट उपयोगकर्ताकंट्रोलर के अनुरोध को अग्रेषित करेगा home() तरीका।
उपयोगकर्ता / add.htm अनुरोध किया गया है, DispatcherServlet UserController के अनुरोध को अग्रेषित करेगा add() तरीका।
उपयोगकर्ता / remove.htm अनुरोध किया गया है, DispatcherServlet UserController के अनुरोध को अग्रेषित करेगा remove() तरीका।
आरंभ करने के लिए, हमारे पास एक काम करने वाली ग्रहण आईडीई है और स्प्रिंग वेब फ्रेमवर्क का उपयोग करके डायनामिक फॉर्म आधारित वेब एप्लिकेशन को विकसित करने के लिए निम्न चरणों से चिपके रहें।
| कदम | विवरण |
|---|---|
| 1 | एक नाम के साथ एक परियोजना बनाएँ TestWeb स्प्रिंग एमवीसी - हैलो वर्ल्ड चैप्टर में बताए अनुसार एक पैकेज com.tutorialspoint के तहत। |
| 2 | Com.tutorialspoint पैकेज के तहत एक जावा क्लास यूजर कंट्रोलर बनाएं। |
| 3 | Jsp सब-फोल्डर के तहत व्यू फाइल्स home.jsp और user.jsp बनाएं। |
| 4 | अंतिम चरण स्रोत और कॉन्फ़िगरेशन फ़ाइलों की सामग्री बनाना और नीचे बताए अनुसार एप्लिकेशन को निर्यात करना है। |
UserController.java
package com.tutorialspoint;
import javax.servlet.http.HttpServletRequest;
import javax.servlet.http.HttpServletResponse;
import org.springframework.web.servlet.ModelAndView;
import org.springframework.web.servlet.mvc.multiaction.MultiActionController;
public class UserController extends MultiActionController{
public ModelAndView home(HttpServletRequest request,
HttpServletResponse response) throws Exception {
ModelAndView model = new ModelAndView("home");
model.addObject("message", "Home");
return model;
}
public ModelAndView add(HttpServletRequest request,
HttpServletResponse response) throws Exception {
ModelAndView model = new ModelAndView("user");
model.addObject("message", "Add");
return model;
}
public ModelAndView remove(HttpServletRequest request,
HttpServletResponse response) throws Exception {
ModelAndView model = new ModelAndView("user");
model.addObject("message", "Remove");
return model;
}
}TestWeb-servlet.xml
<beans xmlns = "http://www.springframework.org/schema/beans"
xmlns:context = "http://www.springframework.org/schema/context"
xmlns:xsi = "http://www.w3.org/2001/XMLSchema-instance"
xsi:schemaLocation = "
http://www.springframework.org/schema/beans
http://www.springframework.org/schema/beans/spring-beans-3.0.xsd
http://www.springframework.org/schema/context
http://www.springframework.org/schema/context/spring-context-3.0.xsd">
<bean class = "org.springframework.web.servlet.view.InternalResourceViewResolver">
<property name = "prefix" value = "/WEB-INF/jsp/"/>
<property name = "suffix" value = ".jsp"/>
</bean>
<bean class = "org.springframework.web.servlet.handler.BeanNameUrlHandlerMapping"/>
<bean name = "/home.htm" class = "com.tutorialspoint.UserController" />
<bean name = "/user/*.htm" class = "com.tutorialspoint.UserController" />
</beans>home.jsp
<%@ page contentType = "text/html; charset = UTF-8" %>
<html>
   <head>
      <meta http-equiv = "Content-Type" content = "text/html; charset = ISO-8859-1">
      <title>Home</title>
   </head>

   <body>
      <a href = "user/add.htm" >Add</a> <br>
      <a href = "user/remove.htm" >Remove</a>
   </body>
</html>
user.jsp
<%@ page contentType = "text/html; charset = UTF-8" %>
<html>
   <head>
      <title>Hello World</title>
   </head>
   <body>
      <h2>${message}</h2>
   </body>
</html>
एक बार जब आप स्रोत और कॉन्फ़िगरेशन फ़ाइल बनाने के साथ हो जाते हैं, तो अपने एप्लिकेशन को निर्यात करें। अपने आवेदन पर राइट क्लिक करें, उपयोग करेंExport → WAR File विकल्प और सहेजें TestWeb.war टॉमकैट के वेबैप फ़ोल्डर में फ़ाइल।
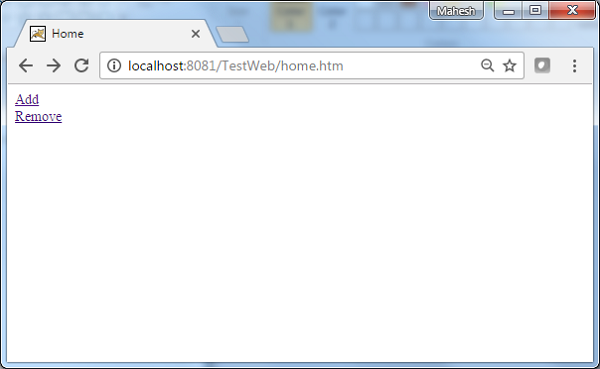
अब, अपना टॉमकैट सर्वर शुरू करें और सुनिश्चित करें कि आप मानक ब्राउज़र का उपयोग करके वेबैप्स फ़ोल्डर से अन्य वेबपेजों तक पहुँचने में सक्षम हैं। अब, एक URL आज़माएँ -http://localhost:8080/TestWeb/home.htm और हम निम्न स्क्रीन देखेंगे, यदि स्प्रिंग वेब एप्लिकेशन के साथ सब कुछ ठीक है।

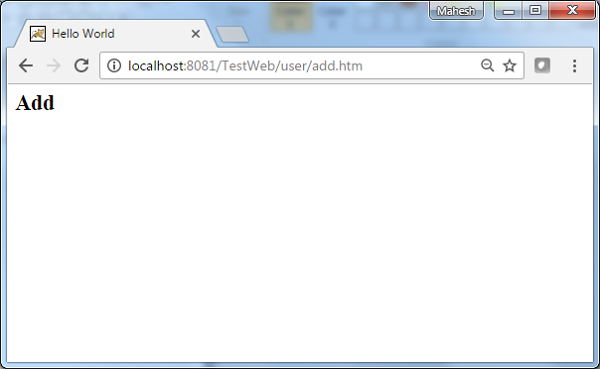
एक URL आज़माएं http://localhost:8080/TestWeb/user/add.htm और हम निम्न स्क्रीन देखेंगे, यदि स्प्रिंग वेब एप्लिकेशन के साथ सब कुछ ठीक है।
