フラスコ– WTF
Webアプリケーションの重要な側面の1つは、ユーザーにユーザーインターフェイスを提示することです。HTMLは<form>タグ。インターフェイスの設計に使用されます。AForm’s テキスト入力、ラジオ、選択などの要素を適切に使用できます。
ユーザーが入力したデータは、GETまたはPOSTメソッドのいずれかによってサーバーサイドスクリプトにHttpリクエストメッセージの形式で送信されます。
サーバーサイドスクリプトは、httpリクエストデータからフォーム要素を再作成する必要があります。したがって、実際には、フォーム要素を2回定義する必要があります。1回はHTMLで、もう1回はサーバーサイドスクリプトで定義します。
HTMLフォームを使用するもう1つの欠点は、フォーム要素を動的にレンダリングすることが(不可能ではないにしても)難しいことです。HTML自体は、ユーザーの入力を検証する方法を提供しません。
ここが WTForms、柔軟なフォーム、レンダリングおよび検証ライブラリが便利です。Flask-WTF拡張機能は、これとのシンプルなインターフェイスを提供しますWTForms 図書館。
使用する Flask-WTF、Pythonスクリプトでフォームフィールドを定義し、HTMLテンプレートを使用してレンダリングできます。検証をに適用することも可能ですWTF フィールド。
この動的なHTMLの生成がどのように機能するかを見てみましょう。
まず、Flask-WTF拡張機能をインストールする必要があります。
pip install flask-WTFインストールされたパッケージには、 Form クラス。ユーザー定義フォームの親として使用する必要があります。
WTformsパッケージには、さまざまなフォームフィールドの定義が含まれています。いくつかStandard form fields 以下にリストされています。
| シニア番号 | 標準フォームのフィールドと説明 |
|---|---|
| 1 | TextField <input type = 'text'> HTMLフォーム要素を表します |
| 2 | BooleanField <input type = 'チェックボックス'> HTMLフォーム要素を表します |
| 3 | DecimalField 数値を小数で表示するためのテキストフィールド |
| 4 | IntegerField 整数を表示するためのTextField |
| 5 | RadioField <input type = 'radio'> HTMLフォーム要素を表します |
| 6 | SelectField 選択したフォーム要素を表します |
| 7 | TextAreaField <testarea> htmlフォーム要素を表します |
| 8 | PasswordField <input type = 'password'> HTMLフォーム要素を表します |
| 9 | SubmitField <input type = 'submit'>フォーム要素を表します |
たとえば、テキストフィールドを含むフォームは次のように設計できます-
from flask_wtf import Form
from wtforms import TextField

class ContactForm(Form):
   name = TextField("Name Of Student")
に加えて ‘name’フィールド、CSRFトークンの非表示フィールドが自動的に作成されます。これは防ぐためですCross Site Request Forgery 攻撃。
レンダリングすると、次のような同等のHTMLスクリプトになります。
<input id = "csrf_token" name = "csrf_token" type = "hidden" />
<label for = "name">Name Of Student</label><br>
<input id = "name" name = "name" type = "text" value = "" />
ユーザー定義のフォームクラスはFlaskアプリケーションで使用され、フォームはテンプレートを使用してレンダリングされます。
from flask import Flask, render_template
from forms import ContactForm
app = Flask(__name__)
app.secret_key = 'development key'

@app.route('/contact')
def contact():
   form = ContactForm()
   return render_template('contact.html', form = form)

if __name__ == '__main__':
   app.run(debug = True)
WTFormsパッケージには、バリデータークラスも含まれています。フォームフィールドに検証を適用するのに役立ちます。次のリストは、一般的に使用されるバリデーターを示しています。
| シニア番号 | バリデーターのクラスと説明 |
|---|---|
| 1 | DataRequired 入力フィールドが空かどうかを確認します |
| 2 | フィールドのテキストが電子メールIDの規則に従っているかどうかを確認します |
| 3 | IPAddress 入力フィールドのIPアドレスを検証します |
| 4 | Length 入力フィールドの文字列の長さが指定された範囲内にあるかどうかを確認します |
| 5 | NumberRange 指定された範囲内の入力フィールドの数値を検証します |
| 6 | URL 入力フィールドに入力されたURLを検証します |
今から応募します ‘DataRequired’ の検証ルール name お問い合わせフォームのフィールド。
name = TextField("Name Of Student",[validators.Required("Please enter your name.")])ザ・ validate()フォームオブジェクトの関数はフォームデータを検証し、検証が失敗した場合は検証エラーをスローします。ザ・Errorメッセージはテンプレートに送信されます。HTMLテンプレートでは、エラーメッセージが動的にレンダリングされます。
{% for message in form.name.errors %}
   {{ message }}
{% endfor %}次の例は、上記の概念を示しています。のデザインContact form 以下に示します (forms.py)。
from flask_wtf import Form
from wtforms import TextField, IntegerField, TextAreaField, SubmitField, RadioField,
   SelectField

from wtforms import validators, ValidationError

class ContactForm(Form):
   name = TextField("Name Of Student",[validators.Required("Please enter
      your name.")])
   Gender = RadioField('Gender', choices = [('M','Male'),('F','Female')])
   Address = TextAreaField("Address")

   email = TextField("Email",[validators.Required("Please enter your email address."),
      validators.Email("Please enter your email address.")])

   Age = IntegerField("age")
   language = SelectField('Languages', choices = [('cpp', 'C++'),
      ('py', 'Python')])
   submit = SubmitField("Send")
バリデーターはに適用されます Name そして Email 田畑。
以下にFlaskアプリケーションスクリプトを示します。 (formexample.py)。
from flask import Flask, render_template, request, flash
from forms import ContactForm
app = Flask(__name__)
app.secret_key = 'development key'

@app.route('/contact', methods = ['GET', 'POST'])
def contact():
   form = ContactForm()

   if request.method == 'POST':
      if form.validate() == False:
         flash('All fields are required.')
         return render_template('contact.html', form = form)
      else:
         return render_template('success.html')
      elif request.method == 'GET':
         return render_template('contact.html', form = form)

if __name__ == '__main__':
   app.run(debug = True)
テンプレートのスクリプト (contact.html) 次のとおりです-
<!doctype html>
<html>
   <body>
      <h2 style = "text-align: center;">Contact Form</h2>

      {% for message in form.name.errors %}
         <div>{{ message }}</div>
      {% endfor %}

      {% for message in form.email.errors %}
         <div>{{ message }}</div>
      {% endfor %}

      <form action = "http://localhost:5000/contact" method = post>
         <fieldset>
            <legend>Contact Form</legend>
            {{ form.hidden_tag() }}

            <div style = font-size:20px; font-weight:bold; margin-left:150px;>
               {{ form.name.label }}<br>
               {{ form.name }}
               <br>

               {{ form.Gender.label }} {{ form.Gender }}
               {{ form.Address.label }}<br>
               {{ form.Address }}
               <br>

               {{ form.email.label }}<br>
               {{ form.email }}
               <br>

               {{ form.Age.label }}<br>
               {{ form.Age }}
               <br>

               {{ form.language.label }}<br>
               {{ form.language }}
               <br>
               {{ form.submit }}
            </div>

         </fieldset>
      </form>
   </body>
</html>
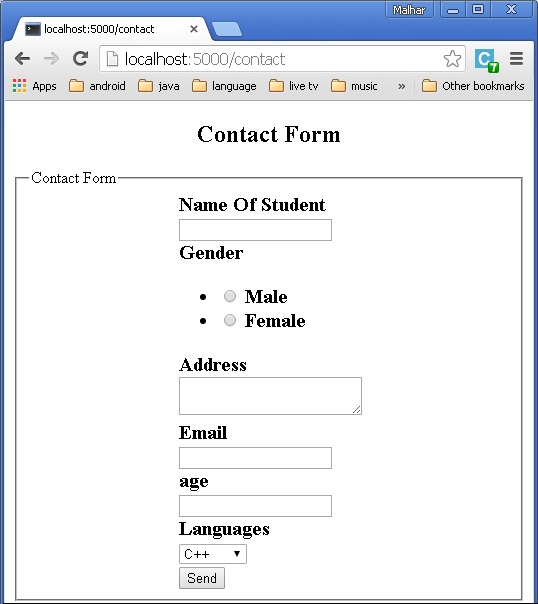
実行 formexample.py PythonシェルでURLにアクセスします http://localhost:5000/contact。ザ・Contact フォームは以下のように表示されます。

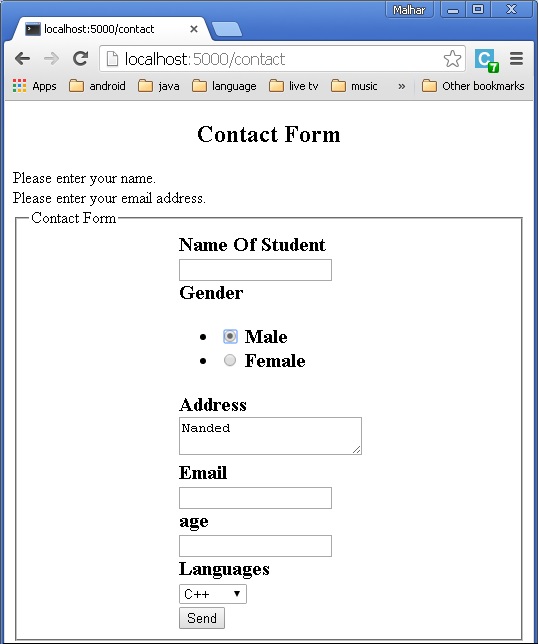
エラーがある場合、ページは次のようになります-

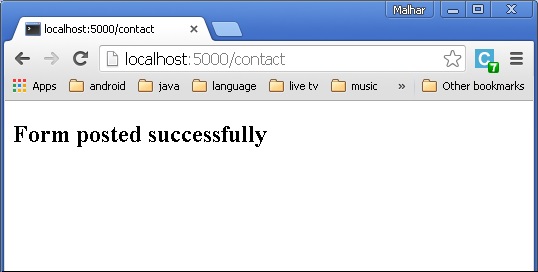
エラーがない場合は、 ‘success.html’ レンダリングされます。
