JasmineJS-テキストの作成と実行
この章では、 hello world app これは私たちをテストします “helloworld.js”ファイル。hello worldアプリを開発する前に、前の章に戻って、Jasmineを使用して環境をテストする準備ができていることを確認してください。
Step 1 − Create a Web application in your IDE
ここでは、NetBeans 8.1を使用して、JasmineでHelloWorldアプリを開発しています。NetBeansで、「ファイル」→「新規プロジェクト」→「Html5 / JSアプリケーション」に移動し、プロジェクトを作成します。プロジェクトを作成すると、プロジェクトディレクトリは次のスクリーンショットのようになります。プロジェクトに名前を付けましたJasmine_Demo。

Step 2 − Include the Jasmine lib file into the application
デモプロジェクトを作成したら、作成したアプリケーションのユニットテストフォルダーにJasmineライブラリのunzipフォルダーを含めるだけです。すべてのライブラリファイルをアプリケーションフォルダーに追加すると、プロジェクトの構造は次のスクリーンショットのようになります。
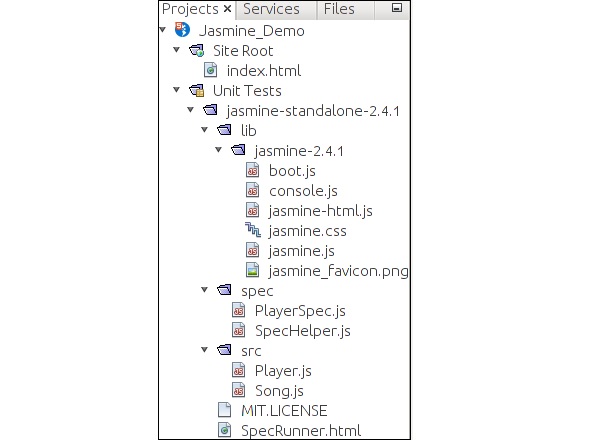
下に与えられたファイル spec そして srcフォルダは、Jasmineチームによって提供されたデモファイルです。独自のテストファイルとテストケースを作成するため、これらのファイルを削除します。これらのJavaScriptファイルを削除する際に、出力htmlファイル内のこれらのファイルの参照を削除する必要があります。SpecRunner.html。
以下は、SpecRunner.htmlファイルのスクリーンショットです。内部のさまざまなJavaScriptファイルの参照 spec そして src 削除されます。

Step 3 − Create a JavaScript file
このステップでは、という名前のJavaScriptファイルを作成します helloworld.js 下 srcフォルダ。これは、Jasmineを介してテストするファイルです。JavaScriptファイルを作成した後、ファイル内に次のコードセットを追加します。
/*
* This is the JavaScript file that need to be tested through jasmine
* Below is the helloworld function that will return 'Hello World'
*
*/

var helloworld = function() {
   return 'Hello World';
};
Step 4 − Create a test case
このステップでは、上記のJavaScriptファイルのテストケースを含む別のJavaScriptファイルを作成します。先に進み、「Spec」フォルダの下にJavaScriptファイルを作成し、次のように名前を付けます。“HelloWorldsSpec.js”。これに次のコード行を追加しますjs ファイル。
/*
* This is the file which will call our java script file that need to be tested.
* Each describe block is equivalent to one test case
*
*/

describe("Hello World", function() {

   it("should Return Hello world",function() {
      expect(helloworld()).toEqual('Hello World');
   });

});
Step 5 − Add reference to the output file
テストする独自のファイルと対応するテストケースを正常に作成しました。2つの異なるフォルダに保存しました。このステップでは、変更します“SpecRunner.html” これら2つの新しく作成されたファイルの参照を含めます。
<!DOCTYPE html>

<html>
   <head>
      <meta charset = "utf-8">

      <title>Jasmine Spec Runner v2.4.1</title>

      <link rel = "shortcut icon" type = "image/png" href =
      "lib/jasmine2.4.1/jasmine_favicon.png">
      <link rel = "stylesheet" href = "lib/jasmine-2.4.1/jasmine.css">

      <script src = "lib/jasmine-2.4.1/jasmine.js"></script>
      <script src = "lib/jasmine-2.4.1/jasmine-html.js"></script>
      <script src = "lib/jasmine-2.4.1/boot.js"></script>

      <!--Lines to be deleted
      <script src = "src/Player.js"></script>
      <script src = "src/Song.js"></script>
      <script src = "spec/SpecHelper.js"></script>
      <script src = "spec/PlayerSpec.js"></script> -->

      <!--adding the reference of our newly created file --->

      <script src = "src/helloworld.js"></script>
      <script src = "spec/HelloWorldsSpec.js"></script>
   </head>

   <body>
   </body>

</html>
Step 6 − Execute by running SpecRunner.html
これがアプリケーション開発の最終ステップです。お気に入りのブラウザでSpecRunner.htmlを実行します。結果として、次のスクリーンショットが表示されます。緑の画面は成功を示し、赤はテストケースの失敗を示します。

Step 7 − Understand the failure case
今まで私たちは見てきました successhelloworldアプリケーションのテストケース。ここで、問題が発生してテストが失敗した場合はどうなるかを見てみましょう。障害ケースを実装するには、障害テストケースを作成する必要があります。同じことをするために、私たちは修正するつもりですhelloworld.js 次のコードを使用してファイルします。
var helloworld = function () {
   return '';
};

// we are not returning any string whereas in the spec file
//we are expecting a // string as “Hello World”
スペックファイルが期待される文字列を出力として取得していないため、上記のコードは間違いなく失敗します helloworld()。次のスクリーンショットspecRunner.html ファイルは、赤いインジケータにエラーがあることを示しています。
