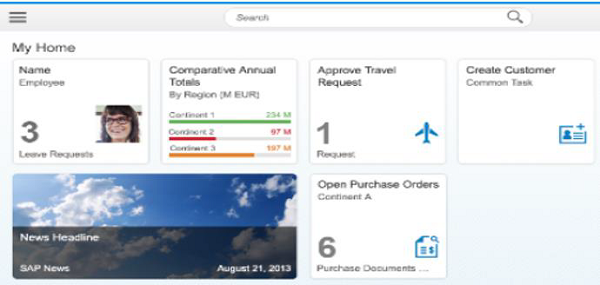
SAPFiori-ランチパッド
SAP Fiori Launchpadは、モバイルおよびデスクトップデバイス上のFioriアプリシステムへのエントリポイントとして知られています。Fioriシステムのさまざまなタイルが含まれています。タイルは、さまざまなFioriアプリにアクセスするために使用される正方形のオブジェクトです。これらのタイルへのアクセスは、ユーザーの役割に基づいています。
SAP Fioriタイルは複数のデバイスタイプで実行され、トランザクション、分析、ファクトシート、スマートビジネスアプリなどのビジネスアプリケーションに単一のアクセスポイントを提供します。
SAP FioriLaunchpad-重要な事実
SAP FioriLaunchpadに関する重要なポイントを以下に示します。
プラットフォームやデバイス間でSAPBusinessアプリケーションを使用するためのWebベースのエントリポイント。
IHTMLクライアントにすぐに使える考え方として提供されます。
テーマ設定、検索統合、カスタマイズなどの機能を使用するエンドユーザーの高い生産性。
複数のデバイスタイプを使用するエンドユーザーに単一のエントリポイントを提供します。
SAP Fiori Launchpadはどのように機能しますか?
Fiori Launchpadを起動すると、表示されるのは fiorilaunchpad.htmlURLの終わりとして。これは、fiorilaunchpad.html ブラウザに読み込まれる唯一のHTMLドキュメントであり、唯一のHTMLドキュメントです。 SAPUI5 ルートアプリケーション。
起動ページを使用している顧客の場合、これは、起動ページにアプリケーションごとにindex.htmlがあるという点で異なります。この変更により、ページのナビゲーションと遷移が可能になり、より包括的なユーザーエクスペリエンスが提供されます。
Fiori Launchpad –主な利点
以下に示すのは、SAP FioriLaunchpadを使用して達成できる主な利点です。
- 特定の役割またはペルソナのアプリケーションの使用法を定義する機能
- 1つのホームページ
- Personalization
- Responsiveness
- シングル・サインオン
- Theming
- Search
- Bookmarks
- ページ/ナビゲーションの遷移
SAP Fiori Launchpad –キーバリュー
Simple −直感的で、簡単で、一貫性のあるユーザーエクスペリエンス。
Role based −簡素化された役割ベースのナビゲーションとビジネス機能へのアクセス。
Contextual −リアルタイム、コンテキスト、およびパーソナライズされたアクセス。
Responsive −単一のユーザーエクスペリエンスで、デバイス、バージョン、チャネルをまたがって消費します。
Multi-platform −複数のプラットフォームで実行する予定– ABAP(本日利用可能)、SAPポータル、SAP HANAクラウドポータル、HANA。
Launchpadの構成
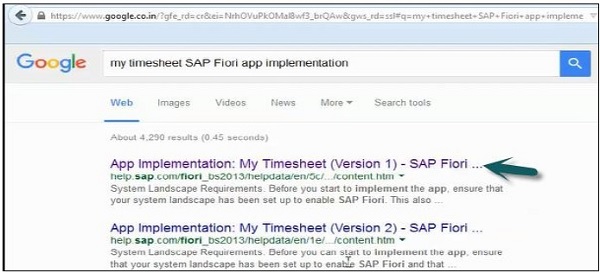
SAP Fiori Appsの実装手順と要件を確認するには、次のURLにアクセスしてください。 help.sap.com/Fiori。
SAPヘルプページのURLを確認するには、Google.comにアクセスしてアプリ名を入力します。
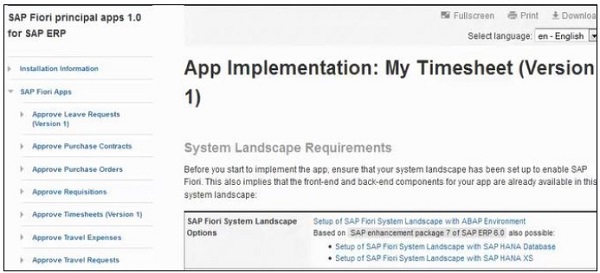
これはのフロントエンドコンポーネントです My Timesheet SAP FioriUI5アプリケーションをアクティブ化するためのLaunchpadのアプリ-

Fiori AppsURLとSAPUI5コンポーネントを確認する方法
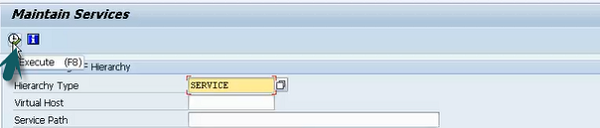
SAPログオンを使用してフロントエンドサーバーにログインし、Tコードを実行します。 SICF

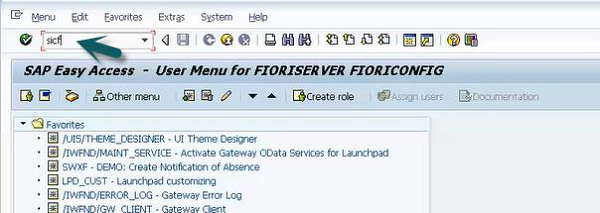
新しいウィンドウが開きます。クリックExecute 下記のパスに移動します-
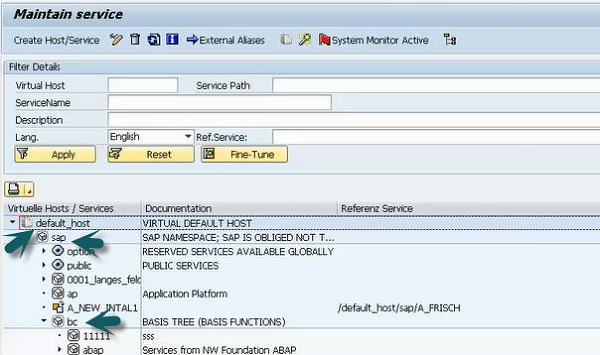
Default_host→SAP→bc→ui5_ui5→sap→検索 hcm_ts_cre とダブルクリックします。

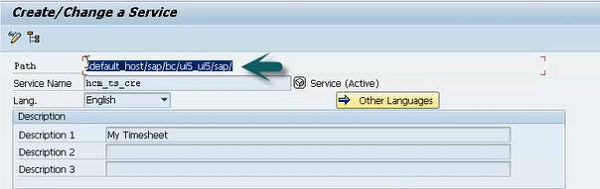
あなたはのURLパスを見ることができます My Time Sheet応用。このパスをメモ帳にコピーし、default-hostを削除して、最後にサービス名を追加します。

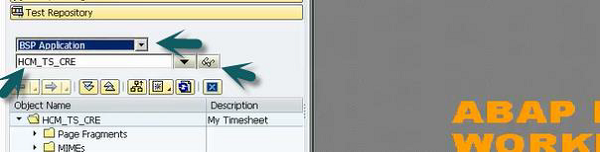
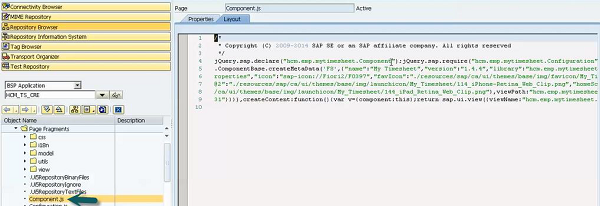
次に、Tコードを実行します。 SE80

新しいウィンドウが開きます。の名前を入力してくださいBSP アプリケーションと UI5 アプリケーション名と以下のように表示ボタンをクリックします-
に移動 componenet.js コンポーネント名をメモします。

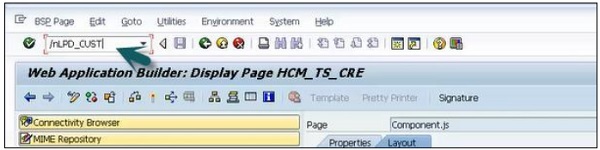
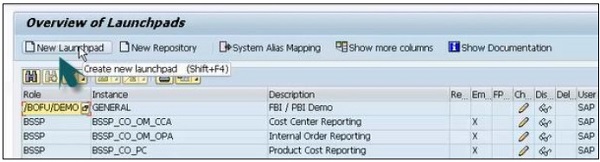
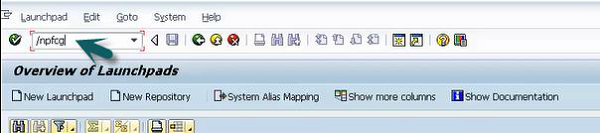
ここで、Launchpadを構成するには、 T-code: LPD_CUST に行きます New Launchpad。
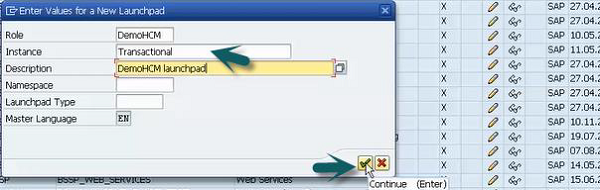
ラベルの詳細を入力します Role, Instance, Description をクリックします Continue and Yes。
新しいウィンドウが開きます。新しいアプリケーションをクリックします。

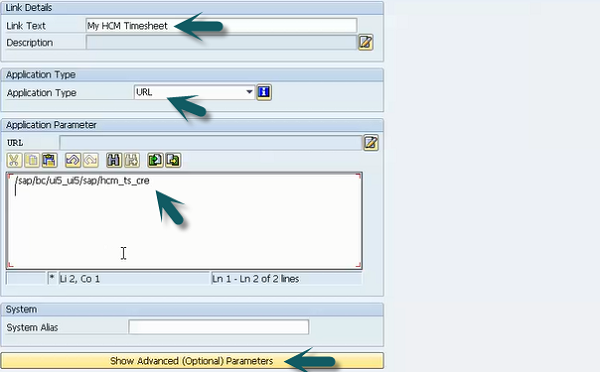
詳細を入力します。リンクテキスト、アプリケーションタイプ、URLをクリックして、Show Advanced Parameters。
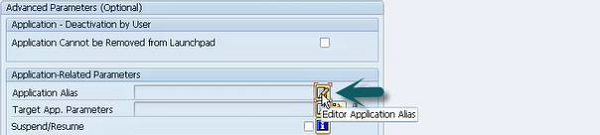
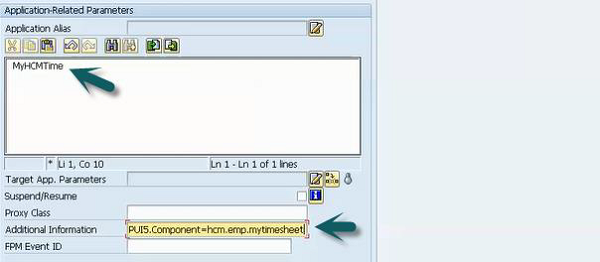
詳細、アプリケーションエイリアス、SAP UI5コンポーネント名を入力し、[ save 上部のボタン。
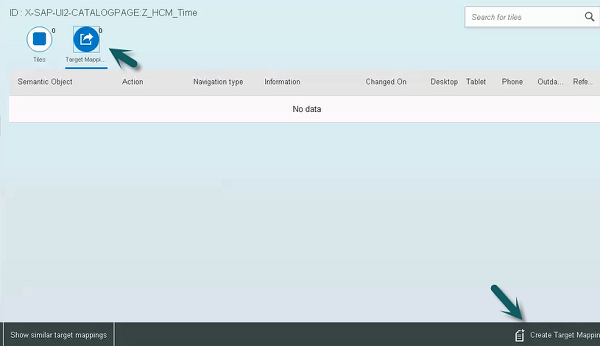
Launchpadデザイナに移動して選択すると、このタイルを作成できます。 create target mapping。
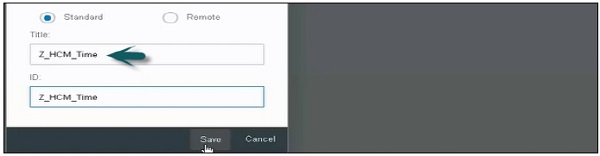
クリック Plus タイルの名前に署名して入力し、をクリックします save。
次のステップは、ターゲットマッピングを作成することです。ターゲットマッピングに移動し、をクリックしますCreate target mapping。
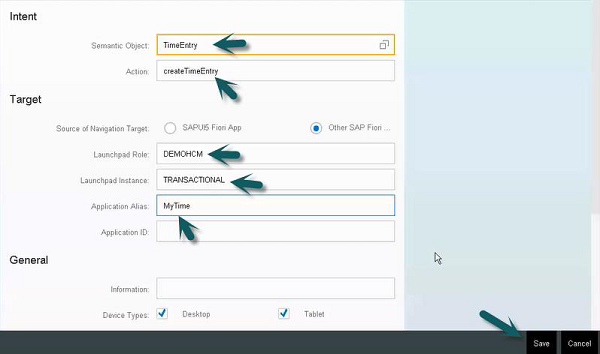
新しいウィンドウが開きます。下の画像に示すように詳細を入力します。
Launchpadでのカタログとタイルの作成
ターゲットマッピングがどのように行われるかを学びました。次のステップは、タイルを作成することです。
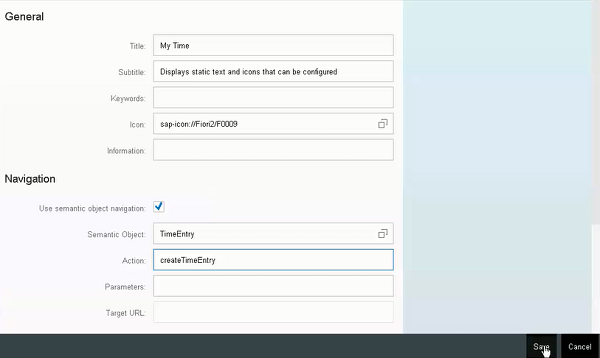
[タイル]タブに移動し、[+]記号をクリックして、作成するタイルのタイプを選択し、詳細を入力します。
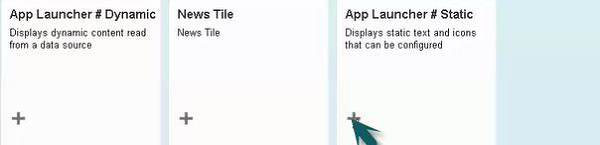
静的タイルを選択したら、詳細を入力して保存アイコンをクリックします。
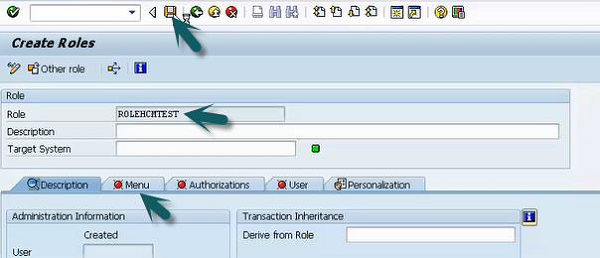
これにロールを割り当てるには、フロントエンドシステムに移動し、トランザクションを使用します PFCG。
ロール名を入力します。単一の役割をクリックして保存します。次に、[メニュー]タブをクリックします。

[ユーザー]タブに移動し、使用するユーザーの詳細を入力して、ランチパッドにアクセスして保存します。
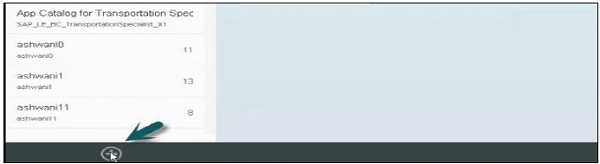
Launchpadのグループにカタログを追加するには、Launchpadにログインして、タイルカタログを選択します。
作成したカタログを選択し、「+」記号をクリックしてグループに追加します。

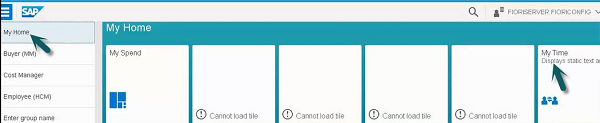
選択した場合 My Home グループ名として、Launchpadホームページに戻ると表示されます My Time そこにタイル。
これは、Launchpadを構成し、LaunchpadDesignerで新しいカタログとタイルを作成する方法です。