지속적인 통합-소프트웨어
소프트웨어 부분은 지속적인 통합 프로세스에서 가장 중요한 부분입니다. 이 장에서는 전체 지속적인 통합 프로세스에 필요한 소프트웨어에 중점을 둡니다.
소스 코드 저장소
소스 코드 저장소는 모든 소스 코드와 모든 변경 사항을 유지하는 데 사용됩니다. 소스 코드 리포지토리 관리에 가장 많이 사용되는 두 가지는 Subversion과 Git이 가장 최근에 많이 사용되는 시스템입니다. 이제 시스템에 Git을 설치하는 방법을 살펴 보겠습니다.
시스템 요구 사항
| 기억 | 2GB RAM (권장) |
| 디스크 공간 | 설치용 200MB HDD. 프로젝트 소스 코드를 저장하려면 추가 저장소가 필요하며 이는 추가되는 소스 코드에 따라 다릅니다. |
| 운영 체제 버전 | Windows, Ubuntu / Debian, Red Hat / Fedora / CentOS, Mac OS X에 설치할 수 있습니다. |
Git 설치
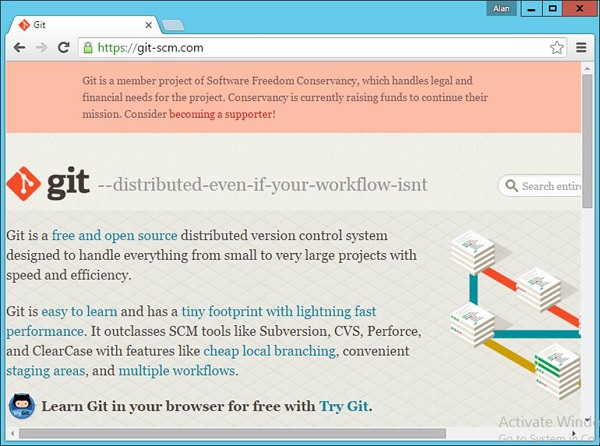
Step 1 − Git의 공식 웹 사이트는 https://git-scm.com/. 링크를 클릭하면 다음 스크린 샷과 같이 Git 공식 웹 사이트의 홈페이지로 이동합니다.
Step 2 − Git을 다운로드하려면 화면을 아래로 스크롤하여 다운로드 섹션으로 이동하여 다운로드를 클릭하십시오.
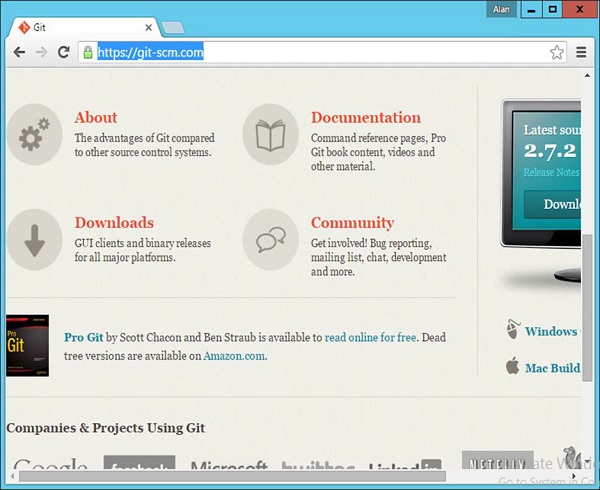
Step 3 − Windows 링크를 클릭하면 Git 다운로드가 자동으로 시작됩니다.

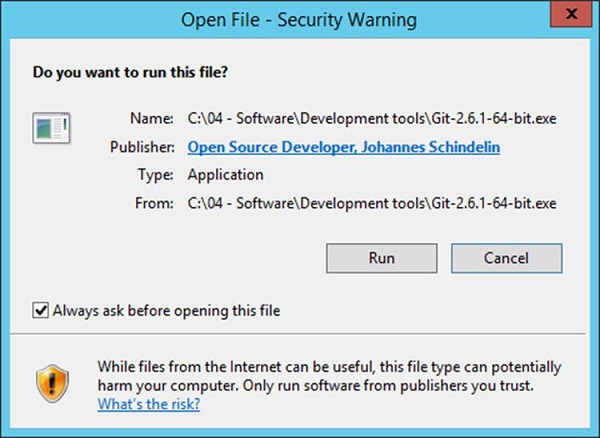
Step 4− 다운로드 한 Git 용 .exe 파일을 클릭합니다. 이 경우 Git-2.6.1-64-bit.exe 파일을 사용하고 있습니다. 다음 화면에 나타나는 실행을 클릭하십시오.
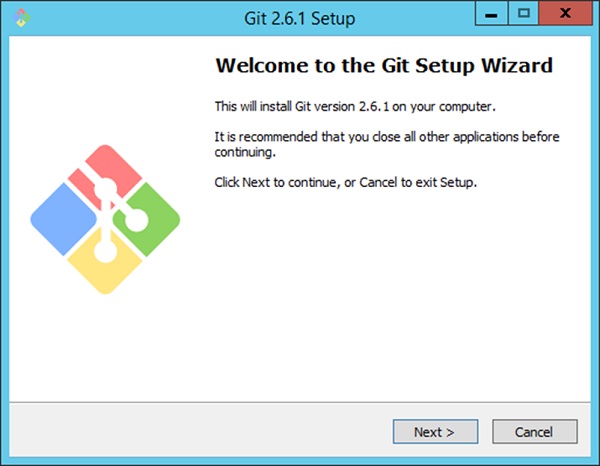
Step 5 − 다음 화면에 나타나는 다음 버튼을 클릭합니다.
Step 6 − 다음 화면에서 다음을 클릭하여 일반 라이선스 계약에 동의합니다.

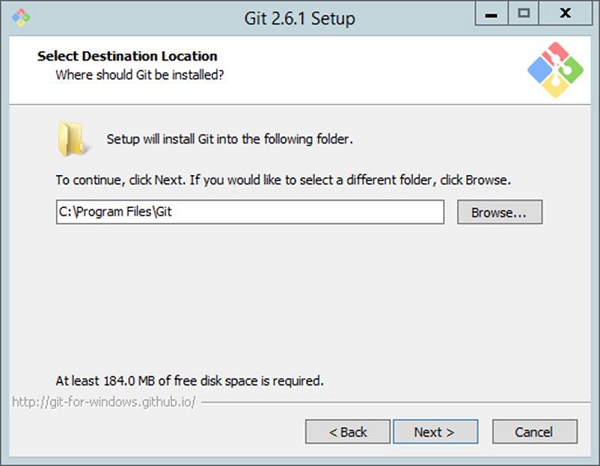
Step 7 − Git 설치 위치를 선택하십시오.
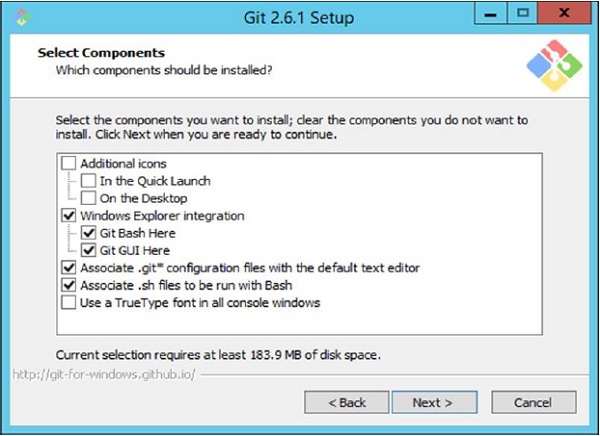
Step 8 − 다음을 클릭하여 설치해야하는 기본 구성 요소를 수락합니다.
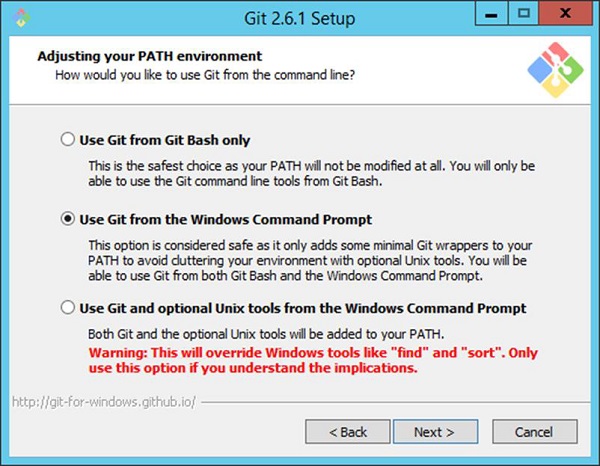
Step 9 − Windows에서 Git을 사용할 것이므로 'Windows 명령 프롬프트에서 Git 사용'옵션을 선택합니다.
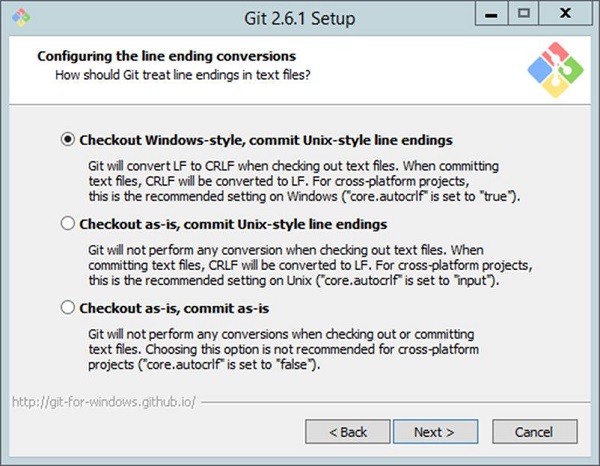
Step 10 − 다음 화면에서 'Checkout Windows-style, commit Unix-style line endings'의 기본 설정을 수락하고 다음을 클릭합니다.
Step 11 − 다음 화면에서 Git 설치를위한 시스템으로 Windows를 사용하고 있으므로 'Windows 기본 콘솔 창 사용'옵션을 선택합니다.

이제 설치가 시작되고 설치가 완료되면 Git 구성을위한 후속 단계를 수행 할 수 있습니다.

Git 구성
Git이 설치되면 Git의 초기 구성을위한 구성 단계를 수행해야합니다.
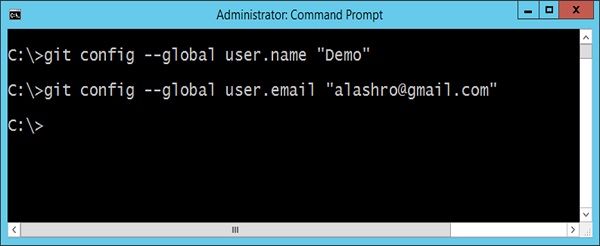
가장 먼저해야 할 일은 Git에서 ID를 구성한 다음 사용자 이름과 이메일을 구성하는 것입니다. 이것은 모든Git commit이 정보를 사용하고 생성을 시작하는 커밋에 불변으로 구워집니다. 명령 프롬프트를 열고 다음 명령을 입력하여이를 수행 할 수 있습니다.
git config –global user.name “Username”
git config –global user.email “emailid”
다음 스크린 샷은 이해를 돕기위한 예입니다.
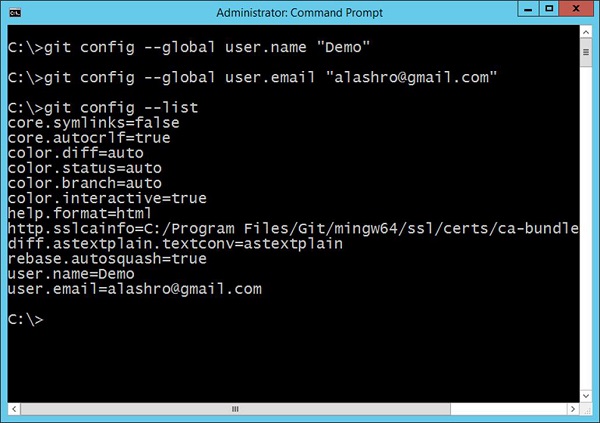
이 명령은 실제로 Git의 구성 파일을 그에 따라 변경합니다. 설정이 적용되었는지 확인하려면 다음 명령을 실행하여 Git 구성 파일의 설정을 나열 할 수 있습니다.
git config --list출력 예는 다음 스크린 샷에 나와 있습니다.
지속적 통합 서버
전체 지속적 통합 파이프 라인에 필요한 다음으로 중요한 소프트웨어는 지속적 통합 소프트웨어 자체입니다. 다음은 업계에서 가장 일반적으로 사용되는 지속적 통합 소프트웨어입니다.
Jenkins− 이것은 많은 개발 커뮤니티에서 사용하는 오픈 소스 연속 통합 소프트웨어입니다.
Jet Brains TeamCity − 이것은 가장 널리 사용되는 상업용 연속 통합 소프트웨어 중 하나이며 대부분의 회사는 연속 통합 요구 사항에 이것을 사용합니다.
Atlassian Bamboo− Atlassian Pvt라는 회사에서 제공하는 또 다른 인기있는 지속적 통합 소프트웨어입니다. Ltd.
위에서 언급 한 모든 소프트웨어는 지속적인 통합을 위해 동일한 모델에서 작동합니다. 이 튜토리얼의 목적을 위해 우리는Jetbrains TeamCity Continuous Integration 서버의 경우.
TeamCity 설치
다음은 컴퓨터에 Jet Brains TeamCity를 설치하기위한 단계 및 시스템 요구 사항입니다.
시스템 요구 사항
| 기억 | 4GB RAM (권장) |
| 디스크 공간 | 설치용 1GB HDD. 각 프로젝트의 빌드 작업 영역을 저장하려면 추가 저장소가 필요합니다. |
| 운영 체제 버전 | Windows, Linux, Mac OS X에 설치할 수 있습니다. |
설치
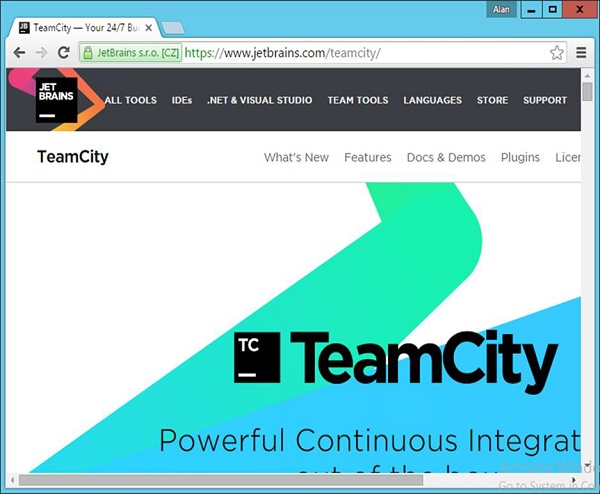
Step 1 − TeamCity의 공식 웹 사이트는https://www.jetbrains.com/teamcity/. 주어진 링크를 클릭하면 다음 스크린 샷과 같이 TeamCity 공식 웹 사이트의 홈 페이지로 이동합니다. 페이지를 검색하여 TeamCity에 필요한 소프트웨어를 다운로드 할 수 있습니다.
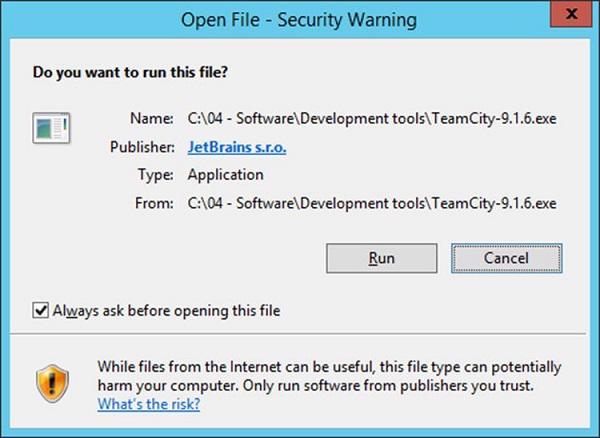
Step 2 − 다운로드 한 .exe가 실행 목적으로 사용되고 있습니다. TeamCity-9.1.6.exe. 실행 파일을 두 번 클릭 한 다음 팝업되는 다음 화면에서 실행을 클릭합니다.
Step 3 − 다음을 클릭하여 설정을 시작합니다.

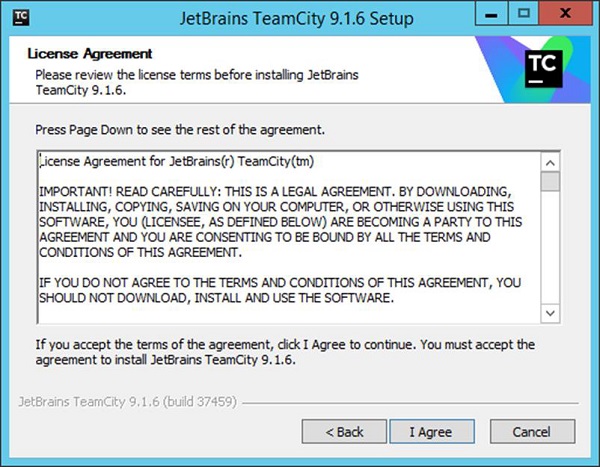
Step 4 − '동의 함'버튼을 클릭하여 사용권 계약에 동의하고 설치를 계속합니다.
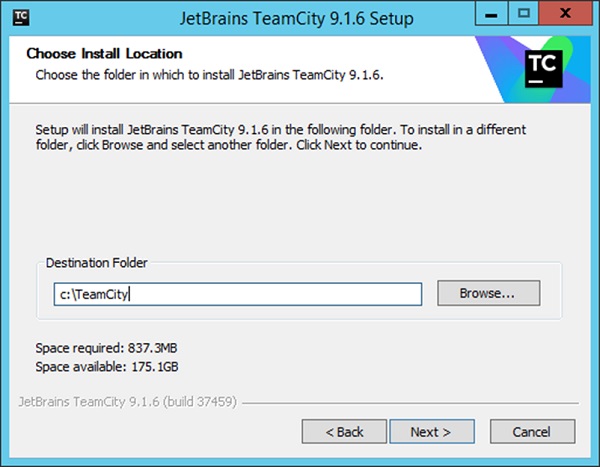
Step 5 − 설치할 위치를 선택하고 다음을 클릭합니다.
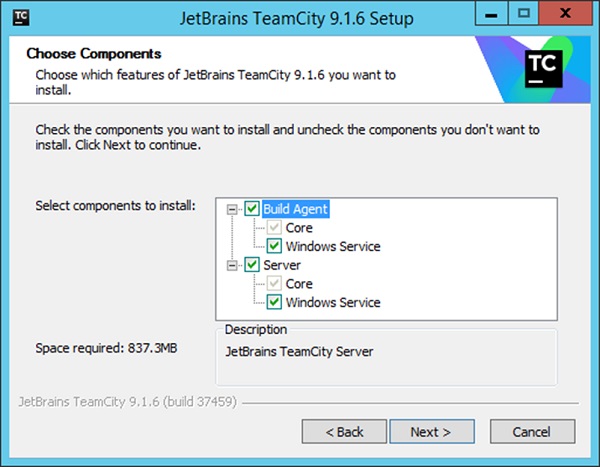
Step 6 − 설치를위한 기본 구성 요소를 선택하고 다음을 클릭합니다.
설치 프로세스가 시작됩니다. 완료되면 구성 프로세스가 수행됩니다.
Step 7− 실행할 서버의 포트 번호를 선택하십시오. 가장 좋은 방법은 다음과 같은 다른 포트를 사용하는 것입니다.8080.

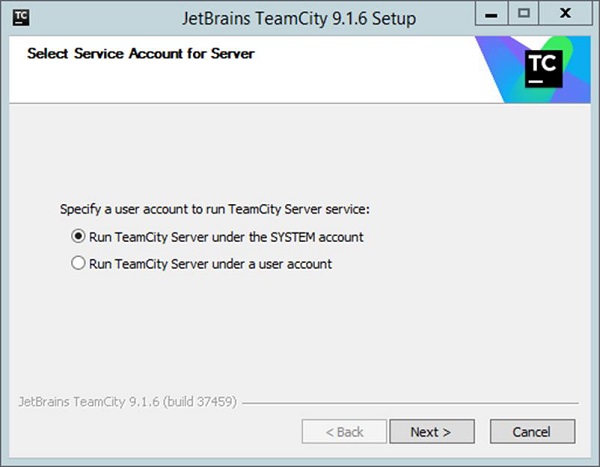
Step 8− 다음으로 TeamCity를 실행해야하는 계정을 묻습니다. 시스템 계정을 선택하고 다음을 클릭합니다.
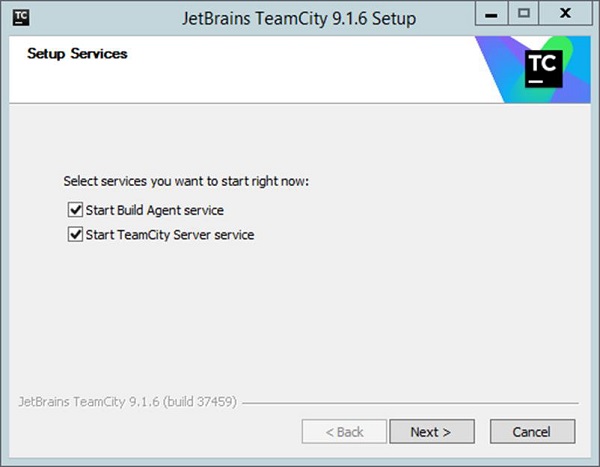
Step 9− 다음으로 시작해야하는 서비스를 요청합니다. 기본 설정을 수락하고 다음을 클릭합니다.
TeamCity 구성
설치가 완료되면 다음 단계는 TeamCity 구성입니다. 이 소프트웨어는 브라우저에서 다음 URL을 검색하여 열 수 있습니다.
http://locahost:8080
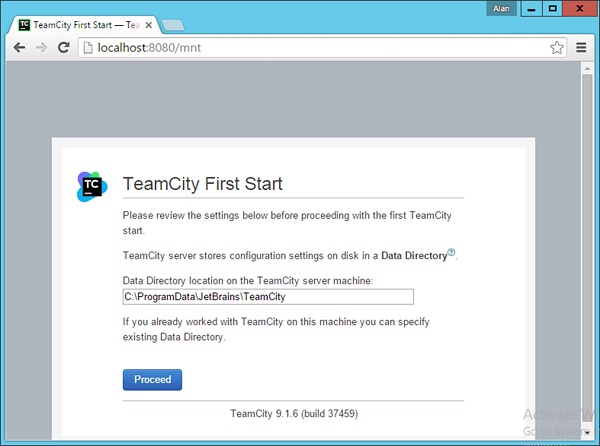
Step 1− 첫 번째 단계는 TeamCity에서 수행 할 빌드 위치를 제공하는 것입니다. 원하는 위치를 선택하고 진행 버튼을 클릭합니다.
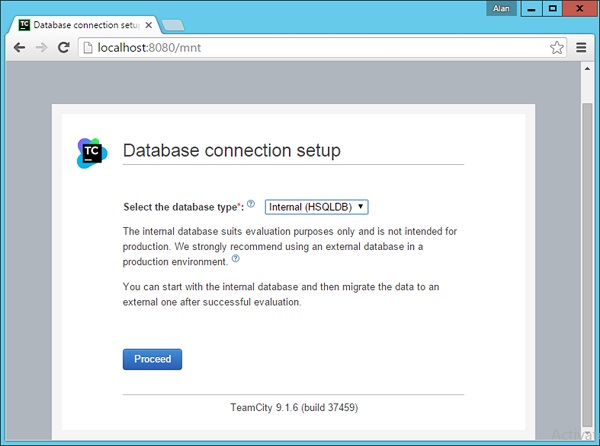
Step 2− 다음 단계는 모든 TeamCity 인공물을 저장할 데이터베이스를 지정하는 것입니다. 튜토리얼의 목적에 따라Internal (HSQLDB), 테스트 목적으로 제품을 사용할 때 가장 적합한 내부 데이터베이스입니다.
그러면 TeamCity가이를 시작하고 실행하는 데 필요한 모든 단계를 처리합니다.
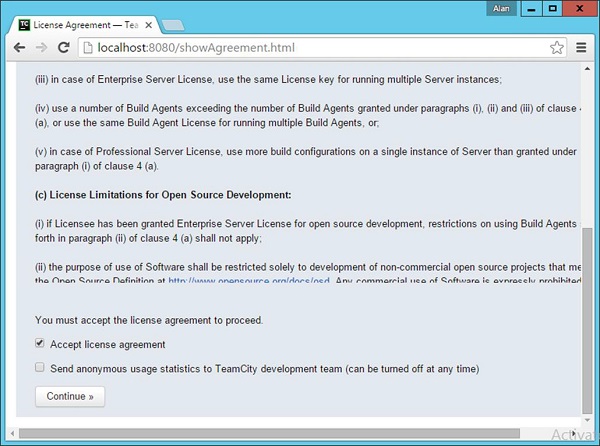
Step 3− 다음으로 라이센스 계약에 동의하라는 메시지가 표시됩니다. 동일한 내용을 수락하고 계속을 클릭하십시오.
Step 4− TeamCity 소프트웨어에 로그인하는 데 사용할 관리자 계정을 생성해야합니다. 필요한 세부 정보를 입력하고 '계정 만들기'버튼을 클릭합니다.

이제 TeamCity에 로그인됩니다.
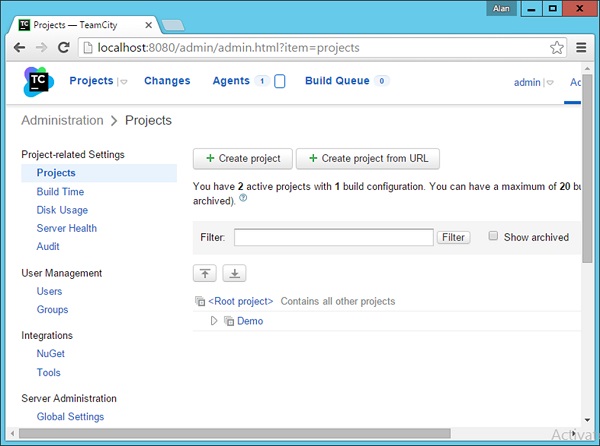
빌드 도구
빌드 도구는 프로그램이 특정 방식으로 빌드되도록하는 도구입니다. 이 도구는 일반적으로 프로그램이 적절한 방식으로 빌드되는 데 필요한 작업 목록을 수행합니다. 우리의 예에서 우리는.Net program, 우리는 MSBuild빌드 도구로. MSBuild 도구는 프로젝트를 빌드하는 데 사용되는 작업 목록이 포함 된 빌드 파일을 확인합니다. 웹 구성 프로젝트에 대한 일반적인 빌드 파일을 살펴 보겠습니다.
다음은 고려해야 할 빌드 파일의 주요 섹션입니다.
IIS 설정
다음 설정은 포트 번호, 웹 서버의 경로 및 응용 프로그램 실행시 필요한 인증 유형을 결정하는 데 사용됩니다. 이러한 설정은 중요한 설정이며 자습서의 뒷부분에서 배포를 수행하는 방법을 배울 때 MSBuild 명령을 통해 변경됩니다.
<UseIIS>True</UseIIS>
<AutoAssignPort>True</AutoAssignPor>
<DevelopmentServerPort>61581</DevelopmentServerPort>
<DevelopmentServerVPath>/</DevelopmentServerVPath>
<IISUrl>http://localhost:61581/</IISUrl>
<NTLMAuthentication>False</NTLMAuthentication>
ItemGroup
이 프로젝트를 실행하는 데 필요한 모든 종속 바이너리를 빌드 서버에 알리는 데 사용됩니다.
<ItemGroup>
   <Reference Include = "System.Web.ApplicationServices" />
   <Reference Include = "System.ComponentModel.DataAnnotations" />
<ItemGroup>
<Compile Include = "App_Start\BundleConfig.cs" />
<Compile Include = "App_Start\FilterConfig.cs" />.Net Framework 버전
그만큼 TargetFrameworkVersion프로젝트가 작동하는 데 필요한 .Net 버전을 알려줍니다. 이는 빌드 서버에이 기능이 없으면 빌드가 실패하기 때문에 절대적으로 필요합니다.
<TargetFrameworkVersion>v4.5</TargetFrameworkVersion>배포 환경 – Amazon
이 자습서에서는 지속적 통합 서버가 애플리케이션을 Amazon에 배포 할 수 있는지 확인합니다. 이를 위해 다음과 같은 인공물이 제자리에 있는지 확인해야합니다.
데이터베이스 서버
배포를 위해 데이터베이스 서버가 Amazon에 있는지 확인하려면 다음 단계를 수행하십시오.
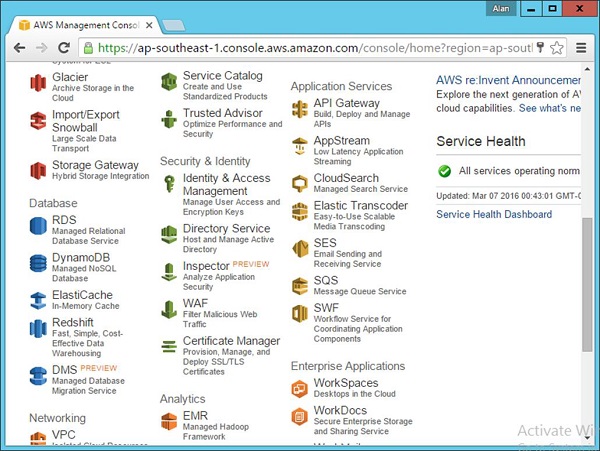
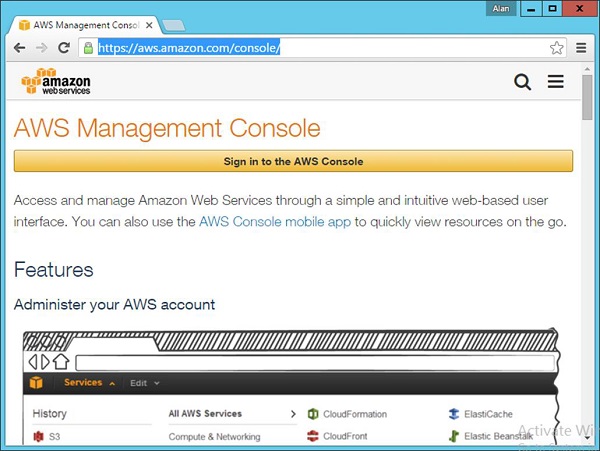
Step 1 − Amazon 콘솔로 이동 − https://aws.amazon.com/console/.
자격 증명으로 로그인하십시오. Amazon 사이트에서 무료 ID를 신청하면 Amazon의 일부 리소스를 무료로 사용할 수있는 프리 티어를 가질 수 있습니다.

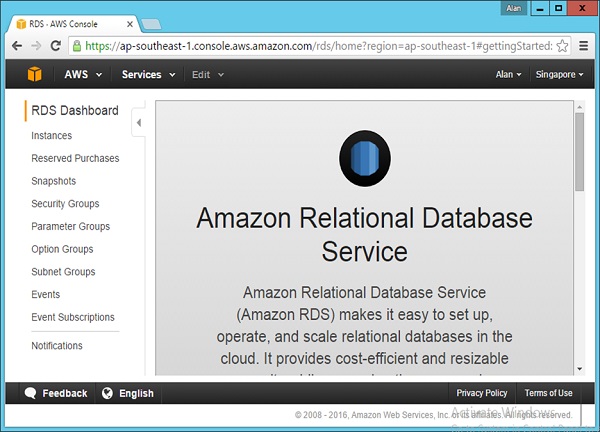
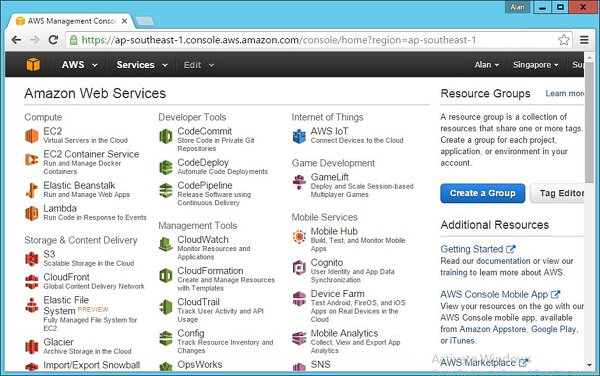
Step 2 − RDS 섹션으로 이동하여 데이터베이스를 생성합니다.
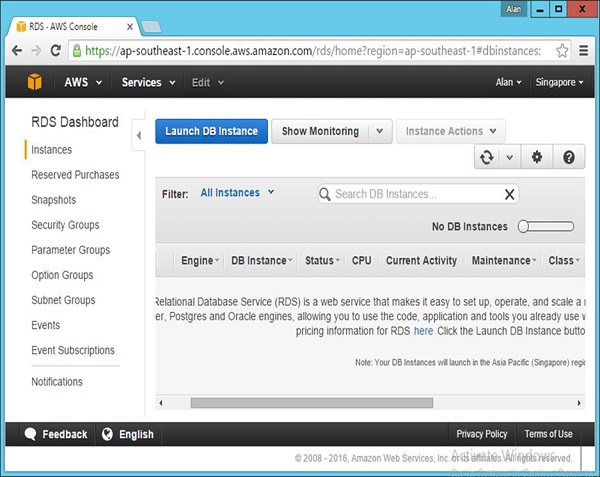
Step 3 − 다음 팝업 화면에서 인스턴스를 클릭합니다.
Step 4 − 클릭 Launch DB 나타나는 다음 화면에서 옵션.
Step 5 − SQL Server 탭을 선택한 다음 SQL Server Express에 대한 선택 옵션을 선택합니다.
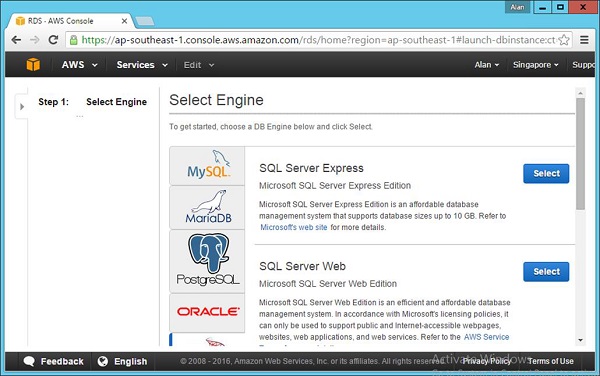
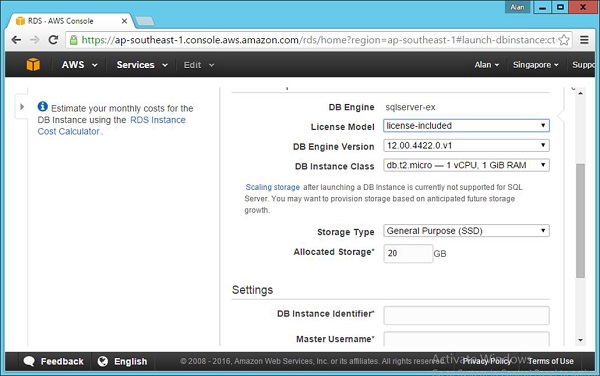
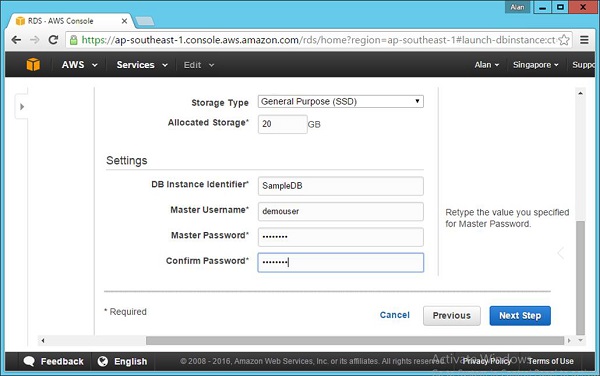
Step 6 − Amazon에서 제공하는 프리 티어 데이터베이스를 사용하고 있는지 확인하려면 다음 세부 정보를 입력해야합니다.
Step 7 − 모든 필드가 채워지면 다음 단계 버튼을 클릭합니다.
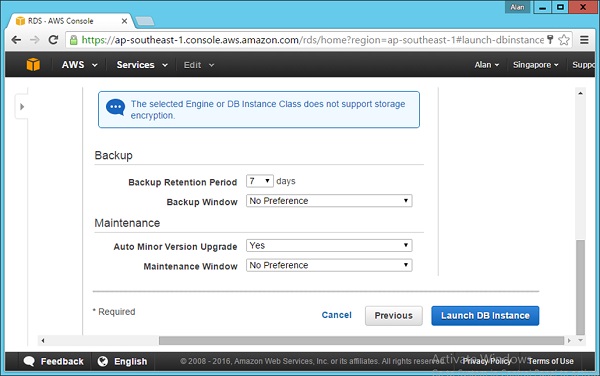
Step 8 − 다음 화면이 나타나면 모든 기본 설정을 수락하고 Launch DB Instance.
Step 9− 그러면 DB가 성공적으로 시작되었다는 화면이 표시됩니다. 같은 페이지에 DB 인스턴스를 볼 수있는 버튼이 있습니다. 링크를 클릭하면DB Instance 설정 중입니다.
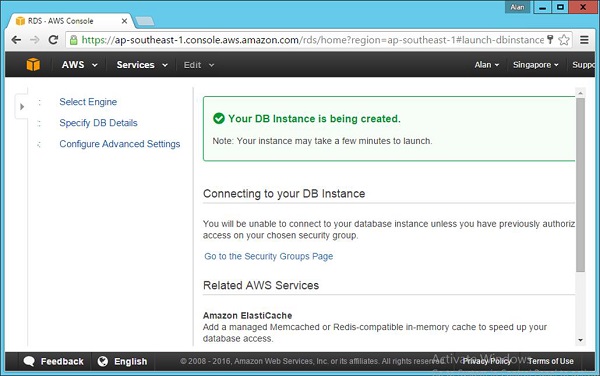

잠시 후 위 화면의 상태가 변경되어 DB 인스턴스가 성공적으로 생성되었음을 알립니다.
웹 서버
다음 단계는 웹 애플리케이션을 호스팅 할 Amazon에 웹 서버를 만드는 것입니다. 이 작업은 후속 단계에 따라 수행 할 수 있습니다.
Step 1 − Amazon Console로 이동 − https://aws.amazon.com/console/.
자격 증명으로 로그인하십시오. 신청할 수 있습니다.free id on the Amazon site, Amazon의 일부 리소스를 무료로 사용할 수있는 프리 티어를 가질 수 있습니다.
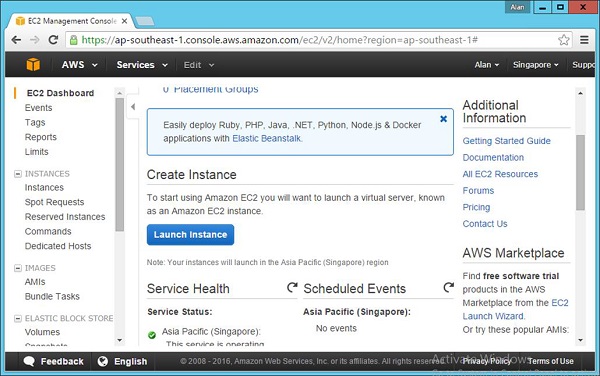
Step 2 − 다음으로 이동 EC2 section 웹 서버를 만듭니다.
Step 3 − 다음 화면에서 인스턴스 시작을 클릭합니다.
Step 4 − Windows 클릭 – Microsoft Windows Server 2010 R2 Base.

Step 5 − 선택 t2.micro옵션은 프리 티어의 일부입니다. 딸깍 하는 소리Next: Configure Instance Details.

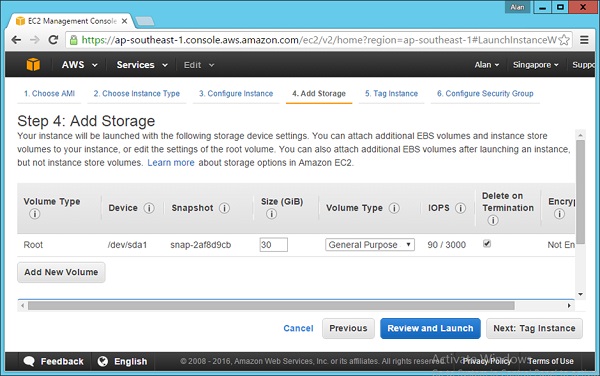
Step 6 − 다음 화면이 나타나면 기본 설정을 수락하고 옵션을 선택합니다. Next: Add Storage.

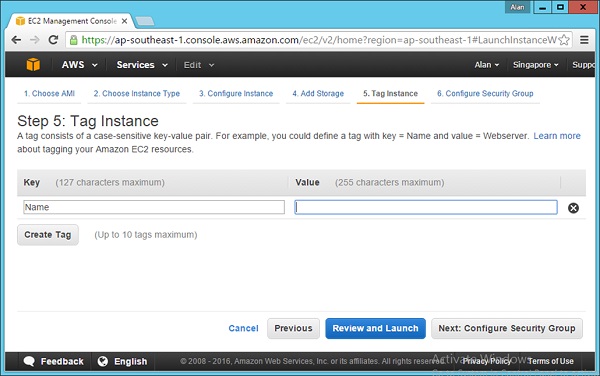
Step 7 − 다음 화면에서 기본 설정을 수락하고 옵션을 선택합니다. Next: Tag Instance.
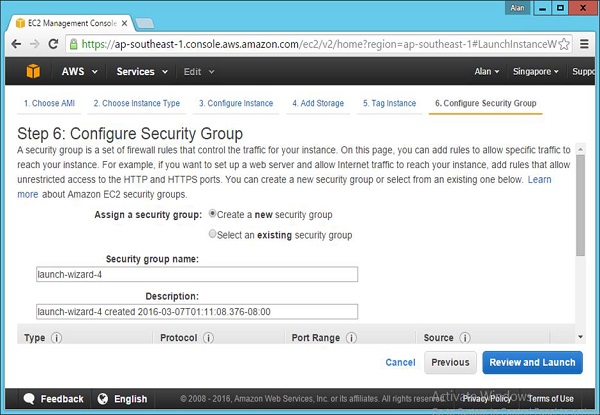
Step 8 − 다음 화면에서 기본 설정을 수락하고 옵션을 선택합니다. Next: Configure Security Group.
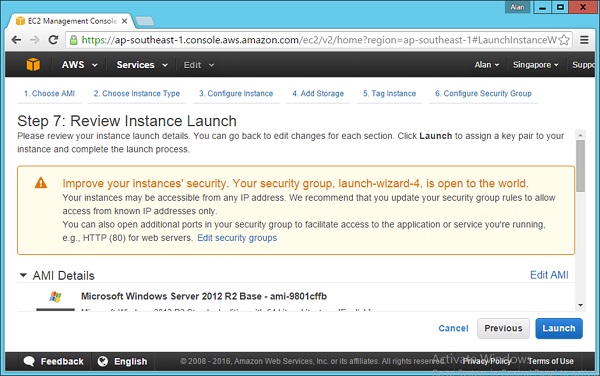
Step 9 − 다음 화면에서 기본 설정을 수락하고 옵션을 선택합니다. Review and Launch.
Step 10 − 다음 화면이 나타나면 시작을 클릭합니다.
Step 11− 다음 화면이 나타나면 키 페어를 생성하라는 메시지가 표시됩니다. 나중에 서버에 로그인하는 데 사용됩니다. 키 쌍을 생성하고Launch Instance.
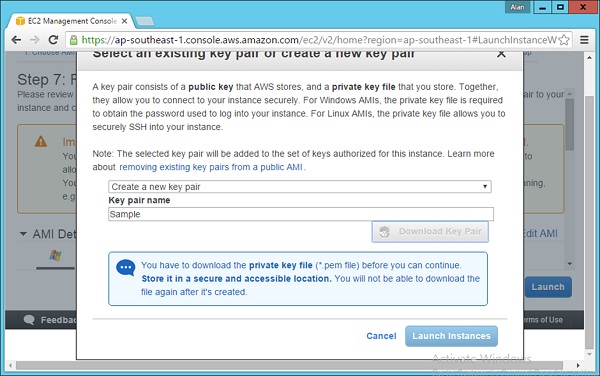
이제 인스턴스가 Amazon에서 설정됩니다.