.NET Core-테스트 라이브러리
이 장에서 우리는 StringLibrary를 테스트 할 것이고 그렇게하기 위해 우리는 기본 규칙을 따를 수 있도록 프로젝트를 재정렬해야합니다.
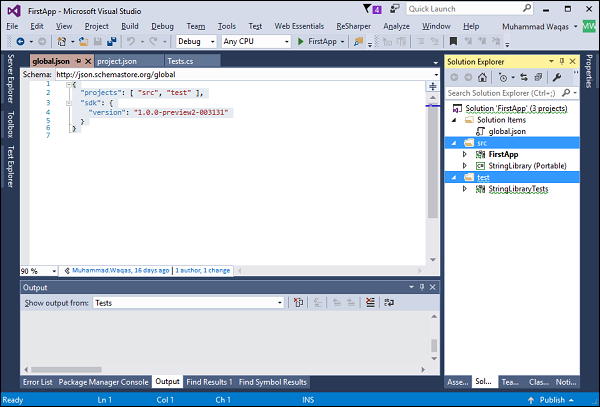
열어 보자 global.json 파일.
{
   "projects": [ "src", "test" ],
   "sdk": {
      "version": "1.0.0-preview2-003131"
   }
}
이 파일의 맨 위에 프로젝트 설정이 표시되고 다음과 같은 일부 폴더가 설정됩니다. src 과 test 기본적으로.
관례에 따라 이러한 폴더에 프로젝트가 있어야합니다. 이것은 새로운 규칙이며 .NET Core의 일부로 사용될 것입니다.
솔루션 탐색기에서 콘솔 프로젝트와 라이브러리 프로젝트가 모두 내부에 있음을 알 수 있습니다. src 테스트 프로젝트가 내부에있는 동안 폴더 test 폴더.
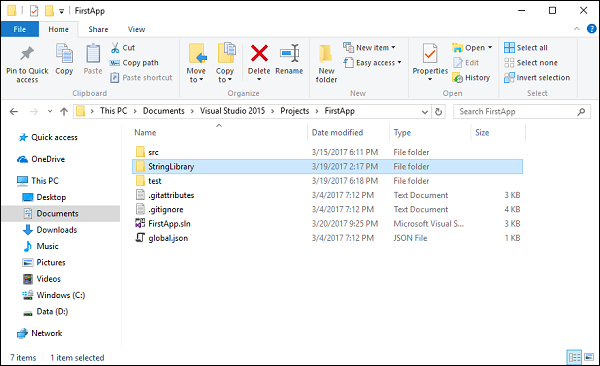
그리고 솔루션 탐색기의 프로젝트 구조는 프로젝트가 디스크에서 실제로 존재하는 위치를 나타내지 않습니다. 이제 솔루션 폴더를 열면StringLibrary 프로젝트는 내부에 없습니다 src 폴더.
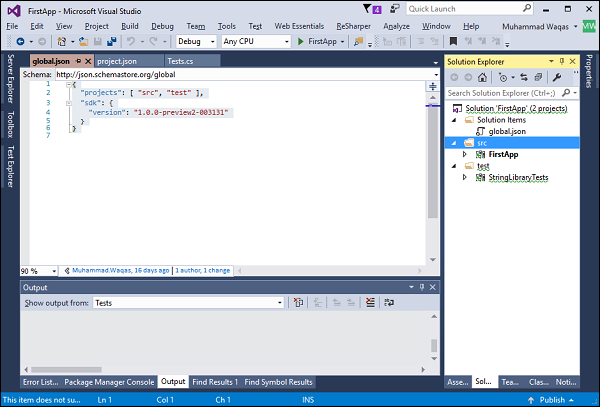
둘 다 볼 수 있습니다 src 과 test 폴더는에 지정된 규칙에 매핑됩니다. global.json파일. 그러나 관례를 벗어난 하나의 프로젝트 StringLibrary가 있습니다. 이제StringLibrary 프로젝트 내부 src 폴더.
src 폴더에는 두 개의 프로젝트가 있으며 모든 프로젝트를 올바르게 사용할 수 있도록 문제를 수정해야합니다. Visual Studio로 돌아가서 StringLibrary 프로젝트를 마우스 오른쪽 단추로 클릭하고 제거 옵션을 선택하겠습니다. 삭제되지는 않지만 프로젝트 만 제거됩니다.

이제 src 폴더를 마우스 오른쪽 버튼으로 클릭하고 Add → Existing Project…
현재 내부에있는 StringLibrary 프로젝트를 찾습니다. src 폴더에서 StringLibrary.csproj 파일 및 클릭 Open.

이제 참조를 제거해야합니다. StringLibrary ~로부터 project.json 콘솔 앱의 파일.
{
   "version": "1.0.0-*",
   "buildOptions": {
      "emitEntryPoint": true
   },
   "dependencies": {
      "Microsoft.NETCore.App": {
         "type": "platform",
         "version": "1.0.1"
      },
      "NuGet.CommandLine": "3.5.0",
      "System.Runtime.Serialization.Json": "4.0.3"
   },
   "frameworks": {
      "netcoreapp1.0": {
         "dependencies": { },
         "imports": "dnxcore50"
      }
   }
}
변경 사항을 저장 한 다음 참조를 추가하십시오. StringLibrary 다시 콘솔 프로젝트에서.
{
   "version": "1.0.0-*",
   "buildOptions": {
      "emitEntryPoint": true
   },
   "dependencies": {
      "Microsoft.NETCore.App": {
         "type": "platform",
         "version": "1.0.1"
      },
   "NuGet.CommandLine": "3.5.0",
      "System.Runtime.Serialization.Json": "4.0.3"
   },
   "frameworks": {
      "netcoreapp1.0": {
         "dependencies": {
            "StringLibrary": {
               "target": "project"
            }
         },
         "imports": "dnxcore50"
      }
   }
}
이제 모든 것이 다시 작동하고 빌드 할 수 있습니다. StringLibrary 그리고 FirstApp(콘솔 프로젝트) 오류없이. 이제 xunit을 사용하여 StringLibrary 기능을 테스트 해 보겠습니다. 테스트 프로젝트에 StringLibrary의 참조를 추가해야합니다. References of StringLibraryTests 프로젝트를 마우스 오른쪽 버튼으로 클릭하고 참조 추가…를 선택합니다.
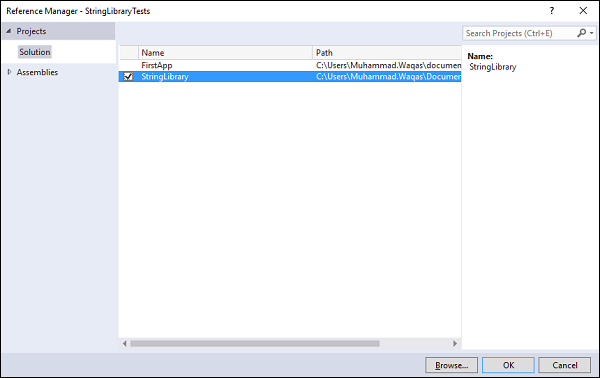
딸깍 하는 소리 OK 참조를 추가합니다 StringLibrary우리 테스트 프로젝트에. 이제 다음 코드를Tests.cs 파일.
using System;
using Xunit;
using StringLibrary;

namespace Tests {
   public class Tests {
      [Fact]
      public void StartsWithUpperCaseTest() {
         string input = "Mark";
         Assert.True(input.StartsWithUpper());
      }
      [Fact]
      public void StartsWithLowerCaseTest() {
         string input = "mark";
         Assert.True(input.StartsWithLower());
      }
      [Fact]
      public void StartsWithNumberCaseTest() {
         string input = "123";
         Assert.True(input.StartsWithNumber());
      }
   }
}
StringLibrary의 기능을 테스트 할 세 가지 테스트 메서드가 있음을 알 수 있습니다. 클릭하겠습니다Run All 링크를 클릭하면 테스트 탐색기에 다음 출력이 표시됩니다.
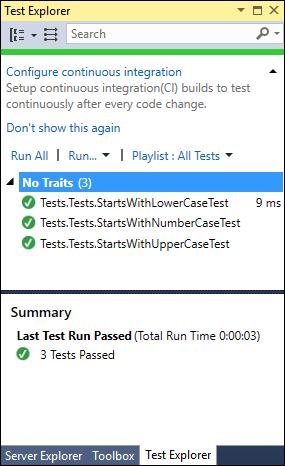
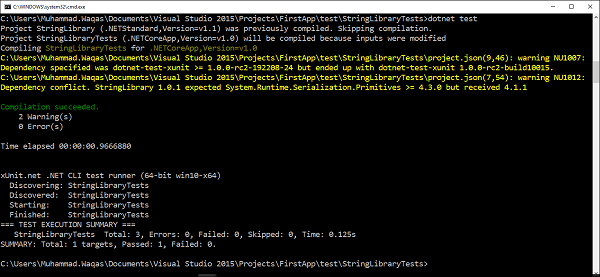
명령 줄에서 테스트를 실행할 수도 있습니다. 명령 프롬프트를 열고dotnet test 명령.