iText-이미지 위치 설정
이 장에서는 iText 라이브러리를 사용하여 PDF 문서에서 이미지의 위치를 설정하는 방법을 알아 봅니다.
이미지 위치 설정
인스턴스화하여 빈 PDF 문서를 만들 수 있습니다. Document수업. 이 클래스를 인스턴스화하는 동안PdfDocument 생성자에 대한 매개 변수로 객체.
pdf에 이미지를 추가하려면 추가해야하는 이미지의 개체를 만들고 추가합니다. add() 의 방법 Document수업. 방법을 사용하여 문서의 원하는 위치에 이미지를 삽입 할 수 있습니다.setFixedPosition() 의 Image 수업.
다음은 PDF 문서에서 이미지의 위치를 설정하는 단계입니다.
1 단계 : PdfWriter 개체 만들기
그만큼 PdfWriter클래스는 PDF 용 DocWriter를 나타냅니다. 이 클래스는 패키지에 속합니다.com.itextpdf.kernel.pdf. 이 클래스의 생성자는 PDF가 생성 될 파일의 경로를 나타내는 문자열을받습니다.
아래와 같이 생성자에 문자열 값 (PDF를 만들어야하는 경로를 나타냄)을 전달하여 PdfWriter 클래스를 인스턴스화합니다.
// Creating a PdfWriter
String dest = "C:/itextExamples/positionOfImage.pdf";
PdfWriter writer = new PdfWriter(dest);
이 유형의 객체가 PdfDocument (클래스)에 전달되면이 문서에 추가 된 모든 요소가 지정된 파일에 기록됩니다.
2 단계 : PdfDocument 개체 만들기
그만큼 PdfDocumentclass는 iText에서 PDF 문서를 나타내는 클래스입니다. 이 클래스는 패키지에 속합니다.com.itextpdf.kernel.pdf. 이 클래스를 인스턴스화하려면 (쓰기 모드에서) 클래스의 객체를 전달해야합니다.PdfWriter 생성자에.
아래와 같이 위에서 만든 PdfWriter 개체를 생성자에 전달하여 PdfDocument 클래스를 인스턴스화합니다.
// Creating a PdfDocument
PdfDocument pdfDoc = new PdfDocument(writer);
PdfDocument 개체가 생성되면 해당 클래스에서 제공하는 각 메서드를 사용하여 페이지, 글꼴, 파일 첨부 및 이벤트 처리기와 같은 다양한 요소를 추가 할 수 있습니다.
3 단계 : Document 개체 만들기
그만큼 Document 패키지 클래스 com.itextpdf.layout자급 자족 PDF를 만드는 동안 루트 요소입니다. 이 클래스의 생성자 중 하나는 PdfDocument 클래스의 개체를받습니다.
인스턴스화 Document 클래스의 객체를 전달하여 클래스 PdfDocument 아래와 같이 이전 단계에서 생성되었습니다.
// Creating a Document
Document document = new Document(pdfDoc);
4 단계 : 이미지 개체 만들기
이미지 개체를 만들려면 먼저 ImageData 개체를 사용하여 create() 의 방법 ImageDataFactory수업. 이 메서드의 매개 변수로 아래와 같이 이미지의 경로를 나타내는 문자열 매개 변수를 전달합니다.
// Creating an ImageData object
String imageFile = "C:/itextExamples/javafxLogo.jpg";
ImageData data = ImageDataFactory.create(imageFile);
이제 인스턴스화 Image 의 클래스 com.itextpdf.layout.element꾸러미. 인스턴스화하는 동안ImageData 아래와 같이 생성자에 대한 매개 변수로 객체를 생성합니다.
// Creating an Image object
Image img = new Image(data);
5 단계 : 이미지 위치 설정
PDF 문서에서 이미지의 위치를 설정할 수 있습니다. setFixedPosition()Image의 방법. 아래 그림과 같이이 방법을 사용하여 이미지 위치를 문서의 좌표 (100, 250)로 설정합니다.
// Setting the position of the image to the center of the page
image.setFixedPosition(100, 250);
6 단계 : 문서에 이미지 추가
이제 이전 단계에서 만든 이미지 개체를 추가합니다. add() 의 방법 Document 아래와 같이 클래스.
// Adding image to the document
document.add(img);
7 단계 : 문서 닫기
다음을 사용하여 문서를 닫습니다. close() 의 방법 Document 아래와 같이 클래스.
// Closing the document
document.close();
예
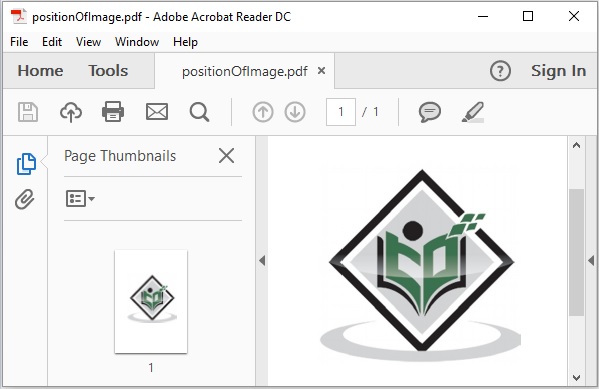
다음 Java 프로그램은 iText 라이브러리를 사용하여 PDF 문서의 원하는 위치에 이미지를 설정하는 방법을 보여줍니다. 이름을 가진 PDF 문서를 생성합니다.positionOfImage.pdf, 이미지를 추가하고 페이지 중앙에 더 가깝게 설정 한 다음 경로에 저장합니다. C:/itextExamples/
이 코드를 이름으로 파일에 저장하십시오. SettingPosition.java.
import com.itextpdf.io.image.ImageData;
import com.itextpdf.io.image.ImageDataFactory;

import com.itextpdf.kernel.pdf.PdfDocument;
import com.itextpdf.kernel.pdf.PdfWriter;

import com.itextpdf.layout.Document;
import com.itextpdf.layout.element.Image;

public class SettingPosition {
   public static void main(String args[]) throws Exception {
      // Creating a PdfWriter
      String dest = "C:/EXAMPLES/itextExamples/3images/positionOfImage.pdf";
      PdfWriter writer = new PdfWriter(dest);

      // Creating a PdfDocument
      PdfDocument pdfDoc = new PdfDocument(writer);

      // Creating a Document
      Document document = new Document(pdfDoc);

      // Creating an ImageData object
      String imFile = "C:/EXAMPLES/itextExamples/3images/logo.jpg";
      ImageData data = ImageDataFactory.create(imFile);

      // Creating an Image object
      Image image = new Image(data);

      // Setting the position of the image to the center of the page
      image.setFixedPosition(100, 250);

      // Adding image to the document
      document.add(image);

      // Closing the document
      document.close();

      System.out.println("Image added");
   }
}
다음 명령을 사용하여 명령 프롬프트에서 저장된 Java 파일을 컴파일하고 실행합니다.
javac SettingPosition.java
java SettingPosition
실행시 위의 프로그램은 PDF 문서를 생성하고 다음 메시지를 표시합니다.
Image added지정된 경로를 확인하면 아래와 같이 생성 된 PDF 문서를 찾을 수 있습니다.
