แบบฟอร์มและส่วนประกอบการตรวจสอบ
Form Componentใช้เพื่อสร้างแบบฟอร์มในหน้า Tapestry สำหรับการป้อนข้อมูลของผู้ใช้ แบบฟอร์มสามารถมีฟิลด์ข้อความฟิลด์วันที่ช่องทำเครื่องหมายเลือกตัวเลือกปุ่มส่งและอื่น ๆ
บทนี้จะอธิบายรายละเอียดเกี่ยวกับส่วนประกอบฟอร์มเด่นบางส่วน
องค์ประกอบช่องทำเครื่องหมาย
คอมโพเนนต์ช่องทำเครื่องหมายถูกใช้เพื่อเลือกระหว่างสองตัวเลือกที่ใช้ร่วมกัน สร้างเพจโดยใช้ Checkbox ดังที่แสดงด้านล่าง -
Checkbox.java
package com.example.MyFirstApplication.pages;

import org.apache.tapestry5.annotations.Property;

public class Checkbox {
   @Property
   private boolean check1;

   @Property
   private boolean check2;
}
ตอนนี้สร้างเทมเพลตที่เกี่ยวข้อง Checkbox.tml ดังแสดงด้านล่าง -
<html t:type = "newlayout" title = "About MyFirstApplication"
   xmlns:t = "http://tapestry.apache.org/schema/tapestry_5_4.xsd"
   xmlns:p = "tapestry:parameter">

   <h3> checkbox component</h3>
   <t:form>
      <t:checkbox t:id = "check1"/> I have a bike <br/>
      <t:checkbox t:id = "check2"/> I have a car
   </t:form>

</html>
ที่นี่รหัสพารามิเตอร์ช่องทำเครื่องหมายตรงกับค่าบูลีนที่เกี่ยวข้อง
Result - หลังจากขอเพจแล้วช่องทำเครื่องหมาย http: // localhost: 8080 / myFirstApplication / จะให้ผลลัพธ์ดังต่อไปนี้

ส่วนประกอบ TextField
ส่วนประกอบ TextField ช่วยให้ผู้ใช้สามารถแก้ไขข้อความบรรทัดเดียวได้ สร้างเพจText ดังแสดงด้านล่าง
Text.java
package com.example.MyFirstApplication.pages;

import org.apache.tapestry5.annotations.Property;
import org.apache.tapestry5.corelib.components.TextField;public class Text {
   @Property
   private String fname;
   @Property
   private String lname;
}
จากนั้นสร้างเทมเพลตที่เกี่ยวข้องดังที่แสดงด้านล่าง - Text.tml
<html t:type = "newlayout" title = "About MyFirstApplication"
   xmlns:t = "http://tapestry.apache.org/schema/tapestry_5_4.xsd"
   xmlns:p = "tapestry:parameter">
   <p> Form application </p>

   <body>
      <h3> Text field created from Tapestry component </h3>
      <t:form>
         <table>
            <tr>
               <td>
                  Firstname: </td> <td><t:textfield t:id = "fname" />
               </td>
               <td>Lastname: </td> <td> <t:textfield t:id = "lname" /> </td>
            </tr>
         </table>
      </t:form>
   </body>

</html>
ที่นี่หน้าข้อความมีคุณสมบัติที่ชื่อ fname และ lname. คุณสมบัตินี้เข้าถึงรหัสส่วนประกอบ
การร้องขอเพจจะให้ผลลัพธ์ดังต่อไปนี้ -
http://localhost:8080/myFirstApplication/Text

ส่วนประกอบ PasswordField
PasswordField เป็นช่องข้อความเฉพาะสำหรับรหัสผ่าน สร้างรหัสผ่านของเพจตามที่แสดงด้านล่าง -
Password.java
package com.example.MyFirstApplication.pages;

import org.apache.tapestry5.annotations.Property;
import org.apache.tapestry5.corelib.components.PasswordField;

public class Password {
   @Property
   private String pwd;
}
ตอนนี้สร้างไฟล์เทมเพลตที่เกี่ยวข้องดังที่แสดงด้านล่าง -
Password.tml
<html t:type = "newlayout" title = "About MyFirstApplication"
   xmlns:t = "http://tapestry.apache.org/schema/tapestry_5_4.xsd"
   xmlns:p = "tapestry:parameter">
   <p> Form application </p>
   <h3> Password field created from Tapestry component </h3>

   <t:form>
      <table>
         <tr>
            <td> Password: </td>
            <td><t:passwordfield t:id = "pwd"/> </td>
         </tr>
      </table>
   </t:form>

</html>
ที่นี่คอมโพเนนต์ PasswordField มีรหัสพารามิเตอร์ซึ่งชี้ไปที่คุณสมบัติ pwd. การร้องขอเพจจะให้ผลลัพธ์ดังต่อไปนี้ -
http://localhost:8080/myFirstApplication/Password

ส่วนประกอบ TextArea
ส่วนประกอบ TextArea คือตัวควบคุมข้อความอินพุตหลายบรรทัด สร้างเพจ TxtArea ดังภาพด้านล่าง
TxtArea.java
package com.example.MyFirstApplication.pages;

import org.apache.tapestry5.annotations.Property;
import org.apache.tapestry5.corelib.components.TextArea;

public class TxtArea {
   @Property
   private String str;
}
จากนั้นสร้างไฟล์เทมเพลตที่เกี่ยวข้องดังที่แสดงด้านล่าง
TxtArea.tml
<html t:type = "newlayout" title = "About MyFirstApplication"
   xmlns:t = "http://tapestry.apache.org/schema/tapestry_5_4.xsd"
   xmlns:p = "tapestry:parameter">
   <h3>TextArea component </h3>

   <t:form>
      <table>
         <tr>
            <td><t:textarea t:id = "str"/>
            </td>
         </tr>
      </table>
   </t:form>

</html>
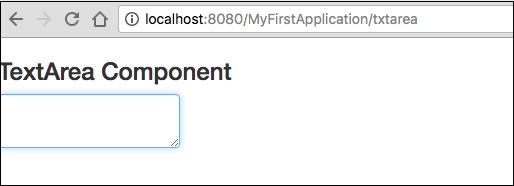
ที่นี่รหัสพารามิเตอร์คอมโพเนนต์ TextArea ชี้ไปที่คุณสมบัติ“ str” การร้องขอเพจจะให้ผลลัพธ์ดังต่อไปนี้ -
http://localhost:8080/myFirstApplication/TxtArea**

เลือกส่วนประกอบ
ส่วนประกอบ Select มีรายการตัวเลือกแบบหล่นลง สร้างเพจ SelectOption ดังภาพด้านล่าง
SelectOption.java
package com.example.MyFirstApplication.pages;

import org.apache.tapestry5.annotations.Property;
import org.apache.tapestry5.corelib.components.Select;

public class SelectOption {
   @Property
   private String color0;

   @Property

   private Color1 color1;
   public enum Color1 {
      YELLOW, RED, GREEN, BLUE, ORANGE
   }
}
จากนั้นสร้างเทมเพลตที่สอดคล้องกันดังนี้ -
SelectOption.tml
<html t:type = "newlayout" title = "About MyFirstApplication"
   xmlns:t = "http://tapestry.apache.org/schema/tapestry_5_4.xsd"
   xmlns:p = "tapestry:parameter">
   <p> Form application </p>
   <h3> select component </h3>

   <t:form>
      <table>
         <tr>
            <td> Select your color here: </td>
            <td> <select t:type = "select" t:id = "color1"></select></td>
         </tr>
      </table>
   </t:form>

</html>
ที่นี่ส่วนประกอบ Select มีพารามิเตอร์สองตัว -
Type - ประเภทของคุณสมบัติคือ enum
Id - Id ชี้ไปที่คุณสมบัติ Tapestry“ color1”
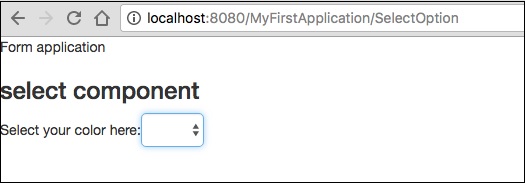
การร้องขอเพจจะให้ผลลัพธ์ดังต่อไปนี้ -
http://localhost:8080/myFirstApplication/SelectOption

ส่วนประกอบของ RadioGroup
คอมโพเนนต์ RadioGroup จัดเตรียมกลุ่มคอนเทนเนอร์สำหรับส่วนประกอบวิทยุ คอมโพเนนต์ Radio และ RadioGroup ทำงานร่วมกันเพื่ออัพเดตคุณสมบัติของอ็อบเจ็กต์ ส่วนประกอบนี้ควรล้อมรอบส่วนประกอบวิทยุอื่น ๆ สร้างเพจใหม่“ Radiobutton.java” ดังแสดงด้านล่าง -
Radiobutton.java
package com.example.MyFirstApplication.pages;

import org.apache.tapestry5.PersistenceConstants;
import org.apache.tapestry5.annotations.Persist;
import org.apache.tapestry5.annotations.Property;

public class Radiobutton {
   @Property
   @Persist(PersistenceConstants.FLASH)
   private String value;
}
จากนั้นสร้างไฟล์เทมเพลตที่เกี่ยวข้องดังที่แสดงด้านล่าง -
Radiobutton.tml
<html t:type = "Newlayout" title = "About MyFirstApplication"
   xmlns:t = "http://tapestry.apache.org/schema/tapestry_5_4.xsd"
   xmlns:p = "tapestry:parameter">
   <h3>RadioGroup component </h3>

   <t:form>
      <t:radiogroup t:id = "value">
         <t:radio t:id = "radioT" value = "literal:T" label = "Male" />
         <t:label for = "radioT"/>
         <t:radio t:id = "radioF" value = "literal:F" label = "Female"/>
         <t:label for = "radioF"/>
      </t:radiogroup>
   </t:form>

</html>
ที่นี่รหัสคอมโพเนนต์ RadioGroup เชื่อมโยงกับคุณสมบัติ“ value” การร้องขอเพจจะให้ผลลัพธ์ดังต่อไปนี้
http://localhost:8080/myFirstApplication/Radiobutton

ส่งส่วนประกอบ
เมื่อผู้ใช้คลิกปุ่มส่งแบบฟอร์มจะถูกส่งไปยังที่อยู่ที่ระบุไว้ในการตั้งค่าการดำเนินการของแท็ก สร้างเพจSubmitComponent ดังแสดงด้านล่าง
package com.example.MyFirstApplication.pages;
import org.apache.tapestry5.annotations.InjectPage;

public class SubmitComponent {
   @InjectPage
   private Index page1;
   Object onSuccess() {
      return page1;
   }
}
ตอนนี้สร้างไฟล์เทมเพลตที่เกี่ยวข้องดังที่แสดงด้านล่าง
SubmitComponent.tml
<html t:type = "newlayout" title = "About MyFirstApplication"
   xmlns:t = "http://tapestry.apache.org/schema/tapestry_5_4.xsd"
   xmlns:p = "tapestry:parameter">
   <h3>Tapestry Submit component </h3>

   <body>
      <t:form>
         <t:submit t:id = "submit1" value = "Click to go Index"/>
      </t:form>
   </body>

</html>
ที่นี่องค์ประกอบ Submit จะส่งค่าไปยังหน้าดัชนี การร้องขอเพจจะให้ผลลัพธ์ดังต่อไปนี้ -
http://localhost:8080/myFirstApplication/SubmitComponent

การตรวจสอบแบบฟอร์ม
โดยปกติการตรวจสอบแบบฟอร์มจะเกิดขึ้นที่เซิร์ฟเวอร์หลังจากไคลเอนต์ป้อนข้อมูลที่จำเป็นทั้งหมดแล้วจึงส่งแบบฟอร์ม หากข้อมูลที่ลูกค้าป้อนไม่ถูกต้องหรือขาดหายไปเซิร์ฟเวอร์จะต้องส่งข้อมูลทั้งหมดกลับไปยังไคลเอนต์และขอให้ส่งแบบฟอร์มอีกครั้งพร้อมข้อมูลที่ถูกต้อง
ให้เราพิจารณาตัวอย่างง่ายๆต่อไปนี้เพื่อทำความเข้าใจกระบวนการตรวจสอบความถูกต้อง
สร้างเพจ Validate ดังแสดงด้านล่าง
Validate.java
package com.example.MyFirstApplication.pages;

import org.apache.tapestry5.annotations.Property;
import org.apache.tapestry5.PersistenceConstants;
import org.apache.tapestry5.annotations.Persist;

public class Validate {
   @Property
   @Persist(PersistenceConstants.FLASH)
   private String firstName;

   @Property
   @Persist(PersistenceConstants.FLASH)
   private String lastName;
}
ตอนนี้สร้างไฟล์เทมเพลตที่เกี่ยวข้องดังที่แสดงด้านล่าง
Validate.tml
<html t:type = "newlayout" title = "About MyFirstApplication"
   xmlns:t = "http://tapestry.apache.org/schema/tapestry_5_4.xsd"
   xmlns:p = "tapestry:parameter">

   <t:form>
      <table>
         <tr>
            <td><t:label for = "firstName"/>:</td>
            <td><input t:type = "TextField" t:id = "firstName"
            t:validate = "required, maxlength = 7" size = "10"/></td>
         </tr>
         <tr>
            <td><t:label for = "lastName"/>:</td>
            <td><input t:type = "TextField" t:id = "lastName"
            t:validate = "required, maxLength = 5" size = "10"/></td>
         </tr>
      </table>
      <t:submit t:id = "sub" value =" Form validation"/>
   </t:form>

</html>
Form Validation มีพารามิเตอร์ที่สำคัญดังต่อไปนี้ -
Max - กำหนดค่าสูงสุดเช่น = «ค่าสูงสุด 20 »
MaxDate- กำหนด maxDate เช่น = «วันที่สูงสุด 06/09/2013 » ในทำนองเดียวกันคุณสามารถกำหนด MinDate ได้เช่นกัน
MaxLength - maxLength สำหรับเช่น = «ความยาวสูงสุด 80 »
Min - ขั้นต่ำ
MinLength - ความยาวขั้นต่ำสำหรับเช่น = «ความยาวขั้นต่ำ 2 »
Email - การตรวจสอบอีเมลซึ่งใช้อีเมลมาตรฐาน regexp ^ \ w [._ \ w] * \ w @ \ w [-._ \ w] * \ w \. \ w2,6 $ หรือไม่มีเลย
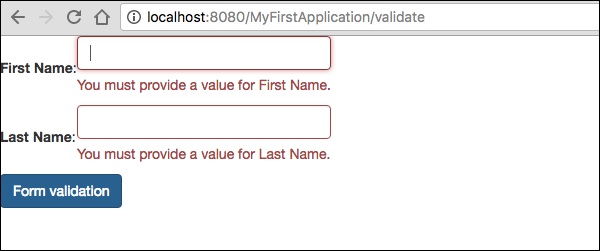
การร้องขอเพจจะให้ผลลัพธ์ดังต่อไปนี้ -
http://localhost:8080/myFirstApplication/Validate
