Docker - คู่มือฉบับย่อ
Docker คือบริการจัดการคอนเทนเนอร์ คีย์เวิร์ดของ Docker คือdevelop, ship และ runได้ทุกที่ แนวคิดทั้งหมดของ Docker มีไว้เพื่อให้นักพัฒนาสามารถพัฒนาแอปพลิเคชันได้อย่างง่ายดายจัดส่งลงในคอนเทนเนอร์ซึ่งสามารถนำไปใช้งานได้ทุกที่
Docker เปิดตัวครั้งแรกในเดือนมีนาคม 2013 และตั้งแต่นั้นเป็นต้นมามันก็กลายเป็นคำที่แพร่หลายสำหรับการพัฒนาโลกสมัยใหม่โดยเฉพาะอย่างยิ่งในการเผชิญหน้ากับโครงการที่ใช้ Agile
คุณสมบัติของ Docker
Docker มีความสามารถในการลดขนาดของการพัฒนาโดยการจัดเตรียมระบบปฏิบัติการให้เล็กลงผ่านคอนเทนเนอร์
ด้วยคอนเทนเนอร์ทำให้ทีมในหน่วยต่างๆเช่นการพัฒนาการควบคุมคุณภาพและการดำเนินงานทำงานได้อย่างราบรื่นระหว่างแอปพลิเคชันต่างๆ
คุณสามารถปรับใช้คอนเทนเนอร์ Docker ได้จากทุกที่บนเครื่องจริงและเครื่องเสมือนและแม้แต่บนคลาวด์
เนื่องจากคอนเทนเนอร์ Docker มีน้ำหนักเบาจึงสามารถปรับขนาดได้ง่ายมาก
ส่วนประกอบของ Docker
Docker มีส่วนประกอบดังต่อไปนี้
Docker for Mac - อนุญาตให้เรียกใช้คอนเทนเนอร์ Docker บน Mac OS
Docker for Linux - อนุญาตให้เรียกใช้คอนเทนเนอร์ Docker บน Linux OS
Docker for Windows - อนุญาตให้เรียกใช้คอนเทนเนอร์ Docker บน Windows OS
Docker Engine - ใช้สำหรับสร้างอิมเมจ Docker และสร้างคอนเทนเนอร์ Docker
Docker Hub - นี่คือรีจิสทรีที่ใช้เพื่อโฮสต์อิมเมจ Docker ต่างๆ
Docker Compose - ใช้เพื่อกำหนดแอปพลิเคชันโดยใช้คอนเทนเนอร์ Docker หลายตัว
เราจะพูดถึงส่วนประกอบทั้งหมดนี้โดยละเอียดในบทต่อ ๆ ไป
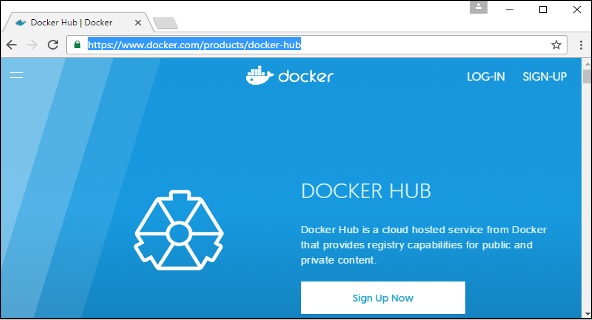
เว็บไซต์อย่างเป็นทางการสำหรับ Docker คือ https://www.docker.com/ไซต์นี้มีข้อมูลและเอกสารเกี่ยวกับซอฟต์แวร์ Docker ทั้งหมด นอกจากนี้ยังมีลิงค์ดาวน์โหลดสำหรับระบบปฏิบัติการต่างๆ
ในการเริ่มการติดตั้ง Docker เราจะใช้อินสแตนซ์ของ Ubuntu คุณสามารถใช้ Oracle Virtual Box เพื่อตั้งค่าอินสแตนซ์ Virtual Linux ในกรณีที่คุณยังไม่มี
ภาพหน้าจอต่อไปนี้แสดงเซิร์ฟเวอร์ Ubuntu แบบธรรมดาที่ติดตั้งบน Oracle Virtual Box มีผู้ใช้ OS ชื่อdemo ซึ่งถูกกำหนดไว้ในระบบที่มีการเข้าถึงรูททั้งหมดไปยังเซิร์ฟเวอร์

ในการติดตั้ง Docker เราต้องทำตามขั้นตอนด้านล่าง
Step 1- ก่อนที่จะติดตั้ง Docker ก่อนอื่นคุณต้องตรวจสอบให้แน่ใจว่าคุณมีเวอร์ชันเคอร์เนลของ Linux ที่ทำงานอยู่ นักเทียบท่าได้รับการออกแบบให้ทำงานบนเคอร์เนลลินุกซ์เวอร์ชัน 3.8 ขึ้นไปเท่านั้น เราสามารถทำได้โดยรันคำสั่งต่อไปนี้
ไม่มีชื่อ
วิธีนี้ส่งคืนข้อมูลระบบเกี่ยวกับระบบ Linux
ไวยากรณ์
uname -aตัวเลือก
a - ใช้เพื่อให้แน่ใจว่าข้อมูลระบบจะถูกส่งกลับ
ส่งคืนค่า
วิธีนี้ส่งคืนข้อมูลต่อไปนี้บนระบบ Linux -
- ชื่อเคอร์เนล
- ชื่อโหนด
- การปล่อยเคอร์เนล
- เวอร์ชันเคอร์เนล
- machine
- processor
- แพลตฟอร์มฮาร์ดแวร์
- ระบบปฏิบัติการ
ตัวอย่าง
uname –aเอาต์พุต
เมื่อเราเรียกใช้คำสั่งด้านบนเราจะได้ผลลัพธ์ดังต่อไปนี้ -

จากผลลัพธ์เราจะเห็นว่าเวอร์ชันเคอร์เนลของลินุกซ์คือ 4.2.0-27 ซึ่งสูงกว่าเวอร์ชัน 3.8 ดังนั้นเราจึงพร้อมที่จะไป
Step 2 - คุณต้องอัปเดตระบบปฏิบัติการด้วยแพ็คเกจล่าสุดซึ่งสามารถทำได้ผ่านคำสั่งต่อไปนี้ -
apt-getวิธีนี้จะติดตั้งแพ็กเกจจากอินเทอร์เน็ตไปยังระบบ Linux
ไวยากรณ์
อัปเดต sudo apt-get
ตัวเลือก
sudo - sudo คำสั่งใช้เพื่อให้แน่ใจว่าคำสั่งรันด้วยการเข้าถึงรูท
update - update ใช้ตัวเลือกเพื่อให้แน่ใจว่าแพ็กเกจทั้งหมดได้รับการอัพเดตบนระบบ Linux
ส่งคืนค่า
ไม่มี
ตัวอย่าง
sudo apt-get updateเอาต์พุต
เมื่อเราเรียกใช้คำสั่งดังกล่าวเราจะได้ผลลัพธ์ดังต่อไปนี้ -
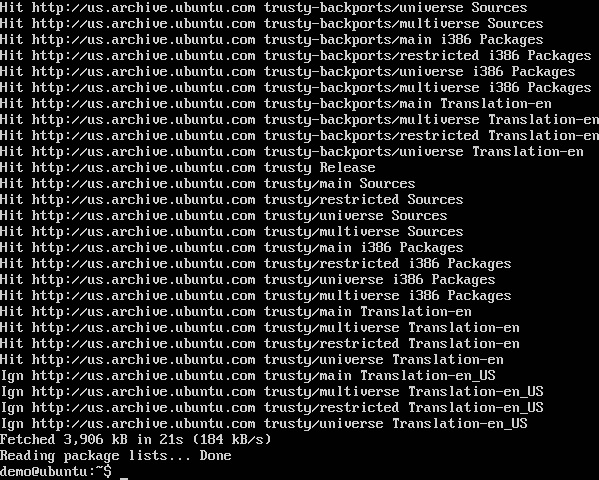
คำสั่งนี้จะเชื่อมต่ออินเทอร์เน็ตและดาวน์โหลดแพ็คเกจระบบล่าสุดสำหรับ Ubuntu
Step 3- ขั้นตอนต่อไปคือการติดตั้งใบรับรองที่จำเป็นซึ่งจะต้องใช้ในการทำงานกับไซต์ Docker ในภายหลังเพื่อดาวน์โหลดแพ็คเกจ Docker ที่จำเป็น สามารถทำได้ด้วยคำสั่งต่อไปนี้
sudo apt-get install apt-transport-https ca-certificates
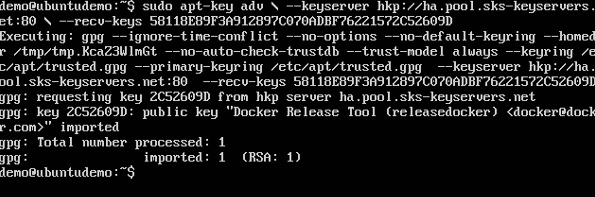
Step 4- ขั้นตอนต่อไปคือการเพิ่มคีย์ GPG ใหม่ คีย์นี้จำเป็นเพื่อให้แน่ใจว่าข้อมูลทั้งหมดได้รับการเข้ารหัสเมื่อดาวน์โหลดแพ็คเกจที่จำเป็นสำหรับ Docker
คำสั่งต่อไปนี้จะดาวน์โหลดคีย์ด้วย ID 58118E89F3A912897C070ADBF76221572C52609D จาก keyserver hkp: //ha.pool.sks-keyservers.net: 80 และเพิ่มลงในไฟล์ advพวงกุญแจ. โปรดทราบว่าคีย์เฉพาะนี้จำเป็นสำหรับการดาวน์โหลดแพ็คเกจ Docker ที่จำเป็น
Step 5 - ถัดไปขึ้นอยู่กับเวอร์ชันของ Ubuntu ที่คุณมีคุณจะต้องเพิ่มไซต์ที่เกี่ยวข้องลงในไฟล์ docker.list สำหรับ apt package managerเพื่อให้สามารถตรวจจับแพ็คเกจ Docker จากไซต์ Docker และดาวน์โหลดได้ตามนั้น
แม่นยำ 12.04 (LTS) ─ deb https://apt.dockerproject.org/repoUbuntu ที่แม่นยำหลัก
Trusty 14.04 (LTS) ─ deb https://apt.dockerproject.org/repo/ ubuntu-trusty หลัก
เจ้าเล่ห์ 15.10 ─ deb https://apt.dockerproject.org/repo ubuntu-wily หลัก
ซีเนียล 16.04 (LTS) - https://apt.dockerproject.org/repo ubuntu-xenial หลัก
เนื่องจากระบบปฏิบัติการของเราคือ Ubuntu 14.04 เราจะใช้ชื่อ Repository ว่า“ deb https://apt.dockerproject.org/repoubuntu-trusty main”.
จากนั้นเราจะต้องเพิ่มที่เก็บนี้ในไฟล์ docker.list ดังกล่าวข้างต้น
echo "deb https://apt.dockerproject.org/repo ubuntu-trusty main”
   | sudo tee /etc/apt/sources.list.d/docker.list
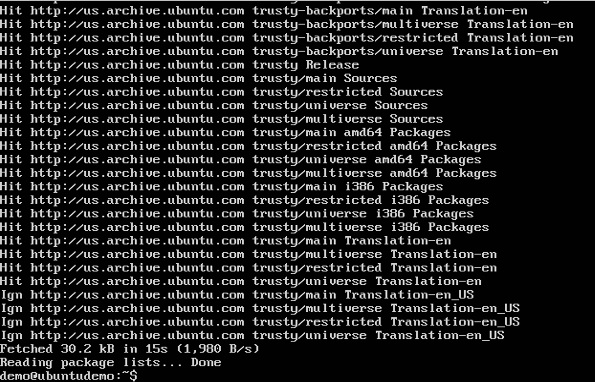
Step 6 - ต่อไปเราจะออกไฟล์ apt-get update command เพื่ออัปเดตแพ็คเกจบนระบบ Ubuntu

Step 7 - หากคุณต้องการตรวจสอบว่าตัวจัดการแพ็กเกจชี้ไปที่ที่เก็บที่ถูกต้องคุณสามารถทำได้โดยการออกไฟล์ apt-cache command.
apt-cache policy docker-engineในผลลัพธ์คุณจะได้รับลิงค์ไป https://apt.dockerproject.org/repo/
Step 8 - ออก apt-get update command เพื่อให้แน่ใจว่าแพ็กเกจทั้งหมดในระบบโลคัลเป็นปัจจุบัน
Step 9 - สำหรับ Ubuntu Trusty, Wily และ Xenial เราต้องติดตั้งแพ็คเกจเคอร์เนล linux-image-extra- * ซึ่งอนุญาตให้ใช้ aufs storage driver. ไดรเวอร์นี้ใช้โดย Docker เวอร์ชันใหม่กว่า
สามารถทำได้โดยใช้คำสั่งต่อไปนี้
sudo apt-get install linux-image-extra-$(uname -r)
   linux-image-extra-virtual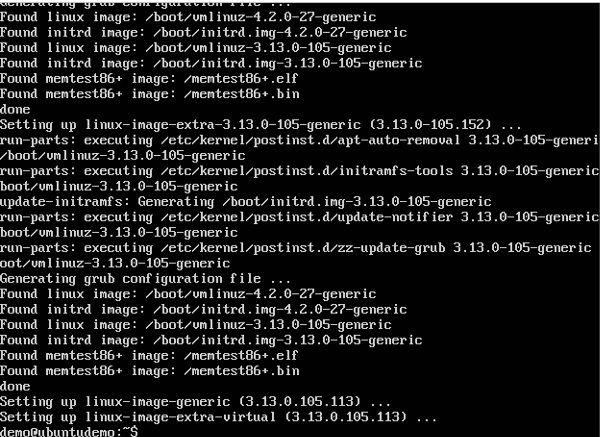
Step 10 - ขั้นตอนสุดท้ายคือการติดตั้ง Docker และเราสามารถทำได้ด้วยคำสั่งต่อไปนี้ -
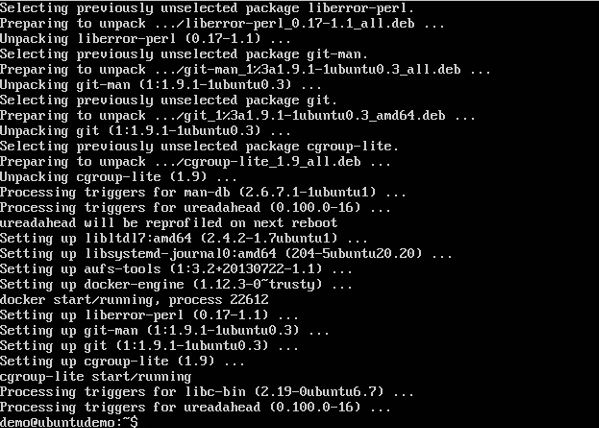
sudo apt-get install –y docker-engineที่นี่ apt-get ใช้ตัวเลือกการติดตั้งเพื่อดาวน์โหลดอิมเมจ Docker-engine จากเว็บไซต์ Docker และติดตั้ง Docker
Docker-engine เป็นแพ็คเกจอย่างเป็นทางการจาก Docker Corporation สำหรับระบบที่ใช้ Ubuntu
ในส่วนถัดไปเราจะดูวิธีตรวจสอบเวอร์ชันของ Docker ที่ติดตั้งไว้
เวอร์ชัน Docker
หากต้องการดูเวอร์ชันของ Docker ที่ทำงานอยู่คุณสามารถใช้คำสั่งต่อไปนี้ -
ไวยากรณ์
docker versionตัวเลือก
version - ใช้เพื่อให้แน่ใจว่าคำสั่ง Docker ส่งคืนเวอร์ชัน Docker ที่ติดตั้ง
ส่งคืนค่า
เอาต์พุตจะให้รายละเอียดต่างๆของเวอร์ชัน Docker ที่ติดตั้งในระบบ
ตัวอย่าง
sudo docker versionเอาต์พุต
เมื่อเรารันโปรแกรมข้างต้นเราจะได้ผลลัพธ์ดังนี้ -

ข้อมูลนักเทียบท่า
หากต้องการดูข้อมูลเพิ่มเติมเกี่ยวกับ Docker ที่ทำงานบนระบบคุณสามารถออกคำสั่งต่อไปนี้ -
ไวยากรณ์
docker infoตัวเลือก
info - ใช้เพื่อให้แน่ใจว่าคำสั่ง Docker ส่งคืนข้อมูลโดยละเอียดเกี่ยวกับบริการ Docker ที่ติดตั้ง
ส่งคืนค่า
เอาต์พุตจะให้รายละเอียดต่างๆของ Docker ที่ติดตั้งในระบบเช่น -
- จำนวนตู้คอนเทนเนอร์
- จำนวนภาพ
- ไดรเวอร์จัดเก็บข้อมูลที่ Docker ใช้
- ไดเร็กทอรีรากที่ Docker ใช้
- โปรแกรมควบคุมการดำเนินการที่ใช้โดย Docker
ตัวอย่าง
sudo docker infoเอาต์พุต
เมื่อเราเรียกใช้คำสั่งดังกล่าวเราจะได้ผลลัพธ์ดังต่อไปนี้ -

Docker สำหรับ Windows
Docker รองรับ Windows ได้ทันที แต่คุณต้องมีการกำหนดค่าต่อไปนี้เพื่อติดตั้ง Docker สำหรับ Windows
ความต้องการของระบบ
| ระบบปฏิบัติการ Windows | Windows 10 64 บิต |
| หน่วยความจำ | RAM 2 GB (แนะนำ) |
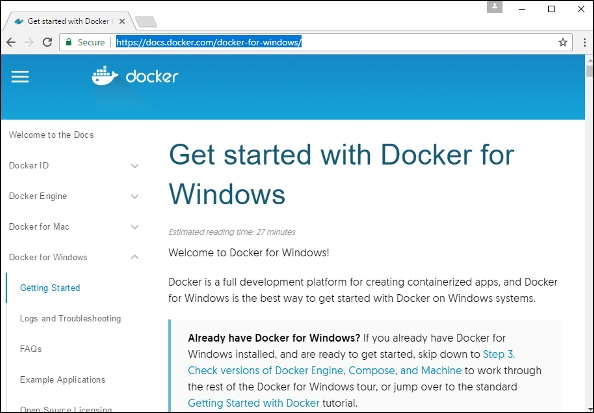
คุณสามารถดาวน์โหลด Docker สำหรับ Windows ได้จาก - https://docs.docker.com/docker-for-windows/

กล่องเครื่องมือ Docker
Docker ToolBox ได้รับการออกแบบมาสำหรับ Windows รุ่นเก่าเช่น Windows 8.1 และ Windows 7 คุณจำเป็นต้องมีการกำหนดค่าต่อไปนี้เพื่อติดตั้ง Docker สำหรับ Windows
ความต้องการของระบบ
| ระบบปฏิบัติการ Windows | Windows 7, 8, 8.1 |
| หน่วยความจำ | RAM 2 GB (แนะนำ) |
| Virtualization | ควรเปิดใช้งาน |
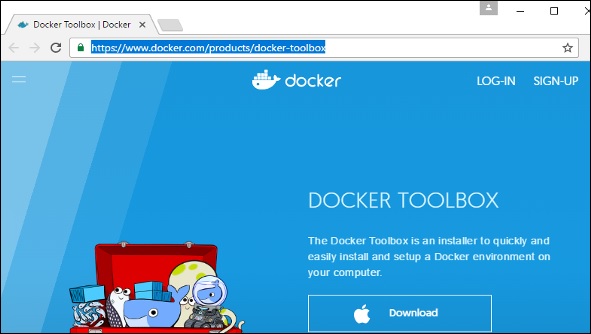
คุณสามารถดาวน์โหลด Docker ToolBox ได้จาก - https://www.docker.com/products/docker-toolbox
มาดูการติดตั้งผลิตภัณฑ์แต่ละชิ้นกัน
Docker สำหรับ Windows
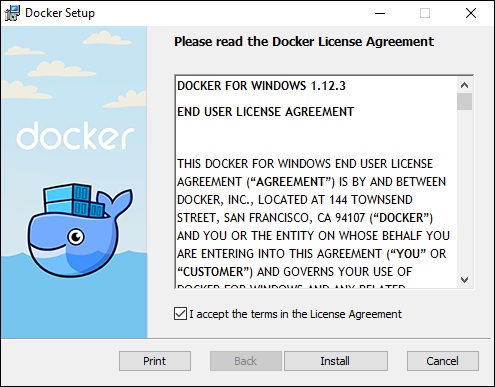
เมื่อดาวน์โหลดตัวติดตั้งแล้วให้ดับเบิลคลิกเพื่อเริ่มโปรแกรมติดตั้งจากนั้นทำตามขั้นตอนด้านล่าง
Step 1 - คลิกที่เงื่อนไขข้อตกลงแล้วคลิกปุ่มติดตั้งเพื่อดำเนินการติดตั้งต่อไป
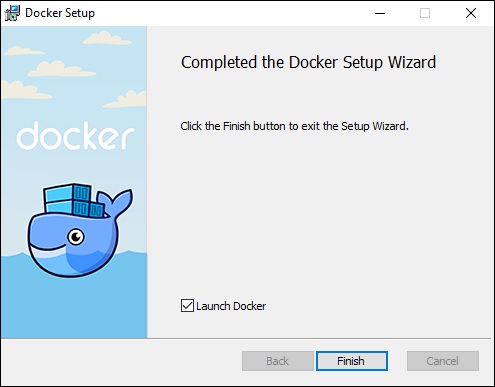
Step 2 - เมื่อเสร็จสิ้นคลิกปุ่ม Finish เพื่อทำการติดตั้ง
กล่องเครื่องมือ Docker
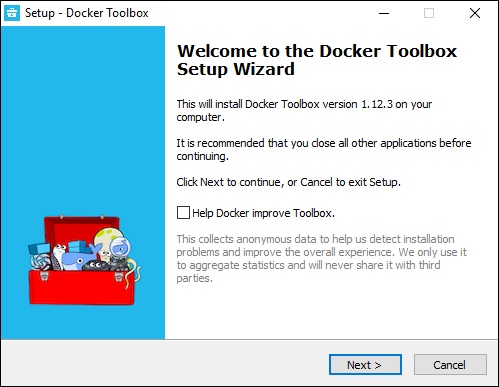
เมื่อดาวน์โหลดตัวติดตั้งแล้วให้ดับเบิลคลิกเพื่อเริ่มโปรแกรมติดตั้งจากนั้นทำตามขั้นตอนด้านล่าง
Step 1 - คลิกปุ่มถัดไปบนหน้าจอเริ่มต้น
Step 2 - เก็บตำแหน่งเริ่มต้นไว้ในหน้าจอถัดไปแล้วคลิกปุ่มถัดไป

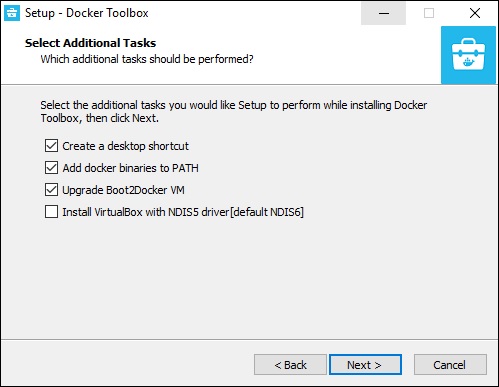
Step 3 - เก็บส่วนประกอบเริ่มต้นและคลิกปุ่มถัดไปเพื่อดำเนินการต่อ

Step 4 - เก็บงานเพิ่มเติมตามที่เป็นอยู่แล้วคลิกปุ่มถัดไป
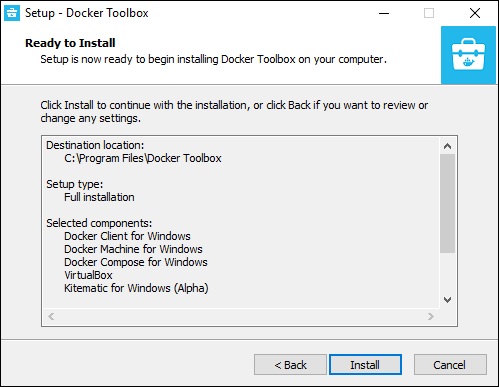
Step 5 - ในหน้าจอสุดท้ายให้คลิกปุ่มติดตั้ง
การทำงานกับ Docker Toolbox
ตอนนี้เรามาดูกันว่า Docker Toolbox สามารถใช้ทำงานกับ Docker container บน Windows ได้อย่างไร ขั้นตอนแรกคือการเปิดแอปพลิเคชั่น Docker Toolbox ซึ่งสร้างทางลัดบนเดสก์ท็อปเมื่อดำเนินการติดตั้งกล่องเครื่องมือ Docker
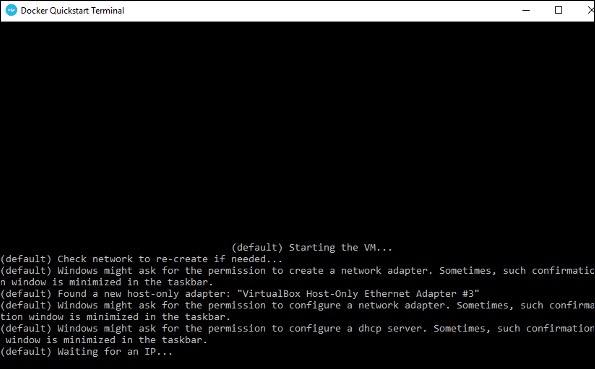
ถัดไปคุณจะเห็นการกำหนดค่าที่ดำเนินการเมื่อเปิดใช้กล่องเครื่องมือ Docker
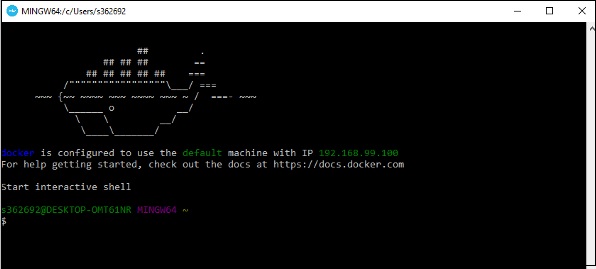
เมื่อเสร็จแล้วคุณจะเห็น Docker กำหนดค่าและเปิดใช้งาน คุณจะได้รับเชลล์แบบโต้ตอบสำหรับ Docker
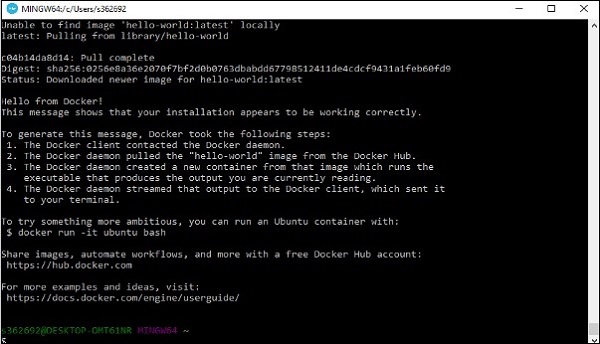
ในการทดสอบว่า Docker ทำงานอย่างถูกต้องเราสามารถใช้ Docker run command เพื่อดาวน์โหลดและเรียกใช้ไฟล์ HelloWorld Docker container.
การทำงานของ Docker run command ได้รับด้านล่าง -
docker runคำสั่งนี้ใช้เพื่อรันคำสั่งในคอนเทนเนอร์ Docker
ไวยากรณ์
docker run imageตัวเลือก
Image - นี่คือชื่อของรูปภาพที่ใช้ในการเรียกใช้คอนเทนเนอร์
ส่งคืนค่า
เอาต์พุตจะรันคำสั่งในคอนเทนเนอร์ที่ต้องการ
ตัวอย่าง
sudo docker run hello-worldคำสั่งนี้จะดาวน์โหลดไฟล์ hello-world รูปภาพหากยังไม่มีอยู่และเรียกใช้ไฟล์ hello-world เป็นภาชนะ
เอาต์พุต
เมื่อเราเรียกใช้คำสั่งดังกล่าวเราจะได้ผลลัพธ์ดังต่อไปนี้ -
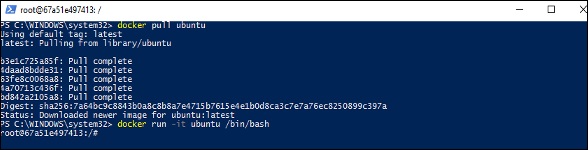
หากคุณต้องการเรียกใช้ Ubuntu OS บน Windows คุณสามารถดาวน์โหลด Ubuntu Image โดยใช้คำสั่งต่อไปนี้ -
Docker run –it ubuntu bashที่นี่คุณกำลังบอกให้ Docker รันคำสั่งในโหมดโต้ตอบผ่านไฟล์ –it ตัวเลือก
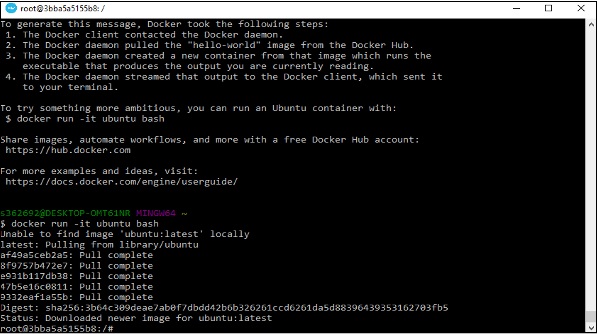
ในผลลัพธ์คุณจะเห็นว่ามีการดาวน์โหลดและเรียกใช้อิมเมจ Ubuntu จากนั้นคุณจะเข้าสู่ระบบในฐานะผู้ใช้รูทในคอนเทนเนอร์ Ubuntu
Docker Hub คือบริการรีจิสตรีบนคลาวด์ที่ให้คุณดาวน์โหลดอิมเมจ Docker ที่สร้างโดยชุมชนอื่น ๆ คุณยังสามารถอัปโหลดอิมเมจ Docker ที่สร้างขึ้นเองไปยัง Docker hub ในบทนี้เราจะดูวิธีการดาวน์โหลดและการใช้ภาพ Jenkins Docker จาก Docker hub
เว็บไซต์อย่างเป็นทางการสำหรับ Docker hub คือ - https://www.docker.com/community-edition#/add_ons
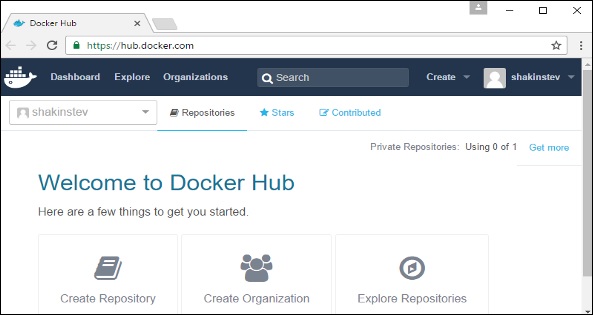
Step 1 - ก่อนอื่นคุณต้องลงทะเบียนง่ายๆบน Docker hub
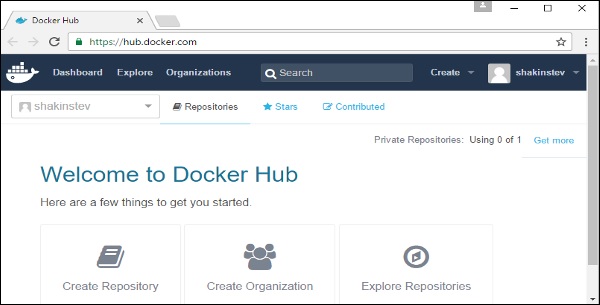
Step 2 - เมื่อคุณสมัครแล้วคุณจะเข้าสู่ Docker Hub
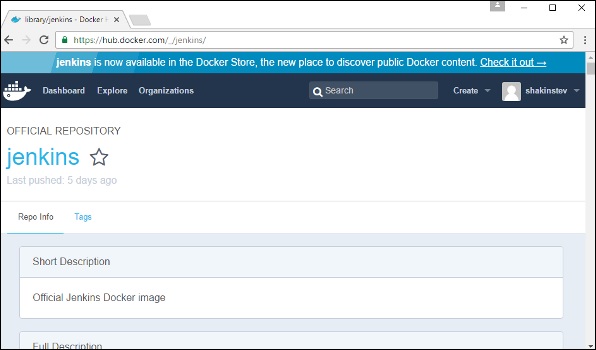
Step 3 - ต่อไปมาดูและค้นหาภาพ Jenkins

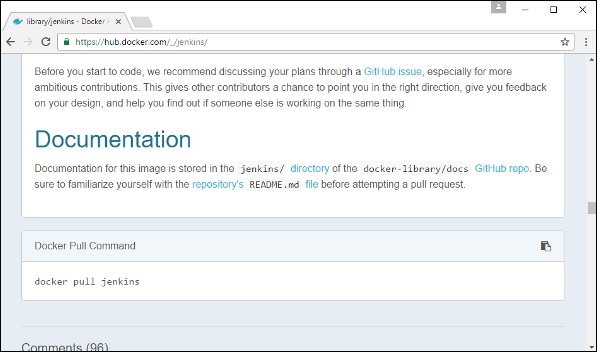
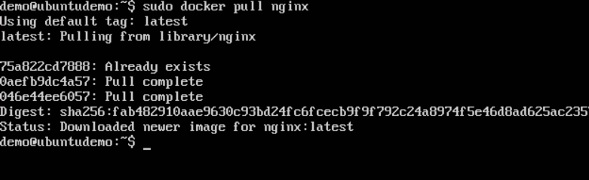
Step 4 - หากคุณเลื่อนลงในหน้าเดียวกันคุณจะเห็น Docker pullคำสั่ง สิ่งนี้จะใช้เพื่อดาวน์โหลดอิมเมจ Jenkins ไปยังเซิร์ฟเวอร์ Ubuntu ในเครื่อง
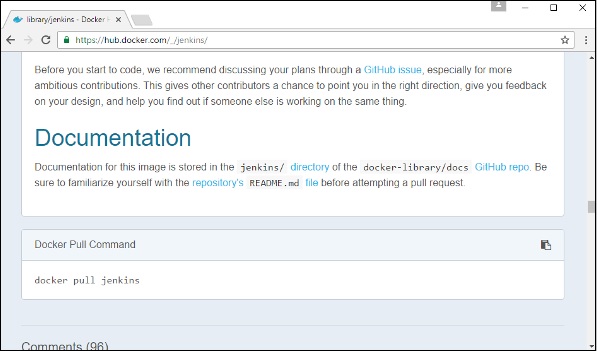
Step 5 - ตอนนี้ไปที่เซิร์ฟเวอร์ Ubuntu และเรียกใช้คำสั่งต่อไปนี้ -
sudo docker pull jenkins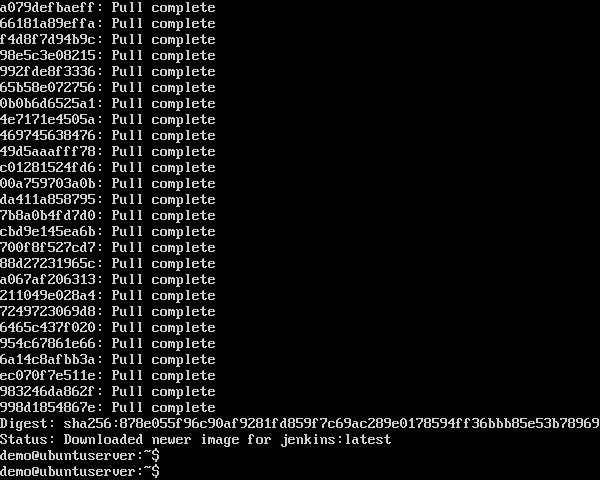
ในการเรียกใช้ Jenkins คุณต้องเรียกใช้คำสั่งต่อไปนี้ -
sudo docker run -p 8080:8080 -p 50000:50000 jenkinsสังเกตประเด็นต่อไปนี้เกี่ยวกับข้างต้น sudo คำสั่ง -
เรากำลังใช้ไฟล์ sudo คำสั่งเพื่อให้แน่ใจว่ารันด้วยการเข้าถึงรูท
ที่นี่ jenkins คือชื่อของรูปภาพที่เราต้องการดาวน์โหลดจาก Docker hub และติดตั้งบนเครื่อง Ubuntu ของเรา
-p ใช้เพื่อแมปหมายเลขพอร์ตของอิมเมจ Docker ภายในกับเซิร์ฟเวอร์ Ubuntu หลักของเราเพื่อให้เราสามารถเข้าถึงคอนเทนเนอร์ได้
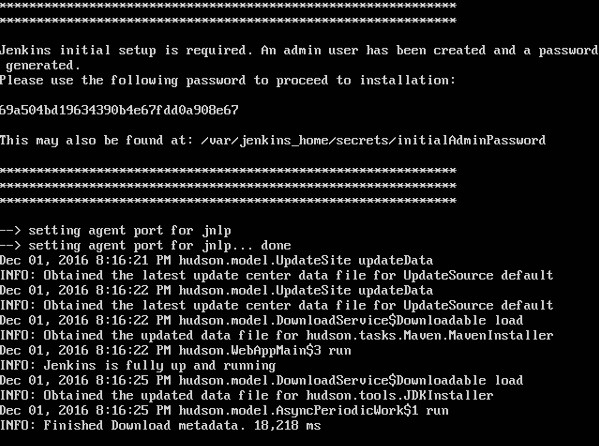
จากนั้นคุณจะให้ Jenkins ทำงานเป็นคอนเทนเนอร์บนเครื่อง Ubuntu ได้สำเร็จ
ใน Docker ทุกอย่างจะขึ้นอยู่กับรูปภาพ รูปภาพคือการรวมกันของระบบไฟล์และพารามิเตอร์ ลองดูตัวอย่างคำสั่งต่อไปนี้ใน Docker
docker run hello-worldคำสั่ง Docker เป็นคำสั่งเฉพาะและบอกโปรแกรม Docker บนระบบปฏิบัติการว่าต้องทำอะไรบางอย่าง
run คำสั่งใช้เพื่อพูดถึงว่าเราต้องการสร้างอินสแตนซ์ของรูปภาพซึ่งเรียกว่าไฟล์ container.
สุดท้าย "hello-world" แสดงถึงภาพที่ใช้ในการสร้างคอนเทนเนอร์
ตอนนี้เรามาดูกันว่าเราจะใช้อิมเมจ CentOS ที่มีอยู่ใน Docker Hub เพื่อเรียกใช้ CentOS บนเครื่อง Ubuntu ของเราได้อย่างไร เราสามารถทำได้โดยดำเนินการคำสั่งต่อไปนี้บนเครื่อง Ubuntu ของเรา -
sudo docker run centos –it /bin/bashสังเกตประเด็นต่อไปนี้เกี่ยวกับข้างต้น sudo คำสั่ง -
เรากำลังใช้ไฟล์ sudo เพื่อให้แน่ใจว่ารันด้วย root เข้าไป.
ที่นี่ centos คือชื่อของรูปภาพที่เราต้องการดาวน์โหลดจาก Docker Hub และติดตั้งบนเครื่อง Ubuntu ของเรา
─it ใช้เพื่อพูดถึงว่าเราต้องการเรียกใช้ interactive mode.
/bin/bash ใช้เพื่อเรียกใช้ bash shell เมื่อ CentOS เปิดใช้งาน
การแสดงภาพ Docker
หากต้องการดูรายการอิมเมจ Docker บนระบบคุณสามารถใช้คำสั่งต่อไปนี้
docker imagesคำสั่งนี้ใช้เพื่อแสดงภาพทั้งหมดที่ติดตั้งบนระบบในปัจจุบัน
ไวยากรณ์
docker imagesตัวเลือก
ไม่มี
ส่งคืนค่า
ผลลัพธ์จะแสดงรายการรูปภาพบนระบบ
ตัวอย่าง
sudo docker imagesเอาต์พุต
เมื่อเรารันคำสั่งดังกล่าวจะให้ผลลัพธ์ดังนี้ -
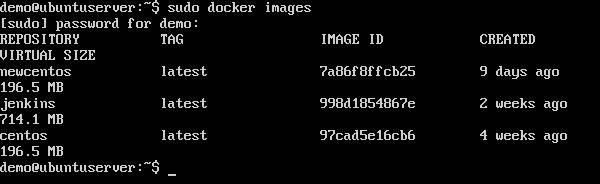
จากผลลัพธ์ด้านบนคุณจะเห็นว่าเซิร์ฟเวอร์มีภาพสามภาพ: centos, newcentos, และ jenkins. แต่ละภาพมีคุณสมบัติดังต่อไปนี้ -
TAG - ใช้เพื่อแท็กรูปภาพอย่างมีเหตุผล
Image ID - ใช้เพื่อระบุรูปภาพโดยไม่ซ้ำกัน
Created - จำนวนวันนับตั้งแต่สร้างภาพ
Virtual Size - ขนาดของภาพ
การดาวน์โหลด Docker Images
สามารถดาวน์โหลดรูปภาพได้จาก Docker Hub โดยใช้ Docker runคำสั่ง มาดูรายละเอียดกันว่าเราจะทำได้อย่างไร
ไวยากรณ์
ไวยากรณ์ต่อไปนี้ใช้เพื่อรันคำสั่งในคอนเทนเนอร์ Docker
docker run imageตัวเลือก
Image - นี่คือชื่อของรูปภาพที่ใช้ในการเรียกใช้คอนเทนเนอร์
ส่งคืนค่า
เอาต์พุตจะรันคำสั่งในคอนเทนเนอร์ที่ต้องการ
ตัวอย่าง
sudo docker run centosคำสั่งนี้จะดาวน์โหลดไฟล์ centos อิมเมจหากยังไม่มีอยู่และเรียกใช้ระบบปฏิบัติการเป็นคอนเทนเนอร์
เอาต์พุต
เมื่อเราเรียกใช้คำสั่งดังกล่าวเราจะได้ผลลัพธ์ดังต่อไปนี้ -
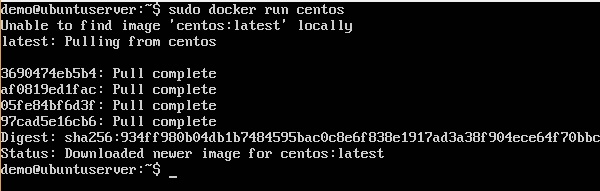
ตอนนี้คุณจะเห็นภาพ CentOS Docker ดาวน์โหลด ทีนี้ถ้าเราเรียกใช้ Dockerimages เพื่อดูรายการรูปภาพในระบบเราควรจะเห็นไฟล์ centos ภาพด้วย

การลบ Docker Images
The Docker images on the system can be removed via the docker rmi command. Let’s look at this command in more detail.
docker rmiThis command is used to remove Docker images.
Syntax
docker rmi ImageIDOptions
ImageID − This is the ID of the image which needs to be removed.
Return Value
The output will provide the Image ID of the deleted Image.
Example
sudo docker rmi 7a86f8ffcb25Here, 7a86f8ffcb25 is the Image ID of the newcentos image.
Output
When we run the above command, it will produce the following result −

Let’s see some more Docker commands on images.
docker images -q
This command is used to return only the Image ID’s of the images.
Syntax
docker imagesOptions
q − It tells the Docker command to return the Image ID’s only.
Return Value
The output will show only the Image ID’s of the images on the Docker host.
Example
sudo docker images -qOutput
When we run the above command, it will produce the following result −

docker inspect
This command is used see the details of an image or container.
Syntax
docker inspect RepositoryOptions
Repository − This is the name of the Image.
Return Value
The output will show detailed information on the Image.
Example
sudo docker inspect jenkinsOutput
When we run the above command, it will produce the following result −

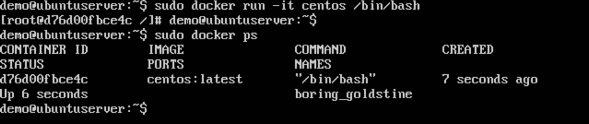
Containers are instances of Docker images that can be run using the Docker run command. The basic purpose of Docker is to run containers. Let’s discuss how to work with containers.
Running a Container
Running of containers is managed with the Docker run command. To run a container in an interactive mode, first launch the Docker container.
sudo docker run –it centos /bin/bashThen hit Crtl+p and you will return to your OS shell.

You will then be running in the instance of the CentOS system on the Ubuntu server.
Listing of Containers
One can list all of the containers on the machine via the docker ps command. This command is used to return the currently running containers.
docker psSyntax
docker psOptions
None
Return Value
The output will show the currently running containers.
Example
sudo docker psOutput
When we run the above command, it will produce the following result −

Let’s see some more variations of the docker ps command.
docker ps -a
This command is used to list all of the containers on the system
Syntax
docker ps -aOptions
─a − It tells the docker ps command to list all of the containers on the system.
Return Value
The output will show all containers.
Example
sudo docker ps -aOutput
When we run the above command, it will produce the following result −

docker history
With this command, you can see all the commands that were run with an image via a container.
Syntax
docker history ImageIDOptions
ImageID − This is the Image ID for which you want to see all the commands that were run against it.
Return Value
The output will show all the commands run against that image.
Example
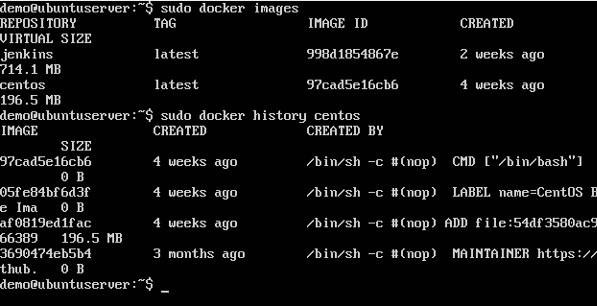
sudo docker history centosThe above command will show all the commands that were run against the centos image.
Output
When we run the above command, it will produce the following result −
In this chapter, we will explore in detail what we can do with containers.
docker top
With this command, you can see the top processes within a container.
Syntax
docker top ContainerIDOptions
ContainerID − This is the Container ID for which you want to see the top processes.
Return Value
The output will show the top-level processes within a container.
Example
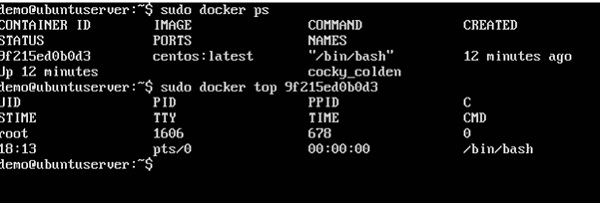
sudo docker top 9f215ed0b0d3The above command will show the top-level processes within a container.
Output
When we run the above command, it will produce the following result −
docker stop
This command is used to stop a running container.
Syntax
docker stop ContainerIDOptions
ContainerID − This is the Container ID which needs to be stopped.
Return Value
The output will give the ID of the stopped container.
Example
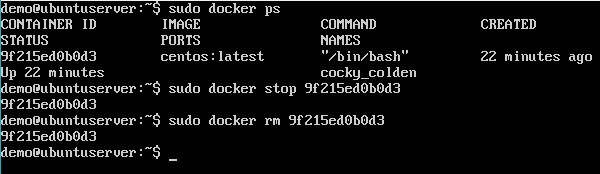
sudo docker stop 9f215ed0b0d3The above command will stop the Docker container 9f215ed0b0d3.
Output
When we run the above command, it will produce the following result −
docker rm
This command is used to delete a container.
Syntax
docker rm ContainerIDOptions
ContainerID − This is the Container ID which needs to be removed.
Return Value
The output will give the ID of the removed container.
Example
sudo docker rm 9f215ed0b0d3The above command will remove the Docker container 9f215ed0b0d3.
Output
When we run the above command, it will produce the following result −

docker stats
This command is used to provide the statistics of a running container.
Syntax
docker stats ContainerIDOptions
ContainerID − This is the Container ID for which the stats need to be provided.
Return Value
The output will show the CPU and Memory utilization of the Container.
Example
sudo docker stats 9f215ed0b0d3The above command will provide CPU and memory utilization of the Container 9f215ed0b0d3.
Output
When we run the above command, it will produce the following result −

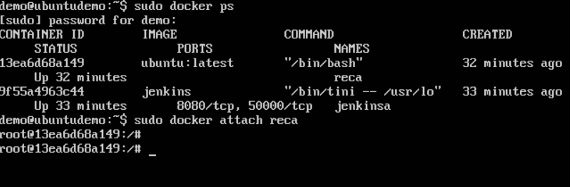
docker attach
This command is used to attach to a running container.
Syntax
docker attach ContainerIDOptions
ContainerID − This is the Container ID to which you need to attach.
Return Value
None
Example
sudo docker attach 07b0b6f434feThe above command will attach to the Docker container 07b0b6f434fe.
Output
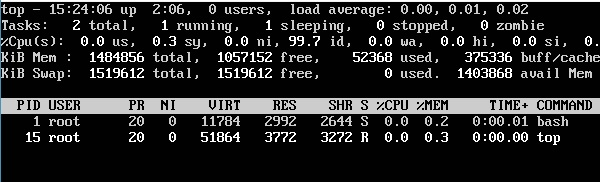
When we run the above command, it will produce the following result −
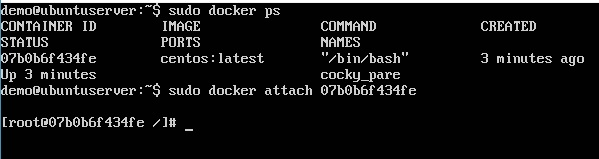
Once you have attached to the Docker container, you can run the above command to see the process utilization in that Docker container.
docker pause
This command is used to pause the processes in a running container.
Syntax
docker pause ContainerIDOptions
ContainerID − This is the Container ID to which you need to pause the processes in the container.
Return Value
The ContainerID of the paused container.
Example
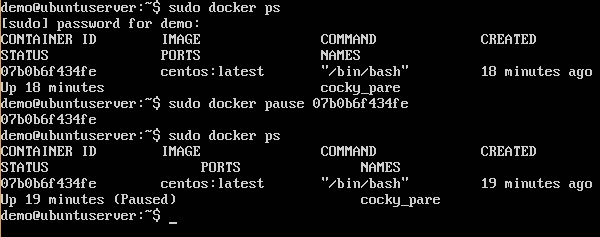
sudo docker pause 07b0b6f434feThe above command will pause the processes in a running container 07b0b6f434fe.
Output
When we run the above command, it will produce the following result −
docker unpause
This command is used to unpause the processes in a running container.
Syntax
docker unpause ContainerIDOptions
ContainerID − This is the Container ID to which you need to unpause the processes in the container.
Return Value
The ContainerID of the running container.
Example
sudo docker unpause 07b0b6f434feThe above command will unpause the processes in a running container: 07b0b6f434fe
Output
When we run the above command, it will produce the following result −

docker kill
This command is used to kill the processes in a running container.
Syntax
docker kill ContainerIDOptions
ContainerID − This is the Container ID to which you need to kill the processes in the container.
Return Value
The ContainerID of the running container.
Example
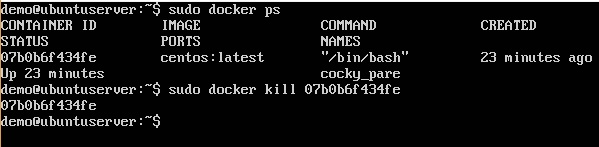
sudo docker kill 07b0b6f434feThe above command will kill the processes in the running container 07b0b6f434fe.
Output
When we run the above command, it will produce the following result −
Docker – Container Lifecycle
The following illustration explains the entire lifecycle of a Docker container.

Initially, the Docker container will be in the created state.
Then the Docker container goes into the running state when the Docker run command is used.
The Docker kill command is used to kill an existing Docker container.
The Docker pause command is used to pause an existing Docker container.
The Docker stop command is used to pause an existing Docker container.
The Docker run command is used to put a container back from a stopped state to a running state.
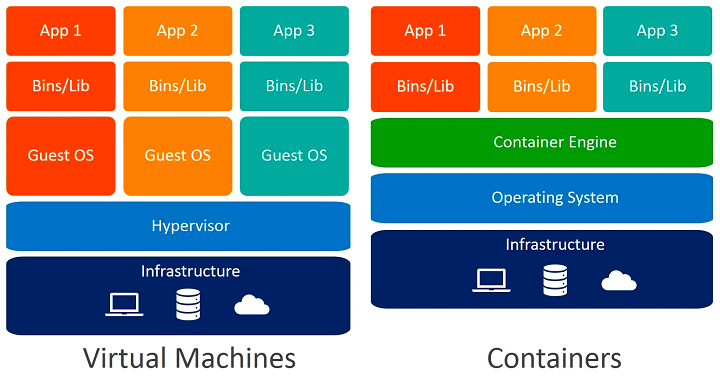
The following image shows the standard and traditional architecture of virtualization.
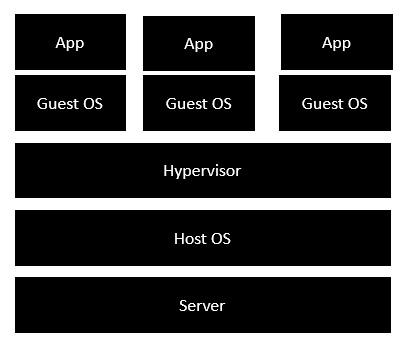
The server is the physical server that is used to host multiple virtual machines.
The Host OS is the base machine such as Linux or Windows.
The Hypervisor is either VMWare or Windows Hyper V that is used to host virtual machines.
You would then install multiple operating systems as virtual machines on top of the existing hypervisor as Guest OS.
You would then host your applications on top of each Guest OS.
The following image shows the new generation of virtualization that is enabled via Dockers. Let’s have a look at the various layers.
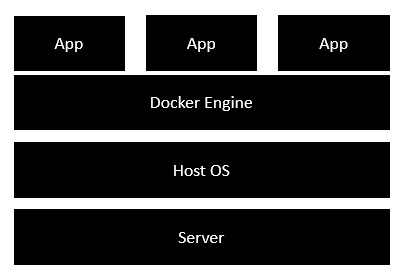
The server is the physical server that is used to host multiple virtual machines. So this layer remains the same.
The Host OS is the base machine such as Linux or Windows. So this layer remains the same.
Now comes the new generation which is the Docker engine. This is used to run the operating system which earlier used to be virtual machines as Docker containers.
All of the Apps now run as Docker containers.
The clear advantage in this architecture is that you don’t need to have extra hardware for Guest OS. Everything works as Docker containers.
The good thing about the Docker engine is that it is designed to work on various operating systems. We have already seen the installation on Windows and seen all the Docker commands on Linux systems. Now let’s see the various Docker commands on the Windows OS.
Docker Images
Let’s run the Docker images command on the Windows host.
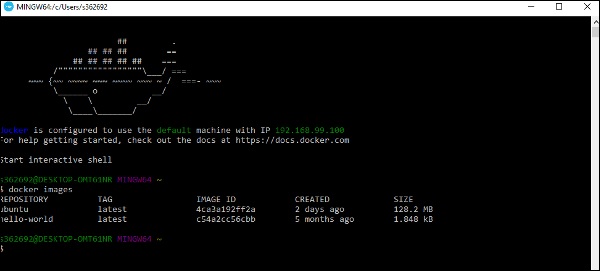
From here, we can see that we have two images − ubuntu and hello-world.
Running a Container
Now let’s run a container in the Windows Docker host.
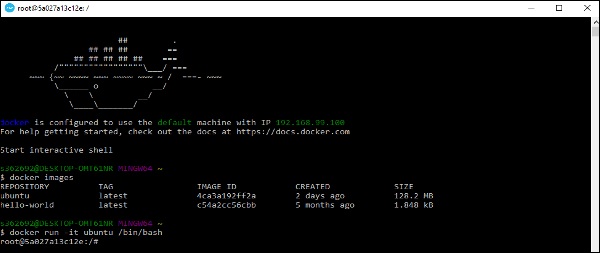
We can see that by running the container, we can now run the Ubuntu container on a Windows host.
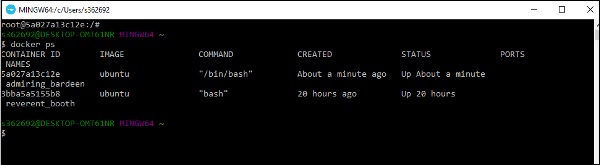
Listing All Containers
Let’s list all the containers on the Windows host.
Stopping a Container
Let’s now stop a running container on the Windows host.
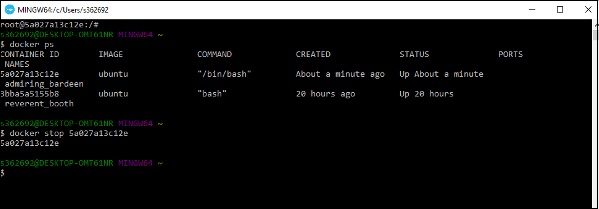
So you can see that the Docker engine is pretty consistent when it comes to different Docker hosts and it works on Windows in the same way it works on Linux.
In this chapter, we will look at the different options to configure Docker.
service docker stop
This command is used to stop the Docker daemon process.
Syntax
service docker stopOptions
None
Return Value
A message showing that the Docker process has stopped.
Example
sudo service docker stopOutput
When we run the above command, it will produce the following result −

service docker start
This command is used to start the Docker daemon process.
Syntax
service docker startOptions
None
Return Value
A message showing that the Docker process has started.
Example
sudo service docker startOutput
When we run the above command, it will produce the following result −

By default, when you launch a container, you will also use a shell command while launching the container as shown below. This is what we have seen in the earlier chapters when we were working with containers.
In the above screenshot, you can observe that we have issued the following command −
sudo docker run –it centos /bin/bashWe used this command to create a new container and then used the Ctrl+P+Q command to exit out of the container. It ensures that the container still exists even after we exit from the container.
We can verify that the container still exists with the Docker ps command. If we had to exit out of the container directly, then the container itself would be destroyed.
Now there is an easier way to attach to containers and exit them cleanly without the need of destroying them. One way of achieving this is by using the nsenter command.
Before we run the nsenter command, you need to first install the nsenter image. It can be done by using the following command −
docker run --rm -v /usr/local/bin:/target jpetazzo/nsenter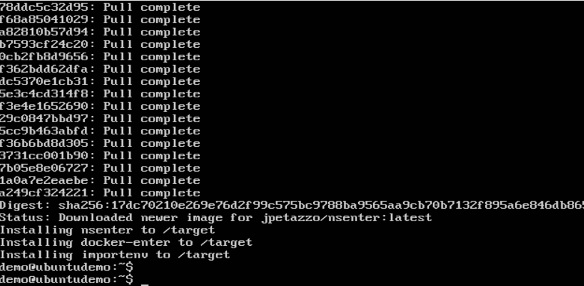
Before we use the nsenter command, we need to get the Process ID of the container, because this is required by the nsenter command. We can get the Process ID via the Docker inspect command and filtering it via the Pid.
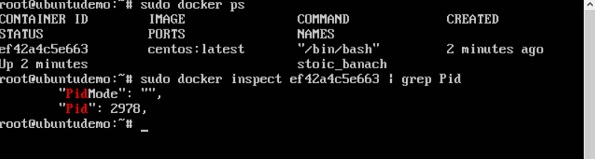
As seen in the above screenshot, we have first used the docker ps command to see the running containers. We can see that there is one running container with the ID of ef42a4c5e663.
We then use the Docker inspect command to inspect the configuration of this container and then use the grep command to just filter the Process ID. And from the output, we can see that the Process ID is 2978.
Now that we have the process ID, we can proceed forward and use the nsenter command to attach to the Docker container.
nsenter
This method allows one to attach to a container without exiting the container.
Syntax
nsenter –m –u –n –p –i –t containerID command
Options
-u is used to mention the Uts namespace
-m is used to mention the mount namespace
-n is used to mention the network namespace
-p is used to mention the process namespace
-i s to make the container run in interactive mode.
-t is used to connect the I/O streams of the container to the host OS.
containerID − This is the ID of the container.
Command − This is the command to run within the container.
Return Value
None
Example
sudo nsenter –m –u –n –p –i –t 2978 /bin/bashOutput
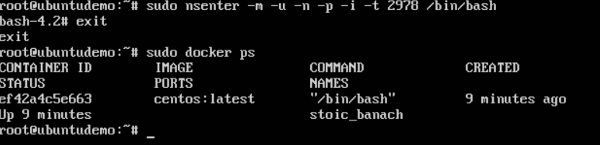
From the output, we can observe the following points −
The prompt changes to the bash shell directly when we issue the nsenter command.
We then issue the exit command. Now normally if you did not use the nsenter command, the container would be destroyed. But you would notice that when we run the nsenter command, the container is still up and running.
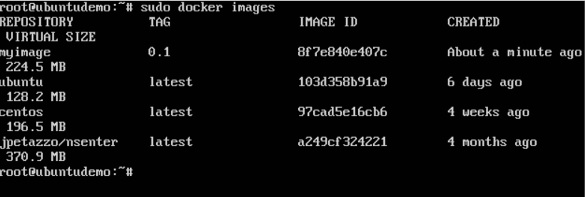
In the earlier chapters, we have seen the various Image files such as Centos which get downloaded from Docker hub from which you can spin up containers. An example is again shown below.

If we use the Docker images command, we can see the existing images in our system. From the above screenshot, we can see that there are two images: centos and nsenter.
But Docker also gives you the capability to create your own Docker images, and it can be done with the help of Docker Files. A Docker File is a simple text file with instructions on how to build your images.
The following steps explain how you should go about creating a Docker File.
Step 1 − Create a file called Docker File and edit it using vim. Please note that the name of the file has to be "Dockerfile" with "D" as capital.

Step 2 − Build your Docker File using the following instructions.
#This is a sample Image
FROM ubuntu
MAINTAINER [email protected]

RUN apt-get update
RUN apt-get install –y nginx
CMD [“echo”,”Image created”]
The following points need to be noted about the above file −
The first line "#This is a sample Image" is a comment. You can add comments to the Docker File with the help of the # command
The next line has to start with the FROM keyword. It tells docker, from which base image you want to base your image from. In our example, we are creating an image from the ubuntu image.
The next command is the person who is going to maintain this image. Here you specify the MAINTAINER keyword and just mention the email ID.
The RUN command is used to run instructions against the image. In our case, we first update our Ubuntu system and then install the nginx server on our ubuntu image.
The last command is used to display a message to the user.
Step 3 − Save the file. In the next chapter, we will discuss how to build the image.

We created our Docker File in the last chapter. It’s now time to build the Docker File. The Docker File can be built with the following command −
docker buildLet’s learn more about this command.
docker build
This method allows the users to build their own Docker images.
Syntax
docker build -t ImageName:TagName dirOptions
-t − is to mention a tag to the image
ImageName − This is the name you want to give to your image.
TagName − This is the tag you want to give to your image.
Dir − The directory where the Docker File is present.
Return Value
None
Example
sudo docker build –t myimage:0.1.Here, myimage is the name we are giving to the Image and 0.1 is the tag number we are giving to our image.
Since the Docker File is in the present working directory, we used "." at the end of the command to signify the present working directory.
Output
From the output, you will first see that the Ubuntu Image will be downloaded from Docker Hub, because there is no image available locally on the machine.

Finally, when the build is complete, all the necessary commands would have run on the image.

You will then see the successfully built message and the ID of the new Image. When you run the Docker images command, you would then be able to see your new image.
You can now build containers from your new Image.
Public repositories can be used to host Docker images which can be used by everyone else. An example is the images which are available in Docker Hub. Most of the images such as Centos, Ubuntu, and Jenkins are all publicly available for all. We can also make our images available by publishing it to the public repository on Docker Hub.
For our example, we will use the myimage repository built in the "Building Docker Files" chapter and upload that image to Docker Hub. Let’s first review the images on our Docker host to see what we can push to the Docker registry.
Here, we have our myimage:0.1 image which was created as a part of the “Building Docker Files” chapter. Let’s use this to upload to the Docker public repository.
The following steps explain how you can upload an image to public repository.
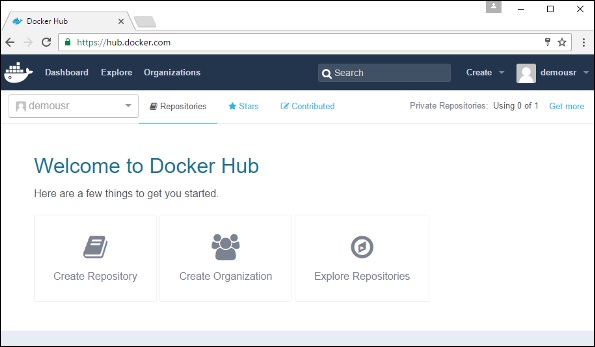
Step 1 − Log into Docker Hub and create your repository. This is the repository where your image will be stored. Go to https://hub.docker.com/ and log in with your credentials.
Step 2 − Click the button "Create Repository" on the above screen and create a repository with the name demorep. Make sure that the visibility of the repository is public.

Once the repository is created, make a note of the pull command which is attached to the repository.
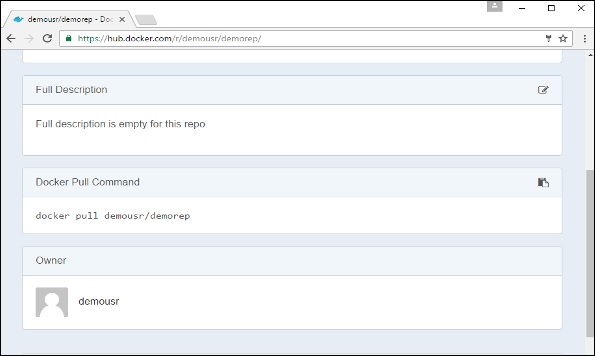
The pull command which will be used in our repository is as follows −
docker pull demousr/demorepStep 3 − Now go back to the Docker Host. Here we need to tag our myimage to the new repository created in Docker Hub. We can do this via the Docker tag command.
We will learn more about this tag command later in this chapter.
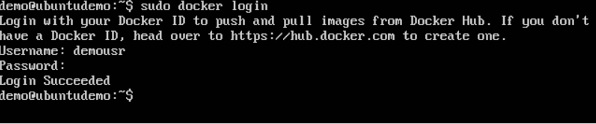
Step 4 − Issue the Docker login command to login into the Docker Hub repository from the command prompt. The Docker login command will prompt you for the username and password to the Docker Hub repository.
Step 5 − Once the image has been tagged, it’s now time to push the image to the Docker Hub repository. We can do this via the Docker push command. We will learn more about this command later in this chapter.
docker tag
This method allows one to tag an image to the relevant repository.
Syntax
docker tag imageID RepositorynameOptions
imageID − This is the ImageID which needs to be tagged to the repository.
Repositoryname − This is the repository name to which the ImageID needs to be tagged to.
Return Value
None
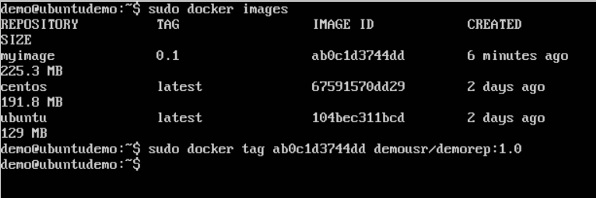
Example
sudo docker tag ab0c1d3744dd demousr/demorep:1.0Output
A sample output of the above example is given below.
docker push
This method allows one to push images to the Docker Hub.
Syntax
docker push RepositorynameOptions
Repositoryname − This is the repository name which needs to be pushed to the Docker Hub.
Return Value
The long ID of the repository pushed to Docker Hub.
Example
sudo docker push demousr/demorep:1.0Output
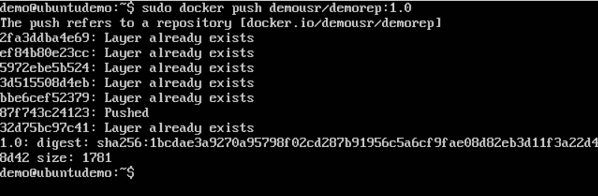
If you go back to the Docker Hub page and go to your repository, you will see the tag name in the repository.
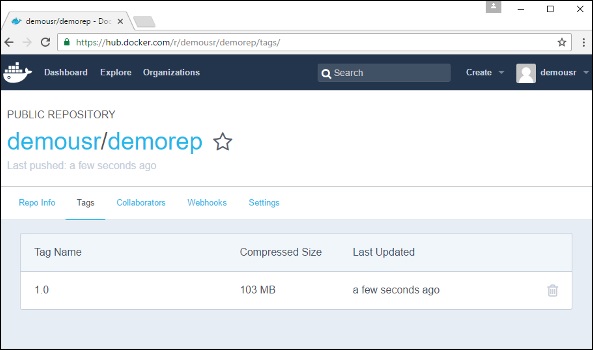
Now let’s try to pull the repository we uploaded onto our Docker host. Let’s first delete the images, myimage:0.1 and demousr/demorep:1.0, from the local Docker host. Let’s use the Docker pull command to pull the repository from the Docker Hub.
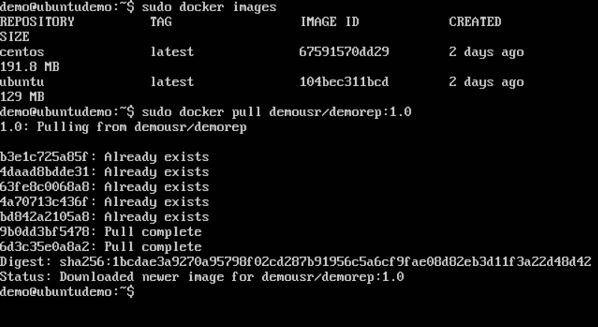
From the above screenshot, you can see that the Docker pull command has taken our new repository from the Docker Hub and placed it on our machine.
In Docker, the containers themselves can have applications running on ports. When you run a container, if you want to access the application in the container via a port number, you need to map the port number of the container to the port number of the Docker host. Let’s look at an example of how this can be achieved.
In our example, we are going to download the Jenkins container from Docker Hub. We are then going to map the Jenkins port number to the port number on the Docker host.
Step 1 − First, you need to do a simple sign-up on Docker Hub.
Step 2 − Once you have signed up, you will be logged into Docker Hub.
Step 3 − Next, let’s browse and find the Jenkins image.
Step 4 − If you scroll down on the same page, you can see the Docker pull command. This will be used to download the Jenkins Image onto the local Ubuntu server.
Step 5 − Now go to the Ubuntu server and run the command −
sudo docker pull jenkins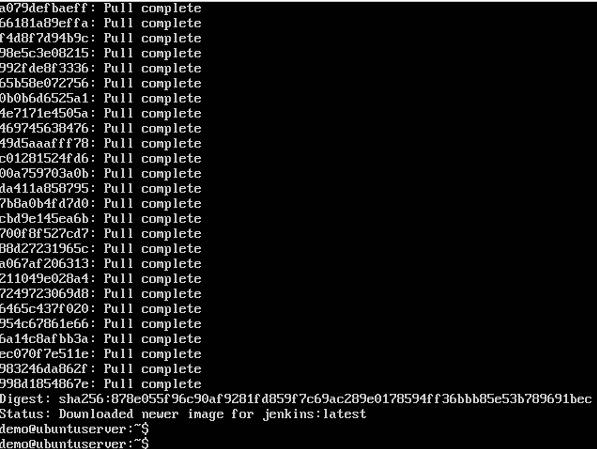
Step 6 − To understand what ports are exposed by the container, you should use the Docker inspect command to inspect the image.
Let’s now learn more about this inspect command.
docker inspect
This method allows one to return low-level information on the container or image.
Syntax
docker inspect Container/ImageOptions
Container/Image − The container or image to inspect
Return Value
The low-level information of the image or container in JSON format.
Example
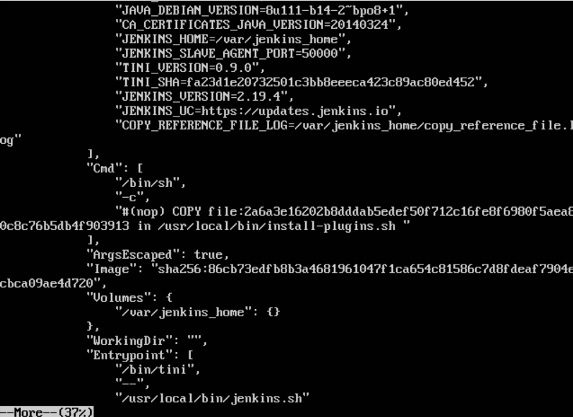
sudo docker inspect jenkinsOutput

The output of the inspect command gives a JSON output. If we observe the output, we can see that there is a section of "ExposedPorts" and see that there are two ports mentioned. One is the data port of 8080 and the other is the control port of 50000.
To run Jenkins and map the ports, you need to change the Docker run command and add the ‘p’ option which specifies the port mapping. So, you need to run the following command −
sudo docker run -p 8080:8080 -p 50000:50000 jenkinsThe left-hand side of the port number mapping is the Docker host port to map to and the right-hand side is the Docker container port number.
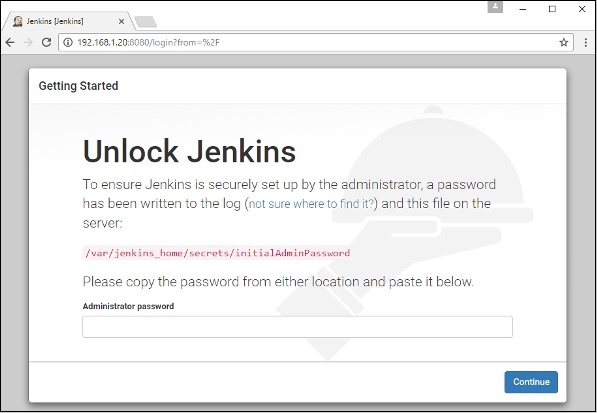
When you open the browser and navigate to the Docker host on port 8080, you will see Jenkins up and running.
You might have the need to have your own private repositories. You may not want to host the repositories on Docker Hub. For this, there is a repository container itself from Docker. Let’s see how we can download and use the container for registry.
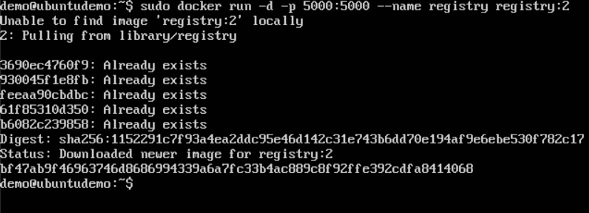
Step 1 − Use the Docker run command to download the private registry. This can be done using the following command.
sudo docker run –d –p 5000:5000 –-name registry registry:2The following points need to be noted about the above command −
Registry is the container managed by Docker which can be used to host private repositories.
The port number exposed by the container is 5000. Hence with the –p command, we are mapping the same port number to the 5000 port number on our localhost.
We are just tagging the registry container as “2”, to differentiate it on the Docker host.
The –d option is used to run the container in detached mode. This is so that the container can run in the background
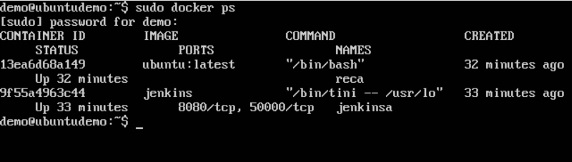
Step 2 − Let’s do a docker ps to see that the registry container is indeed running.
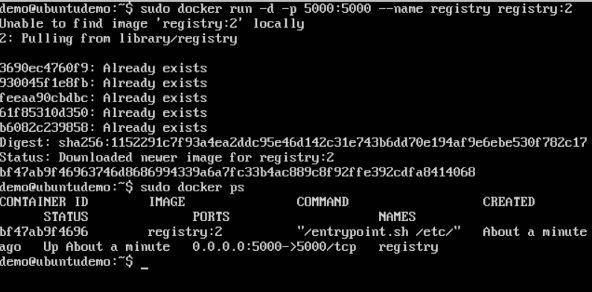
We have now confirmed that the registry container is indeed running.
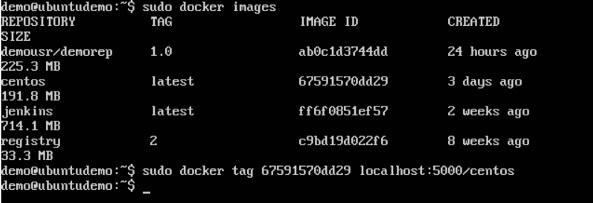
Step 3 − Now let’s tag one of our existing images so that we can push it to our local repository. In our example, since we have the centos image available locally, we are going to tag it to our private repository and add a tag name of centos.
sudo docker tag 67591570dd29 localhost:5000/centosThe following points need to be noted about the above command −
67591570dd29 refers to the Image ID for the centos image.
localhost:5000 is the location of our private repository.
We are tagging the repository name as centos in our private repository.
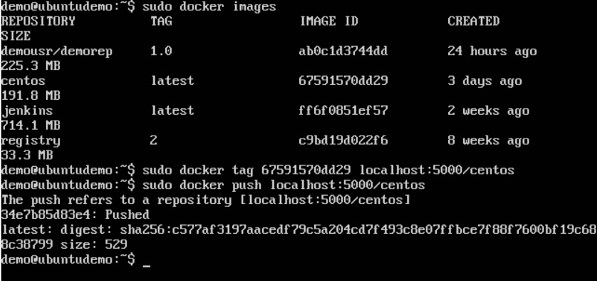
Step 4 − Now let’s use the Docker push command to push the repository to our private repository.
sudo docker push localhost:5000/centosHere, we are pushing the centos image to the private repository hosted at localhost:5000.
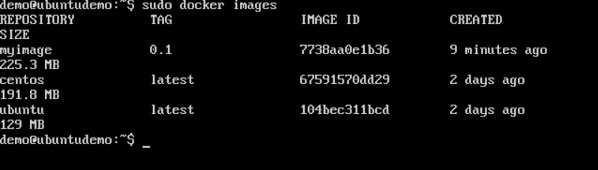
Step 5 − Now let’s delete the local images we have for centos using the docker rmi commands. We can then download the required centos image from our private repository.
sudo docker rmi centos:latest
sudo docker rmi 67591570dd29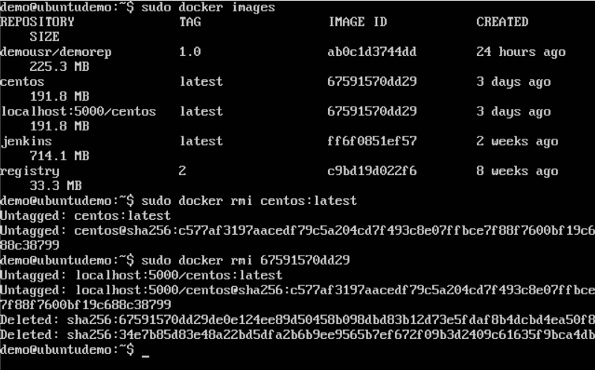
Step 6 − Now that we don’t have any centos images on our local machine, we can now use the following Docker pull command to pull the centos image from our private repository.
sudo docker pull localhost:5000/centosHere, we are pulling the centos image to the private repository hosted at localhost:5000.
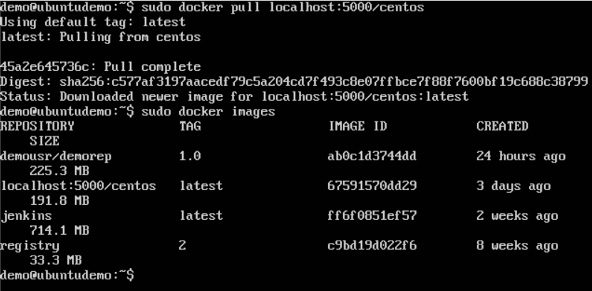
If you now see the images on your system, you will see the centos image as well.
We have already learnt how to use Docker File to build our own custom images. Now let’s see how we can build a web server image which can be used to build containers.
In our example, we are going to use the Apache Web Server on Ubuntu to build our image. Let’s follow the steps given below, to build our web server Docker file.
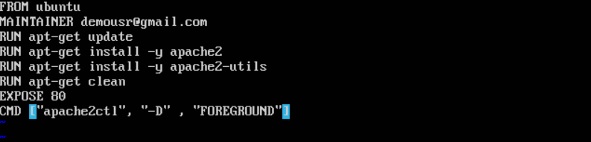
Step 1 − The first step is to build our Docker File. Let’s use vim and create a Docker File with the following information.
FROM ubuntu
RUN apt-get update
RUN apt-get install –y apache2
RUN apt-get install –y apache2-utils
RUN apt-get clean
EXPOSE 80 CMD [“apache2ctl”, “-D”, “FOREGROUND”]
The following points need to be noted about the above statements −
We are first creating our image to be from the Ubuntu base image.
Next, we are going to use the RUN command to update all the packages on the Ubuntu system.
Next, we use the RUN command to install apache2 on our image.
Next, we use the RUN command to install the necessary utility apache2 packages on our image.
Next, we use the RUN command to clean any unnecessary files from the system.
The EXPOSE command is used to expose port 80 of Apache in the container to the Docker host.
Finally, the CMD command is used to run apache2 in the background.
เมื่อกรอกรายละเอียดไฟล์แล้วให้บันทึกไฟล์
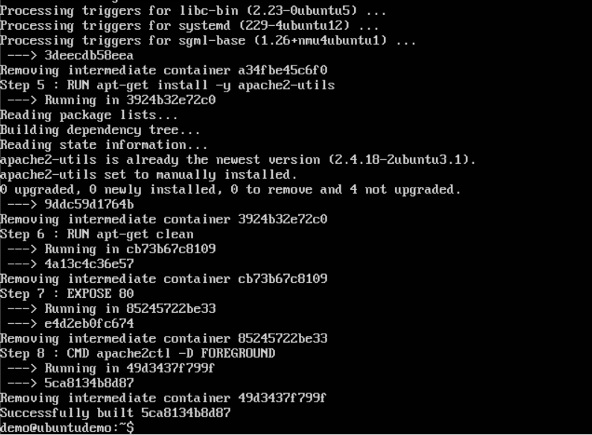
Step 2 - เรียกใช้ Docker buildคำสั่งเพื่อสร้างไฟล์ Docker สามารถทำได้โดยใช้คำสั่งต่อไปนี้ -
sudo docker build –t=”mywebserver” .เรากำลังแท็กรูปภาพของเราเป็น mywebserver. เมื่อสร้างภาพแล้วคุณจะได้รับข้อความที่แสดงว่าสร้างไฟล์เสร็จเรียบร้อยแล้ว
Step 3- เมื่อสร้างไฟล์เว็บเซิร์ฟเวอร์แล้วก็ถึงเวลาสร้างคอนเทนเนอร์จากรูปภาพ เราสามารถทำได้ด้วย Dockerrun คำสั่ง
sudo docker run –d –p 80:80 mywebserver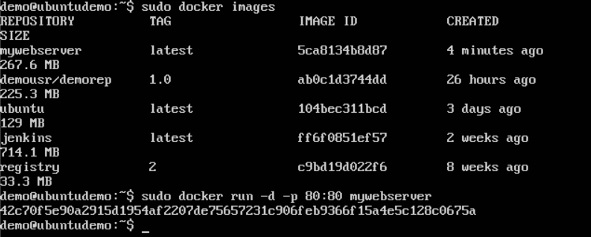
ประเด็นต่อไปนี้ต้องสังเกตเกี่ยวกับคำสั่งดังกล่าว -
หมายเลขพอร์ตที่คอนเทนเนอร์เปิดเผยคือ 80 ดังนั้นด้วย –p คำสั่งเรากำลังแมปหมายเลขพอร์ตเดียวกันกับหมายเลขพอร์ต 80 บน localhost ของเรา
–dใช้ตัวเลือกเพื่อเรียกใช้คอนเทนเนอร์ในโหมดแยกออก เพื่อให้คอนเทนเนอร์ทำงานในพื้นหลังได้
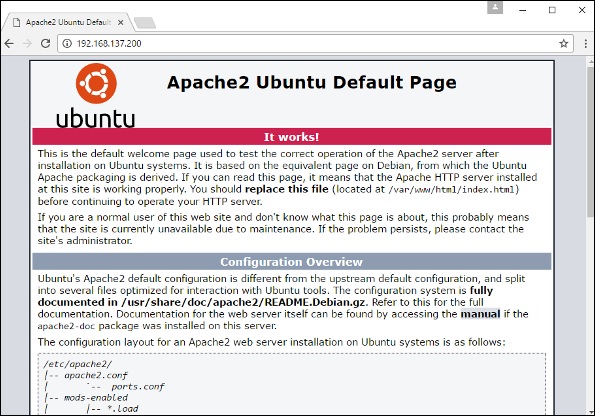
หากคุณไปที่พอร์ต 80 ของโฮสต์ Docker ในเว็บเบราว์เซอร์ของคุณตอนนี้คุณจะเห็นว่า Apache พร้อมใช้งานแล้ว
Docker มีโฮสต์ของคำสั่งคำสั่ง คำสั่งเหล่านี้คือคำสั่งที่ใส่ไว้ใน Docker File ลองดูตัวที่มีอยู่
คำสั่ง CMD
คำสั่งนี้ใช้เพื่อดำเนินการคำสั่งที่รันไทม์เมื่อเรียกใช้คอนเทนเนอร์
ไวยากรณ์
CMD command param1ตัวเลือก
command - นี่คือคำสั่งที่จะรันเมื่อเปิดคอนเทนเนอร์
param1 - นี่คือพารามิเตอร์ที่ป้อนให้กับคำสั่ง
ส่งคืนค่า
คำสั่งจะดำเนินการตามนั้น
ตัวอย่าง
ในตัวอย่างของเราเราจะป้อนไฟล์ Hello World echo ในไฟล์ Docker ของเราและสร้างภาพและเปิดคอนเทนเนอร์จากมัน
Step 1 - สร้างไฟล์ Docker ด้วยคำสั่งต่อไปนี้ -
FROM ubuntu
MAINTAINER [email protected]
CMD [“echo” , “hello world”]
ที่นี่ CMD ใช้ในการพิมพ์ hello world.

Step 2 - สร้างภาพโดยใช้ Docker build คำสั่ง
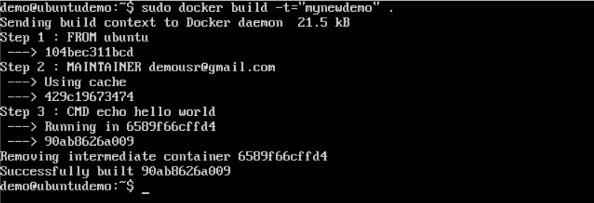
Step 3 - เรียกใช้คอนเทนเนอร์จากรูปภาพ

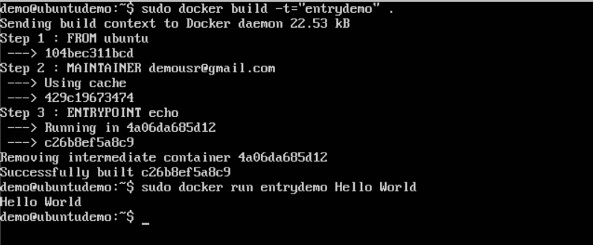
ENTRYPOINT
คำสั่งนี้ยังสามารถใช้เพื่อดำเนินการคำสั่งที่รันไทม์สำหรับคอนเทนเนอร์ แต่เราสามารถยืดหยุ่นได้มากขึ้นด้วยคำสั่ง ENTRYPOINT
ไวยากรณ์
ENTRYPOINT command param1ตัวเลือก
command - นี่คือคำสั่งที่จะรันเมื่อเปิดคอนเทนเนอร์
param1 - นี่คือพารามิเตอร์ที่ป้อนในคำสั่ง
ส่งคืนค่า
คำสั่งจะดำเนินการตามนั้น
ตัวอย่าง
ลองมาดูตัวอย่างเพื่อทำความเข้าใจเพิ่มเติมเกี่ยวกับ ENTRYPOINT ในตัวอย่างของเราเราจะป้อนไฟล์echo คำสั่งในไฟล์ Docker ของเราและสร้างภาพและเรียกใช้คอนเทนเนอร์จากมัน
Step 1 - สร้างไฟล์ Docker ด้วยคำสั่งต่อไปนี้ -
FROM ubuntu
MAINTAINER [email protected]
ENTRYPOINT [“echo”]
Step 2 - สร้างภาพโดยใช้ Docker build คำสั่ง
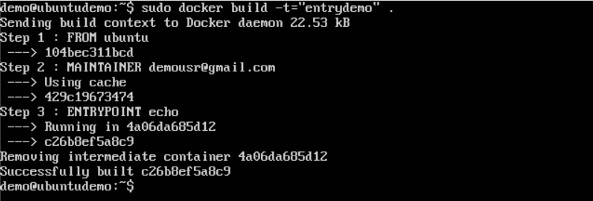
Step 3 - เรียกใช้คอนเทนเนอร์จากรูปภาพ
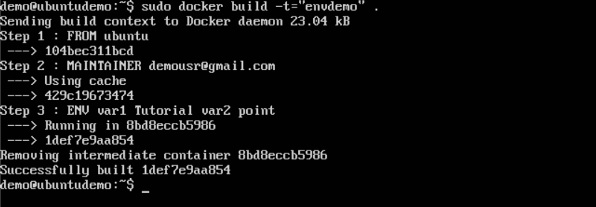
ENV
คำสั่งนี้ใช้เพื่อตั้งค่าตัวแปรสภาพแวดล้อมในคอนเทนเนอร์
ไวยากรณ์
ENV key valueตัวเลือก
Key - นี่คือกุญแจสำคัญสำหรับตัวแปรสภาพแวดล้อม
value - นี่คือค่าสำหรับตัวแปรสภาพแวดล้อม
ส่งคืนค่า
คำสั่งจะดำเนินการตามนั้น
ตัวอย่าง
ในตัวอย่างของเราเราจะป้อนไฟล์ echo คำสั่งในไฟล์ Docker ของเราและสร้างภาพและเรียกใช้คอนเทนเนอร์จากมัน
Step 1 - สร้างไฟล์ Docker ด้วยคำสั่งต่อไปนี้ -
FROM ubuntu
MAINTAINER [email protected]
ENV var1=Tutorial var2=point
Step 2 - สร้างภาพโดยใช้ Docker build คำสั่ง
Step 3 - เรียกใช้คอนเทนเนอร์จากรูปภาพ
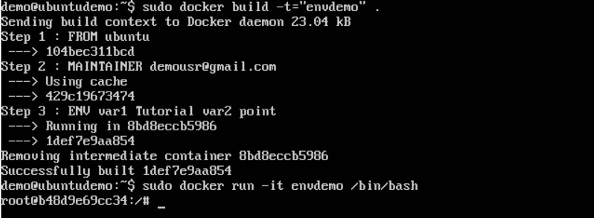
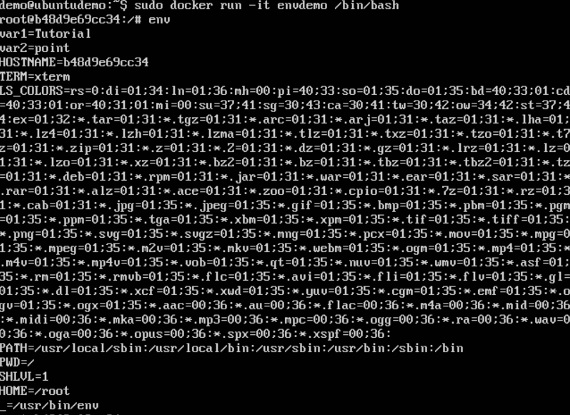
Step 4 - สุดท้ายรันไฟล์ env คำสั่งเพื่อดูตัวแปรสภาพแวดล้อม
WORKDIR
คำสั่งนี้ใช้เพื่อตั้งค่าไดเร็กทอรีการทำงานของคอนเทนเนอร์
ไวยากรณ์
WORKDIR dirnameตัวเลือก
dirname- ไดเร็กทอรีการทำงานใหม่ หากไม่มีไดเร็กทอรีจะถูกเพิ่มเข้าไป
ส่งคืนค่า
คำสั่งจะดำเนินการตามนั้น
ตัวอย่าง
ในตัวอย่างของเราเราจะป้อนไฟล์ echo คำสั่งในไฟล์ Docker ของเราและสร้างภาพและเรียกใช้คอนเทนเนอร์จากมัน
Step 1 - สร้างไฟล์ Docker ด้วยคำสั่งต่อไปนี้ -
FROM ubuntu
MAINTAINER [email protected]
WORKDIR /newtemp
CMD pwd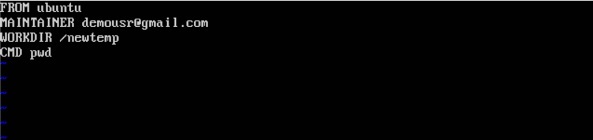
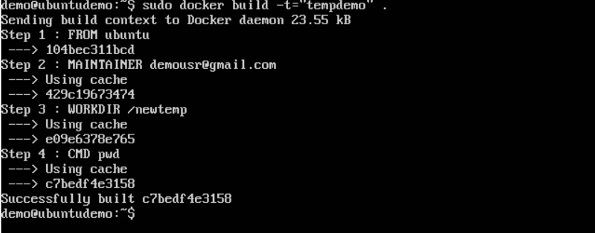
Step 2 - สร้างภาพโดยใช้ Docker build คำสั่ง
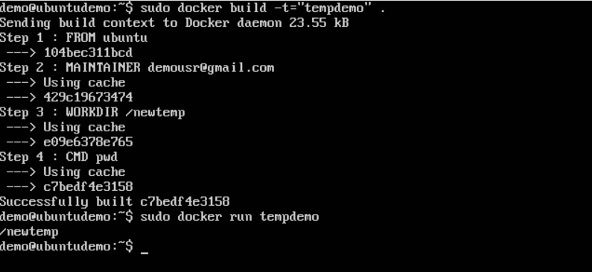
Step 3 - เรียกใช้คอนเทนเนอร์จากรูปภาพ
การเชื่อมโยงคอนเทนเนอร์ทำให้หลายคอนเทนเนอร์เชื่อมโยงกัน เป็นตัวเลือกที่ดีกว่าการเปิดเผยพอร์ต ไปทีละขั้นตอนและเรียนรู้วิธีการทำงาน
Step 1 - ดาวน์โหลดภาพ Jenkins หากยังไม่มีให้ใช้ Jenkins pull คำสั่ง

Step 2 - เมื่อรูปภาพพร้อมใช้งานให้เรียกใช้คอนเทนเนอร์ แต่คราวนี้คุณสามารถระบุชื่อให้กับคอนเทนเนอร์ได้โดยใช้ไฟล์ –-nameตัวเลือก นี่จะเป็นของเราsource container.

Step 3- ต่อไปก็ถึงเวลาเปิดใช้งานคอนเทนเนอร์ปลายทาง แต่คราวนี้เราจะเชื่อมโยงกับคอนเทนเนอร์ต้นทางของเรา สำหรับคอนเทนเนอร์ปลายทางของเราเราจะใช้อิมเมจ Ubuntu มาตรฐาน

เมื่อคุณทำ docker psคุณจะเห็นทั้งตู้คอนเทนเนอร์กำลังทำงานอยู่
Step 4 - ตอนนี้แนบกับภาชนะรับ
จากนั้นเรียกใช้ไฟล์ envคำสั่ง คุณจะสังเกตเห็นตัวแปรใหม่สำหรับการเชื่อมโยงกับคอนเทนเนอร์ต้นทาง

ไดรเวอร์จัดเก็บข้อมูล
Docker มีไดรเวอร์หน่วยเก็บข้อมูลหลายตัวที่อนุญาตให้ใช้งานร่วมกับอุปกรณ์จัดเก็บข้อมูลพื้นฐานได้ ตารางต่อไปนี้แสดงไดรเวอร์หน่วยเก็บข้อมูลต่างๆพร้อมกับเทคโนโลยีที่ใช้สำหรับไดรเวอร์จัดเก็บข้อมูล
| เทคโนโลยี | ไดร์เวอร์สตอเรจ |
|---|---|
| โอเวอร์เลย์ FS | วางซ้อนหรือซ้อนทับ 2 |
| AUFS | aufs |
| Btrfs | brtfs |
| ตัวจัดการอุปกรณ์ | อุปกรณ์ |
| วีเอฟเอส | vfs |
| ZFS | zfs |
ตอนนี้ให้เราพูดถึงบางกรณีที่คุณจะใช้ไดรเวอร์จัดเก็บข้อมูลต่างๆ -
AUFS
นี่คือไดรเวอร์ที่เสถียร สามารถใช้สำหรับแอปพลิเคชันที่พร้อมใช้งานจริง
มีการใช้หน่วยความจำที่ดีและเหมาะสำหรับการใช้งาน Docker ที่ราบรื่นสำหรับคอนเทนเนอร์
มีกิจกรรมการเขียนสูงที่เกี่ยวข้องกับไดรเวอร์นี้ซึ่งควรได้รับการพิจารณา
เหมาะสำหรับระบบที่เป็น Platform เป็นงานประเภทบริการ
Devicemapper
นี่คือไดรเวอร์ที่เสถียร ช่วยให้มั่นใจได้ถึงประสบการณ์ Docker ที่ราบรื่น
ไดรเวอร์นี้เหมาะสำหรับการทดสอบการใช้งานในห้องแล็บ
ไดรเวอร์นี้สอดคล้องกับฟังก์ชันเคอร์เนลหลักของ Linux
Btrfs
ไดรเวอร์นี้สอดคล้องกับฟังก์ชันเคอร์เนลหลักของ Linux
มีกิจกรรมการเขียนสูงที่เกี่ยวข้องกับไดรเวอร์นี้ซึ่งควรได้รับการพิจารณา
ไดรเวอร์นี้เหมาะสำหรับอินสแตนซ์ที่คุณดูแลบิลด์พูลหลายตัว
โอเวล
นี่คือไดรเวอร์ที่เสถียรและสอดคล้องกับการทำงานของเคอร์เนล Linux หลัก
มีการใช้หน่วยความจำที่ดี
ไดรเวอร์นี้เหมาะสำหรับการทดสอบการใช้งานในห้องแล็บ
ZFS
นี่คือไดรเวอร์ที่เสถียรและเหมาะสำหรับการทดสอบการใช้งานในห้องแล็บ
เหมาะสำหรับระบบที่เป็นงานประเภท Platform-as-a-Service
หากต้องการดูโปรแกรมควบคุมการจัดเก็บที่ใช้อยู่ให้ออกไฟล์ docker info คำสั่ง
ไวยากรณ์
docker infoตัวเลือก
ไม่มี
ส่งคืนค่า
คำสั่งจะให้ข้อมูลเกี่ยวกับส่วนประกอบ Docker ที่ติดตั้งบน Docker Host
ตัวอย่าง
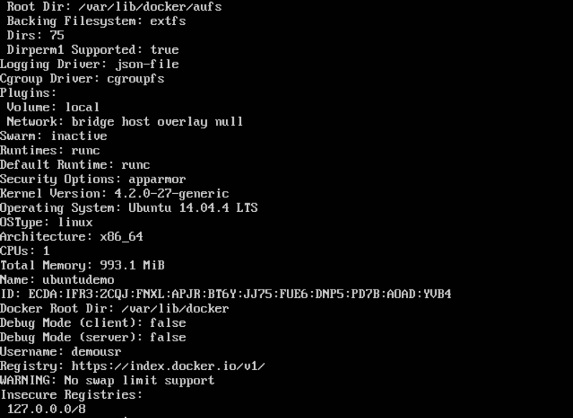
sudo docker infoเอาต์พุต
ผลลัพธ์ต่อไปนี้แสดงให้เห็นว่าไดรเวอร์หลักที่ใช้คือไฟล์ aufs ไดรเวอร์และไดเร็กทอรีรากถูกเก็บไว้ใน /var/lib/docker/aufs.
ปริมาณข้อมูล
ใน Docker คุณมีโวลุ่มแยกต่างหากที่สามารถแชร์ข้ามคอนเทนเนอร์ได้ เหล่านี้เรียกว่าdata volumes. คุณสมบัติบางประการของปริมาณข้อมูล ได้แก่ -
- ซึ่งจะเริ่มต้นเมื่อสร้างคอนเทนเนอร์
- สามารถใช้ร่วมกันและนำกลับมาใช้ใหม่ได้ในหลาย ๆ คอนเทนเนอร์
- การเปลี่ยนแปลงใด ๆ ในระดับเสียงสามารถทำได้โดยตรง
- แม้ว่าจะมีการลบคอนเทนเนอร์แล้วก็ตาม
ลองดูที่คอนเทนเนอร์ Jenkins ของเรา มาทำdocker inspectเพื่อดูรายละเอียดของภาพนี้ เราสามารถใช้คำสั่งต่อไปนี้เพื่อเขียนผลลัพธ์ของไฟล์docker inspect คำสั่งไปยังไฟล์ข้อความแล้วดูไฟล์ตามนั้น
sudo docker inspect Jenkins > tmp.txtเมื่อคุณดูไฟล์ข้อความโดยใช้ไฟล์ more commandคุณจะเห็นรายการเป็น JENKINS_HOME=/var/Jenkins_home.
นี่คือการจับคู่ที่ทำภายในคอนเทนเนอร์ผ่านภาพ Jenkins
ตอนนี้สมมติว่าคุณต้องการแมปไดรฟ์ข้อมูลในคอนเทนเนอร์กับไดรฟ์ข้อมูลในเครื่องจากนั้นคุณต้องระบุตัวเลือก –v เมื่อเรียกใช้คอนเทนเนอร์ ตัวอย่างแสดงด้านล่าง -
sudo docker run –d –v /home/demo:/var/jenkins_home –p 8080:8080 –p 50000:50000 jenkinsอ็อพชัน –v ใช้เพื่อแมปไดรฟ์ข้อมูลในคอนเทนเนอร์ซึ่งเป็น /var/jenkins_home ไปยังตำแหน่งบน Docker Host ของเราซึ่งก็คือ /home/demo.

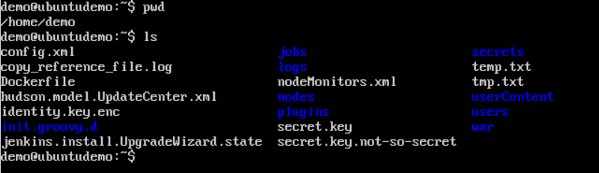
ตอนนี้ถ้าคุณไปที่ไฟล์ /home/demo ตำแหน่งบน Docker Host ของคุณหลังจากเปิดใช้งานคอนเทนเนอร์คุณจะเห็นไฟล์คอนเทนเนอร์ทั้งหมดอยู่ที่นั่น
การเปลี่ยนไดร์เวอร์หน่วยเก็บข้อมูลสำหรับคอนเทนเนอร์
หากคุณต้องการเปลี่ยนเป็นไดรเวอร์หน่วยเก็บข้อมูลที่ใช้สำหรับคอนเทนเนอร์คุณสามารถทำได้เมื่อเปิดใช้งานคอนเทนเนอร์ ซึ่งสามารถทำได้โดยใช้–volume-driver เมื่อใช้พารามิเตอร์ docker runคำสั่ง ตัวอย่างได้รับด้านล่าง -
sudo docker run –d --volume-driver=flocker
   –v /home/demo:/var/jenkins_home –p 8080:8080 –p 50000:50000 jenkins
–volume-driver ใช้เพื่อระบุไดรเวอร์หน่วยเก็บข้อมูลอื่นสำหรับคอนเทนเนอร์

เพื่อยืนยันว่ามีการเปลี่ยนไดรเวอร์ก่อนอื่นให้ใช้ docker psคำสั่งเพื่อดูคอนเทนเนอร์ที่กำลังทำงานอยู่และรับ ID คอนเทนเนอร์ ดังนั้นให้ออกคำสั่งต่อไปนี้ก่อน -
sudo docker psจากนั้นออกก docker inspect กับคอนเทนเนอร์และใส่เอาต์พุตในไฟล์ข้อความโดยใช้คำสั่ง
sudo docker inspect 9bffb1bfebee > temp.txt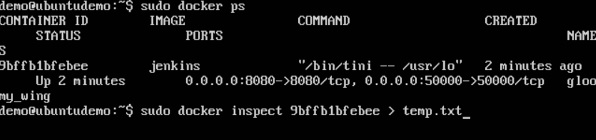
หากคุณเรียกดูไฟล์ข้อความและไปที่บรรทัดที่ระบุว่า VolumeDriverคุณจะเห็นว่ามีการเปลี่ยนชื่อไดรเวอร์

การสร้างไดรฟ์ข้อมูล
สามารถสร้างไดรฟ์ข้อมูลล่วงหน้าโดยใช้ไฟล์ dockerคำสั่ง มาเรียนรู้เพิ่มเติมเกี่ยวกับคำสั่งนี้
ไวยากรณ์
docker volume create –-name=volumename –-opt optionsตัวเลือก
name - นี่คือชื่อของโวลุ่มที่ต้องสร้าง
opt - นี่คือตัวเลือกที่คุณสามารถให้ได้ในขณะที่สร้างไดรฟ์ข้อมูล
ส่งคืนค่า
คำสั่งจะแสดงชื่อของไดรฟ์ข้อมูลที่สร้างขึ้น
ตัวอย่าง
sudo docker volume create –-name = demo –opt o = size = 100mในคำสั่งด้านบนเรากำลังสร้างไดรฟ์ข้อมูลขนาด 100MB และด้วยชื่อของการสาธิต
เอาต์พุต
ผลลัพธ์ของคำสั่งดังกล่าวแสดงไว้ด้านล่าง -

รายชื่อเล่มทั้งหมด
คุณยังสามารถแสดงรายการไฟล์ docker volumes บน docker host. รายละเอียดเพิ่มเติมเกี่ยวกับคำสั่งนี้มีให้ด้านล่าง -
ไวยากรณ์
docker volume lsตัวเลือก
ไม่มี
ส่งคืนค่า
คำสั่งจะส่งออกไดรฟ์ข้อมูลทั้งหมดบนไฟล์ docker host.
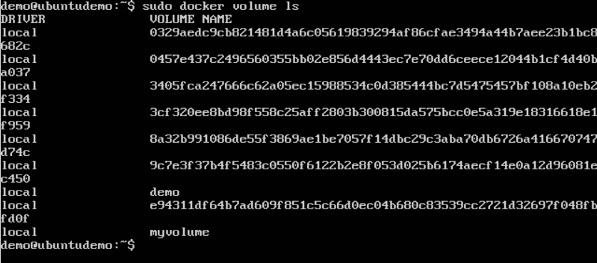
ตัวอย่าง
sudo docker volume lsเอาต์พุต
ผลลัพธ์ของคำสั่งดังกล่าวแสดงไว้ด้านล่าง -
Docker ดูแลด้านเครือข่ายเพื่อให้คอนเทนเนอร์สามารถสื่อสารกับคอนเทนเนอร์อื่น ๆ และกับ Docker Host หากคุณทำไฟล์ifconfigบน Docker Host คุณจะเห็นอะแดปเตอร์ Docker Ethernet อะแด็ปเตอร์นี้ถูกสร้างขึ้นเมื่อติดตั้ง Docker บน Docker Host
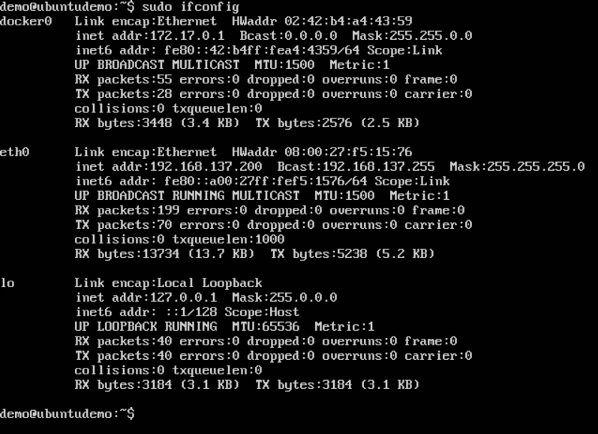
นี่คือสะพานเชื่อมระหว่าง Docker Host และ Linux Host ตอนนี้เรามาดูคำสั่งบางคำที่เกี่ยวข้องกับระบบเครือข่ายใน Docker
รายชื่อเครือข่าย Docker ทั้งหมด
คำสั่งนี้สามารถใช้เพื่อแสดงรายการเครือข่ายทั้งหมดที่เกี่ยวข้องกับ Docker บนโฮสต์
ไวยากรณ์
docker network lsตัวเลือก
ไม่มี
ส่งคืนค่า
คำสั่งจะส่งออกเครือข่ายทั้งหมดบน Docker Host
ตัวอย่าง
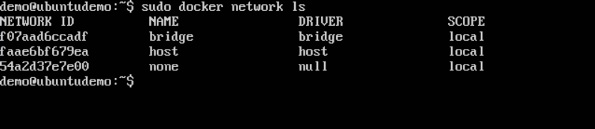
sudo docker network lsเอาต์พุต
ผลลัพธ์ของคำสั่งดังกล่าวแสดงอยู่ด้านล่าง
การตรวจสอบเครือข่าย Docker
หากคุณต้องการดูรายละเอียดเพิ่มเติมเกี่ยวกับเครือข่ายที่เกี่ยวข้องกับ Docker คุณสามารถใช้ Docker network inspect คำสั่ง
ไวยากรณ์
docker network inspect networknameตัวเลือก
networkname - นี่คือชื่อของเครือข่ายที่คุณต้องตรวจสอบ
ส่งคืนค่า
คำสั่งจะแสดงรายละเอียดทั้งหมดเกี่ยวกับเครือข่าย
ตัวอย่าง
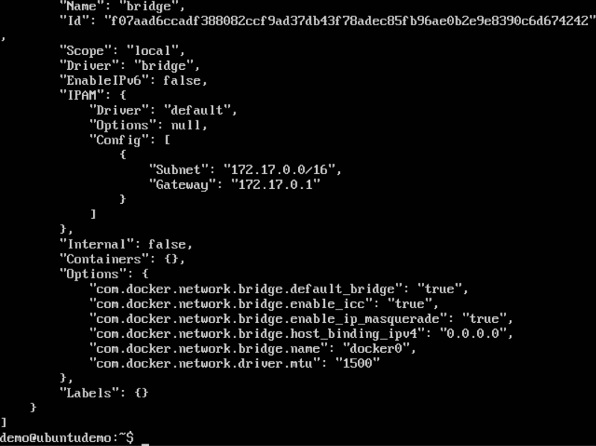
sudo docker network inspect bridgeเอาต์พุต
ผลลัพธ์ของคำสั่งดังกล่าวแสดงไว้ด้านล่าง -
ตอนนี้ให้เรียกใช้คอนเทนเนอร์และดูว่าจะเกิดอะไรขึ้นเมื่อเราตรวจสอบเครือข่ายอีกครั้ง มาหมุนคอนเทนเนอร์ Ubuntu ด้วยคำสั่งต่อไปนี้ -
sudo docker run –it ubuntu:latest /bin/bash
ตอนนี้ถ้าเราตรวจสอบชื่อเครือข่ายของเราผ่านคำสั่งต่อไปนี้คุณจะเห็นว่าคอนเทนเนอร์นั้นติดอยู่กับบริดจ์
sudo docker network inspect bridge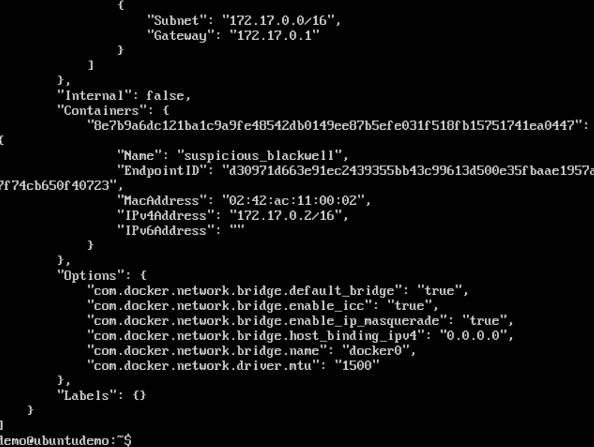
การสร้างเครือข่ายใหม่ของคุณเอง
เราสามารถสร้างเครือข่ายใน Docker ก่อนเปิดใช้งานคอนเทนเนอร์ สามารถทำได้ด้วยคำสั่งต่อไปนี้ -
ไวยากรณ์
docker network create –-driver drivername nameตัวเลือก
drivername - นี่คือชื่อที่ใช้สำหรับไดรเวอร์เครือข่าย
name - นี่คือชื่อที่กำหนดให้กับเครือข่าย
ส่งคืนค่า
คำสั่งจะส่งออก ID แบบยาวสำหรับเครือข่ายใหม่
ตัวอย่าง
sudo docker network create –-driver bridge new_nwเอาต์พุต
ผลลัพธ์ของคำสั่งดังกล่าวแสดงไว้ด้านล่าง -

ตอนนี้คุณสามารถเชื่อมต่อเครือข่ายใหม่เมื่อเปิดคอนเทนเนอร์ งั้นมาหมุนคอนเทนเนอร์ Ubuntu ด้วยคำสั่งต่อไปนี้ -
sudo docker run –it –network=new_nw ubuntu:latest /bin/bash
และตอนนี้เมื่อคุณตรวจสอบเครือข่ายผ่านคำสั่งต่อไปนี้คุณจะเห็นคอนเทนเนอร์ที่เชื่อมต่อกับเครือข่าย
sudo docker network inspect new_nw
Node.js คือเฟรมเวิร์ก JavaScript ที่ใช้สำหรับการพัฒนาแอพพลิเคชั่นฝั่งเซิร์ฟเวอร์ เป็นเฟรมเวิร์กโอเพนซอร์สที่พัฒนาขึ้นเพื่อทำงานบนระบบปฏิบัติการที่หลากหลาย เนื่องจาก Node.js เป็นเฟรมเวิร์กยอดนิยมสำหรับการพัฒนา Docker จึงมั่นใจได้ว่ามันรองรับแอพพลิเคชั่น Node.js
ตอนนี้เราจะเห็นขั้นตอนต่างๆในการรับ Docker container สำหรับ Node.js และทำงาน
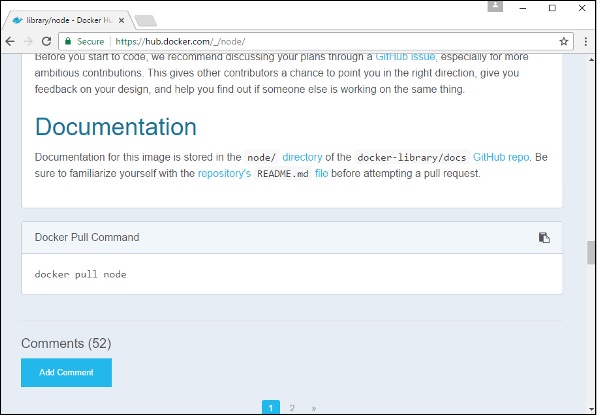
Step 1- ขั้นตอนแรกคือการดึงภาพจาก Docker Hub เมื่อคุณเข้าสู่ Docker Hub คุณจะสามารถค้นหาและดูภาพสำหรับ Node.js ดังที่แสดงด้านล่าง เพียงพิมพ์ Node ในช่องค้นหาและคลิกที่ลิงค์โหนด (อย่างเป็นทางการ) ที่ปรากฏในผลการค้นหา

Step 2 - คุณจะเห็นว่า Docker pull คำสั่งสำหรับโหนดในรายละเอียดของที่เก็บใน Docker Hub
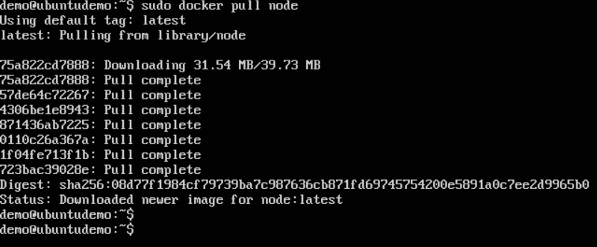
Step 3 - บน Docker Host ให้ใช้ Docker pull คำสั่งดังที่แสดงด้านบนเพื่อดาวน์โหลดอิมเมจโหนดล่าสุดจาก Docker Hub

เมื่อ pull เสร็จสมบูรณ์แล้วเราสามารถดำเนินการขั้นตอนต่อไปได้
Step 4 - บน Docker Host ให้ใช้ไฟล์ vimแก้ไขและสร้างไฟล์ตัวอย่าง Node.js หนึ่งไฟล์ ในไฟล์นี้เราจะเพิ่มคำสั่งง่ายๆเพื่อแสดง“ HelloWorld” ในพรอมต์คำสั่ง

ในไฟล์ Node.js ให้เพิ่มคำสั่งต่อไปนี้ -
Console.log(‘Hello World’);สิ่งนี้จะส่งออกวลี "Hello World" เมื่อเราเรียกใช้ผ่าน Node.js

ตรวจสอบให้แน่ใจว่าคุณบันทึกไฟล์แล้วดำเนินการในขั้นตอนถัดไป
Step 5 - ในการเรียกใช้สคริปต์ Node.js ของเราโดยใช้คอนเทนเนอร์ Node Docker เราจำเป็นต้องดำเนินการคำสั่งต่อไปนี้ -
sudo docker run –it –rm –name = HelloWorld –v “$PWD”:/usr/src/app
   –w /usr/src/app node node HelloWorld.js
ประเด็นต่อไปนี้ต้องสังเกตเกี่ยวกับคำสั่งดังกล่าว -
–rm ตัวเลือกนี้ใช้เพื่อลบคอนเทนเนอร์หลังจากที่รัน
เราตั้งชื่อให้กับคอนเทนเนอร์ที่เรียกว่า“ HelloWorld”
เรากำลังพูดถึงการแมปปริมาตรในคอนเทนเนอร์ซึ่งเป็น /usr/src/appไปยังไดเร็กทอรีการทำงานปัจจุบันของเรา สิ่งนี้ทำได้เพื่อให้โหนดคอนเทนเนอร์รับสคริปต์ HelloWorld.js ของเราซึ่งมีอยู่ในไดเร็กทอรีการทำงานของเราบน Docker Host
–w ใช้เพื่อระบุไดเร็กทอรีการทำงานที่ใช้โดย Node.js
อ็อพชันโหนดแรกถูกใช้เพื่อระบุเพื่อรันอิมเมจโหนด
อ็อพชันโหนดที่สองใช้เพื่อกล่าวถึงเพื่อรันคำสั่งโหนดในคอนเทนเนอร์โหนด
และในที่สุดเราก็เอ่ยชื่อสคริปต์ของเรา
จากนั้นเราจะได้ผลลัพธ์ต่อไปนี้ และจากผลลัพธ์เราจะเห็นได้อย่างชัดเจนว่า Node container ทำงานเป็นคอนเทนเนอร์และเรียกใช้สคริปต์ HelloWorld.js

MongoDB เป็นฐานข้อมูลที่เน้นเอกสารที่มีชื่อเสียงซึ่งถูกใช้โดยเว็บแอปพลิเคชันสมัยใหม่จำนวนมาก เนื่องจาก MongoDB เป็นฐานข้อมูลยอดนิยมสำหรับการพัฒนา Docker จึงมั่นใจได้ว่ามีการรองรับ MongoDB
ตอนนี้เราจะเห็นขั้นตอนต่างๆในการรับ Docker container สำหรับ MongoDB และทำงาน
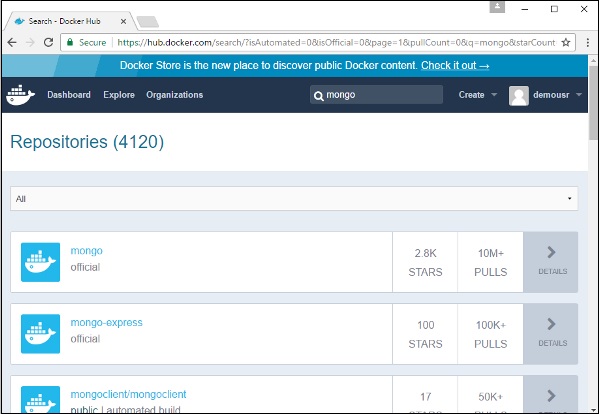
Step 1- ขั้นตอนแรกคือการดึงภาพจาก Docker Hub เมื่อคุณเข้าสู่ Docker Hub คุณจะสามารถค้นหาและดูภาพสำหรับ Mongo ดังที่แสดงด้านล่าง เพียงพิมพ์ Mongo ในช่องค้นหาและคลิกลิงก์ Mongo (อย่างเป็นทางการ) ที่ปรากฏในผลการค้นหา
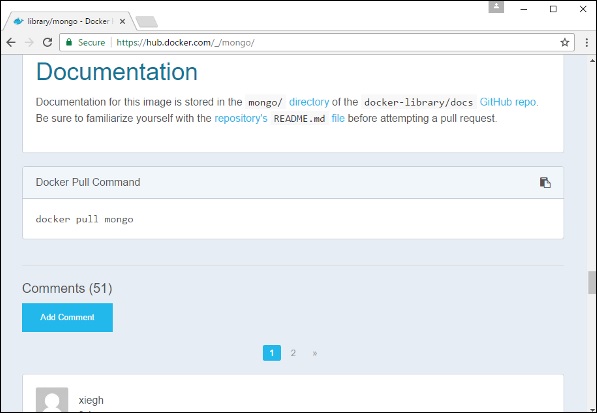
Step 2 - คุณจะเห็นว่า Docker pull คำสั่งสำหรับ Mongo ในรายละเอียดของที่เก็บใน Docker Hub
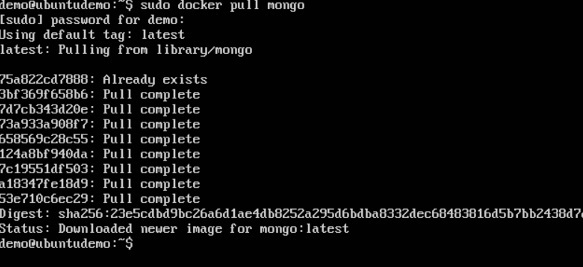
Step 3 - บน Docker Host ให้ใช้ Docker pull คำสั่งดังที่แสดงด้านบนเพื่อดาวน์โหลดภาพ Mongo ล่าสุดจาก Docker Hub

Step 4- ตอนนี้เรามีอิมเมจสำหรับ Mongo แล้วเรามารันคอนเทนเนอร์ MongoDB ก่อนซึ่งจะเป็นอินสแตนซ์ของเราสำหรับ MongoDB สำหรับสิ่งนี้เราจะออกคำสั่งต่อไปนี้ -
sudo docker run -it -d mongoสามารถสังเกตประเด็นต่อไปนี้เกี่ยวกับคำสั่งดังกล่าว -
–it ตัวเลือกใช้เพื่อเรียกใช้คอนเทนเนอร์ในโหมดโต้ตอบ
–d อ็อพชันถูกใช้เพื่อรันคอนเทนเนอร์เป็นกระบวนการดีมอน
และในที่สุดเรากำลังสร้างคอนเทนเนอร์จากภาพ Mongo
จากนั้นคุณสามารถออกไฟล์ docker ps คำสั่งเพื่อดูคอนเทนเนอร์ที่กำลังทำงานอยู่ -
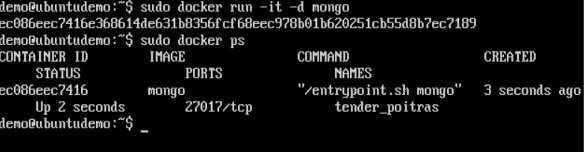
จดประเด็นต่อไปนี้ -
ชื่อของคอนเทนเนอร์คือ tender_poitras. ชื่อนี้จะแตกต่างกันเนื่องจากชื่อของคอนเทนเนอร์จะเปลี่ยนไปเรื่อย ๆ เมื่อคุณหมุนคอนเทนเนอร์ แต่เพียงจดบันทึกคอนเทนเนอร์ที่คุณเปิดตัว
ถัดไปให้สังเกตหมายเลขพอร์ตที่กำลังทำงานอยู่ กำลังฟังบนพอร์ต TCP ของ 27017
Step 5- ทีนี้มาหมุนคอนเทนเนอร์อื่นซึ่งจะทำหน้าที่เป็นไคลเอนต์ของเราซึ่งจะใช้เพื่อเชื่อมต่อกับฐานข้อมูล MongoDB ออกคำสั่งต่อไปนี้สำหรับสิ่งนี้ -
sudo docker run –it –link=tender_poitras:mongo mongo /bin/bashสามารถสังเกตประเด็นต่อไปนี้เกี่ยวกับคำสั่งดังกล่าว -
–it ตัวเลือกใช้เพื่อเรียกใช้คอนเทนเนอร์ในโหมดโต้ตอบ
ตอนนี้เรากำลังเชื่อมโยงคอนเทนเนอร์ใหม่ของเรากับคอนเทนเนอร์เซิร์ฟเวอร์ MongoDB ที่เปิดตัวแล้ว ที่นี่คุณต้องระบุชื่อของคอนเทนเนอร์ที่เปิดตัวแล้ว
จากนั้นเราจะระบุว่าเราต้องการเปิด Mongo container เป็นไคลเอนต์ของเราจากนั้นเรียกใช้ไฟล์ bin/bash เปลือกในภาชนะใหม่ของเรา

ตอนนี้คุณจะอยู่ในคอนเทนเนอร์ใหม่
Step 6 - เรียกใช้ไฟล์ env คำสั่งในคอนเทนเนอร์ใหม่เพื่อดูรายละเอียดวิธีการเชื่อมต่อกับคอนเทนเนอร์เซิร์ฟเวอร์ MongoDB
Step 6- ตอนนี้ถึงเวลาเชื่อมต่อกับเซิร์ฟเวอร์ MongoDB จากคอนเทนเนอร์ไคลเอนต์ เราสามารถทำได้โดยใช้คำสั่งต่อไปนี้ -
mongo 172.17.0.2:27017ต้องสังเกตประเด็นต่อไปนี้เกี่ยวกับคำสั่งดังกล่าว
mongo คำสั่งคือไคลเอนต์ mongo คำสั่งที่ใช้เพื่อเชื่อมต่อกับฐานข้อมูล MongoDB
IP และหมายเลขพอร์ตคือสิ่งที่คุณจะได้รับเมื่อใช้ไฟล์ env คำสั่ง
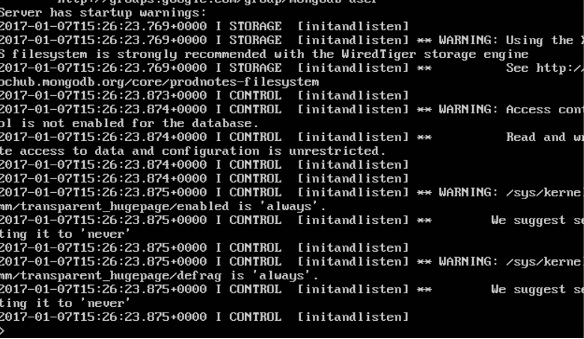
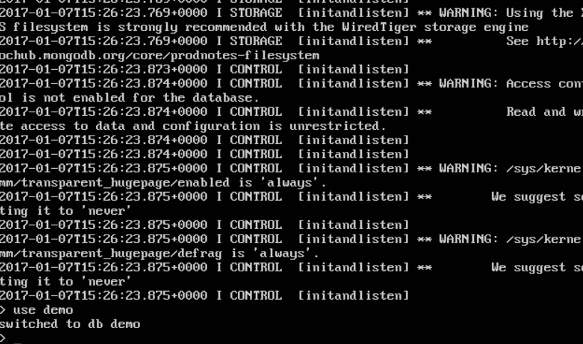
เมื่อคุณรันคำสั่งคุณจะเชื่อมต่อกับฐานข้อมูล MongoDB

จากนั้นคุณสามารถรันคำสั่ง MongoDB ในพรอมต์คำสั่ง ในตัวอย่างของเราเรากำลังเรียกใช้คำสั่งต่อไปนี้ -
use demoคำสั่งนี้เป็นคำสั่ง MongoDB ซึ่งใช้เพื่อเปลี่ยนไปใช้ชื่อฐานข้อมูล demo. ถ้าฐานข้อมูลไม่พร้อมใช้งานจะถูกสร้างขึ้น
ตอนนี้คุณสร้างไคลเอนต์และเซิร์ฟเวอร์ MongoDB container สำเร็จแล้ว
NGINX เป็นเว็บแอปพลิเคชันน้ำหนักเบายอดนิยมที่ใช้สำหรับการพัฒนาแอปพลิเคชันฝั่งเซิร์ฟเวอร์ เป็นเว็บเซิร์ฟเวอร์แบบโอเพนซอร์สที่พัฒนาขึ้นเพื่อทำงานบนระบบปฏิบัติการที่หลากหลาย ตั้งแต่nginx เป็นเว็บเซิร์ฟเวอร์ยอดนิยมสำหรับการพัฒนา Docker มั่นใจได้ว่ารองรับไฟล์ nginx.
ตอนนี้เราจะเห็นขั้นตอนต่างๆในการรับ Docker container สำหรับ nginx ขึ้นและทำงาน
Step 1- ขั้นตอนแรกคือการดึงภาพจาก Docker Hub เมื่อคุณเข้าสู่ Docker Hub คุณจะสามารถค้นหาและดูภาพสำหรับnginxดังแสดงด้านล่าง เพียงพิมพ์ nginx ในช่องค้นหาและคลิกที่ไฟล์nginx (อย่างเป็นทางการ) ซึ่งปรากฏขึ้นในผลการค้นหา
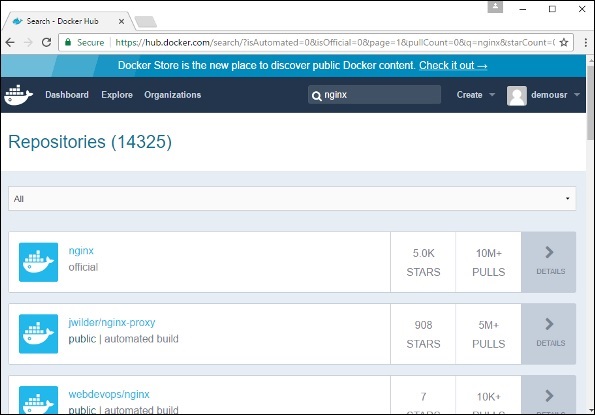
Step 2 - คุณจะเห็นว่า Docker pull คำสั่งสำหรับ nginx ในรายละเอียดของที่เก็บใน Docker Hub
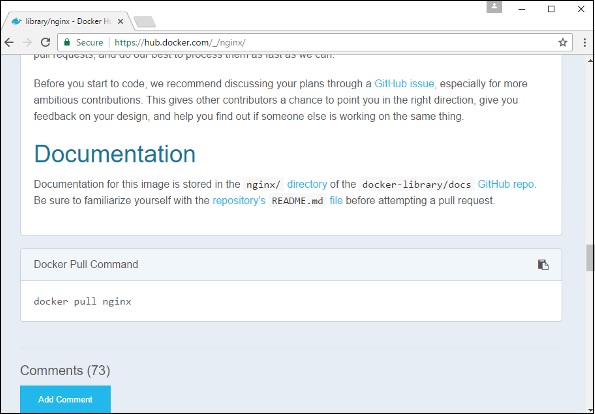
Step 3 - บน Docker Host ให้ใช้ Docker pull คำสั่งดังที่แสดงด้านบนเพื่อดาวน์โหลดอิมเมจ nginx ล่าสุดจาก Docker Hub
Step 4 - ตอนนี้ให้เรียกใช้ nginx คอนเทนเนอร์ผ่านคำสั่งต่อไปนี้
sudo docker run –p 8080:80 –d nginxเรากำลังเปิดเผยพอร์ตบน nginx เซิร์ฟเวอร์ซึ่งเป็นพอร์ต 80 ถึงพอร์ต 8080 บน Docker Host

เมื่อคุณรันคำสั่งคุณจะได้ผลลัพธ์ต่อไปนี้หากคุณเรียกดู URL http://dockerhost:8080. นี่แสดงให้เห็นว่าไฟล์nginx คอนเทนเนอร์เริ่มทำงานแล้ว

Step 5 - ลองดูตัวอย่างอื่นที่เราสามารถโฮสต์หน้าเว็บง่ายๆในไฟล์ ngnixภาชนะ ในตัวอย่างของเราเราจะสร้างไฟล์HelloWorld.html ไฟล์และโฮสต์ไว้ในไฟล์ nginx ภาชนะ
ก่อนอื่นมาสร้างไฟล์ HTML ชื่อ HelloWorld.html

เพิ่มบรรทัดง่ายๆของ Hello World ในไฟล์ HTML

จากนั้นให้เรียกใช้คำสั่ง Docker ต่อไปนี้
sudo docker run –p 8080:80 –v
   “$PWD”:/usr/share/nginx/html:ro –d nginx
ประเด็นต่อไปนี้ต้องสังเกตเกี่ยวกับคำสั่งดังกล่าว -
เรากำลังเปิดเผยพอร์ตบน nginx เซิร์ฟเวอร์ซึ่งเป็นพอร์ต 80 ถึงพอร์ต 8080 บน Docker Host
ต่อไปเราจะแนบไดรฟ์ข้อมูลบนคอนเทนเนอร์ซึ่งเป็น /usr/share/nginx/htmlไปยังไดเร็กทอรีการทำงานปัจจุบันของเรา นี่คือที่เก็บไฟล์ HelloWorld.html ของเรา
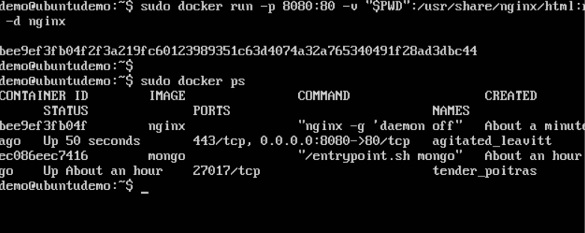
ตอนนี้ถ้าเราเรียกดู URL http://dockerhost:8080/HelloWorld.html เราจะได้ผลลัพธ์ต่อไปนี้ตามที่คาดไว้ -

ในบทแนะนำเราได้เห็นการติดตั้ง Docker toolbox บน Windows กล่องเครื่องมือ Docker ได้รับการพัฒนาเพื่อให้สามารถเรียกใช้คอนเทนเนอร์ Docker บน Windows และ MacOS ได้ ไซต์สำหรับกล่องเครื่องมือบน Windows คือhttps://docs.docker.com/docker-for-windows/
สำหรับ Windows คุณต้องมี Windows 10 หรือ Windows Server 2016 ที่เปิดใช้งาน Hyper-V
กล่องเครื่องมือประกอบด้วยส่วนประกอบต่อไปนี้ -
Docker Engine - ใช้เป็นเอนจินพื้นฐานหรือ Docker daemon ที่ใช้เพื่อรันคอนเทนเนอร์ Docker
Docker Machine - สำหรับการเรียกใช้คำสั่งเครื่อง Docker
Docker Compose สำหรับการเรียกใช้ Docker compose คำสั่ง
Kinematic - นี่คือ Docker GUI ที่สร้างขึ้นสำหรับ Windows และ Mac OS
Oracle virtualbox
ตอนนี้เรามาดูกิจกรรมประเภทต่างๆที่เป็นไปได้ด้วย Docker toolbox
ทำงานใน Powershell
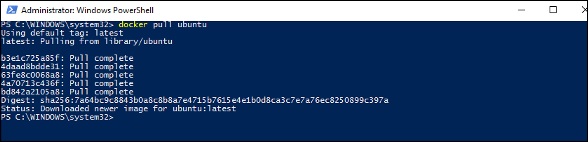
ด้วย Docker toolbox บน Windows 10 ตอนนี้คุณสามารถปิดคำสั่ง Docker ได้แล้ว powershell. หากคุณเปิด powershell บน Windows และพิมพ์คำสั่งของ Docker version คุณจะได้รับรายละเอียดที่จำเป็นทั้งหมดเกี่ยวกับเวอร์ชัน Docker ที่ติดตั้ง

การดึงรูปภาพและการเรียกใช้คอนเทนเนอร์
You can also now pull Images from Docker Hub and run containers in powershell as you would do in Linux. The following example will show in brief the downloading of the Ubuntu image and running of the container off the image.
The first step is to use the Docker pull command to pull the Ubuntu image from Docker Hub.
The next step is to run the Docker image using the following run command −
docker run –it ubuntu /bin/bashYou will notice that the command is the same as it was in Linux.
Kitematic
This is the GUI equivalent of Docker on Windows. To open this GUI, go to the taskbar and on the Docker icon, right-click and choose to open Kitematic.

It will prompt you to download Kitematic GUI. Once downloaded, just unzip the contents. There will be a file called Kitematic.exe. Double-click this exe file to open the GUI interface.
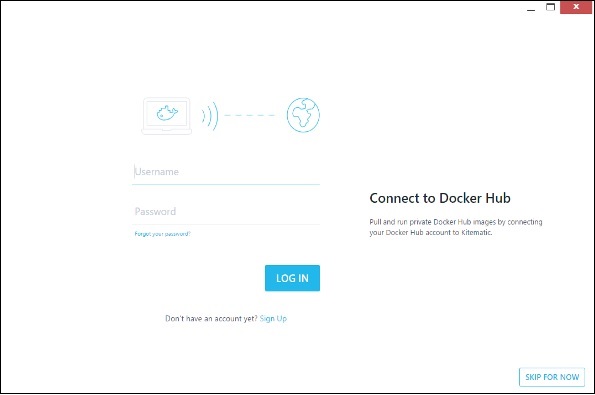
You will then be requested to log into Docker Hub, enter through the GUI. Just enter the required username and password and then click the Login button.
Once logged in, you will be able to see all the images downloaded on the system on the left-hand side of the interface.
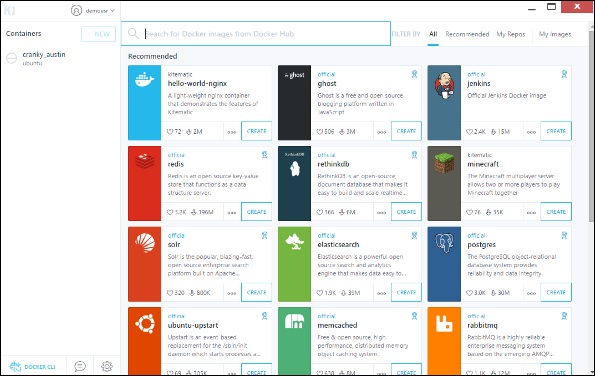
On the right-hand side, you will find all the images available on Docker Hub.
Let’s take an example to understand how to download the Node image from Docker Hub using Kitematic.
Step 1 − Enter the keyword of node in the search criteria.
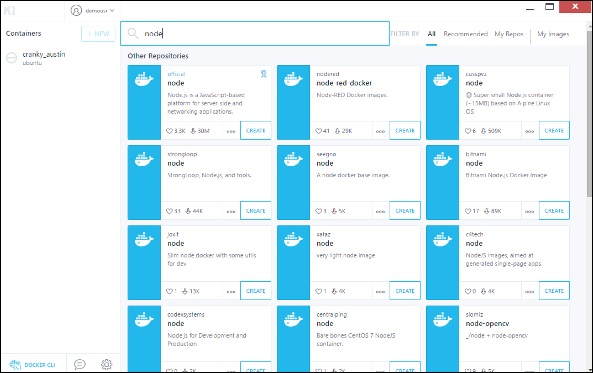
Step 2 − Click the create button on official Node image. You will then see the image being downloaded.

Once the image has been downloaded, it will then start running the Node container.

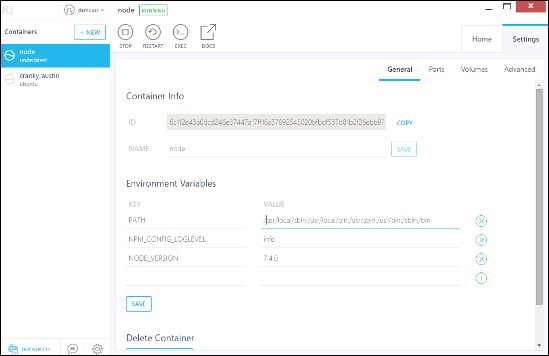
Step 3 − If you go to the settings tab, you can drill-down to further settings options, as shown below.
General settings − In this tab, you can name the container, change the path settings, and delete the container.
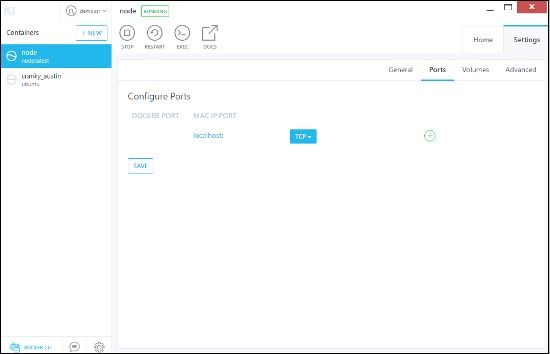
Ports − Here you can see the different port mappings. If you want, you can create your own port mappings.
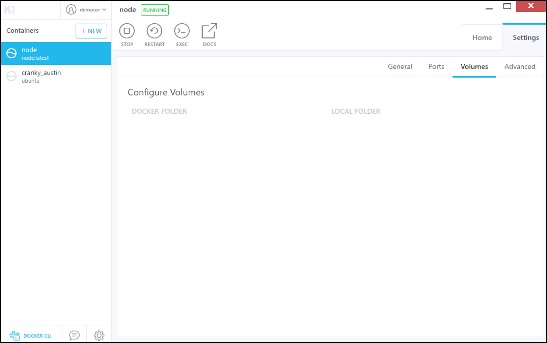
Volumes − Here you can see the different volume mappings.
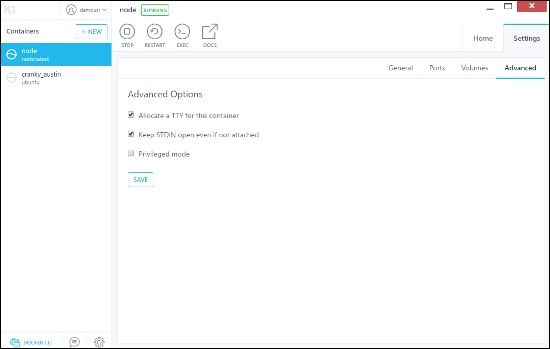
Advanced − It contains the advanced settings for the container.
ASP.Net is the standard web development framework that is provided by Microsoft for developing server-side applications. Since ASP.Net has been around for quite a long time for development, Docker has ensured that it has support for ASP.Net.
In this chapter, we will see the various steps for getting the Docker container for ASP.Net up and running.
Prerequisites
The following steps need to be carried out first for running ASP.Net.
Step 1 − Since this can only run on Windows systems, you first need to ensure that you have either Windows 10 or Window Server 2016.
Step 2 − Next, ensure that Hyper-V is and Containers are installed on the Windows system. To install Hyper–V and Containers, you can go to Turn Windows Features ON or OFF. Then ensure the Hyper-V option and Containers is checked and click the OK button.
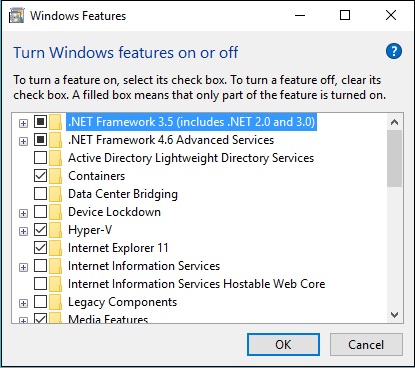
The system might require a restart after this operation.
Step 3 − Next, you need to use the following Powershell command to install the 1.13.0rc4 version of Docker. The following command will download this and store it in the temp location.
Invoke-WebRequest "https://test.docker.com/builds/Windows/x86_64/docker-1.13.0-
   rc4.zip" -OutFile "$env:TEMP\docker-1.13.0-rc4.zip" –UseBasicParsing
Step 4 − Next, you need to expand the archive using the following powershell command.
Expand-Archive -Path "$env:TEMP\docker-1.13.0-rc4.zip" -DestinationPath $env:ProgramFiles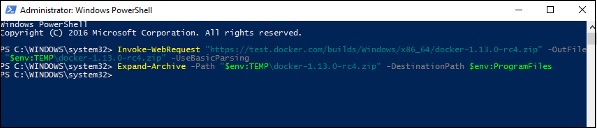
Step 5 − Next, you need to add the Docker Files to the environment variable using the following powershell command.
$env:path += ";$env:ProgramFiles\Docker"Step 6 − Next, you need to register the Docker Daemon Service using the following powershell command.
dockerd --register-serviceStep 7 − Finally, you can start the docker daemon using the following command.
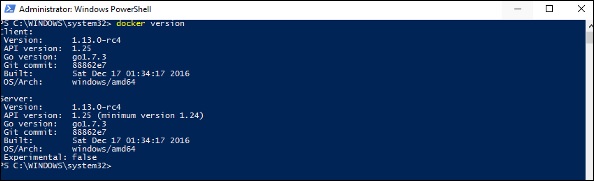
Start-Service DockerUse the docker version command in powershell to verify that the docker daemon is working
Installing the ASP.Net Container
Let’s see how to install the ASP.Net container.
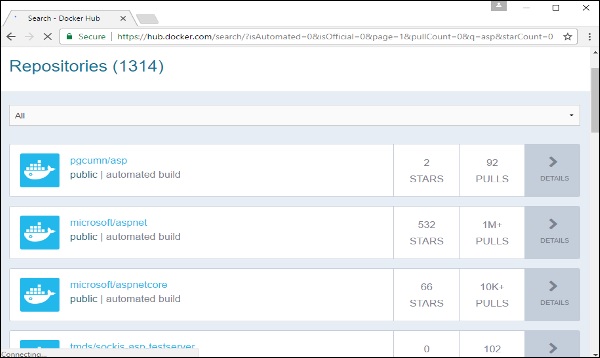
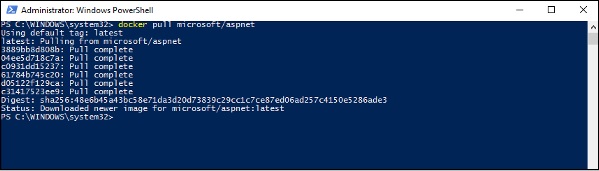
Step 1 − The first step is to pull the image from Docker Hub. When you log into Docker Hub, you will be able to search and see the image for Microsoft/aspnet as shown below. Just type in asp in the search box and click on the Microsoft/aspnet link which comes up in the search results.
Step 2 − You will see that the Docker pull command for ASP.Net in the details of the repository in Docker Hub.

Step 3 − Go to Docker Host and run the Docker pull command for the microsoft/aspnet image. Note that the image is pretty large, somewhere close to 4.2 GB.
Step 4 − Now go to the following location https://github.com/Microsoft/aspnet-docker and download the entire Git repository.
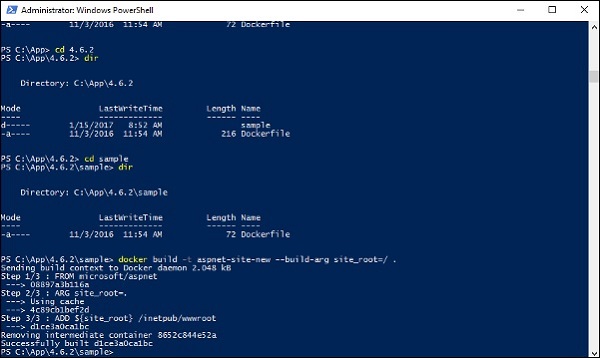
Step 5 − Create a folder called App in your C drive. Then copy the contents from the 4.6.2/sample folder to your C drive. Go the Docker File in the sample directory and issue the following command −
docker build –t aspnet-site-new –build-arg site_root=/The following points need to be noted about the above command −
- It builds a new image called aspnet-site-new from the Docker File.
- The root path is set to the localpath folder.
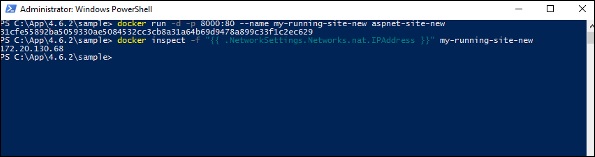
Step 6 − Now it’s time to run the container. It can be done using the following command −
docker run –d –p 8000:80 –name my-running-site-new aspnet-site-new
Step 7 − You will now have IIS running in the Docker container. To find the IP Address of the Docker container, you can issue the Docker inspect command as shown below.
The Docker Cloud is a service provided by Docker in which you can carry out the following operations −
Nodes − You can connect the Docker Cloud to your existing cloud providers such as Azure and AWS to spin up containers on these environments.
Cloud Repository − Provides a place where you can store your own repositories.
Continuous Integration − Connect with Github and build a continuous integration pipeline.
Application Deployment − Deploy and scale infrastructure and containers.
Continuous Deployment − Can automate deployments.
Getting started
You can go to the following link to getting started with Docker Cloud − https://cloud.docker.com/
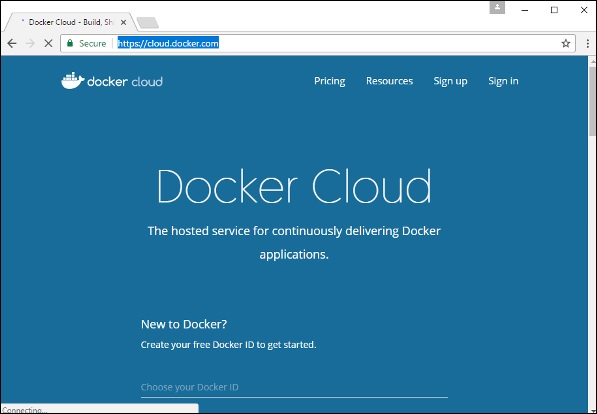
Once logged in, you will be provided with the following basic interface −

Connecting to the Cloud Provider
The first step is to connect to an existing cloud provider. The following steps will show you how to connect with an Amazon Cloud provider.
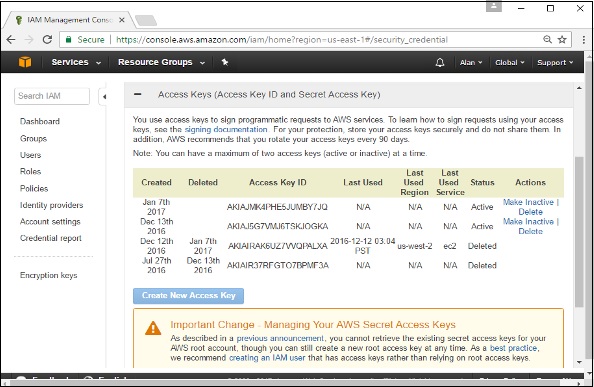
Step 1 − The first step is to ensure that you have the right AWS keys. This can be taken from the aws console. Log into your aws account using the following link −
Step 2 − Once logged in, go to the Security Credentials section. Make a note of the access keys which will be used from Docker Hub.
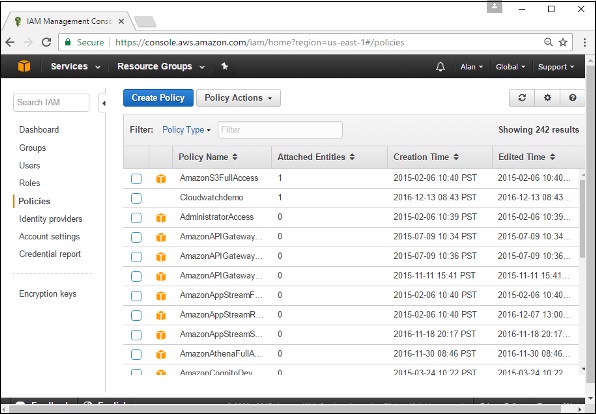
Step 3 − Next, you need to create a policy in aws that will allow Docker to view EC2 instances. Go to the profiles section in aws. Click the Create Policy button.
Step 4 − Click on ‘Create Your Own Policy’ and give the policy name as dockercloudpolicy and the policy definition as shown below.
{
   "Version": "2012-10-17",
   "Statement": [ {
      "Action": [
         "ec2:*",
         "iam:ListInstanceProfiles"
      ],
      "Effect": "Allow",
      "Resource": "*"
   } ]
}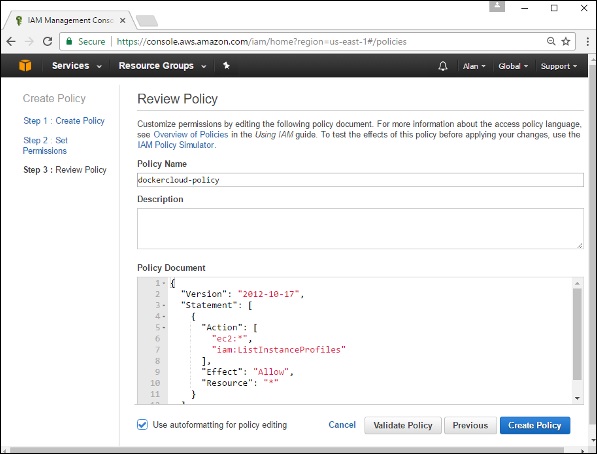
Next, click the Create Policy button
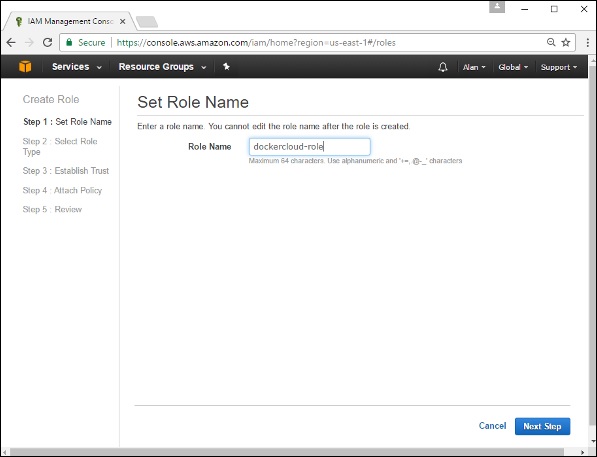
Step 5 − Next, you need to create a role which will be used by Docker to spin up nodes on AWS. For this, go to the Roles section in AWS and click the Create New Role option.
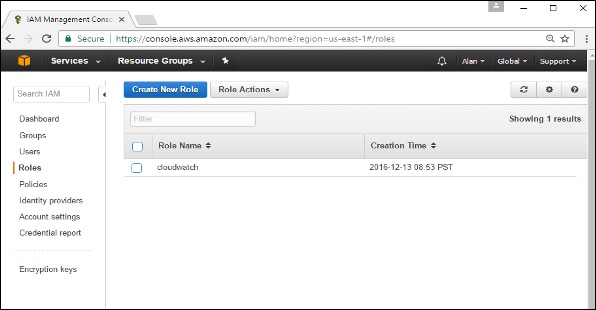
Step 6 − Give the name for the role as dockercloud-role.
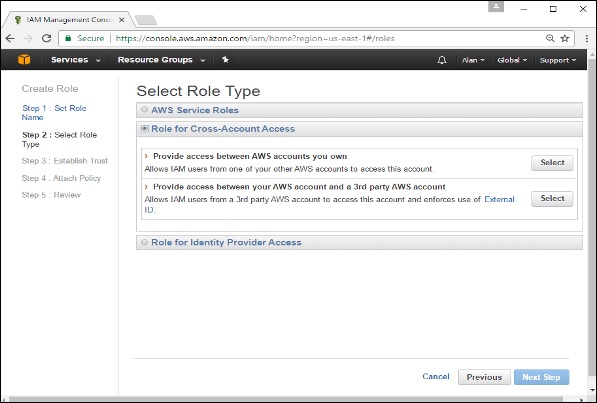
Step 7 − On the next screen, go to ‘Role for Cross Account Access’ and select “Provide access between your account and a 3rd party AWS account".
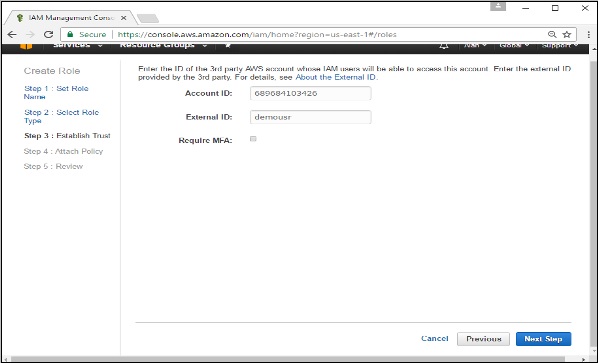
Step 8 − On the next screen, enter the following details −
- In the Account ID field, enter the ID for the Docker Cloud service: 689684103426.
- In the External ID field, enter your Docker Cloud username.
Step 9 − Then, click the Next Step button and on the next screen, attach the policy which was created in the earlier step.
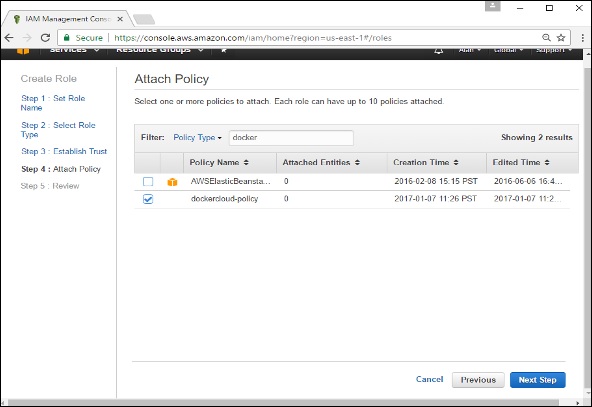
Step 10 − Finally, on the last screen when the role is created, make sure to copy the arn role which is created.
arn:aws:iam::085363624145:role/dockercloud-role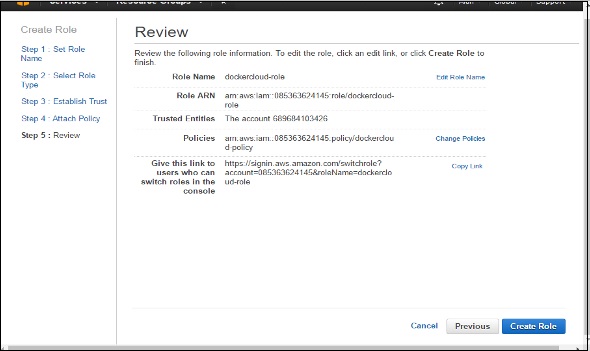
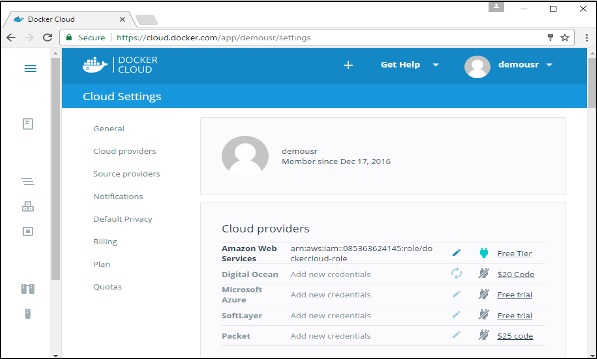
Step 11 − Now go back to Docker Cloud, select Cloud Providers, and click the plug symbol next to Amazon Web Services.

Enter the arn role and click the Save button.
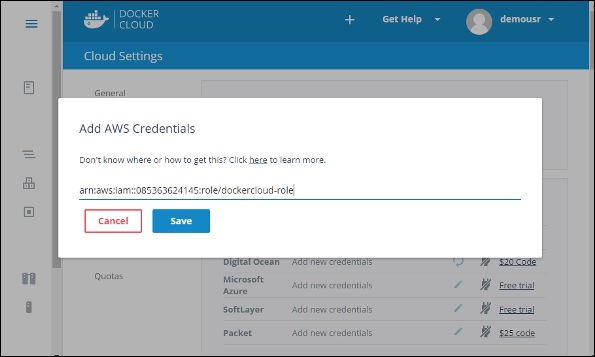
Once saved, the integration with AWS would be complete.
Setting Up Nodes
Once the integration with AWS is complete, the next step is to setup a node. Go to the Nodes section in Docker Cloud. Note that the setting up of nodes will automatically setup a node cluster first.
Step 1 − Go to the Nodes section in Docker Cloud.
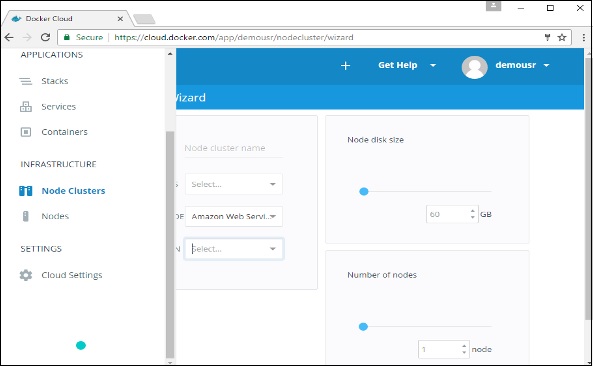
Step 2 − Next, you can give the details of the nodes which will be setup in AWS.
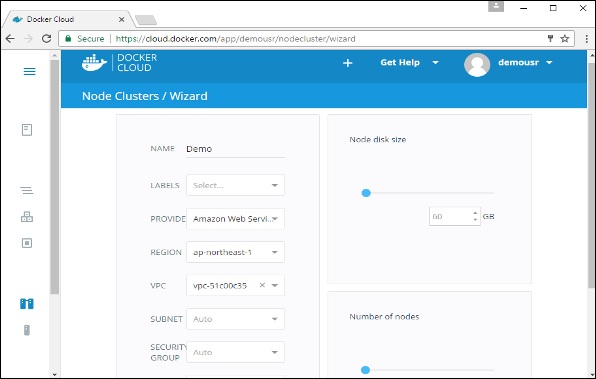
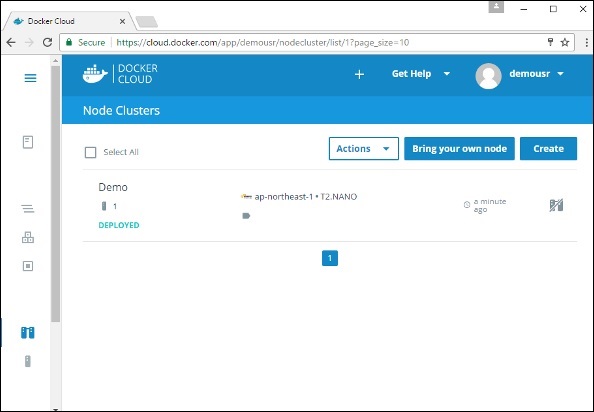
You can then click the Launch Node cluster which will be present at the bottom of the screen. Once the node is deployed, you will get the notification in the Node Cluster screen.
Deploying a Service
The next step after deploying a node is to deploy a service. To do this, we need to perform the following steps.
Step 1 − Go to the Services Section in Docker Cloud. Click the Create button
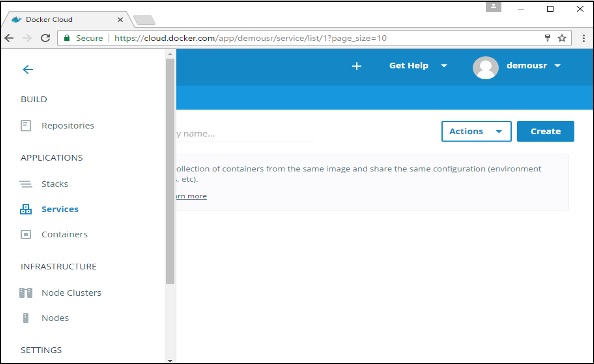
Step 2 − Choose the Service which is required. In our case, let’s choose mongo.
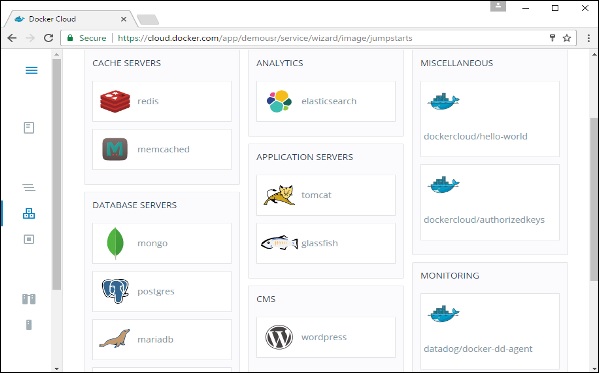
Step 3 − On the next screen, choose the Create & Deploy option. This will start deploying the Mongo container on your node cluster.
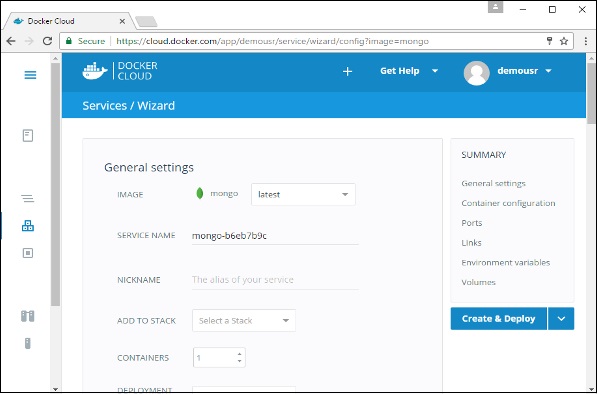
Once deployed, you will be able to see the container in a running state.

Docker has logging mechanisms in place which can be used to debug issues as and when they occur. There is logging at the daemon level and at the container level. Let’s look at the different levels of logging.
Daemon Logging
At the daemon logging level, there are four levels of logging available −
Debug − It details all the possible information handled by the daemon process.
Info − It details all the errors + Information handled by the daemon process.
Errors − It details all the errors handled by the daemon process.
Fatal − It only details all the fatal errors handled by the daemon process.
Go through the following steps to learn how to enable logging.
Step 1 − First, we need to stop the docker daemon process, if it is already running. It can be done using the following command −
sudo service docker stop
Step 2 − Now we need to start the docker daemon process. But this time, we need to append the –l parameter to specify the logging option. So let’s issue the following command when starting the docker daemon process.
sudo dockerd –l debug &The following points need to be noted about the above command −
dockerd is the executable for the docker daemon process.
The –l option is used to specify the logging level. In our case, we are putting this as debug
& is used to come back to the command prompt after the logging has been enabled.

Once you start the Docker process with logging, you will also now see the Debug Logs being sent to the console.
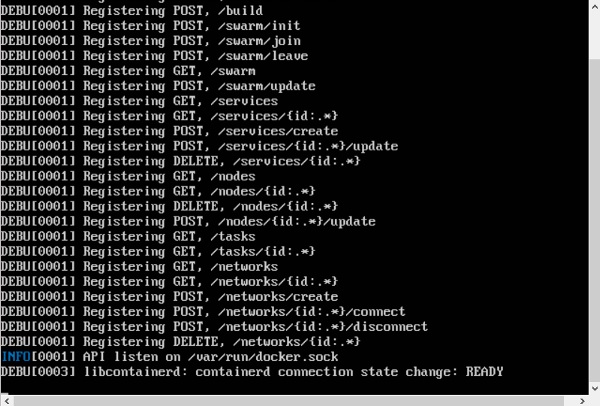
Now, if you execute any Docker command such as docker images, the Debug information will also be sent to the console.

Container Logging
Logging is also available at the container level. So in our example, let’s spin up an Ubuntu container first. We can do it by using the following command.
sudo docker run –it ubuntu /bin/bash
Now, we can use the docker log command to see the logs of the container.
Syntax
Docker logs containerIDParameters
containerID − This is the ID of the container for which you need to see the logs.
Example
On our Docker Host, let’s issue the following command. Before that, you can issue some commands whilst in the container.
sudo docker logs 6bfb1271fcddOutput
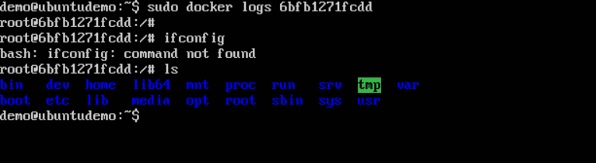
From the output, you can see that the commands executed in the container are shown in the logs.
Docker Compose is used to run multiple containers as a single service. For example, suppose you had an application which required NGNIX and MySQL, you could create one file which would start both the containers as a service without the need to start each one separately.
In this chapter, we will see how to get started with Docker Compose. Then, we will look at how to get a simple service with MySQL and NGNIX up and running using Docker Compose.
Docker Compose ─ Installation
The following steps need to be followed to get Docker Compose up and running.
Step 1 − Download the necessary files from github using the following command −
curl -L "https://github.com/docker/compose/releases/download/1.10.0-rc2/dockercompose
   -$(uname -s) -$(uname -m)" -o /home/demo/docker-compose
The above command will download the latest version of Docker Compose which at the time of writing this article is 1.10.0-rc2. It will then store it in the directory /home/demo/.

Step 2 − Next, we need to provide execute privileges to the downloaded Docker Compose file, using the following command −
chmod +x /home/demo/docker-compose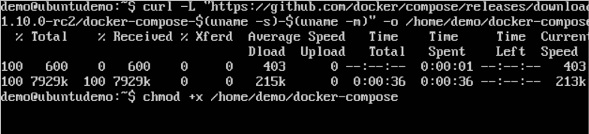
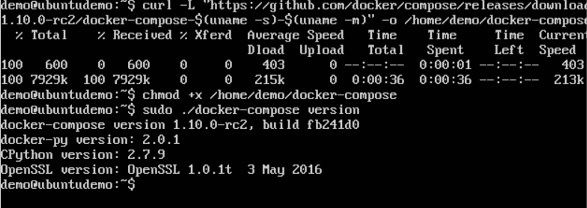
We can then use the following command to see the compose version.
Syntax
docker-compose versionParameters
version − This is used to specify that we want the details of the version of Docker Compose.
Output
The version details of Docker Compose will be displayed.
Example
The following example shows how to get the docker-compose version.
sudo ./docker-compose -versionOutput
You will then get the following output −
Creating Your First Docker-Compose File
Now let’s go ahead and create our first Docker Compose file. All Docker Compose files are YAML files. You can create one using the vim editor. So execute the following command to create the compose file −
sudo vim docker-compose.yml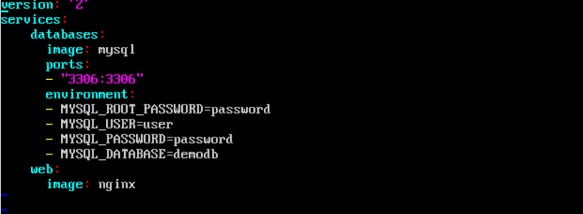
Let’s take a close look at the various details of this file −
The database and web keyword are used to define two separate services. One will be running our mysql database and the other will be our nginx web server.
The image keyword is used to specify the image from dockerhub for our mysql and nginx containers
For the database, we are using the ports keyword to mention the ports that need to be exposed for mysql.
And then, we also specify the environment variables for mysql which are required to run mysql.
Now let’s run our Docker Compose file using the following command −
sudo ./docker-compose upThis command will take the docker-compose.yml file in your local directory and start building the containers.
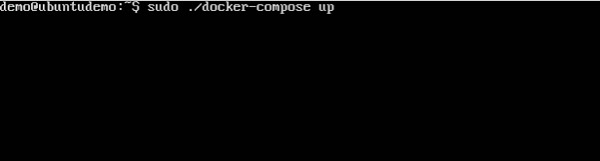
Once executed, all the images will start downloading and the containers will start automatically.
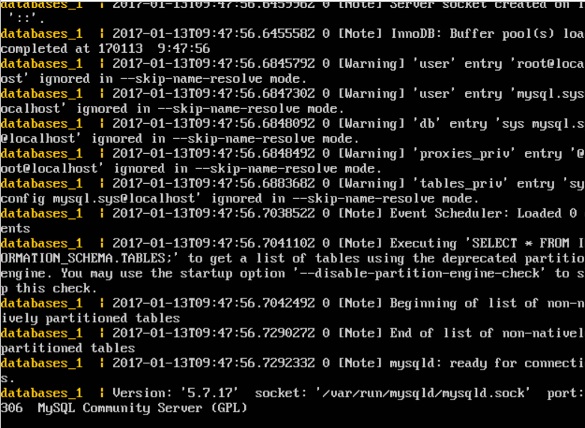
And when you do a docker ps, you can see that the containers are indeed up and running.

Docker has integrations with many Continuous Integrations tools, which also includes the popular CI tool known as Jenkins. Within Jenkins, you have plugins available which can be used to work with containers. So let’s quickly look at a Docker plugin available for the Jenkins tool.
Let’s go step by step and see what’s available in Jenkins for Docker containers.
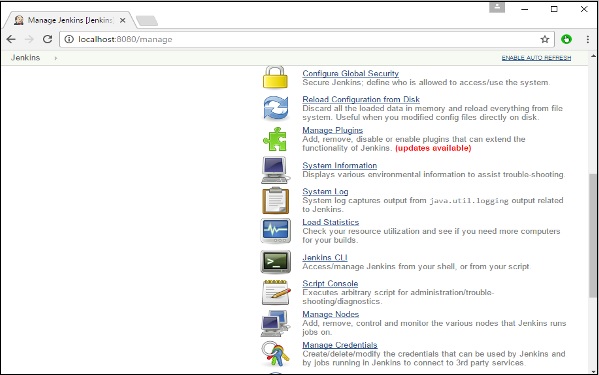
Step 1 − Go to your Jenkins dashboard and click Manage Jenkins.
Step 2 − Go to Manage Plugins.
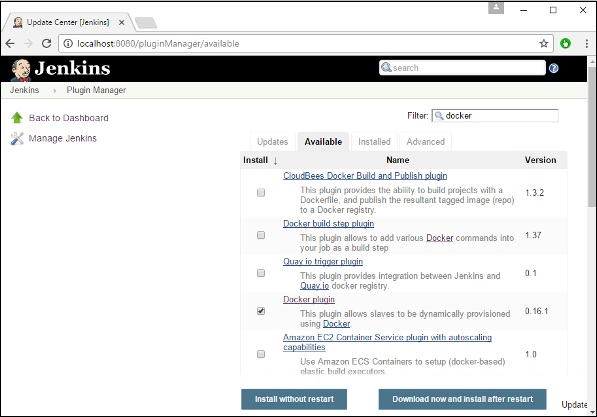
Step 3 − Search for Docker plugins. Choose the Docker plugin and click the Install without restart button.
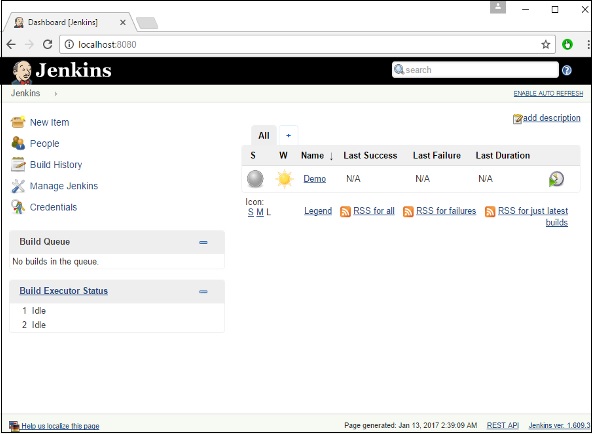
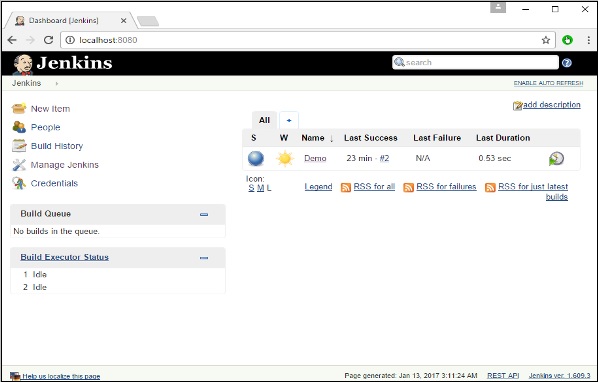
Step 4 − Once the installation is completed, go to your job in the Jenkins dashboard. In our example, we have a job called Demo.
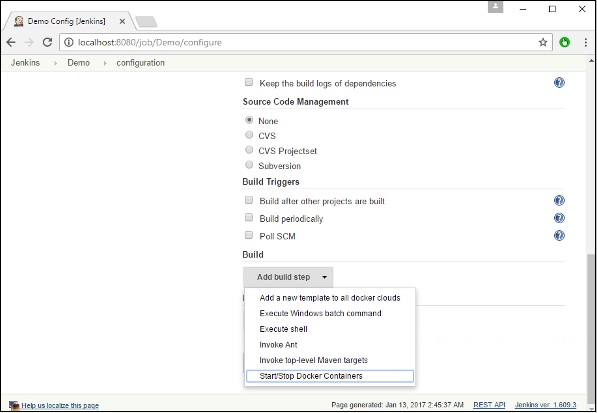
Step 5 − In the job, when you go to the Build step, you can now see the option to start and stop containers.
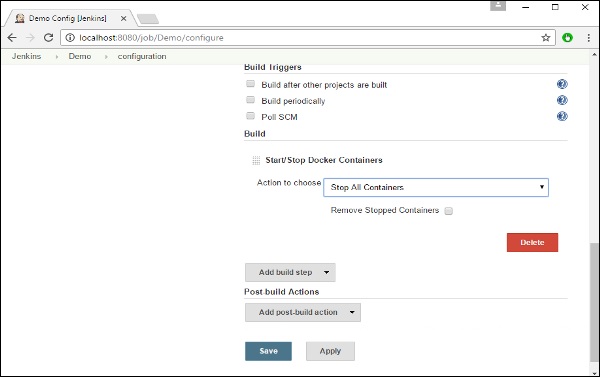
Step 6 − As a simple example, you can choose the further option to stop containers when the build is completed. Then, click the Save button.
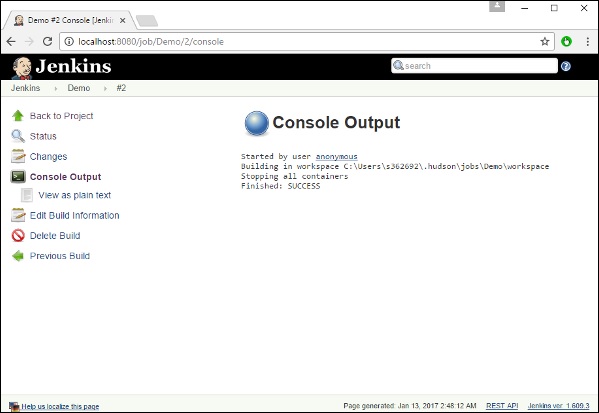
Now, just run your job in Jenkins. In the Console output, you will now be able to see that the command to Stop All containers has run.
Kubernetes is an orchestration framework for Docker containers which helps expose containers as services to the outside world. For example, you can have two services − One service would contain nginx and mongoDB, and another service would contain nginx and redis. Each service can have an IP or service point which can be connected by other applications. Kubernetes is then used to manage these services.
The following diagram shows in a simplistic format how Kubernetes works from an architecture point of view.
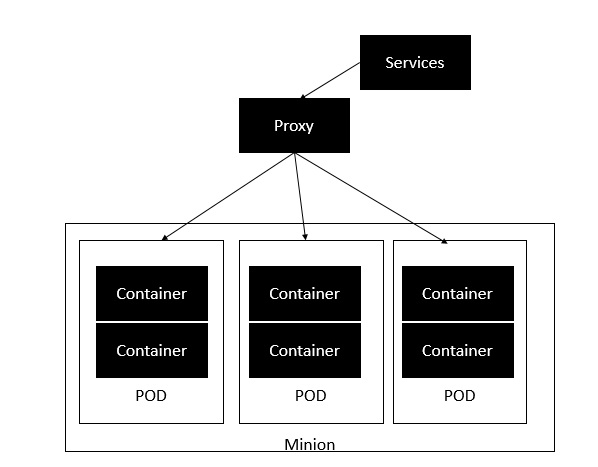
The minion is the node on which all the services run. You can have many minions running at one point in time. Each minion will host one or more POD. Each POD is like hosting a service. Each POD then contains the Docker containers. Each POD can host a different set of Docker containers. The proxy is then used to control the exposing of these services to the outside world.
Kubernetes has several components in its architecture. The role of each component is explained below &mius;
etcd − This component is a highly available key-value store that is used for storing shared configuration and service discovery. Here the various applications will be able to connect to the services via the discovery service.
Flannel − This is a backend network which is required for the containers.
kube-apiserver − This is an API which can be used to orchestrate the Docker containers.
kube-controller-manager − This is used to control the Kubernetes services.
kube-scheduler − This is used to schedule the containers on hosts.
Kubelet − This is used to control the launching of containers via manifest files.
kube-proxy − This is used to provide network proxy services to the outside world.
In this chapter, we will see how to install Kubenetes via kubeadm. This is a tool which helps in the installation of Kubernetes. Let’s go step by step and learn how to install Kubernetes.
Step 1 − Ensure that the Ubuntu server version you are working on is 16.04.
Step 2 − Ensure that you generate a ssh key which can be used for ssh login. You can do this using the following command.
ssh-keygenThis will generate a key in your home folder as shown below.

Step 3 − Next, depending on the version of Ubuntu you have, you will need to add the relevant site to the docker.list for the apt package manager, so that it will be able to detect the Kubernetes packages from the kubernetes site and download them accordingly.
We can do it using the following commands.
curl -s https://packages.cloud.google.com/apt/doc/apt-key.gpg | apt-key add -
echo "deb http://apt.kubernetes.io/ kubernetes-xenial main” | sudo tee /etc/apt/sources.list.d/docker.list
Step 4 − We then issue an apt-get update to ensure all packages are downloaded on the Ubuntu server.
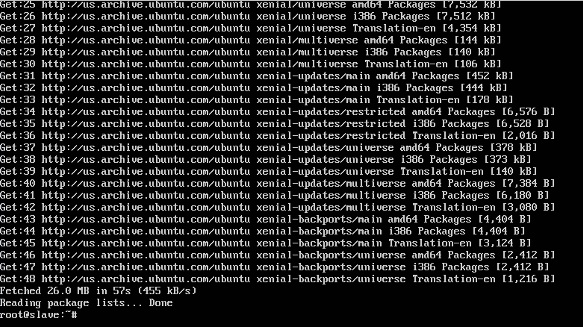
Step 5 - ติดตั้งแพ็คเกจ Docker ตามรายละเอียดในบทก่อนหน้า
Step 6 - ถึงเวลาติดตั้งแล้ว kubernetes โดยติดตั้งแพ็คเกจต่อไปนี้ -
apt-get install –y kubelet kubeadm kubectl kubernetes-cni

Step 7 - ทุกครั้ง kubernetes ดาวน์โหลดแพ็คเกจแล้วถึงเวลาเริ่มตัวควบคุม kubernetes โดยใช้คำสั่งต่อไปนี้ -
kubeadm init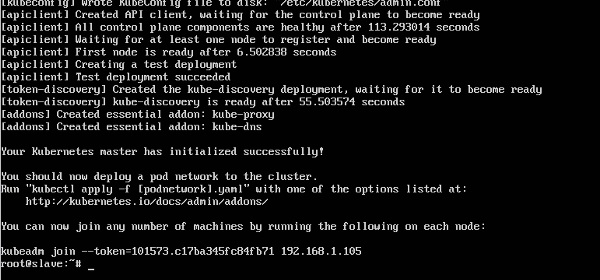
เมื่อเสร็จแล้วคุณจะได้รับข้อความที่สำเร็จว่ามาสเตอร์พร้อมใช้งานและโหนดสามารถเข้าร่วมคลัสเตอร์ได้แล้ว