Bahar WS - Statik WSDL
Önceki Spring -WS - First Application bölümünde , Spring WS Yapılandırmasını kullanarak WSDL'yi otomatik olarak oluşturduk. Bu durumda, Spring WS kullanılarak mevcut WSDL'nin nasıl ortaya çıkarılacağını göstereceğiz.
| Adım | Açıklama |
|---|---|
| 1 | Spring WS - İlk Uygulama bölümünde açıklandığı gibi com.tutorialspoint paketinin altında LeaveService adlı bir proje oluşturun. |
| 2 | / WEB-INF / wsdl alt klasörü altında bir WSDL allow.wsdl oluşturun. |
| 3 | / WEB-INF alt klasörünün altındaki spring-ws-servlet.xml dosyasını güncelleyin. Burada dynamic-wsdl yerine static-wsdl etiketini kullanıyoruz. |
| 4 | Son adım, tüm kaynak ve yapılandırma dosyalarının içeriğini oluşturmak ve uygulamayı aşağıda açıklandığı gibi dışa aktarmaktır. |
/WEB-INF/spring-ws-servlet.xml
<wsdl:definitions xmlns:wsdl = "http://schemas.xmlsoap.org/wsdl/"
   xmlns:soap = "http://schemas.xmlsoap.org/wsdl/soap/"
   xmlns:schema = "http://tutorialspoint.com/hr/schemas"
   xmlns:tns = "http://tutorialspoint.com/hr/definitions"
   targetNamespace = "http://tutorialspoint.com/hr/definitions">

   <wsdl:types>
      <xsd:schema xmlns:xsd = "http://www.w3.org/2001/XMLSchema">
         <xsd:import namespace = "http://tutorialspoint.com/hr/schemas"
            schemaLocation = "hr.xsd"/>
      </xsd:schema>
   </wsdl:types>

   <wsdl:message name = "LeaveRequest">
      <wsdl:part element = "schema:LeaveRequest" name = "LeaveRequest"/>
   </wsdl:message>

   <wsdl:portType name = "HumanResource">
      <wsdl:operation name = "Leave">
         <wsdl:input message = "tns:LeaveRequest" name = "LeaveRequest"/>
      </wsdl:operation>
   </wsdl:portType>

   <wsdl:binding name = "HumanResourceBinding" type = "tns:HumanResource">
      <soap:binding style = "document"
         transport = "http://schemas.xmlsoap.org/soap/http"/>
      <wsdl:operation name = "Leave">
         <soap:operation soapAction = "http://mycompany.com/RequestLeave"/>
         <wsdl:input name = "LeaveRequest">
            <soap:body use = "literal"/>
         </wsdl:input>
      </wsdl:operation>
   </wsdl:binding>

   <wsdl:service name = "HumanResourceService">
      <wsdl:port binding = "tns:HumanResourceBinding" name = "HumanResourcePort">
         <soap:address location = "http://localhost:8080/leaveService/"/>
      </wsdl:port>
   </wsdl:service>
</wsdl:definitions>
/WEB-INF/spring-ws-servlet.xml
<beans xmlns = "http://www.springframework.org/schema/beans"
   xmlns:xsi = "http://www.w3.org/2001/XMLSchema-instance"
   xmlns:context = "http://www.springframework.org/schema/context"
   xmlns:sws = "http://www.springframework.org/schema/web-services"
   xsi:schemaLocation = "http://www.springframework.org/schema/beans

   http://www.springframework.org/schema/beans/spring-beans-3.0.xsd
   http://www.springframework.org/schema/web-services
   http://www.springframework.org/schema/web-services/web-services-2.0.xsd
   http://www.springframework.org/schema/context
   http://www.springframework.org/schema/context/spring-context-3.0.xsd">

   <context:component-scan base-package = "com.tutorialspoint.hr"/>
   <sws:annotation-driven/>
   <sws:static-wsdl id = "leave" location = "/WEB-INF/wsdl/leave.wsdl"/>
</beans>
Projeyi Çalıştırın
Kaynak ve yapılandırma dosyalarını oluşturmayı bitirdiğimizde, uygulamayı dışa aktarmalıyız. Uygulamaya sağ tıklayın, Export → WAR Dosyası seçeneğini kullanın ve allowService.war dosyanızı Tomcat'in webapps klasörüne kaydedin.
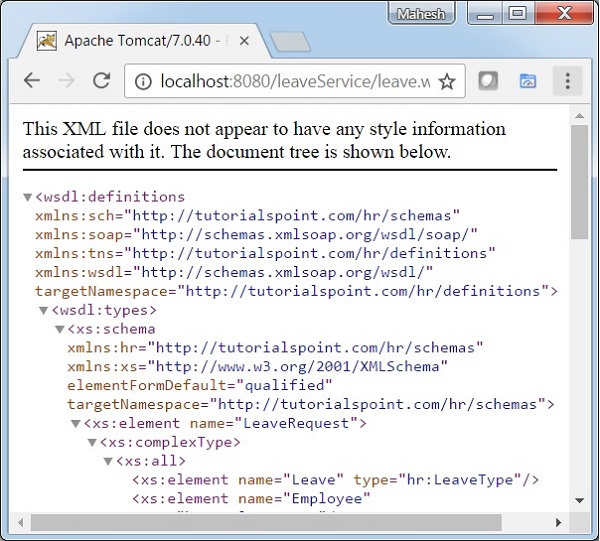
Şimdi, Tomcat sunucusunu başlatın ve diğer web sayfalarına standart bir tarayıcı kullanarak webapps klasöründen erişebildiğimizden emin olun. URL'ye erişmeye çalışın - http: // localhost: 8080 / LeaveService / Leave.wsdl, Spring Web Uygulaması ile ilgili her şey yolundaysa, aşağıdaki ekranı göreceğiz.