SAPSolman-テンプレート管理
SAP Solution Managerでは、テンプレート管理を使用して、ブループリントドキュメント、ビジネスシナリオ、および設定用のテンプレートをグローバルレベルで作成し、それらを配布することができます。テンプレートは、他のプロジェクトやソリューションで再利用できます。
テンプレートの作成
SAP Solution Managerで、テンプレートを作成するには、テンプレートプロジェクトから開始する必要があります。
Step 1 −プロジェクト管理に移動します。

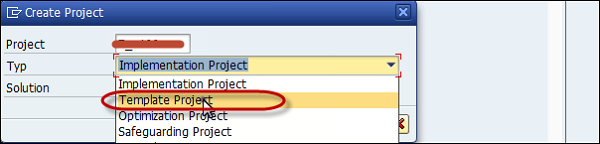
Step 2−次に、プロジェクト名を入力し、プロジェクトタイプを選択します。プロジェクトタイプはTemplate Projectテンプレートを作成します。このプロジェクトを作成するソリューションを選択します。
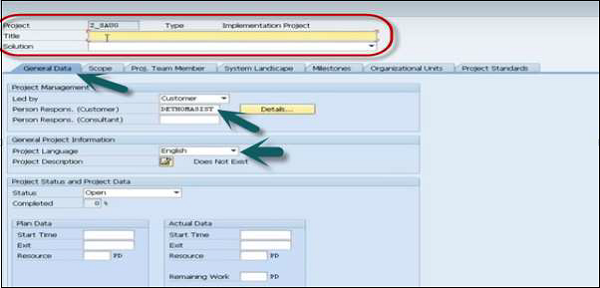
Step 3 −次のウィンドウで、次の詳細を入力する必要があります-言語、プロジェクトタイトル、責任者、およびその他のオプションを[全般]タブに入力します。
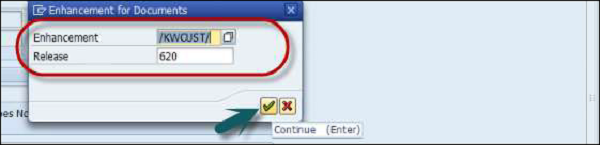
Step 4−すべての詳細を入力したら、上部にある[保存]ボタンをクリックします。選択する必要がありますEnhancement version そして Release。[続行]をクリックします。パッケージ→続行を選択します。
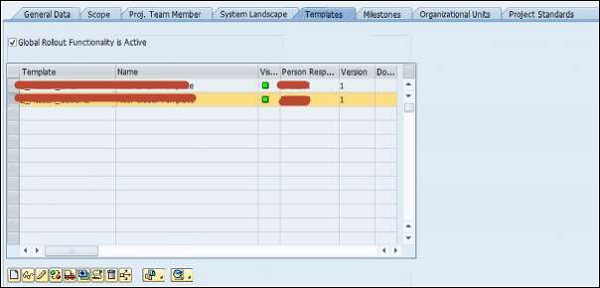
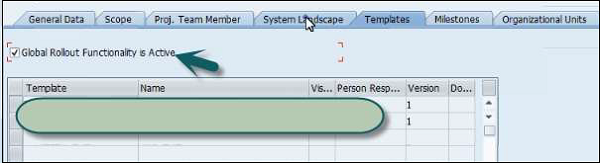
Step 5 −次に、 Templates上部のタブ。クリックCreate Templateボタン。テンプレートと名前を入力し、[続行]をクリックします。

Step 6−1つのプロジェクトで複数のテンプレートを作成できます。選択するGlobal Rollout Functionality is Active テンプレート用。
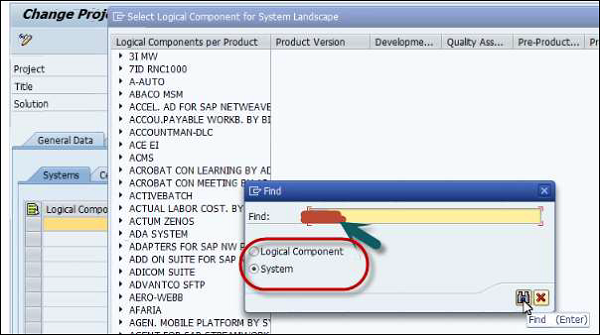
Step 7 −に移動 System Landscapeタブをクリックし、プロジェクトに追加する論理コンポーネント/システムを選択します。特定のシステム/論理コンポーネントの検索を実行できます。
Step 8 − [システムランドスケープ]ですべての論理コンポーネントを選択したら、上部にある[保存]ボタンをクリックします。

Step 9 −次に、ビジネスブループリント構造を定義します。 Edit → Business Blueprint Fill。
Step 10 −構造ファイルを選択→開く→続行。

Step 11 −次に、ビジネスブループリントを定義し、[ジャンプ]→[プロジェクト]→[ビジネスブループリント]をクリックします。

Step 12−左側のペインでビジネスシナリオに移動します。シナリオ名を選択します。に移動Structure → Scenario Name and select Scenario。
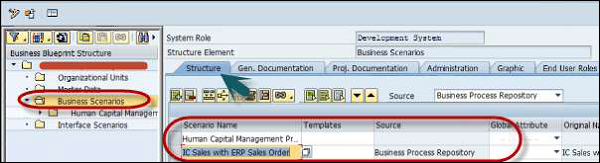
Step 13−テンプレートを割り当て、グローバル属性を設定します。テンプレートに移動し、作成されたテンプレートを選択します。
属性を選択するには、に移動します Global Attributeドロップダウンリストから[グローバル]を選択します。テンプレートとグローバル属性を選択したら、上部にある[保存]ボタンをクリックします。

プロジェクトのテンプレートのリリース
プロジェクトのテンプレートをリリースするには、
Step 1 −クリック Goto → Project Dataメイン画面に移動します。に移動しますTemplateタブを押してテンプレートを選択します。クリックChange Visibility テンプレートをリリースします。
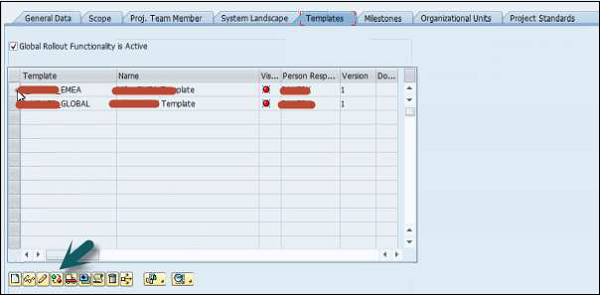

どちらのテンプレートも可視性を緑に変更し、プロジェクトで使用できます。