Joomla - Şablon Oluşturma
Bu bölümde, nasıl yapılacağını inceleyeceğiz. create a template Joomla'da.
Şablon Oluşturma
Joomla'da şablon oluşturmak için basit adımlar aşağıdadır -
Step 1 - adlı bir klasör oluşturun MyFirstTemplate senin içinde Joomla → TemplatesKlasör. İçerideMyFirstTemplateKlasör olarak adlandırılan 2 daha fazla klasör oluşturmak görüntüleri tüm görüntüleri ve CSS dosyaları kaydetmek için ve CSS.
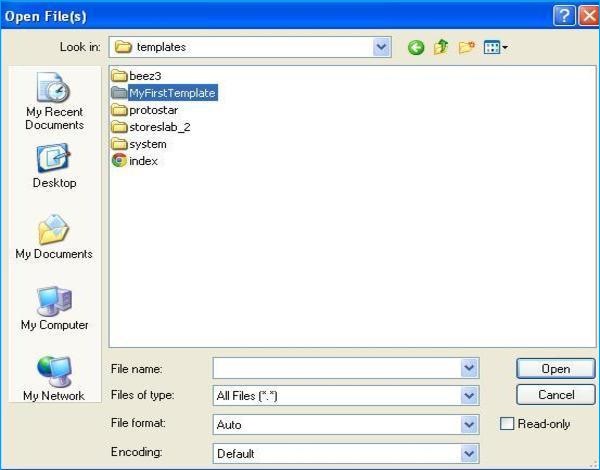
Step 2 - İçeride MyFirstTemplate klasör, adında bir dosya oluşturun templateDetails.xml, bu dosya olmadan şablon Joomla'da görüntülenmeyecektir.
templateDetails.xml
<?xml version = "1.0" encoding = "utf-8"?>

<extension version = "3.0" type = "template">
   <name>Tutorials Point</name>
   <creationDate>2015-06-13</creationDate>
   <author>Tutorials Point</author>
   <authorEmail>[email protected]</authorEmail>
   <authorUrl>http://www.example.com </authorUrl>
   <copyright>Jack 2015</copyright>
   <license>GNU/GPL</license>
   <version>1.0.2</version>
   <description>My First Template</description>

   <files>
      <filename>index.php</filename>
      <filename>templateDetails.xml</filename>
      <folder>images</folder>
      <folder>css</folder>
   </files>

   <positions>
      <position>breadcrumb</position>
      <position>left</position>
      <position>right</position>
      <position>top</position>
      <position>user1</position>
      <position>user2</position>
      <position>user3</position>
     <position>user4</position>
     <position>footer</position>
   </positions>

</extension>
Kodun ayrıntıları
<files> - içindeki mevcut dosya ve klasörleri içerir. MyFirstTemplate Klasör.
<folder> - Mevcut tüm klasörleri alır MyFirstTemplate Klasör.
Step 3 - olarak adlandırılan bir dosya oluşturun index.php. Bu, tüm Joomla sayfalarının yürütülmesine yardımcı olur.
index.php
<?php defined( '_JEXEC' ) or die( 'Restricted access' );?>
<!DOCTYPE html>

<html xmlns = "http://www.w3.org/1999/xhtml" xml:lang = "<?php echo $this->language; ?>" lang = "<?php echo $this->language; ?>" >

   <head>                                         //head section
      <jdoc:include type = "head" />
      <link rel = "stylesheet" href = "<?php echo $this->baseurl ?>/templates/system/css/system.css" type = "text/css" />
      <link rel = "stylesheet" href = "<?php echo $this->baseurl ?>/templates/system/css/general.css" type = "text/css" />
      <link rel = "stylesheet" href = "<?php echo $this->baseurl ?>/templates/<?php echo $this->template; ?>/css/template.css" type="text/css" />
   </head>

   <body>                                          //body section
      <jdoc:include type = "modules" name = "top" />
      <jdoc:include type = "component" />
      <jdoc:include type = "modules" name = "bottom" />
   </body>

</html>

?>
Kodun ayrıntıları
<?php defined( '_JEXEC' ) or die( 'Restricted access' );?>
<!DOCTYPE html>
<html xmlns = "http://www.w3.org/1999/xhtml" xml:lang = "<?php echo $this->language; ?>" lang = "<?php echo $this->language; ?>" >
Bu kod, tarayıcıya hangi tür html sayfasının kullanıldığını söylemek için kullanılır ve web sitesinde kullanılan dili açıklayarak HTML belgesini başlatır.
<head>                                         //head section
   <jdoc:include type = "head" />
   <link rel = "stylesheet" href = "<?php echo $this->baseurl ?>/templates/system/css/system.css" type = "text/css" />
   <link rel = "stylesheet" href = "<?php echo $this->baseurl ?>/templates/system/css/general.css" type = "text/css" />
   <link rel = "stylesheet" href = "<?php echo $this->baseurl ?>/templates/<?php echo $this->template; ?>/css/template.css" type = "text/css" />
</head>
Bu satırlar, Joomla'daki şablon için çeşitli stil sayfalarını birbirine bağlamak için kullanılır.
<body>                                          //body section
   <jdoc:include type = "modules" name = "top" />
   <jdoc:include type = "component" />
   <jdoc:include type = "modules" name = "bottom" />
</body>
Burada vücut bölümünde, jdocJoomla sisteminin bazı bölümlerinden çıktıyı Joomla'ya dahil etmek için kullanılır. name = "top" üstteki menüyü ayarlamak için kullanılır.
Step 4 - Bu iki dosyayı oluşturduktan sonra Joomla'ya giriş yapın ve Extension → Extension Manager ve aşağıdaki sayfa görüntülenecektir.
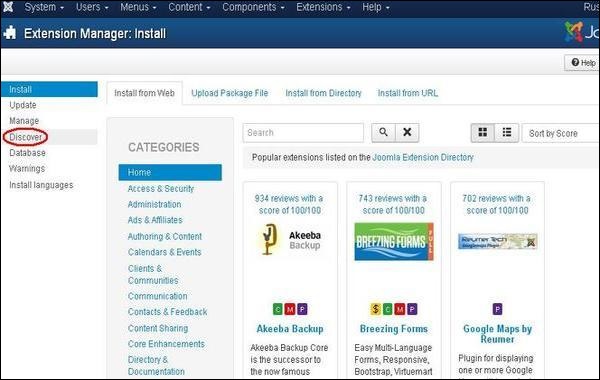
Step 5 - Yukarıdaki sayfada tıklayın Discover bağlantı, aşağıdaki sayfa görüntülenir.

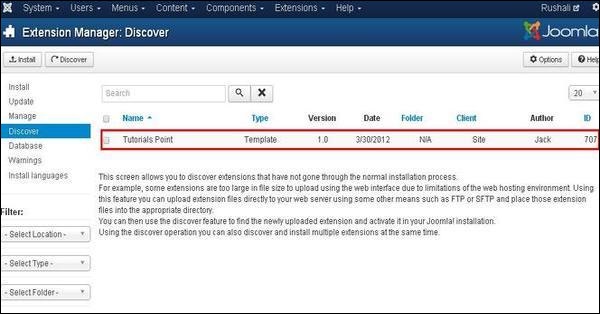
Step 6 - Ardından, Discover Aşağıda gösterildiği gibi yeni oluşturulan şablonu keşfetmek için düğmesine basın.
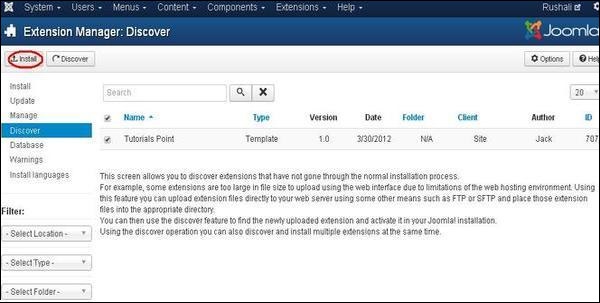
Step 7 - Şablonu seçmek için onay kutusunu tıklayın ve Install Şablonu Joomla'ya yüklemek için tıklayın.
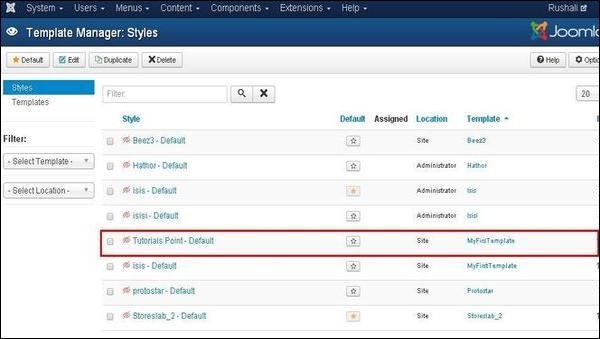
Step 8 - Şablonu kurduktan sonra yeni oluşturduğunuz şablonu tıklayarak görüntüleyebilirsiniz. Extension → Template Manager. Yeni oluşturduğunuz şablonun aşağıda gösterildiği gibi listelendiğini göreceksiniz.
Araç çubuğu
Şablon Yöneticisi'ndeki araç çubuğu seçenekleri aşağıdadır -
Default - Varsayılan şablonu seçin.
Edit - Düzenlemek için şablonu seçin.
Duplicate - Seçilen şablonun kopyasını çoğaltın.
Delete - Joomla için şablonu silin.