Spring MVC - Ví dụ về hộp kiểm
Ví dụ sau mô tả cách sử dụng Hộp kiểm đơn trong các biểu mẫu sử dụng khung Spring Web MVC. Để bắt đầu, hãy để chúng tôi có một IDE Eclipse đang hoạt động tại chỗ và xem xét các bước sau để phát triển Ứng dụng web dựa trên Biểu mẫu động bằng cách sử dụng Spring Web Framework.
| Bươc | Sự miêu tả |
|---|---|
| 1 | Tạo một dự án với tên HelloWeb trong một gói com.tutorialspointas được giải thích trong chương Spring MVC - Hello World Ví dụ. |
| 2 | Tạo các lớp Java User, UserController trong gói com.tutorialspoint. |
| 3 | Tạo một tệp xem user.jsp, users.jsp trong thư mục con jsp. |
| 4 | Bước cuối cùng là tạo nội dung của tệp nguồn và cấu hình và xuất ứng dụng như được giải thích bên dưới. |
User.java
package com.tutorialspoint;

public class User {

   private String username;
   private String password;
   private String address;
   private boolean receivePaper;

   public String getUsername() {
      return username;
   }
   public void setUsername(String username) {
      this.username = username;
   }

   public String getPassword() {
      return password;
   }
   public void setPassword(String password) {
      this.password = password;
   }
   public String getAddress() {
      return address;
   }
   public void setAddress(String address) {
      this.address = address;
   }
   public boolean isReceivePaper() {
      return receivePaper;
   }
   public void setReceivePaper(boolean receivePaper) {
      this.receivePaper = receivePaper;
   }
}
UserController.java
package com.tutorialspoint;

import org.springframework.stereotype.Controller;
import org.springframework.web.bind.annotation.ModelAttribute;
import org.springframework.web.bind.annotation.RequestMapping;
import org.springframework.web.bind.annotation.RequestMethod;
import org.springframework.web.servlet.ModelAndView;
import org.springframework.ui.ModelMap;

@Controller
public class UserController {

   @RequestMapping(value = "/user", method = RequestMethod.GET)
   public ModelAndView user() {
      return new ModelAndView("user", "command", new User());
   }

   @RequestMapping(value = "/addUser", method = RequestMethod.POST)
   public String addUser(@ModelAttribute("SpringWeb")User user,
      ModelMap model) {
      model.addAttribute("username", user.getUsername());
      model.addAttribute("password", user.getPassword());
      model.addAttribute("address", user.getAddress());
      model.addAttribute("receivePaper", user.isReceivePaper());
      return "users";
   }
}
Ở đây, đối với phương thức dịch vụ đầu tiên user (), chúng tôi đã chuyển một đối tượng Người dùng trống trong đối tượng ModelAndView với tên "lệnh", bởi vì khung công tác mùa xuân mong đợi một đối tượng có tên "lệnh", nếu bạn đang sử dụng <form: form> trong tệp JSP của bạn. Vì vậy, khi phương thức user () được gọi, nó sẽ trả về dạng xem user.jsp.
Phương thức dịch vụ thứ hai addUser () sẽ được gọi đối với phương thức POST trên URL HelloWeb / addUser. Bạn sẽ chuẩn bị đối tượng mô hình của mình dựa trên thông tin đã gửi. Cuối cùng, chế độ xem "người dùng" sẽ được trả về từ phương thức dịch vụ, điều này sẽ dẫn đến việc hiển thị users.jsp.
user.jsp
<%@taglib uri = "http://www.springframework.org/tags/form" prefix = "form"%>
<html>
   <head>
      <title>Spring MVC Form Handling</title>
   </head>
   <body>

      <h2>User Information</h2>
      <form:form method = "POST" action = "/HelloWeb/addUser">
         <table>
            <tr>
               <td><form:label path = "username">User Name</form:label></td>
               <td><form:input path = "username" /></td>
            </tr>
            <tr>
               <td><form:label path = "password">Age</form:label></td>
               <td><form:password path = "password" /></td>
            </tr>
            <tr>
               <td><form:label path = "address">Address</form:label></td>
               <td><form:textarea path = "address" rows = "5" cols = "30" /></td>
            </tr>
            <tr>
               <td><form:label path = "receivePaper">Subscribe Newsletter</form:label></td>
               <td><form:checkbox path = "receivePaper" /></td>
            </tr>
            <tr>
               <td colspan = "2">
                  <input type = "submit" value = "Submit"/>
               </td>
            </tr>
         </table>
      </form:form>
   </body>
</html>
Ở đây, chúng tôi đang sử dụng <form:checkboxes /> để hiển thị hộp hộp kiểm HTML.
Ví dụ -
<form:checkbox path="receivePaper" />Nó sẽ hiển thị nội dung HTML sau.
<input id="receivePaper1" name = "receivePaper" type = "checkbox" value = "true"/>
<input type = "hidden" name = "_receivePaper" value = "on"/>
users.jsp
<%@taglib uri = "http://www.springframework.org/tags/form" prefix = "form"%>
<html>
   <head>
      <title>Spring MVC Form Handling</title>
   </head>
   <body>

      <h2>Submitted User Information</h2>
      <table>
         <tr>
            <td>Username</td>
            <td>${username}</td>
         </tr>
         <tr>
            <td>Password</td>
            <td>${password}</td>
         </tr>
         <tr>
            <td>Address</td>
            <td>${address}</td>
         </tr>
         <tr>
            <td>Subscribed to Newsletter</td>
            <td>${receivePaper}</td>
         </tr>
      </table>
   </body>
</html>
Khi bạn đã hoàn tất việc tạo tệp nguồn và cấu hình, hãy xuất ứng dụng của bạn. Nhấp chuột phải vào ứng dụng của bạn, sử dụng tùy chọn Export → WAR File và lưu tệp HelloWeb.war của bạn vào thư mục webapps của Tomcat.
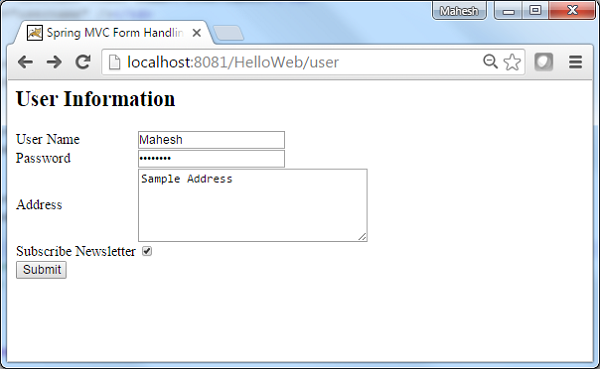
Bây giờ, hãy khởi động máy chủ Tomcat của bạn và đảm bảo rằng bạn có thể truy cập các trang web khác từ thư mục ứng dụng web bằng trình duyệt chuẩn. Hãy thử một URL - http: // localhost: 8080 / HelloWeb / user và chúng ta sẽ thấy màn hình sau nếu mọi thứ đều ổn với Ứng dụng Web Spring.
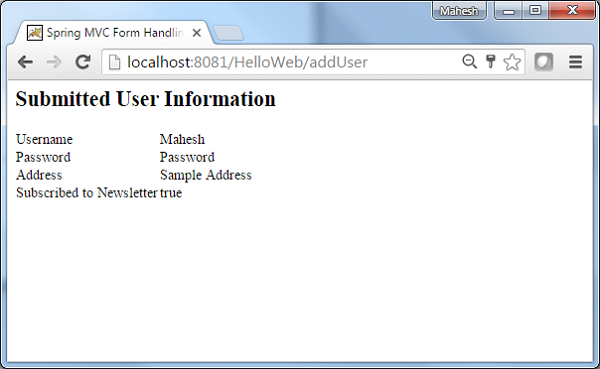
Sau khi gửi các thông tin cần thiết, hãy nhấp vào nút gửi để gửi biểu mẫu. Chúng ta sẽ thấy màn hình sau nếu mọi thứ đều ổn với Ứng dụng Web Mùa xuân.