Zend 프레임 워크-Ajax
AJAX는 웹 프로그래밍의 최신 기술입니다. 페이지를 새로 고치지 않고 웹 페이지에서 비동기 적으로 데이터를 보내고받는 옵션을 제공합니다. Zend 프레임 워크는json 모델을 통해 zend-view 과 zend-json구성 요소. 이 장에서 Zend AJAX 프로그래밍에 대해 알아 보겠습니다.
json 구성 요소 설치
Zend json 구성 요소는 다음을 사용하여 설치할 수 있습니다. Composer 아래에 지정된 명령-
composer require zendframework/zend-json개념
Zend 프레임 워크는 AJAX 지원 웹 애플리케이션을 쉽게 작성할 수있는 두 가지 방법을 제공합니다. 그들은 다음과 같습니다-
그만큼 isXmlHttpRequest() 방법 Requestobject – AJAX 요청이 이루어지면 요청 객체의 isXmlHttpRequest () 메서드가 true를 반환하고 그렇지 않으면 false를 반환합니다. 이 메소드는 서버 측에서 AJAX 요청을 적절하게 처리하는 데 사용됩니다.
if ($request->isXmlHttpRequest()) {
   // Ajax request
} else {
   // Normal request
}
Zend / View / Model / JsonModel – JsonModel 에 대한 대안입니다 ViewModelAJAX 및 REST API 시나리오 전용으로 사용됩니다. JsonModel과 함께JsonStrategy (모듈의 뷰 관리자 블록에서 구성) 모델 데이터를 Json 뷰 (phtml) 대신 응답으로 반환합니다.
AJAX – 작업 예
새로운 ajax 페이지를 추가하겠습니다. ajax튜토리얼 모듈에서 책 정보를 비동기 적으로 가져옵니다. 이렇게하려면 다음 단계를 따라야합니다.
1 단계 : 모듈 구성에 JsonStrategy 추가
튜토리얼 모듈 구성 파일 (myapp / module / Tutorial / config / module.config.php)에서보기 관리자 블록을 업데이트합니다. 그때,JsonStrategy 함께 일할 것이다 JsonModel json 데이터를 인코딩하고 보냅니다.
'view_manager' => [
   'template_map' => array
      ('layout/layout' => __DIR__ . '/../view/layout/newlayout.phtml'),
   'template_path_stack' => [
      'tutorial' => __DIR__ . '/../view',
   ],
   'strategies' => array('ViewJsonStrategy',),
],
2 단계 : TutorialController.php에 ajaxAction 메서드 추가
다음 코드를 사용하여 TutorialController.php에 ajaxAction 메서드를 추가합니다.
public function ajaxAction() {
   $data = $this->bookTable->fetchAll(); $request = $this->getRequest(); $query = $request->getQuery(); if ($request->isXmlHttpRequest() || $query->get('showJson') == 1) { $jsonData = array();
      $idx = 0; foreach($data as $sampledata) { $temp = array(
            'author' => $sampledata->author, 'title' => $sampledata->title,
            'imagepath' => $sampledata->imagepath ); $jsonData[$idx++] = $temp;
      }
      $view = new JsonModel($jsonData);
      $view->setTerminal(true); } else { $view = new ViewModel();
   }
   return $view;
}
여기서 ajaxAction은 들어오는 요청이 AJAX인지 여부를 확인합니다. 수신 요청이 AJAX이면JsonModel생성됩니다. 그렇지 않으면 정상ViewModel 생성됩니다.
두 경우 모두 도서 정보는 데이터베이스에서 가져와 모델에 채워집니다. 모델이 JsonModel이면JsonStrategy 호출되고 데이터를 json으로 인코딩하고 응답으로 반환합니다.
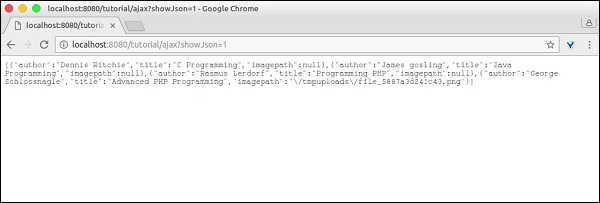
그만큼 $query->get('showJson') == 1디버깅 목적으로 사용됩니다. 그냥 추가showJson=1 URL과 페이지에 json 데이터가 표시됩니다.
3 단계 : ajax.phtml 추가
이제보기 스크립트를 추가합니다. ajax.phtmlajaxAction 메소드의 경우. 이 페이지에는 레이블이있는 링크가 있습니다.Load book information.
해당 링크를 클릭하면 AJAX 요청이 수행되어 도서 정보를 Json 데이터로 가져오고 도서 정보를 형식이 지정된 테이블로 표시합니다. AJAX 처리는JQuery.
전체 코드 목록은 다음과 같습니다.
<a id = "loadbook" href = "#">Load book information</a>
</br> </br>

<table class = "table">
   <tbody id = "book">
   </tbody>
</table>

<script language = "javascript">
$(document).ready(function(){ $("#loadbook").on("click", function(event){
      $.ajax({ url: '/tutorial/ajax', type: 'POST', dataType: 'json', async: true, success: function(data, status) { var e = $('<tr><th>Author</th><th>Title</th><th>Picture</th></tr>');
            $('#book').html(''); $('#book').append(e);

            for(i = 0; i < data.length; i++) {
               book = data[i];
               var e = $('<tr><td id = "author"></td><td id = "title"></td> <td id="imagepath"><img src = ""/></td></tr>'); $('#author', e).html(book['author']);
               $('#title', e).html(book['title']); $('#imagepath img', e).attr('src', book['imagepath']);
               $('#book').append(e);
            }
         },
         error : function(xhr, textStatus, errorThrown) {
            alert('Ajax request failed.');
         }
      });
   });
});
</script>
4 단계 : 애플리케이션 실행
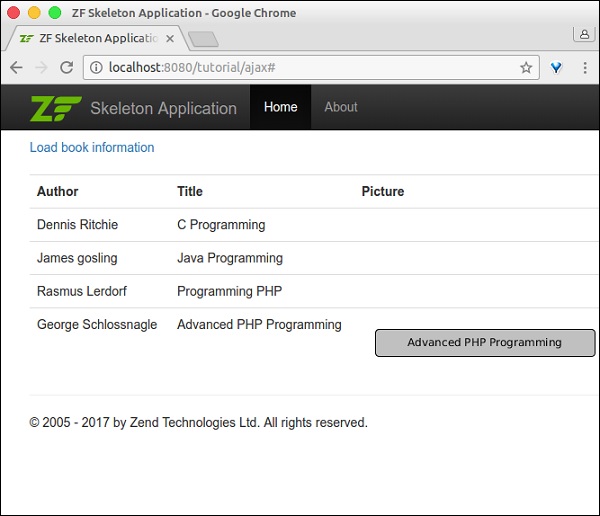
마지막으로 응용 프로그램을 실행하십시오. http://localhost:8080/tutorial/ajax 책 정보로드 링크를 클릭합니다.
결과는 다음과 같습니다.
Ajax Page −

Ajax Page with Book Information

Ajax page with debugging information
