SharePoint - รูปแบบแอป
ในบทนี้เราจะกล่าวถึงโมเดลแอปการปรับใช้ SharePoint เนื่องจาก SharePoint กำลังก้าวไปสู่ระบบคลาวด์โมเดลการปรับใช้ต่อไปนี้จึงพร้อมใช้งานเพื่อใช้ Apps สำหรับ SharePoint -
- SharePoint-hosted
- Autohosted
แอปที่โฮสต์บน SharePoint
ชนิดการปรับใช้ที่โฮสต์บน SharePoint แสดงถึงวิธีการปรับใช้แอปที่มีน้ำหนักเบาและฝั่งไคลเอ็นต์ไปยัง SharePoint วิธีที่ง่ายที่สุดในการนึกถึงแอปที่โฮสต์บน SharePoint เป็นแอปพลิเคชันที่ไม่มีรหัสฝั่งเซิร์ฟเวอร์
คุณสมบัติที่สำคัญของแอปที่โฮสต์บน SharePoint คือ -
เป็นแอปพลิเคชันที่ประกอบด้วยไฟล์แอปพลิเคชันแบบคงที่หรือเพจที่อยู่ใน SharePoint ของคุณเช่นไฟล์ HTML และ JavaScript ที่เปิดใช้งานการเข้ารหัสฝั่งไคลเอ็นต์
เมื่อผู้ใช้เข้าถึงแอปที่โฮสต์บน SharePoint พวกเขาจะถูกเปลี่ยนเส้นทางไปยังหน้าที่มีแอปพลิเคชันของคุณ
ประเภทการปรับใช้ที่โฮสต์บน SharePoint เหมาะสำหรับแอปที่มีน้ำหนักเบากว่าเช่นมุมมองรายการแบรนด์แอปสื่อหรือแอปสภาพอากาศ
ถ้าคุณตัดสินใจที่จะใช้ประโยชน์จากรูปแบบการปรับใช้ที่โฮสต์ SharePoint แสดงว่าคุณถูก จำกัด ไว้ที่รหัสที่ไม่ทำงานบนเซิร์ฟเวอร์
คุณสามารถใช้ Silverlight กับ SharePoint และใช้ประโยชน์จาก HTML ร่วมกับ JavaScript ได้
ให้เราดูตัวอย่างง่ายๆของแอปพลิเคชันที่โฮสต์บน SharePoint
Step 1 - เปิด Visual Studio แล้วเลือกไฟล์ File → New → Project menu.
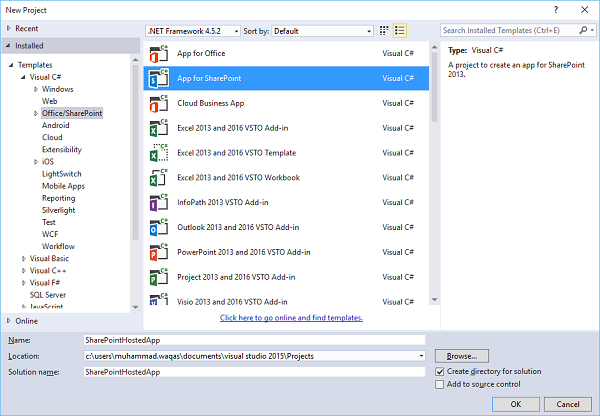
Step 2 - ในบานหน้าต่างด้านซ้ายเลือก Templates → Visual C# → Office/SharePoint จากนั้นในบานหน้าต่างตรงกลางให้เลือก App for SharePoint.
ป้อนชื่อในฟิลด์ชื่อคลิกตกลงและคุณจะเห็นกล่องโต้ตอบต่อไปนี้
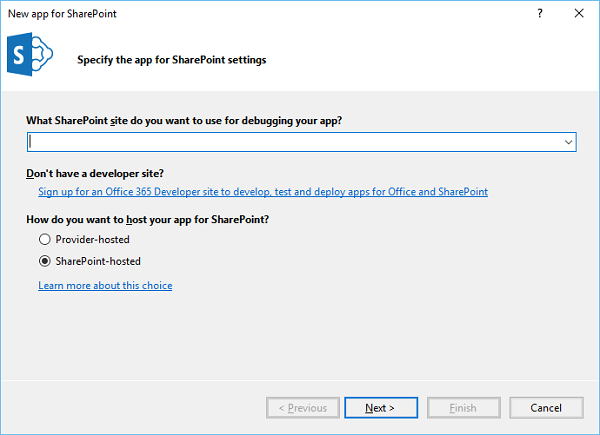
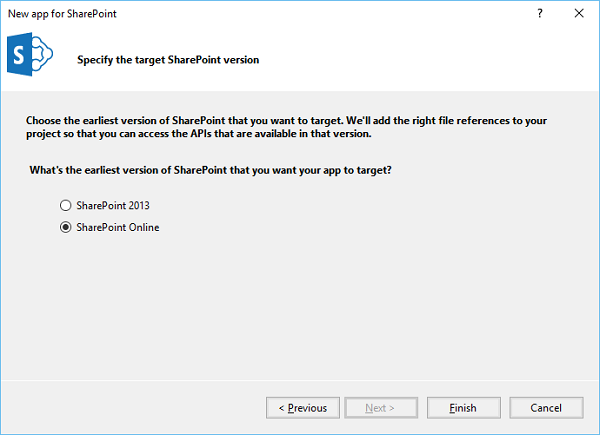
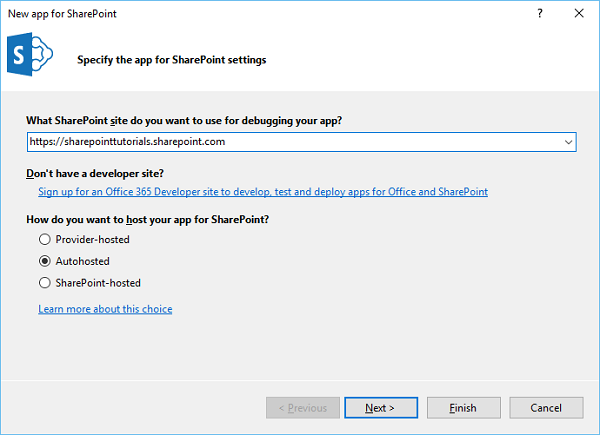
ในแอปใหม่สำหรับ SharePoint เราจำเป็นต้องเพิ่ม URL ของไซต์ SharePoint ที่เราต้องการแก้ไขข้อบกพร่องจากนั้นเลือกรูปแบบที่โฮสต์บน SharePoint เป็นวิธีที่คุณต้องการโฮสต์แอปของคุณสำหรับ SharePoint
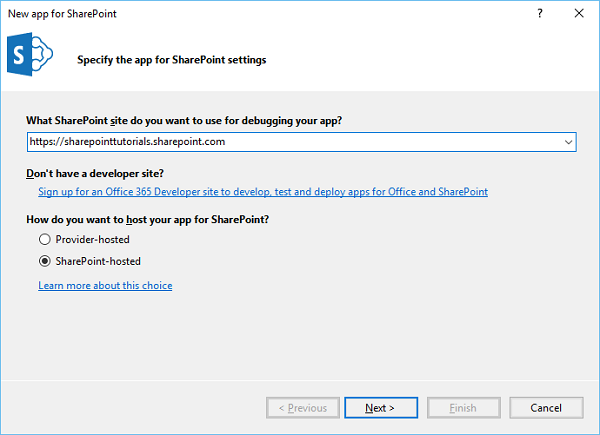
Step 3 - ไปที่ศูนย์การจัดการ SharePoint และคัดลอก URL ของ SharePoint

Step 4 - วาง URL ในไฟล์ New App for SharePoint กล่องโต้ตอบดังที่แสดงด้านล่าง
Step 5 - คลิก Next และจะเปิดไฟล์ Connect to SharePoint กล่องโต้ตอบที่เราต้องเข้าสู่ระบบ
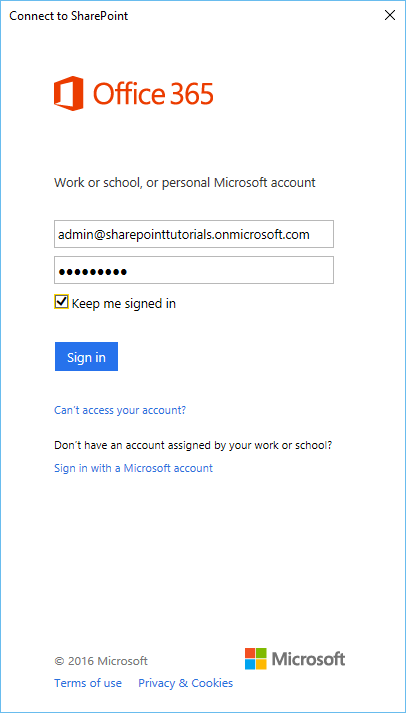
Step 6 - ป้อนข้อมูลประจำตัวของคุณแล้วคลิกไฟล์ Sign inปุ่ม. เมื่อคุณเข้าสู่ไซต์ SharePoint สำเร็จแล้วคุณจะเห็นกล่องโต้ตอบต่อไปนี้ -
Step 7 - คลิก Finish. เมื่อสร้างโครงการแล้วให้คลิกไฟล์AppMenifest.xml ใน Solution Explorer

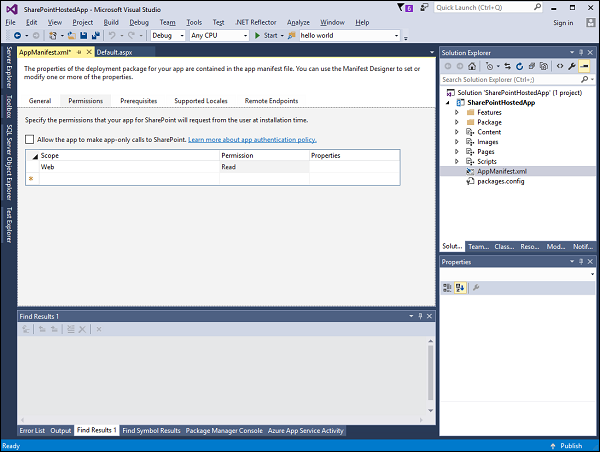
Step 8 - คลิกไฟล์ Permissionsแท็บ รายการแบบเลื่อนลงขอบเขตจะเปิดขึ้น
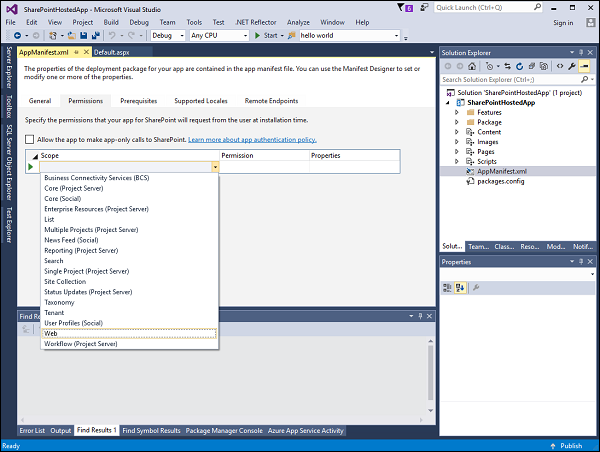
Step 9 - ในรายการแบบเลื่อนลงขอบเขตให้เลือก Webซึ่งเป็นขอบเขตของสิทธิ์ที่คุณกำลังกำหนดค่า ในรายการดรอปดาวน์การอนุญาตให้เลือกอ่านซึ่งเป็นประเภทของสิทธิ์ที่คุณกำลังกำหนดค่า
Step 10 - เปิดไฟล์ Default.aspx และแทนที่ด้วยรหัสต่อไปนี้
<%-- The following 4 lines are ASP.NET directives needed when
   using SharePoint components --%>

<%@ Page Inherits = "Microsoft.SharePoint.WebPartPages.WebPartPage,
   Microsoft.SharePoint, Version = 15.0.0.0, Culture = neutral,
   PublicKeyToken = 71e9bce111e9429c" MasterPageFile = "~masterurl/default.master"
   Language = "C#" %>

<%@ Register TagPrefix = "Utilities" Namespace = "Microsoft.SharePoint.Utilities"
   Assembly = "Microsoft.SharePoint, Version = 15.0.0.0, Culture = neutral,
   PublicKeyToken = 71e9bce111e9429c" %>

<%@ Register TagPrefix = "WebPartPages"
   Namespace = "Microsoft.SharePoint.WebPartPages" Assembly = "Microsoft.SharePoint,
   Version = 15.0.0.0, Culture = neutral, PublicKeyToken = 71e9bce111e9429c" %>

<%@ Register TagPrefix = "SharePoint"
   Namespace = "Microsoft.SharePoint.WebControls" Assembly = "Microsoft.SharePoint,
   Version = 15.0.0.0, Culture = neutral, PublicKeyToken = 71e9bce111e9429c" %>

<%-- The markup and script in the following Content element
   will be placed in the <head> of the page --%>

<asp:Content ID = "Content1" ContentPlaceHolderID = "PlaceHolderAdditionalPageHead"
   runat = "server">
   <script type = "text/javascript" src = "../Scripts/jquery- 1.6.2.min.js"></script>
   <link rel = "Stylesheet" type = "text/css" href = "../Content/App.css" />
   <script type = "text/javascript" src = "../Scripts/App.js"></script>
</asp:Content>

<asp:Content ID = "Content2" ContentPlaceHolderID = "PlaceHolderMain"
   runat = "server">
   <script type = "text/javascript">
      function hello() {
         var currentTime = new Date();
         $get("timeDiv").innerHTML = currentTime.toDateString();
      }
   </script>
   <div id = "timeDiv"></div>
   <input type = "button" value = "Push me!" onclick = "hello();" />
</asp:Content>
Step 11- ไปที่ Solution explorer คลิกขวาที่โปรเจ็กต์แล้วเลือกเผยแพร่ คลิกPackage the appปุ่ม. สิ่งนี้จะสร้างแอปที่โฮสต์ SharePoint ของคุณและเตรียมไว้ให้คุณสำหรับการปรับใช้กับไซต์ SharePoint ของคุณ

คุณจะเห็นโฟลเดอร์ต่อไปนี้ซึ่งมีไฟล์ * .app

Step 12 - ไปที่ไซต์ออนไลน์ SharePoint ของคุณ
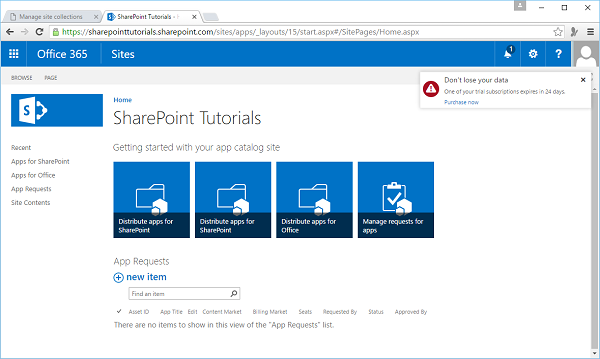
Step 13 - คลิก Apps for SharePointในบานหน้าต่างด้านซ้าย เพจใหม่จะเปิดขึ้น
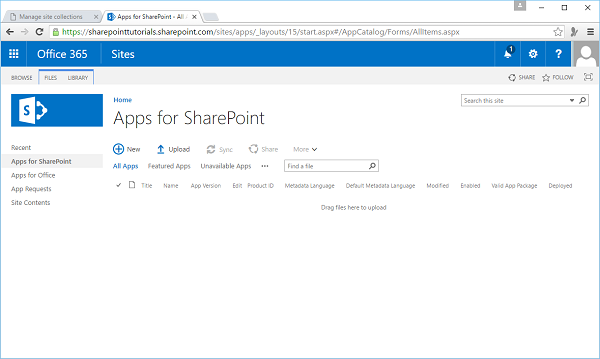
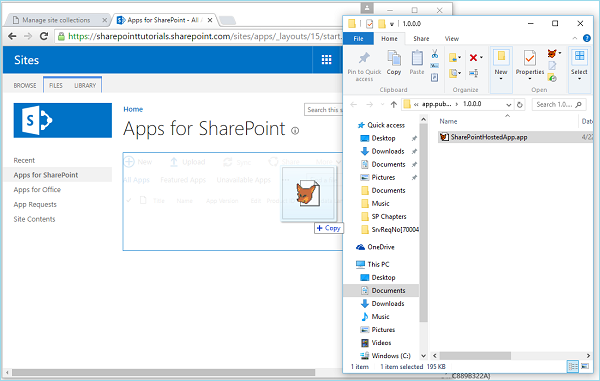
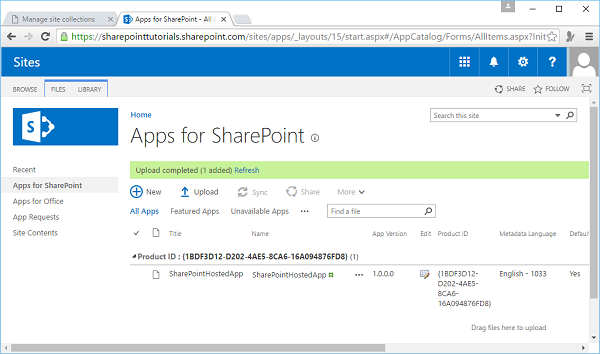
Step 14 - ลากไฟล์ของคุณมาที่นี่เพื่ออัปโหลด
เมื่ออัปโหลดไฟล์แล้วคุณจะเห็นหน้าต่อไปนี้ -
Step 15 - คลิกตัวเลือก - Site Contentsในบานหน้าต่างด้านซ้าย คลิกadd an app ไอคอนดังที่แสดงในภาพหน้าจอต่อไปนี้ -
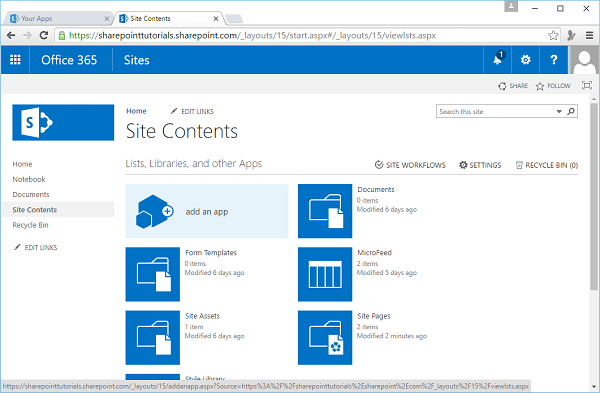
เพจใหม่จะเปิดขึ้น
Step 16 - เลือก Your Apps → From Your Organizationในบานหน้าต่างด้านซ้ายและคุณจะเห็นว่าแอปพร้อมสำหรับการติดตั้ง คลิกแอป

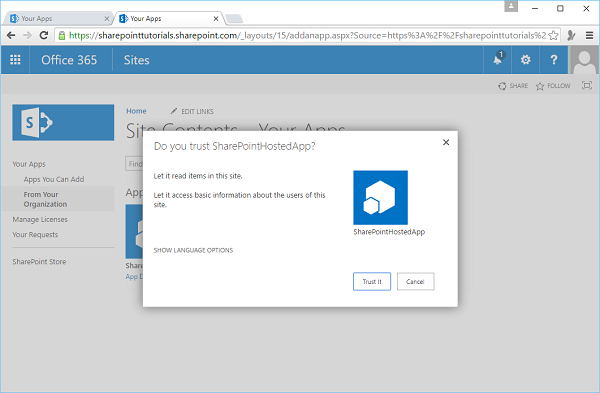
Step 17- เมื่อคุณคลิกแอปกล่องโต้ตอบจะเปิดขึ้นตามที่แสดงในภาพหน้าจอต่อไปนี้ คลิกTrust it.
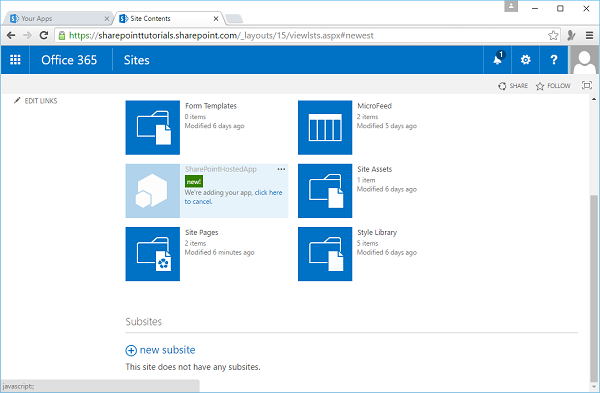
Step 18- คุณจะเห็นว่ามีการติดตั้งแอป เมื่อการติดตั้งเสร็จสมบูรณ์คุณสามารถคลิกที่แอพ
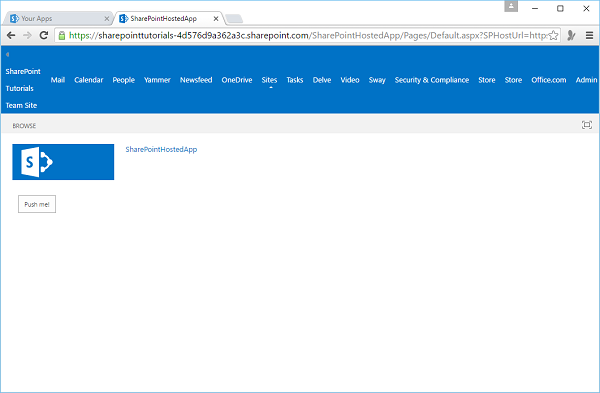
คุณจะเห็นหน้าต่อไปซึ่งมีปุ่มเดียว -
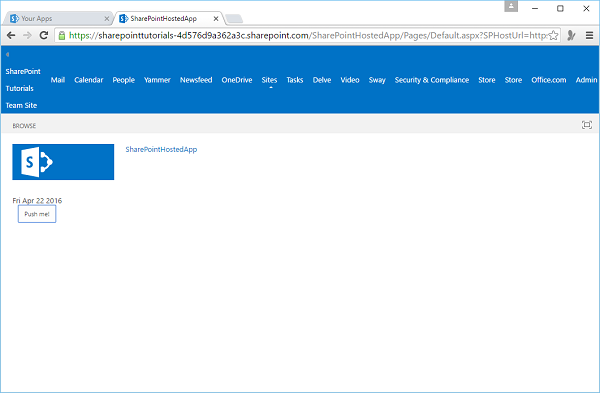
เมื่อคุณคลิกไฟล์ Push me มันจะแสดงวันที่ปัจจุบัน
โฮสต์อัตโนมัติ
Autohostedรูปแบบการปรับใช้เป็นการออกจากแอปพลิเคชัน SharePoint รุ่นก่อนหน้าอย่างมีนัยสำคัญ ในรุ่นนี้คุณสร้างแอปสำหรับ SharePoint แต่โค้ดจะปรับใช้กับ Windows Azure ในพื้นหลังได้อย่างราบรื่นดังนั้น SharePoint จึงสร้างแอปที่โฮสต์บนคลาวด์ให้คุณโดยอัตโนมัติ
คุณสมบัติที่สำคัญคือ -
ดูเหมือนว่ากำลังทำงานบน SharePoint แต่ในเบื้องหลังจะถูกปรับใช้กับอินสแตนซ์ Office 365 Windows Azure พิเศษและลงทะเบียนเป็นแอปที่รับรองความถูกต้องและได้รับอนุญาตกับ SharePoint
คุณไม่สามารถเข้าถึงความสามารถทั้งหมดของแพลตฟอร์ม Windows Azure ด้วยโมเดลการปรับใช้ที่โฮสต์อัตโนมัติ แต่คุณมีแพลตฟอร์มเพียงพอที่จะสร้างแอปพลิเคชันที่น่าสนใจ
ให้เราดูตัวอย่างง่ายๆของ Autohosted โดยการสร้างโครงการใหม่
Step 1 - เลือก App for SharePoint 2013 แล้วคลิก OK.

กล่องโต้ตอบใหม่จะเปิดขึ้น
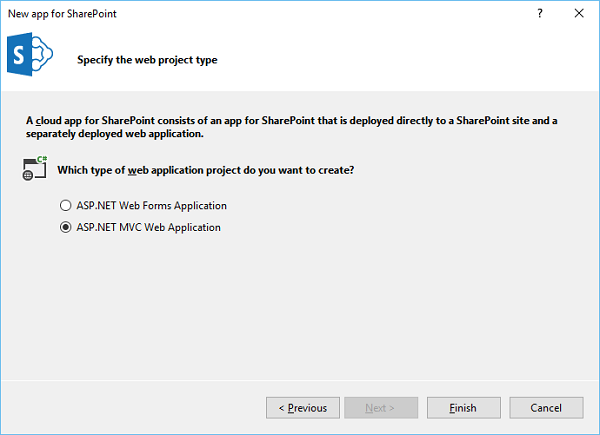
Step 2 - เลือก Autohosted แล้วคลิก Next.
Step 3- กล่องโต้ตอบใหม่จะเปิดขึ้น เลือกASP.NET MVC Web Application แล้วคลิก Finish.
เมื่อสร้างโครงการแล้วให้เผยแพร่แอปของคุณ ขั้นตอนที่เหลือจะเหมือนกับที่กำหนดไว้สำหรับตัวเลือกที่โฮสต์บน SharePoint