Spring MVC - Exemple de résolution de vue Xml
Le XmlViewResolver est utilisé pour résoudre les noms de vue à l'aide des beans de vue définis dans le fichier xml. L'exemple suivant montre comment utiliser XmlViewResolver à l'aide du framework Spring Web MVC.
TestWeb-servlet.xml
<bean class = "org.springframework.web.servlet.view.XmlViewResolver">
   <property name = "location">
      <value>/WEB-INF/views.xml</value>
   </property>
</bean>
views.xml
<bean id = "hello"
   class = "org.springframework.web.servlet.view.JstlView">
   <property name = "url" value = "/WEB-INF/jsp/hello.jsp" />
</bean>
Par exemple, en utilisant la configuration ci-dessus, si URI -
/ hello est demandé, DispatcherServlet transmettra la requête au hello.jsp défini par le bean hello dans le view.xml.
Pour commencer, ayons un IDE Eclipse fonctionnel en place et respectons les étapes suivantes pour développer une application Web basée sur un formulaire dynamique à l'aide de Spring Web Framework.
| Étape | La description |
|---|---|
| 1 | Créez un projet avec un nom TestWeb sous un package com.tutorialspoint comme expliqué dans le chapitre Spring MVC - Hello World. |
| 2 | Créez une classe Java HelloController sous le package com.tutorialspointpackage. |
| 3 | Créez un fichier de vue hello.jsp sous le sous-dossier jsp. |
| 4 | Téléchargez la bibliothèque JSTL jstl.jar . Mettez-le dans votre CLASSPATH. |
| 5 | La dernière étape consiste à créer le contenu des fichiers source et de configuration et d'exporter l'application comme expliqué ci-dessous. |
HelloController.java
package com.tutorialspoint;

import org.springframework.stereotype.Controller;
import org.springframework.web.bind.annotation.RequestMapping;
import org.springframework.web.bind.annotation.RequestMethod;
import org.springframework.ui.ModelMap;

@Controller
@RequestMapping("/hello")
public class HelloController{

   @RequestMapping(method = RequestMethod.GET)
   public String printHello(ModelMap model) {
      model.addAttribute("message", "Hello Spring MVC Framework!");

      return "hello";
   }

}
TestWeb-servlet.xml
<beans xmlns = "http://www.springframework.org/schema/beans"
   xmlns:context = "http://www.springframework.org/schema/context"
   xmlns:xsi = "http://www.w3.org/2001/XMLSchema-instance"
   xsi:schemaLocation = "
   http://www.springframework.org/schema/beans
   http://www.springframework.org/schema/beans/spring-beans-3.0.xsd
   http://www.springframework.org/schema/context
   http://www.springframework.org/schema/context/spring-context-3.0.xsd">

   <context:component-scan base-package = "com.tutorialspoint" />

   <bean class = "org.springframework.web.servlet.view.XmlViewResolver">
      <property name = "location">
         <value>/WEB-INF/views.xml</value>
      </property>
   </bean>
</beans>
views.xml
<beans xmlns = "http://www.springframework.org/schema/beans"
   xmlns:context = "http://www.springframework.org/schema/context"
   xmlns:xsi = "http://www.w3.org/2001/XMLSchema-instance"
   xsi:schemaLocation = "
   http://www.springframework.org/schema/beans
   http://www.springframework.org/schema/beans/spring-beans-3.0.xsd
   http://www.springframework.org/schema/context
   http://www.springframework.org/schema/context/spring-context-3.0.xsd">

   <bean id = "hello"
      class = "org.springframework.web.servlet.view.JstlView">
      <property name = "url" value = "/WEB-INF/jsp/hello.jsp" />
   </bean>
</beans>
bonjour.jsp
<%@ page contentType = "text/html; charset = UTF-8" %>
<html>
   <head>
      <title>Hello World</title>
   </head>
   <body>
      <h2>${message}</h2>
   </body>
</html>
Une fois que vous avez terminé la création des fichiers source et de configuration, exportez votre application. Faites un clic droit sur votre application, utilisezExport → WAR File option et enregistrez le HelloWeb.war fichier dans le dossier webapps de Tomcat.
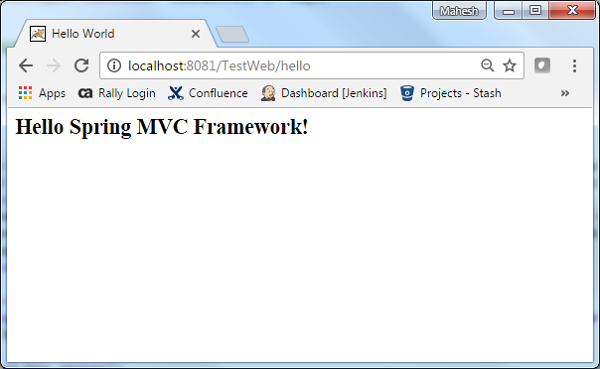
Maintenant, démarrez votre serveur Tomcat et assurez-vous que vous pouvez accéder à d'autres pages Web à partir du dossier Webapps à l'aide d'un navigateur standard. Essayez d'accéder à l'URL -http://localhost:8080/HelloWeb/hello et si tout va bien avec l'application Web Spring, nous verrons l'écran suivant.
