GraphQL-반응 통합
React는 사용자 인터페이스를 구축하기위한 Javascript 라이브러리입니다. 이 장에서는 GraphQL을 React 애플리케이션과 통합하는 방법을 설명합니다.
삽화
반응 프로젝트를 설정하는 가장 빠른 방법은 Create React App 도구를 사용하는 것 입니다. 다음 섹션에서는 서버와 클라이언트를 모두 설정하는 방법을 배웁니다.
서버 설정
서버를 설정하려면 아래 단계를 따르십시오.
1 단계-프로젝트에 필요한 종속성 다운로드 및 설치
폴더 생성 react-server-app. 디렉토리를 다음으로 변경하십시오. react-server-app 터미널에서. 환경 설정 장에 설명 된 3 ~ 5 단계를 따릅니다.
2 단계-스키마 생성
더하다 schema.graphql 프로젝트 폴더의 파일 react-server-app 다음 코드를 추가하십시오-
type Query
{
   greeting: String
   sayHello(name:String!):String
}
이 파일은 greeting과 sayHello라는 두 가지 쿼리를 정의했습니다. sayHello 쿼리는 문자열 매개 변수를 받아들이고 다른 문자열을 반환합니다. sayHello () 함수에 대한 매개 변수가 null이 아닙니다.
3 단계-리졸버 생성
파일 생성 resolvers.js 프로젝트 폴더에 다음 코드를 추가하십시오-
const Query =
{
   greeting: () => 'Hello GraphQL  From TutorialsPoint !!' ,
   sayHello:(root,args,context,info) =>  `Hi ${args.name} GraphQL server says Hello to you!!`
}
module.exports = {Query}
여기서 greeting과 sayHello는 두 명의 해결 자입니다. sayHello 해석기에서 name 매개 변수에 전달 된 값은 args를 통해 액세스 할 수 있습니다. 모듈 외부에서 리졸버 기능에 액세스하려면 module.exports를 사용하여 Query 객체를 내 보내야합니다.
4 단계-애플리케이션 실행
server.js 파일을 만듭니다. 환경 설정 장의 8 단계를 참조하십시오. 터미널에서 npm start 명령을 실행합니다 . 서버는 9000 포트에서 실행됩니다. 여기서는 GraphiQL을 클라이언트로 사용하여 애플리케이션을 테스트합니다.
브라우저를 열고 URL을 입력하십시오. http://localhost:9000/graphiql. 편집기에 다음 쿼리를 입력하십시오-
{
   greeting,
   sayHello(name:"Mohtashim")
}
서버의 응답은 다음과 같습니다.
{
   "data": {
      "greeting": "Hello GraphQL  From TutorialsPoint !!",
      "sayHello": "Hi Mohtashim GraphQL server says Hello to you!!"
   }
}
클라이언트 설정
클라이언트 용 새 터미널을 엽니 다. 클라이언트 애플리케이션을 실행하기 전에 서버 터미널이 계속 실행되어야합니다. React 애플리케이션은 포트 번호 3000에서 실행되고 서버 애플리케이션은 포트 번호 9000에서 실행됩니다.
1 단계-React 프로젝트 만들기 hello-world-client
클라이언트 터미널에서 다음 명령을 입력하십시오-
npx create-react-app hello-world-client이것은 일반적인 반응 애플리케이션에 필요한 모든 것을 설치합니다. 그만큼npx 유틸리티 및 create-react-app도구는 hello-world-client라는 이름으로 프로젝트를 만듭니다. 설치가 완료되면 VSCode에서 프로젝트를 엽니 다.
2 단계-hello-world-client 시작
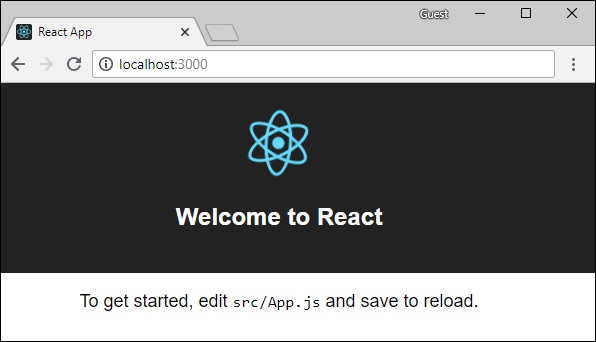
터미널의 현재 폴더 경로를 hello-world-client로 변경합니다. npm start를 입력하여 프로젝트를 시작합니다. 그러면 포트 3000에서 개발 서버가 실행되고 자동으로 브라우저가 열리고 색인 페이지가로드됩니다.
이것은 아래 주어진 스크린 샷에 표시됩니다-

3 단계-앱 구성 요소 수정
src 폴더 내의 App.js에서 두 개의 함수를 추가하십시오. 하나는 인사말을로드하고 다른 하나는 sayHello 메시지를로드합니다.
다음은 인사말을 위해 GraphQL 쿼리를 보내는 loadGreeting 함수입니다.
async function loadGreeting() {
   const response = await fetch('http://localhost:9000/graphql', {
      method:'POST',

      headers:{'content-type':'application/json'},
      body:JSON.stringify({query:'{greeting}'})
   })

   const rsponseBody = await response.json();
   return rsponseBody.data.greeting;

   console.log("end of function")
}
다음은 loadSayhello sayHello에 대한 GraphQL 쿼리를 보내는 함수-
async function  loadSayhello(name) {
   const response = await fetch('http://localhost:9000/graphql', {
      method:'POST',
      headers:{'content-type':'application/json'},
      body:JSON.stringify({query:`{sayHello(name:"${name}")}`})
   })
}
완전한 App.js 파일은 다음과 같습니다-
import React, { Component } from 'react';
import logo from './logo.svg';
import './App.css';

async function loadGreeting() {
   const response =  await fetch('http://localhost:9000/graphql', {
      method:'POST',
      headers:{'content-type':'application/json'},
      body:JSON.stringify({query:'{greeting}'})
   })
   const rsponseBody =  await response.json();
   return rsponseBody.data.greeting;
   console.log("end of function")
}

async function  loadSayhello(name) {
   const response =  await fetch('http://localhost:9000/graphql', {
      method:'POST',
      headers:{'content-type':'application/json'},
      body:JSON.stringify({query:`{sayHello(name:"${name}")}`})
   })
   const rsponseBody =  await response.json();
   return rsponseBody.data.sayHello;
}

class App extends Component {
   constructor(props) {
      super(props);
      this.state =  {greetingMessage:'',sayHelloMessage:'',userName:''}
      this.updateName =  this.updateName.bind(this);
      this.showSayHelloMessage =  this.showSayHelloMessage.bind(this);
      this.showGreeting =  this.showGreeting.bind(this);
   }

   showGreeting() {
      loadGreeting().then(g => this.setState({greetingMessage:g+" :-)"}))
   }

   showSayHelloMessage() {
      const name = this.state.userName;
      console.log(name)
      loadSayhello(name).then(m => this.setState({sayHelloMessage:m}))
   }

   updateName(event) {
      this.setState({userName:event.target.value})
   }
   render() {
      return (
         <div className = "App">
            <header className = "App-header">
               <img src = {logo} className = "App-logo" alt = "logo" />
               <h1 className = "App-title">Welcome to React</h1>
            </header>
            <br/><br/>
            <section>
               <button id = "btnGreet" onClick = {this.showGreeting}>Greet</button>
               <br/> <br/>
               <div id = "greetingDiv">
                  <h1>{this.state.greetingMessage}</h1>
               </div>
            </section>

            <hr/>

            <section>
               Enter a name:<input id = "txtName" type = "text" onChange = {this.updateName}
               value = {this.state.userName}/>
               <button id = "btnSayhello" onClick = {this.showSayHelloMessage}>SayHello</button>
               <br/>
               user name is:{this.state.userName}    <br/>
               <div id = "SayhelloDiv">
                  <h1>{this.state.sayHelloMessage}</h1>
               </div>
            </section>
         </div>
      );
   }
}

export default App;
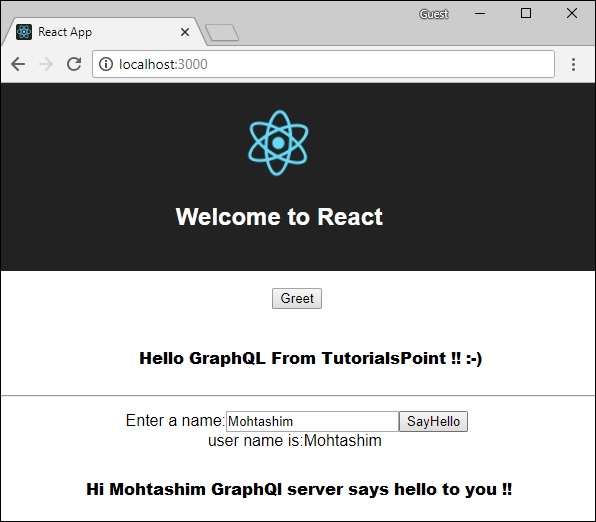
두 응용 프로그램이 모두 실행되면 인사 버튼을 클릭합니다. 그런 다음 텍스트 상자에 이름을 입력하고 sayHello 버튼을 클릭합니다. 출력은 다음과 같습니다.
