WPF-3D 그래픽
WPF (Windows Presentation Foundation)는 응용 프로그램 요구 사항에 따라 3D 그래픽을 그리고, 변형하고, 애니메이션하는 기능을 제공합니다. 본격적인 3D 게임 개발을 지원하지는 않지만 어느 정도 3D 그래픽을 만들 수 있습니다.
2D 및 3D 그래픽을 결합하여 풍부한 컨트롤을 만들거나 복잡한 데이터 그림을 제공하거나 응용 프로그램 인터페이스의 사용자 경험을 향상시킬 수도 있습니다. Viewport3D 요소는 3D 모델을 WPF 애플리케이션에 호스팅합니다.
예
3D 그래픽을 사용하는 방법을 이해하기 위해 간단한 예를 들어 보겠습니다.
이름으로 새 WPF 프로젝트 만들기 WPF3DGraphics.
다음 XAML 코드는 3D 지오메트리를 사용하여 2D 개체를 만드는 방법을 보여줍니다.
<Window x:Class = "WPF3DGraphics.MainWindow"
   xmlns = "http://schemas.microsoft.com/winfx/2006/xaml/presentation"
   xmlns:x = "http://schemas.microsoft.com/winfx/2006/xaml"
   xmlns:mc = "http://schemas.openxmlformats.org/markup-compatibility/2006"
   xmlns:local = "clr-namespace:WPF3DGraphics"
   mc:Ignorable = "d" Title = "MainWindow" Height = "500" Width = "604">

   <Grid>
      <Viewport3D>

         <Viewport3D.Camera>
            <PerspectiveCamera Position = "2,0,10" LookDirection = "0.2,0.4,-1"
               FieldOfView = "65" UpDirection = "0,1,0" />
         </Viewport3D.Camera>

         <ModelVisual3D>
            <ModelVisual3D.Content>
               <Model3DGroup>
                  <AmbientLight Color = "Bisque" />

                  <GeometryModel3D>
                     <GeometryModel3D.Geometry>
                        <MeshGeometry3D Positions = "0,0,0 0,8,0 10,0,0 8,8,0"
                           Normals = "0,0,1 0,0,1 0,0,1 0,0,1" TriangleIndices = "0,2,1 1,2,3"/>
                     </GeometryModel3D.Geometry>

                     <GeometryModel3D.Material>
                        <DiffuseMaterial Brush = "Bisque" />
                     </GeometryModel3D.Material>
                  </GeometryModel3D>

               </Model3DGroup>
            </ModelVisual3D.Content>
         </ModelVisual3D>

      </Viewport3D>
   </Grid>

</Window>
위 코드를 컴파일하고 실행하면 3D로 2D 객체가 생성됩니다.

예
3D 객체를 보여주는 또 다른 예를 살펴 보겠습니다.
이름으로 새 WPF 프로젝트 만들기 WPF3DGraphics1
다음 XAML 코드는 3D 개체와 슬라이더를 만듭니다. 슬라이더를 사용하여이 3D 개체를 회전 할 수 있습니다.
<Window x:Class = "WPF3DGraphics1.MainWindow"
   xmlns = "http://schemas.microsoft.com/winfx/2006/xaml/presentation"
   xmlns:x = "http://schemas.microsoft.com/winfx/2006/xaml"
   xmlns:d = "http://schemas.microsoft.com/expression/blend/2008"
   xmlns:mc = "http://schemas.openxmlformats.org/markup-compatibility/2006"
   xmlns:local = "clr-namespace:WPF3DGraphics1"
   mc:Ignorable = "d" Title = "MainWindow" Height = "350" Width = "525">

   <Grid>
      <Viewport3D Name="viewport3D1">

         <Viewport3D.Camera>
            <PerspectiveCamera x:Name = "camMain" Position = "6 5 4" LookDirection = "-6 -5 -4">
            </PerspectiveCamera>
         </Viewport3D.Camera>

         <ModelVisual3D>
            <ModelVisual3D.Content>
               <DirectionalLight x:Name = "dirLightMain" Direction = "-1,-1,-1">
               </DirectionalLight>
            </ModelVisual3D.Content>
         </ModelVisual3D>

         <ModelVisual3D x:Name = "MyModel">
            <ModelVisual3D.Content>
               <GeometryModel3D>

                  <GeometryModel3D.Geometry>
                     <MeshGeometry3D x:Name = "meshMain"
                        Positions = "0 0 0  1 0 0  0 1 0  1 1 0  0 0 1  1 0 1  0 1 1  0 1 1"
                        TriangleIndices = "2 3 1  3 1 0  7 1 3  7 5 1  6 5 7  6 4 5  6 2 0
                        2 0 4  2 7 3  2 6 7  0 1 5  0 5 4">
                     </MeshGeometry3D>
                  </GeometryModel3D.Geometry>

                  <GeometryModel3D.Material>
                     <DiffuseMaterial x:Name = "matDiffuseMain">
                        <DiffuseMaterial.Brush>
                           <SolidColorBrush Color = "Bisque"/>
                        </DiffuseMaterial.Brush>
                     </DiffuseMaterial>
                  </GeometryModel3D.Material>

               </GeometryModel3D>
            </ModelVisual3D.Content>

            <ModelVisual3D.Transform>
               <RotateTransform3D>
                  <RotateTransform3D.Rotation>
                     <AxisAngleRotation3D x:Name = "rotate" Axis = "1 2 1"/>
                  </RotateTransform3D.Rotation>
               </RotateTransform3D>
            </ModelVisual3D.Transform>

         </ModelVisual3D>
      </Viewport3D>

      <Slider Height = "23" HorizontalAlignment = "Left"
         Margin = "145,271,0,0" Name = "slider1"
         VerticalAlignment = "Top" Width = "269"
         Maximum = "360"
         Value = "{Binding ElementName = rotate, Path=Angle}" />

   </Grid>

</Window>
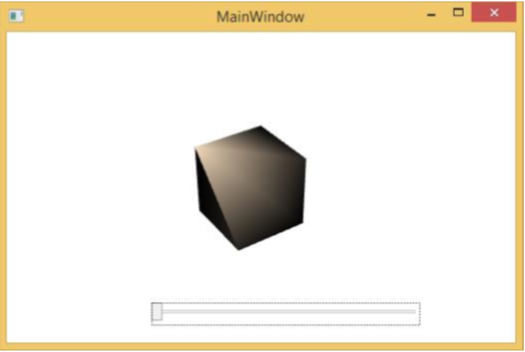
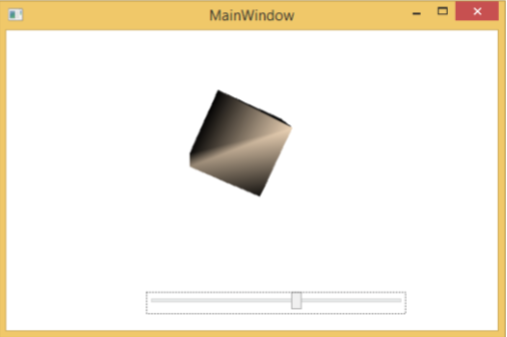
응용 프로그램을 실행하면 창에 3D 개체와 슬라이더가 생성됩니다.

슬라이더를 밀면 창의 개체도 회전합니다.

위의 코드를 실행하고 더 많은 3D 지오메트리를 시도하는 것이 좋습니다.