WPF-멀티미디어
WPF 응용 프로그램은 다음을 사용하여 비디오 및 오디오를 지원합니다. MediaElement. 오디오 및 비디오를 응용 프로그램에 통합 할 수 있습니다. MediaElement 클래스는 Image 클래스와 비슷한 방식으로 작동합니다. 미디어를 가리 키기 만하면 렌더링됩니다. 가장 큰 차이점은 동영상이 움직이는 것입니다.하지만 MP3와 같이 오디오 만 포함하고 동영상이없는 파일을 가리키면 화면에 아무것도 표시되지 않고 재생됩니다.
WPF는 컴퓨터 구성에 따라 모든 유형의 비디오 / 오디오 형식을 지원합니다. 미디어 파일이 미디어 플레이어를 재생하는 경우 동일한 컴퓨터의 WPF에서도 작동합니다.
예
응용 프로그램에 멀티미디어를 통합하는 방법을 이해하는 예를 들어 보겠습니다.
이름으로 새 WPF 프로젝트 만들기 WPFMultimedia.
다음 XAML 코드는 미디어 요소와 세 개의 단추를 만들고 몇 가지 속성을 사용하여 초기화합니다.
<Window x:Class = "WPFMultimedia.MainWindow"
   xmlns = "http://schemas.microsoft.com/winfx/2006/xaml/presentation"
   xmlns:x = "http://schemas.microsoft.com/winfx/2006/xaml"
   xmlns:d = "http://schemas.microsoft.com/expression/blend/2008"
   xmlns:mc = "http://schemas.openxmlformats.org/markup-compatibility/2006"
   xmlns:local = "clr-namespace:WPFMultimedia"
   mc:Ignorable = "d" Title = "MainWindow" Height = "350" Width = "604">

   <Grid>
      <StackPanel HorizontalAlignment = "Center" VerticalAlignment = "Center">
         <MediaElement Name = "myMedia" Source = "D:\MicrosoftMVA.mp4"
            LoadedBehavior = "Manual" Width = "591" Height = "274" />
         <StackPanel Orientation = "Horizontal" Margin = "0,10,0,0">
            <Button Content = "Play" Margin = "0,0,10,0" Padding = "5" Click = "mediaPlay" />
            <Button Content = "Pause" Margin = "0,0,10,0" Padding = "5" Click = "mediaPause" />
            <Button x:Name = "muteButt" Content = "Mute" Padding = "5" Click = "mediaMute" />
         </StackPanel>
      </StackPanel>
   </Grid>

</Window>
다음은 다양한 버튼에 대한 C #의 Click 이벤트 구현입니다.
using System;
using System.Windows;

namespace WPFMultimedia {

   public partial class MainWindow : Window {

      public MainWindow() {
         InitializeComponent();
         myMedia.Volume = 100;
         myMedia.Play();
      }

      void mediaPlay(Object sender, EventArgs e) {
         myMedia.Play();
      }

      void mediaPause(Object sender, EventArgs e) {
         myMedia.Pause();
      }

      void mediaMute(Object sender, EventArgs e) {

         if (myMedia.Volume == 100) {
            myMedia.Volume = 0;
            muteButt.Content = "Listen";
         }
         else {
            myMedia.Volume = 100;
            muteButt.Content = "Mute";
         }
      }
   }
}
위 코드를 컴파일하고 실행하면 다음과 같은 창이 생성됩니다. 세 개의 버튼으로 동영상을 재생하고 재생을 제어 할 수 있습니다.
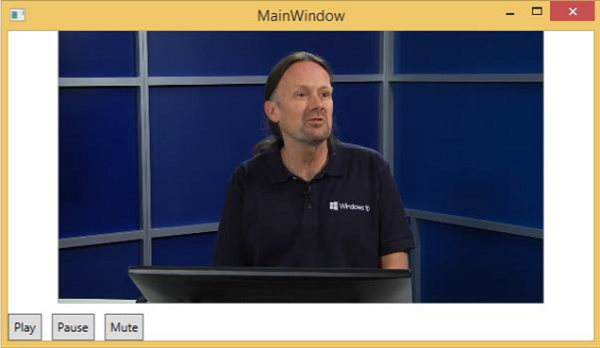
버튼을 사용하여 비디오를 일시 중지, 음소거 및 재생할 수 있습니다.
음성 합성기
WPF에는 텍스트를 음성으로 변환하는 기능이 있습니다. 이 API는 System.Speech 네임 스페이스에 포함되어 있습니다.SpeechSynthesizer 클래스는 텍스트를 말로 변환합니다.
예
간단한 예를 살펴 보겠습니다.
이름으로 새 WPF 프로젝트 만들기 WPFTextToSpeech.
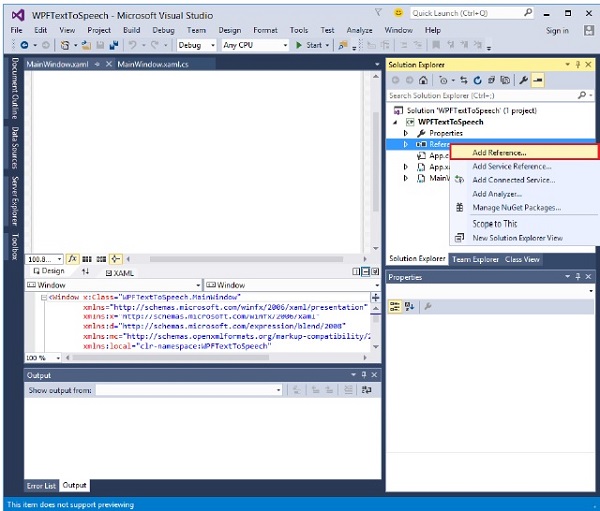
참조로 추가하려면 System.Speech 어셈블리가 필요합니다. SpeechSynthesizer 일하는 수업.
참조를 마우스 오른쪽 버튼으로 클릭하고 참조 추가를 선택합니다.
참조 관리자 대화 상자가 열립니다. 이제 System.Speech 확인란을 선택하십시오.
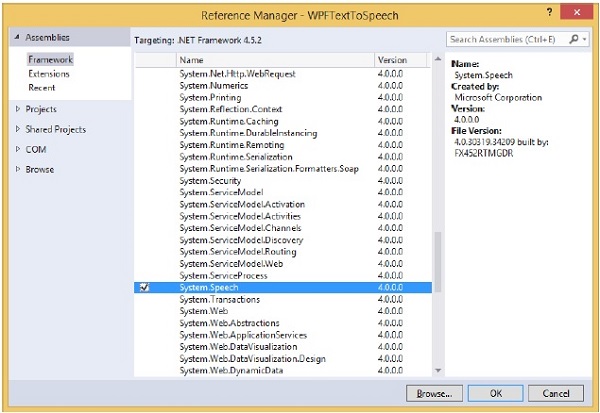
확인 버튼을 클릭합니다. 참조에서 System.Speech 어셈블리를 볼 수 있습니다.

이제 도구 상자에서 버튼과 텍스트 상자를 디자인 창으로 드래그합니다.
다음 XAML 코드는 단추와 텍스트 상자를 만들고 일부 속성을 사용하여 초기화합니다.
<Window x:Class = "WPFTextToSpeech.MainWindow"
   xmlns = "http://schemas.microsoft.com/winfx/2006/xaml/presentation"
   xmlns:x = "http://schemas.microsoft.com/winfx/2006/xaml"
   xmlns:d = "http://schemas.microsoft.com/expression/blend/2008"
   xmlns:mc = "http://schemas.openxmlformats.org/markup-compatibility/2006"
   xmlns:local = "clr-namespace:WPFTextToSpeech"
   mc:Ignorable = "d" Title = "MainWindow" Height = "350" Width = "604">

   <Grid>
      <Button x:Name = "button" Content = "Speak"
         HorizontalAlignment = "Left" Margin = "218,176,0,0"
         VerticalAlignment = "Top" Width = "75"/>

      <TextBox x:Name = "textBox" HorizontalAlignment = "Left"
         Height = "23" Margin = "60,104,0,0" TextWrapping = "Wrap"
         VerticalAlignment = "Top" Width = "418"/>
   </Grid>

</Window>
다음은 텍스트 상자 내부의 텍스트를 음성으로 변환하는 C #의 간단한 구현입니다.
using System.Speech.Synthesis;
using System.Windows;
namespace WPFTextToSpeech {
/// <summary>
/// Interaction logic for MainWindow.xaml
/// </summary>
public partial class MainWindow : Window {
public MainWindow() {
InitializeComponent();
}
private void button_Click(object sender, RoutedEventArgs e) {
if (textBox.Text != "") {
SpeechSynthesizer speechSynthesizer = new SpeechSynthesizer();
speechSynthesizer.Speak(textBox.Text);
}
else {
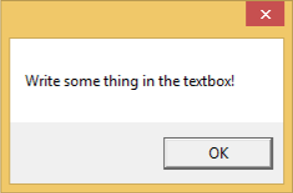
MessageBox.Show("Write some thing in the textbox!");
}
}
}
}위 코드를 컴파일하고 실행하면 다음과 같은 창이 생성됩니다. 이제 텍스트 상자에 Hello World를 입력하고 말하기 버튼을 클릭합니다.
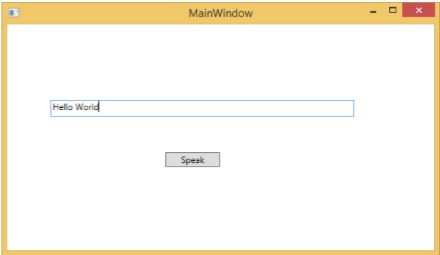
"Hello World"사운드가 생성됩니다. 텍스트 상자에 아무것도 입력하지 않으면 다음 메시지가 깜박입니다.
위의 예를 실행하는 것이 좋습니다.