Google AMP - คู่มือฉบับย่อ
Google Accelerated Mobile Pages(Google-AMP) เป็นโครงการโอเพ่นซอร์สใหม่ของ Google ที่ออกแบบมาเป็นพิเศษเพื่อสร้างหน้าเว็บที่มีน้ำหนักเบาโดยใช้ amp html จุดมุ่งหมายหลักของโครงการนี้คือเพื่อให้แน่ใจว่ารหัสแอมป์ทำงานได้ดีและโหลดเร็วบนอุปกรณ์ที่เป็นไปได้ทั้งหมดเช่นสมาร์ทโฟนแท็บเล็ตเป็นต้น
AMP คืออะไร?
Accerated Mobile Pages (AMP) เป็นโครงการโอเพ่นซอร์สของ Google ที่ออกแบบมาเป็นพิเศษเพื่อให้หน้าเว็บเป็นมิตรกับอุปกรณ์เคลื่อนที่โดยทำให้การแสดงผลเนื้อหาเร็วขึ้นราบรื่นขึ้นและตอบสนองได้ในทุกเบราว์เซอร์
เว็บไซต์อย่างเป็นทางการของ Google amp คือ - https://www.ampproject.org/
ทำไมต้อง AMP
ผู้ใช้ทุกคนคาดหวังว่าเว็บไซต์จะโหลดเนื้อหาได้เร็วมาก อย่างไรก็ตามอาจไม่ใช่กรณีที่หน้าเว็บเต็มไปด้วยรูปภาพวิดีโอภาพเคลื่อนไหววิดเจ็ตโซเชียลซึ่งทำให้เพจมีน้ำหนักมากและทำให้เวลาในการโหลดเพิ่มขึ้น สถานการณ์ดังกล่าวอาจก่อให้เกิดการสูญเสียผู้ใช้ไปยังเว็บไซต์ในระยะยาว
Google AMP ออกแบบมาเพื่อแก้ปัญหานี้ AMP มีวิธีพิเศษในการดูแลรูปภาพ iframes จาวาสคริปต์โฆษณาวิดีโอภาพเคลื่อนไหว css โหลดแบบอักษร ฯลฯ เนื้อหาของหน้า AMP จะถูกแคชไว้ที่ส่วนท้ายของ Google ดังนั้นทุกครั้งที่ผู้ใช้คลิกที่ผลการค้นหา เนื้อหาถูกเสิร์ฟจากแคช นอกจากนี้เวอร์ชันแคชยังได้รับการอัปเดตตามเวลาที่กำหนดเพื่อให้ผู้ใช้ได้รับหน้าที่อัปเดตใหม่อยู่เสมอ
ทำไมต้องเลือก AMP
ส่วนนี้จะบอกเหตุผลที่คุณต้องเลือกใช้ AMP สำหรับไซต์ของคุณ -
จัดลำดับความสำคัญบน Google Search
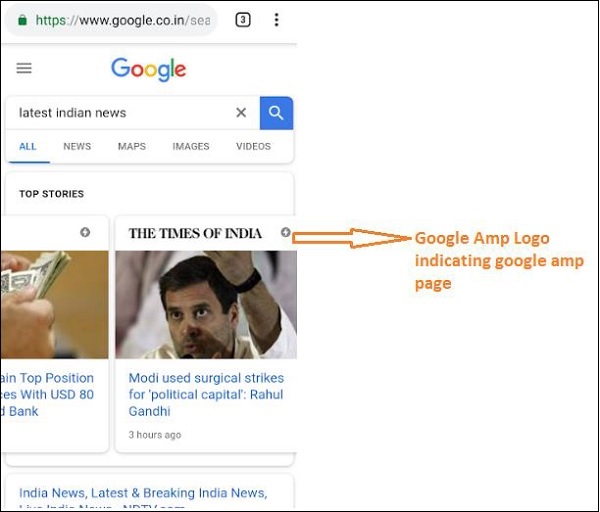
วันนี้เมื่อคุณค้นหาบางสิ่งบน Google คุณจะพบภาพหมุนของ Google ที่แสดงอยู่ด้านบนพร้อมกับหน้าตามด้วยรายการหน้าเพื่อตอบสนองการค้นหาของคุณ ภาพหมุนข่าวสารที่แสดงเป็นไซต์ AMP ที่ถูกต้องทั้งหมด หมายความว่า Google ให้ความสำคัญกับหน้า amp และแสดงตามการจัดอันดับในภาพหมุนข่าว
ตัวอย่างการค้นหาใน Google ด้วยคำหลัก“latest indian news"ได้รับที่นี่ -

หน้าเว็บที่ได้รับการจัดอันดับสูงทั้งหมดซึ่งเป็นหน้า AMP จะแสดงเมื่อเริ่มต้นใน Google carousel ดังที่แสดงในภาพด้านบน
หน้า AMP ของ Google มีลักษณะดังที่แสดงด้านล่างเมื่อผู้ใช้ค้นหาบางสิ่งใน Google Search โปรดทราบว่ามีโลโก้ Google AMP ในหน้า AMP
เวลาโหลดเร็วขึ้น
เมื่อหน้าของคุณได้รับการแปลง AMP เวลาในการโหลดจะดีกว่ามากเมื่อเทียบกับหน้าที่ไม่ใช่ AMP เวลาในการโหลดที่เร็วขึ้นเป็นปัจจัยสำคัญในการจัดอันดับหน้าในการค้นหาของ Google
ไม่มีป๊อปอัป
การใช้ Google AMP ให้ประสบการณ์การท่องเว็บที่น่าพึงพอใจเนื่องจากผู้ใช้จะไม่เห็นป๊อปอัปที่ไม่ต้องการสำหรับหน้าที่ออกแบบด้วย Google AMP
สร้างการเข้าชม
เมื่ออัตราการโหลดหน้าเว็บเร็วจะเพิ่มจำนวนผู้ชมโดยอัตโนมัติและทำให้การเข้าชมเพจเพิ่มขึ้น
AMP ทำงานอย่างไร
ส่วนประกอบที่สำคัญที่สุดที่ใช้ในการสร้างเว็บไซต์คือจาวาสคริปต์รูปภาพวิดีโอฟอนต์ css เป็นต้นการออกแบบหน้า AMP ทำได้โดยการดูแลปัจจัยเหล่านี้ด้วยวิธีที่ไม่ซ้ำใคร ในส่วนนี้ให้เราพูดคุยสั้น ๆ ว่า AMP ทำอะไรเพื่อให้หน้าเว็บเร็วขึ้น
JavaScript แบบอะซิงโครนัส
Javascript มีบทบาทสำคัญบนเพจเนื่องจากช่วยในการเพิ่มการโต้ตอบให้กับเพจในรูปแบบของภาพเคลื่อนไหวการเปลี่ยนแปลง DOM เป็นต้นนอกจากนี้ยังเพิ่มความช้าให้กับเพจและสามารถบล็อกเนื้อหาอื่น ๆ จากการแสดงผลบนเพจได้
AMP จัดการกับ JavaScript อย่างไร
AMP โหลด JavaScript แบบอะซิงโครนัส ไม่อนุญาตให้ใช้ JavaScript ที่กำหนดเองในหน้า AMP โดยเด็ดขาด โปรดทราบว่า AMP มีการเพิ่มองค์ประกอบจำนวนมากบางส่วนเป็นการแทนที่แท็ก html ที่มีอยู่ เช่น amp-img, amp-iframe, amp-video, amp-lightbox, amp-animations เป็นต้น
สำหรับแต่ละองค์ประกอบนี้จะมีไฟล์ JavaScript ที่ต้องโหลดซึ่งมีการเพิ่มแอตทริบิวต์ async ลงในแท็กสคริปต์ อนุญาตเฉพาะไฟล์ JavaScript ที่เกี่ยวข้องกับ amp-components เท่านั้นและไม่อนุญาตให้ใช้ JavaScript อื่น ๆ ภายในหน้า AMP หรือไฟล์ javascript ของบุคคลที่สาม เนื่องจาก AMP ใช้แคช AMP ของ Google ไฟล์จะถูกโหลดล่วงหน้าจากแคชทำให้โหลดได้เร็วขึ้น
ขนาดสำหรับแท็ก HTML
จำเป็นต้องกำหนดขนาดสำหรับแท็กรูปภาพ iframe วิดีโอเพื่อให้หน้าแอมป์สามารถหาที่ว่างบนเพจได้โดยไม่ต้องโหลดทรัพยากร ทรัพยากรที่จะโหลดจะถูกจัดลำดับความสำคัญโดยเพจ amp เนื้อหามีลำดับความสำคัญมากกว่าทรัพยากรที่จะโหลด
วิดเจ็ตโซเชียล / โฆษณา
แอมป์มีส่วนประกอบพิเศษคือ amp-facebook, amp-twitter, amp-ad, amp-sticky เพื่อดูแลวิดเจ็ตโซเชียลที่จะแสดงบนเพจ องค์ประกอบโฆษณา AMP ใช้เพื่อแสดงโฆษณาบนหน้า AMP ใช้ความระมัดระวังเป็นพิเศษในการจัดการส่วนประกอบและโหลดเนื้อหาตามลำดับความสำคัญตามข้อกำหนด
CSS
ไม่อนุญาตให้ใช้ CSS ภายนอกในหน้า AMP CSS ที่กำหนดเองหากสามารถเพิ่มใน style tag โดยใช้ amp-custom attribute นอกจากนี้ยังอนุญาตให้ใช้ CSS แบบอินไลน์ AMP ลดคำขอ http ด้วยวิธีการทั้งหมดที่เป็นไปได้
แบบอักษร
แบบอักษรได้รับอนุญาตใน amp หน้าและลำดับความสำคัญของการโหลดแบบอักษรจะถูกกำหนดโดย AMP
ภาพเคลื่อนไหว
AMP รองรับคอมโพเนนต์แอมป์แอนิเมชั่นและอนุญาตให้เปลี่ยนได้ตามที่เบราว์เซอร์สมัยใหม่รองรับ
เมื่อพิจารณาถึงจุดทั้งหมดที่ระบุไว้ข้างต้น AMP จะดูแลเป็นพิเศษสำหรับคำขอ HTTP ที่สร้างขึ้นสำหรับแบบอักษรรูปภาพ iframes โฆษณาที่จะแสดงเป็นต้นทรัพยากรที่มีอยู่ในครึ่งหน้าบนจะแสดงผลตามความชอบก่อนและหลังสำหรับทรัพยากรที่มีอยู่ครึ่งหน้าล่าง .
จุดอื่น ๆ
Google AMP Cache เป็นอีกปัจจัยสำคัญที่ช่วยในการแสดงผลเนื้อหาได้เร็วขึ้นเนื่องจากดึงเนื้อหามาจากแคช
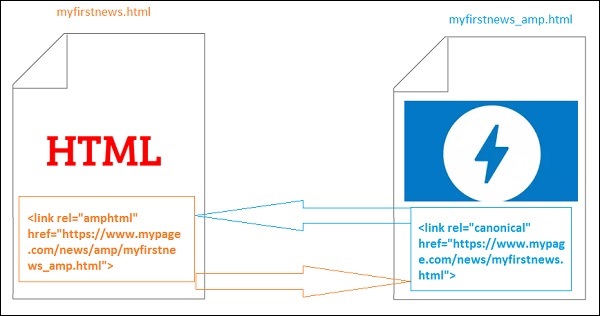
ผู้เผยแพร่โฆษณาต้องดูแลสองไซต์แอมป์และเพจที่ไม่ใช่แอมป์ ตัวอย่างเช่นพิจารณาว่าไซต์มีที่อยู่ -https://www.mypage.com. จากนั้นหน้าเว็บภายในสำหรับ non-amp ที่จะแสดงบนเดสก์ท็อปจะเป็นhttps://www.mypage/com/news/amp/
Google ระบุหน้า AMP และไม่ใช่ AMP อย่างไร
ตอนนี้ให้เราทำความเข้าใจว่า Google ระบุ AMP และหน้าที่ไม่ใช่ AMP อย่างไร
เมื่อการค้นหาของ Google รวบรวมข้อมูลหน้านั้นหากได้รับ amp ใน html หรือ <html amp> หรือ <html ⚡> ก็จะรู้ว่าเป็นหน้า AMP
นอกจากนี้ในกรณีที่ Google พบเพจที่ไม่ใช่แอมป์ก่อนอื่นที่ต้องรู้เกี่ยวกับหน้าแอมป์จำเป็นต้องเพิ่มแท็กลิงก์ต่อไปนี้ในส่วนหัวของหน้า html สำหรับทั้งแอมป์และเพจที่ไม่ใช่แอมป์
Page-url สำหรับ Non amp-page
<link rel = "amphtml" href = "https://www.mypage.com/news/amp/myfirstnews_amp.html">ที่นี่มีการระบุrel =” amphtmlสำหรับเพจที่ไม่ใช่แอมป์ให้ชี้ไปที่เวอร์ชันแอมป์เพื่อให้ Google แสดงเพจที่ถูกต้องตามแพลตฟอร์ม
Page-url สำหรับ amp-page
<link rel = "canonical" href = "https://www.mypage.com/news/myfirstnews.html">ที่นี่rel =” canonical”ระบุไว้ใน amp page เพื่อชี้ไปที่เวอร์ชันมาตรฐานของ html เพื่อให้ Google แสดงเวอร์ชันที่ถูกต้องตามแพลตฟอร์ม
ในกรณีที่ไซต์ของคุณมีหน้าแอมป์เพียงหน้าเดียว แต่อย่าลืมเพิ่ม rel =” canonical” ซึ่งจะชี้ไปที่ตัวเอง -
<link rel = "canonical" href = "https://www.mypage.com/news/amp/myfirstnews_amp.html">แผนภาพต่อไปนี้แสดงการอ้างอิงถึง rel =” amphtml” ที่ชี้ไปที่หน้า amp และ rel =” canonical” ที่ชี้ไปที่หน้า html มาตรฐาน
คุณสมบัติของ Google AMP
ในส่วนนี้ให้เราพูดคุยเกี่ยวกับคุณลักษณะสำคัญที่มีให้กับ Google AMP -
แอมป์แคช
การแคช Google Amp เป็นหนึ่งในคุณสมบัติหลักที่เพิ่มเข้ามาในแอมป์ มีเครือข่ายการจัดส่งเนื้อหาที่ใช้พร็อกซีเพื่อให้บริการหน้าแอมป์บริสุทธิ์โดยค่าเริ่มต้นแคชของแอมป์จะพร้อมใช้งานสำหรับหน้าแอมป์ที่ถูกต้องทั้งหมดช่วยในการแสดงผลหน้าเว็บได้เร็วขึ้นเมื่อเทียบกับเพจที่ไม่ใช่แอมป์ปัจจุบันมีผู้ให้บริการแคช 2 แอมป์ของ Google AMP Cache และ Cloudflare AMP Cache เมื่อผู้ใช้คลิกและเปลี่ยนเส้นทางไปยังหน้า amp เนื้อหาจะถูกแสดงจากแคชของ Google
ส่วนประกอบแอมป์
แอมป์มีส่วนประกอบมากมายที่ออกแบบมาเพื่อวัตถุประสงค์ต่างๆ บางส่วนมีการระบุไว้ด้านล่าง -
amp-img - ใช้เพื่อแสดงภาพบนหน้าแอมป์
amp-iframe- ใช้เพื่อแสดง iframe พร้อมเนื้อหาภายนอกที่จะแสดงบนเพจ โปรดทราบว่า iframe ที่ใช้เป็นแซนด์บ็อกซ์ซึ่งหมายความว่าต้องได้รับอนุญาตเพื่อแสดงข้อมูลบนหน้าแอมป์ ดังนั้นจึงต้องระบุรายละเอียด cross origin สำหรับแอตทริบิวต์ sandbox
amp-video - เพื่อแสดงวิดีโอบนเพจ
amp-audio - เพื่อแสดงเสียงบนหน้า
amp-datepicker- ใช้เพื่อแสดงวิดเจ็ตวันที่บนหน้า คุณไม่จำเป็นต้องไปหา datepickers ของบุคคลที่สามใด ๆ เนื่องจากมีให้ใช้งานโดยตรงคือแอมป์
amp-story - สื่อในการแสดงเรื่องราวของคุณบนเพจ
amp-selector- เป็นส่วนประกอบแอมป์ที่แสดงเมนูของตัวเลือกและผู้ใช้สามารถเลือกระหว่างตัวเลือกได้ ตัวเลือกที่แสดงอาจเป็นข้อความรูปภาพหรือส่วนประกอบแอมป์อื่น ๆ
amp-list - เป็นส่วนประกอบแอมป์ที่เรียกจุดสิ้นสุด CORS json และข้อมูลจากไฟล์ json จะแสดงภายในเทมเพลต
การโฆษณา
การโฆษณามีความสำคัญมากสำหรับผู้เผยแพร่เนื่องจากรายได้ของพวกเขาขึ้นอยู่กับโฆษณาที่แสดงบนหน้าเว็บ Amp ไม่อนุญาตให้เพิ่ม javascript ภายนอกใด ๆ บนหน้าเว็บ แต่มีการนำเสนอส่วนประกอบของ amp พิเศษที่เรียกว่า amp-ad ซึ่งดูแลการแสดงโฆษณาบนหน้า
เครือข่ายโฆษณาที่ผู้เผยแพร่โฆษณาต้องการแสดงบนหน้าของตนจะต้องได้รับการสนับสนุน amp-ad ตัวอย่างเช่นในการแสดงโฆษณาแบบดับเบิลคลิกบนหน้าเว็บการคลิกสองครั้งจำเป็นต้องรองรับโฆษณาที่จะแสดงโดยใช้องค์ประกอบโฆษณาแอมป์ โค้ดต่อไปนี้แสดงแท็ก amp-ad ของ doubleclick
<amp-ad width = "300"
   height = "200"
   type = "doubleclick"
   data-slot = "/4119129/ad-layout">
   <div placeholder>
      <b>Placeholder here!!!</b>
   </div>
</amp-ad>
แอมป์ยังรองรับ amphtmlads ซึ่งเป็นแอมป์บริสุทธิ์ที่พัฒนาจากส่วนประกอบ AMP และ html Amp ยังรองรับ amp-sticky-ads ซึ่งเป็นโฆษณาส่วนท้ายที่แสดงที่ด้านล่างของหน้า รายละเอียดของโฆษณาใน amp จะกล่าวถึงในบทโฆษณา amp
วิดเจ็ตโซเชียล
วิดเจ็ตโซเชียลเช่น Facebook, Twitter, Instagram กลายเป็นสิ่งสำคัญมากที่จะต้องแสดงบนเพจของผู้เผยแพร่เพื่อให้เพจถูกแชร์ผ่านโซเชียลมีเดีย AMP ได้ขยายการรองรับไปยังวิดเจ็ตโซเชียลมีเดียที่สำคัญทั้งหมดที่จะใช้ในเพจโดยการพัฒนาส่วนประกอบ AMP เช่น amp-facebook, amp-twitter, amp-instagram, amp-pinterest เป็นต้น
แอมป์มีเดีย
องค์ประกอบที่สำคัญอีกอย่างบนหน้าเว็บคือสื่อสำหรับแสดงวิดีโอและแสดงโฆษณาระหว่างวิดีโอเป็นโฆษณาตอนกลาง AMP เป็นสื่อในการทำเช่นนั้นโดยใช้ amp-jwplayer, amp-youtube เป็นต้นคุณไม่จำเป็นต้องโหลดไฟล์ของบุคคลที่สามเพิ่มเติมเพื่อให้มี jwplayer, youtube ที่จะแสดงบนเพจของคุณ
การวิเคราะห์แอมป์
การวิเคราะห์แอมป์เป็นองค์ประกอบ AMP ที่ใช้ติดตามข้อมูลในหน้าที่กำหนด สามารถบันทึกและบันทึกการโต้ตอบของผู้ใช้ทั้งหมดในเพจเพื่อวิเคราะห์ข้อมูลเพื่อการปรับปรุงเพิ่มเติมหรือวัตถุประสงค์ทางธุรกิจ
แอมป์แอนิเมชั่น
Amp-animation เป็นส่วนประกอบของแอมป์ที่กำหนดภาพเคลื่อนไหวที่จะใช้กับส่วนประกอบแอมป์อื่น ๆ IT รองรับภาพเคลื่อนไหวการเปลี่ยนแปลงซึ่งทำงานได้ดีกับเบราว์เซอร์สมัยใหม่ คุณไม่จำเป็นต้องใช้ไลบรารี CSS ภายนอกใด ๆ เพื่อแสดงแอนิเมชั่นและสามารถใช้ประโยชน์จากคอมโพเนนต์ amp-animation ได้
เลย์เอาต์แอมป์
AMP-Layout เป็นคุณลักษณะสำคัญอย่างหนึ่งที่มีอยู่ใน google-amp เค้าโครงแอมป์ทำให้แน่ใจว่าคอมโพเนนต์ของแอมป์แสดงผลอย่างถูกต้องเมื่อโหลดเพจโดยไม่ทำให้เกิดปัญหาการกะพริบหรือการเลื่อน
Google AMP ตรวจสอบให้แน่ใจว่าการแสดงผลการจัดวางเสร็จสิ้นในหน้าก่อนทรัพยากรระยะไกลอื่น ๆ เช่นคำขอ http สำหรับรูปภาพการเรียกข้อมูลจะเสร็จสิ้น แอตทริบิวต์ที่พร้อมใช้งานสำหรับโครงร่าง ได้แก่ ความกว้าง / ความสูงของส่วนประกอบแอมป์ทั้งหมดแอตทริบิวต์โครงร่างที่มีค่าเช่น responsive, fill, fixed ฯลฯ แอตทริบิวต์ตัวยึดที่จะแสดงเมื่อทรัพยากรใช้เวลาโหลดหรือมีข้อผิดพลาดใด ๆ แอตทริบิวต์ทางเลือกที่จะแสดงเมื่อ ทรัพยากรมีข้อผิดพลาด
รูปแบบการแสดงแอมป์
แอมป์รองรับคอมโพเนนต์จำนวนมากที่ใช้ในการแสดงเนื้อหาบนเพจโดยไม่จำเป็นต้องใช้ไลบรารีของบุคคลที่สามหรือไม่ต้องสร้าง CSS จำนวนมากบนเพจ รายการประกอบด้วย
Accordion- แอมป์หีบเพลงเป็นส่วนประกอบแอมป์ที่ใช้เพื่อแสดงเนื้อหาในรูปแบบขยาย - ยุบ มันกลายเป็นเรื่องง่ายสำหรับผู้ใช้ที่จะดูบนอุปกรณ์มือถือซึ่งพวกเขาสามารถเลือกส่วนตามที่พวกเขาเลือกจากหีบเพลงได้
Carousel - Amp-carousel เป็นส่วนประกอบของแอมป์เพื่อแสดงชุดของเนื้อหาที่คล้ายกันบนหน้าจอและใช้ลูกศรเพื่อเลื่อนไปมาระหว่างเนื้อหา
Lightbox - Amp-lightbox เป็นส่วนประกอบของแอมป์ที่จะใช้งานวิวพอร์ตเต็มรูปแบบและแสดงผลเหมือนภาพซ้อนทับ
Slider - Amp-image-slider เป็นส่วนประกอบของแอมป์ที่ใช้ในการเปรียบเทียบภาพ 2 ภาพโดยการเพิ่มแถบเลื่อนเพื่อเลื่อนในแนวตั้งเหนือภาพ
Sidebar - Amp sidebar เป็นส่วนประกอบของแอมป์ที่ใช้ในการแสดงเนื้อหาที่เลื่อนจากด้านข้างของหน้าต่างเมื่อแตะปุ่ม
ข้อดีของ AMP
หน้า AMP มีน้ำหนักเบาและโหลดได้เร็วขึ้น
Google ให้ความสำคัญกับหน้า AMP ในการค้นหาของ Google หน้า AMP แสดงอยู่ในรูปแบบภาพหมุนที่ด้านบนสุดของหน้า เพื่อให้ได้รับการจัดอันดับที่สูงขึ้นการมีหน้าเว็บใน AMP เป็นข้อได้เปรียบที่ดี
หน้า AMP เหมาะกับอุปกรณ์เคลื่อนที่เนื่องจากเนื้อหาตอบสนองและปรับเปลี่ยนได้ดีในทุกเบราว์เซอร์โดยไม่ต้องใช้สไตล์เพิ่มเติมใด ๆ
ความพึงพอใจของผู้ใช้เพิ่มขึ้นสำหรับหน้า AMP เนื่องจากอัตราการโหลดหน้าเร็วกว่าเมื่อเทียบกับหน้าเว็บที่ไม่ใช่แอมป์จึงช่วยประหยัดแบนด์วิดท์และแบตเตอรี่มือถือ
ข้อเสียของ AMP
แอมป์มีข้อเสียดังต่อไปนี้ -
ผู้เผยแพร่โฆษณาต้องดูแลสองเวอร์ชันสำหรับเพจของพวกเขาแอมป์และไม่ใช่แอมป์
ผู้ใช้ต้องใช้ความพยายามเพิ่มเติมในการแปลงหน้า non-amp เป็น amp เนื่องจากแอมป์ไม่รองรับจาวาสคริปต์แบบกำหนดเองหรือการโหลดจาวาสคริปต์ภายนอกจึงจำเป็นต้องทำได้เช่นเดียวกันกับสิ่งที่มีอยู่ในแอมป์
Google Accelerated Mobile Pages(Google-AMP) เป็นโครงการโอเพ่นซอร์สใหม่ของ Google ที่ออกแบบมาเป็นพิเศษเพื่อสร้างหน้าเว็บที่มีน้ำหนักเบาโดยใช้ amp html จุดมุ่งหมายหลักของโครงการนี้คือเพื่อให้แน่ใจว่าโค้ด AMP ทำงานได้ดีและโหลดได้เร็วบนอุปกรณ์ทั้งหมดที่เป็นไปได้เช่นสมาร์ทโฟนและแท็บเล็ต
AMP เป็นเพียงส่วนเสริมของ HTML มาตรฐาน แท็ก HTML มีการเปลี่ยนแปลงเล็กน้อยและ AMP ได้เพิ่มข้อ จำกัด ในการใช้งาน ในบทนี้เราจะแสดงรายการแท็ก html ซึ่งมีการเปลี่ยนแปลงและข้อ จำกัด ที่เพิ่มเข้ามา แท็กที่เกี่ยวข้องกับการโหลดทรัพยากรภายนอกเช่นรูปภาพ, css, js, การส่งแบบฟอร์ม, วิดีโอ, เสียง ฯลฯ มีการเปลี่ยนแปลง
นอกจากนี้ยังมีคุณสมบัติใหม่มากมายที่เพิ่มเข้ามาใน amp เช่น amp-date-picker, amp-facebook, amp-ad, amp-analytics, amp-ad, amp-lightbox และอื่น ๆ อีกมากมายซึ่งสามารถใช้ได้โดยตรงในหน้า html พักผ่อนอื่น ๆ ที่มีไว้สำหรับการแสดงผลจะใช้ตามที่เป็นอยู่
ด้วยการเปลี่ยนแปลงและคุณลักษณะใหม่ทั้งหมดนี้ AMP สัญญาว่าจะให้โหลดได้เร็วขึ้นประสิทธิภาพที่ดีขึ้นสำหรับหน้าเว็บเมื่อใช้ในสภาพแวดล้อมจริง
เมื่อคุณค้นหาสิ่งใดก็ตามในการค้นหาของ Google บนมือถือของคุณการแสดงผลที่เห็นใน Google carousel ที่ด้านบนส่วนใหญ่จะเป็นหน้าแอมป์ดังที่แสดงด้านล่าง -
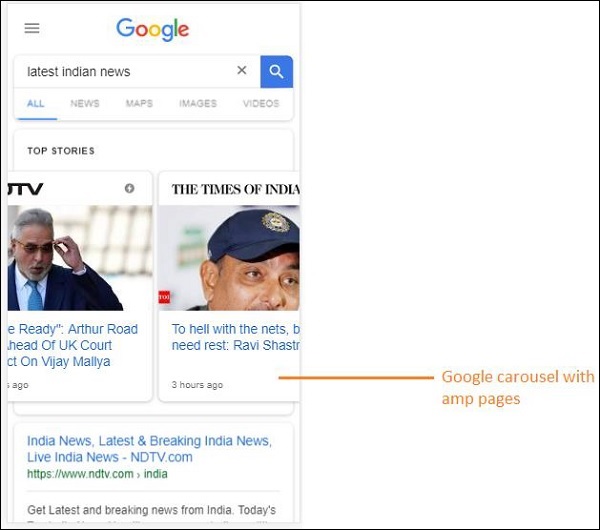
เมื่อคุณคลิกหน้า AMP URL ที่คุณได้รับในแถบที่อยู่จะเป็นดังนี้ -
https://www.google.co.in/amp/s/m.timesofindia.com/sports/cricket/india-in-australia/to-hell-with-the-nets-boys-need-rest-ravi-shastri/amp_articleshow/67022458.cms
URL ไม่ได้มาจากผู้เผยแพร่โดยตรง แต่ Google ชี้ไปที่สำเนาของตนเองบนเซิร์ฟเวอร์ของ Google ซึ่งเป็นเวอร์ชันแคชและช่วยให้การแสดงผลเนื้อหาเร็วขึ้นเมื่อเทียบกับหน้าที่ไม่ใช่แอมป์ สิ่งนี้จะเกิดขึ้นเฉพาะในอุปกรณ์หรือในโหมด Google emulator
ตัวอย่างหน้าแอมป์
ตัวอย่างหน้าแอมป์แสดงอยู่ด้านล่าง -
<!doctype html>
<html amp>
   <head>
      <meta charset = "utf-8">
      <title>Amp Sample Page</title>
      <link rel = "canonical" href = "./regular-html-version.html">
      <meta name = "viewport" content = "width = device-width,
         minimum-scale = 1,initial-scale = 1">
      <style amp-custom>
         h1 {color: red}
      </style>
      <script type = application/json>{
         "vars": {
            "uid": "23870",
            "domain": "dummyurl.com",
            "sections": "us",
            "authors": "Hello World"
         }
      }
      </script>
      <style amp-boilerplate>
         body{
            -webkit-animation:
            -amp-start 8s steps(1,end) 0s 1 normal both;-moz-animation:
            -amp-start 8s steps(1,end) 0s 1 normal both;-ms-animation:
            -amp-start 8s steps(1,end) 0s 1 normal both;animation:
            -amp-start 8s steps(1,end) 0s 1 normal both
         }
         @-webkit-keyframes
         -amp-start{from{visibility:hidden}to{visibility:visible}}@-moz-keyframes
         -amp-start{from{visibility:hidden}to{visibility:visible}}@-ms-keyframes
         -amp-start{from{visibility:hidden}to{visibility:visible}}@-o-keyframes
         -amp-start{from{visibility:hidden}to{visibility:visible}}@keyframes
         -amp-start{from{visibility:hidden}to{visibility:visible}}
      </style>
      <noscript>
         <style amp-boilerplate>
            body{
               -webkit-animation:none;
               -moz-animation:none;
               -ms-animation:none;
               animation:none}
         </style>
      </noscript>

      <script async src = "https://cdn.ampproject.org/v0.js"></script>
   </head>
   <body>
      <h1>Amp Sample Page</h1>
      <p>
         <amp-img src = "imgurl.jpg" width = "300" height = "300"
            layout = "responsive"></amp-img>
      </p>
      <amp-ad width = "300" height = "250" type = "doubleclick"
         data-slot = "/4119129/no-ad">
         <div fallback>
            <p style = "color:green;font-size:25px;">No ads to Serve!</p>
         </div>
      </amp-ad>
   </body>
</html>
สิ่งที่ควรทำและไม่ควรทำในหน้า AMP
ให้เราเข้าใจสิ่งที่ควรทำและไม่ควรทำที่โปรแกรมเมอร์ต้องปฏิบัติตามในหน้า AMP
แท็กบังคับ
มีแท็กบังคับบางอย่างที่ต้องรวมไว้ในหน้าแอมป์ตามที่ระบุด้านล่าง -
เราต้องตรวจสอบให้แน่ใจว่ามีการเพิ่ม amp หรือ⚡ลงในแท็ก html ดังที่แสดงด้านล่าง -
<html amp>
   OR
<html ⚡>
ควรเพิ่มแท็ก <head> และ <body> ในหน้า html
ควรเพิ่มเมตาแท็กที่จำเป็นต่อไปนี้ในส่วนหัวของหน้า มิฉะนั้นจะล้มเหลวในการตรวจสอบความถูกต้องของแอมป์
<meta charset = "utf-8">
<meta name = "viewport" content = "width=device-width, minimum-scale = 1, initial-scale = 1">
ลิงก์ของ rel = "canonical" ที่จะเพิ่มเข้าไปใน head tag
<link rel = "canonical" href = "./regular-html-version.html">แท็กสไตล์พร้อม amp-boilerplate -
<style amp-boilerplate>
   body{
      -webkit-animation:
      -amp-start 8s steps(1,end) 0s 1 normal both;-moz-animation:
      -amp-start 8s steps(1,end) 0s 1 normal both;-ms-animation:
      -amp-start 8s steps(1,end) 0s 1 normal both;animation:
      -amp-start 8s steps(1,end) 0s 1 normal both
   }
   @-webkit-keyframes
   -amp-start{from{visibility:hidden}to{visibility:visible}}@-moz-keyframes
   -amp-start{from{visibility:hidden}to{visibility:visible}}@-ms-keyframes
   -amp-start{from{visibility:hidden}to{visibility:visible}}@-o-keyframes
   -amp-start{from{visibility:hidden}to{visibility:visible}}@keyframes
   -amp-start{from{visibility:hidden}to{visibility:visible}}
</style>
แท็ก Noscript พร้อม amp-สำเร็จรูป -
<noscript>
   <style amp-boilerplate>
      body{
         -webkit-animation:none;
         -moz-animation:none;
         -ms-animation:none;
         animation:none
      }
   </style>
</noscript>
สำคัญมากแท็ก amp script ที่เพิ่ม async ดังที่แสดงด้านล่าง -
<script async src = "https://cdn.ampproject.org/v0.js"> </script>ในกรณีที่คุณต้องการเพิ่ม CSS ที่กำหนดเองลงในเพจโปรดจดบันทึกไว้ที่นี่เราไม่สามารถเรียกสไตล์ชีตภายนอกในแอมป์เพจได้ ในการเพิ่ม CSS ที่กำหนดเอง CSS ทั้งหมดของคุณต้องไปที่นี่ดังที่แสดง -
<style amp-custom>
   //all your styles here
</style>
แท็กสไตล์ควรมีแอตทริบิวต์ที่กำหนดเองและเพิ่มเข้าไป
สคริปต์สำหรับส่วนประกอบ AMP
โปรดทราบว่าไม่อนุญาตให้ใช้สคริปต์ที่มี src และ type =” text / javascript” ใน amp page โดยเด็ดขาด อนุญาตให้เพิ่มเฉพาะแท็กสคริปต์ที่ async และเกี่ยวข้องกับ amp-components ในส่วน head
ส่วนนี้แสดงสคริปต์บางส่วนที่ใช้สำหรับส่วนประกอบแอมป์ตามที่ระบุด้านล่าง -
amp-ad
<script async custom-element = "amp-ad"
   src = "https://cdn.ampproject.org/v0/amp-ad-0.1.js">
</script>
amp-iframe
<script async custom-element = "amp-iframe"
   src = "https://cdn.ampproject.org/v0/amp-iframe-0.1.js">
</script>
สังเกตว่าสคริปต์มีแอตทริบิวต์ async และองค์ประกอบที่กำหนดเองพร้อมชื่อของคอมโพเนนต์ amp ที่จะโหลด Amp ตรวจสอบความถูกต้องของแท็กสคริปต์ตามคุณสมบัติ async และองค์ประกอบที่กำหนดเองและไม่อนุญาตให้โหลดสคริปต์อื่น ๆ มันต้องใช้เวลาtype=application/json ซึ่งเราได้เพิ่มไว้ในไฟล์ตัวอย่างดังที่แสดงด้านล่าง
<type = application/json>
{
   "vars": {
      "uid": "23870",
      "domain": "dummyurl.com",
      "sections": "us",
      "authors": "Hello World"
   }
}
</script>
สคริปต์ข้างต้นสามารถใช้กับส่วนประกอบ amp อื่น ๆ ได้หากจำเป็นตัวอย่างเช่นสำหรับ amp-analytics
แท็ก HTML
จนถึงตอนนี้เราได้เห็นแท็กบังคับที่จำเป็นในหน้าแอมป์ ตอนนี้เราจะพูดถึงองค์ประกอบ HTML ที่อนุญาต / ไม่อนุญาตและข้อ จำกัด ที่กำหนดไว้
นี่คือรายการแท็ก HTML ที่อนุญาต / ไม่อนุญาต -
| ซีเนียร์ No | แท็ก HTML และคำอธิบาย |
|---|---|
| 1 | img แท็กนี้ถูกแทนที่ด้วย amp-img ไม่อนุญาตให้ใช้แท็ก img โดยตรงในหน้า AMP |
| 2 | video แทนที่ด้วย amp-video |
| 3 | audio แทนที่ด้วยแอมป์เสียง |
| 4 | iframe แทนที่ด้วย amp-iframe |
| 5 | object ไม่ได้รับอนุญาต |
| 6 | embed ไม่ได้รับอนุญาต |
| 7 | form สามารถใช้เป็น <form> เราต้องเพิ่มสคริปต์เพื่อให้ทำงานกับฟอร์มในหน้า AMP Example − |
| 8 | Input elements |
| 9 | <fieldset> ได้รับอนุญาต |
| 10 | <label> ได้รับอนุญาต |
| 11 | P, div, header,footer,section ได้รับอนุญาต |
| 12 | button ได้รับอนุญาต |
| 13 | a <a> อนุญาตให้ใช้แท็กโดยมีเงื่อนไขต่อไปนี้ href ไม่ควรขึ้นต้นด้วยจาวาสคริปต์ หากแสดงค่าแอตทริบิวต์เป้าหมายต้องเป็น _blank |
| 14 | svg ไม่ได้รับอนุญาต |
| 15 | meta ได้รับอนุญาต |
| 16 | Link ได้รับอนุญาต แต่ไม่อนุญาตให้โหลดสไตล์ชีตภายนอก |
| 17 | style ได้รับอนุญาต จำเป็นต้องมี amp-boilerplate หรือ amp-custom แอตทริบิวต์ |
| 18 | base ไม่ได้รับอนุญาต |
| 19 | noscript ได้รับอนุญาต |
ความคิดเห็น
ไม่อนุญาตให้แสดงความคิดเห็น html ตามเงื่อนไข ตัวอย่างเช่น -
<!--[if Chrome]>
This browser is chrome (any version)
<![endif]-->เหตุการณ์ HTML
เหตุการณ์ที่เราใช้ในหน้า html เช่น onclick, onmouseover ไม่ได้รับอนุญาตในหน้า AMP
เราสามารถใช้เหตุการณ์ได้ดังนี้ -
on = "eventName:elementId[.methodName[(arg1 = value, arg2 = value)]]"นี่คือตัวอย่างเหตุการณ์ที่ใช้กับองค์ประกอบอินพุต -
<input id = "txtname" placeholder = "Type here"
on = "inputthrottled:
AMP.setState({name: event.value})">เหตุการณ์ที่ใช้จะถูกป้อนเข้า - throlled
ชั้นเรียน
คุณไม่สามารถมีชั้นเรียนในเพจของคุณด้วยคำนำหน้าเช่น -amp- or i-amp-. นอกจากนี้คุณสามารถใช้ชื่อคลาสตามความต้องการของคุณ
รหัส
คุณไม่สามารถมีรหัสสำหรับองค์ประกอบ html ของคุณที่นำหน้าด้วย -amp หรือ i-amp- นอกจากนี้คุณสามารถใช้รหัสกับองค์ประกอบ html ของคุณได้ตามความต้องการของคุณ
ลิงค์
ไม่อนุญาตให้ใช้ JavaScript เป็น href ในหน้า amp
Example
<a href = "javascript:callfunc();">click me</a>สไตล์ชีท
ไม่อนุญาตให้ใช้สไตล์ชีตภายนอกในหน้า AMP เป็นไปได้ที่จะเพิ่มสไตล์ที่จำเป็นสำหรับหน้าภายใน -
<style amp-custom>
//all your styles here
</style>แท็กสไตล์ควรมี amp-custom เพิ่มแอตทริบิวต์แล้ว
@ -rules
อนุญาตให้ใช้ @ -rules ต่อไปนี้ในสไตล์ชีต -
@ font-face, @keyframes, @media, @page, @ รองรับ @ นำเข้าจะไม่ได้รับอนุญาต การสนับสนุนสำหรับสิ่งเดียวกันจะถูกเพิ่มในอนาคต
@keyframes ได้รับอนุญาตให้ใช้ภายใน<styleamp-custom> . หากมี @keyframes มากเกินไปจะเป็นการดีที่จะสร้าง<styleamp-keyframes> แท็กและเรียกแท็กนี้ที่ส่วนท้ายของเอกสารแอมป์
ชื่อคลาสรหัสชื่อแท็กและแอตทริบิวต์ไม่ควรนำหน้าด้วย -amp- และ i-amp- เนื่องจากใช้ภายในโค้ดแอมป์ซึ่งอาจทำให้เกิดความขัดแย้งหากกำหนดไว้บนเพจด้วยในขณะรันไทม์
!important ไม่อนุญาตให้ใช้คุณสมบัติภายในสไตล์เนื่องจากแอมป์ต้องการควบคุมขนาดองค์ประกอบเมื่อใดก็ตามที่ต้องการ
แบบอักษรที่กำหนดเอง
สไตล์ชีตสำหรับแบบอักษรที่กำหนดเองได้รับอนุญาตในหน้า AMP
Example
<link rel = "stylesheet"
href = "https://fonts.googleapis.com/css?family=Tangerine">แบบอักษรเป็นรายการที่อนุญาตพิเศษสำหรับการติดตามต้นกำเนิดซึ่งสามารถใช้ในหน้า AMP ได้
Fonts.com - https://fast.fonts.net
Google Fonts - https://fonts.googleapis.com
Font Awesome - https://maxcdn.bootstrapcdn.com
Typekit - https://use.typekit.net/kitId.css (แทนที่ kitId ตาม)
Note - อนุญาตให้ใช้แบบอักษรที่กำหนดเอง @ font-face ในหน้าแอมป์
Example
@font-face {
font-family: myFirstFont;
src: url(dummyfont.woff);
}AMP Runtime
สภาพแวดล้อมรันไทม์ของแอมป์จะถูกตัดสินใจเมื่อโหลดไฟล์หลัก amp -
<script async src = "https://cdn.ampproject.org/v0.js"></script>ไฟล์หลักจะดูแลการโหลดทรัพยากรภายนอกตัดสินใจจัดลำดับความสำคัญว่าจะโหลดเมื่อใดและยังช่วยในการตรวจสอบความถูกต้องของเอกสาร amp เมื่อมีการเพิ่ม # development = 1 ใน amp URL
Example
http://localhost:8080/googleamp/amppage.html#development=1URL ด้านบนเมื่อเรียกใช้งานในเบราว์เซอร์จะแสดงรายการข้อผิดพลาดหากล้มเหลวในการตรวจสอบความถูกต้องของแอมป์หรือแสดงข้อความยืนยันความถูกต้องของแอมป์หากไม่มีข้อผิดพลาด
ส่วนประกอบ AMP
แอมป์มีการเพิ่มส่วนประกอบของแอมป์จำนวนมาก โดยทั่วไปจะใช้เพื่อจัดการกับการโหลดทรัพยากรอย่างมีประสิทธิภาพ นอกจากนี้ยังมีส่วนประกอบในการดูแลภาพเคลื่อนไหวข้อมูลที่แสดงการแสดงโฆษณาวิดเจ็ตโซเชียลเป็นต้น
มีส่วนประกอบ 2 ประเภทใน AMP
- Built-in
- External
Note- <amp-img> เป็นส่วนประกอบในตัวและพร้อมใช้งานหากมีการเพิ่มไฟล์ core amp js ส่วนประกอบภายนอกเช่น <amp-ad>, <amp-facebook>, <amp-video> และอื่น ๆ อีกมากมายต้องการไฟล์ js ที่เกี่ยวข้องกับคอมโพเนนต์ที่จะเพิ่ม
คุณสมบัติทั่วไป
แอตทริบิวต์เช่นความกว้างความสูงเค้าโครงตัวยึดตำแหน่งและทางเลือกจะพร้อมใช้งานสำหรับส่วนประกอบ AMP เกือบทั้งหมดที่มี แอตทริบิวต์เหล่านี้มีความสำคัญมากสำหรับคอมโพเนนต์ AMP เนื่องจากเป็นตัวตัดสินการแสดงองค์ประกอบในหน้า AMP
คุณลักษณะข้างต้นทั้งหมดที่แสดงไว้สำหรับ AMP จะกล่าวถึงโดยละเอียดในบทต่อ ๆ ไปของบทช่วยสอนนี้
โปรดทราบว่าตัวอย่างทั้งหมดในบทช่วยสอนนี้ได้รับการทดสอบสำหรับอุปกรณ์และใช้โหมด Google Mobile Emulator ให้เราเรียนรู้เกี่ยวกับเรื่องนี้โดยละเอียดตอนนี้
Google Mobile Emulator
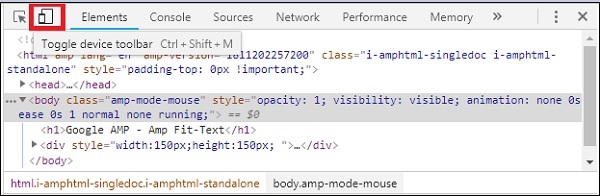
ในการใช้โปรแกรมจำลองอุปกรณ์เคลื่อนที่ของ Google ให้เปิดเบราว์เซอร์ Chrome คลิกขวาและเปิดคอนโซลนักพัฒนาตามที่แสดงด้านล่าง -
เราสามารถเห็นเครื่องมือสำหรับนักพัฒนาสำหรับ Chrome ดังที่แสดงด้านบน กดลิงก์ที่คุณต้องการทดสอบในเบราว์เซอร์ สังเกตว่าหน้านี้แสดงในโหมดเดสก์ท็อป
ในการรับหน้าด้านบนเพื่อทดสอบอุปกรณ์ให้คลิกที่สลับแถบเครื่องมืออุปกรณ์ตามที่แสดงด้านล่าง -
คุณยังสามารถใช้แป้นพิมพ์ลัด Ctrl + shift + M การดำเนินการนี้จะเปลี่ยนโหมดเดสก์ท็อปเป็นโหมดอุปกรณ์ดังที่แสดงด้านล่าง -
รายชื่ออุปกรณ์สามารถดูได้ตามที่แสดงด้านล่าง -
คุณสามารถเลือกอุปกรณ์ที่คุณต้องการทดสอบหน้า โปรดทราบว่าหน้าทั้งหมดในบทช่วยสอนเหล่านี้ได้รับการทดสอบบน Google Mobile Emulator ตามที่แสดงด้านบน คุณลักษณะเดียวกันนี้สามารถใช้ได้กับ Firefox และเบราว์เซอร์ Internet Explorer ล่าสุดด้วย
รูปภาพที่ใช้ในหน้า AMP ของ Google จะคล้ายกับวิธีที่ใช้ในหน้า HTML มาตรฐาน แต่ความแตกต่างเพียงอย่างเดียวคือวิธีใช้ชื่อแท็กกับคุณสมบัติเพิ่มเติมบางอย่าง บทนี้จะกล่าวถึงสิ่งเหล่านี้โดยละเอียด
สังเกตไวยากรณ์ที่แสดงด้านล่าง -
HTML มาตรฐาน
<img src = ”example.jpg” width = ”300” height = ”250” alt = ”Example” ></img>ในหน้า AMP
<amp-img src = "example.jpg" alt = "Example" height = "300" width = "250" ><//amp-img>สังเกตว่าแท็กจาก img เปลี่ยนเป็น amp-img.
ทำไมต้องใช้ amp-img แทน img?
เหตุผลที่อยู่เบื้องหลังการเปลี่ยน img เป็น amp-img คือเพื่อให้สามารถควบคุมเค้าโครงเพจได้มากขึ้นและคำขอของเครือข่ายที่ทำขึ้นเพื่อโหลดรูปภาพ Amp เพิ่มการโหลดแบบขี้เกียจให้กับทรัพยากรรูปภาพและจัดลำดับความสำคัญของการโหลดตามทรัพยากรอื่น ๆ ที่มีอยู่ในหน้า
ตัวอย่าง
ปฏิบัติตามรหัสต่อไปนี้เพื่อความเข้าใจที่ดีขึ้น -
<!doctype html>
<html amp lang = "en">
<head>
<meta charset = "utf-8">
<script async src = "https://cdn.ampproject.org/v0.js"></script>
<title>Google AMP - Image</title>
<link rel = "canonical" href = "http://example.ampproject.org/articlemetadata.html">
<meta name = "viewport" content = "width = device-width,
minimum-scale = 1,initialscale = 1">
<style amp-boilerplate>
body{
-webkit-animation:
-amp-start 8s steps(1,end) 0s1 normal both;-moz-animation:
-amp-start 8s steps(1,end) 0s 1 normal both;-msanimation:
- amp-start 8s steps(1,end) 0s 1 normal both;animation:
-amp-start 8s steps(1,end) 0s 1 normal both
}
@-webkit-keyframes
-ampstart{from{visibility:hidden}to{visibility:visible}}@-moz-keyframes
-ampstart{from{visibility:hidden}to{visibility:visible}}@-ms-keyframes
-ampstart{from{visibility:hidden}to{visibility:visible}}@-o-keyframes
-ampstart{from{visibility:hidden}to{visibility:visible}}@keyframes
amp-start{from{visibility:hidden}to{visibility:visible}}
</style>
<noscript>
<style amp-boilerplate>
body{
-webkit-animation:none;
-moz-animation:none;
-msanimation:none;
animation:none
}
</style>
</noscript>
</head>
<body>
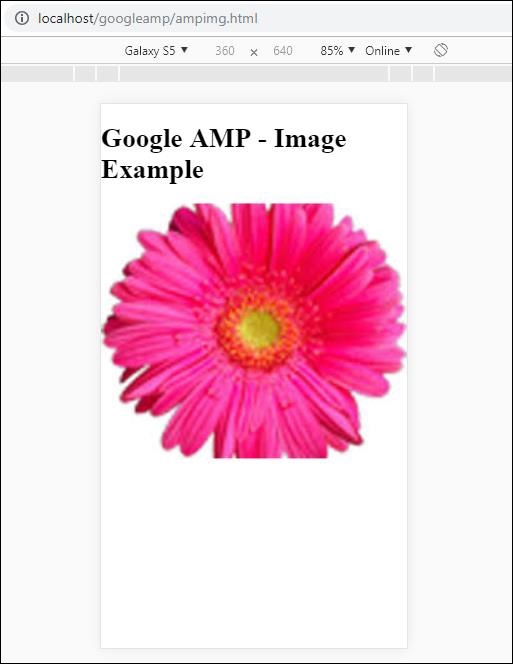
<h1>Google AMP - Image Example</h1>
<amp-img alt = "Beautiful Flower" src = "images/flower.jpg"
width = "246"
height = "205">
</amp-img>
</body>
</html>เอาต์พุต
เมื่อคุณเรียกใช้โค้ดที่แสดงด้านบนคุณจะพบผลลัพธ์ดังที่แสดงด้านล่าง -

คุณยังสามารถทำให้รูปภาพตอบสนองได้โดยการเพิ่ม property layout =” responsive” ลงในแท็กamp-imgดังที่แสดงด้านล่าง
ตัวอย่าง
ปฏิบัติตามรหัสต่อไปนี้เพื่อความเข้าใจที่ดีขึ้น -
<amp-img alt = "Beautiful Flower" src = "images/flower.jpg"
width = "246"
height = "205"
layout = "responsive">
</amp-img>เอาต์พุต
เมื่อคุณเรียกใช้โค้ดที่แสดงด้านบนคุณจะพบผลลัพธ์ดังที่แสดงด้านล่าง -
บทนี้จะอธิบายวิธีการทำงานกับแบบฟอร์มใน Google AMP
โปรดทราบว่าแท็กแบบฟอร์มยังคงเหมือนกับใน HTML มาตรฐาน AMP ได้เพิ่มข้อ จำกัด พิเศษในการใช้แบบฟอร์มเนื่องจากเราจำเป็นต้องเพิ่มไฟล์ JavaScript รูปแบบแอมป์เพื่อทำงานกับแบบฟอร์ม
สคริปต์สำหรับ amp-form
<script async custom-element = "amp-form"
src = "https://cdn.ampproject.org/v0/ampform-0.1.js"></script>ในการใช้แบบฟอร์มในหน้า AMP เราต้องรวมสคริปต์ด้านบนไว้ในไฟล์. html ไฟล์ JavaScript รูปแบบ amp รองรับhttp และ xmlhttprequestสำหรับการส่งแบบฟอร์ม การใช้คำขอ HTTP เพจจะโหลดซ้ำและด้วยxmlhttprequest มันไม่โหลดหน้าซ้ำทำหน้าที่เหมือนคำขอ ajax
แท็กแบบฟอร์มใน AMP
For xmlhttprequest :
<form method = "post" class = "p2" action-xhr = "submitform.php" target = "_top">
//Input fields here
</form>
For http :
<form method = "post" class = "p2" action = "submitform.php" target = "_top">
//Input fields here
</form>Amp-form มีคุณสมบัติพิเศษเช่น submit-error และ submit-success เพื่อจัดการกับข้อผิดพลาดและความสำเร็จเมื่อส่งแบบฟอร์ม
Example
ตัวอย่างสำหรับ amp-form แสดงไว้ด้านล่าง -
<!doctype html>
<html amp lang = "en">
<head>
<meta charset = "utf-8">
<script async src = "https://cdn.ampproject.org/v0.js"></script>
<title>Google AMP - Form</title>
<link rel = "canonical" href = "ampform.html">
<meta name = "viewport" conten t = "width = device-width,
minimum-scale = 1,initialscale = 1">
<style amp-boilerplate>
body{
-webkit-animation:
-amp-start 8s steps(1,end) 0s1 normal both;-moz-animation:
-amp-start 8s steps(1,end) 0s 1 normal both;-msanimation:
-amp-start 8s steps(1,end) 0s 1 normal both;animation:
-amp-start 8s steps(1,end) 0s 1 normal both
}
@-webkit-keyframes
-ampstart{from{visibility:hidden}to{visibility:visible}}@-moz-keyframes
-ampstart{from{visibility:hidden}to{visibility:visible}}@-ms-keyframes
-ampstart{from{visibility:hidden}to{visibility:visible}}@-o-keyframes
-ampstart{from{visibility:hidden}to{visibility:visible}}@keyframes
-ampstart{from{visibility:hidden}to{visibility:visible}}
</style>
<noscript>
<style amp-boilerplate>
body{
-webkit-animation:none;
-moz-animation:none;
-msanimation:none;
animation:none
}
</style>
</noscript>
<script async custom-element = "amp-form"
   src = "https://cdn.ampproject.org/v0/amp-form-0.1.js">
</script>
<script async custom-template = "amp-mustache"
src = "https://cdn.ampproject.org/v0/amp-mustache-0.2.js">
</script>
<style amp-custom>
form.amp-form-submit-success [submit-success],
form.amp-form-submit-error [submit-error]{
margin-top: 16px;
}
form.amp-form-submit-success [submit-success] {
color: white;
background-color:gray;
}
form.amp-form-submit-error [submit-error] {
color: red;
}
form.amp-form-submit-success.hide-inputs > input {
display: none;
}
</style>
</head>
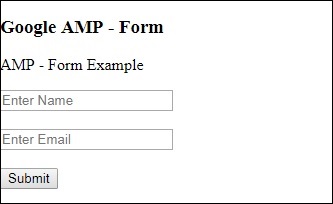
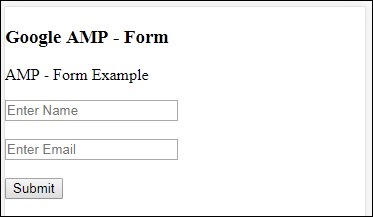
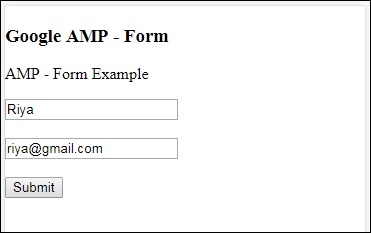
<body>
<h3>Google AMP - Form</h3>
<form method = "post"
class = "p2"
action-xhr = "submitform.php"
target = "_top">
<p>AMP - Form Example</p>
<div>
<input type = "text" name = "name" placeholder = "Enter
Name" required><br/><br/>
<input type = "email" name = "email"
placeholder = "Enter Email" required>
<br/>
<br/>
</div>
<input type = "submit" value = "Submit">
<div submit-success>
<template type = "amp-mustache">
Form Submitted! Thanks {{name}}.
</template>
</div>
<div submit-error>
<template type = "amp-mustache">
Error! {{name}}, please try again.
</template>
</div>
</form>
</body>
</html>Output
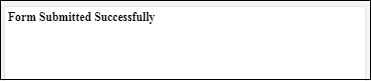
เมื่อคุณเรียกใช้โค้ดที่แสดงด้านบนคุณจะพบผลลัพธ์ดังที่แสดงด้านล่าง -
ตอนนี้ป้อนรายละเอียดและคลิกปุ่มส่ง หน้าจอแสดงผลมีดังนี้ -
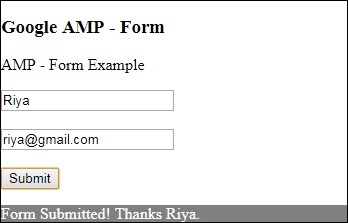
สังเกตว่าเราใช้ amp-mustache สำหรับการผูกข้อมูล แบบฟอร์มใช้ action-xhr เช่น xmlhttprequest เพื่อส่งแบบฟอร์ม เราได้ใช้submitform.php ไฟล์ที่ส่งคืนข้อมูลในรูปแบบ json
<form method = "post" class = "p2" action-xhr = "submitform.php"
target = "_top">
</form>submitform.php
<?php
if(!empty($_POST)){ $domain_url = (isset($_SERVER['HTTPS']) ? "https" : "http") . "://$_SERVER[HTTP_HOST]";
header("Content-type: application/json");
header("AMP-Access-Control-Allow-Source-Origin: " . $domain_url); header("Access-Control-Expose-Headers: AMP-Access-Control-Allow-Source-Origin"); $myJSON = json_encode($_POST); echo $myJSON;
}
?>เพื่อให้แบบฟอร์มทำงานโดยใช้ xmlhttprequest เราจำเป็นต้องเพิ่มส่วนหัวตามข้อกำหนด CORS รายละเอียดของส่วนหัวการตอบกลับที่เพิ่มใน submitform.php แสดงอยู่ด้านล่าง -

เพื่อให้แบบฟอร์มทำงานได้เราต้องเพิ่มส่วนหัวเช่น access-control-expose-headers ด้วยคุณค่า AMP-Access-Control-Allow-Source-Origin และ amp-access-controlallow- source-origin -http://localhost:8080.
โปรดทราบว่าเรากำลังใช้ไฟล์ php และเซิร์ฟเวอร์ apache ในไฟล์ php เราได้เพิ่มส่วนหัวที่ต้องการดังที่แสดงด้านล่าง -
<?php
if(!empty($_POST)){ $domain_url = (isset($_SERVER['HTTPS']) ? "https" : "http") . "://$_SERVER[HTTP_HOST]";
header("Content-type: application/json");
header("AMP-Access-Control-Allow-Source-Origin: " . $domain_url); header("Access-Control-Expose-Headers: AMP-Access-Control-Allow-Source-Origin"); $myJSON = json_encode($_POST); echo $myJSON;
}
?
?>ในกรณีที่เราใช้คำขอ http ปกติหน้าเว็บจะโหลดซ้ำดังที่แสดงด้านล่าง -
สำหรับคำขอ http เราได้ใช้แบบฟอร์มดังนี้ -
<form method = "GET" class = "p2" action = "submitform.php"
target = "_top">
</form>Example
ปฏิบัติตามรหัสต่อไปนี้เพื่อความเข้าใจที่ดีขึ้น -
<!doctype html>
<html amp lang = "en">
<head>
<meta charset = "utf-8">
<script async src = "https://cdn.ampproject.org/v0.js"></script>
<title>Google AMP - Form</title>
<link rel = "canonical" href = "ampform.html">
<meta name = "viewport" content = "width = device-width,minimum-scale = 1,initialscale = 1">
<style amp-boilerplate>
body{
-webkit-animation:
-amp-start 8s steps(1,end) 0s1 normal both;-moz-animation:
-amp-start 8s steps(1,end) 0s 1 normal both;-msanimation:
-amp-start 8s steps(1,end) 0s 1 normal both;animation:
-amp-start 8s steps(1,end) 0s 1 normal both
}
@-webkit-keyframes
-ampstart{from{visibility:hidden}to{visibility:visible}}@-moz-keyframes
-ampstart{from{visibility:hidden}to{visibility:visible}}@-ms-keyframes
-ampstart{from{visibility:hidden}to{visibility:visible}}@-o-keyframes
-ampstart{from{visibility:hidden}to{visibility:visible}}@keyframes
-ampstart{from{visibility:hidden}to{visibility:visible}}
</style>
<noscript>
<style amp-boilerplate>
body {
-webkit-animation:none;
-moz-animation:none;
-msanimation:none;
animation:none}
>/style>
</noscript>
<script async custom-element = "amp-form"
src = "https://cdn.ampproject.org/v0/amp-form-0.1.js">
</script>
<script async custom-template = "amp-mustache"
src = "https://cdn.ampproject.org/v0/amp-mustache-0.2.js">
</script>
<style amp-custom>
form.amp-form-submit-success [submit-success],
form.amp-form-submit-error [submit-error]{
margin-top: 16px;
}
form.amp-form-submit-success [submit-success] {
color: white;
background-color:gray;
}
form.amp-form-submit-error [submit-error] {
color: red;
}
form.amp-form-submit-success.hide-inputs >
input {
display: none;
}
</style>
</head>
<body>
<h3>Google AMP - Form</h3>
<form method = "GET" class = "p2" action = "submitform.php" target = "_top">
<p>AMP - Form Example</p>
<div>
<input type = "text" name = "name" placeholder = "Enter Name" required>
<br/>
<br/>
<input type = "email" name = "email" placeholder = "Enter Email" required>
<br/>
<br/>
<div>
<input type = "submit" value = "Submit">
<div submit-success>
<template type = "amp-mustache">
Form Submitted! Thanks {{name}}.
</template>
</div>
<div submit-error>
<template type = "amp-mustache">
Error! {{name}}, please try again.
</template>
</div>
</form>
</body>
</html>Output
เมื่อคุณเรียกใช้โค้ดที่แสดงด้านบนคุณจะพบผลลัพธ์ดังที่แสดงด้านล่าง -
Google amp-iframeใช้เพื่อแสดง iframes บนเพจมีเงื่อนไขบางอย่างที่ต้องเพิ่มใน amp-iframe ดังนั้นเราจึงไม่สามารถใช้ iframe ปกติบนเพจได้ บทนี้จะกล่าวถึงเพิ่มเติมเกี่ยวกับเรื่องนี้
เงื่อนไขที่ต้องปฏิบัติตามสำหรับ iFrames
เงื่อนไขที่ต้องดูแลขณะใช้ iframe ในหน้า AMP มีดังนี้ -
URL ที่ใช้บน iframe ต้องเป็นคำขอhttpsหรือdata-URIหรือใช้แอตทริบิวต์srcdoc
amp-iframe โดยค่าเริ่มต้นจะมีการเพิ่มแอตทริบิวต์ sandbox เข้าไป แอตทริบิวต์ sandbox จะถูกตั้งค่าเป็นว่าง ค่าว่างสำหรับแซนด์บ็อกซ์หมายความว่า iframe คือmaximum sandboxed(ข้อ จำกัด พิเศษใน iframe) เราสามารถเพิ่มค่าให้กับแซนด์บ็อกซ์ซึ่งจะกล่าวถึงด้วยความช่วยเหลือของตัวอย่างด้านล่าง
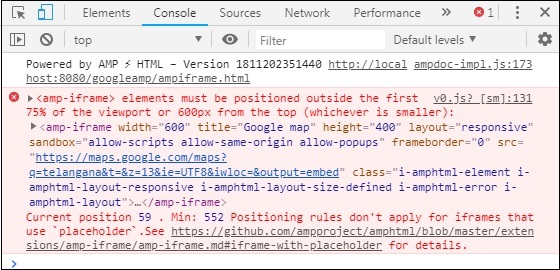
ไม่สามารถแสดง amp-iframe ที่ด้านบนสุดของหน้าได้ควรอยู่ห่างจากด้านบนเกือบ 600px หรือภายใน 75% แรกของวิวพอร์ตเมื่อเลื่อนไปด้านบน ในกรณีที่คุณต้องแสดง iframe เมื่อเริ่มต้นคุณต้องเพิ่มตัวยึดตำแหน่งให้กับ iframe ซึ่งเราจะพูดถึงด้วยความช่วยเหลือของตัวอย่างในบทช่วยสอนในภายหลัง
amp-iframe ต้องไม่มีต้นกำเนิดเดียวกันกับคอนเทนเนอร์ ตัวอย่างเช่นหากไซต์หลักของคุณอยู่บน www.xyz.com คุณไม่สามารถมี iframe src เป็นได้www.xyz.com/urlname. อาจใช้เวลาอื่นเช่น.xyz.com, example.xyz.com เป็นต้น
ในการทำงานกับ iframe เราต้องเพิ่มสคริปต์ต่อไปนี้ -
<script async custom-element = "amp-iframe"
src = "https://cdn.ampproject.org/v0/amp-iframe-0.1.js"></script>รูปแบบ Amp-iframe มีดังนี้ -
<amp-iframe width = "600" title = "Google map"
height = "400" layout = "responsive"
sandbox = "allow-scripts allow-same-origin allow-popups"
frameborder = "0"
src = "https://maps.google.com/maps?q=telangana&t=&z=13&ie=UTF8&iwloc=&output=embed">
</amp-iframe>ให้เราเข้าใจสิ่งนี้ด้วยความช่วยเหลือของตัวอย่างการทำงานที่จะใช้ iframe เพื่อแสดงแผนที่ Google ตามที่ระบุด้านล่าง
ตัวอย่าง
<!doctype html>
<html amp lang = "en">
<head>
<meta charset = "utf-8">
<script async src = "https://cdn.ampproject.org/v0.js"></script>
<title>Google AMP - Amp Iframe</title>
<link rel = "canonical" href = "http://example.ampproject.org/article-metadata.html">
<meta name = "viewport" content = "width = device-width,minimum-scale = 1,initial-scale = 1">
<style amp-boilerplate>
body{
-webkit-animation:-amp-start 8s steps(1,end) 0s
1 normal both;-moz-animation:
-amp-start 8s steps(1,end) 0s 1 normal both;-ms-animation:
-amp-start 8s steps(1,end) 0s 1 normal both;animation:
-amp-start 8s steps(1,end) 0s 1 normal both}
@-webkit-keyframes
-amp-start{from{visibility:hidden}to{visibility:visible}}@-moz-keyframes
-amp-start{from{visibility:hidden}to{visibility:visible}}@-ms-keyframes
-amp-start{from{visibility:hidden}to{visibility:visible}}@-o-keyframes
-amp-start{from{visibility:hidden}to{visibility:visible}}@keyframes
-amp-start{from{visibility:hidden}to{visibility:visible}}
</style><noscript>
<style amp-boilerplate>
body{-webkit-animation:none;-moz-animation:
none;-ms-animation:none;animation:none}
</style></noscript>
<script async custom-element = "amp-iframe"
src = "https://cdn.ampproject.org/v0/amp-iframe-0.1.js"
></script>
<style>
div {
height:850px;
text-align:center;
}
</style>
</head>
<body>
<h3>Google AMP - Amp Iframe</h3>
<div>
Google Maps in Iframe
</div>
<h3>Google AMP - Amp Iframe</h3>
<amp-iframe width = "600"
title = "Google map"
height = "400"
layout = "responsive"
sandbox = "allow-scripts allow-same-origin allow-popups"
frameborder = "0" src = "https://maps.google.com/maps?q=telangana&t=&z=13&ie=UTF8&iwloc=&output=embed">
</amp-iframe>
</body>
</html>เอาต์พุต
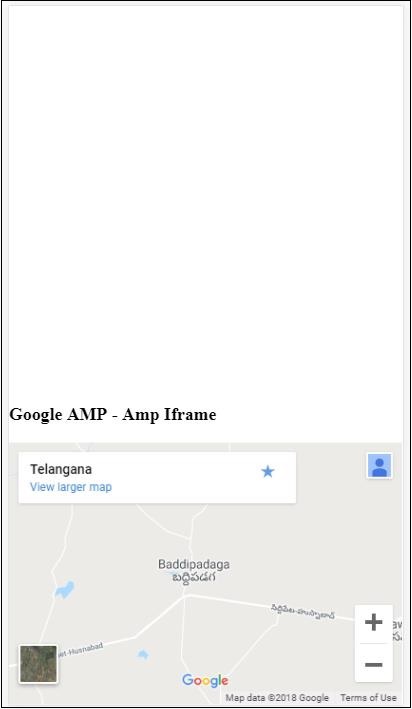
สังเกตว่าเราวาง iframe ไว้ที่มากกว่า 600px จากด้านบน มีข้อผิดพลาดดังแสดงด้านล่าง -
ในตัวอย่างด้านบนเราได้ใช้แซนด์บ็อกซ์กับค่าที่ระบุด้านล่าง -
sandbox = "allow-scripts allow-same-origin allow-popups"แอตทริบิวต์ Sandbox ทำหน้าที่เหมือนการอนุญาตให้โหลดเนื้อหาภายใน iframe ที่นี่เราอนุญาตให้โหลดสคริปต์ทั้งหมดซึ่งมาจากลิงก์ Google maps ในกรณีที่เราไม่ได้ให้แอตทริบิวต์ sandbox นี่คือข้อผิดพลาดที่แสดงขึ้นซึ่งบล็อกเนื้อหาที่จะโหลดใน iframe -
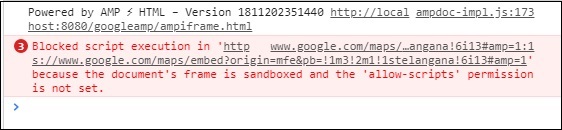
โปรดทราบว่าเราต้องให้สิทธิ์ที่ถูกต้องกับแซนด์บ็อกซ์ คุณสามารถดูรายละเอียดของการอนุญาตทั้งหมดที่จะมอบให้กับแซนด์บ็อกซ์ได้ที่นี่ -https://developer.mozilla.org/en-US/docs/Web/HTML/Element/iframe#attr-sandbox.
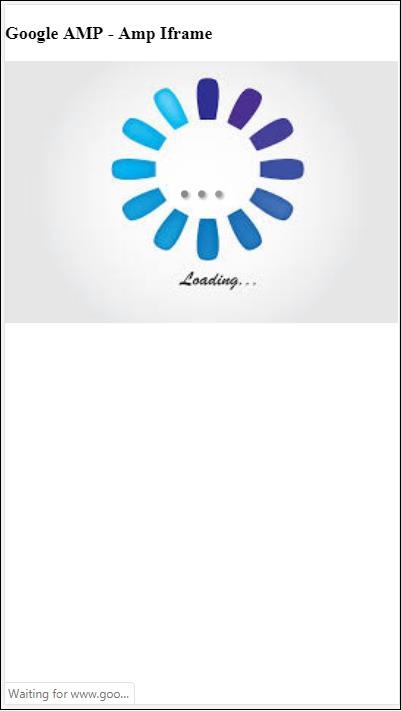
เราสามารถใช้ตัวยึดแอตทริบิวต์ภายใน amp-iframe เพื่อกำจัดเงื่อนไขที่มากกว่า 600px
ตัวอย่างการทำงานเหมือนกันแสดงไว้ด้านล่าง -
<!doctype html>
<html amp lang = "en">
<head>
<meta charset = "utf-8">
<script async src = "https://cdn.ampproject.org/v0.js"></script>
<title>Google AMP - Amp Iframe</title>
<link rel = "canonical" href = "http://example.ampproject.org/article-metadata.html">
<meta name = "viewport" content = "width = device-width, minimum-scale=1,initial-scale=1">
<style amp-boilerplate>
body{
-webkit-animation:-amp-start 8s steps(1,end) 0s
1 normal both;-moz-animation:
-amp-start 8s steps(1,end) 0s 1 normal both;-ms-animation:
-amp-start 8s steps(1,end) 0s 1 normal both;animation:
-amp-start 8s steps(1,end) 0s 1 normal both
}
@-webkit-keyframes
-amp-start{from{visibility:hidden}to{visibility:visible}}@-moz-keyframes
-amp-start{from{visibility:hidden}to{visibility:visible}}@-ms-keyframes
-amp-start{from{visibility:hidden}to{visibility:visible}}@-o-keyframes
-amp-start{from{visibility:hidden}to{visibility:visible}}@keyframes
-amp-start{from{visibility:hidden}to{visibility:visible}}
</style>
<noscript>
<style amp-boilerplate>
body{
-webkit-animation:none;
-moz-animation:none;
-ms-animation:none;
animation:none
}
</style>
</noscript>
<script async custom-element = "amp-iframe"
src = "https://cdn.ampproject.org/v0/amp-iframe-0.1.js">
</script>
<style>
div {
height:850px;
text-align:center;
}
</style>
</head>
<body>
<h3>Google AMP - Amp Iframe</h3>
<amp-iframe width = "600"
title = "Google map"
height = "400"
layout = "responsive"
sandbox = "allow-scripts allow-same-origin allow-popups"
frameborder = "0"
src = "https://maps.google.com/maps?q=telangana&t=&z=13&ie=UTF8&iwloc=&output=embed">
<amp-img layout = "fill" src = "images/loading.jpg" placeholder></amp-img>
</amp-iframe>
</body>
</html>เราได้ใช้ amp-img เป็นตัวยึดดังนี้ -
<amp-iframe width = "600"
title = "Google map"
height = "400"
layout = "responsive"
sandbox = "allow-scripts allow-same-origin allow-popups"
frameborder = "0"
src = "https://maps.google.com/maps?q=telangana&t=&z=13&ie = UTF8&iwloc = &output = embed">
<amp-img layout = "fill" src = "images/loading.jpg" placeholder></amp-img>
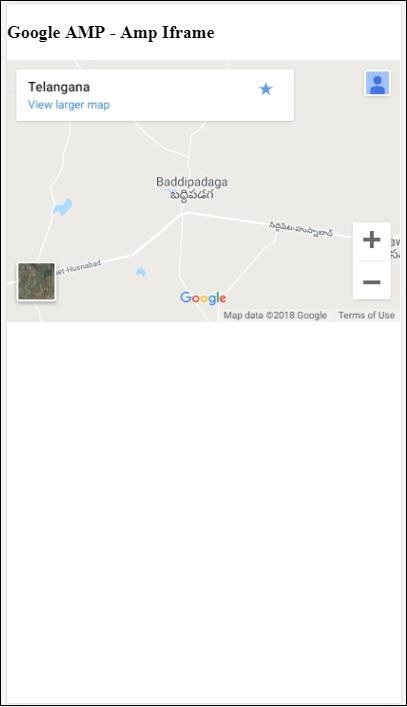
</amp-iframe>ในกรณีนี้จะไม่พิจารณาข้อ จำกัด 600px และ amp-iframe ในวิวพอร์ต 75% ตัวบ่งชี้การโหลด (จุดสามจุด) จะแสดงบนรูปภาพใช้เป็นตัวยึดตำแหน่งซึ่งโดยพื้นฐานแล้วสำหรับ amp-iframe src เมื่อโหลดเนื้อหา iframe แล้วรูปภาพจะถูกลบออกและเนื้อหา iframe จะแสดงดังที่แสดงในผลลัพธ์ที่แสดงด้านล่าง -
เอาต์พุต
แอมป์วิดีโอในแอมป์เป็นวิดีโอ html5 มาตรฐานที่ใช้เล่นวิดีโอฝังโดยตรง ในบทนี้ให้เราเข้าใจวิธีการทำงานและใช้ amp-video
ในการทำงานกับ amp-video เราต้องเพิ่มสคริปต์ต่อไปนี้ -
<script async custom-element = "amp-video"
src = "https://cdn.ampproject.org/v0/amp-video-0.1.js">
</script>แอมป์วิดีโอมีแอตทริบิวต์ src ซึ่งมีทรัพยากรวิดีโอที่จะโหลดซึ่งโหลดโดยแอมป์ขณะรันไทม์ นอกจากนี้คุณสมบัติทั้งหมดเกือบจะเหมือนกับแท็กวิดีโอ html5
ต่อไปนี้เป็นโหนดที่จะเพิ่มลงในวิดีโอแอมป์ -
Source - คุณสามารถเพิ่มไฟล์มีเดียต่างๆที่จะเล่นโดยใช้แท็กนี้
Track - แท็กนี้ให้คุณเปิดใช้งานคำบรรยายสำหรับวิดีโอ
Placeholder - แท็กตัวยึดตำแหน่งนี้จะแสดงเนื้อหาก่อนที่วิดีโอจะเริ่ม
Fallback - แท็กนี้จะถูกเรียกเมื่อเบราว์เซอร์ไม่รองรับวิดีโอ HTML5
รูปแบบของแท็ก amp-video
รูปแบบของแท็ก amp-video แสดงที่นี่ -
<amp-video controls width = "640" height = "360"
layout = "responsive" poster = "images/videoposter.png">
<source src = "video/bunny.webm" type = "video/webm" />
<source src = "video/samplevideo.mp4" type = "video/mp4" />
<div fallback>
<p>This browser does not support the video element.</p>
</div>
</amp-video>ให้เราเข้าใจ amp-video โดยใช้ตัวอย่างการทำงานดังที่แสดงด้านล่าง -
ตัวอย่าง
<!doctype html>
<html amp lang = "en">
<head>
<meta charset = "utf-8">
<script async src = "https://cdn.ampproject.org/v0.js"></script>
<title>Google AMP - Amp Video</title>
<link rel = "canonical" href = "http://example.ampproject.org/article-metadata.html">
<meta name = "viewport" content = "width = device-width, minimum-scale = 1,initial-scale=1">
<style amp-boilerplate>
body {
-webkit-animation:
-amp-start 8s steps(1,end) 0s 1 normal both;-moz-animation:
-amp-start 8s steps(1,end) 0s 1 normal both;-ms-animation:
-amp-start 8s steps(1,end) 0s 1 normal both;animation:
-amp-start 8s steps(1,end) 0s 1 normal both}
@-webkit-keyframes
-amp-start{from{visibility:hidden}to{visibility:visible}}@-moz-keyframes
-amp-start{from{visibility:hidden}to{visibility:visible}}@-ms-keyframes
-amp-start{from{visibility:hidden}to{visibility:visible}}@-o-keyframes
-amp-start{from{visibility:hidden}to{visibility:visible}}@keyframes
-amp-start{from{visibility:hidden}to{visibility:visible}}
</style>
<noscript>
<style amp-boilerplate>
body {
-webkit-animation:none;
-moz-animation:none;
-ms-animation:none;
animation:none
}
</style>
</noscript>
<script async custom-element = "amp-video"
src = "https://cdn.ampproject.org/v0/amp-video-0.1.js">
</script>
</head>
<body>
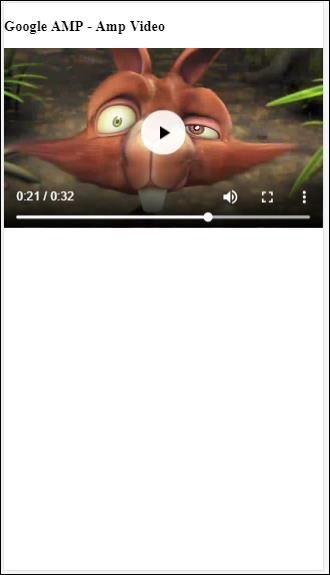
<h3>Google AMP - Amp Video</h3>
<amp-video controls
width = "640"
height = "360"
layout = "responsive"
poster = "images/videoposter.png">
<source src = "video/bunny.webm" type = "video/webm" />
<source src = "video/samplevideo.mp4" type = "video/mp4" />
<div fallback>
<p>This browser does not support the video element.</p>
</div>
</amp-video>
</body>
</html>เอาต์พุต
ผลลัพธ์ของรหัสที่ระบุข้างต้นเป็นดังที่แสดงด้านล่าง -
คุณสมบัติที่มีให้สำหรับแอมป์วิดีโอ
แอตทริบิวต์ที่ใช้ได้สำหรับ amp-video แสดงอยู่ในตารางที่นี่ -
| ซีเนียร์ No | คุณสมบัติและคำอธิบาย |
|---|---|
| 1 | src หากไม่มีโหนด <source> แสดงว่าจะต้องระบุ src และเป็น https: // url |
| 2 | poster ผู้โพสต์ใช้ img url ซึ่งจะแสดงก่อนที่วิดีโอจะเริ่ม |
| 3 | autoplay การมีแอตทริบิวต์นี้ใน amp-video จะเล่นวิดีโอโดยอัตโนมัติหากเบราว์เซอร์รองรับวิดีโอจะเล่นในโหมดปิดเสียงและผู้ใช้จะต้องแตะที่วิดีโอเพื่อเปิดเสียง |
| 4 | controls การมีแอตทริบิวต์นี้ใน amp-video จะแสดงการควบคุมวิดีโอคล้ายกับวิดีโอ html5 |
| 5 | loop หากมีแอตทริบิวต์นี้อยู่ใน amp-video วิดีโอจะเล่นอีกครั้งเมื่อเสร็จสิ้น |
| 6 | crossorigin แอตทริบิวต์นี้จะปรากฏในภาพหากทรัพยากรในการเล่นวิดีโออยู่ในแหล่งกำเนิดอื่น |
| 7 | rotate-to-fullscreen หากมองเห็นวิดีโอวิดีโอจะแสดงแบบเต็มหน้าจอหลังจากที่ผู้ใช้หมุนอุปกรณ์เข้าสู่โหมดแนวนอน |
เล่นวิดีโอ AMP อัตโนมัติ
เราสามารถใช้แอตทริบิวต์เล่นอัตโนมัติในกรณีที่เราต้องการเล่นวิดีโออัตโนมัติ คุณลักษณะนี้จะทำงานตามการสนับสนุนเบราว์เซอร์ โปรดทราบว่าวิดีโอจะอยู่ในสถานะปิดเสียงเมื่อเล่นอัตโนมัติ เมื่อผู้ใช้แตะที่วิดีโอวิดีโอนั้นจะถูกเปิดเสียง
ให้เราใช้คุณสมบัติเล่นอัตโนมัติด้วยความช่วยเหลือของตัวอย่างการทำงานที่ให้ไว้ด้านล่าง -
ตัวอย่าง
<!doctype html>
<html amp lang = "en">
<head>
<meta charset = "utf-8">
<script async src = "https://cdn.ampproject.org/v0.js"></script>
<title>Google AMP - Amp Video</title>
<link rel = "canonical" href = "http://example.ampproject.org/article-metadata.html">
<meta name = "viewport" content = "width=device-width,minimum-scale = 1, initial-scale = 1">
<style amp-boilerplate>
body {
-webkit-animation:
-amp-start 8s steps(1,end) 0s 1 normal both;
-moz-animation:-amp-start 8s steps(1,end) 0s 1 normal both;-ms-animation:
-amp-start 8s steps(1,end) 0s 1 normal both;animation:
-amp-start 8s steps(1,end) 0s 1 normal both
}
@-webkit-keyframes
-amp-start{from{visibility:hidden}to{visibility:visible}}@-moz-keyframes
-amp-start{from{visibility:hidden}to{visibility:visible}}@-ms-keyframes
-amp-start{from{visibility:hidden}to{visibility:visible}}@-o-keyframes
-amp-start{from{visibility:hidden}to{visibility:visible}}@keyframes
-amp-start{from{visibility:hidden}to{visibility:visible}}
</style>
<noscript>
<style amp-boilerplate>
body{
-webkit-animation:none;
-moz-animation:none;
-ms-animation:none;
animation:none
}
</style>
</noscript>
<script async custom-element = "amp-video" src = "
https://cdn.ampproject.org/v0/amp-video-0.1.js">
</script>
</head>
<body>
<h3>Google AMP - Amp Video Autoplay</h3>
<amp-video controls
width = "640"
height = "360"
layout = "responsive"
poster = "images/videoposter.png" autoplay>
<source src = "video/bunny.webm" type = "video/webm" />
<source src = "video/samplevideo.mp4" type = "video/mp4" />
<div fallback>
<p>This browser does not support the video element.</p>
</div>
</amp-video>
</body>
</html>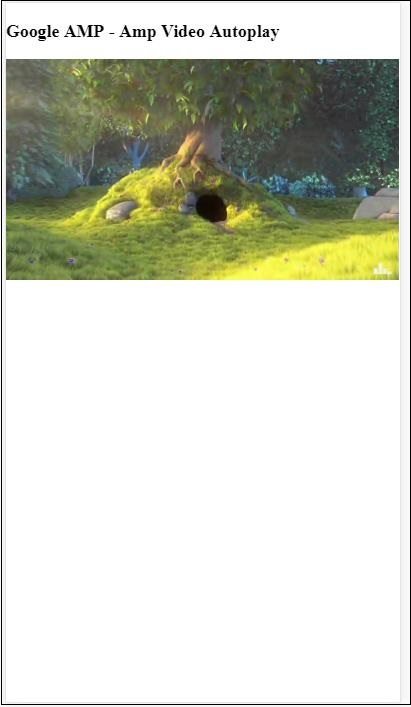
คุณสามารถเปิดใช้งานการควบคุมวิดีโอได้โดยเพิ่มแอตทริบิวต์การควบคุมดังที่แสดงในรหัสต่อไปนี้ -
<amp-video controls
width = "640"
height = "360"
layout = "responsive"
poster = "images/videoposter.png" autoplay>
<source src = "video/bunny.webm" type = "video/webm" />
<source src = "video/samplevideo.mp4" type = "video/mp4" />
<div fallback>
<p>This browser does not support the video element.</p>
</div>
</amp-video>ปุ่มเป็นอีกคุณสมบัติหนึ่งของ AMP โปรดทราบว่าปุ่มต่างๆใน AMP ไม่มีการเปลี่ยนแปลงและจะใช้เหมือนกับแท็กปุ่ม HTML มาตรฐาน ความแตกต่างเพียงอย่างเดียวของปุ่มในหน้า AMP คือการทำงานของเหตุการณ์ในหน้านั้น
ในบทนี้เราจะเห็นตัวอย่างบางส่วนเพื่อแสดงการทำงานของปุ่มและวิธีใช้กับคอมโพเนนต์ AMP
โค้ดตัวอย่างสำหรับไลท์บ็อกซ์
ตัวอย่างต่อไปนี้แสดงวิธีใช้ปุ่มเพื่อแสดง / ซ่อนแอมป์ไลท์บ็อกซ์ดังที่แสดงด้านล่าง -
<!doctype html>
<html amp lang = "en">
<head>
<meta charset = "utf-8">
<script async src = "https://cdn.ampproject.org/v0.js"></script>
<title>Google AMP - Amp Lightbox</title>
<link rel = "canonical" href = "http://example.ampproject.org/article-metadata.html">
<meta name = "viewport" content ="width = device-width,minimum-scale = 1,initial-scale = 1">
<style amp-boilerplate>
body{
-webkit-animation:-amp-start 8s steps(1,end) 0s 1 normal both;-moz-animation:
-amp-start 8s steps(1,end) 0s 1 normal both;-ms-animation:
-amp-start 8s steps(1,end) 0s 1 normal both;animation:
-amp-start 8s steps(1,end) 0s 1 normal both
}
@-webkit-keyframes
-amp-start{from{visibility:hidden}to{visibility:visible}}@-moz-keyframes
-amp-start{from{visibility:hidden}to{visibility:visible}}@-ms-keyframes
-amp-start{from{visibility:hidden}to{visibility:visible}}@-o-keyframes
-amp-start{from{visibility:hidden}to{visibility:visible}}@keyframes
-amp-start{from{visibility:hidden}to{visibility:visible}}
</style>
<noscript>
<style amp-boilerplate>
body{
-webkit-animation:none;-moz-animation:none;-ms-an
imation:none;animation:none
}
</style>
</noscript>
<script async custom-element = "amp-lightbox"
src = "https://cdn.ampproject.org/v0/amp-lightbox-0.1.js">
</script>
<style amp-custom>
amp-img {
border: 1px solid #ddd;
border-radius: 4px;
padding: 5px;
}
button{
background-color:
#ACAD5C; color: white;
padding: 12px 20px;
border: none;
border-radius: 4px;
cursor: pointer;
float: left;
}
.lightbox {
background: rgba(211,211,211,0.8);
width: 100%;
height: 100%;
position: absolute;
display: flex;
align-items: center;
justify-content: center;
}
</style>
</head>
<body>
<h3>Google AMP - Amp Lightbox</h3>
<button on = "tap:my-lightbox">
Show LightBox
</button>
<amp-lightbox id = "my-lightbox" layout = "nodisplay">
<div class = "lightbox" on = "tap:my-lightbox.close" tabindex = "0">
<amp-img alt = "Beautiful Flower"
src = "images/flower.jpg"
width = "246"
height = "205">
</amp-img>
</div>
</amp-lightbox>
</body>
</html>เอาต์พุต
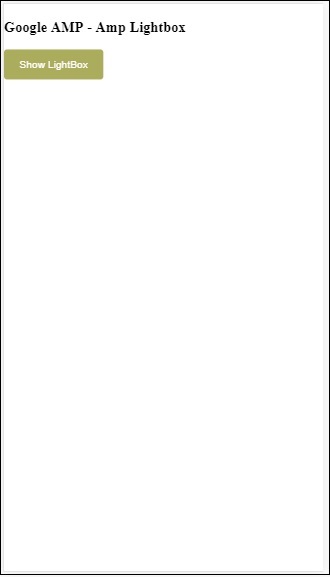

ตอนนี้คุณสามารถคลิกที่ใดก็ได้บนหน้าจอเพื่อปิดไลท์บ็อกซ์
ในตัวอย่างข้างต้นเราได้ใช้ปุ่มโดยใช้รหัสดังที่แสดงด้านล่าง -
<button on = "tap:my-lightbox">
Show LightBox
</button>
Next, we have added action on the button using on attribute as shown:
on = "tap:my-lightbox"การดำเนินการจะเกิดขึ้นเมื่อคุณแตะที่ปุ่ม โปรดทราบว่ามีการกำหนดรหัสของไลท์บ็อกซ์ เมื่อผู้ใช้แตะที่ปุ่มไลท์บ็อกซ์จะเปิดขึ้น ในทำนองเดียวกันคุณสามารถใช้ปุ่มกับการดำเนินการกับส่วนประกอบใด ๆ เพื่อโต้ตอบกับมัน
Timeago จะให้รายละเอียดการประทับเวลาโดยเปรียบเทียบกับอดีตเช่น 'x' ชั่วโมงที่แล้ว ในบทนี้ให้เราพูดถึงรายละเอียดเกี่ยวกับคุณลักษณะนี้
ในการแทรกคุณสมบัตินี้ในงานของเราเราต้องเพิ่มสคริปต์ที่ให้ไว้ด้านล่างในหน้า. html -
<script async custom-element = "amp-timeago"
src = "https://cdn.ampproject.org/v0/amp-timeago-0.1.js">
</script>แท็ก amp-timeago มีลักษณะดังที่แสดงด้านล่าง -
<amp-timeago layout = "fixed" width = "160" height = "20"
datetime = "2018-10-01T00:37:33.809Z"
locale = "en">Monday 01 October 2018 00.37
</amp-timeago>ให้เราเข้าใจสิ่งนี้ด้วยความช่วยเหลือของตัวอย่างการทำงานดังที่แสดงด้านล่าง -
ตัวอย่าง
<!doctype html>
<html amp lang = "en">
<head>
<meta charset = "utf-8">
<script async src = "https://cdn.ampproject.org/v0.js"></script>
<title>Google AMP - TimeAgo</title>
<link rel = "canonical" href = " http://example.ampproject.org/article-metadata.html">
<meta name = "viewport" content = "width = device-width,minimum-scale = 1,initial- scale = 1">
<style amp-boilerplate>
body{
-webkit-animation:-amp-start 8s steps(1,end)
0s 1 normal both;-moz-animation:
-amp-start 8s steps(1,end) 0s 1 normal both;-ms-animation:
-amp-start 8s steps(1,end) 0s 1 normal both;animation:
-amp-start 8s steps(1,end) 0s 1 normal both
}
@-webkit-keyframes
-amp-start{from{visibility:hidden}to{visibility:visible}}@-moz-keyframes
-amp-start{from{visibility:hidden}to{visibility:visible}}@-ms-keyframes
-amp-start{from{visibility:hidden}to{visibility:visible}}@-o-keyframes
-amp-start{from{visibility:hidden}to{visibility:visible}}@keyframes
-amp-start{from{visibility:hidden}to{visibility:visible}}
</style>
<noscript>
<style amp-boilerplate>
body{
-webkit-animation:none;-moz-animation:none;-ms
-animation:none;animation:none
}
</style>
</noscript>
<script async custom-element="amp-timeago"
src = "https://cdn.ampproject.org/v0/amp-timeago-0.1.js">
</script>
</head>
<body>
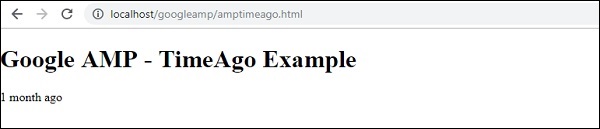
<h1>Google AMP - TimeAgo Example</h1>
<amp-timeago
layout = "fixed"
width = "160"
height = "20"
datetime = "2018-10-01T00:37:33.809Z"
locale = "en">Monday 01 October 2018 00.37
</amp-timeago>
</body>
</html>เอาต์พุต
ตามค่าเริ่มต้นภาษาจะถูกตั้งค่าเป็น en เราสามารถเปลี่ยนเวลาเดิมและแสดงเวลาในโลแคลได้ตามต้องการ สถานที่ที่สามารถใช้กับแท็ก timeago ได้แสดงไว้ในตารางที่แสดงด้านล่าง
| ซีเนียร์ No | สถานที่และคำอธิบาย |
|---|---|
| 1 | ar อาหรับ |
| 2 | be เบลารุส |
| 3 | be เบลารุส |
| 4 | bg บัลแกเรีย |
| 5 | ca คาตาลัน |
| 6 | da เดนมาร์ก |
| 7 | de เยอรมัน |
| 8 | el กรีก |
| 9 | en ภาษาอังกฤษ |
| 10 | enShort อังกฤษ - สั้น |
| 11 | es ภาษาสเปน |
| 12 | eu บาสก์ |
| 13 | fi ภาษาฟินแลนด์ |
| 14 | fr ฝรั่งเศส |
| 15 | he ฮีบรู |
| 16 | hu ฮังการี |
| 17 | inBG บางลา |
| 18 | inHI ภาษาฮินดี |
| 19 | inID มาเลย์ |
| 20 | it อิตาลี |
| 21 | ja ญี่ปุ่น |
| 22 | ko เกาหลี |
| 23 | ml มาลายาลัม |
| 24 | nbNO Bokmålของนอร์เวย์ |
| 25 | nl ดัตช์ |
| 26 | nnNO Nynorsk ของนอร์เวย์ |
| 27 | pl ขัด |
| 28 | ptBR โปรตุเกส |
| 29 | ro โรมาเนีย |
| 30 | ru รัสเซีย |
| 31 | sv สวีเดน |
| 32 | ta ทมิฬ |
| 33 | th ไทย |
| 34 | tr ตุรกี |
| 35 | uk ยูเครน |
| 36 | vi เวียดนาม |
| 37 | zhCN ชาวจีน |
| 38 | zhTW ไต้หวัน |
ให้เราพูดคุยเกี่ยวกับสถานที่บางแห่งโดยใช้ตัวอย่างการทำงานตามที่ระบุด้านล่าง -
ตัวอย่าง
<!doctype html>
<html amp lang = "en">
<head>
<meta charset = "utf-8">
<script async src = "https://cdn.ampproject.org/v0.js"></script>
<title>Google AMP - TimeAgo Using Locale</title>
<link rel = "canonical" href = "http://example.ampproject.org/article-metadata.html">
<meta name = "viewport" content = "width = device-width,minimum-scale = 1, initial-scale = 1">
<style amp-boilerplate>
body{
-webkit-animation:
-amp-start 8s steps(1,end) 0s 1 normal both;-moz-animation:
-amp-start 8s steps(1,end) 0s 1 normal both;-ms-animation:
-amp-start 8s steps(1,end) 0s 1 normal both;animation:
-amp-start 8s steps(1,end) 0s 1 normal both
}
@-webkit-keyframes
-amp-start{from{visibility:hidden}to{visibility:visible}}@-moz-keyframes
-amp-start{from{visibility:hidden}to{visibility:visible}}@-ms-keyframes
-amp-start{from{visibility:hidden}to{visibility:visible}}@-o-keyframes
-amp-start{from{visibility:hidden}to{visibility:visible}}@keyframes
-amp-start{from{visibility:hidden}to{visibility:visible}}
</style>
<noscript>
<style amp-boilerplate>
body{
-webkit-animation:none;
-moz-animation:none;-ms
-animation:none;
animation:none
}
</style>
</noscript>
<script async custom-element = "amp-timeago"
src = "https://cdn.ampproject.org/v0/amp-timeago-0.1.js">
</script>
</head>
<body>
<h1>Google AMP - TimeAgo Example Using Locale</h1>
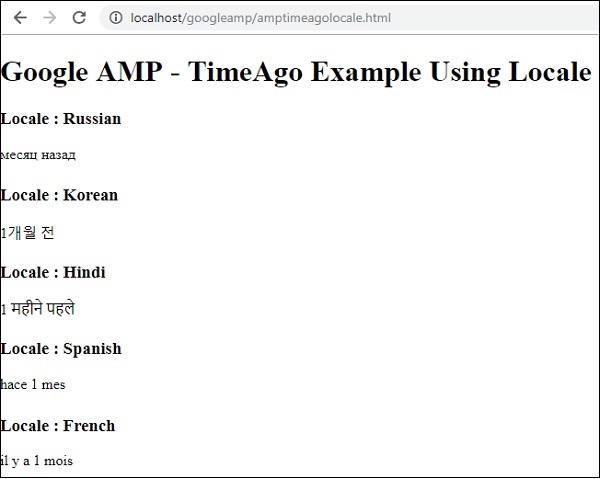
<h3>Locale : Russian</h3>
<amp-timeago layout = "fixed"
width = "160" height = "20"
datetime = "2018-10-01T00:37:33.809Z"
locale = "ru">
Monday 01 October 2018 00.37
</amp-timeago>
<h3>Locale : Korean</h3>
<amp-timeago
layout = "fixed"
width = "160"
height = "20"
datetime = "2018-10-01T00:37:33.809Z"
locale = "ko">
Monday 01 October 2018 00.37
</amp-timeago>
<h3>Locale : Hindi</h3>
<amp-timeago
layout = "fixed"
width = "160"
height = "20"
datetime = "2018-10-01T00:37:33.809Z"
locale = "inHI">
Monday 01 October 2018 00.37
</amp-timeago>
<h3>Locale : Spanish</h3>
<amp-timeago
layout = "fixed"
width = "160"
height = "20"
datetime = "2018-10-01T00:37:33.809Z"
locale = "es">
Monday 01 October 2018 00.37
</amp-timeago>
<h3>Locale : French</h3>
<amp-timeago
layout = "fixed"
width = "160"
height = "20"
datetime = "2018-10-01T00:37:33.809Z"
locale = "fr">
Monday 01 October 2018 00.3
</amp-timeago>
</body>
</html>เอาต์พุต
ผลลัพธ์ของโค้ดด้านบนเป็นดังที่แสดงด้านล่าง -
ในกรณีที่ต้องเปลี่ยนการแสดงผล "X time ago" เราสามารถใช้แอตทริบิวต์ "ตัด" กับ timeago ได้ Cutoff ใช้ค่าเป็นวินาทีเพื่อกำจัดการแสดงผลก่อนหน้านี้
ให้เราเข้าใจสิ่งนี้ด้วยความช่วยเหลือของตัวอย่างการทำงานที่ให้ไว้ด้านล่าง -
ตัวอย่าง
<!doctype html>
<html amp lang = "en">
<head>
<meta charset = "utf-8">
<script async src = "https://cdn.ampproject.org/v0.js"></script>
<title>Google AMP - TimeAgo</title>
<link rel = "canonical" href = "http://example.ampproject.org/article-metadata.html">
<meta name = "viewport" content = "width = device-width,minimum-scale=1, initial-scale=1">
<style amp-boilerplate>
body{
-webkit-animation:
-amp-start 8s steps(1,end) 0s 1 normal both;-moz-animation:
-amp-start 8s steps(1,end) 0s 1 normal both;-ms-animation:
-amp-start 8s steps(1,end) 0s 1 normal both;animation:
-amp-start 8s steps(1,end) 0s 1 normal both
}
@-webkit-keyframes
-amp-start{from{visibility:hidden}to{visibility:visible}}@-moz-keyframes
-amp-start{from{visibility:hidden}to{visibility:visible}}@-ms-keyframes
-amp-start{from{visibility:hidden}to{visibility:visible}}@-o-keyframes
-amp-start{from{visibility:hidden}to{visibility:visible}}@keyframes
-amp-start{from{visibility:hidden}to{visibility:visible}}
</style>
<noscript>
<style amp-boilerplate>
body{
-webkit-animation:none;
-moz-animation:none;
-ms-animation:none;
animation:none
}
</style>
</noscript>
<script async custom-element = "amp-timeago"
src = "https://cdn.ampproject.org/v0/amp-timeago-0.1.js">
</script>
</head>
<body>
<h1>Google AMP - TimeAgo Example</h1>
<amp-timeago
layout = "fixed"
width = "160"
height = "20"
datetime = "2018-10-01T00:37:33.809Z"
locale = "en"
cutoff = "300">
Monday 01 October 2018 00.37
</amp-timeago>
</body>
</html>เอาต์พุต

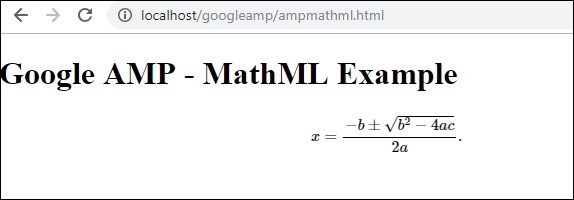
เมื่อใช้ MathML เราสามารถแสดงสูตรคณิตศาสตร์ ในบทนี้ให้เราดูตัวอย่างการทำงานวิธีการใช้ MathML และทำงานกับสูตรทางคณิตศาสตร์สองสามรายการเพื่อแสดงสิ่งเดียวกัน
ในการทำงานกับ MathML เราจำเป็นต้องรวมไฟล์ javascript ต่อไปนี้ -
<script async custom-element = "amp-mathml"
src = "https://cdn.ampproject.org/v0/amp-mathml-0.1.js">
</script>แท็ก AMP ของ MathML
แท็กแอมป์ mathML มีรูปแบบดังแสดงที่นี่ -
<amp-mathml layout = "container"
data-formula = "\[x = {-b \pm \sqrt{b^2-4ac} \over 2a}.\]">
</amp-mathml>โปรดทราบว่าไฟล์ data-formula เป็นแอตทริบิวต์บังคับที่กำหนดสูตร
ตัวอย่าง
ขอให้เราเข้าใจแท็กนี้ดีขึ้นด้วยความช่วยเหลือของตัวอย่าง
<!doctype html>
<html amp lang = "en">
<head>
<meta charset = "utf-8">
<script async src = "https://cdn.ampproject.org/v0.js"></script>
<title>Google AMP - MathML</title>
<link rel = "canonical" href = " http://example.ampproject.org/article-metadata.html">
<meta name = "viewport" content = "width = device-width,minimum-scale = 1,initial-scale = 1">
<style amp-boilerplate>
body{
-webkit-animation:
-amp-start 8s steps(1,end) 0s 1 normal both;-moz-animation:
-amp-start 8s steps(1,end) 0s 1 normal both;-ms-animation:
-amp-start 8s steps(1,end) 0s 1 normal both;animation:
-amp-start 8s steps(1,end) 0s 1 normal both
}
@-webkit-keyframes
-amp-start{from{visibility:hidden}to{visibility:visible}}@-moz-keyframes
-amp-start{from{visibility:hidden}to{visibility:visible}}@-ms-keyframes
-amp-start{from{visibility:hidden}to{visibility:visible}}@-o-keyframes
-amp-start{from{visibility:hidden}to{visibility:visible}}@keyframes
-amp-start{from{visibility:hidden}to{visibility:visible}}
</style>
<noscript>
<style amp-boilerplate>
body{
-webkit-animation:none;
-moz-animation:none;
-ms-animation:none;
animation:none
}
</style>
</noscript>
<script async custom-element = "amp-mathml"
src = "https://cdn.ampproject.org/v0/amp-mathml-0.1.js">
</script>
</head>
<body>
<h1>Google AMP - MathML Example</h1>
<amp-mathml layout = "container"
data-formula = "\[x = {-b \pm \sqrt{b^2-4ac} \over 2a}.\]">
</amp-mathml>
</body>
</html>เอาต์พุต
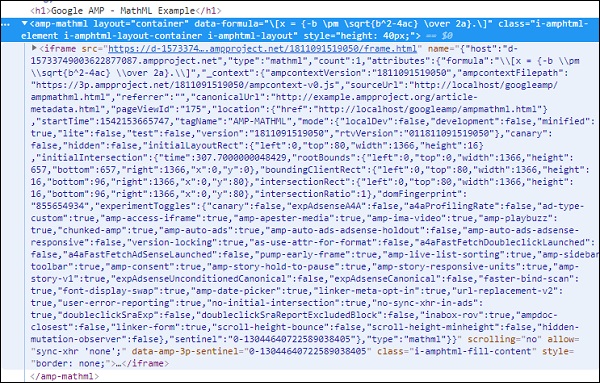
แท็ก Amp-mathml เมื่อรันแสดงผลใน iframe ดังที่แสดงด้านล่าง -
แท็กแอมป์ amp-fit-textจะลดขนาดตัวอักษรหากพื้นที่ไม่เพียงพอที่จะแสดงผล บทนี้กล่าวถึงแท็กนี้โดยละเอียด
เพื่อให้ amp-fit-text ทำงานได้เราต้องเพิ่มสคริปต์ต่อไปนี้ -
<script async custom-element = "amp-fit-text"
src = "https://cdn.ampproject.org/v0/amp-fit-text-0.1.js">
</script>แอมป์พอดี - แท็กข้อความ
รูปแบบสำหรับแท็กข้อความ amp-fit แสดงไว้ด้านล่าง -
<amp-fit-text width = "200" height = "200" layout = "responsive">
Text here
</amp-fit-text>ตัวอย่าง
ขอให้เราเข้าใจแท็กนี้ดีขึ้นด้วยความช่วยเหลือของตัวอย่าง
<!doctype html>
<html amp lang = "en">
<head>
<meta charset = "utf-8">
<script async src = "https://cdn.ampproject.org/v0.js"></script>
<title>Google AMP - Amp Fit-Text</title>
<link rel = "canonical" href = "http://example.ampproject.org/article-metadata.html">
<meta name = "viewport" content = "width = device-width,minimum-scale = 1, initial-scale = 1">
<style amp-boilerplate>
body{
-webkit-animation:-amp-start 8s steps(1,end)
0s 1 normal both;-moz-animation:
-amp-start 8s steps(1,end) 0s 1 normal both;-ms-animation:
-amp-start 8s steps(1,end) 0s 1 normal both;animation:
-amp-start 8s steps(1,end) 0s 1 normal both
}
@-webkit-keyframes
-amp-start{from{visibility:hidden}to{visibility:visible}}@-moz-keyframes
-amp-start{from{visibility:hidden}to{visibility:visible}}@-ms-keyframes
-amp-start{from{visibility:hidden}to{visibility:visible}}@-o-keyframes
-amp-start{from{visibility:hidden}to{visibility:visible}}@keyframes
-amp-start{from{visibility:hidden}to{visibility:visible}}
</style>
<noscript>
<style amp-boilerplate>
body{
-webkit-animation:none;-moz-animation:none;-ms
-animation:none;animation:none}
</style>
</noscript>
<script async custom-element = "amp-fit-text"
src = "https://cdn.ampproject.org/v0/amp-fit-text-0.1.js">
</script>
</head>
<body>
<h1>Google AMP - Amp Fit-Text</h1>
<div style = "width:150px;height:150px; ">
<amp-fit-text
width = "150"
height = "150"
layout = "responsive">
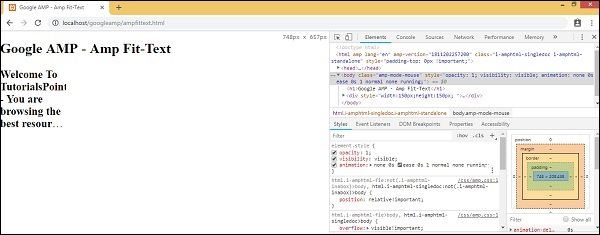
<b>Welcome To TutorialsPoint - You are browsing the best resource
for Online Education</b>
</amp-fit-text>
</div>
</body>
</html>เอาต์พุต
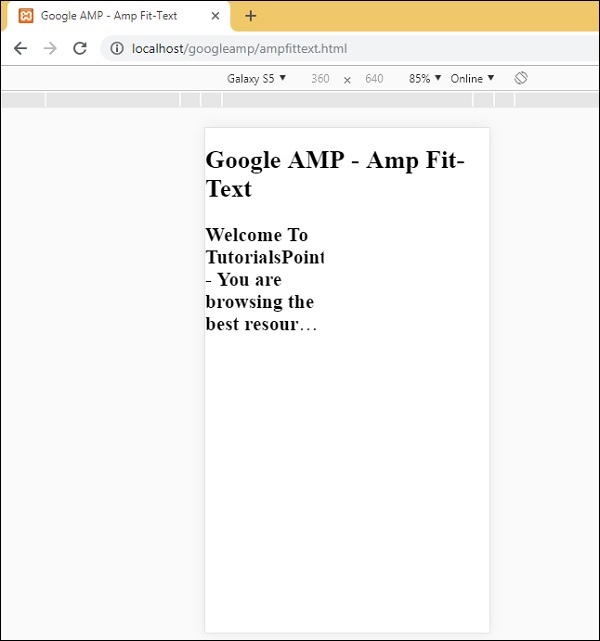
ผลลัพธ์ของรหัสที่ระบุข้างต้นเป็นดังที่แสดงด้านล่าง -
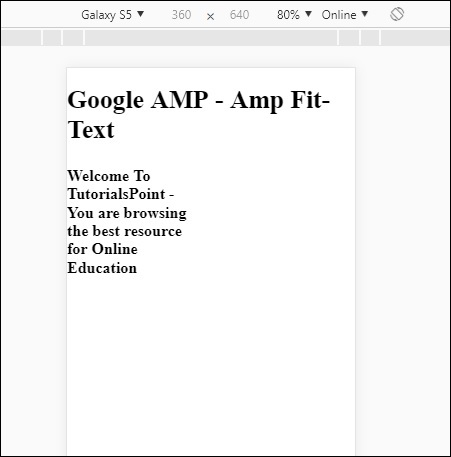
หากคุณเห็นการแสดงผลโดยใช้ amp-fit-text เนื้อหาจะพยายามปรับเปลี่ยนตามพื้นที่ที่มี
Amp-fit-text มาพร้อมกับ 2 แอตทริบิวต์ max-font-size และ min-font-size.
เมื่อเราใช้ max-font-size และหากไม่มีพื้นที่ว่างในการแสดงผลข้อความก็จะพยายามลดขนาดและปรับภายในช่องว่างที่มี
ในกรณีที่เราระบุ min-font-size และหากไม่มีช่องว่างก็จะตัดข้อความและแสดงจุดที่ซ่อนข้อความไว้
ตัวอย่าง
ให้เราดูตัวอย่างการทำงานที่เราจะระบุทั้งขนาดตัวอักษรสูงสุดและขนาดแบบอักษรขั้นต่ำให้กับ amp-fit-text
<!doctype html>
<html amp lang = "en">
<head>
<meta charset = "utf-8">
<script async src = "https://cdn.ampproject.org/v0.js"></script>
<title>Google AMP - Amp Fit-Text</title>
<link rel = "canonical" href = " http://example.ampproject.org/article-metadata.html">
<meta name = "viewport" content = "width = device-width,minimum-scale = 1,initial-scale = 1">
<style amp-boilerplate>
body{
-webkit-animation:
-amp-start 8s steps(1,end) 0s 1 normal both;-moz-animation:
-amp-start 8s steps(1,end) 0s 1 normal both;-ms-animation:
-amp-start 8s steps(1,end) 0s 1 normal both;animation:
-amp-start 8s steps(1,end) 0s 1 normal both
}
@-webkit-keyframes
-amp-start{from{visibility:hidden}to{visibility:visible}}@-moz-keyframes
-amp-start{from{visibility:hidden}to{visibility:visible}}@-ms-keyframes
-amp-start{from{visibility:hidden}to{visibility:visible}}@-o-keyframes
-amp-start{from{visibility:hidden}to{visibility:visible}}@keyframes
-amp-start{from{visibility:hidden}to{visibility:visible}}
</style>
<noscript>
<style amp-boilerplate>
body{
-webkit-animation:none;
-moz-animation:none;
-ms-animation:none;
animation:none}
</style>
</noscript>
<script async custom-element = "amp-fit-text" src =
"https://cdn.ampproject.org/v0/amp-fit-text-0.1.js">
</script>
</head>
<body>
<h1>Google AMP - Amp Fit-Text</h1>
<div style = "width:150px;height:150px; ">
<amp-fit-text
width = "150"
height = "150"
layout = "responsive"
max-font-size = "30"
min-font-size = "25">
<b>Welcome To TutorialsPoint - You are
browsing the best resource for Online Education</b>
</amp-fit-text>
</div>
</body>
</html>เอาต์พุต

ส่วนประกอบแอมป์อื่นที่เรียกว่าการนับถอยหลังวันที่ของแอมป์ซึ่งใช้เพื่อแสดงวันชั่วโมงนาทีวินาทีจนถึงวันที่กำหนดเช่น Y2K38 ( 2038)ตามค่าเริ่มต้นการแสดงผลสามารถทำได้ตามสถานที่ที่คุณเลือก โดยค่าเริ่มต้นจะเป็น en (ภาษาอังกฤษ) แอมป์วันที่นับถอยหลังใช้เทมเพลต amp-mustache สำหรับการแสดงผลข้อมูล
ในบทนี้เราจะดูตัวอย่างการทำงานเพื่อทำความเข้าใจรายละเอียดเพิ่มเติมเกี่ยวกับ amp-date-countdown
ในการทำงานกับ amp-date-countdown เราจำเป็นต้องเพิ่มสคริปต์ต่อไปนี้
สำหรับแอมป์วันที่นับถอยหลัง
<script async custom-element = "amp-date-countdown"
src = "https://cdn.ampproject.org/v0/amp-date-countdown-0.1.js">
</script>สำหรับแอมป์หนวด
<script async custom-template = "amp-mustache"
src = "https://cdn.ampproject.org/v0/amp-mustache-0.1.js">
</script>แอมป์วันที่ - แท็กนับถอยหลัง
แท็ก amp-date-countdown มีดังนี้ -
<amp-date-countdown timestamp-seconds = "2100466648"
layout = "fixed-height"
height = "50">
<template type = "amp-mustache">
<p class = "p1">
{{d}} days, {{h}} hours, {{m}} minutes and {{s}} seconds until
<a href = "https://en.wikipedia.org/wiki/Year_2038_problem">
Y2K38
</a>.
</p>
</template>
</amp-date-countdown>แอตทริบิวต์สำหรับ amp-date-countdown
แอตทริบิวต์สำหรับ amp-date-countdown แสดงอยู่ในตารางที่นี่ -
| ซีเนียร์ No | คุณสมบัติและคำอธิบาย |
|---|---|
| 1 | end-date วันที่จัดรูปแบบ ISO เพื่อนับถอยหลัง ตัวอย่างเช่น 2025-08-01T00: 00: 00 + 08: 00 |
| 2 | timestamp-ms ค่ายุค POSIX หน่วยเป็นมิลลิวินาที ถือว่าเป็นเขตเวลา UTC ตัวอย่างเช่น timestamp-ms = "1521880470000" |
| 3 | timestamp-seconds ค่ายุค POSIX เป็นวินาที ถือว่าเป็นเขตเวลา UTC ตัวอย่างเช่น timestamp-seconds = "1521880470" |
| 4 | timeleft-ms ค่าหน่วยเป็นมิลลิวินาทีซึ่งเหลือให้นับถอยหลัง ตัวอย่างเช่น 50 ชั่วโมง left timeleft-ms = "180,000,000" |
| 5 | offset-seconds (optional) จำนวนบวกหรือลบซึ่งระบุจำนวนวินาทีที่จะเพิ่มหรือลบออกจากวันที่สิ้นสุดที่กำหนด ตัวอย่างเช่น offset-seconds = "60" จะเพิ่ม 60 วินาทีในวันที่สิ้นสุด |
| 6 | when-ended (optional) ระบุว่าจะหยุดตัวจับเวลาหรือไม่เมื่อถึง 0 วินาที สามารถตั้งค่าเป็นหยุด (ค่าเริ่มต้น) เพื่อระบุตัวจับเวลาให้หยุดที่ 0 วินาทีและจะไม่ผ่านวันที่สุดท้ายหรือยังคงระบุว่าตัวจับเวลาควรดำเนินต่อไปหลังจากถึง 0 วินาที |
| 7 | locale (optional) สตริงภาษาสากลสำหรับหน่วยจับเวลาแต่ละหน่วย ค่าเริ่มต้นคือ en (สำหรับภาษาอังกฤษ) ค่าที่รองรับแสดงอยู่ด้านล่าง |
รูปแบบ
รูปแบบที่ amp-date-countdown ใช้เพื่อแสดงการนับถอยหลังมีให้ในตารางต่อไปนี้ -
| ซีเนียร์ No | รูปแบบและคำอธิบาย |
|---|---|
| 1 | d แสดงวันเป็น 0,1,2,3 ... อินฟินิตี้ |
| 2 | dd แสดงวันเป็น 00,01,02,03 ... อินฟินิตี้ |
| 3 | h แสดงชั่วโมงเป็น 0,1,2,3 ... อินฟินิตี้ |
| 4 | hh แสดงชั่วโมงเป็น 00,01,02,03 ... อินฟินิตี้ |
| 5 | m แสดงนาทีเป็น 0,1,2,3,4 …อินฟินิตี้ |
| 6 | mm แสดงนาทีเป็น 00,01,02,03 … .infinity |
| 7 | s แสดงวินาทีเป็น 0,1,2,3 ... อินฟินิตี้ |
| 8 | ss แสดงวินาทีเป็น 00,01,02,03 … .infinity |
| 9 | days แสดงสตริงวันหรือวันตามสถานที่ |
| 10 | hours แสดงสตริงชั่วโมงหรือชั่วโมงตามสถานที่ |
| 11 | minutes แสดงสตริงนาทีหรือนาทีตามโลแคล |
| 12 | seconds แสดงสตริงวินาทีหรือวินาทีตามโลแคล |
ตัวอย่าง
<!doctype html>
<html amp lang = "en">
<head>
<meta charset = "utf-8">
<script async src = "https://cdn.ampproject.org/v0.js"></script>
<title>Google AMP - Amp Date-Countdown</title>
<link rel = "canonical" href = " http://example.ampproject.org/article-metadata.html">
<meta name = "viewport" content = "width = device-width,minimum-scale = 1,initial-scale = 1">
<style amp-boilerplate>
body{-webkit-animation:-amp-start 8s steps(1,end)
0s 1 normal both;-moz-animation:
-amp-start 8s steps(1,end) 0s 1 normal both;-ms-animation:
-amp-start 8s steps(1,end) 0s 1 normal both;animation:
-amp-start 8s steps(1,end) 0s 1 normal both
}
@-webkit-keyframes
-amp-start{from{visibility:hidden}to{visibility:visible}}@-moz-keyframes
-amp-start{from{visibility:hidden}to{visibility:visible}}@-ms-keyframes
-amp-start{from{visibility:hidden}to{visibility:visible}}@-o-keyframes
-amp-start{from{visibility:hidden}to{visibility:visible}}@keyframes
-amp-start{from{visibility:hidden}to{visibility:visible}}
</style>
<noscript>
<style amp-boilerplate>
body{-webkit-animation:none;-moz-animation:none;-ms
-animation:none;animation:none}
</style>
</noscript>
<script async custom-element = "amp-date-countdown"
src = "https://cdn.ampproject.org/v0/amp-date-countdown-0.1.js">
</script>
<script async custom-template="amp-mustache" src=
"https://cdn.ampproject.org/v0/amp-mustache-0.1.js">
</script>
</head>
<body>
<h1>Google AMP - Amp Date-Countdown</h1>
<amp-date-countdown
timestamp-seconds = "2145683234"
layout = "fixed-height"
height = "50">
<template type = "amp-mustache">
<p class = "p1">
{{d}} days, {{h}} hours, {{m}} minutes and
{{s}} seconds until
<a href = "https://en.wikipedia.org/wiki/Year_2038_problem">
Y2K38
</a>.
</p>
</template>
</amp-date-countdown>
</body>
</html>เอาต์พุต
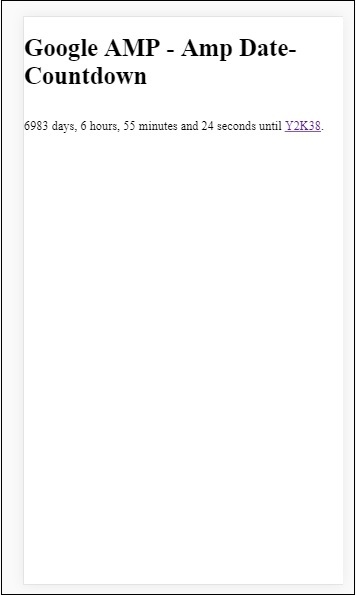
ตัวอย่าง
ให้เราเข้าใจแอตทริบิวต์ amp-countdown offset-seconds ด้วยตัวอย่างการทำงาน -
<!doctype html>
<html amp lang = "en">
<head>
<meta charset = "utf-8">
<script async src = "https://cdn.ampproject.org/v0.js"></script>
<title>Google AMP - Amp Date-Countdown</title>
<link rel = "canonical" href = " http://example.ampproject.org/article-metadata.html">
<meta name = "viewport" content = "width = device-width,minimum-scale = 1,initial-scale = 1">
<style amp-boilerplate>
body{
-webkit-animation:-amp-start 8s steps(1,end)
0s 1 normal both;-moz-animation:
-amp-start 8s steps(1,end) 0s 1 normal both;-ms-animation:
-amp-start 8s steps(1,end) 0s 1 normal both;animation:
-amp-start 8s steps(1,end) 0s 1 normal both
}
@-webkit-keyframes
-amp-start{from{visibility:hidden}to{visibility:visible}}@-moz-keyframes
-amp-start{from{visibility:hidden}to{visibility:visible}}@-ms-keyframes
-amp-start{from{visibility:hidden}to{visibility:visible}}@-o-keyframes
-amp-start{from{visibility:hidden}to{visibility:visible}}@keyframes
-amp-start{from{visibility:hidden}to{visibility:visible}}
</style>
<noscript>
<style amp-boilerplate>
body{
-webkit-animation:none;-moz-animation:none;-ms
-animation:none;animation:none}
</style>
</noscript>
<script async custom-element = "amp-date-countdown"
src = "https://cdn.ampproject.org/v0/amp-date-countdown-0.1.js">
</script>
<script async custom-template = "amp-mustache"
src = "https://cdn.ampproject.org/v0/amp-mustache-0.1.js">
</script>
</head>
<body>
<h1>Google AMP - Amp Date-Countdown</h1>
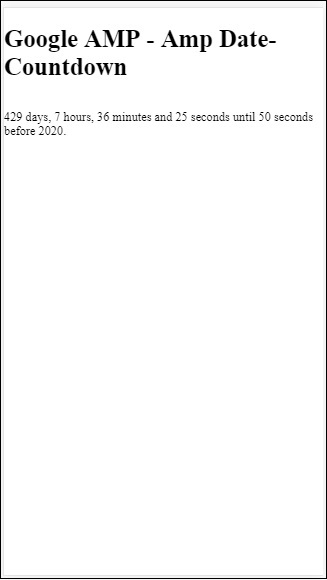
<amp-date-countdown
end-date = "2020-01-19T08:14:08.000Z"
offset-seconds = "-50"
layout = "fixed-height"
height = "100">
<template type = "amp-mustache">
<p class = "p1">
{{d}} days, {{h}} hours, {{m}}
minutes and {{s}} seconds until 50
seconds before 2020.
</p>
</template>
</amp-date-countdown>
</body>
</html>เอาต์พุต
รายชื่อสถานที่ที่รองรับ
ต่อไปนี้เป็นรายการของสถานที่ที่รองรับโดย amp-date-countdown -
| ซีเนียร์ No | ชื่อและสถานที่ |
|---|---|
| 1 | en ภาษาอังกฤษ |
| 2 | es ภาษาสเปน |
| 3 | fr ฝรั่งเศส |
| 4 | de เยอรมัน |
| 5 | id ชาวอินโดนีเซีย |
| 6 | it อิตาลี |
| 7 | ja ญี่ปุ่น |
| 8 | ko เกาหลี |
| 9 | nl ดัตช์ |
| 10 | pt โปรตุเกส |
| 11 | ru รัสเซีย |
| 12 | th ไทย |
| 13 | tr ตุรกี |
| 14 | vi เวียดนาม |
| 15 | zh-cn ภาษาจีนประยุกต์ |
| 16 | zh-tw ภาษาจีนดั้งเดิม |
ตอนนี้เราจะลองใช้ตัวอย่างหนึ่งเพื่อแสดงการนับถอยหลังโดยใช้ภาษาใดภาษาหนึ่งด้านบน
ตัวอย่าง
<!doctype html>
<html amp lang = "en">
<head>
<meta charset = "utf-8">
<script async src = "https://cdn.ampproject.org/v0.js"></script>
<title>Google AMP - Amp Date-Countdown</title>
<link rel = "canonical" href = "http://example.ampproject.org/article-metadata.html">
<meta name="viewport" content="width = device-width, minimum-scale = 1,initial-scale = 1">
<style amp-boilerplate>
body{
-webkit-animation:
-amp-start 8s steps(1,end)0s 1 normal both;-moz-animation:
-amp-start 8s steps(1,end) 0s 1 normal both;-ms-animation:
-amp-start 8s steps(1,end) 0s 1 normal both;animation:
-amp-start 8s steps(1,end) 0s 1 normal both
}
@-webkit-keyframes
-amp-start{from{visibility:hidden}to{visibility:visible}}@-moz-keyframes
-amp-start{from{visibility:hidden}to{visibility:visible}}@-ms-keyframes
-amp-start{from{visibility:hidden}to{visibility:visible}}@-o-keyframes
-amp-start{from{visibility:hidden}to{visibility:visible}}@keyframes
-amp-start{from{visibility:hidden}to{visibility:visible}}
</style>
<noscript>
<style amp-boilerplate>
body{
-webkit-animation:none;
-moz-animation:none;
-ms-animation:none;
animation:none}
</style>
</noscript>
<script async custom-element = "amp-date-countdown"
src = "https://cdn.ampproject.org/v0/amp-date-countdown-0.1.js">
</script>
<script async custom-template = "amp-mustache"
src = "https://cdn.ampproject.org/v0/amp-mustache-0.1.js">
</script>
</head>
<body>
<h1>Google AMP - Amp Date-Countdown</h1>
<amp-date-countdown
locale = "ja"
end-date = "2020-01-19T08:14:08.000Z"
offset-seconds = "-50"
layout = "fixed-height"
height = "100">
<template type = "amp-mustache">
<p class = "p1">
{{d}} {{days}}, {{h}} {{hours}}, {{m}}
{{minutes}} and {{s}} {{seconds}} until
50 seconds before 2020.
</p>
</template>
</amp-date-countdown>
</body>
</html>เอาต์พุต

AMP Datepicker เป็นคอมโพเนนต์แอมป์ที่แสดงปฏิทินในหน้าซึ่งผู้ใช้สามารถเลือกวันที่ได้ AMP datepicker สามารถแสดงได้เหมือนปฏิทินแบบคงที่หรือตามการเลือกอินพุตนั่นคือการคลิกปุ่ม
เพื่อให้ amp-date-picker ทำงานได้เราจำเป็นต้องเพิ่มสคริปต์ต่อไปนี้ในหน้า -
<script async custom-element = "amp-date-picker"
src = "https://cdn.ampproject.org/v0/amp-date-picker-0.1.js">
</script>แท็กตัวเลือกวันที่แอมป์
แท็กของ amp-date-picker มีลักษณะดังนี้ -
<amp-date-picker layout = "fixed-height" height = "360"></amp-date-picker>คุณสมบัติที่รองรับ
รองรับแอตทริบิวต์ต่อไปนี้สำหรับ amp-date-picker -
| ซีเนียร์ No | คุณสมบัติและคำอธิบาย |
|---|---|
| 1 | mode ตัวเลือกที่มีคือแบบคงที่และแบบซ้อนทับ สำหรับแบบคงที่ปฏิทินจะเปิดขึ้นตามค่าเริ่มต้นในหน้า สำหรับการวางซ้อนปฏิทินจะเปิดขึ้นเมื่อมีการโต้ตอบ |
| 2 | mode ตัวเลือกที่ใช้ได้คือแบบเดี่ยวและแบบช่วง คุณสามารถเลือกวันที่ในปฏิทินได้เพียงวันเดียว ด้วยช่วงคุณสามารถเลือกวันที่ได้มากกว่าหนึ่งวัน แต่อยู่ในช่วงต่อเนื่อง |
| 3 | input-selector สิ่งนี้สามารถเป็นตัวเลือกแบบสอบถามสำหรับการป้อนวันที่ ตัวอย่างเช่นสำหรับ id คือ #nameoftheid สำหรับคลาสที่เป็น nameoftheclass. วันที่จะได้รับการอัปเดตสำหรับแท็กที่กำหนดรหัส |
| 4 | start-input-selector สิ่งนี้สามารถเป็นตัวเลือกแบบสอบถามสำหรับการป้อนวันที่ ตัวอย่างเช่นสำหรับ id คือ #nameoftheid สำหรับคลาสคือ. nameoftheclass วันที่จะได้รับการอัปเดตสำหรับแท็กที่กำหนดรหัส |
| 5 | end-input-selector สิ่งนี้สามารถเป็นตัวเลือกแบบสอบถามสำหรับการป้อนวันที่ ตัวอย่างเช่น id คือ #nameoftheid สำหรับคลาสคือ. nameoftheclass วันที่จะได้รับการอัปเดตสำหรับแท็กที่กำหนดรหัส |
| 6 | min วันที่แรกสุดที่ผู้ใช้อาจเลือก ต้องอยู่ในรูปแบบวันที่ ISO 8601 หากไม่มีแอตทริบิวต์ min วันที่ปัจจุบันจะเป็นวันที่ต่ำสุด |
| 7 | max วันที่ล่าสุดที่ผู้ใช้อาจเลือก ต้องอยู่ในรูปแบบวันที่ ISO 8601 หากไม่มีแอตทริบิวต์สูงสุดตัวเลือกวันที่จะไม่มีวันที่สูงสุด |
| 8 | month-format รูปแบบเดือนที่คุณต้องแสดงวันที่ที่เลือก โดยค่าเริ่มต้นค่าคือ "MMMM YYYY" |
| 9 | format รูปแบบที่คุณต้องการให้วันที่แสดงในช่องป้อนข้อมูลหรือ htmlelement ใด ๆ ที่ใช้ตัวเลือก โดยค่าเริ่มต้นคือ "YYYY-MM-DD" |
| 10 | week-day-format รูปแบบเพื่อแสดงวันในสัปดาห์ |
| 11 | locale สถานที่เพื่อแสดงมุมมองปฏิทิน โดยค่าเริ่มต้นคือ en |
| 12 | minimum-nights จำนวนคืนที่ผู้ใช้ต้องเลือกในช่วงวันที่ ค่าเริ่มต้นคือ "1" ค่า "0" ช่วยให้ผู้ใช้เลือกวันที่เดียวกันสำหรับวันที่เริ่มต้นและวันที่สิ้นสุด |
| 13 | number-of-months จำนวนเดือนที่จะแสดงพร้อมกันในมุมมองปฏิทิน ค่าเริ่มต้นคือ "1" |
| 14 | first-day-of-week วันที่ระบุเป็นวันแรกของสัปดาห์ (0-6) ค่าเริ่มต้นคือ "0" (วันอาทิตย์) |
| 15 | day-size ขนาดเป็น px ของเซลล์วันที่ในตารางมุมมองปฏิทิน ค่าเริ่มต้นคือ 39 |
คุณสมบัติหลักคือ type และ mode. สำหรับmode, เรามี static และ overlayพิมพ์ปฏิทิน สำหรับtype เราสามารถมี single และ rangeตัวเลือก. ด้วยtype = ”single” เราสามารถเลือกวันที่จากปฏิทินและสำหรับ type = ”range” เราสามารถเลือกได้มากกว่าหนึ่งข้อมูลในช่วง
ตอนนี้ให้เราทำความเข้าใจ amp-date-picker สำหรับปฏิทินประเภทคงที่และแบบซ้อนทับผ่านตัวอย่างการทำงานบางส่วน
เครื่องมือเลือกวันที่แบบคงที่ของ AMP
สำหรับเครื่องมือเลือกวันที่ประเภทคงที่เราจำเป็นต้องระบุโหมด = คงที่ดังที่แสดงในตัวอย่างด้านล่าง
ตัวอย่าง
<!doctype html>
<html amp lang = "en">
<head>
<meta charset = "utf-8">
<script async src = "https://cdn.ampproject.org/v0.js"></script>
<title>Google AMP - Amp Date-Picker Static </title>
<link rel = "canonical" href = " http://example.ampproject.org/article-metadata.html">
<meta name = "viewport" content = "width = device-width, minimum-scale = 1,initial-scale = 1">
<style amp-boilerplate>
body{
-webkit-animation:
-amp-start 8s steps(1,end) 0s 1 normal both;-moz-animation:
-amp-start 8s steps(1,end) 0s 1 normal both;-ms-animation:
-amp-start 8s steps(1,end) 0s 1 normal both;animation:
-amp-start 8s steps(1,end) 0s 1 normal both
}
@-webkit-keyframes
-amp-start{from{visibility:hidden}to{visibility:visible}}@-moz-keyframes
-amp-start{from{visibility:hidden}to{visibility:visible}}@-ms-keyframes
-amp-start{from{visibility:hidden}to{visibility:visible}}@-o-keyframes
-amp-start{from{visibility:hidden}to{visibility:visible}}@keyframes
-amp-start{from{visibility:hidden}to{visibility:visible}}
</style>
<noscript>
<style amp-boilerplate>
body{-webkit-animation:
none;-moz-animation:none;-ms-animation:none;animation:none}
</style>
</noscript>
<script async custom-element = "amp-date-picker"
src = "https://cdn.ampproject.org/v0/amp-date-picker-0.1.js">
</script>
<script async custom-element = "amp-bind"
src = "https://cdn.ampproject.org/v0/amp-bind-0.1.js">
</script>
<script async custom-template = "amp-mustache"
src = "https://cdn.ampproject.org/v0/amp-mustache-0.1.js">
</script>
<style>
input[type = text]{
width: 50%;
padding: 12px;
border: 1px
solid #ccc;
border-radius: 4px;
resize: vertical;
}
label {
padding: 12px 12px 12px 0;display: inline-block;
}
.col-label {
float: left;width: 25%;margin-top: 6px;
}
.col-content {
float: left;width: 75%;margin-top: 6px;
}
.row:after {
content: "";display: table;clear: both;
}
.amp_example {
background-color: #f1f1f1;
padding: 0.01em 16px;
margin: 20px 0;
box-shadow: 0 2px 4px 0
rgba(0,0,0,0.16),0 2px 10px 0
rgba(0,0,0,0.12)!important;
}
h3{font-family: "Segoe UI",Arial,sans-serif;
font-weight: 400;margin: 10px 0;}
</style>
</head>
<body>
<div class = "amp_example">
<h3>Google AMP - Amp Date-Picker using type = single</h3>
<amp-date-picker
id = "static-date"
type = "single"
mode = "static"
layout = "fixed-height"
height = "600"
format = "YYYY-MM-DD"
input-selector = "#date">
<div class = "row">
<div class = "col-label">
<label for = "start">
Date is:
</label>
</div>
<div class = "col-content">
<input type = "text" id = "date" name = "date"
placeholder = "Date Selected Is...">
</div>
</div>
</amp-date-picker>
<div>
</body>
</html>สังเกตว่าในตัวอย่างนี้เรากำลังแสดงปฏิทินเช่น datepicker ตามค่าเริ่มต้นบนหน้าจอ
วันที่ที่ผู้ใช้เลือกจะแสดงในช่องข้อความดังที่แสดงในหน้าจอสาธิตที่แสดงด้านล่าง -
เอาต์พุต
จะรับวันที่ที่เลือกจาก amp-date-picker ได้อย่างไร?
หากคุณตรวจสอบตัวอย่างข้างต้นจะมีแอตทริบิวต์ที่เรียกว่า input-selectorซึ่งจะได้รับรหัสของช่องข้อความ เมื่อผู้ใช้เลือกวันที่จะแสดงในช่องป้อนข้อมูล
<amp-date-picker
id = "static-date"
type = "single"
mode = "static"
layout = "fixed-height"
height = "600"
format = "YYYY-MM-DD"
input-selector = "#date"
<div class = "row">
<div class = "col-label">
<label for = "start">Date is:</label>
</div>
<div class = "col-content">
<input type = "text" id = "date" name = "date"
placeholder = "Date Selected Is...">
</div>
</div>
</amp-date-picker>คุณยังสามารถตั้งชื่อคุณสมบัติให้กับแอตทริบิวต์ตัวเลือกอินพุตได้ดังนี้ -
<amp-date-picker
type = "single"
mode = "static"
layout = "container"
input-selector = "[name = date]">
<input type = "text" id = "date" name = "date" placeholder = "Date Selected Is...">
</amp-date-picker>ในกรณีที่ไม่ได้กำหนดตัวเลือกอินพุตเกิน amp-date-picker จะสร้างฟิลด์อินพุตที่ซ่อนอยู่และตั้งชื่อเป็น date or ${id}-date โดยใช้ id ของตัวเลือก amp-date
เราจะพูดถึงตัวอย่างเพิ่มเติมบางส่วนที่มีแอตทริบิวต์ต่างๆที่มีอยู่ในตัวเลือกวันที่ ในข้างต้นเราสามารถเลือกวันเดียวได้ตามที่เรากล่าวไว้type=”single”และโหมดเป็นแบบคงที่ นอกจากนี้เรายังสามารถเลือกช่วงของวันที่โดยกำหนดประเภทเป็นtype=”range”.
ตัวอย่าง
<!doctype html>
<html amp lang = "en">
<head>
<meta charset = "utf-8">
<script async src = "https://cdn.ampproject.org/v0.js"></script>
<title>Google AMP - Amp Date-Picker Static </title>
<link rel = "canonical" href = "http://example.ampproject.org/article-metadata.html">
<meta name = "viewport" content = "width = device-width, minimum-scale = 1,initial-scale = 1">
<style amp-boilerplate>
body{-webkit-animation:
-amp-start 8s steps(1,end) 0s 1 normal both;-moz-animation:
-amp-start 8s steps(1,end) 0s 1 normal both;-ms-animation:
-amp-start 8s steps(1,end) 0s 1 normal both;animation:
-amp-start 8s steps(1,end) 0s 1 normal both
}
@-webkit-keyframes
-amp-start{from{visibility:hidden}to{visibility:visible}}@-moz-keyframes
-amp-start{from{visibility:hidden}to{visibility:visible}}@-ms-keyframes
-amp-start{from{visibility:hidden}to{visibility:visible}}@-o-keyframes
-amp-start{from{visibility:hidden}to{visibility:visible}}@keyframes
-amp-start{from{visibility:hidden}to{visibility:visible}}
</style>
<noscript>
<style amp-boilerplate>
body{
-webkit-animation:
none;-moz-animation:none;-ms-animation:none;animation:none}
</style>
</noscript>
<script async custom-element = "amp-date-picker"
src = "https://cdn.ampproject.org/v0/amp-date-picker-0.1.js">
</script>
<script async custom-element = "amp-bind"
src = "https://cdn.ampproject.org/v0/amp-bind-0.1.js">
</script>
<script async custom-template = "amp-mustache"
src = "https://cdn.ampproject.org/v0/amp-mustache-0.1.js">
</script>
<style>
input[type = text]{
width: 50%;
padding: 12px;
border: 1px solid #ccc;
border-radius: 4px;
resize: vertical;
}
label {padding: 12px 12px 12px 0;display: inline-block;}
.col-label {float: left;width: 25%;margin-top: 6px;}
.col-content {float: left;width: 75%;margin-top: 6px;}
.row:after {content: "";display: table;clear: both;}
.amp_example {
background-color: #f1f1f1;
padding: 0.01em 16px;
margin: 20px 0;
box-shadow: 0 2px 4px 0
rgba(0,0,0,0.16),0 2px 10px 0
rgba(0,0,0,0.12)!important;
}
h3{
font-family: "Segoe UI",Arial,sans-serif;
font-weight: 400;margin: 10px 0;
}
</style>
</head>
<body>
<div class = "amp_example">
<h3>Google AMP - Amp Date-Picker Static Multi Select Dates using type = range</h3>
<amp-date-picker
id = "static-date"
type = "range"
mode = "static"
layout = "fixed-height"
height = "600"
start-input-selector = "#start"
end-input-selector = "#end"
format = "YYYY-MM-DD"
input-selector = "#static-date-input">
<div class = "row">
<div class = "col-label">
<label for = "start">Start Date:</label>
</div>
<div class = "col-content">
<input type = "text" id = "start"
name = "start" placeholder = "Start Date">
</div>
</div>
<div class = "row">
<div class = "col-label">
<label for = "end">End Date:</label>
</div>
<div class = "col-content">
<input type = "text" id = "end"
name = "end" placeholder = "End Date">
</div>
</div>
</amp-date-picker>
</div>
</body>
</html>เอาต์พุต
ผลลัพธ์ของโค้ดที่แสดงด้านบนเป็นไปตามที่ระบุด้านล่าง -
How to get the start and end date using type= ”range” selected from amp-date-picker?
ในการรับวันที่เริ่มต้นและสิ้นสุดเราได้ใช้แอตทริบิวต์ amp-date-picker start-input-selector และ end-input-selector.
รายละเอียดของไวยากรณ์แสดงไว้ที่นี่ -
<amp-date-picker
id = "static-date"
type = "range"
mode = "static"
layout = "fixed-height"
height = "600"
start-input-selector = "#start"
end-input-selector="#end"
format = "YYYY-MM-DD"
input-selector = "#static-date-input">
<input type = "text" id = "start" name = "start" placeholder="Start Date">
<input type = "text" id = "end" name = "end" placeholder = "End Date">
</amp-date-picker>ตัวเลือกทั้งสองมี id ฟิลด์อินพุตที่เราต้องการให้แสดงวันที่เริ่มต้นและวันที่สิ้นสุด คุณยังสามารถตั้งชื่อช่องป้อนข้อมูลตามที่กล่าวไว้ที่นี่
AMP Overlay Date Picker
สำหรับตัวเลือกวันที่ของโหมดโอเวอร์เลย์ปฏิทินจะแสดงตามช่องป้อนข้อมูล เราสามารถซ้อนทับด้วย type =” single” และ type =” range” ตามที่เราเห็นสำหรับเครื่องมือเลือกวันที่แบบคงที่
ตอนนี้ให้เราดูตัวอย่างการทำงานของการเลือกช่วงวันที่สำหรับเครื่องมือเลือกวันที่ประเภทโอเวอร์เลย์
ตัวอย่าง
<!doctype html>
<html amp lang = "en">
<head>
<meta charset = "utf-8">
<script async src = "https://cdn.ampproject.org/v0.js"></script>
<itle>Google AMP - Amp Date-Picker Static</title>
<link rel = "canonical" href = "http://example.ampproject.org/article-metadata.html">
<meta name = "viewport" content = "width = device-width,minimum-scale = 1,initial-scale = 1">
<style amp-boilerplate>
body{
-webkit-animation:
-amp-start 8s steps(1,end) 0s 1 normal both;-moz-animation:
-amp-start 8s steps(1,end) 0s 1 normal both;-ms-animation:
-amp-start 8s steps(1,end) 0s 1 normal both;animation:
-amp-start 8s steps(1,end) 0s 1 normal both
}
@-webkit-keyframes
-amp-start{from{visibility:hidden}to{visibility:visible}}@-moz-keyframes
-amp-start{from{visibility:hidden}to{visibility:visible}}@-ms-keyframes
-amp-start{from{visibility:hidden}to{visibility:visible}}@-o-keyframes
-amp-start{from{visibility:hidden}to{visibility:visible}}@keyframes
-amp-start{from{visibility:hidden}to{visibility:visible}}
</style>
<noscript>
<style amp-boilerplate>
body{
-webkit-animation:
none;-moz-animation:none;-ms-animation:none;animation:none}
</style>
</noscript>
<script async custom-element = "amp-date-picker"
src = "https://cdn.ampproject.org/v0/amp-date-picker-0.1.js">
</script>
<script async custom-element = "amp-bind"
src = "https://cdn.ampproject.org/v0/amp-bind-0.1.js">
</script>
<script async custom-template = "amp-mustache"
src = "https://cdn.ampproject.org/v0/amp-mustache-0.1.js">
</script>
<style>
input[type=text]{
width: 50%;
padding: 12px;border:
1px solid #ccc;
border-radius: 4px;resize: vertical;
}
label {
padding: 12px 12px 12px 0;
display: inline-block;
font-family: "Segoe UI",Arial,sans-serif;
font-weight: 400;
}
.col-label {float: left;width: 25%;margin-top: 6px;}
.col-content {float: left;width: 75%;margin-top: 6px;}
.row:after {content: "";display: table;clear: both;}
.amp_example {
background-color: #f1f1f1;
padding: 0.01em 16px;
margin: 20px 0;
box-shadow: 0 2px 4px 0
rgba(0,0,0,0.16),0 2px 10px 0
rgba(0,0,0,0.12)!important;
}
h3{font-family: "Segoe UI",Arial,sans-serif;font-weight: 400;margin: 10px 0;}
button { background-color: #ACAD5C;
color: white;
padding: 12px 20px;
border: none;
border-radius: 4px;
cursor: pointer;
float: right;
}
</style>
</head>
<body>
<div class = "amp_example">
<h3>Google AMP - Amp Date-Picker Overlay Multi Select Dates using type = rangelt;/h3>
<amp-date-picker id = "overlay-date"
type = "range"
mode = "overlay"
start-input-selector = "#start"
end-input-selector = "#end"
format = "YYYY-MM-DD"
open-after-select
input-selector = "#start">
<div class = "row">
<div class = "col-label">
<label for = "start">Start Date:lt;/label>
</div>
<div class = "col-content">
<input type = "text" id = "start"
name = "start" placeholder = "Start Date">
</div>
</div>
<div class = "row">
<div class = "col-label">
<label for = "end">End Date:lt;/label>
</div>
<div class = "col-content">
<input type = "text" id="end" name = "end"
placeholder = "End Date">
</div>
</div>
<div class = "row">
<div class = "col-label">
</div>
<div class = "col-content">
<button class = "ampstart-btn caps" on = "tap:overlay-date.clear">
Clear
</button>
</div>
</div>
</amp-date-picker>
</div>
</body>
</html>เอาต์พุต
ผลลัพธ์ของโค้ดที่แสดงด้านบนเป็นไปตามที่ระบุด้านล่าง -
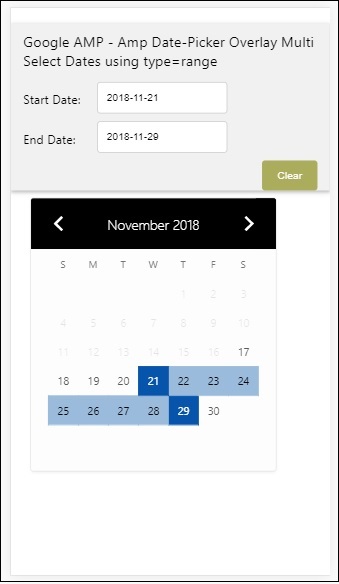
เราได้เห็นวิธีเริ่มต้นและวันที่สิ้นสุดแล้ว สังเกตว่าเราได้ใช้อีกหนึ่งคุณลักษณะที่นี่open-after-select. แอตทริบิวต์นี้จะเปิดการวางซ้อนไว้หลังจากที่เลือก หากคุณคลิกนอกตัวเลือกวันที่ระบบจะปิด นอกจากนี้ยังมีปุ่มเพิ่มที่เรียกว่าชัดเจน คลิกปุ่มล้างวันที่ที่เลือกด้วยการล้างไวยากรณ์ที่จะดำเนินการมีดังนี้ -
<button class = "ampstart-btn caps" on = "tap:overlay-date.clear">
Clear
</button>ในการเพิ่มเหตุการณ์เราต้องใช้ onแอตทริบิวต์ รายละเอียดเพิ่มเติมเกี่ยวกับเหตุการณ์ต่างๆจะกล่าวถึงในEventsบทของบทช่วยสอนนี้ เราได้ใช้ลักษณะการทำงานของแท็กและเพื่อกำหนดรหัสของ datepicker และเหตุการณ์ที่ชัดเจนซึ่งดูแลการล้างช่วงวันที่ที่เลือก
ต่อไปให้เราดูวิธีใช้ amp-date-picker เป็นไลท์บ็อกซ์
เครื่องมือเลือกวันที่ไลท์บ็อกซ์ AMP
ตัวเลือกวันที่สามารถใช้ภายในหน้าต่างโมดอล เรายังสามารถใช้ lightbox date-picker ได้เช่นเดียวกัน ให้เราเข้าใจสิ่งนี้ด้วยความช่วยเหลือของตัวอย่างการทำงาน
ในการใช้ตัวเลือกวันที่ภายในไลท์บ็อกซ์เราจำเป็นต้องเพิ่มสคริปต์กล่องไฟดังที่แสดงด้านล่าง -
<script async custom-element = "amp-lightbox"
src = "https://cdn.ampproject.org/v0/amp-lightbox-0.1.js">
</script>ตัวอย่าง
<!doctype html>
<html amp lang = "en">
<head>
<meta charset = "utf-8">
<script async src = "https://cdn.ampproject.org/v0.js"></script>
<title>Google AMP - Amp Date-Picker Static </title>
<link rel = "canonical" href = "http://example.ampproject.org/article-metadata.html">
<meta name = "viewport" content = "width=device-width,minimum-scale = 1,initial-scale = 1">
<style amp-boilerplate>
body{
-webkit-animation:
-amp-start 8s steps(1,end) 0s 1 normal both;-moz-animation:
-amp-start 8s steps(1,end) 0s 1 normal both;-ms-animation:
-amp-start 8s steps(1,end) 0s 1 normal both;animation:
-amp-start 8s steps(1,end) 0s 1 normal both
}
@-webkit-keyframes
-amp-start{from{visibility:hidden}to{visibility:visible}}@-moz-keyframes
-amp-start{from{visibility:hidden}to{visibility:visible}}@-ms-keyframes
-amp-start{from{visibility:hidden}to{visibility:visible}}@-o-keyframes
-amp-start{from{visibility:hidden}to{visibility:visible}}@keyframes
-amp-start{from{visibility:hidden}to{visibility:visible}}
</style>
<noscript>
<style amp-boilerplate>
body{
-webkit-animation:none;
-moz-animation:none;
-ms-animation:none;
animation:none}
</style>
</noscript>
<script async custom-element = "amp-date-picker"
src = "https://cdn.ampproject.org/v0/amp-date-picker-0.1.js">
</script>
<script async custom-element = "amp-bind" src = "
https://cdn.ampproject.org/v0/amp-bind-0.1.js">
<script>
<script async custom-template = "amp-mustache"
src = "https://cdn.ampproject.org/v0/amp-mustache-0.1.js">
</script>
<script async custom-element = "amp-lightbox"
src = "https://cdn.ampproject.org/v0/amp-lightbox-0.1.js">
</script>
<style>
input[type=text]{
width: 50%;
padding: 12px;
border: 1px solid #ccc;
border-radius: 4px;
resize: vertical;
}
label {
padding: 12px 12px 12px 0;
display: inline-block;
font-family: "Segoe UI",Arial,sans-serif;
font-weight: 400;
}
.col-label {
float: left;width: 25%;
margin-top: 6px;
}
.col-content {
float: left;
width: 75%;
margin-top: 6px;
}
.row:after {
content: "";
display: table;clear: both;
}
.amp_example {
background-color: #f1f1f1;
padding: 0.01em 16px;
margin: 20px 0;
box-shadow: 0 2px 4px 0 rgba(0,0,0,0.16),0 2px 10px 0rgba(0,0,0,0.12)!important;
}
h3{font-family: "Segoe UI",Arial,sans-serif;
font-weight: 400;
margin: 10px 0;
}
button {
background-color: #ACAD5C;
color: white;
padding: 12px 20px;
border: none;
border-radius: 4px;
cursor: pointer;
float: right;
}
.lightbox {background-color: rgba(100, 100, 100, 0.5);}
</style>
</head>
<body>
<div class = "amp_example">
<h3>Google AMP - Amp Date-Picker Overlay Multi Select Dates using type = range</h3>
<div class = "row">
<div class = "col-label">
<label for = "start">Start Date:</label>
<div>
<div class = "col-content">
<input type = "text" id = "start" name =
"start" placeholder = "Start Date" on = "tap:lightbox.open">
</div>
</div>
<div class = "row">
<div class = "col-label">
<label for = "end">End Date:</label>
</div>
<div class = "col-content">
<input type = "text" id = "end" name =
"end" placeholder = "End Date" on = "tap:lightbox.open">
</div>
</div>
<div class = "row">
<div class = "col-label"></div>
<div class = "col-content">
<button class = "ampstart-btn caps" on =
"tap:overlay-date.clear">Clear</button>
</div>
</div>
<amp-lightbox id = "lightbox" layout = "nodisplay" class = "lightbox">
<amp-date-picker id = "overlay-date"
type = "range"
layout = "fill"
start-input-selector = "#start"
end-input-selector = "#end"
format = "YYYY-MM-DD"
on = "activate: lightbox.open;deactivate: lightbox.close">
</amp-date-picker>
</amp-lightbox>
</div>
</body>
</html>เอาต์พุต
เมื่อผู้ใช้คลิกที่ช่องป้อนข้อมูลตัวเลือกวันที่จะเปิดขึ้นภายในไลท์บ็อกซ์ดังที่แสดงด้านล่าง -

ในการดำเนินการนี้มีการเพิ่มเหตุการณ์ในช่องป้อนข้อมูลดังที่แสดงด้านล่าง -
<input type = "text" id = "start" name = "start"
placeholder = "Start Date" on = "tap:lightbox.open">
<input type = "text" id = "end" name = "end"
placeholder = "End Date" on = "tap:lightbox.open">โปรดทราบว่า “on” คือเหตุการณ์ที่เรียกว่า tap - lightbox.open เพื่อเปิดไลท์บ็อกซ์
ไลท์บ็อกซ์คือ id ที่กำหนดให้กับ amp-lightbox ตามที่แสดงด้านล่าง Amp-date-picker เรียกว่าภายใน amp-lightbox และเปิดใช้งานเมื่อแตะช่องอินพุต
<amp-lightbox id = "lightbox" layout = "nodisplay" class = "lightbox">
<amp-date-picker id = "overlay-date"
type = "range"
layout = "fill"
start-input-selector = "#start"
end-input-selector = "#end"
format = "YYYY-MM-DD"
on = "activate: lightbox.open;deactivate: lightbox.close">
</amp-date-picker>
</amp-lightbox>Amp-story เป็นส่วนประกอบของแอมป์ที่ใช้เพื่อแสดงเนื้อหาที่ทำให้ผู้ใช้มีส่วนร่วมกับเรื่องราว ตัวอย่างเช่นการใช้ชุดรูปภาพที่บอกเกี่ยวกับแบรนด์
ในการทำงานกับ amp-story เราจำเป็นต้องรวมสคริปต์ดังที่แสดงด้านล่าง -
<script async custom-element = "amp-story"
src = "https://cdn.ampproject.org/v0/amp-story-1.0.js">
</script>ในบทนี้ให้เราเข้าใจว่าเรื่องราวของแอมป์คืออะไรและทำงานอย่างไร สมมติว่าเรามีแกลเลอรีรูปภาพและต้องการแสดงสิ่งเดียวกันบนหน้า ในหน้าแอมป์เราสามารถทำให้มันดูสวยงามและโต้ตอบกับผู้ใช้โดยใช้องค์ประกอบเรื่องราวของแอมป์
รูปแบบของ amp-story tag มีลักษณะดังที่แสดงด้านล่าง -
<amp-story standalone> ---> Main story Tag
<amp-story-page id = "page-1"> ---> Pages inside the story e.g page1
<amp-story-grid-layer template = "fill"> -->
Layers for the page1.You can have more than one layer.
//Add html elements here or amp components
</amp-story-grid-layer>
<amp-story-grid-layer template = "fill"> -->
Layers for the page1.You can have more than one layer.
//Add html elements here or amp components
</amp-story-grid-layer>
...
</amp-story-page>
<amp-story-page id = "page-2"> ---> Pages inside the story e.g page2
<amp-story-grid-layer template = "fill"> -->
Layers for the page2.You can have more than one layer.
//Add html elements here or amp components
</amp-story-grid-layer>
...
</amp-story-page>
...
</amp-story>มีการเพิ่มคุณสมบัติเพิ่มเติมสำหรับ amp-story ดังนี้ -
<amp-story standalone title = "My Story"
publisher = "The AMP Team"
publisher-logo-src = "publisherlogo image here"
poster-portrait-src = "poster portrait here"
poster-square-src = "poster square image here"
poster-landscape-src = "poster landscape image here">คุณลักษณะนี้ทำให้การเล่าเรื่องโดยใช้แอมป์โต้ตอบได้ดีมาก
โค้ดต่อไปนี้แสดงตัวอย่างการทำงานของ amp-story ผลลัพธ์เดียวกันจะแสดงสำหรับเดสก์ท็อปและโหมดมือถือ
ตัวอย่าง
<!doctype html>
<html amp lang = "en">
<head>
<meta charset = "utf-8">
<script async src = "https://cdn.ampproject.org/v0.js"></script>
<script async custom-element = "amp-story" src = "https://cdn.ampproject.org/v0/amp-story-1.0.js"></script>
<title>Google AMP - Story</title>
<meta name = "viewport" content = "width = device-width,minimum-scale = 1,initial-scale=1">
<link rel = "canonical" href = "/stories/introduction/amp_story_hello_world/">
<style amp-boilerplate>
body{
-webkit-animation:
-amp-start 8s steps(1,end) 0s 1 normal both;-moz-animation:
-amp-start 8s steps(1,end) 0s 1 normal both;-ms-animation:
-amp-start 8s steps(1,end) 0s 1 normal both;animation:
-amp-start 8s steps(1,end) 0s 1 normal both
}
@-webkit-keyframes
-amp-start{from{visibility:hidden}to{visibility:visible}}@-moz-keyframes
-amp-start{from{visibility:hidden}to{visibility:visible}}@-ms-keyframes
-amp-start{from{visibility:hidden}to{visibility:visible}}@-o-keyframes
-amp-start{from{visibility:hidden}to{visibility:visible}}@keyframes
-amp-start{from{visibility:hidden}to{visibility:visible}}
</style>
<noscript>
<style amp-boilerplate>
body{
-webkit-animation:
none;-moz-animation:none;
-ms-animation:none;
animation:none}
</style>
</noscript>
<style amp-custom>
amp-story {
font-family: Roboto, Helvetica, Arial, sans-serif;
}
amp-story-page * {
color: white;
text-align: center;
}
</style>
</head>
<body>
<amp-story standalone title = "Stories in AMP - Hello World" publisher = "AMP Project">
<amp-story-page id = "page-1">
<amp-story-grid-layer template = "fill">
<amp-img src = "images/christmas1.jpg"
width = "300" height = "250"
layout = "responsive">
</amp-img>
</amp-story-grid-layer>
<amp-story-grid-layer template = "vertical">
<h1>Hello World</h1>
<p>This is an AMP Story.</p>
</amp-story-grid-layer>
</amp-story-page>
<amp-story-page id = "page-2">
<amp-story-grid-layer template = "fill">
<amp-img src = "images/christmas5.jpg"
width = "300" height = "250"
layout = "responsive">
</amp-img>
</amp-story-grid-layer>
<amp-story-grid-layer template = "vertical">
<h1>Hello World</h1>
<p>This is an AMP Story.</p>
</amp-story-grid-layer>
</amp-story-page>
<amp-story-page id = "page-3">
<amp-story-grid-layer template = "fill">
<amp-img src = "images/christmas3.jpg"
width = "300" height = "250"
layout = "responsive">
</amp-img>
</amp-story-grid-layer>
<amp-story-grid-layer template = "vertical">
<h1>Hello World</h1>
<p>This is an AMP Story.</p>
</amp-story-grid-layer>
</amp-story-page>
<amp-story-page id = "page-4">
<amp-story-grid-layer template = "fill">
<amp-img src = "images/christmas4.jpg"
width = "300" height="250"
layout = "responsive">
</amp-img>
</amp-story-grid-layer>
<amp-story-grid-layer template = "vertical">
<h1>Hello World</h1>
<p>This is an AMP Story.</p>
</amp-story-grid-layer>
</amp-story-page>
<amp-story-bookend src = "ampstory.json" layout = "nodisplay">
</amp-story-bookend>
</amp-story>
<body>
</html>ampstory.json
{
"bookendVersion": "v1.0",
"shareProviders": [
"email",
"twitter",
"tumblr",
{
"provider": "facebook",
"app_id": "254325784911610"
}
],
"components": [
{
"type": "heading",
"text": "Introduction"
},
{
"type": "small",
"title": "Next Story is on Car Brands",
"url": "ampcarbrand.html",
"image": "images/audi.jpg"
}
]
}เอาต์พุตบนเดสก์ท็อป


นี่คือวิธีการแสดงส่วนเรื่องราว คุณยังสามารถเพิ่มวิดีโอหรือส่วนประกอบแอมป์อื่น ๆ เพื่อให้เรื่องราวโต้ตอบได้มากขึ้น
เมื่อถึงจุดสิ้นสุดของเรื่องจะแสดงสิ่งที่ให้ไว้ใน amp-bookend ดังที่แสดงด้านล่าง -
<amp-story-bookend
src = "ampstory.json" layout = "nodisplay">
</amp-story-bookend>เราได้มอบไฟล์ ampstory.json ให้กับ amp-bookend ไฟล์ json มีรายละเอียดของตัวอย่างของเรื่องถัดไปดังที่แสดงด้านล่าง เมื่อผู้ใช้คลิกที่จุดสามจุดที่แสดงทางด้านขวาหน้าจอต่อไปนี้จะปรากฏขึ้น -
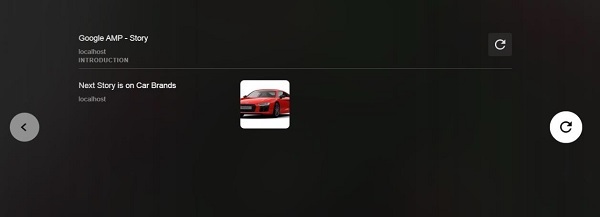
มันมีปุ่มเล่นซ้ำซึ่งจะโหลดเรื่องราวอีกครั้ง คุณสามารถคลิกที่รูปภาพของรถยนต์ซึ่งจะแสดงเรื่องราวของแบรนด์รถยนต์
ผลลัพธ์ในโหมดมือถือมีดังนี้ -


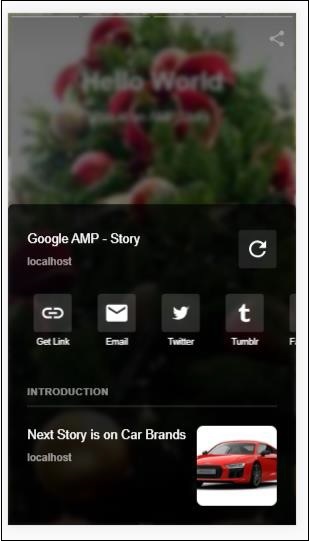
Amp-selector เป็นส่วนประกอบของแอมป์ที่แสดงเมนูของตัวเลือกและผู้ใช้สามารถเลือกระหว่างตัวเลือกต่างๆ ตัวเลือกที่แสดงอาจเป็นข้อความรูปภาพหรือส่วนประกอบแอมป์อื่น ๆ ในบทนี้ให้เราพิจารณาเรื่องนี้โดยละเอียด
ในการทำงานกับ amp-selector เราจำเป็นต้องรวมไฟล์ javascript ดังต่อไปนี้ -
<script async custom-element = "amp-selector"
src = "https://cdn.ampproject.org/v0/amp-selector-0.1.js">
</script>รูปแบบของ amp-selector
โค้ดต่อไปนี้แสดงตัวอย่างสำหรับรูปแบบของ amp-selector -
<amp-selector layout = "container">
<amp-img src = "images/christmas1.jpg"
width = "60"
height = "40"
option = "1">
<amp-img src = "images/christmas2.jpg"
width = "60"
height = "40"
option = "2">
</amp-img>
<amp-img src = "images/christmas3.jpg"
width = "60"
height = "40"
option = "3">
</amp-img>
<amp-img src = "images/christmas4.jpg"
width = "60"
height = "40"
option = "4">
</amp-img>
</amp-selector>คุณสามารถใช้แท็ก html มาตรฐานหรือส่วนประกอบแอมป์ภายใน amp-selector ได้เนื้อหาจะแสดงเหมือนเมนูบนหน้าจอและผู้ใช้สามารถเลือกระหว่างกันได้เมนูที่แสดงอาจเป็นการเลือกเพียงครั้งเดียวหรือหลายรายการก็ได้
ให้เราเข้าใจสิ่งนี้ด้วยความช่วยเหลือของตัวอย่าง single และ multi select ที่ระบุด้านล่าง
ตัวเลือกแอมป์เลือกเดี่ยว
โค้ดต่อไปนี้เป็นตัวอย่างสำหรับ amp-selector single select -
<!doctype html>
<html amp lang = "en">
<head>
<meta charset = "utf-8">
<script async src = "https://cdn.ampproject.org/v0.js"></script>
<title>Google AMP - Amp Selector</title>
<link rel = "canonical" href = "http://example.ampproject.org/article-metadata.html">
<meta name="viewport" content="width=device-width,minimum-scale = 1,initial-scale = 1">
<style amp-boilerplate>
body{-
webkit-animation:-amp-start 8s steps(1,end) 0s 1 normal both;-moz-animation:
-amp-start 8s steps(1,end) 0s 1 normal both;-ms-animation:
-amp-start 8s steps(1,end) 0s 1 normal both;animation:
-amp-start 8s steps(1,end) 0s 1 normal both
}
@-webkit-keyframes
-amp-start{from{visibility:hidden}to{visibility:visible}}@-moz-keyframes
-amp-start{from{visibility:hidden}to{visibility:visible}}@-ms-keyframes
-amp-start{from{visibility:hidden}to{visibility:visible}}@-o-keyframes
-amp-start{from{visibility:hidden}to{visibility:visible}}@keyframes
-amp-start{from{visibility:hidden}to{visibility:visible}}
</style>
<noscript>
<style amp-boilerplate>
body{
-webkit-animation:none;-moz-animation:none;
-ms-animation:none;animation:none}
</style>
</noscript>
<script async custom-element="amp-selector"
src = "https://cdn.ampproject.org/v0/amp-selector-0.1.js">
</script>
<style amp-custom>
amp-selector:not([disabled])
amp-img[option][selected]:not([disabled]) {
outline-color: #b6A848;
outline-width: 2px;
}
</style>
</head>
<body>
<h3>Google AMP - Amp Selector</h3>
<amp-selector layout = "container">
<amp-img src = "images/christmas1.jpg"
width = "60"
height = "40"
option="1">
</amp-img>
<amp-img src="images/christmas2.jpg"
widt h = 60"
height = "40"
option = "2">
</amp-img>
<amp-img src = "images/christmas3.jpg"
width = "60"
height = "40"
option = "3">
</amp-img>
<amp-img src = "images/christmas4.jpg"
width = "60"
height = "40"
option = "4">
</amp-img>
</amp-selector>
</body>
</html>เอาต์พุต
ผลลัพธ์ของโค้ดที่ระบุข้างต้นเป็นดังที่แสดงด้านล่าง -
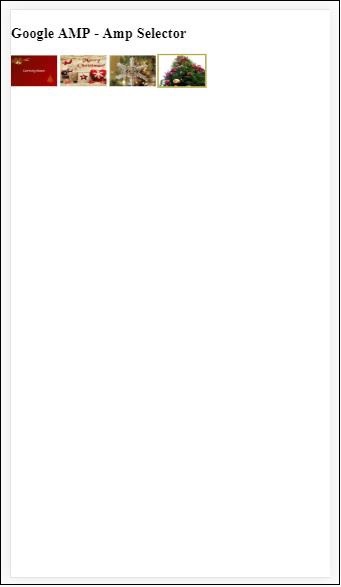
โปรดทราบว่าในตัวอย่างด้านบนเราได้ใช้ amp-selector และใช้รูปภาพภายในเพื่อแสดงตัวเลือก เป็นตัวเลือกการเลือกเดียวเพื่อให้คุณสามารถเลือกภาพใดภาพหนึ่งดังที่แสดงในผลลัพธ์
Amp Selector Multiple Select
ในตัวอย่างนี้ให้เราแสดง amp-selector พร้อมรูปภาพโดยใช้หลายแอตทริบิวต์เราสามารถเลือกได้หลายตัวเลือกจากตัวเลือก
ตัวอย่าง
<!doctype html>
<html amp lang = "en">
<head>
<meta charset = "utf-8 ">
<script async src = "https://cdn.ampproject.org/v0.js"></script>
<title>Google AMP - Amp Selector</title>
<link rel = "canonical" href = "http://example.ampproject.org/article-metadata.html">
<meta name = "viewport" content = "width = device-width,minimum-scale = 1,initial-scale =1">
<style amp-boilerplate>
body{-webkit-animation:
-amp-start 8s steps(1,end) 0s 1 normal both;-moz-animation:
-amp-start 8s steps(1,end) 0s 1 normal both;-ms-animation:
-amp-start 8s steps(1,end) 0s 1 normal both;animation:
-amp-start 8s steps(1,end) 0s 1 normal both}
@-webkit-keyframes
-amp-start{from{visibility:hidden}to{visibility:visible}}@-moz-keyframes
-amp-start{from{visibility:hidden}to{visibility:visible}}@-ms-keyframes
-amp-start{from{visibility:hidden}to{visibility:visible}}@-o-keyframes
-amp-start{from{visibility:hidden}to{visibility:visible}}@keyframes
-amp-start{from{visibility:hidden}to{visibility:visible}}
</style>
<noscript>
<style amp-boilerplate>
body{
-webkit-animation:none;-moz-animation:none;
-ms-animation:none;animation:none
}
</style>
</noscript>
<script async custom-element = "amp-selector"
src = "https://cdn.ampproject.org/v0/amp-selector-0.1.js">
</script>
<style amp-custom>
amp-selector:not([disabled])
amp-img[option][selected]:not([disabled]) {
outline-color: blue;
outline-width: 2px;
}
</style>
</head>
<body>
<h3>Google AMP - Amp Selector</h3>
<amp-selector layout = "container" multiple>
<amp-img src = "images/christmas1.jpg"
width = "60"
height ="40"
option = "1">
</amp-img>
<amp-img src="images/christmas2.jpg"
width = "60"
height = "40"
option = "2">
</amp-img>
<amp-img src ="images/christmas3.jpg"
width = "60"
height = "40"
option = "3">
</amp-img>
<amp-img src = "images/christmas4.jpg"
width = "60"
height = "40"
option = "4">
</amp-img>
</amp-selector>
</body>
</html>เอาต์พุต
ผลลัพธ์ของรหัสที่แสดงด้านบนแสดงไว้ด้านล่าง -

เรายังสามารถใช้ amp-selector เพื่อแสดงปุ่มตัวเลือกดังที่แสดงในรหัสที่ระบุด้านล่าง -
ตัวอย่าง
<!doctype html>
<html amp lang = "en">
<head>
<meta charset = "utf-8">
<script async src = "https://cdn.ampproject.org/v0.js"></script>
<title>Google AMP - Amp Selector</title>
<link rel = "canonical" href = "http://example.ampproject.org/article-metadata.html">
<meta name = "viewport" content ="width = device-width,minimum-scale = 1,initial-scale = 1">
<style amp-boilerplate>
body{
-webkit-animation:
-amp-start 8s steps(1,end) 0s 1 normal both;-moz-animation:
-amp-start 8s steps(1,end) 0s 1 normal both;-ms-animation:
-amp-start 8s steps(1,end) 0s 1 normal both;animation:
-amp-start 8s steps(1,end) 0s 1 normal both
}
@-webkit-keyframes
-amp-start{from{visibility:hidden}to{visibility:visible}}@-moz-keyframes
-amp-start{from{visibility:hidden}to{visibility:visible}}@-ms-keyframes
-amp-start{from{visibility:hidden}to{visibility:visible}}@-o-keyframes
-amp-start{from{visibility:hidden}to{visibility:visible}}@keyframes
-amp-start{from{visibility:hidden}to{visibility:visible}}
</style>
<noscript>
<style amp-boilerplate>
body{
-webkit-animation:none;
-moz-animation:none;
-ms-animation:none;
animation:none}
</style>
</noscript>
<script async custom-element = "amp-selector"
src = "https://cdn.ampproject.org/v0/amp-selector-0.1.js">
</script>
<style amp-custom>
.radio-menu {
list-style: none;
}
.radio-menu [option][selected] {
outline: none;
}
.radio-menu [option] {
display: flex;
align-items: center;
}
.radio-menu [option]:before {
transition: background 0.25s ease-in-out;
content: "";
display: inline-block;
width: 24px;
height: 24px;
margin: 8px;
border-radius: 100%;
border: solid 1px black;
}
.radio-menu [option = red][selected]:before {
text-align: center;
content: "✓";
color: white;
background: red;
}
.radio-menu [option = green][selected]:before {
text-align: center;
content: "✓";
color: white;
background: green;
}
.radio-menu [option = blue][selected]:before {
text-align: center;
content: "✓";
color: white;
background: blue;
}
</style>
</head>
<body>
<h3>Google AMP - Amp Selector</h3>
<amp-selector class = "radio-menu" layout = "container" name = "my-selector">
<div option = "red">Red</div>
<div option = "green">Green</div>
<div option = "blue">Blue</div>
</amp-selector>
</body>
</html>เอาต์พุต
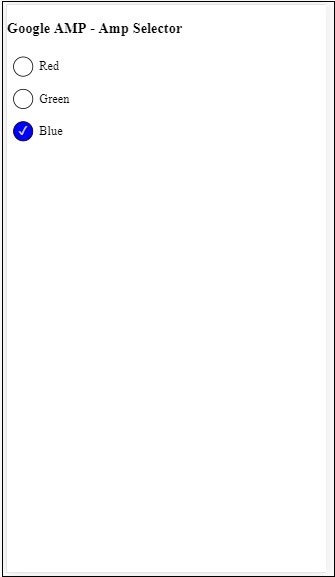
แท็กลิงก์ใน amp ใช้เพื่อบอกเครื่องมือค้นหาของ Google เกี่ยวกับหน้าแอมป์และหน้าที่ไม่มีแอมป์ ในบทนี้ให้เราพูดคุยโดยละเอียดเกี่ยวกับประเด็นที่เกี่ยวข้องกับแท็กลิงก์และวิธีที่ Google ตัดสินใจเกี่ยวกับ amp-page และ non amp-page
การค้นพบหน้า AMP
พิจารณาว่าคุณมีไซต์ชื่อ www.mypage.com บทความข่าวเชื่อมโยงไปยังหน้า - www.mypage.com/news/myfirstnews.html
เมื่อผู้ใช้ค้นหาในเสิร์ชเอ็นจิ้นของ Google และได้รับหน้าแอมป์ที่ไม่ใช่เพื่อที่จะได้รับการอ้างอิงไปยังหน้าแอมป์ด้วยเราจำเป็นต้องระบุ url แอมป์โดยใช้แท็กลิงก์ดังที่แสดงด้านล่าง -
ตัวอย่าง
Page-url for Non amp-page
<link rel = "amphtml" href = "https://www.mypage.com/news/amp/myfirstnews_amp.html">ที่นี่rel =” amphtml”ระบุไว้สำหรับเพจที่ไม่ใช่แอมป์ให้ชี้ไปที่เวอร์ชันแอมป์เพื่อให้ Google แสดงเพจที่ถูกต้องตามแพลตฟอร์ม
Page-url for amp-page
<link rel = "canonical" href = "https://www.mypage.com/news/myfirstnews.html">ที่นี่rel =” canonical”ระบุไว้ใน amp page เพื่อชี้ไปที่เวอร์ชันมาตรฐานของ html เพื่อให้ Google แสดงเวอร์ชันที่ถูกต้องตามแพลตฟอร์ม
ในกรณีที่ไซต์ของคุณมีเพียงหน้าเดียวซึ่งเป็นหน้าแอมป์คุณไม่ควรลืมใส่ rel =” canonical” ซึ่งจะชี้ไปที่ตัวเอง -
<link rel = "canonical" href = "https://www.mypage.com/news/amp/myfirstnews_amp.html">แผนภาพต่อไปนี้แสดงการอ้างอิงถึง rel =” amphtml” ที่ชี้ไปที่หน้า amp และ rel =” canonical” ที่ชี้ไปที่หน้า html มาตรฐาน

แบบอักษรโดยใช้ลิงก์
สามารถโหลดแบบอักษรจากภายนอกได้โดยใช้ลิงค์ที่แสดงด้านล่าง -
<link rel = "stylesheet" href = "https://fonts.googleapis.com/css?family=Roboto">โปรดทราบว่าอนุญาตเฉพาะต้นทางที่อนุญาตเท่านั้น รายการต้นทางที่อนุญาตพิเศษซึ่งเราสามารถรับแบบอักษรได้ดังที่แสดงไว้ที่นี่ -
Fonts.com - https://fast.fonts.net
Google Fonts - https://fonts.googleapis.com
Font Awesome - https://maxcdn.bootstrapcdn.com
Typekit - https://use.typekit.net/kitId.css (แทนที่ kitId ตาม)
ตัวอย่างการทำงานโดยใช้rel =” canonical”และrel =” stylesheet”แสดงอยู่ด้านล่าง -
ตัวอย่าง
<!doctype html>
<html amp>
<head>
<meta charset ="utf-8">
<title>Amp Sample Page</title>
<link rel = "canonical" href = "amppage.html">
<meta name = "viewport" content = "width = device-width,minimum-scale=1,initial-scale = 1">
<style amp-custom>
h1 {color: red}
</style>
<style amp-boilerplate>
body{
-webkit-animation:
-amp-start 8s steps(1,end) 0s 1 normal both;-moz-animation:
-amp-start 8s steps(1,end) 0s 1 normal both;-ms-animation:
-amp-start 8s steps(1,end) 0s 1 normal both;animation:
-amp-start 8s steps(1,end) 0s 1 normal both
}
@-webkit-keyframes
-amp-start{from{visibility:hidden}to{visibility:visible}}@-moz-keyframes
-amp-start{from{visibility:hidden}to{visibility:visible}}@-ms-keyframes
-amp-start{from{visibility:hidden}to{visibility:visible}}@-o-keyframes
-amp-start{from{visibility:hidden}to{visibility:visible}}@keyframes
-amp-start{from{visibility:hidden}to{visibility:visible}}
</style>
<noscript>
<style amp-boilerplate>
body{
-webkit-animation:none;
-moz-animation:none;
-ms-animation:none;
animation:none
}
</style>
</noscript>
<script async src = "https://cdn.ampproject.org/v0.js"></script>
<link rel = "stylesheet" href = "https://fonts.googleapis.com/css?family=Roboto">
</head>
<body>
<h1>Amp Sample Page</h1>
<p>
<amp-img src = "images/christmas1.jpg"
width = "300" height = "250"
layout = "responsive">
</amp-img>
</p>
<p style = "font-family: 'Roboto'; font-size:25px;">
Welcome to Amp Page
</p>
</body>
</html>เอาต์พุต
ผลลัพธ์ของโค้ดที่แสดงด้านบนเป็นดังที่แสดงด้านล่าง -
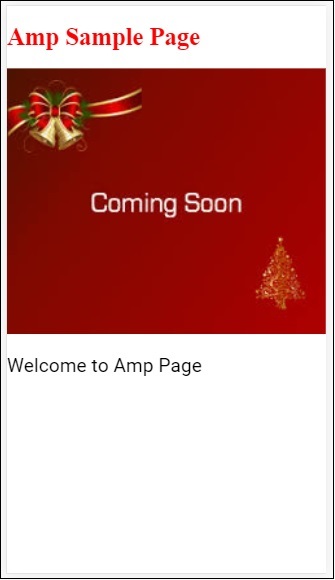
แบบอักษรแอมป์เป็นส่วนประกอบของแอมป์ในแอมป์ซึ่งโดยพื้นฐานแล้วจะช่วยในการทริกเกอร์และตรวจสอบฟอนต์ที่กำหนดเองไปยังหน้าแอมป์ บทนี้จะกล่าวถึง amp-font โดยละเอียด
ในการทำงานกับ amp-font เราจำเป็นต้องเพิ่มไฟล์ javascript ดังต่อไปนี้ -
<script async custom-element = "amp-font"
src = "https://cdn.ampproject.org/v0/amp-font-0.1.js">
</script>คอมโพเนนต์ amp-font ใช้สำหรับควบคุมเวลาในการโหลดฟอนต์ มีแอตทริบิวต์การหมดเวลาซึ่งใช้เวลาเป็นมิลลิวินาทีโดยค่าเริ่มต้นคือ 3000ms คอมโพเนนต์อนุญาตให้เพิ่ม / ลบคลาสจาก document.documentElement หรือ document.body ขึ้นอยู่กับว่าฟอนต์ที่ต้องการถูกโหลดหรือเข้าสู่สถานะข้อผิดพลาด
รูปแบบของแท็ก amp-font มีดังที่แสดงด้านล่าง -
<amp-font
layout = "nodisplay"
font-family = "Roboto Italic"
timeout = "2000"
on-error-remove-class = "robotoitalic-loading"
on-error-add-class = "robotoitalic-missing"
on-load-remove-class = "robotoitalic-loading"
on-load-add-class = "robotoitalic-loaded">
</amp-font>ตัวอย่างการใช้งานเกี่ยวกับการใช้ amp-font ในหน้า amp แสดงไว้ที่นี่ -
ตัวอย่าง
<!doctype html>
<html amp lang = "en">
<head>
<meta charset = "utf-8">
<script async src = "https://cdn.ampproject.org/v0.js"></script>
<title>Google AMP - Amp Font</title>
<link rel = "canonical" href = "http://example.ampproject.org/article-metadata.html">
<meta name = "viewport" content = "width = device-width,minimum-scale = 1,initial-scale = 1">
<style amp-boilerplate>
body{
-webkit-animation:
-amp-start 8s steps(1,end) 0s 1 normal both;-moz-animation:
-amp-start 8s steps(1,end) 0s 1 normal both;-ms-animation:
-amp-start 8s steps(1,end) 0s 1 normal both;animation:
-amp-start 8s steps(1,end) 0s 1 normal both
}
@-webkit-keyframes
-amp-start{from{visibility:hidden}to{visibility:visible}}@-moz-keyframes
-amp-start{from{visibility:hidden}to{visibility:visible}}@-ms-keyframes
-amp-start{from{visibility:hidden}to{visibility:visible}}@-o-keyframes
-amp-start{from{visibility:hidden}to{visibility:visible}}@keyframes
-amp-start{from{visibility:hidden}to{visibility:visible}}
</style>
<noscript>
<style amp-boilerplate>
body{
-webkit-animation:none;
-moz-animation:none;
-ms-animation:none;
animation:none}
</style>
</noscript>
<cript async custom-element = "amp-font"
src = "https://cdn.ampproject.org/v0/amp-font-0.1.js"
></script>
<style amp-custom>
@font-face {
font-family: 'This font is not available';
font-style: normal;
font-weight: 300;
src: url(fonts/MissingFont.ttf) format('truetype');
}
.font-missing {
color:red;
font-size:25px;
}
</style>
</head>
<body>
<h1>Google AMP - Amp Font</h1>
<amp-font
layout = "nodisplay"
font-family = "Font Does Not exist"
timeout = "2000"
on-error-remove-class = "font-missing"
on-error-add-class = "font-error"
on-load-remove-class = "font-missing"
on-load-add-class = "font-loaded">
</amp-font>
<p class = "font-missing">
Example of amp-font component to show how
attributes on-error-remove-class,
on-error-add-class, on-load-remove-class
and on-load-add-class works when the font
file to be loaded does not exist.
</p>
</body>
</html>เอาต์พุต
ผลลัพธ์ของโค้ดตัวอย่างที่ระบุข้างต้นเป็นดังที่แสดงด้านล่าง -
ตัวอย่างของ amp-font เมื่อโหลดไฟล์แบบอักษรสำเร็จแสดงที่นี่ -
ตัวอย่าง
<!doctype html>
<html amp lang = "en">
<head>
<meta charset = "utf-8">
<script async src = "https://cdn.ampproject.org/v0.js"></script>
<title>Google AMP - Amp Font</title>
<link rel = "canonical" href = "http://example.ampproject.org/article-metadata.html">
<meta name = "viewport" content = "width = device-width,minimum-scale = 1,initial-scale = 1">
<style amp-boilerplate>
body{
-webkit-animation:
-amp-start 8s steps(1,end) 0s 1 normal both;-moz-animation:
-amp-start 8s steps(1,end) 0s 1 normal both;-ms-animation:
-amp-start 8s steps(1,end) 0s 1 normal both;animation:
-amp-start 8s steps(1,end) 0s 1 normal both
}
@-webkit-keyframes
-amp-start{from{visibility:hidden}to{visibility:visible}}@-moz-keyframes
-amp-start{from{visibility:hidden}to{visibility:visible}}@-ms-keyframes
-amp-start{from{visibility:hidden}to{visibility:visible}}@-o-keyframes
-amp-start{from{visibility:hidden}to{visibility:visible}}@keyframes
-amp-start{from{visibility:hidden}to{visibility:visible}}
</style>
<noscript>
<style amp-boilerplate>
body{
-webkit-animation:none;
-moz-animation:none;
-ms-animation:none;
animation:none}
</style>
</noscript>
<script async custom-element = "amp-font"
src = "https://cdn.ampproject.org/v0/amp-font-0.1.js">
</script>
<style amp-custom>
@font-face {
font-family: 'This font is not available';
font-style: normal;
font-weight: 300;
src: url(fonts/MissingFont.ttf)
format('truetype');
}
@font-face {
font-family: 'Roboto Italic';
font-style: normal;
font-weight: 300;
src:url(fonts/Roboto-Italic.ttf) format('truetype');
}
.font-missing {
color:red;
font-size:25px;
}
.robotoitalic-loading {
color: green;
}
.robotoitalic-loaded {
font-size:25px;
color: blue;
}
.robotoitalic-missing {
color: red;
}
.robotoitalic {
font-family: 'Roboto Italic';
}
</style>
</head>
<body>
<h1>Google AMP - Amp Font</h1>
<amp-font
layout = "nodisplay"
font-family = "Font Does Not exist"
timeout = "2000"
on-error-remove-class = "font-missing"
on-error-add-class = "font-error"
on-load-remove-class = "font-missing"
on-load-add-class = "font-loaded">
</amp-font>
<p class="font-missing">
Example of amp-font component to show
how attributes on-error-remove-class,
on-error-add-class, on-load-remove-class
and on-load-add-class works when the
font file to be loaded does not exist.
</p>
<amp-font
layout = "nodisplay"
font-family = "Roboto Italic"
timeout = "2000"
on-error-remove-class = "robotoitalic-
loading"
on-error-add-class = "robotoitalic-missing"
on-load-remove-class = "robotoitalic-loading"
on-load-add-class = "robotoitalic-loaded">
</amp-font>
<p class = "robotoitalic">
Example of amp-font component to show how
attributes on-error-remove-class,
on-error-add-class, on-load-remove-class
and on-load-add-class works when the font
file exists and loads fine.
</p>
</body>
</html>เอาต์พุต
ผลลัพธ์ของโค้ดตัวอย่างที่ระบุข้างต้นเป็นดังที่แสดงด้านล่าง -
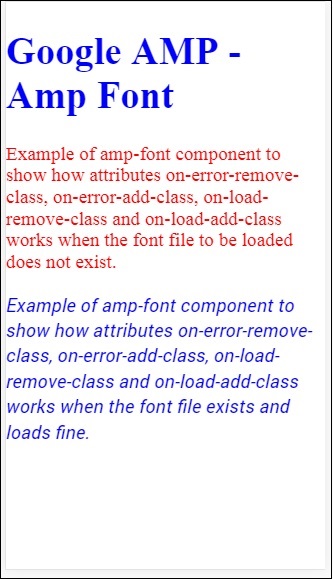
ตัวอย่างด้านบนแสดงวิธีการทำงานกับแอตทริบิวต์แบบอักษรเช่น font-family,timeout,on-error-remove-class,on-error-add-class,on-load-remove-class,on-load-add-classชั้นเรียนจะตัดสินว่ามีข้อผิดพลาดหรือความสำเร็จในการโหลดแบบอักษร
Amp-list เป็นส่วนประกอบของแอมป์ที่เรียกจุดสิ้นสุด CORS json และแสดงข้อมูลในรูปแบบของไฟล์ json ภายในเทมเพลต ให้เราเข้าใจสิ่งนี้ด้วยความช่วยเหลือของตัวอย่างการทำงาน
ในการทำงานกับ amp-list เราจำเป็นต้องรวมสคริปต์ต่อไปนี้ -
<script async custom-element = "amp-list"
src = "https://cdn.ampproject.org/v0/amp-list-0.1.js">
</script>นี่คือรูปแบบของ amp-list tag -
<amp-list width = "auto" height = "100"
layout = "fixed-height" src = "amplist.json" class = "m1">
<template type = "amp-mustache">
<div class = "images_for_display">
<amp-img width = "150"
height = "100"
alt = "{{title}}"
src = "{{url}}">
</amp-img>
</div>
</template>
</amp-list>src ที่ใช้สำหรับ amp-list คือไฟล์ json ซึ่งมีรายละเอียดที่จะแสดงรายการ เราสามารถใช้แท็ก html ปกติหรือ amp-components ภายใน amp-list เพื่อแสดงข้อมูลจากไฟล์ json ชนิดแม่แบบ amp-mustache ใช้สำหรับการผูกข้อมูลที่จะแสดงข้อมูล
ให้เราเข้าใจสิ่งนี้ด้วยความช่วยเหลือของตัวอย่างการทำงานดังที่แสดงด้านล่าง -
ตัวอย่าง
<!doctype html>
<html amp lang = "en">
<head>
<meta charset = "utf-8">
<script async src = "https://cdn.ampproject.org/v0.js"></script>
<title>Google AMP - Amp List</title>
<link rel = "canonical" href = "http://example.ampproject.org/article-metadata.html">
<meta name = "viewport" content = "width = device-width,minimum-scale = 1,initial-scale = 1">
<style amp-boilerplate>
body{-webkit-animation:
-amp-start 8s steps(1,end) 0s 1 normal both;-moz-animation:
-amp-start 8s steps(1,end) 0s 1 normal both;-ms-animation:
-amp-start 8s steps(1,end) 0s 1 normal both;animation:
-amp-start 8s steps(1,end) 0s 1 normal both
}
@-webkit-keyframes
-amp-start{from{visibility:hidden}to{visibility:visible}}@-moz-keyframes
-amp-start{from{visibility:hidden}to{visibility:visible}}@-ms-keyframes
-amp-start{from{visibility:hidden}to{visibility:visible}}@-o-keyframes
-amp-start{from{visibility:hidden}to{visibility:visible}}@keyframes
-amp-start{from{visibility:hidden}to{visibility:visible}}
</style>
<noscript>
<style amp-boilerplate>
body{
-webkit-animation:none;-moz-animation:none;
-ms-animation:none;animation:none}
</style>
</noscript>
<script async custom-element = "amp-list"
src = "https://cdn.ampproject.org/v0/amp-list-0.1.js">
</script>
<script async custom-template = "amp-mustache"
src ="https://cdn.ampproject.org/v0/amp-mustache-0.2.js">
</script>
<style amp-custom>
amp-img {
border: 1px solid #ddd;
border-radius: 4px;
padding: 5px;
}
</style>
</head>
<body>
<h3>Google AMP - Amp List</h3>
<amp-list width = "auto" height = "100"
layout = "fixed-height" src = "amplist.json" class = "m1">
<template type = "amp-mustache">
<div class = "images_for_display">
<amp-img width = "150"
height = "100"
alt = "{{title}}"
src = "{{url}}">
</amp-img>
</div>
</template>
</amp-list>
</body>
</html>เอาต์พุต
ผลลัพธ์ของตัวอย่างการทำงานที่แสดงด้านบนเป็นดังที่แสดงด้านล่าง -
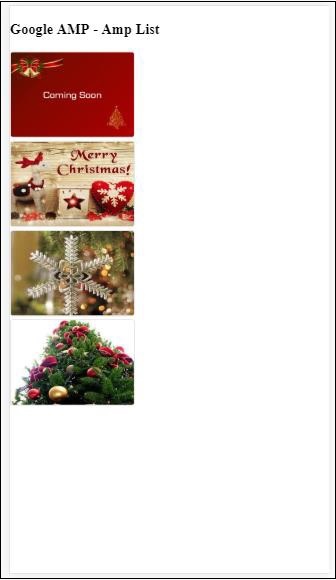
ไฟล์ json ที่ใช้ในตัวอย่างการทำงานที่ให้ไว้ข้างต้นแสดงไว้ที่นี่ -
{
"items": [
{
"title": "Christmas Image 1",
"url": "images/christmas1.jpg"
},
{
"title": "Christmas Image 2",
"url": "images/christmas2.jpg"
},
{
"title": "Christmas Image 3",
"url": "images/christmas3.jpg"
},
{
"title": "Christmas Image 4",
"url": "images/christmas4.jpg"
}
]
}เราสามารถรีเฟรชรายการโดยใช้เหตุการณ์ในรายการแอมป์ดังที่แสดงในรหัสที่ระบุด้านล่าง -
ตัวอย่าง
<!doctype html>
<html amp lang = "en">
<head>
<meta charset = "utf-8">
<script async src = "https://cdn.ampproject.org/v0.js"></script>
<title>Google AMP - Amp List</title>
<link rel = "canonical" href = "http://example.ampproject.org/article-metadata.html">
<meta name = "viewport" content = "width = device-width,minimum-scale = 1,initial-scale = 1">
<style amp-boilerplate>
body{
-webkit-animation:
-amp-start 8s steps(1,end) 0s 1 normal both;-moz-animation:
-amp-start 8s steps(1,end) 0s 1 normal both;-ms-animation:
-amp-start 8s steps(1,end) 0s 1 normal both;animation:
-amp-start 8s steps(1,end) 0s 1 normal both
}
@-webkit-keyframes
-amp-start{from{visibility:hidden}to{visibility:visible}}@-moz-keyframes
-amp-start{from{visibility:hidden}to{visibility:visible}}@-ms-keyframes
-amp-start{from{visibility:hidden}to{visibility:visible}}@-o-keyframes
-amp-start{from{visibility:hidden}to{visibility:visible}}@keyframes
-amp-start{from{visibility:hidden}to{visibility:visible}}
</style>
<noscript>
<style amp-boilerplate>
body{
-webkit-animation:none;
-moz-animation:none;
-ms-animation:none;
animation:none}
</style>
</noscript>
<script async custom-element = "amp-list"
src = "https://cdn.ampproject.org/v0/amp-list-0.1.js">
</script>
<script async custom-template = "amp-mustache"
src = "https://cdn.ampproject.org/v0/amp-mustache-0.2.js">
</script>
<style amp-custom>
amp-img {
border: 1px solid #ddd;
border-radius: 4px;
padding: 5px;
}
button{
background-color: #ACAD5C;
color: white;
padding: 12px 20px;
border: none;
border-radius: 4px;
cursor: pointer;
float: right;
}
</style>
</head>
<body>
<h3>Google AMP - Amp List</h3>
<button on = "tap:amplist.refresh">Refresh Images</button>
<amp-list id = "amplist" width = "auto" height = "100"
layout = "fixed-height" src = "amplist.json" class = "m1">
<template type = "amp-mustache">
<div class = "images_for_display">
<amp-img width = "150"
height = "100"
alt = "{{title}}"
src = "{{url}}"></amp-img>
</div>
</template>
</amp-list>
</body>
</html>เอาต์พุต
ผลลัพธ์สำหรับตัวอย่างการทำงานที่ให้ไว้ข้างต้นเป็นดังที่แสดงไว้ที่นี่ -
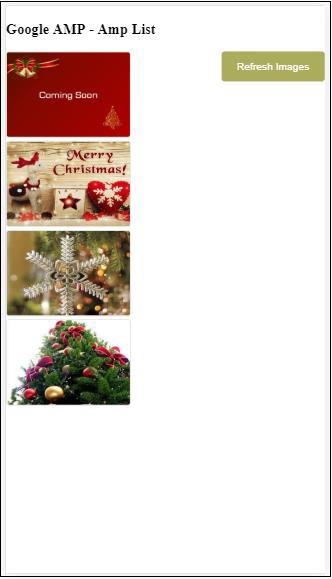
มีการเพิ่มปุ่มซึ่งเมื่อคลิกเรียกการดำเนินการรีเฟรชโดยใช้เหตุการณ์ที่แสดงด้านล่าง -
<button on = "tap:amplist.refresh">
Refresh Images
</button>
//amplist is the id used for amp-listคลิกที่ปุ่มไฟล์ json จะถูกเรียกอีกครั้งและโหลดเนื้อหา หากมีภาพที่โหลดแล้วภาพเหล่านั้นจะถูกแคช
การแจ้งเตือนผู้ใช้แอมป์ของ Google ใช้เพื่อแสดงข้อความในกล่องโต้ตอบที่ปิดได้ให้กับผู้ใช้ เราสามารถใช้เพื่อแจ้งให้ผู้ใช้ทราบเกี่ยวกับคุกกี้บนหน้า
ในการทำงานกับ amp-user-notification เราจำเป็นต้องเพิ่มสคริปต์ต่อไปนี้ในหน้า -
<script async custom-element = "amp-user-notification"
src = "https://cdn.ampproject.org/v0/amp-user-notification-0.1.js">
</script>รูปแบบแท็กการแจ้งเตือนผู้ใช้แอมป์ -
<amp-user-notification id = "my-notification" layout = "nodisplay">
<div>Example of amp-user-notification.
<button on = "tap:my-notification.dismiss">I accept
</button>
</div>
</amp-user-notification>ให้เราทำความเข้าใจกับ amp-user-alert โดยใช้ตัวอย่างการทำงาน -
ตัวอย่าง
<!doctype html>
<html amp lang = "en">
<head>
<meta charset = "utf-8">
<script async src = "https://cdn.ampproject.org/v0.js"></script>
<title>Google AMP - Amp Selector</title>
<link rel = "canonical" href = " http://example.ampproject.org/article-metadata.html">
<meta name = "viewport" content = "width = device-width,minimum-scale = 1,initial-scale = 1">
<style amp-boilerplate>
body{
-webkit-animation:
-amp-start 8s steps(1,end) 0s 1 normal both;-moz-animation:
-amp-start 8s steps(1,end) 0s 1 normal both;-ms-animation:
-amp-start 8s steps(1,end) 0s 1 normal both;animation:
-amp-start 8s steps(1,end) 0s 1 normal both
}
@-webkit-keyframes
-amp-start{from{visibility:hidden}to{visibility:visible}}@-moz-keyframes
-amp-start{from{visibility:hidden}to{visibility:visible}}@-ms-keyframes
-amp-start{from{visibility:hidden}to{visibility:visible}}@-o-keyframes
-amp-start{from{visibility:hidden}to{visibility:visible}}@keyframes
-amp-start{from{visibility:hidden}to{visibility:visible}}
</style>
<noscript>
<style amp-boilerplate>
body{
-webkit-animation:none;
-moz-animation:none;
-ms-animation:none
animation:none
}
</style>
</noscript>
<script async custom-element = "amp-user-notification"
src = "https://cdn.ampproject.org/v0/amp-user-notification-0.1.js">
</script>
<style amp-custom>
div {
font-size: 15px;
background-color : #ccc;
padding: 10px 10px;
border-radius: 2px;
}
button{
background-color: #ACAD5C;
color: white;
cursor: pointer;
float: right;
}
</style>
</head>
<body>
<h3>Google AMP - Amp User Notification</h3>
<amp-user-notification
id = "my-notification"
layout = "nodisplay">
<div>Example of amp-user-notification.
<button on = "tap:my-notification.dismiss">I accept
</button>
</div>
</amp-user-notification>
</body>
</html>เอาต์พุต
ผลลัพธ์ของโค้ดตัวอย่างการทำงานที่ให้ไว้ข้างต้นเป็นดังที่แสดงด้านล่าง -
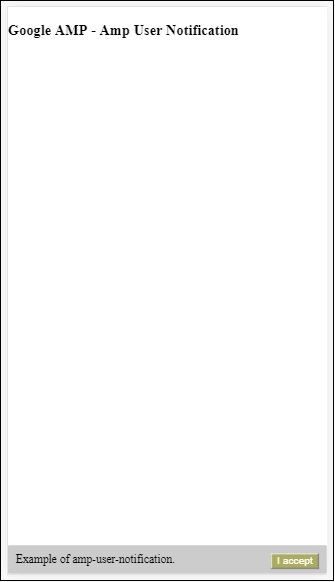
เมื่อผู้ใช้คลิกปุ่มการแจ้งเตือนจะถูกปิด เมื่อปิดแล้วการแจ้งเตือนจะไม่แสดงแม้ว่าคุณจะโหลดหน้านี้ซ้ำ
ข้อมูลของการแจ้งเตือนของผู้ใช้จะถูกเก็บไว้ในเบราว์เซอร์ localStorage หากล้างที่เก็บข้อมูลในเครื่องและรีเฟรชเพจคุณจะสามารถเห็นการแจ้งเตือนอีกครั้ง คุณสามารถลองใช้ไฟล์localStorage.clear() ในคอนโซลของเบราว์เซอร์
การใช้ dismiss การดำเนินการแจ้งเตือนสามารถยกเลิกได้โดยใช้การดำเนินการบนปุ่มดังต่อไปนี้
<button on = "tap:my-notification.dismiss">
I accept
</button>เมื่อผู้ใช้แตะที่ปุ่มการแจ้งเตือนจะถูกปิด
หน้าถัดไปของแอมป์เป็นส่วนประกอบของแอมป์ซึ่งสามารถโหลดหน้าเพิ่มเติมได้แบบไดนามิกเมื่อผู้ใช้มาถึงตอนท้ายของเอกสาร บทนี้เกี่ยวข้องกับแนวคิดนี้โดยละเอียด
ในการทำงานกับคอมโพเนนต์ amp-next-page เราต้องเพิ่มสคริปต์ต่อไปนี้ -
<script async custom-element = "amp-next-page"
src = "https://cdn.ampproject.org/v0/amp-next-page-0.1.js">
</script>นอกจากนี้ amp-next-page ยังไม่เปิดใช้งานอย่างสมบูรณ์ดังนั้นเพื่อให้หน้าทดสอบใช้งานได้ให้เพิ่มเมตาแท็กต่อไปนี้ -
<meta name = "amp-experiments-opt-in" content = "amp-next-page">ในการโหลดหน้าเว็บแบบไดนามิกเราต้องให้ page-urls แก่แท็ก script ประเภท =” application / json” ดังที่แสดงด้านล่าง -
<amp-next-page>
<script type = "application/json">
{
"pages": [
{
"title": "Page 2",
"image": "images/christmas1.jpg",
"ampUrl": "ampnextpage1.html"
},
{
"title": "Page 3",
"image": "images/christmas1.jpg",
"ampUrl": "ampnextpage2.html"
}
]
}
</script>
</amp-next-page>ในแท็กด้านบนเรากำลังพยายามโหลด 2 หน้า ampnextpage1.html และ ampnextpage2.html.
ตอนนี้ให้เราดูผลลัพธ์สุดท้าย ต้องเพิ่มเพจทั้งหมดที่ต้องโหลดลงในอาร์เรย์เพจที่มีชื่อเรื่องรูปภาพและ ampUrl
ตัวอย่าง
<!doctype html>
<html amp>
<head>
<meta charset = "utf-8">
<title>Google Amp - Next Page</title>
<link rel = "canonical" href = "ampnextpage.html">
<meta name = "amp-experiments-opt-in" content = "amp-next-page">
<meta name = "viewport" content ="width = device-width,
minimum-scale = 1,initial-scale = 1">
<style amp-boilerplate>
body {
-webkit-animation:
-amp-start 8s steps(1,end) 0s 1 normal both;-moz-animation:
-amp-start 8s steps(1,end) 0s 1 normal both;-ms-animation:
-amp-start 8s steps(1,end) 0s 1 normal both;animation:
-amp-start 8s steps(1,end) 0s 1 normal both
}
@-webkit-keyframes
-amp-start{from{visibility:hidden}to{visibility:visible}}@-moz-keyframes
-amp-start{from{visibility:hidden}to{visibility:visible}}@-ms-keyframes
-amp-start{from{visibility:hidden}to{visibility:visible}}@-o-keyframes
-amp-start{from{visibility:hidden}to{visibility:visible}}@keyframes
-amp-start{from{visibility:hidden}to{visibility:visible}}
</style>
<noscript>
<style amp-boilerplate>
body{
-webkit-animation:none;
-moz-animation:none;
-ms-animation:none;
animation:none
}
</style>
</noscript>
<script async src="https://cdn.ampproject.org/v0.js">
</script>
<script async custom-element = "amp-next-page"
src = "https://cdn.ampproject.org/v0/amp-next-page-0.1.js">
</script>
</head>
<body>
<h1>Google Amp - Next Page</h1>
<h1>Page 1</h1>
<p>Start of page 1</p>
<p>This content is loaded from page 1</p>
<p>This content is loaded from page 1</p>
<p>This content is loaded from page 1</p>
<p>This content is loaded from page 1</p>
<p>This content is loaded from page 1</p>
<p>This content is loaded from page 1</p>
<p>This content is loaded from page 1</p>
<p>This content is loaded from page 1</p>
<p>This content is loaded from page 1</p>
<p>This content is loaded from page 1</p>
<p>This content is loaded from page 1</p>
<p>This content is loaded from page 1</p>
<p>This content is loaded from page 1</p>
<p>This content is loaded from page 1</p>
<p>This content is loaded from page 1</p>
<p>This content is loaded from page 1</p>
<p>This content is loaded from page 1</p>
<p>This content is loaded from page 1</p>
<p>This content is loaded from page 1</p>
<p>This content is loaded from page 1</p>
<p>This content is loaded from page 1</p>
<p>This content is loaded from page 1</p>
<p>End of page 1</p>
<amp-next-page>
<script type = "application/json">
{
"pages": [
{
"title": "Page 2",
"image": "images/christmas1.jpg",
"ampUrl": "ampnextpage1.html"
},
{
"title": "Page 3",
"image": "images/christmas1.jpg",
"ampUrl": "ampnextpage2.html"
}
]
}
</script>
</amp-next-page>
</body>
</html>เอาต์พุต

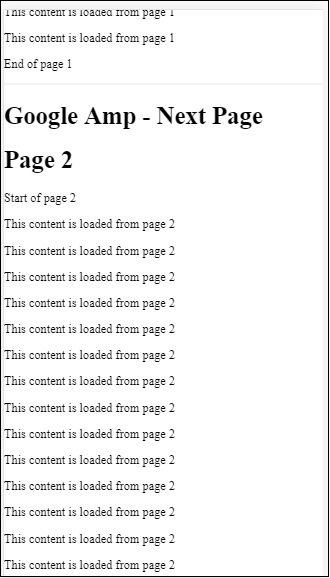

คุณสามารถสังเกตได้ว่าเมื่อคุณเลื่อนหน้าจะแสดงหน้าถัดไปที่จะโหลดและ page-url ในแถบที่อยู่ก็เปลี่ยนไปด้วย
บทนี้จะกล่าวถึงคุณลักษณะทั่วไปทั้งหมดที่ใช้โดยส่วนประกอบแอมป์
รายการคุณสมบัติทั่วไปมีดังนี้ -
- fallback
- heights
- layout
- media
- noloading
- on
- placeholder
- sizes
- ความกว้างและความสูง
แอตทริบิวต์ทางเลือก
แอตทริบิวต์ทางเลือกส่วนใหญ่จะใช้เมื่อเบราว์เซอร์ไม่รองรับองค์ประกอบที่ใช้หรือมีปัญหาในการโหลดไฟล์หรือมีข้อผิดพลาดกับไฟล์ที่ใช้
ตัวอย่างเช่นคุณกำลังใช้ amp-video และไฟล์สื่อกำลังมีปัญหาในเบราว์เซอร์ดังนั้นในกรณีเช่นนี้เราสามารถระบุแอตทริบิวต์ทางเลือกและแสดงข้อความว่าไฟล์สื่อไม่สามารถเล่นหรือไม่รองรับโดยเบราว์เซอร์แทนที่จะแสดง ข้อความแสดงข้อผิดพลาดบนหน้า
ใช้ทางเลือกในแอมป์วิดีโอ
<amp-video controls
width = "640"
height = "360"
layout = "responsive"
poster = "images/videoposter.png">
<source src = "video/bunny.webm" type = "video/webm" />
<source src = "video/samplevideo.mp4" type = "video/mp4" />
<div fallback>
<p>This browser does not support the video element.</p>
</div>
</amp-video>ให้เราเข้าใจทางเลือกของระบบปฏิบัติการที่ใช้งานได้โดยใช้ตัวอย่าง -
ตัวอย่าง
<!doctype html>
<html amp lang = "en">
<head>
<meta charset = "utf-8">
<script async src = "https://cdn.ampproject.org/v0.js"></script>
<title>Google AMP - Amp Video</title>
<link rel = "canonical" href = " http://example.ampproject.org/article-metadata.html">
<meta name = "viewport" content = "width = device-width,minimum-scale = 1,initial-scale = 1">
<style amp-boilerplate>
body{
-webkit-animation:
-amp-start 8s steps(1,end) 0s 1 normal both;-moz-animation:
-amp-start 8s steps(1,end) 0s 1 normal both;-ms-animation:
-amp-start 8s steps(1,end) 0s 1 normal both;animation:
-amp-start 8s steps(1,end) 0s 1 normal both
}
@-webkit-keyframes
-amp-start{from{visibility:hidden}to{visibility:visible}}@-moz-keyframes
-amp-start{from{visibility:hidden}to{visibility:visible}}@-ms-keyframes
-amp-start{from{visibility:hidden}to{visibility:visible}}@-o-keyframes
-amp-start{from{visibility:hidden}to{visibility:visible}}@keyframes
-amp-start{from{visibility:hidden}to{visibility:visible}}
</style>
<noscript>
<style amp-boilerplate>
body{
-webkit-animation:none;-moz-animation:none;
-ms-animation:none;animation:none
}
</style>
</noscript>
<script async custom-element = "amp-video"
src = "https://cdn.ampproject.org/v0/amp-video-0.1.js">
</script>
</head>
<body>
<h3>Google AMP - Amp Video</h3>
<amp-video controls
width = "640"
height = "360"
layout = "responsive"
poster = "images/videoposter.png">
<source src = "video/bunny.webm"type="video/webm" />
<source src = "video/samplevideo.mp4"type = "video/mp4" />
<div fallback>
<p>This browser does not support the video element.</p>
</div>
</amp-video>
</body>
</html>เอาต์พุต

คุณสมบัติความสูง
แอตทริบิวต์นี้ได้รับการสนับสนุนโดยทั่วไปสำหรับรูปแบบที่ตอบสนอง คุณสามารถใช้นิพจน์สื่อกับแอตทริบิวต์ heights และใช้กับความสูงขององค์ประกอบ นอกจากนี้ยังใช้ค่าเปอร์เซ็นต์ดังนั้นความสูงจะถูกคำนวณตามเปอร์เซ็นต์ความกว้างที่กำหนด
ตัวอย่าง
<!doctype html>
<html amp lang = "en">
<head>
<meta charset = "utf-8">
<script async src = "https://cdn.ampproject.org/v0.js"></script>
<title>Google AMP - heights attribute</title>
<link rel = "canonical" href = "http://example.ampproject.org/article-metadata.html">
<meta name = "viewport" content = "width=device-width,minimum-scale = 1,initial-scale = 1">
<style amp-boilerplate>
body{
-webkit-animation:
-amp-start 8s steps(1,end) 0s 1 normal both;-moz-animation:
-amp-start 8s steps(1,end) 0s 1 normal both;-ms-animation:
-amp-start 8s steps(1,end) 0s 1 normal both;animation:
-amp-start 8s steps(1,end) 0s 1 normal both
}
@-webkit-keyframes
-amp-start{from{visibility:hidden}to{visibility:visible}}@-moz-keyframes
-amp-start{from{visibility:hidden}to{visibility:visible}}@-ms-keyframes
-amp-start{from{visibility:hidden}to{visibility:visible}}@-o-keyframes
-amp-start{from{visibility:hidden}to{visibility:visible}}@keyframes
-amp-start{from{visibility:hidden}to{visibility:visible}}
</style>
<noscript>
<style amp-boilerplate>
body{
-webkit-animation:none;-moz-animation:none;
-ms-animation:none;animation:none
}
</style>
</noscript>
<style amp-custom>
amp-img {
border: 1px solid black;
border-radius: 4px;
padding: 5px;
}
h1{font-family: "Segoe UI",Arial,sans-serif;font-weight: 400;margin: 10px 0;}
</style>
</head>
<body>
<h1>Google AMP - heights attribute</h1>
<amp-img src = "images/christmas1.jpg"
width = "320" height = "256"
heights = "(min-width:500px) 200px, 80%">
</amp-img>
</body>
</html>เอาต์พุต

แอตทริบิวต์เค้าโครง
AMP-Layout เป็นคุณลักษณะสำคัญอย่างหนึ่งที่มีอยู่ใน google-amp เค้าโครงแอมป์ทำให้แน่ใจว่าคอมโพเนนต์ของแอมป์แสดงผลอย่างถูกต้องเมื่อโหลดเพจโดยไม่ทำให้เกิดปัญหาการกะพริบหรือการเลื่อน นอกจากนี้ยังตรวจสอบการแสดงผลหน้าก่อนทรัพยากรระยะไกลอื่น ๆ เช่นคำขอ http สำหรับรูปภาพการเรียกข้อมูลจะเสร็จสิ้น
รายการเลย์เอาต์ที่แอมป์รองรับมีดังนี้ -
- ไม่อยู่
- Container
- fill
- fixed
- fixed-height
- flex-item
- intrinsic
- nodisplay
- Responsive
คุณจะได้เรียนรู้โดยละเอียดเกี่ยวกับสิ่งเดียวกันในบทนี้ Google AMP − Layout ของบทช่วยสอนนี้
ให้เข้าใจการทำงานของ layout =” responsive” ด้วยความช่วยเหลือของตัวอย่างดังที่แสดง -
ตัวอย่าง
<!doctype html>
<html amp lang = "en">
<head>
<meta charset = "utf-8">
<script async src = "https://cdn.ampproject.org/v0.js"></script>
<title>Google AMP - Image>/title>
<link rel = "canonical" href = " http://example.ampproject.org/article-metadata.html">
<meta name = "viewport" content = "width = device-width,minimum-scale = 1,initial-scale = 1">
<style amp-boilerplate>
body {
-webkit-animation:
-amp-start 8s steps(1,end) 0s 1 normal both;-moz-animation:
-amp-start 8s steps(1,end) 0s 1 normal both;-ms-animation:
-amp-start 8s steps(1,end) 0s 1 normal both;animation:
-amp-start 8s steps(1,end) 0s 1 normal both
}
@-webkit-keyframes
-amp-start{from{visibility:hidden}to{visibility:visible}}@-moz-keyframes
-amp-start{from{visibility:hidden}to{visibility:visible}}@-ms-keyframes
-amp-start{from{visibility:hidden}to{visibility:visible}}@-o-keyframes
-amp-start{from{visibility:hidden}to{visibility:visible}}@keyframes
-amp-start{from{visibility:hidden}to{visibility:visible}}
</style>
<noscript>
<style amp-boilerplate>
body {
-webkit-animation:none;-moz-animation:none;
-ms-animation:none;animation:none
}
</style>
</noscript>
<style amp-custom>
amp-img {
border: 1px solid black;
border-radius: 4px;
padding: 5px;
}
displayitem {
display: inline-block;
width: 200px;
height:200px;
margin: 5px;
}
h1{font-family: "Segoe
UI",Arial,sans-serif;font-weight: 400;margin: 10px 0;}
</style>
</head>
<body>
<h1>Google AMP - Layout = responsive Image Example>/h1>
<div class = "displayitem">
<amp-img alt = "Beautiful Flower"
src = "images/flower.jpg"
width = "246"
height = "205"
layout = "responsive">
</amp-img>
</div>
</body>
</html>เอาต์พุต
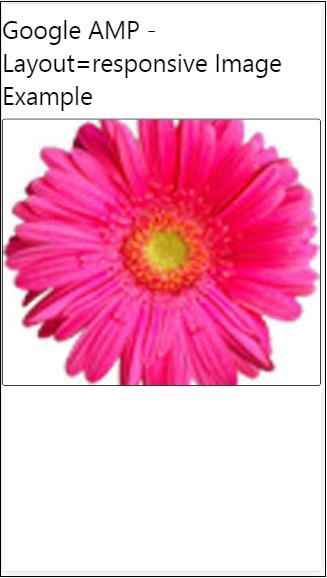
คุณสมบัติสื่อ
แอตทริบิวต์นี้สามารถใช้ได้กับส่วนประกอบแอมป์ส่วนใหญ่ ต้องใช้แบบสอบถามสื่อและหากค่าไม่ตรงกับองค์ประกอบจะไม่แสดงผล
ให้เราเข้าใจการทำงานของแอตทริบิวต์สื่อด้วยความช่วยเหลือของตัวอย่าง -
ตัวอย่าง
<!doctype html>
<html amp lang = "en">
<head>
<meta charset = "utf-8">
<script async src = "https://cdn.ampproject.org/v0.js"></script>
<title>Google AMP - Image</title>
<link rel = "canonical" href = " http://example.ampproject.org/article-metadata.html">
<meta name = "viewport" content = "width = device-width,minimum-scale = 1,initial-scale = 1">
<style amp-boilerplate>
body{
-webkit-animation:
-amp-start 8s steps(1,end) 0s 1 normal both;-moz-animation:
-amp-start 8s steps(1,end) 0s 1 normal both;-ms-animation:
-amp-start 8s steps(1,end) 0s 1 normal both;animation:
-amp-start 8s steps(1,end) 0s 1 normal both
}
@-webkit-keyframes
-amp-start{from{visibility:hidden}to{visibility:visible}}@-moz-keyframes
-amp-start{from{visibility:hidden}to{visibility:visible}}@-ms-keyframes
-amp-start{from{visibility:hidden}to{visibility:visible}}@-o-keyframes
-amp-start{from{visibility:hidden}to{visibility:visible}}@keyframes
-amp-start{from{visibility:hidden}to{visibility:visible}}
</style>
<noscript>
<style amp-boilerplate>
body {
-webkit-animation:none;-moz-animation:none;
-ms-animation:none;animation:none
}
</style>
</noscript>
<style amp-custom>
amp-img {
border: 1px solid black;
border-radius: 4px;
padding: 5px;
}
h1{font-family: "Segoe
UI",Arial,sans-serif;font-weight: 400;margin: 10px 0;}
</style>
</head>
<body>
<h1>Google AMP - Media Attribute</h1>
<div class = "displayitem">
<amp-img
media = "(min-width: 600px)"
src = "images/christmas1.jpg"
width = "466"
height = "355"
layout = "responsive">
</amp-img>
</div>
</body>
</html>เราได้ใช้แอตทริบิวต์สื่อบนแท็ก <amp-img> ดังที่แสดงด้านล่าง -
<amp-img
media = "(min-width: 600px)"
src = "images/christmas1.jpg"
width = "466"
height = "355"
layout = "responsive">
</amp-img>โปรดทราบว่ารูปภาพจะไม่แสดงหากความกว้างของหน้าจอน้อยกว่า 600px เราจะใช้โหมดมือถือจำลอง Google เพื่อทดสอบตัวอย่าง
เอาต์พุตบนสมาร์ทโฟน
เราตรวจสอบบนอุปกรณ์แล้วไม่สามารถมองเห็นภาพได้เนื่องจากความกว้างของอุปกรณ์น้อยกว่า 600px หากเราตรวจสอบแท็บเล็ตเราจะได้ผลลัพธ์ดังที่แสดงด้านล่าง -
เอาต์พุตบน IPAD

แอตทริบิวต์ Noloading
ส่วนประกอบแอมป์เช่น <amp-img>, <amp-video>, <amp-facebook> แสดงตัวบ่งชี้การโหลดก่อนที่เนื้อหาจริงจะโหลดและแสดงให้ผู้ใช้เห็น
หากต้องการหยุดแสดงตัวบ่งชี้การโหลดเราสามารถใช้แอตทริบิวต์ noloading ได้ดังนี้ -
<amp-img src = "images/christmas1.jpg"
noloading
height = "300"
width = "250"
layout = "responsive">
</amp-img>ใน Attribute
แอตทริบิวต์ on ถูกใช้กับอิลิเมนต์สำหรับการจัดการเหตุการณ์และการดำเนินการกับ amp-components ไวยากรณ์ที่จะใช้กับแอตทริบิวต์มีดังนี้ -
ไวยากรณ์ -
on = "eventName:elementId[.methodName[(arg1 = value, arg2 = value)]]"รายละเอียดส่งผ่านไปยัง on แอตทริบิวต์มีดังนี้ -
eventName- ใช้ชื่อของเหตุการณ์ที่พร้อมใช้งานสำหรับ amp-component ตัวอย่างเช่นสำหรับแบบฟอร์มเราสามารถใช้ submit-success, submit-error eventNames
elementId- ใช้รหัสขององค์ประกอบที่จำเป็นต้องเรียกเหตุการณ์ อาจเป็นรหัสของแบบฟอร์มที่เราต้องการทราบเกี่ยวกับความสำเร็จหรือข้อผิดพลาด
methodName - ใช้ชื่อของเมธอดที่จะเรียกตามเหตุการณ์ที่เกิดขึ้น
arg=value - ใช้อาร์กิวเมนต์ที่มีรูปแบบคีย์ = ค่าส่งไปยังเมธอด
นอกจากนี้ยังสามารถส่งผ่านหลายเหตุการณ์ไปยังแอตทริบิวต์ On ได้ดังนี้ -
on = "submit-success:lightbox;submit-error:lightbox1"Note - หากมีหลายเหตุการณ์เหตุการณ์เหล่านี้จะถูกส่งต่อไปยังแอตทริบิวต์ on และแยกโดยใช้อัฒภาค (;)
แอตทริบิวต์การดำเนินการ
การดำเนินการโดยทั่วไปจะใช้กับแอตทริบิวต์ on และไวยากรณ์มีดังนี้ -
on = "tab:elementid.hide;"เราสามารถผ่านการกระทำต่างๆได้ดังนี้ -
on = "tab:elementid.open;tab:elementid.hide;”Elementid คือรหัสขององค์ประกอบที่จะต้องดำเนินการ
แอมป์มีเหตุการณ์และการดำเนินการที่กำหนดทั่วโลกซึ่งสามารถใช้กับองค์ประกอบแอมป์ใดก็ได้และเป็นเช่นนั้น tap events และการกระทำคือ hide, show และ togglevisibility.
Note - หากคุณต้องการซ่อน / แสดงหรือใช้การสลับการมองเห็นในองค์ประกอบ html หรือ amp คุณสามารถใช้ on=”tap:elementid.[hide/show/togglevisibility]”
แอตทริบิวต์ตัวยึดตำแหน่ง
แอตทริบิวต์ตัวยึดตำแหน่งสามารถใช้กับองค์ประกอบ html ใด ๆ เช่นองค์ประกอบอินพุตและยังสามารถใช้กับองค์ประกอบแอมป์ตัวยึดตำแหน่งเป็นสิ่งแรกที่จะแสดงบนเพจและเมื่อโหลดเนื้อหาแล้วตัวยึดจะถูกลบออกและ ทำให้มองไม่เห็น
ตัวยึดตำแหน่งในองค์ประกอบอินพุต
<input type = "text" id = "date" name = "date" placeholder = "Start Date">ตัวยึดตำแหน่งในองค์ประกอบแอมป์
<amp-anim src = "images/loreal.gif" width = "300" height = "250" layout = "responsive">
<amp-img placeholder src = "images/flower.jpg"
layout = "fill">
</amp-img>
</amp-anim>ขนาดแอตทริบิวต์
ใช้เช่นเดียวกับแอตทริบิวต์ heights ค่าเป็นนิพจน์ดังแสดงด้านล่าง -
<amp-img src = "amp.png"
width = "400" height = "300"
layout = "responsive"
sizes = "(min-width: 250px) 250px, 100vw">
</amp-img>แอตทริบิวต์ความกว้างและความสูง
ใช้กับองค์ประกอบ html และส่วนประกอบแอมป์เกือบทั้งหมด ความกว้างและความสูงใช้เพื่อระบุพื้นที่ที่องค์ประกอบแอมป์ครอบครองบนหน้า
ตัวอย่าง
<amp-img src = "amp.png"
width = "400" height = "300"
layout = "responsive">
</amp-img>แอมป์แสดงผลหน้าบนหน้าจอหลังจากพิจารณาอย่างถี่ถ้วนแล้วหน้าที่โหลดจะมีรูปภาพวิดีโอ iframe และอื่น ๆ ซึ่งเป็นคำขอ http ที่ต้องทำมากกว่า ดังนั้นคำขอ http ที่ต้องดำเนินการจึงล่าช้าเพื่อให้เนื้อหาบนเพจแสดงขึ้นและยังมีการสร้างพื้นที่ที่จำเป็นสำหรับรูปภาพวิดีโอและ iframe ที่จะโหลด
แอมป์มีคุณสมบัติเช่นตัวยึดตำแหน่งทางเลือก srcset และแอตทริบิวต์เค้าโครงเพื่อให้เพจตอบสนองและยังตรวจสอบให้แน่ใจว่าเนื้อหาในเพจไม่ถูกรบกวน ในบทนี้ให้เราพิจารณารายละเอียดทั้งหมดนี้
แท็กสไตล์แอมป์
แอมป์มีสไตล์แท็กด้วย amp-custom ตามที่แสดงด้านล่าง -
<style amp-custom>
button{
background-color: #ACAD5C;
color: white;
padding: 12px 20px;
border: none;
border-radius: 4px;
cursor: pointer;
float: left;
}
amp-img {
border: 1px solid black;
border-radius: 4px;
padding: 5px;
}
p {
padding: 1rem;
font-size:25px;
}
largeText {
font-size:30px;
background-color:red;
}
</style>โดยทั่วไปจะใช้เพื่อเขียน css แบบกำหนดเองที่จำเป็นสำหรับเพจ โปรดอย่าลืมเพิ่มไฟล์amp-customคุณลักษณะ; มิฉะนั้นจะล้มเหลวในการตรวจสอบความถูกต้องของแอมป์ดังที่แสดงด้านล่าง -

Amp ยังรองรับ inline css สำหรับองค์ประกอบ html ดังที่แสดงด้านล่าง -
<div style = "color:green;margin-left:30px;">
Welcome to TutorialsPoint</p>แท็กสไตล์ชีตภายนอก
แอมป์ไม่รองรับสไตล์ชีตภายนอกและจะล้มเหลวในการตรวจสอบความถูกต้องเมื่อตรวจสอบความถูกต้องสำหรับแอมป์
ตัวอย่าง
<!doctype html>
<html amp lang = "en">
<head>
<meta charset = "utf-8">
<script async src = "https://cdn.ampproject.org/v0.js"></script>
<title>Google AMP - Dynamic Css Classes</title>
<link rel = "canonical" href = "
http://example.ampproject.org/article-metadata.html">
<meta name = "viewport" content = "width = device-width,minimum-scale = 1,initial-scale = 1">
<style amp-boilerplate>
body {
-webkit-animation:
-amp-start 8s steps(1,end) 0s 1 normal both;-moz-animation:
-amp-start 8s steps(1,end) 0s 1 normal both;-ms-animation:
-amp-start 8s steps(1,end) 0s 1 normal both;animation:
-amp-start 8s steps(1,end) 0s 1 normal both
}
@-webkit-keyframes
-amp-start{from{visibility:hidden}to{visibility:visible}}@-moz-keyframes
-amp-start{from{visibility:hidden}to{visibility:visible}}@-ms-keyframes
-amp-start{from{visibility:hidden}to{visibility:visible}}@-o-keyframes
-amp-start{from{visibility:hidden}to{visibility:visible}}@keyframes
-amp-start{from{visibility:hidden}to{visibility:visible}}
</style>
<noscript>
<style amp-boilerplate>
body {
-webkit-animation:none;
-moz-animation:none;
-ms-animation:none;
animation:none
}
</style>
</noscript>
<script async custom-element = "amp-bind" src = "
https://cdn.ampproject.org/v0/amp-bind-0.1.js">
</script>
<script async custom-element = "amp-dynamic-css-classes"
src = "https://cdn.ampproject.org/v0/amp-dynamic-css-classes-0.1.js">
</script>
<link rel = "stylesheet"
href = "https://cdnjs.cloudflare.com/ajax/libs/materialize/0.9 8.0/css/materialize.min.css">
<style amp-custom>
p {
padding: 1rem;
font-size:25px;
}
</style>
</head>
<body>
<h3>Google AMP - Dynamic Css Classes</h3>
<div style = "color:green;margin-left:30px;">
Welcome to TutorialsPoint</p>
</body>
</html>เมื่อตรวจสอบความถูกต้องด้วยโปรแกรมตรวจสอบAMPเราจะได้รับข้อผิดพลาดต่อไปนี้
ในการแสดงองค์ประกอบในหน้าตามอุปกรณ์องค์ประกอบแอมป์จำเป็นต้องระบุความกว้างและความสูงที่องค์ประกอบจะใช้ในหน้านั้น การเพิ่มเค้าโครง = "ตอบสนอง" จะทำให้องค์ประกอบที่ตอบสนองบนหน้าเว็บคงอัตราส่วนไว้
รายละเอียดของแอตทริบิวต์เค้าโครงจะกล่าวถึงโดยละเอียดในบทนี้ Google AMP – Layout.
amp-dynamic-css-class เพิ่มคลาสไดนามิกให้กับ body tag ในบทนี้ให้เราเรียนรู้รายละเอียดของแท็กนี้
ในการทำงานกับ amp-dynamic-css-class เราจำเป็นต้องเพิ่มสคริปต์ต่อไปนี้ -
<script asynccustom-element="amp-dynamic-css-classes"
src = "https://cdn.ampproject.org/v0/amp-dynamic-css-classes-0.1.js">
</script>มีคลาสสำคัญสองคลาสที่ได้รับการดูแลโดย amp-dynamic-css-คลาส -
- amp-referrer-*
- amp-viewer
ให้เราคุยรายละเอียดแต่ละเรื่อง
แอมป์ผู้อ้างอิง - *
ชั้นเรียนเหล่านี้ตั้งขึ้นอยู่กับว่าผู้ใช้เข้ามาอย่างไร หมายความว่าหากผู้ใช้มาจาก Google คลาสผู้อ้างอิงที่เกี่ยวข้องกับ Google จะถูกตั้งค่า เช่นเดียวกับ Twitter และ Pinterest
ชั้นเรียนมีให้ตามประเภทของผู้อ้างอิง
ตัวอย่างเช่นสำหรับ Google ชั้นเรียนต่อไปนี้จะถูกเพิ่มหากผู้ใช้คลิก amp หน้าจากเครื่องมือค้นหาของ Google
- amp-referrer-www-google-com
- amp-referrer-google-com
- amp-referrer-com
ในทำนองเดียวกันมีชั้นเรียนสำหรับ Twitter, Pinterest, Linkedin และอื่น ๆ
amp-viewer
โปรแกรมดูแอมป์จะเปลี่ยน url ของแอมป์เพื่อรับรายละเอียดจากแคชของ Google หากคุณค้นหาบางสิ่งในการค้นหาของ Google ภาพหมุนที่ปรากฏขึ้นจะมีหน้าแอมป์ทั้งหมด
เมื่อคุณคลิกพวกเขาจะถูกเปลี่ยนเส้นทางไปยัง URL ที่มี Google url เป็นคำนำหน้า คลาส amp-viewer จะถูกตั้งค่าเมื่อผู้ใช้ดูเพจใน amp- viewer และใช้คลาสไดนามิก

เมื่อคุณคลิกหน้าแอมป์ URL ที่คุณได้รับในแถบที่อยู่จะเป็นดังนี้ -
https://www.google.co.in/amp/s/m.timesofindia.com/sports/cricket/india-in-australia/to-hell-with-the-nets-boys-need-rest-ravi-shastri/amp_articleshow/67022458.cms
ตัวอย่าง
<!doctype html>
<html amp lang = "en">
<head>
<meta charset = "utf-8">
<script async src = "https://cdn.ampproject.org/v0.js"></script>
<title>Google AMP - Dynamic Css Classes</title>
<link rel = "canonical" href = "http://example.ampproject.org/article-metadata.html">
<meta name = "viewport" content = "width = device-width,minimum-scale = 1,initial-scale = 1">
<style amp-boilerplate>
body{
-webkit-animation:
-amp-start 8s steps(1,end) 0s 1 normal both;-moz-animation:
-amp-start 8s steps(1,end) 0s 1 normal both;-ms-animation:
-amp-start 8s steps(1,end) 0s 1 normal both;animation:
-amp-start 8s steps(1,end) 0s 1 normal both
}
@-webkit-keyframes
-amp-start{from{visibility:hidden}to{visibility:visible}}@-moz-keyframes
-amp-start{from{visibility:hidden}to{visibility:visible}}@-ms-keyframes
-amp-start{from{visibility:hidden}to{visibility:visible}}@-o-keyframes
-amp-start{from{visibility:hidden}to{visibility:visible}}@keyframes
-amp-start{from{visibility:hidden}to{visibility:visible}}
</style>
<noscript>
<style amp-boilerplate>
body {
-webkit-animation:none;-moz-animation:none;
-ms-animation:none;animation:none
}
</style>
</noscript>
<script async custom-element = "amp-bind"
src = "https://cdn.ampproject.org/v0/amp-bind-0.1.js">
</script>
<script async custom-element = "amp-dynamic-css-classes"
src = "https://cdn.ampproject.org/v0/amp-dynamic-css-classes-0.1.js">
</script>
<link rel = "stylesheet" href = "https://cdnjs.cloudflare.com/ajax/libs/materialize/0.98.0/css/materialize.min.css">
<style amp-custom>
body:not(.amp-referrer-pinterest-com) .if-pinterest,
body:not(.amp-referrer-ampbyexample-com) .if-ampbyexample,
body:not(.amp-referrer-google-com) .if-google,
body:not(.amp-referrer-twitter-com) .if-twitter,
body:not(.amp-referrer-linkedin-com) .if-linkedin,
body:not(.amp-referrer-localhost) .if-localhost {
display: none;
}
body:not(.amp-viewer) .if-viewer,
body.amp-viewer .if-not-viewer {
display: none;
}
p {
padding: 1rem;
font-size:25px;
}
</style>
</head>
<body>
<h3>Google AMP - Dynamic Css Classes</h3>
<div>
<p class = "if-pinterest">You were referred here or embedded by Pinterest!</p>
<p class = "if-twitter">You were referred here or embedded by Twitter!</p>
<p class = "if-google">You were referred here or embedded by Google!</p>
<p class = "if-ampbyexample">You came here directly! Cool :)</p>
< class = "if-localhost">You came here directly! Cool :)</p>
</div>
<div>
<p class = "if-not-viewer">Hey! You are not coming from amp viewer</p>
<p class = "if-viewer">Hey! From amp viewer.</p>
<div>
</body>
</html>เอาต์พุต
ในการใช้การกระทำหรือเหตุการณ์กับ amp-component เราสามารถใช้แอตทริบิวต์ on ในบทนี้ให้เราพิจารณารายละเอียด
เหตุการณ์
ไวยากรณ์ในการทำงานกับเหตุการณ์มีดังนี้ -
on = "eventName:elementId[.methodName[(arg1 = value, arg2 = value)]]"รายละเอียดส่งผ่านไปยัง on แอตทริบิวต์มีดังนี้ -
eventName- ใช้ชื่อของเหตุการณ์ที่พร้อมใช้งานสำหรับ amp-component ตัวอย่างเช่นสำหรับแบบฟอร์มเราสามารถใช้ submit-success, submit-error eventNames
elementId- ใช้รหัสขององค์ประกอบที่จำเป็นต้องเรียกเหตุการณ์ อาจเป็นรหัสของแบบฟอร์มที่เราต้องการทราบเกี่ยวกับความสำเร็จหรือข้อผิดพลาด
methodName - ใช้ชื่อของเมธอดที่จะเรียกตามเหตุการณ์ที่เกิดขึ้น
arg=value - ใช้อาร์กิวเมนต์ที่มีรูปแบบคีย์ = ค่าส่งไปยังเมธอด
นอกจากนี้ยังสามารถส่งผ่านหลายเหตุการณ์ไปยังแอตทริบิวต์ on ได้และทำได้ดังนี้ -
on = "submit-success:lightbox;submit-error:lightbox1"หากมีหลายเหตุการณ์เหตุการณ์เหล่านี้จะถูกส่งต่อไปยังแอตทริบิวต์ on และคั่นด้วยเครื่องหมายอัฒภาค (;)
การดำเนินการ
โดยทั่วไปแล้วการดำเนินการจะใช้กับแอตทริบิวต์และไวยากรณ์มีดังนี้ -
on = "tab:elementid.hide;"เราสามารถผ่านการกระทำต่างๆได้ดังนี้ -
on = "tab:elementid.open;tab:elementid.hide;”Elementid คือรหัสขององค์ประกอบที่จะต้องดำเนินการ
แอมป์มีเหตุการณ์และการดำเนินการที่กำหนดทั่วโลกซึ่งสามารถใช้กับส่วนประกอบแอมป์ใดก็ได้และเป็นเช่นนั้น tap event และการกระทำคือ hide, show และ togglevisibility.
หากคุณต้องการซ่อน / แสดงหรือใช้ togglevisibility ใน html หรือ amp component คุณสามารถใช้ on=”tap:elementid.[hide/show/togglevisibility]”
ให้เราดูตัวอย่างการทำงานสำหรับเหตุการณ์และการกระทำ
ในองค์ประกอบอินพุต
ให้เราเข้าใจสิ่งนี้ให้ดีขึ้นด้วยตัวอย่างการใช้งาน -
ตัวอย่าง
<!doctype html>
<html amp lang = "en">
<head>
<meta charset = "utf-8">
<script async src = "https://cdn.ampproject.org/v0.js"></script>
<title>Google AMP - Amp Bind</title>
<link rel = "canonical" href = "http://example.ampproject.org/article-metadata.html">
<meta name = "viewport" content = "width = device-width,minimum-scale = 1,initial-scale = 1">
<style amp-boilerplate>
body{
-webkit-animation:
-amp-start 8s steps(1,end) 0s 1 normal both;-moz-animation:
-amp-start 8s steps(1,end) 0s 1 normal both;-ms-animation:
-amp-start 8s steps(1,end) 0s 1 normal both;animation:
-amp-start 8s steps(1,end) 0s 1 normal both
}
@-webkit-keyframes
-amp-start{from{visibility:hidden}to{visibility:visible}}@-moz-keyframes
-amp-start{from{visibility:hidden}to{visibility:visible}}@-ms-keyframes
-amp-start{from{visibility:hidden}to{visibility:visible}}@-o-keyframes
-amp-start{from{visibility:hidden}to{visibility:visible}}@keyframes
-amp-start{from{visibility:hidden}to{visibility:visible}}
</style>
<noscript>
<style amp-boilerplate>
body {
-webkit-animation:none;
-moz-animation:none;
-ms-animation:none;
animation:none
}
</style>
</noscript>
<script async custom-element = "amp-bind" src = "
https://cdn.ampproject.org/v0/amp-bind-0.1.js">
</script>
<script async custom-element = "amp-lightbox" src = "
https://cdn.ampproject.org/v0/amp-lightbox-0.1.js">
</script>
<style amp-custom>
button{
background-color: #ACAD5C;
color: white;
padding: 12px 20px;
border: none;
border-radius: 4px;
cursor: pointer;
float: left;}
.lightbox {
background: rgba(211,211,211,0.8);
width: 100%;
height: 100%;
position: absolute;
display: flex;
align-items: center;
justify-content: center;
}
#txtname{
width: 100%;
padding: 12px 20px;
margin: 8px 0;
display: inline-block;
border: 1px solid #ccc;
border-radius: 4px;
box-sizing: border-box;
}
div {
font-size:25px;
}
</style>
</head>
<body>
<h3>Google AMP - Amp Bind</h3>
<button on = "tap:AMP.setState({displaylightbox: true})">
Click Here
</button>
<br/>
<br/>
<h3>AMP - Input Element</h3>
<input id = "txtname" placeholder = "Type here" on =
"input-throttled:AMP.setState({name: event.value})">
<div [text] = "name"></div>
</body>
</html>เอาต์พุต
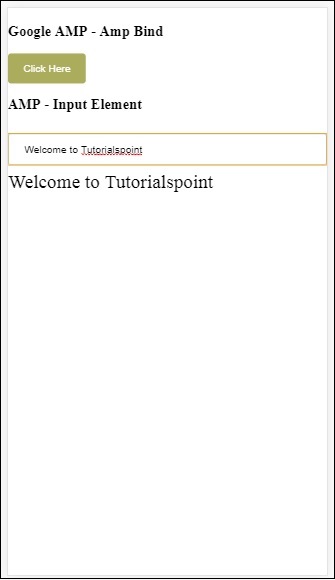
โปรดทราบว่าในตัวอย่างข้างต้นเรากำลังใช้เหตุการณ์ในช่องป้อนข้อมูลดังนี้ -
<input id = "txtname" placeholder = "Type here"
on = "input-throttled:AMP.setState({name: event.value})">เหตุการณ์ที่ใช้คือ input-throlled.
เรายังสามารถใช้การเปลี่ยนแปลงได้ดังนี้ -
<input id = "txtname" placeholder = "Type here" on =
"change:AMP.setState({name: event.value})">ผลลัพธ์จะแสดงขึ้นเมื่อผู้ใช้ออกมาจากช่องป้อนข้อมูล เราสามารถใช้เหตุการณ์การเปลี่ยนแปลงในประเภทอินพุตเป็นวิทยุช่องทำเครื่องหมาย ฯลฯ และในองค์ประกอบที่เลือก
<input id = "txtname" placeholder = "Type here" on =
"input-debounced:AMP.setState({name: event.value})">เหตุการณ์ input-debounced เหมือนกับ changeเหตุการณ์ แต่ผลลัพธ์จะเห็นหลังจาก 300ms หลังจากผู้ใช้พิมพ์
ตัวอย่าง
<!doctype html>
<html amp lang = "en">
<head>
<meta charset = "utf-8">
<script async src = "https://cdn.ampproject.org/v0.js"></script>
<title>Google AMP - Amp Bind</title>
<link rel = "canonical" href = " http://example.ampproject.org/article-metadata.html">
<meta name = "viewport" content = "width = device-width,minimum-scale = 1,initial-scale = 1">
<style amp-boilerplate>
body{
-webkit-animation:
-amp-start 8s steps(1,end) 0s 1 normal both;-moz-animation:
-amp-start 8s steps(1,end) 0s 1 normal both;-ms-animation:
-amp-start 8s steps(1,end) 0s 1 normal both;animation:
-amp-start 8s steps(1,end) 0s 1 normal both
}
@-webkit-keyframes
-amp-start{from{visibility:hidden}to{visibility:visible}}@-moz-keyframes
-amp-start{from{visibility:hidden}to{visibility:visible}}@-ms-keyframes
-amp-start{from{visibility:hidden}to{visibility:visible}}@-o-keyframes
-amp-start{from{visibility:hidden}to{visibility:visible}}@keyframes
-amp-start{from{visibility:hidden}to{visibility:visible}}
</style>
<noscript>
<style amp-boilerplate>
body{
-webkit-animation:none;
-moz-animation:none;
-ms-animation:none;
animation:none}
</style>
</noscript>
<script async custom-element = "amp-bind"
src = "https://cdn.ampproject.org/v0/amp-bind-0.1.js">
</script>
<script async custom-element = "amp-lightbox"
src = "https://cdn.ampproject.org/v0/amp-lightbox-0.1.js">
</script>
<style amp-custom>
button{
background-color: #ACAD5C;
color: white;
padding: 12px 20px;
border: none;
border-radius: 4px;
cursor: pointer;
float: left;
}
.lightbox {
background: rgba(211,211,211,0.8);
width: 100%;
height: 100%;
position: absolute;
display: flex;
align-items: center;
justify-content: center;
}
#txtname{
width: 100%;
padding: 12px 20px;
margin: 8px 0;
display: inline-block;
border: 1px solid #ccc;
border-radius: 4px;
box-sizing: border-box;
}
div {
font-size:25px;
}
</style>
</head>
<body>
<h3>Google AMP - Amp Bind</h3>
<button on = "tap:AMP.setState({displaylightbox: true})">
Click Here
</button>
<br/>
<br/>
<h3>AMP - Input Element</h3>
<input id = "txtname" placeholder = "Type here" on =
"input-debounced:AMP.setState({name: event.value})">
<div [text] = "name"></div>
</body>
</html>เอาต์พุต
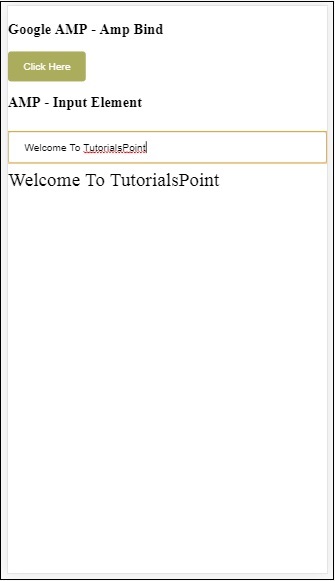
บนแอมป์ไลท์บ็อกซ์
ในส่วนนี้เราจะทดสอบเหตุการณ์ต่อไปนี้บนไลท์บ็อกซ์ -
- lightboxOpen
- lightboxClose
ตัวอย่าง
<!doctype html>
<html amp lang = "en">
<head>
<meta charset = "utf-8">
<script async src = "https://cdn.ampproject.org/v0.js"></script>
<title>Google AMP - Amp Lightbox</title>
<link rel = "canonical" href = " http://example.ampproject.org/article-metadata.html">
<meta name = "viewport" content = "width = device-width,minimum-scale = 1,initial-scale = 1">
<style amp-boilerplate>
body{
-webkit-animation:
-amp-start 8s steps(1,end) 0s 1 normal both;-moz-animation:
-amp-start 8s steps(1,end) 0s 1 normal both;-ms-animation:
-amp-start 8s steps(1,end) 0s 1 normal both;animation:
-amp-start 8s steps(1,end) 0s 1 normal both
}
@-webkit-keyframes
-amp-start{from{visibility:hidden}to{visibility:visible}}@-moz-keyframes
-amp-start{from{visibility:hidden}to{visibility:visible}}@-ms-keyframes
-amp-start{from{visibility:hidden}to{visibility:visible}}@-o-keyframes
-amp-start{from{visibility:hidden}to{visibility:visible}}@keyframes
-amp-start{from{visibility:hidden}to{visibility:visible}}
</style>
<noscript>
<style amp-boilerplate>
body{
-webkit-animation:none;
-moz-animation:none;
-ms-animation:none;
animation:none}
</style>
</noscript>
<script async custom-element = "amp-bind"
src = "https://cdn.ampproject.org/v0/amp-bind-0.1.js">
</script>
<script async custom-element = "amp-lightbox"
src = "https://cdn.ampproject.org/v0/amp-lightbox-0.1.js">
</script>
<style amp-custom>
amp-img {
border: 1px solid #ddd;
border-radius: 4px;
padding: 5px;
}
button {
background-color: #ACAD5C;
color: white;
padding: 12px 20px;
border: none;
border-radius: 4px;
cursor: pointer;
float: left;
}
.lightbox {
background: rgba(211,211,211,0.8);
width: 100%;
height: 100%;
position: absolute;
display: flex;
align-items: center;
justify-content: center;
}
p{font-size:30px;}
</style>
</head>
<body>
<h3>Google AMP - Amp Lightbox</h3>
<p [text] = "'Lightbox is ' + lightboxstatus + '.'">
Lightbox Event Testing
</p>
<button on = "tap:my-lightbox.open">
Show LightBox
</button>
<amp-lightbox id = "my-lightbox" layout = "nodisplay"
close-button on = "lightboxOpen:AMP.setState({lightboxstatus:'opened'});
lightboxClose:AMP.setState({lightboxstatus:'closed'});">
<div class = "lightbox">
<amp-img alt = "Beautiful Flower" src = "images/loreal.gif"
width = "246"
height = "205">
</amp-img>
</div>
</amp-lightbox>
</body>
</html>เอาต์พุต
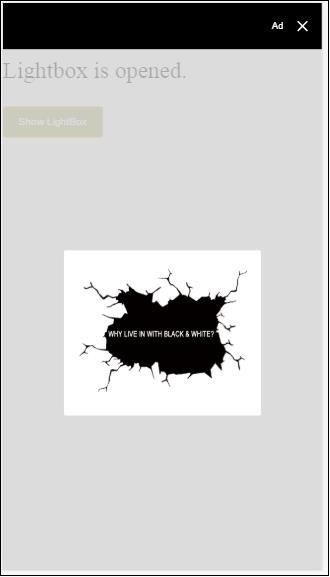
รหัสต่อไปนี้แสดงวิธีการใช้งานเหตุการณ์เปิดและปิดบนไลท์บ็อกซ์ -
<p [text]="'Lightbox is ' + lightboxstatus + '.'">Lightbox Event Testing</p>
<button on = "tap:my-lightbox.open">Show LightBox</button>
<amp-lightbox id = "my-lightbox" layout = "nodisplay"
close-button on = "lightboxOpen:AMP.setState({lightboxstatus:'opened'});
lightboxClose:AMP.setState({lightboxstatus:'closed'});">
<div class = "lightbox">
<amp-img alt = "Beautiful Flower" src = "images/loreal.gif"
width = "246"
height = "205">
</amp-img>
</div>
</amp-lightbox>เหตุการณ์บน Amp -Selector
เหตุการณ์ที่มีอยู่ใน amp-selector คือ select.
ตัวอย่าง
<!doctype html>
<html amp lang = "en">
<head>
<meta charset = "utf-8">
<script async src = "https://cdn.ampproject.org/v0.js"></script>
<title>Google AMP - Amp Selector</title>
<link rel = "canonical" href = "http://example.ampproject.org/article-metadata.html">
<meta name = "viewport" content = "width = device-width,minimum-scale = 1,initial-scale = 1">
<style amp-boilerplate>
body{
-webkit-animation:
-amp-start 8s steps(1,end) 0s 1 normal both;-moz-animation:
-amp-start 8s steps(1,end) 0s 1 normal both;-ms-animation:
-amp-start 8s steps(1,end) 0s 1 normal both;animation:
-amp-start 8s steps(1,end) 0s 1 normal both
}
@-webkit-keyframes
-amp-start{from{visibility:hidden}to{visibility:visible}}@-moz-keyframes
-amp-start{from{visibility:hidden}to{visibility:visible}}@-ms-keyframes
-amp-start{from{visibility:hidden}to{visibility:visible}}@-o-keyframes
-amp-start{from{visibility:hidden}to{visibility:visible}}@keyframes
-amp-start{from{visibility:hidden}to{visibility:visible}}
</style>
<noscript>
<style amp-boilerplate>
body {
-webkit-animation:none;
-moz-animation:none;
-ms-animation:none;
animation:none
}
</style>
</noscript>
<script async custom-element = "amp-bind"
src = "https://cdn.ampproject.org/v0/amp-bind-0.1.js">
</script>
<script async custom-element = "amp-selector"
src = "https://cdn.ampproject.org/v0/amp-selector-0.1.js">
</script>
<style amp-custom>
.radio-menu {
list-style: none;
}
.radio-menu [option][selected] {
outline: none;
}
.radio-menu [option] {
display: flex;
align-items: center;
}
.radio-menu [option]:before {
transition: background 0.25s ease-in-out;
content: "";
display: inline-block;
width: 24px;
height: 24px;
margin: 8px;
border-radius: 100%;
border: solid 1px black;
}
.radio-menu [option = red][selected]:before {
text-align: center;
content: "✓";
color: white;
background: red;
}
.radio-menu [option = green][selected]:before {
text-align: center;
content: "✓";
color: white;
background: green;
}
.radio-menu [option = blue][selected]:before {
text-align: center;
content: "✓";
color: white;
background: blue;
}
p{font-size:30px;}
</style>
</head>
<body>
<h3>Google AMP - Amp Selector</h3>
<p [text] = "'Color selected is ' + ampselectorstatus + '.'">
Amp Selector Event Testing
<p>
<amp-selector
class = "radio-menu"
layout = "container"
name = "my-selector"
on = "select:AMP.setState({ampselectorstatus:event.selectedOptions})">
<div option = "red">
Red
</div>
<div option = "green">
Green
</div>
<div option = "blue">
Blue
</div>
</amp-selector>
</body>
</html>เอาต์พุต
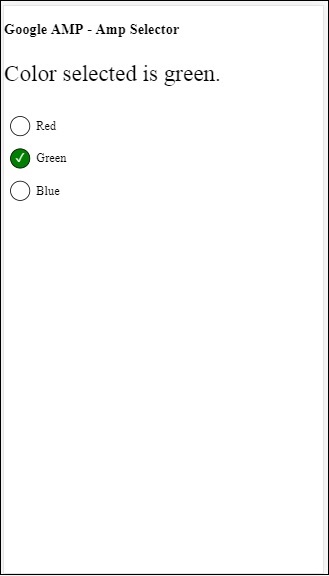
การเลือกเหตุการณ์ถูกใช้ดังนี้ -
<p [text]="'Color selected is ' + ampselectorstatus + '.'">
Amp Selector Event Testing
</p>
<amp-selector
class = "radio-menu"
layout ="container"
name =" my-selector"
on = "select:AMP.setState({ampselectorstatus:event.selectedOptions})">
<div option = "red">
Red
</div>
<div option = "green">
Green
</div>
<div option = "blue">
Blue
</div>
</amp-selector>เหตุการณ์บน Amp-Sidebar
เหตุการณ์ที่มีอยู่คือ sidebarOpen และ sidebarClose.
ตัวอย่าง
<!doctype html>
<html amp lang = "en">
<head>
<meta charset = "utf-8">
<script async src = "https://cdn.ampproject.org/v0.js"></script>
<title>Google AMP - Amp Sidebar</title>
<link rel = "canonical" href = "http://example.ampproject.org/article-metadata.html">
<meta name = "viewport" content = "width = device-width,minimum-scale = 1,initial-scale = 1">
<style amp-boilerplate>
body{
-webkit-animation:
-amp-start 8s steps(1,end) 0s 1 normal both;-moz-animation:
-amp-start 8s steps(1,end) 0s 1 normal both;-ms-animation:
-amp-start 8s steps(1,end) 0s 1 normal both;animation:
-amp-start 8s steps(1,end) 0s 1 normal both
}
@-webkit-keyframes
-amp-start{from{visibility:hidden}to{visibility:visible}}@-moz-keyframes
-amp-start{from{visibility:hidden}to{visibility:visible}}@-ms-keyframes
-amp-start{from{visibility:hidden}to{visibility:visible}}@-o-keyframes
-amp-start{from{visibility:hidden}to{visibility:visible}}@keyframes
-amp-start{from{visibility:hidden}to{visibility:visible}}
</style>
<noscript>
<style amp-boilerplate>
body{
-webkit-animation:none;
-moz-animation:none;
-ms-animation:none;
animation:none
}
</style>
</noscript>
<script async custom-element = "amp-bind"
src = "https://cdn.ampproject.org/v0/amp-bind-0.1.js">
</script>
<script async custom-element = "amp-sidebar"
src = "https://cdn.ampproject.org/v0/amp-sidebar-0.1.js">
</script>
<style amp-custom>
amp-img {
border: 1px solid #ddd;
border-radius: 4px;
padding: 5px;
}
button{
background-color: #ACAD5C;
color: white;
padding: 12px 20px;
border: none;
border-radius: 4px;
cursor: pointer;
float: left;
}
.amp-sidebar-toolbar-target-shown {
display: none;
}
p{font-size:30px;}
</style>
</head>
<body>
<h3>Google AMP - Amp Sidebar</h3>
<p [text] = "'Sidebar is ' + ampsidebarstatus + '.'">
Amp Sidebar Event Testing
</p>
<button on = "tap:sidebar1">
Show Sidebar
</button>
<amp-sidebar
id = "sidebar1"
layout = "nodisplay"
side = "right"
on = "sidebarOpen:AMP.setState({ampsidebarstatus: 'Opened'});
sidebarClose:AMP.setState({ampsidebarstatus: 'Closed'})">
<ul>
<li>Nav item 1</li>
<li>
<a href = "#idTwo" on = "tap:idTwo.scrollTo">Nav item 2</a>
</li>
<li>Nav item 3</li>
<li>
<a href = "#idFour" on="tap:idFour.scrollTo">Nav item 4</a>
</li>
<li>Nav item 5</li>
<li>Nav item 6</li>
</ul>
</amp-sidebar>
<div id = "target-element">
</div>
</body>
</html>เอาต์พุต
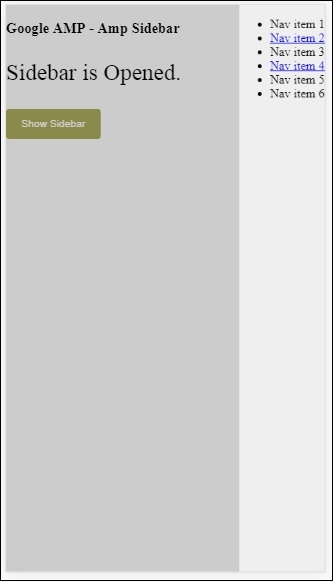
ใช้เหตุการณ์ดังต่อไปนี้ -
<p [text] = "'Sidebar is ' + ampsidebarstatus + '.'">
Amp Sidebar Event Testing
</p>
<button on = "tap:sidebar1">
Show Sidebar
</button>
<amp-sidebar
id = "sidebar1"
layout = "nodisplay"
side = "right"
on = "sidebarOpen:AMP.setState({ampsidebarstatus: 'Opened'});
sidebarClose:AMP.setState({ampsidebarstatus: 'Closed'})">
<ul>
<li>Nav item 1</li>
<li>
<a href = "#idTwo" on = "tap:idTwo.scrollTo">Nav item 2</a>
</li>
<li>Nav item 3</li>
<li>
<a href = "#idFour" on = "tap:idFour.scrollTo">Nav item 4</a>
</li>
<li>Nav item 5</li>
<li>Nav item 6</li>
</ul>
</amp-sidebar>Amp-animation เป็นส่วนประกอบของแอมป์ที่กำหนดภาพเคลื่อนไหวที่จะใช้กับส่วนประกอบแอมป์อื่น ๆ บทนี้จะกล่าวถึงรายละเอียด
ในการทำงานกับ amp-animation เราต้องเพิ่มสคริปต์ต่อไปนี้ -
<script async custom-element = "amp-animation"
src = "https://cdn.ampproject.org/v0/amp-animation-0.1.js">
</script>รายละเอียดของภาพเคลื่อนไหวถูกกำหนดไว้ภายในโครงสร้าง json
โครงสร้างพื้นฐานของ amp-animation ดังที่แสดงไว้ที่นี่ -
<amp-animation layout = "nodisplay">
<script type = "application/json">
{
// Timing properties
...
"animations": [
{
// animation 1
},
...
{
// animation n
}
]
}
</script>
</amp-animation>animation ส่วนประกอบประกอบด้วยสิ่งต่อไปนี้ - Selectors, Variables, Timing Properties, Keyframes etc.
{
"selector": "#target-id",
// Variables
// Timing properties
// Subtargets
...
"keyframes": []
}ตัวเลือก
ที่นี่เราต้องให้คลาสหรือ id ขององค์ประกอบที่จะใช้ภาพเคลื่อนไหว
ตัวแปร
เป็นค่าที่กำหนดให้ใช้ภายในคีย์เฟรม ตัวแปรถูกกำหนดโดยใช้var().
ตัวอย่าง
{
"--delay": "0.5s",
"animations": [
{
"selector": "#target1",
"delay": "var(--delay)",
"--x": "150px",
"--y" : "200px",
"keyframes": {
"transform": "translate(var(--x), var(--y, 0px)"
}
}
]
}ที่นี่ delay, x และ y เป็นตัวแปรและค่าของตัวแปรถูกกำหนดไว้ในตัวอย่างที่แสดง
คุณสมบัติของเวลา
คุณสามารถกำหนดระยะเวลาและความล่าช้าของภาพเคลื่อนไหวได้ที่นี่ ต่อไปนี้เป็นคุณสมบัติเวลาที่รองรับ -
| ทรัพย์สิน | มูลค่า | คำอธิบาย |
|---|---|---|
| ระยะเวลา | คุณสมบัติเวลาค่าจะต้องเป็นมิลลิวินาที | ระยะเวลาที่ใช้สำหรับภาพเคลื่อนไหว |
| ล่าช้า | คุณสมบัติเวลาค่าจะต้องเป็นมิลลิวินาที | ความล่าช้าก่อนที่ภาพเคลื่อนไหวจะเริ่มดำเนินการ |
| endDelay | คุณสมบัติเวลาค่าจะต้องเป็นมิลลิวินาทีหรือวินาที | ความล่าช้าที่กำหนดซึ่งจะมีผลเมื่อภาพเคลื่อนไหวเสร็จสิ้น |
| การทำซ้ำ | ค่าต้องเป็นตัวเลข | จำนวนครั้งที่ต้องเล่นภาพเคลื่อนไหวซ้ำ |
| เริ่มต้น | ค่าต้องเป็นตัวเลข | เวลาชดเชยที่เอฟเฟกต์เริ่มเคลื่อนไหว |
| การค่อยๆเปลี่ยน | ค่าคือสตริง | สิ่งนี้ใช้เพื่อรับเอฟเฟกต์การค่อยๆเปลี่ยนให้กับแอนิเมชั่นตัวอย่างบางส่วนสำหรับการค่อยๆเปลี่ยนเป็นแบบเชิงเส้นความง่ายความสะดวกในการคลายออกความง่ายในการเข้าออก ฯลฯ |
| ทิศทาง | ค่าคือสตริง | หนึ่งใน "ปกติ" "ย้อนกลับ" "ทางเลือก" หรือ "ทางเลือกย้อนกลับ" |
| เติม | ค่าคือสตริง | ค่าสามารถเป็น "none", "forward", "backwards", "both", "auto" |
คีย์เฟรม
คีย์เฟรมสามารถกำหนดได้หลายวิธีเช่นในรูปแบบวัตถุหรือรูปแบบอาร์เรย์ ลองพิจารณาตัวอย่างต่อไปนี้
ตัวอย่าง
"keyframes": {"transform": "translate(100px,200px)"}ตัวอย่าง
{
"keyframes": {
"opacity": [1, 0],
"transform": ["scale(1)", "scale(2)"]
}
}ตัวอย่าง
{
"keyframes": [
{"opacity": 1, "transform": "scale(1)"},
{"opacity": 0, "transform": "scale(2)"}
]
}ตัวอย่าง
{
"keyframes": [
{"easing": "ease-out", "opacity": 1, "transform": "scale(1)"},
{"opacity": 0, "transform": "scale(2)"}
]
}คีย์เฟรมโดยใช้ CSS
<style amp-custom>
div {
width: 100px;
height: 100px;
background-color: red;
position: relative;
margin: 0 auto;
transform:scale(3);
}
@keyframes example { 0% {transform:scale(3)}
75% {transform:scale(2)}
100% {transform:scale(1)}
}
</style>
<amp-animation layout = "nodisplay">
<script type = "application/json">
{
"duration": "4s",
"keyframes": "example"
}
</script>
</amp-animation>มีคุณสมบัติ CSS บางอย่างที่สามารถใช้ภายในคีย์เฟรมได้ สิ่งที่รองรับเรียกว่าคุณสมบัติที่อนุญาตพิเศษ ต่อไปนี้เป็นคุณสมบัติที่อนุญาตพิเศษซึ่งสามารถใช้ได้ภายในคีย์เฟรม -
- opacity
- transform
- visibility
- 'offsetDistance'
Note - การใช้คุณสมบัติอื่น ๆ นอกเหนือจากรายการสีขาวจะทำให้เกิดข้อผิดพลาดในคอนโซล
ตอนนี้ให้เราเข้าใจผ่านตัวอย่างง่ายๆซึ่งจะหมุนภาพเมื่อใช้ภาพเคลื่อนไหว ในตัวอย่างนี้เรากำลังหมุนภาพโดยใช้ amp-animation
ตัวอย่าง
<!doctype html>
<html amp lang = "en">
<head>
<meta charset = "utf-8">
<script async src = "https://cdn.ampproject.org/v0.js"></script>
<title>Google AMP - Amp Video</title>
<link rel = "canonical" href = "http://example.ampproject.org/article-metadata.html">
<meta name = "viewport" content = "width = device-width, minimum-scale = 1,initial-scale = 1">
<style amp-boilerplate>
body{
-webkit-animation:
-amp-start 8s steps(1,end) 0s 1 normal both;-moz-animation:
-amp-start 8s steps(1,end) 0s 1 normal both;-ms
-amp-start 8s steps(1,end) 0s 1 normal both;animation:
-amp-start 8s steps(1,end) 0s 1 normal both
}
@-webkit-keyframes
-amp-start{from{visibility:hidden}to{visibility:visible}}@-moz-keyframes
-amp-start{from{visibility:hidden}to{visibility:visible}}@-ms-keyframes
-amp-start{from{visibility:hidden}to{visibility:visible}}@-o-keyframes
-amp-start{from{visibility:hidden}to{visibility:visible}}@keyframes
-amp-start{from{visibility:hidden}to{visibility:visible}}
</style>
<noscript>
<style amp-boilerplate>
body{
-webkit-animation:none;
-moz-animation:none;
-ms-animation:none;
animation:none
}
</style>
</noscript>
<script async custom-element = "amp-animation"
src =" https://cdn.ampproject.org/v0/amp-animation-0.1.js">
</script>
<style amp-custom>
amp-img {
border: 1px solid black;
border-radius: 4px;
padding: 5px;
}
</style>
</head>
<body>
<h3>Google AMP - Amp Animation Example</h3>
<amp-animation id = "anim1" layout = "nodisplay" trigger = "visibility">
<script type = "application/json">
{
"duration": "1s",
"fill": "both",
"direction": "alternate",
"animations": [
{
"selector": "#image1",
"easing": "cubic-bezier(0,0,.21,1)",
"keyframes": {
"transform": "rotate(20deg)"
}
}
]
}
</script>
</amp-animation>
<br/>
<br/>
<amp-img
id = "image1"
src = "images/christmas1.jpg"
width = 300
height = 250
layout = "responsive">
</amp-img>
<br/>
</body>
</html>เอาต์พุต

รายละเอียดของรายละเอียดแอมป์ - แอนิเมชั่นที่ใช้ข้างต้นมีให้ในโค้ดที่แสดงด้านล่าง
<amp-animation id = "anim1" layout = "nodisplay" trigger = "visibility">
<script type = "application/json">
{
"duration": "1s",
"fill": "both",
"direction": "alternate",
"animations": [
{
"selector": "#image1",
"easing": "cubic-bezier(0,0,.21,1)",
"keyframes": {
"transform": "rotate(20deg)"
}
}
]
}
</script>
</amp-animation>ตัวเลือกนี่คือรหัสของรูปภาพที่ใช้แอนิเมชั่นการหมุน -
<amp-img
id = "image1"
src = "images/christmas1.jpg"
width = 300
height = 250
layout = "responsive">
</amp-img>ตัวอย่างการใช้คีย์เฟรมจาก CSS
ตัวอย่าง
<!doctype html>
<html amp lang = "en">
<head>
<meta charset = "utf-8">
<script async src = "https://cdn.ampproject.org/v0.js"></script>
<title>Google AMP - Amp Video</title>
<link rel = "canonical" href = "http://example.ampproject.org/article-metadata.html">
<meta name = "viewport" content = "width = device-width,minimum-scale = 1,initial-scale = 1">
<style amp-boilerplate>
body{
-webkit-animation:
-amp-start 8s steps(1,end) 0s 1 normal both;-moz-animation:
-amp-start 8s steps(1,end) 0s 1 normal both;-ms-animation:
-amp-start 8s steps(1,end) 0s 1 normal both;animation:
-amp-start 8s steps(1,end) 0s 1 normal both
}
@-webkit-keyframes
-amp-start{from{visibility:hidden}to{visibility:visible}}@-moz-keyframes
-amp-start{from{visibility:hidden}to{visibility:visible}}@-ms-keyframes
-amp-start{from{visibility:hidden}to{visibility:visible}}@-o-keyframes
-amp-start{from{visibility:hidden}to{visibility:visible}}@keyframes
-amp-start{from{visibility:hidden}to{visibility:visible}}
</style>
<noscript>
<style amp-boilerplate>
body{
-webkit-animation:none;
-moz-animation:none;
-ms-animation:none;
animation:none
}
</style>
</noscript>
<script async custom-element = "amp-animation"
src = "https://cdn.ampproject.org/v0/amp-animation-0.1.js">
</script>
<style amp-custom>
div {
width: 100px;
height: 100px;
background-color: red;
position: relative;
margin: 0 auto;
transform:scale(3);
}
@keyframes example {
0% {transform:scale(3)}
75% {transform:scale(2)}
100% {transform:scale(1)}
}
</style>
</head>
<body>
<h3>Google AMP - Amp Animation Example</h3>
<amp-animation id = "anim1" layout = "nodisplay" trigger = "visibility">
<script type = "application/json">
{
"duration": "3s",
"fill": "both",
"direction": "alternate",
"animations": [{
"selector": "#image1",
"easing": "cubic-bezier(0,0,.21,1)",
"keyframes":"example"
}]
}
</script>
</amp-animation>
<br/>
<br/>
<div id = "image1"></div>
<br/>
</body>
</html>เอาต์พุต
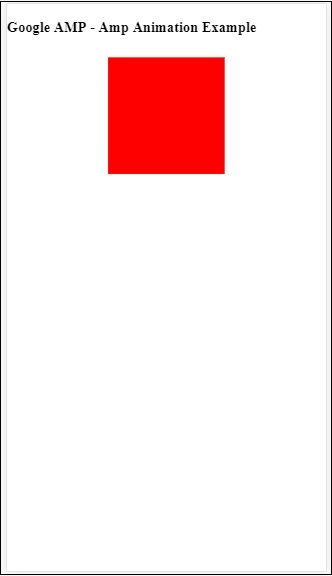
ทริกเกอร์ภาพเคลื่อนไหว
ด้วย trigger =” visibility” ภาพเคลื่อนไหวจะถูกนำไปใช้โดยค่าเริ่มต้น ในการเริ่มภาพเคลื่อนไหวในเหตุการณ์เราต้องลบ trigger =” visibility” และเพิ่มเหตุการณ์เพื่อเริ่มภาพเคลื่อนไหวดังที่แสดงในตัวอย่างด้านล่าง -
ตัวอย่าง
<!doctype html>
<html amp lang = "en">
<head>
<meta charset = "utf-8">
<script async src = "https://cdn.ampproject.org/v0.js"></script>
<title>Google AMP - Amp Video</title>
<link rel = "canonical" href = "http://example.ampproject.org/article-metadata.html">
<meta name = "viewport" content = "width = device-width,
minimum-scale = 1,initial-scale = 1">
<style amp-boilerplate>
body{
-webkit-animation:
-amp-start 8s steps(1,end) 0s 1 normal both;-moz-animation:
-amp-start 8s steps(1,end) 0s 1 normal both;-ms-animation:
-amp-start 8s steps(1,end) 0s 1 normal both;animation:
-amp-start 8s steps(1,end) 0s 1 normal both
}
@-webkit-keyframes
-amp-start{from{visibility:hidden}to{visibility:visible}}@-moz-keyframes
-amp-start{from{visibility:hidden}to{visibility:visible}}@-ms-keyframes
-amp-start{from{visibility:hidden}to{visibility:visible}}@-o-keyframes
-amp-start{from{visibility:hidden}to{visibility:visible}}@keyframes
-amp-start{from{visibility:hidden}to{visibility:visible}}
</style>
<noscript>
<style amp-boilerplate>
body{
-webkit-animation:none;
-moz-animation:none;
-ms-animation:none;
animation:none}
</style>
</noscript>
<script async custom-element = "amp-animation"
src = "https://cdn.ampproject.org/v0/amp-animation-0.1.js">
</script>
<style amp-custom>
div {
width: 100px;
height: 100px;
background-color: red;
position: relative;
margin: 0 auto;
transform:scale(2);
}
@keyframes example {
0% {transform:scale(2)}
75% {transform:scale(1)}
100% {transform:scale(0.5)}
}
button{
background-color: #ACAD5C;
color: white;
padding: 12px 20px;
border: none;
border-radius: 4px;
cursor: pointer;
float: left;
}
</style>
</head>
<body>
<h3>Google AMP - Amp Animation Example</h3>
<amp-animation id = "anim1" layout = "nodisplay">
<script type = "application/json">
{
"duration": "3s",
"fill": "both",
"direction": "alternate",
"animations": [{
"selector": "#image1",
"easing": "cubic-bezier(0,0,.21,1)",
"keyframes":"example"
}]
}
</script>
</amp-animation>
<button on = "tap:anim1.start">Start</button>
<br/>
<br/>
<div id = "image1"></div>
</body>
</html>โปรดทราบว่าภาพเคลื่อนไหวจะเริ่มขึ้นเมื่อแตะปุ่มเริ่ม
เอาต์พุต
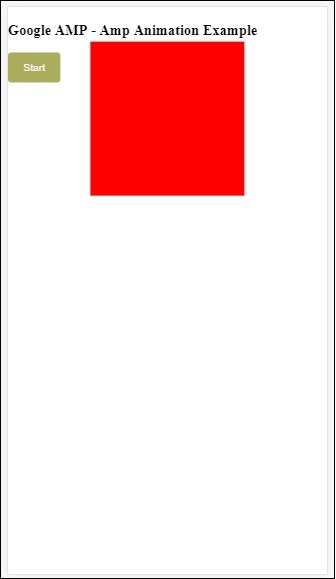
เราได้ใช้การกระทำที่เรียกว่า startเปิดเพื่อเริ่มต้นด้วยภาพเคลื่อนไหว ในทำนองเดียวกันมีการดำเนินการอื่น ๆ ที่รองรับซึ่งมีดังต่อไปนี้ -
- start
- pause
- restart
- resume
- togglePause
- seekTo
- reverse
- finish
- cancel
ให้เราดูตัวอย่างการทำงานที่เราสามารถใช้การกระทำ
ตัวอย่าง
<!doctype html>
<html amp lang = "en">
<head>
<meta charset = "utf-8">
<script async src = "https://cdn.ampproject.org/v0.js"></script>
<title>Google AMP - Amp Video</title>
<link rel = "canonical" href = "http://example.ampproject.org/article-metadata.html">
<meta name = "viewport" content = "width=device-width,minimum-scale = 1,initial-scale = 1">
<style amp-boilerplate>
body{
-webkit-animation:
-amp-start 8s steps(1,end) 0s 1 normal both;-moz-animation:
-amp-start 8s steps(1,end) 0s 1 normal both;-ms-animation:
-amp-start 8s steps(1,end) 0s 1 normal both;animation:
-amp-start 8s steps(1,end) 0s 1 normal both
}
@-webkit-keyframes
-amp-start{from{visibility:hidden}to{visibility:visible}}@-moz-keyframes
-amp-start{from{visibility:hidden}to{visibility:visible}}@-ms-keyframes
-amp-start{from{visibility:hidden}to{visibility:visible}}@-o-keyframes
-amp-start{from{visibility:hidden}to{visibility:visible}}@keyframes
-amp-start{from{visibility:hidden}to{visibility:visible}}
</style>
<noscript>
<style amp-boilerplate>
body{
-webkit-animation:none;
-moz-animation:none;
-ms-animation:none;
animation:none}
</style>
</noscript>
<script async custom-element = "amp-animation"
src = "https://cdn.ampproject.org/v0/amp-animation-0.1.js">
</script>
<style amp-custom>
#image1 {
width: 100px;
height: 100px;
background-color: red;
position: relative;
margin: 0 auto;
transform:scale(2);
}
@keyframes example {
0% {transform:scale(2)}
75% {transform:scale(1)}
100% {transform:scale(0.5)}
}
button1{
background-color: #ACAD5C;
color: white;
padding: 12px 20px;
border: none;
border-radius: 4px;
cursor: pointer;
float: left;
}
</style>
</head>
<body>
<h3>Google AMP - Amp Animation Example</h3>
<amp-animation id = "anim1" layout = "nodisplay">
<script type = "application/json">
{
"duration": "3s",
"fill": "both",
"direction": "alternate",
"animations": [{
"selector": "#image1",
"easing": "cubic-bezier(0,0,.21,1)",
"keyframes":"example"
}]
}
</script>
</amp-animation>
<button on = "tap:anim1.start">Start</button>
<button on = "tap:anim1.pause">Pause</button>
<button on = "tap:anim1.resume">Resume</button>
<button on = "tap:anim1.reverse">Reverse</button>
<button on = "tap:anim1.cancel">cancel</button>
<button on = "tap:anim1.finish">finish</button>
<button on = "tap:anim1.togglePause">togglePause</button>
<button on = "tap:anim1.seekTo(percent = 1.00)">seekTo(100%)</button>
<br/>
<br/>
<br/>
<br/>
<div id="image1"></div>
</body>
</html>เอาต์พุต
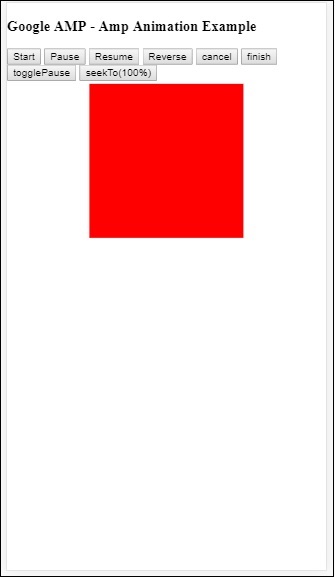
Amp-bind ช่วยเพิ่มการโต้ตอบให้กับ amp-components และแท็ก html ตามการดำเนินการโดยใช้นิพจน์การผูกข้อมูลและแบบ JS บทนี้จะกล่าวถึงการผูกข้อมูลโดยละเอียด
ในการทำงานกับ amp-bind เราต้องเพิ่มสคริปต์ต่อไปนี้ในหน้าของเรา -
<script async custom-element = "amp-bind"
src = "https://cdn.ampproject.org/v0/amp-bind-0.1.js">
</script>ให้เราเข้าใจอย่างถ่องแท้โดยใช้ตัวอย่างการทำงานดังที่แสดง -
ตัวอย่าง
<!doctype html>
<html amp lang = "en">
<head>
<meta charset = "utf-8">
<script async src = "https://cdn.ampproject.org/v0.js"></script>
<title>Google AMP - Amp Bind</title>
<link rel = "canonical" href =
"http://example.ampproject.org/article-metadata.html">
<meta name = "viewport" content = "width = device-width,
minimum-scale = 1,initial-scale = 1">
<style amp-boilerplate>
body{
-webkit-animation:
-amp-start 8s steps(1,end) 0s 1 normal both;-moz-animation:
-amp-start 8s steps(1,end) 0s 1 normal both;-ms-animation:
-amp-start 8s steps(1,end) 0s 1 normal both;animation:
-amp-start 8s steps(1,end) 0s 1 normal both
}
@-webkit-keyframes
-amp-start{from{visibility:hidden}to{visibility:visible}}@-moz-keyframes
-amp-start{from{visibility:hidden}to{visibility:visible}}@-ms-keyframes
-amp-start{from{visibility:hidden}to{visibility:visible}}@-o-keyframes
-amp-start{from{visibility:hidden}to{visibility:visible}}@keyframes
-amp-start{from{visibility:hidden}to{visibility:visible}}
</style>
<noscript>
<style amp-boilerplate>
body{
-webkit-animation:none;
-moz-animation:none;
-ms-animation:none;
animation:none
}
</style>
</noscript>
<script async custom-element = "amp-bind"
src = "https://cdn.ampproject.org/v0/amp-bind-0.1.js"></script>
<style amp-custom>
button{
background-color: #ACAD5C;
color: white;
padding: 12px 20px;
border: none;
border-radius: 4px;
}
</style>
</head>
<body>
<h3>Google AMP - Amp Bind</h3>
<p [text] = "'Hello ' + world + '.'">
Click on the button to change the text
</p>
<button on = "tap:AMP.setState({world: 'This is amp-bind example'})">
Click Here
</button>
</body>
</html>เอาต์พุต
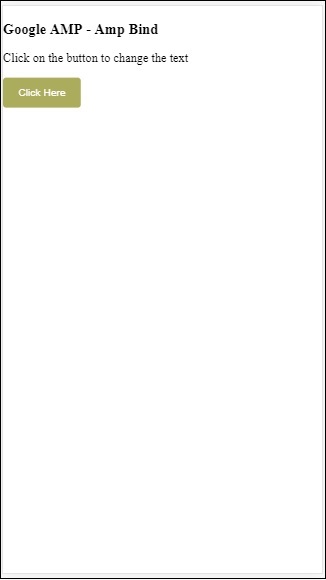
คลิกปุ่มเพื่อดูข้อความที่เปลี่ยนแปลงตามที่แสดงด้านล่าง -
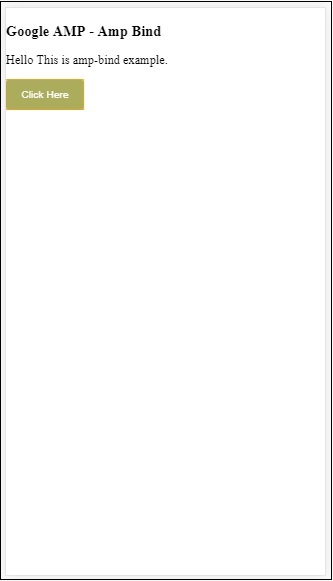
ดังนั้นในตัวอย่างที่แสดงด้านบนเราจึงใช้ amp-bind เพื่อเปลี่ยนข้อความเมื่อคลิกปุ่ม
Amp-bind มีสามองค์ประกอบ -
State- เริ่มแรกสถานะว่างเปล่า เมื่อคุณคลิกปุ่มสถานะจะเปลี่ยนไป ตัวอย่างเช่น,
<button on = "tap:AMP.setState({world: 'This is amp-bind example'})">
Click Here
</button>วิธี AMP.setState ใช้เพื่อเปลี่ยนสถานะ ตัวแปรworld ได้รับการกำหนดค่า This is amp-bind example. ตัวแปรworld ใช้ภายในแท็ก html -
<p [text] = "'Hello ' + world + '.'">
Click on the button to change the text
</p>เมื่อคลิกปุ่มโลกจะถูกกำหนดค่าใหม่: นี่คือตัวอย่างการผูกแอมป์
นอกจากนี้เรายังสามารถใช้ amp-state กับการผูกได้ดังที่แสดงด้านล่าง -
<amp-state id = "myState">
<script type = "application/json">
{
"foo": "bar"
}
</script>
</amp-state>จะมีการกำหนดนิพจน์ bmyState.foo ระหว่างการผูก
Expressions - นิพจน์สำหรับ amp-bind ในการทำงานมีดังนี้ -
'Hello ' + worldworld กล่าวกันว่าเป็น state variable.
Bindings- การเชื่อมโยงใช้กับแอตทริบิวต์พิเศษในรูปแบบ [แอตทริบิวต์] ตัวอย่างเช่น -
<p [text] = "'Hello ' + world + '.'">
Click on the button to change the text
</p>ในตัวอย่างข้างต้น [text] มีนิพจน์ที่ใช้สำหรับผูกไฟล์ p แท็ก
เราสามารถใช้แอตทริบิวต์ต่อไปนี้สำหรับการผูก -
- [text]
- [class]
- [hidden]
- [width]
- [height]
การเชื่อมโยงสามารถทำได้บนส่วนประกอบแอมป์และอนุญาตให้ใช้เฉพาะแอตทริบิวต์ที่เฉพาะเจาะจงเท่านั้น รายการต่อไปนี้แสดงส่วนประกอบและคุณลักษณะของ suh -
| ซีเนียร์ No | ส่วนประกอบแอมป์ | คุณสมบัติและคำอธิบาย |
|---|---|---|
| 1 | <amp-carousel type = slides> | [slide]* เปลี่ยนสไลด์โดยใช้ลักษณะการผูกนี้ |
| 2 | <amp-date-picker> | [min] ขั้นต่ำ -> ตั้งค่าวันที่ที่เลือกได้เร็วที่สุด [max]สูงสุด -> ตั้งค่าวันที่เลือกล่าสุด |
| 3 | <amp-iframe> | [src] เปลี่ยน src ของ iframe |
| 4 | <amp-img> | [alt] [attribution] [src] [srcset] เราสามารถเปลี่ยน alt, การระบุแหล่งที่มา, src และ srcset ได้หากมีการเปลี่ยนแปลง src ให้เปลี่ยน srcset ตามที่ใช้ในการแคช |
| 5 | <amp-lightbox> | [open]* คุณสามารถแสดง / ซ่อนไลท์บ็อกซ์โดยการผูกเพื่อเปิด |
| 6 | <amp-list> | [src] หากนิพจน์เป็นสตริงให้ดึงข้อมูลและแสดงผล JSON จากสตริง URL หากนิพจน์เป็นอ็อบเจ็กต์หรืออาร์เรย์ให้แสดงผลข้อมูลนิพจน์ |
| 7 | <amp-selector> | [selected]* [disabled] เปลี่ยนองค์ประกอบลูกที่เลือกในปัจจุบันที่ระบุโดยค่าแอตทริบิวต์ตัวเลือก รองรับรายการค่าที่คั่นด้วยจุลภาคสำหรับการเลือกหลายรายการ |
การผูกโดยใช้ Amp-State
เราสามารถกำหนด amp-state กับข้อมูลทั้งหมดที่เราต้องการใช้กับ html element หรือ amp-component
ข้อมูลที่ใช้ภายใน amp-state จะต้องอยู่ในรูปแบบ json ดังที่แสดงด้านล่าง -
<amp-state id = "myCarsList">
<script type = "application/json">
{
"currentcar" : "bmw",
"audi": {
"imageUrl": "images/audi.jpg"
},
"bmw": {
"imageUrl": "images/bmw.jpg"
}
}
</script>
</amp-state>ดังนั้นเราจึงกำหนดคู่คีย์ - ค่าด้วยชื่อของรถและรูปภาพที่ใช้สำหรับรถ
Amp-bind บนข้อความและ Amp-Image
ตัวอย่างการทำงานโดยใช้ amp-state กับ amp-bind แสดงอยู่ด้านล่าง -
<!doctype html>
<html amp lang = "en">
<head>
<meta charset = "utf-8">
<script async src = "https://cdn.ampproject.org/v0.js"></script>
<title>Google AMP - Amp Bind</title>
<link rel = "canonical" href =
"http://example.ampproject.org/article-metadata.html">
<meta name = "viewport" content = "width = device-width,
minimum-scale = 1,initial-scale = 1">
<style amp-boilerplate>
body{
-webkit-animation:
-amp-start 8s steps(1,end) 0s 1 normal both;-moz-animation:
-amp-start 8s steps(1,end) 0s 1 normal both;-ms-animation:
-amp-start 8s steps(1,end) 0s 1 normal both;animation:
-amp-start 8s steps(1,end) 0s 1 normal both
}
@-webkit-keyframes
-amp-start{from{visibility:hidden}to{visibility:visible}}@-moz-keyframes
-amp-start{from{visibility:hidden}to{visibility:visible}}@-ms-keyframes
-amp-start{from{visibility:hidden}to{visibility:visible}}@-o-keyframes
-amp-start{from{visibility:hidden}to{visibility:visible}}@keyframes
-amp-start{from{visibility:hidden}to{visibility:visible}
}
</style>
<noscript>
<style amp-boilerplate>
body{
-webkit-animation:none;
-moz-animation:none;
-ms-animation:none;
animation:none
}
</style>
</noscript>
<script async custom-element = "amp-bind" src =
"https://cdn.ampproject.org/v0/amp-bind-0.1.js"></script>
<style amp-custom>
button{
background-color: #ACAD5C;
color: white;
padding: 12px 20px;
border: none;
border-radius: 4px;
cursor: pointer;
float: left;
}
</style>
</head>
<body>
<h3>Google AMP - Amp Bind</h3>
<amp-state id = "myCarsList">
<script type = "application/json">
{
"currentcar" : "bmw",
"audi": {
"imageUrl": "images/audi.jpg",
"style": "greenBackground"
},
"bmw": {
"imageUrl": "images/bmw.jpg",
"style": "redBackground"
}
}
</script>
</amp-state>
<amp-img
width = "300"
height = "200"
src = "images/bmw.jpg"
[src] = "myCarsList[currentcar].imageUrl">
</amp-img>
<p [text] = "'This is a ' + currentcar + '.'">
This is a BMW.
</p>
<br/>
<button on = "tap:AMP.setState({currentcar: 'audi'})">
Change Car
</button>
</body>
</html>เอาต์พุต
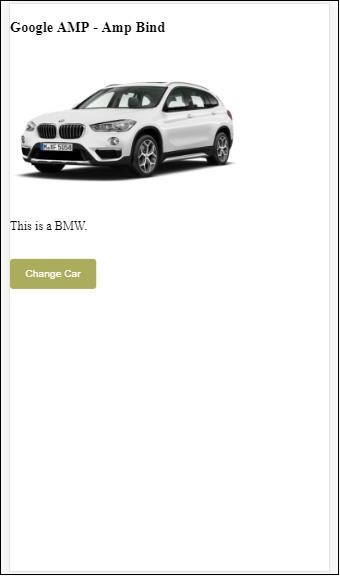
คลิกปุ่มเพื่อดูภาพของรถที่เปลี่ยนไปและข้อความด้านล่าง
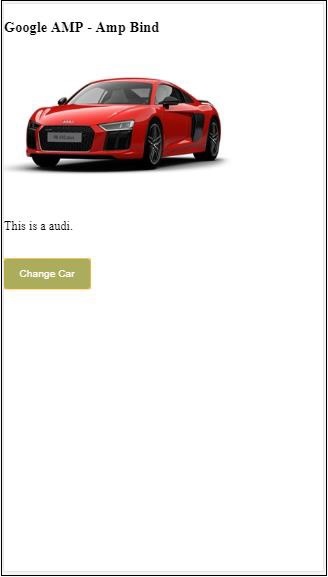
Amp-bind บนวิดีโอและ IFrame
ตอนนี้เราจะเห็นตัวอย่างการทำงานซึ่งจะเปลี่ยน amp-iframe และ amp-video src
<!doctype html>
<html amp lang = "en">
<head>
<meta charset = "utf-8">
<script async src = "https://cdn.ampproject.org/v0.js"></script>
<title>Google AMP - Amp Bind</title>
<link rel = "canonical" href =
"http://example.ampproject.org/article-metadata.html">
<meta name = "viewport" content = "width = device-width,
minimum-scale = 1,initial-scale = 1">
<style amp-boilerplate>
body{
-webkit-animation:
-amp-start 8s steps(1,end) 0s 1 normal both;-moz-animation:
-amp-start 8s steps(1,end) 0s 1 normal both;-ms-animation:
-amp-start 8s steps(1,end) 0s 1 normal both;animation:
-amp-start 8s steps(1,end) 0s 1 normal both
}
@-webkit-keyframes
-amp-start{from{visibility:hidden}to{visibility:visible}}@-moz-keyframes
-amp-start{from{visibility:hidden}to{visibility:visible}}@-ms-keyframes
-amp-start{from{visibility:hidden}to{visibility:visible}}@-o-keyframes
-amp-start{from{visibility:hidden}to{visibility:visible}}@keyframes
-amp-start{from{visibility:hidden}to{visibility:visible}}
</style>
<noscript>
<style amp-boilerplate>
body{
-webkit-animation:none;
-moz-animation:none;
-ms-animation:none;
animation:none
}
</style>
</noscript>
<script async custom-element = "amp-bind" src =
"https://cdn.ampproject.org/v0/amp-bind-0.1.js"></script>
<script async custom-element = "amp-video" src =
"https://cdn.ampproject.org/v0/amp-video-0.1.js"></script>
<script async custom-element = "amp-iframe" src =
"https://cdn.ampproject.org/v0/amp-iframe-0.1.js"></script>
<style amp-custom>
button{
background-color: #ACAD5C;
color: white;
padding: 12px 20px;
border: none;
border-radius: 4px;
cursor: pointer;
float: left;
}
</style>
</head>
<body>
<h3>Google AMP - Amp Bind</h3>
<button on = "tap:AMP.setState({currentlist: 'list1'})">
Click Here
</button>
<br/>
<br/>
<amp-state id = "myList">
<script type = "application/json">
{
"currentlist" : "",
"list1": {
"url": "video/m.mp4",
"style": "greenBackground",
"iframeurl":"https://maps.google.com/maps?q=hyderabad&t=&z=13&ie=UTF8&iwloc=&output=embed"
}
}
</script>
</amp-state>
<h3>AMP - IFRAME</h3>
<amp-iframe
width = "600"
title = "Google map"
height = "400"
layout = "responsive"
sandbox = "allow-scripts allow-same-origin allow-popups"
frameborder = "0"
src = "https://maps.google.com/maps?q=telangana&t=&z=13&ie=UTF8&iwloc=&output=embed"
[src] = "myList[currentlist].iframeurl">
<amp-img
layout = "fill"
src = "images/loading.jpg"
placeholder
>
/amp-img>
</amp-iframe>
<h3>AMP - VIDEO</h3>
<amp-video
id = "amp-video"
src = "video/samplevideo.mp4"
layout="responsive"
[src] = "myList[currentlist].url"
width = "300"
height = "170" autoplay controls>
</amp-video>
</body>
</html>โปรดทราบว่าที่นี่เราได้ใช้ amp-state กับ iframesrc และ video src
<amp-state id = "myList">
<script type = "application/json">
{
"currentlist" : "",
"list1": {
"url": "video/m.mp4",
"style": "greenBackground",
"iframeurl":"
https://maps.google.com/maps?q=hyderabad&t=&z=13&ie=UTF8&iwloc=&output=embed"
}
}
</script>
</amp-state>รายการปัจจุบันถูกตั้งค่าเป็นว่างและเมื่อแตะปุ่มจะถูกตั้งค่าเป็น list1 รายการปัจจุบันจะใช้สำหรับ src ของ iframe และวิดีโอดังที่แสดงด้านล่าง -
<amp-iframe width="600"
title = "Google map"
height = "400"
layout = "responsive"
sandbox = "allow-scripts allow-same-origin allow-popups"
frameborder = "0" src = "https://maps.google.com/maps?q=telangana&t=&z=13&ie=UTF8&iwloc=&output=embed"
[src] = "myList[currentlist].iframeurl">
<amp-img layout = "fill" src = "images/loading.jpg" placeholder>
</amp-img>
</amp-iframe>
<amp-video id = "amp-video" src = "video/samplevideo.mp4"
layout = "responsive" [src] = "myList[currentlist].url" width = "300"
height = "170" autoplay controls>
</amp-video>เอาต์พุต

คลิกปุ่มเพื่อดูวิดีโอและ iframe src ที่เปลี่ยนไป
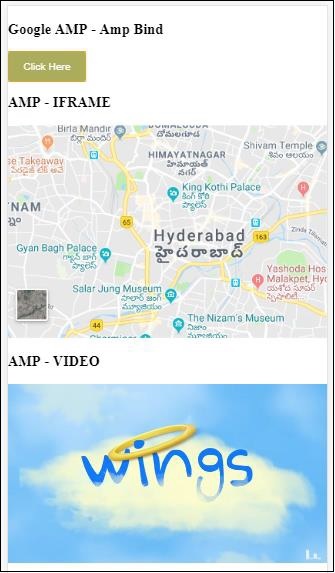
แอมป์ผูกกับแอมป์ไลท์บ็อกซ์
ตอนนี้ให้เราดูการทำงานของการรวมและ amp-lightbox เมื่อใช้ร่วมกัน
ตัวอย่าง
<!doctype html>
<html amp lang = "en">
<head>
<meta charset = "utf-8">
<script async src="https://cdn.ampproject.org/v0.js"></script>
<title>Google AMP - Amp Bind</title>
<link rel = "canonical" href =
"http://example.ampproject.org/article-metadata.html">
<meta name = "viewport" content = "width = device-width,
minimum-scale = 1,initial-scale = 1">
<style amp-boilerplate>
body{
-webkit-animation:
-amp-start 8s steps(1,end) 0s 1 normal both;-moz-animation:
-amp-start 8s steps(1,end) 0s 1 normal both;-ms-animation:
-amp-start 8s steps(1,end) 0s 1 normal both;animation:
-amp-start 8s steps(1,end) 0s 1 normal both
}
@-webkit-keyframes
-amp-start{from{visibility:hidden}to{visibility:visible}}@-moz-keyframes
-amp-start{from{visibility:hidden}to{visibility:visible}}@-ms-keyframes
-amp-start{from{visibility:hidden}to{visibility:visible}}@-o-keyframes
-amp-start{from{visibility:hidden}to{visibility:visible}}@keyframes
-amp-start{from{visibility:hidden}to{visibility:visible}}
</style>
<noscript>
<style amp-boilerplate>
body{
-webkit-animation:none;
-moz-animation:none;
-ms-animation:none;
animation:none
}
</style>
</noscript>
<script async custom-element = "amp-bind" src =
"https://cdn.ampproject.org/v0/amp-bind-0.1.js"></script>
<script async custom-element = "amp-lightbox" src =
"https://cdn.ampproject.org/v0/amp-lightbox-0.1.js"></script>
<style amp-custom>
button{
background-color: #ACAD5C;
color: white;
padding: 12px 20px;
border: none;
border-radius: 4px;
cursor: pointer;
float: left;
}
.lightbox {
background: rgba(211,211,211,0.8);
width: 100%;
height: 100%;
position: absolute;
display: flex;
align-items: center;
justify-content: center;
}
</style>
</head>
<body>
<h3>Google AMP - Amp Bind</h3>
<button on = "tap:AMP.setState({displaylightbox: true})">
Click Here
</button>
<br/>
<br/>
<h3>AMP - Lightbox</h3>
<amp-lightbox
id = "my-lightbox"
[open] = "displaylightbox"
layout = "nodisplay"
close-button>
<div class = "lightbox" on = "tap:AMP.setState({displaylightbox: false})">
<amp-img alt = "Beautiful Flower"
src = "images/loreal.gif"
width = "246"
height = "205">
</amp-img>
</div>
</amp-lightbox>
</body>
</html>ในการใช้การผูกกับ amp-lightbox เราได้ใช้ [open] บน amp-lightbox ดังที่แสดงด้านล่าง -
<amp-lightbox id = "my-lightbox" [open] = "displaylightbox"
layout = "nodisplay" close-button>
<div class = "lightbox" on="tap:AMP.setState({displaylightbox: false})">
<amp-img alt = "Beautiful Flower"
src = "images/loreal.gif"
width = "246"
height = "205">
</amp-img>
</div>
</amp-lightbox>[open] =“ displaylightbox” คือสถานะตัวแปรจะถูกเปลี่ยนเมื่อคลิกปุ่มและเมื่อแตะที่ไลท์บ็อกซ์ div เป็น true / false -
<button on = "tap:AMP.setState({displaylightbox: true})">
Click Here
</button>
<div class = "lightbox" on = "tap:AMP.setState({displaylightbox: false})">
<amp-img alt = "Beautiful Flower"
src = "images/loreal.gif"
width = "246"
height = "205">
</amp-img>
</div>เอาต์พุต
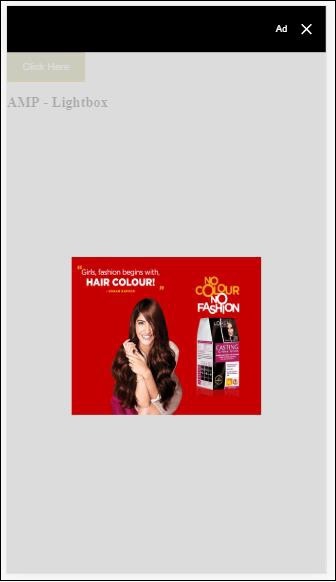
แอมป์เชื่อมโยงกับองค์ประกอบอินพุต
ให้เราเข้าใจการทำงานของการผูกแอมป์กับองค์ประกอบอินพุตด้วยความช่วยเหลือของตัวอย่างการทำงานดังที่แสดง -
<!doctype html>
<html amp lang = "en">
<head>
<meta charset = "utf-8">
<script async src = "https://cdn.ampproject.org/v0.js"></script>
<title>Google AMP - Amp Bind</title>
<link rel = "canonical" href=
"http://example.ampproject.org/article-metadata.html">
<meta name = "viewport" content = "width = device-width,
minimum-scale = 1,initial-scale = 1">
<style amp-boilerplate>
body{
-webkit-animation:
-amp-start 8s steps(1,end) 0s 1 normal both;-moz-animation:
-amp-start 8s steps(1,end) 0s 1 normal both;-ms-animation:
-amp-start 8s steps(1,end) 0s 1 normal both;animation:
-amp-start 8s steps(1,end) 0s 1 normal both
}
@-webkit-keyframes
-amp-start{from{visibility:hidden}to{visibility:visible}}@-moz-keyframes
-amp-start{from{visibility:hidden}to{visibility:visible}}@-ms-keyframes
-amp-start{from{visibility:hidden}to{visibility:visible}}@-o-keyframes
-amp-start{from{visibility:hidden}to{visibility:visible}}@keyframes
-amp-start{from{visibility:hidden}to{visibility:visible}}
</style>
<noscript>
<style amp-boilerplate>
body{
-webkit-animation:none;
-moz-animation:none;
-ms-animation:none;
animation:none
}
</style>
<noscript>
<script async custom-element = "amp-bind"
src = "https://cdn.ampproject.org/v0/amp-bind-0.1.js">
<script>
<script async custom-element = "amp-lightbox"
src = "https://cdn.ampproject.org/v0/amp-lightbox-0.1.js">
</script>
<style amp-custom>
button{
background-color: #ACAD5C;
color: white;
padding: 12px 20px;
border: none;
border-radius: 4px;
cursor: pointer;
float: left;
}
.lightbox {
background: rgba(211,211,211,0.8);
width: 100%;
height: 100%;
position: absolute;
display: flex;
align-items: center;
justify-content: center;
}
#txtname{
width: 100%;
padding: 12px 20px;
margin: 8px 0;
display: inline-block;
border: 1px solid #ccc;
border-radius: 4px;
box-sizing: border-box;
}
div {
font-size:25px;
}
</style>
</head>
<body>
<h3>Google AMP - Amp Bind</h3>
<button on = "tap:AMP.setState({displaylightbox: true})">
Click Here
</button>
<br/>
<br/>
<h3>
AMP - Input Element
<h3>
<input id = "txtname" placeholder = "Type here"
on = "input-throttled:AMP.setState({name: event.value})">
<div [text] = "name">
</div>
</body>
</html>เอาต์พุต
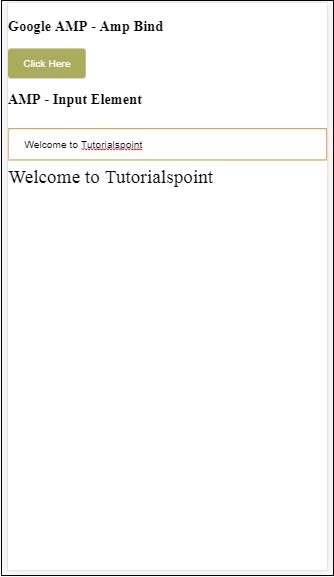
ข้อมูลที่ป้อนภายในกล่องข้อความจะแสดงที่ด้านล่าง สามารถทำได้โดยการเปลี่ยนตัวแปรสถานะname ในเหตุการณ์อินพุตดังที่แสดง -
<input id = "txtname" placeholder = "Type here" on =
"input-throttled:AMP.setState({name: event.value})">
<div [text] = "name">
</div>AMP-Layout เป็นคุณลักษณะสำคัญอย่างหนึ่งที่มีอยู่ใน Google-amp เค้าโครงแอมป์ทำให้แน่ใจว่าคอมโพเนนต์ของแอมป์แสดงผลอย่างถูกต้องเมื่อโหลดเพจโดยไม่ทำให้เกิดปัญหาการกะพริบหรือการเลื่อน Google AMP ตรวจสอบให้แน่ใจว่าการแสดงผลการจัดวางเสร็จสิ้นในหน้าก่อนทรัพยากรระยะไกลอื่น ๆ เช่นคำขอ http สำหรับรูปภาพการเรียกข้อมูลจะเสร็จสิ้น
รายการแอตทริบิวต์เค้าโครงมีให้ด้านล่าง
ความกว้างและความสูง
layout
sizes
heights
media
placeholder
fallback
noloading
เราจะพิจารณา layoutแอตทริบิวต์โดยละเอียดในบทนี้ คุณสมบัติที่เหลือจะกล่าวถึงในรายละเอียดในบทนี้ -Google AMP – Attributes ของบทช่วยสอนนี้
แอตทริบิวต์เค้าโครง
เราสามารถใช้แอตทริบิวต์โครงร่างในองค์ประกอบแอมป์ซึ่งจะตัดสินว่าองค์ประกอบจะแสดงผลอย่างไรในหน้า รายการเลย์เอาต์ที่แอมป์รองรับอยู่ด้านล่าง -
ไม่อยู่
Container
fill
fixed
fixed-height
flex-item
intrinsic
nodisplay
Responsive
สำหรับแต่ละเลย์เอาต์นี้เราจะเห็นตัวอย่างการทำงานซึ่งจะแสดงให้เห็นว่าแอตทริบิวต์การจัดวางทำให้องค์ประกอบแอมป์แตกต่างกันอย่างไร เราจะใช้ประโยชน์จากamp-img ส่วนประกอบในตัวอย่างของเรา
ไม่อยู่ตัวอย่าง
<!doctype html>
<html amp lang = "en">
<head>
<meta charset = "utf-8">
<script async src="https://cdn.ampproject.org/v0.js"></script>
<title>Google AMP - Image</title>
<link rel = "canonical" href =
"http://example.ampproject.org/article-metadata.html">
<meta name = "viewport" content = "width = device-width,
minimum-scale = 1,initial-scale = 1">
<style amp-boilerplate>
body{
-webkit-animation:
-amp-start 8s steps(1,end) 0s 1 normal both;-moz-animation:
-amp-start 8s steps(1,end) 0s 1 normal both;-ms-animation:
-amp-start 8s steps(1,end) 0s 1 normal both;animation:
-amp-start 8s steps(1,end) 0s 1 normal both
}
@-webkit-keyframes
-amp-start{from{visibility:hidden}to{visibility:visible}}@-moz-keyframes
-amp-start{from{visibility:hidden}to{visibility:visible}}@-ms-keyframes
-amp-start{from{visibility:hidden}to{visibility:visible}}@-o-keyframes
-amp-start{from{visibility:hidden}to{visibility:visible}}@keyframes
-amp-start{from{visibility:hidden}to{visibility:visible}}
</style>
<noscript>
<style amp-boilerplate>
body{
-webkit-animation:none;
-moz-animation:none;
-ms-animation:none;
animation:none
}
</style>
</noscript>
<style amp-custom>
amp-img {
border: 1px solid black;
border-radius: 4px;
padding: 5px;
}
</style>
</head>
<body>
<h1>Google AMP - Image Example</h1>
<amp-img
alt = "Beautiful
Flower"src = "images/flower.jpg"
width = "246"
height = "205">
</amp-img>
</body>
</html>เอาต์พุต
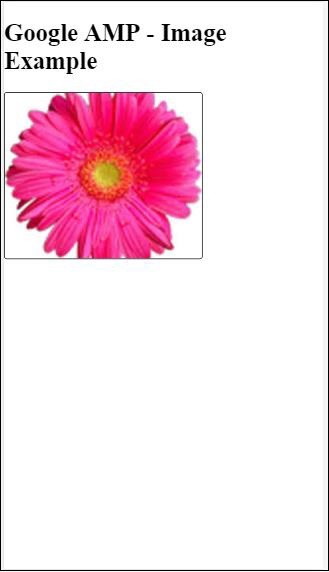
ตัวอย่างคอนเทนเนอร์
Layout =” container” ส่วนใหญ่ถูกกำหนดให้กับองค์ประกอบหลักและองค์ประกอบลูกจะใช้ขนาดที่กำหนดไว้
<!doctype html>
<html amp lang = "en">
<head>
<meta charset = "utf-8">
<script async src = "https://cdn.ampproject.org/v0.js"></script>
<title>Google AMP - Image</title>
<link rel = "canonical" href =
"http://example.ampproject.org/article-metadata.html">
<meta name = "viewport" content = "width = device-width,
minimum-scale = 1,initial-scale = 1">
<style amp-boilerplate>
body{
-webkit-animation:
-amp-start 8s steps(1,end) 0s 1 normal both;-moz-animation:
-amp-start 8s steps(1,end) 0s 1 normal both;-ms-animation:
-amp-start 8s steps(1,end) 0s 1 normal both;animation:
-amp-start 8s steps(1,end) 0s 1 normal both
}@-webkit-keyframes
-amp-start{from{visibility:hidden}to{visibility:visible}}@-moz-keyframes
-amp-start{from{visibility:hidden}to{visibility:visible}}@-ms-keyframes
-amp-start{from{visibility:hidden}to{visibility:visible}}@-o-keyframes
-amp-start{from{visibility:hidden}to{visibility:visible}}@keyframes
-amp-start{from{visibility:hidden}to{visibility:visible}}
</style>
<noscript>
<style amp-boilerplate>
body{
-webkit-animation:none;
-moz-animation:none;
-ms-animation:none;
animation:none
}
</style>
</noscript>
<style amp-custom>
amp-img {
border: 1px solid black;
border-radius: 4px;
padding: 5px;
}
h1{
font-family: "Segoe UI",Arial,sans-serif;
font-weight: 400;margin: 10px 0;
}
</style>
</head>
<body>
<h1>Google AMP - Layout = container Image Example</h1>
<amp-accordion layout = "container">
<amp-img alt = "Beautiful Flower"
src = "images/flower.jpg"
width = "246"
height = "205">
</amp-img>
</amp-accordion>
</body>
</html>เอาต์พุต
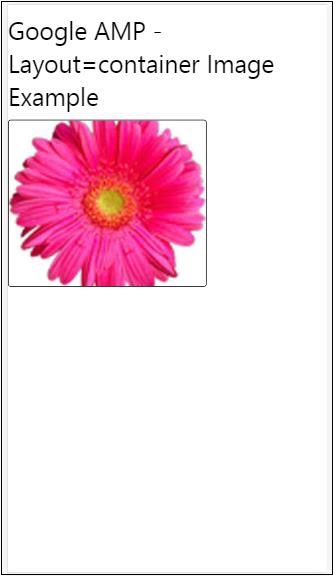
กรอกตัวอย่าง
Layout =” fill” รับความกว้างและความสูงขององค์ประกอบหลัก
<!doctype html>
<html amp lang = "en">
<head>
<meta charset = "utf-8">
<script async src = "https://cdn.ampproject.org/v0.js"></script>
<title>
Google AMP - Image
<title>
<link rel = "canonical" href =
"http://example.ampproject.org/article-metadata.html">
<meta name = "viewport" content = "width = device-width,
minimum-scale = 1,initial-scale = 1">
<style amp-boilerplate>
body{
-webkit-animation:
-amp-start 8s steps(1,end) 0s 1 normal both;-moz-animation:
-amp-start 8s steps(1,end) 0s 1 normal both;-ms-animation:
-amp-start 8s steps(1,end) 0s 1 normal both;animation:
-amp-start 8s steps(1,end) 0s 1 normal both
}
@-webkit-keyframes
-amp-start{from{visibility:hidden}to{visibility:visible}}@-moz-keyframes
-amp-start{from{visibility:hidden}to{visibility:visible}}@-ms-keyframes
-amp-start{from{visibility:hidden}to{visibility:visible}}@-o-keyframes
-amp-start{from{visibility:hidden}to{visibility:visible}}@keyframes
-amp-start{from{visibility:hidden}to{visibility:visible}}
</style>
<noscript>
<style amp-boilerplate>
body{
-webkit-animation:none;
-moz-animation:none;
-ms-animation:none;
animation:none
}
</style>
</noscript>
<style amp-custom>
amp-img {
border: 1px solid black;
border-radius: 4px;
padding: 5px;
}
h1{font-family: "Segoe UI",Arial,sans-serif;
font-weight: 400;margin: 10px 0;}
</style>
</head>
<body>
<h1>Google AMP - Layout = fill Image Example</h1>
<div style = "position:relative;width:100px;height:100px;">
<amp-img alt = "Beautiful Flower"
src = "images/flower.jpg"
width = "246"
height = "205"
layout = "fill">
</amp-img>
</div>
</body>
</html>เอาต์พุต
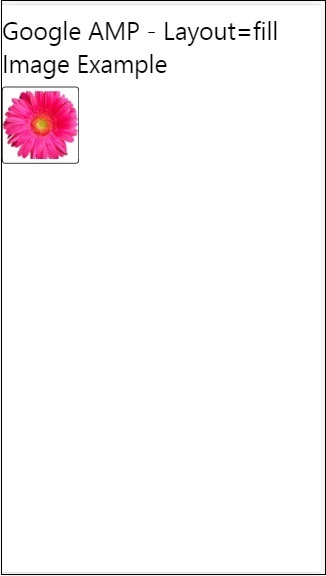
ตัวอย่างความสูงคงที่และคงที่
ก่อนที่จะเข้าใจการใช้ความสูงคงที่และความสูงคงที่โปรดสังเกตสองประเด็นต่อไปนี้ -
layout=”fixed” จำเป็นต้องมีความกว้างและความสูงและส่วนประกอบแอมป์จะแสดงในนั้น
layout=”fixed-height” ต้องมีการระบุความสูงสำหรับส่วนประกอบมันจะทำให้แน่ใจว่าความสูงจะไม่เปลี่ยนแปลงต้องไม่ระบุความกว้างเมื่อใช้ความสูงคงที่หรืออาจเป็นแบบอัตโนมัติ
<!doctype html>
<html amp lang = "en">
<head>
<meta charset = "utf-8">
<script async src = "https://cdn.ampproject.org/v0.js"></script>
<title>Google AMP - Image</title>
<link rel = "canonical" href =
"http://example.ampproject.org/article-metadata.html">
<meta name = "viewport" content = "width = device-width,
minimum-scale = 1,initial-scale = 1">
<style amp-boilerplate>
body{
-webkit-animation:
-amp-start 8s steps(1,end) 0s 1 normal both;-moz-animation:
-amp-start 8s steps(1,end) 0s 1 normal both;-ms-animation:
-amp-start 8s steps(1,end) 0s 1 normal both;animation:
-amp-start 8s steps(1,end) 0s 1 normal both
}
@-webkit-keyframes
-amp-start{from{visibility:hidden}to{visibility:visible}}@-moz-keyframes
-amp-start{from{visibility:hidden}to{visibility:visible}}@-ms-keyframes
-amp-start{from{visibility:hidden}to{visibility:visible}}@-o-keyframes
-amp-start{from{visibility:hidden}to{visibility:visible}}@keyframes
-amp-start{from{visibility:hidden}to{visibility:visible}}
</style>
<noscript>
<style amp-boilerplate>
body{
-webkit-animation:none;
-moz-animation:none;
-ms-animation:none;
animation:none
}
</style>
</noscript>
<style amp-custom>
amp-img {
border: 1px solid black;
border-radius: 4px;
padding: 5px;
}
div{
display: inline-block;
width: 200px;
height:200px;
margin: 5px;
}
h1{font-family: "Segoe UI",Arial,sans-serif;
font-weight: 400;margin: 10px 0;}
</style>
</head>
<body>
<h1>Google AMP - Layout = fixed and
Layout = fixed-height Image Example
</h1>
<div>
<amp-img alt = "Beautiful Flower"
src = "images/flower.jpg"
width = "246"
height = "205"
layout = "fixed">
</amp-img>
</div>
<div>
<amp-img alt = "Beautiful Flower"
src = "images/flower.jpg"
height = "205"
layout = "fixed-height">
</amp-img>
</div>
</body>
</html>เอาต์พุต
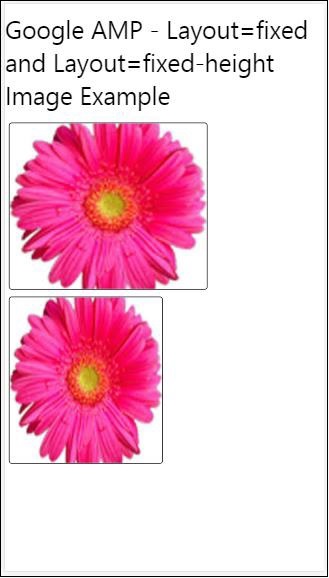
Flex-item และ intrinsic
<!doctype html>
<html amp lang = "en">
<head>
<meta charset = "utf-8">
<script async src ="https://cdn.ampproject.org/v0.js"></script>
<title>Google AMP - Image</title>
<link rel = "canonical" href ="
http://example.ampproject.org/article-metadata.html">
<meta name = "viewport" content = "width = device-width,
minimum-scale = 1,initial-scale = 1">
<style amp-boilerplate>
body{
-webkit-animation:
-amp-start 8s steps(1,end) 0s 1 normal both;-moz-animation:
-amp-start 8s steps(1,end) 0s 1 normal both;-ms-animation:
-amp-start 8s steps(1,end) 0s 1 normal both;animation:
-amp-start 8s steps(1,end) 0s 1 normal both
}
@-webkit-keyframes
-amp-start{from{visibility:hidden}to{visibility:visible}}@-moz-keyframes
-amp-start{from{visibility:hidden}to{visibility:visible}}@-ms-keyframes
-amp-start{from{visibility:hidden}to{visibility:visible}}@-o-keyframes
-amp-start{from{visibility:hidden}to{visibility:visible}}@keyframes
-amp-start{from{visibility:hidden}to{visibility:visible
<style>
<noscript>
<style amp-boilerplate>
body{
-webkit-animation:none;
-moz-animation:none;
-ms-animation:none;
animation:none
}
</style>
</noscript>
<style amp-custom>
amp-img {
border: 1px solid black;
border-radius: 4px;
padding: 5px;
}
displayitem {
display: inline-block;
width: 200px;
height:200px;
margin: 5px;
}
h1{font-family: "Segoe UI",Arial,sans-serif;
font-weight: 400;margin: 10px 0;}
</style>
</head>
<body>
<h1>Google AMP - Layout = flex-item and
Layout = intrinsic Image Example
</h1>
<div class = "displayitem">
<amp-img alt = "Beautiful Flower"
src = "images/flower.jpg"
layout = "flex-item">
</amp-img>
</div>
<div class = "displayitem">
<amp-img alt = "Beautiful Flower"
src = "images/flower.jpg"
width = "246"
height = "205"
layout = "intrinsic">
</amp-img>
</div>
</body>
</html>เอาต์พุต
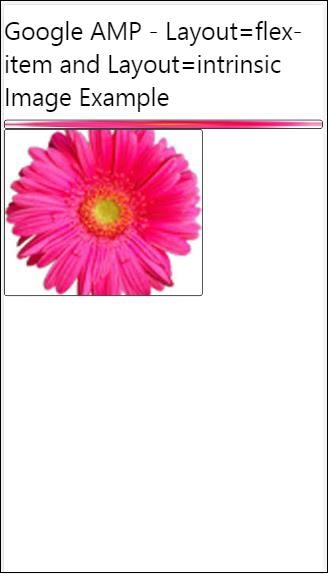
แสดงผลและตอบสนอง
คอมโพเนนต์แอมป์ที่มี layout = nodisplay จะไม่ใช้พื้นที่บนเพจเหมือนกับ display: none ไม่จำเป็นต้องเพิ่มคุณสมบัติความกว้างและความสูงใด ๆ ให้กับเค้าโครงดังกล่าว
คอมโพเนนต์แอมป์ที่มีเค้าโครง = ตอบสนองจะใช้พื้นที่ว่างหรือความกว้างของหน้าและความสูงจะถูกปรับขนาดเพื่อรักษาอัตราส่วนขององค์ประกอบ
<!doctype html>
<html amp lang = "en">
<head>
<meta charset = "utf-8">
<script async src = "https://cdn.ampproject.org/v0.js">
</script>
<title>Google AMP - Image</title>
<link rel = "canonical" href =
"http://example.ampproject.org/article-metadata.html">
<meta name = "viewport" content="width=device-width,
minimum-scale = 1,initial-scale = 1">
<style amp-boilerplate>
body{
-webkit-animation:
-amp-start 8s steps(1,end) 0s 1 normal both;-moz-animation:
-amp-start 8s steps(1,end) 0s 1 normal both;-ms-animation:
-amp-start 8s steps(1,end) 0s 1 normal both;animation:
-amp-start 8s steps(1,end) 0s 1 normal both}
@-webkit-keyframes
-amp-start{from{visibility:hidden}to{visibility:visible}}@-moz-keyframes
-amp-start{from{visibility:hidden}to{visibility:visible}}@-ms-keyframes
-amp-start{from{visibility:hidden}to{visibility:visible}}@-o-keyframes
-amp-start{from{visibility:hidden}to{visibility:visible}}@keyframes
-amp-start{from{visibility:hidden}to{visibility:visible}}
</style>
<noscript>
<style amp-boilerplate>
body{
-webkit-animation:none;
-moz-animation:none;
-ms-animation:none;
animation:none}
</style>
</noscript>
<style amp-custom>
amp-img {
border: 1px solid black;
border-radius: 4px;
padding: 5px;
}
displayitem {
display: inline-block;
width: 200px;
height:200px;
margin: 5px;
}
h1{font-family: "Segoe UI",Arial,sans-serif;
font-weight: 400;margin: 10px 0;}
</style>
</head>
<body>
<h1>Google AMP - Layout=no-display and
Layout = responsive Image Example</h1>
<div class = "displayitem">
<amp-img alt = "Beautiful Flower"
src = "images/flower.jpg"
layout = "no-display">
</amp-img>
</div>
<div class = "displayitem">
<amp-img alt = "Beautiful Flower"
src = "images/flower.jpg"
width = "246"
height = "205"
layout = "responsive">
</amp-img>
</div>
</body>
</html>เอาต์พุต
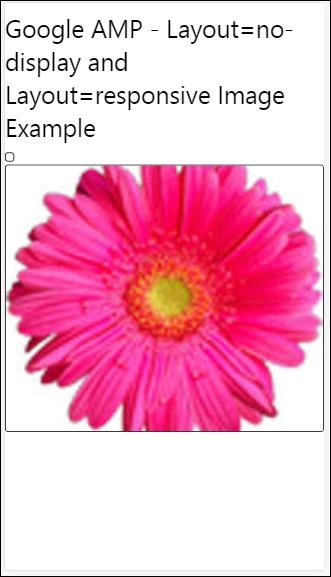
รายการเลย์เอาต์ที่รองรับใน Google AMP มีดังนี้
Accordion
Carousel
Lightbox
Slider
Sidebar
แอมป์ - หีบเพลง
Amp-accordion เป็นส่วนประกอบของแอมป์ที่ใช้เพื่อแสดงเนื้อหาในรูปแบบขยาย - ยุบ มันกลายเป็นเรื่องง่ายสำหรับผู้ใช้ที่จะดูบนอุปกรณ์มือถือซึ่งพวกเขาสามารถเลือกส่วนตามที่พวกเขาเลือกจากหีบเพลงได้
ในการทำงานกับ amp-accordion คุณต้องเพิ่มสคริปต์ต่อไปนี้ -
<script async custom-element = "amp-accordion"
src = "https://cdn.ampproject.org/v0/amp-accordion-0.1.js">
</script>แท็กแอมป์หีบเพลง
<amp-accordion>
<section class = "seca">
<h3>Content 1</h3>
<div>
<p>Content 1 is opened for amp-accordion</p>
<p>Content 1 is opened for amp-accordion</p>
<p>Content 1 is opened for amp-accordion</p>
<p>Content 1 is opened for amp-accordion</p>
<p>Content 1 is opened for amp-accordion</p>
<p>Content 1 is opened for amp-accordion</p>
</div>
</section>
…
</amp-accordion>ให้เราดูตัวอย่างการทำงานของแอมป์หีบเพลง
<!doctype html>
<html amp lang = "en">
<head>
<meta charset = "utf-8">
<script async src = "https://cdn.ampproject.org/v0.js">
</script>
<title>Google AMP - Amp Accordion </title>
<link rel = "canonical" href=
"http://example.ampproject.org/article-metadata.html">
<meta name = "viewport" content = "width = device-width,
minimum-scale = 1,initial-scale = 1">
<style amp-boilerplate>
body{
-webkit-animation:
-amp-start 8s steps(1,end) 0s 1 normal both;-moz-animation:
-amp-start 8s steps(1,end) 0s 1 normal both;-ms-animation:
-amp-start 8s steps(1,end) 0s 1 normal both;animation:
-amp-start 8s steps(1,end) 0s 1 normal both
}
@-webkit-keyframes
-amp-start{from{visibility:hidden}to{visibility:visible}}@-moz-keyframes
-amp-start{from{visibility:hidden}to{visibility:visible}}@-ms-keyframes
-amp-start{from{visibility:hidden}to{visibility:visible}}@-o-keyframes
-amp-start{from{visibility:hidden}to{visibility:visible}}@keyframes
-amp-start{from{visibility:hidden}to{visibility:visible}}
</style>
<noscript>
<style amp-boilerplate>
body{
-webkit-animation:none;
-moz-animation:none;
-ms-animation:none;
animation:none}
</style>
</noscript>
<script async custom-element = "amp-accordion" src =
"https://cdn.ampproject.org/v0/amp-accordion-0.1.js">
</script>
<style>
input[type = text]{
width: 50%;
padding: 12px;
border: 1px solid #ccc;
border-radius: 4px;
resize: vertical;
}
label {
padding: 12px 12px 12px 0;
display: inline-block;
font-family: "Segoe UI",Arial,sans-serif;
font-weight: 400;
}
.col-label {
float: left;
width: 25%;
margin-top: 6px;
}
.col-content {
float: left;
width: 75%;
margin-top: 6px;
}
.row:after {
content: "";
display: table;
clear: both;
}
.amp_example {
background-color: #f1f1f1;
padding: 0.01em 16px;
margin: 20px 0;
box-shadow: 0 2px 4px 0
rgba(0,0,0,0.16),0 2px 10px 0
rgba(0,0,0,0.12)!important;
}
h3{
font-family: "Segoe UI",Arial,sans-serif;
font-weight: 400;margin: 10px 0;
}
input[type=submit] {
background-color: #ACAD5C;
color: white;
padding: 12px 20px;
border: none;
border-radius: 4px;
cursor: pointer;
float: right;
}
.lightbox {background-color: rgba(100, 100, 100, 0.5);}
.seca {background-color:#fff;}
</style>
</head>
<body>
<div class = "amp_example">
<h3>Google AMP - Amp Accordion</h3>
<amp-accordion>
<section class = "seca">
<h3>Content 1</h3>
<div>
<p>Content 1 is opened for amp-accordion</p>
<p>Content 1 is opened for amp-accordion</p>
<p>Content 1 is opened for amp-accordion</p>
<p>Content 1 is opened for amp-accordion</p>
<p>Content 1 is opened for amp-accordion</p>
<p>Content 1 is opened for amp-accordion</p>
</div>
</section>
<section expanded class = "seca">
<h3>Content 2</h3>
<div>
<p>Content 2 is opened for amp-accordion</p>
<p>Content 2 is opened for amp-accordion</p>
<p>Content 2 is opened for amp-accordion</p>
<p>Content 2 is opened for amp-accordion</p>
<p>Content 2 is opened for amp-accordion</p>
</div>
</section>
<section class="seca">
<h3>Content 3</h3>
<div>
<p>Content 3 is opened for amp-accordion</p>
<p>Content 3 is opened for amp-accordion</p>
<p>Content 3 is opened for amp-accordion</p>
<p>Content 3 is opened for amp-accordion</p>
<p>Content 3 is opened for amp-accordion</p>
</div>
</section>
</amp-accordion>
</div>
</body>
</html>เอาต์พุต
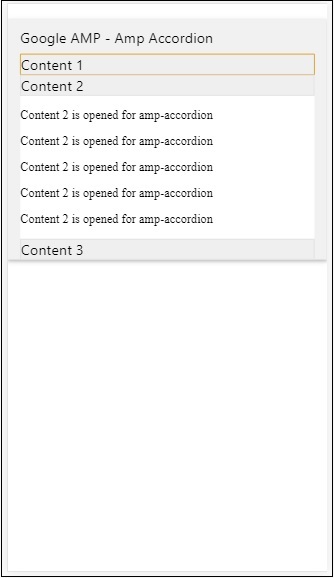
แอมป์หีบเพลงมีส่วนต่างๆอยู่ข้างใน แต่ละส่วนสามารถมีลูกได้ 2 คนและมากกว่า 2 คนจะแสดงข้อผิดพลาดในคอนโซลเบราว์เซอร์ คุณสามารถเพิ่มคอนเทนเนอร์ในส่วนและสามารถมีหลายองค์ประกอบในนั้น
โดยค่าเริ่มต้นเราได้เก็บส่วนหนึ่งไว้ในโหมดขยายโดยใช้แอตทริบิวต์ที่ขยายไปยังส่วน
Accordions ยุบอัตโนมัติ
สำหรับการยุบอัตโนมัติเรากำลังใช้แอตทริบิวต์ expand-single-section บนแอมป์หีบเพลงตามที่แสดงในตัวอย่างส่วนที่ผู้ใช้เปิดจะยังคงอยู่ในส่วนที่เหลือที่ขยายส่วนอื่น ๆ จะปิดโดยใช้ expand-single-section แอตทริบิวต์
<!doctype html>
<html amp lang = "en">
<head>
<meta charset = "utf-8">
<script async src = "https://cdn.ampproject.org/v0.js">
</script>
<title>Google AMP - Amp Accordion </title>
<link rel = "canonical" href=
"http://example.ampproject.org/article-metadata.html">
<meta name = "viewport" content = "width = device-width,
minimum-scale = 1,initial-scale = 1">
<style amp-boilerplate>
body{
-webkit-animation:
-amp-start 8s steps(1,end) 0s 1 normal both;-moz-animation:
-amp-start 8s steps(1,end) 0s 1 normal both;-ms-animation:
-amp-start 8s steps(1,end) 0s 1 normal both;animation:
-amp-start 8s steps(1,end) 0s 1 normal both
}
@-webkit-keyframes
-amp-start{from{visibility:hidden}to{visibility:visible}}@-moz-keyframes
-amp-start{from{visibility:hidden}to{visibility:visible}}@-ms-keyframes
-amp-start{from{visibility:hidden}to{visibility:visible}}@-o-keyframes
-amp-start{from{visibility:hidden}to{visibility:visible}}@keyframes
-amp-start{from{visibility:hidden}to{visibility:visible}}
</style>
<noscript>
<style amp-boilerplate>
body{
-webkit-animation:none;
-moz-animation:none;
-ms-animation:none;
animation:none}
</style>
</noscript>
<script async custom-element = "amp-accordion" src =
"https://cdn.ampproject.org/v0/amp-accordion-0.1.js">
</script>
<style>
input[type = text]{
width: 50%;
padding: 12px;
border: 1px solid #ccc;
border-radius: 4px;
resize: vertical;
}
label {
padding: 12px 12px 12px 0;
display: inline-block;
font-family: "Segoe UI",Arial,sans-serif;
font-weight: 400;
}
.col-label {
float: left;
width: 25%;
margin-top: 6px;
}
.col-content {
float: left;
width: 75%;
margin-top: 6px;
}
.row:after {
content: "";
display: table;
clear: both;
}
.amp_example {
background-color: #f1f1f1;
padding: 0.01em 16px;
margin: 20px 0;
box-shadow: 0 2px 4px 0
rgba(0,0,0,0.16),0 2px 10px 0
rgba(0,0,0,0.12)!important;
}
h3{
font-family: "Segoe UI",Arial,sans-serif;
font-weight: 400;
margin: 10px 0;
}
input[type=submit] {
background-color: #ACAD5C;
color: white;
padding: 12px 20px;
border: none;
border-radius: 4px;
cursor: pointer;
float: right;}
.lightbox {background-color: rgba(100, 100, 100, 0.5);}
.seca {background-color:#fff;}
</style>
<head>
<body>
<div class = "amp_example">
<h3>Google AMP - Amp Accordion</h3>
<amp-accordion expand-single-section>
<section class = "seca">
<h3>Content 1</h3>
<div>
<p>Content 1 is opened for amp-accordion</p>
<p>Content 1 is opened for amp-accordion</p>
<p>Content 1 is opened for amp-accordion</p>
<p>Content 1 is opened for amp-accordion</p>
<p>Content 1 is opened for amp-accordion</p>
<p>Content 1 is opened for amp-accordion</p>
</div>
</section>
<section class = "seca">
<h3>Content 2</h3>
<div>
<p>Content 2 is opened for amp-accordion</p>
<p>Content 2 is opened for amp-accordion</p>
<p>Content 2 is opened for amp-accordion</p>
<p>Content 2 is opened for amp-accordion</p>
<;p>Content 2 is opened for amp-accordion</p>
</div>
</section>
<section class = "seca">
<h3>Content 3</h3>
<div>
<p>Content 3 is opened for amp-accordion</p>
<p>Content 3 is opened for amp-accordion</p>
<p>Content 3 is opened for amp-accordion</p>
<p>Content 3 is opened for amp-accordion</p>
<p>Content 3 is opened for amp-accordion</p>
</div>
</section>
</amp-accordion>
</div>
</body>
</html>เอาต์พุต
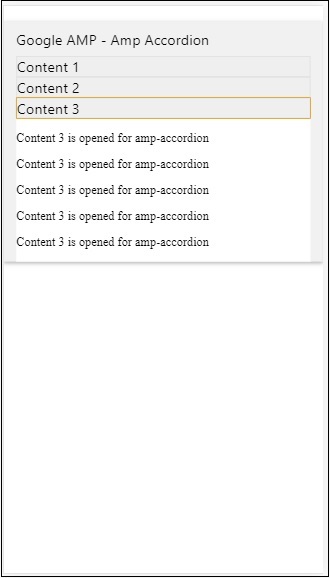
แอนิเมชั่นบน Accordions
ใช้ animateแอตทริบิวต์เราสามารถเพิ่มภาพเคลื่อนไหวสำหรับการขยาย - ยุบหีบเพลง ดูตัวอย่างด้านล่าง -
<!doctype html>
<html amp lang = "en">
<head>
<meta charset = "utf-8">
<script async src = "https://cdn.ampproject.org/v0.js">
</script>
<title>Google AMP - Amp Accordion </title>
<link rel = "canonical" href = "http://example.ampproject.org/article-metadata.html>
<meta name = "viewport" content = "width = device-width,minimum-scale = 1,initial-scale = 1">
<style amp-boilerplate>
body{
-webkit-animation:
-amp-start 8s steps(1,end) 0s 1 normal both;-moz-animation:
-amp-start 8s steps(1,end) 0s 1 normal both;-ms-animation:
-amp-start 8s steps(1,end) 0s 1 normal both;animation:
-amp-start 8s steps(1,end) 0s 1 normal both
}
@-webkit-keyframes
-amp-start{from{visibility:hidden}to{visibility:visible}}@-moz-keyframes
-amp-start{from{visibility:hidden}to{visibility:visible}}@-ms-keyframes
-amp-start{from{visibility:hidden}to{visibility:visible}}@-o-keyframes
-amp-start{from{visibility:hidden}to{visibility:visible}}@keyframes
-amp-start{from{visibility:hidden}to{visibility:visible}}
</style>
<noscript>
<style amp-boilerplate>
body{
-webkit-animation:none;
-moz-animation:none;
-ms-animation:none;animation:none
}
</style>
</noscript>
<script async custom-element = "amp-accordion" src =
"https://cdn.ampproject.org/v0/amp-accordion-0.1.js">
</script>
<style>
input[type = text]{
width: 50%;
padding: 12px;
border: 1px solid #ccc;
border-radius: 4px;
resize: vertical;
}
label {
padding: 12px 12px 12px 0;
display: inline-block;
font-family: "Segoe UI",Arial,sans-serif;
font-weight: 400;
}
.col-label {
float: left;
width: 25%;
margin-top: 6px;
}
.col-content {
float: left;
width: 75%;
margin-top: 6px;
}
.row:after {
content: "";
display: table;
clear: both;
}
.amp_example {
background-color: #f1f1f1;
padding: 0.01em 16px;
margin: 20px 0;
box-shadow: 0 2px 4px 0 rgba(0,0,0,0.16),
0 2px 10px 0 rgba(0,0,0,0.12)!important;
}
h3{
font-family: "Segoe UI",Arial,sans-serif;
font-weight: 400;margin: 10px 0;
}
input[type=submit] {
background-color: #ACAD5C;
color: white;
padding: 12px 20px;
border: none;
border-radius: 4px;
cursor: pointer;
float: right;
}
.lightbox {background-color: rgba(100, 100, 100, 0.5);}
.seca {background-color:#fff;}
</style>
</head>
<body>
<div class = "amp_example">
<h3>Google AMP - Amp Accordion</h3>
<amp-accordion animate expand-single-section>
<section class = "seca">
<h3>Content 1</h3>
<div>
<p>Content 1 is opened for amp-accordion</p>
<p>Content 1 is opened for amp-accordion</p>
<p>Content 1 is opened for amp-accordion</p>
<p>Content 1 is opened for amp-accordion</p>
<p>Content 1 is opened for amp-accordion</p>
<p>Content 1 is opened for amp-accordion</p>
</div>
</section>
<section class = "seca">
<h3>Content 2</h3>
<div>
<p>Content 2 is opened for amp-accordion</p>
<p>Content 2 is opened for amp-accordion</p>
<p>Content 2 is opened for amp-accordion</p>
<p>Content 2 is opened for amp-accordion</p>
<p>Content 2 is opened for amp-accordion</p>
</div>
</section>
<section class="seca">
<h3>Content 3</h3>
<div>
<p>Content 3 is opened for amp-accordion</p>
<p>Content 3 is opened for amp-accordion</p>
<p>Content 3 is opened for amp-accordion</p>
<p>Content 3 is opened for amp-accordion</p>
<p>Content 3 is opened for amp-accordion</p>
</div>
</section>
</amp-accordion>
</div>
</body>
</html>เอาต์พุต
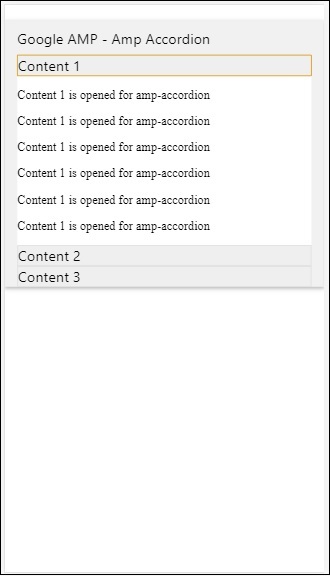
AMP Carousel
Amp-carousel เป็นส่วนประกอบของแอมป์เพื่อแสดงชุดของเนื้อหาที่คล้ายกันบนหน้าจอและใช้ลูกศรเพื่อเลื่อนไปมาระหว่างเนื้อหา
ในการทำงานกับ amp-carousel เราต้องเพิ่มสคริปต์ต่อไปนี้ -
<script async custom-element = "amp-carousel" src = "https://cdn.ampproject.org/v0/amp-carousel-0.1.js"></script>แท็ก Amp-carousel
แท็ก amp-carousel ดังแสดงด้านล่าง -
<amp-carousel height="300" layout="fixed-height" type="carousel">
<amp-img src="images/christmas1.jpg" width="400" height="300" alt="a sample image"></amp-img>
….
</amp-carousel>แอตทริบิวต์ที่ใช้ได้สำหรับ amp-carousel
แอตทริบิวต์ที่มีให้สำหรับ amp-carousel แสดงอยู่ในตารางที่แสดงด้านล่าง -
| ซีเนียร์ No | คุณสมบัติและคำอธิบาย |
|---|---|
| 1 | type เราสามารถแสดงรายการแบบหมุนเป็นแบบหมุนและสไลด์ |
| 2 | height ความสูงของภาพหมุนเป็นพิกเซล |
| 3 | controls (optional) มันแสดงลูกศรซ้าย / ขวาบนหน้าจอมันจะหายไปหลังจากไม่กี่วินาทีบนอุปกรณ์สามารถใช้ CSS เพื่อทำให้ลูกศรมองเห็นได้ตลอดเวลา |
| 4 | data-next-button-aria-label (optional) ใช้เพื่อกำหนดป้ายกำกับสำหรับภาพหมุนถัดไป |
| 5 | data-prev-button-aria-label (optional) ใช้เพื่อตั้งค่าป้ายกำกับสำหรับภาพหมุนก่อนหน้า |
| 6 | autoplay (optional) ใช้เพื่อแสดงสไลด์ถัดไปหลังจาก 5,000 มิลลิวินาที IT สามารถเขียนทับโดยใช้แอตทริบิวต์การหน่วงเวลาโดยไม่มี miiliseconds บน amp-carousel มันจะเพิ่มแอตทริบิวต์ loop ให้กับ carousel และสไลด์จะเล่นอีกครั้งเมื่อถึงจุดสิ้นสุดใช้สำหรับ type = slides เท่านั้น และต้องมีอย่างน้อย 2 สไลด์เพื่อให้เล่นอัตโนมัติได้ |
ตอนนี้ให้เราทำงานกับตัวอย่างเพื่อแสดงภาพหมุนในรูปแบบต่างๆ
ประเภท Amp Carousel เป็นแบบหมุน
ด้วยประเภทภาพหมุนรายการต่างๆจะเลื่อนได้ในแนวนอน
Example
<!doctype html>
<html amp lang = "en">
<head>
<meta charset = "utf-8">
<title>amp-carousel</title>
<script async src = "https://cdn.ampproject.org/v0.js">
</script>
<!-- ## Setup -->
<!-- Import the carousel component in the header. -->
<script async custom-element = "amp-carousel" src =
"https://cdn.ampproject.org/v0/amp-carousel-0.1.js">
</script>
<link rel = "canonical" href="
https://ampbyexample.com/components/amp-carousel/">
<meta name = "viewport" content = "width = device-width,
minimum-scale = 1,initial-scale = 1">
<style amp-boilerplate>
body{
-webkit-animation:
-amp-start 8s steps(1,end) 0s 1 normal both;-moz-animation:
-amp-start 8s steps(1,end) 0s 1 normal both;-ms-animation:
-amp-start 8s steps(1,end) 0s 1 normal both;animation:
-amp-start 8s steps(1,end) 0s 1 normal both
}
@-webkit-keyframes
-amp-start{from{visibility:hidden}to{visibility:visible}}@-moz-keyframes
-amp-start{from{visibility:hidden}to{visibility:visible}}@-ms-keyframes
-amp-start{from{visibility:hidden}to{visibility:visible}}@-o-keyframes
-amp-start{from{visibility:hidden}to{visibility:visible}}@keyframes
-amp-start{from{visibility:hidden}to{visibility:visible}}
</style>
<noscript>
<style amp-boilerplate>
body{
-webkit-animation:none;
-moz-animation:none;
-ms-animation:none;
animation:none
}
</style>
</noscript>
<style amp-custom>
h3{
font-family: "Segoe UI",Arial,sans-serif;
font-weight: 400;
margin: 10px 0;
}
</style>
</head>
<body>
<h3>Google Amp-Carousel</h3>
<amp-carousel height = "300" layout = "fixed-height" type = "carousel">
<amp-img
src = "images/christmas1.jpg"
width = "400"
height = "300"
alt = "a sample image">
</amp-img>
<amp-img src = "images/christmas2.jpg"
width = "400"
height = "300"
alt = "another sample image">
</amp-img>
<amp-img
src = "images/christmas3.jpg"
width = "400"
height = "300"
alt = "and another sample image">
</amp-img>
</amp-carousel>
</body>
</html>เอาต์พุต
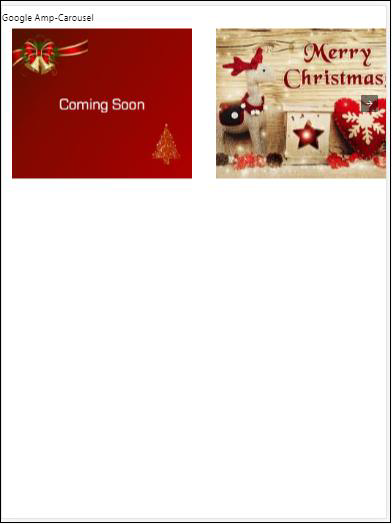
ประเภท Amp Carousel เป็นสไลด์
แอมป์ม้าหมุน type = ”slides” แสดงทีละรายการคุณสามารถใช้เลย์เอาต์เป็นแบบเติมคงที่ความสูงคงที่เฟล็กซ์ไอเท็มแสดงผลและตอบสนอง
Example
<!doctype html>
<html amp lang = "en">
<head>
<meta charset = "utf-8">
<title>amp-carousel</title>
<script async src = "https://cdn.ampproject.org/v0.js">
</script>
<!-- ## Setup -->
<!-- Import the carousel component in the header. -->
<script async custom-element = "amp-carousel" src =
"https://cdn.ampproject.org/v0/amp-carousel-0.1.js">
</script>
<link rel = "canonical" href=
"https://ampbyexample.com/components/amp-carousel/">
<meta name = "viewport" content = "width = device-width,
minimum-scale = 1,initial-scale = 1">
<style amp-boilerplate>
body{
-webkit-animation:
-amp-start 8s steps(1,end) 0s 1 normal both;-moz-animation:
-amp-start 8s steps(1,end) 0s 1 normal both;-ms-animation:
-amp-start 8s steps(1,end) 0s 1 normal both;animation:
-amp-start 8s steps(1,end) 0s 1 normal both
}
@-webkit-keyframes
-amp-start{from{visibility:hidden}to{visibility:visible}}@-moz-keyframes
-amp-start{from{visibility:hidden}to{visibility:visible}}@-ms-keyframes
-amp-start{from{visibility:hidden}to{visibility:visible}}@-o-keyframes
-amp-start{from{visibility:hidden}to{visibility:visible}}@keyframes
-amp-start{from{visibility:hidden}to{visibility:visible}}
</style>
<noscript>
<style amp-boilerplate>
body{
-webkit-animation:none;
-moz-animation:none;
-ms-animation:none;
animation:none}
</style>
</noscript>
<style amp-custom>
h3{
font-family: "Segoe UI",Arial,sans-serif;
font-weight: 400;margin: 10px 0;}
</style>
</head>
<body>
<h3>Google Amp-Carousel</h3>
<amp-carousel
width = "400"
height = "300"
layout = "responsive"
type = "slides">
<amp-img
src = "images/christmas1.jpg"
width = "400"
height = "300"
layout = "responsive"
alt = "a sample image">
</amp-img>
<amp-img
src = "images/christmas2.jpg"
width = "400"
height = "300"
layout = "responsive"
alt="another sample image">
</amp-img>
<amp-img
src = "images/christmas3.jpg"
width = "400"
height = "300"
layout = "responsive"
alt = "and another sample image">
</amp-img>
</amp-carousel>
</body>
</html>เอาต์พุต
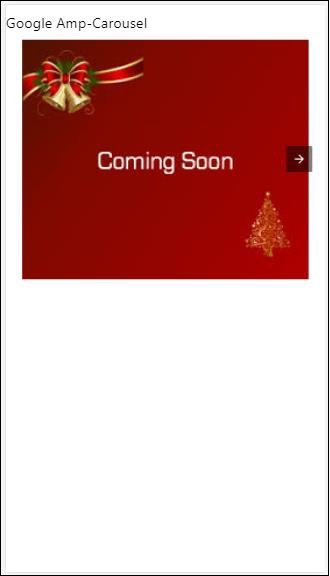
แอมป์ม้าหมุนโดยใช้การเล่นอัตโนมัติ
ในตัวอย่างด้านล่างนี้เราได้เพิ่มแอตทริบิวต์การเล่นอัตโนมัติโดยมีความล่าช้า 2,000 มิลลิวินาที (2 วินาที) สิ่งนี้จะเปลี่ยนสไลด์หลังจากล่าช้าไป 2 วินาที ตามค่าเริ่มต้นความล่าช้าคือ 5,000 มิลลิวินาที (5 วินาที)
Example
<!doctype html>
<html amp lang = "en">
<head>
<meta charset = "utf-8">
<title>amp-carousel</title>
<script async src = "https://cdn.ampproject.org/v0.js">
</script>
<!-- ## Setup -->
<!-- Import the carousel component in the header. -->
<script async custom-element = "amp-carousel" src =
"https://cdn.ampproject.org/v0/amp-carousel-0.1.js">
</script>
<link rel = "canonical" href =
"https://ampbyexample.com/components/amp-carousel/">
<meta name = "viewport" content = "width = device-width,
minimum-scale = 1,initial-scale = 1">
<style amp-boilerplate>
body{
-webkit-animation:
-amp-start 8s steps(1,end) 0s 1 normal both;-moz-animation:
-amp-start 8s steps(1,end) 0s 1 normal both;-ms-animation:
-amp-start 8s steps(1,end) 0s 1 normal both;animation:
-amp-start 8s steps(1,end) 0s 1 normal both
}
@-webkit-keyframes
-amp-start{from{visibility:hidden}to{visibility:visible}}@-moz-keyframes
-amp-start{from{visibility:hidden}to{visibility:visible}}@-ms-keyframes
-amp-start{from{visibility:hidden}to{visibility:visible}}@-o-keyframes
-amp-start{from{visibility:hidden}to{visibility:visible}}@keyframes
-amp-start{from{visibility:hidden}to{visibility:visible}}
</style>
<noscript>
<style amp-boilerplate>
body{
-webkit-animation:none;
-moz-animation:none;
-ms-animation:none;
animation:none}
</style>
</noscript>
<style amp-custom>
h3{
font-family: "Segoe UI",Arial,sans-serif;
font-weight: 400;
margin: 10px 0;
}
</style>
</head>
<body>
<h3>Google Amp-Carousel</h3>
<amp-carousel
width = "400"
height = "300"
layout = "responsive"
type = "slides"
autoplay delay = "2000">
<amp-img
src = "images/christmas1.jpg"
width = "400"
height = "300"
layout = "responsive"
alt = "a sample image">
</amp-img>
<amp-img
src = "images/christmas2.jpg"
width = "400"
height = "300"
layout = "responsive"
alt = "another sample image">
</amp-img>
<amp-img
src = "images/christmas3.jpg"
width = "400"
height = "300"
layout = "responsive"
alt = "and another sample image">
</amp-img>
</amp-carousel>
</body>
</html>เอาต์พุต
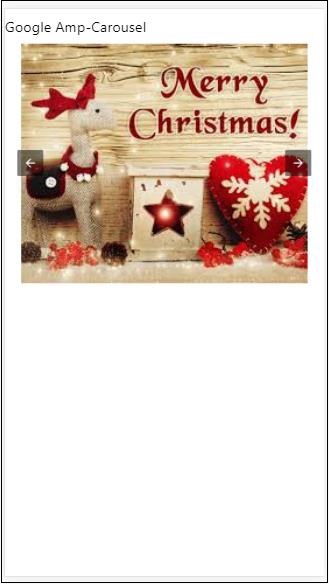
ไลท์บ็อกซ์ AMP
Amp-lightbox เป็นส่วนประกอบของแอมป์ที่จะใช้งานวิวพอร์ตเต็มรูปแบบและแสดงผลเหมือนภาพซ้อนทับ
ในการทำงานกับ amp-lightbox ให้เพิ่มสคริปต์ต่อไปนี้ -
<script async custom-element = "amp-lightbox" src = "https://cdn.ampproject.org/v0/amp-lightbox-0.1.js">
</script>แอตทริบิวต์ที่พร้อมใช้งานสำหรับ amp-lightbox
รายการแอตทริบิวต์สำหรับ amp-lightbox มีให้ด้านล่าง -
| Sr.no | คุณสมบัติและคำอธิบาย |
|---|---|
| 1 | animate-in (optional) คุณสามารถระบุรูปแบบของแอนิเมชั่นสำหรับเปิดไลท์บ็อกซ์ได้ที่นี่โดยค่าเริ่มต้นคือ จางหายไป ค่าที่รองรับสำหรับ stying คือเฟดอินบินเข้าด้านล่างและบินเข้าด้านบน |
| 2 | close-button (required on AMPHTML ads) เมื่อใช้สำหรับ amphtmlads เราสามารถระบุปุ่มปิดสำหรับไลท์บ็อกซ์ |
| 3 | id (required) ตัวระบุเฉพาะสำหรับไลท์บ็อกซ์ |
| 4 | layout (required) ค่าของการจัดวางจะเป็นแบบแสดงผล |
| 5 | Scrollable (optional) ด้วยแอตทริบิวต์นี้บน amp-lightbox เนื้อหาของไลท์บ็อกซ์สามารถเลื่อนได้และมีความสูงมากเกินไปของไลท์บ็อกซ์ |
ตัวอย่างไลท์บ็อกซ์
<!doctype html>
<html amp lang = "en">
<head>
<meta charset = "utf-8">
<script async src = "https://cdn.ampproject.org/v0.js">
</script>
<title>Google AMP - Amp Lightbox</title>
<link rel = "canonical" href =
"http://example.ampproject.org/article-metadata.html">
<meta name = "viewport" content = "width = device-width,
minimum-scale = 1,initial-scale = 1">
<style amp-boilerplate>
body{
-webkit-animation:
-amp-start 8s steps(1,end) 0s 1 normal both;-moz-animation:
-amp-start 8s steps(1,end) 0s 1 normal both;-ms-animation:
-amp-start 8s steps(1,end) 0s 1 normal both;animation:
-amp-start 8s steps(1,end) 0s 1 normal both
}
@-webkit-keyframes
-amp-start{from{visibility:hidden}to{visibility:visible}}@-moz-keyframes
-amp-start{from{visibility:hidden}to{visibility:visible}}@-ms-keyframes
-amp-start{from{visibility:hidden}to{visibility:visible}}@-o-keyframes
-amp-start{from{visibility:hidden}to{visibility:visible}}@keyframes
-amp-start{from{visibility:hidden}to{visibility:visible}}
</style>
<noscript>
<style amp-boilerplate>
body{
-webkit-animation:none;
-moz-animation:none;
-ms-animation:none;
animation:none}
</style>
</noscript>
<script async custom-element = "amp-lightbox" src =
"https://cdn.ampproject.org/v0/amp-lightbox-0.1.js">
</script>
<style amp-custom>
amp-img {
border: 1px solid #ddd;
border-radius: 4px;
padding: 5px;
}
button{
background-color: #ACAD5C;
color: white;
padding: 12px 20px;
border: none;
border-radius: 4px;
cursor: pointer;
float: left;
}
.lightbox {
background: rgba(211,211,211,0.8);
width: 100%;
height: 100%;
position: absolute;
display: flex;
align-items: center;
justify-content: center;
}
</style>
</head>
<body>
<h3>Google AMP - Amp Lightbox</h3>
<button on = "tap:my-lightbox">
Show LightBox
</button>
<amp-lightbox id = "my-lightbox" layout = "nodisplay">
<div class = "lightbox" on="tap:my-lightbox.close" tabindex = "0">
<amp-img
alt = "Beautiful Flower"
src = "images/flower.jpg"
width = "246"
height = "205">
</amp-img>
</div>
</amp-lightbox>
</body>
</html>เอาต์พุต
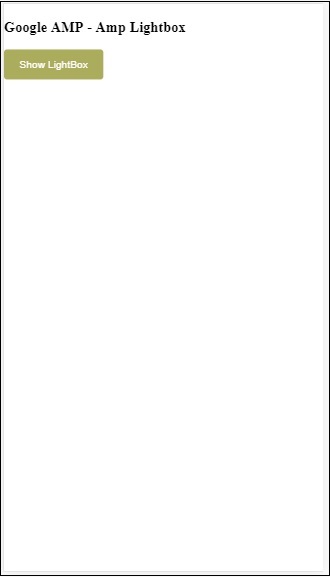

คลิกที่ใดก็ได้บนหน้าจอเพื่อปิดไลท์บ็อกซ์
คุณสามารถเพิ่มปุ่มปิดในไลท์บ็อกซ์ซึ่งส่วนใหญ่จะใช้เมื่อแสดงโฆษณาประเภทโอเวอร์เลย์ ดูตัวอย่างต่อไปนี้ -
ตัวอย่าง
<!doctype html>
<html amp lang = "en">
<head>
<meta charset = "utf-8">
<script async src = "https://cdn.ampproject.org/v0.js">
</script>
<title>Google AMP - Amp Lightbox</title>
<link rel = "canonical" href =
"http://example.ampproject.org/article-metadata.html">
<meta name = "viewport" content = "width = device-width,
minimum-scale = 1,initial-scale = 1">
<style amp-boilerplate>
body{
-webkit-animation:
-amp-start 8s steps(1,end) 0s 1 normal both;-moz-animation:
-amp-start 8s steps(1,end) 0s 1 normal both;-ms-animation:
-amp-start 8s steps(1,end) 0s 1 normal both;animation:
-amp-start 8s steps(1,end) 0s 1 normal both
}
@-webkit-keyframes
-amp-start{from{visibility:hidden}to{visibility:visible}}@-moz-keyframes
-amp-start{from{visibility:hidden}to{visibility:visible}}@-ms-keyframes
-amp-start{from{visibility:hidden}to{visibility:visible}}@-o-keyframes
-amp-start{from{visibility:hidden}to{visibility:visible}}@keyframes
-amp-start{from{visibility:hidden}to{visibility:visible}}
</style>
<noscript>
<style amp-boilerplate>
body{
-webkit-animation:none;
-moz-animation:none;
-ms-animation:none;
animation:none}
</style>
</noscript>
<script async custom-element = "amp-lightbox" src =
"https://cdn.ampproject.org/v0/amp-lightbox-0.1.js">
</script>
<style amp-custom>
amp-img {
border: 1px solid #ddd;
border-radius: 4px;
padding: 5px;
}
button{
background-color: #ACAD5C;
color: white;
padding: 12px 20px;
border: none;
border-radius: 4px;
cursor: pointer;
float: left;
}
.lightbox {
background: rgba(211,211,211,0.8);
width: 100%;
height: 100%;
position: absolute;
display: flex;
align-items: center;
justify-content: center;
}
</style>
</head>
<body>
<h3>Google AMP - Amp Lightbox</h3>
<button on = "tap:my-lightbox">
Show LightBox
</button>
<amp-lightbox id = "my-lightbox" layout = "nodisplay" close-button>
<div class = "lightbox" on = "tap:my-lightbox.close">
<amp-img
alt = "Beautiful Flower"
src = "images/flower.jpg"
width = "246"
height = "205">
</amp-img>
</div>
</amp-lightbox>
</body>
</html>เอาต์พุต
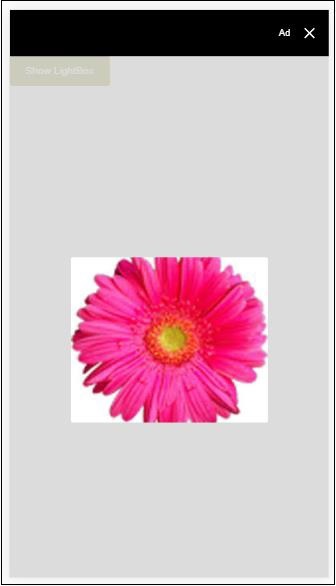
แอมป์แถบด้านข้าง
Amp sidebar เป็นส่วนประกอบของแอมป์ที่ใช้ในการแสดงเนื้อหาที่เลื่อนจากด้านข้างของหน้าต่างเมื่อแตะปุ่ม
ในการทำงานกับ amp-sidebar เราต้องเพิ่มสคริปต์ต่อไปนี้ -
<script async custom-element = "amp-sidebar" src = "
https://cdn.ampproject.org/v0/amp-sidebar-0.1.js">
</script>แอมป์แถบด้านข้าง
<amp-sidebar id = "sidebar" layout = "nodisplay" side = "right">
<span on = "tap:sidebar.close">X</span>
Html content here..
</amp-sidebar>รายการคุณสมบัติที่มีอยู่ใน amp-sidebar มีให้ด้านล่าง -
| Sr.no | คุณสมบัติและคำอธิบาย |
|---|---|
| 1 | side แอตทริบิวต์นี้จะเปิดแถบด้านข้างตามทิศทางที่ระบุ ตัวอย่างซ้าย / ขวา |
| 2 | layout Nodisplay จะใช้สำหรับเค้าโครงแถบด้านข้าง |
| 3 | open แอตทริบิวต์นี้จะถูกเพิ่มเมื่อแถบด้านข้างเปิดอยู่ |
| 4 | data-close-button-aria-label ใช้เพื่อกำหนดป้ายกำกับสำหรับปุ่มปิด |
เราจะทำงานกับแถบด้านข้างโดยใช้แอตทริบิวต์ด้านบน สังเกตตัวอย่างที่แสดงด้านล่าง -
ตัวอย่าง
<!doctype html>
<html amp lang = "en">
<head>
<meta charset = "utf-8">
<script async src = "https://cdn.ampproject.org/v0.js">
</script>
<title>Google AMP - Amp Sidebar</title>
<link rel = "canonical" href="
http://example.ampproject.org/article-metadata.html">
<meta name = "viewport" content = "width = device-width,
minimum-scale = 1,initial-scale = 1">
<style amp-boilerplate>
body{
-webkit-animation:
-amp-start 8s steps(1,end) 0s 1 normal both;-moz-animation:
-amp-start 8s steps(1,end) 0s 1 normal both;-ms-animation:
-amp-start 8s steps(1,end) 0s 1 normal both;animation:
-amp-start 8s steps(1,end) 0s 1 normal both
}
@-webkit-keyframes
-amp-start{from{visibility:hidden}to{visibility:visible}}@-moz-keyframes
-amp-start{from{visibility:hidden}to{visibility:visible}}@-ms-keyframes
-amp-start{from{visibility:hidden}to{visibility:visible}}@-o-keyframes
-amp-start{from{visibility:hidden}to{visibility:visible}}@keyframes
-amp-start{from{visibility:hidden}to{visibility:visible}}
</style>
<noscript>
<style amp-boilerplate>
body{
-webkit-animation:none;
-moz-animation:none;
-ms-animation:none;
animation:none}
</style>
</noscript>
<script async custom-element = "amp-sidebar" src =
"https://cdn.ampproject.org/v0/amp-sidebar-0.1.js">
</script>
<style amp-custom>
amp-img {
border: 1px solid #ddd;
border-radius: 4px;
padding: 5px;
}
button{
background-color: #ACAD5C;
color: white;
padding: 12px 20px;
border: none;
border-radius: 4px;
cursor: pointer;
float: left;
}
</style>
</head>
<body>
<h3>Google AMP - Amp Sidebar</h3>
<button on = "tap:sidebar">
Show Sidebar
</button>
<amp-sidebar id = "sidebar" layout = "nodisplay" side = "right">
<span on = "tap:sidebar.close">X</span>
<ul>
<li><a href = "/">About</a></li>
<li><a href = "/">Services</a></li>
<li><a href = "/">Contact US</a></li>
</ul>
</amp-sidebar>
</body>
</html>เอาต์พุต
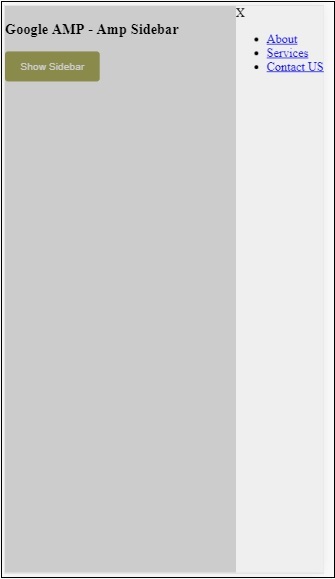
เราได้ใช้ sideเพื่อเปิดแถบด้านข้างทางด้านขวา คุณสามารถใช้ค่าทางซ้ายเพื่อsideเพื่อเปิดทางด้านซ้าย layout แอตทริบิวต์ต้อง nodisplay.Open แอตทริบิวต์จะปรากฏขึ้นเมื่อเปิดแถบด้านข้าง
ข้อมูลปิดปุ่ม aria-label
ตัวเลื่อนภาพแอมป์
Amp-image-slider เป็นส่วนประกอบของแอมป์ที่ใช้ในการเปรียบเทียบภาพสองภาพโดยการเพิ่มแถบเลื่อนเมื่อเลื่อนในแนวตั้งเหนือภาพ
ในการทำงานกับ amp-img-slider ให้เพิ่มสคริปต์ต่อไปนี้ -
<script async custom-element = "amp-image-slider" src = "
https://cdn.ampproject.org/v0/amp-image-slider-0.1.js">
</script>แท็ก Amp-img-slider
<amp-image-slider width = "300" height = "200" layout = "responsive">
<amp-img src = "images/christmas1.jpg" layout = "fill">
</amp-img>
<amp-img src = "images/christmas2.jpg" layout = "fill">
</amp-img>
</amp-image-slider>ตัวอย่างของ amp-img-slider แสดงไว้ที่นี่ ที่นี่เราได้เพิ่มภาพ 2 ภาพภายใน amp-img-slider โดยภาพแรกทำหน้าที่เหมือนแถบเลื่อนและคุณสามารถเลื่อนเข้าด้านบนของภาพที่ 2 ได้
ตัวอย่าง
<!doctype html>
<html amp lang = "en">
<head>
<meta charset = "utf-8">
<script async src = "https://cdn.ampproject.org/v0.js">
</script>
<title>Google AMP - Amp Image Slider</title>
<link rel = "canonical" href =
"http://example.ampproject.org/article-metadata.html">
<meta name = "viewport" content = "width = device-width,
minimum-scale = 1,initial-scale = 1">
<style amp-boilerplate>
body{
-webkit-animation:
-amp-start 8s steps(1,end) 0s 1 normal both;-moz-animation:
-amp-start 8s steps(1,end) 0s 1 normal both;-ms-animation:
-amp-start 8s steps(1,end) 0s 1 normal both;animation:
-amp-start 8s steps(1,end) 0s 1 normal both
}
@-webkit-keyframes
-amp-start{from{visibility:hidden}to{visibility:visible}}@-moz-keyframes
-amp-start{from{visibility:hidden}to{visibility:visible}}@-ms-keyframes
-amp-start{from{visibility:hidden}to{visibility:visible}}@-o-keyframes
-amp-start{from{visibility:hidden}to{visibility:visible}}@keyframes
-amp-start{from{visibility:hidden}to{visibility:visible}}
</style>
<noscript>
<style amp-boilerplate>
body{
-webkit-animation:none;
-moz-animation:none;
-ms-animation:none;
animation:none}
</style>
</noscript>
<script async custom-element = "amp-image-slider" src =
"https://cdn.ampproject.org/v0/amp-image-slider-0.1.js">
</script>
<style amp-custom>
amp-img {
border: 1px solid #ddd;
border-radius: 4px;
padding: 5px;
}
</style>
</head>
<body>
<h3>Google AMP - Amp Image Slider</h3>
<amp-image-slider
width = "300"
height = "200"
layout = "responsive">
<amp-img
src = "images/christmas1.jpg"
layout = "fill">
</amp-img>
<amp-img
src = "images/christmas2.jpg"
layout = "fill">
</amp-img>
</amp-image-slider>
</body>
</html>เอาต์พุต

Amp-image-slider มีการกระทำที่เรียกว่า askTo ซึ่งคุณสามารถเปลี่ยนภาพได้ดังที่แสดงในตัวอย่างด้านล่าง -
ตัวอย่าง
<!doctype html>
<html amp lang = "en">
<head>
<meta charset = "utf-8">
<script async src = "https://cdn.ampproject.org/v0.js">
</script>
<title>Google AMP - Amp Image Slider</title>
<link rel = "canonical" href ="
http://example.ampproject.org/article-metadata.html">
<meta name = "viewport" content = "width = device-width,
minimum-scale = 1,initial-scale = 1">
<style amp-boilerplate>
body{
-webkit-animation:
-amp-start 8s steps(1,end) 0s 1 normal both;-moz-animation:
-amp-start 8s steps(1,end) 0s 1 normal both;-ms-animation:
-amp-start 8s steps(1,end) 0s 1 normal both;animation:
-amp-start 8s steps(1,end) 0s 1 normal both
}
@-webkit-keyframes
-amp-start{from{visibility:hidden}to{visibility:visible}}@-moz-keyframes
-amp-start{from{visibility:hidden}to{visibility:visible}}@-ms-keyframes
-amp-start{from{visibility:hidden}to{visibility:visible}}@-o-keyframes
-amp-start{from{visibility:hidden}to{visibility:visible}}@keyframes
-amp-start{from{visibility:hidden}to{visibility:visible}}
</style>
<noscript>
<style amp-boilerplate>
body{
-webkit-animation:none;
-moz-animation:none;
-ms-animation:none;
animation:none}
</style>
</noscript>
<script async custom-element = "amp-image-slider" src =
"https://cdn.ampproject.org/v0/amp-image-slider-0.1.js">
</script>
<style amp-custom>
amp-img {
border: 1px solid #ddd;
border-radius: 4px;
padding: 5px;
}
button{
background-color: #ACAD5C;
color: white;
padding: 12px 20px;
border: none;
border-radius: 4px;
cursor: pointer;
float: left;
}
.amp-sidebar-toolbar-target-shown {
display: none;
}
</style>
</head>
<body>
<h3>Google AMP - Amp Image Slider</h3>
<amp-image-slider
width = "300"
id="slider1"
height = "200"
layout = "responsive">
<amp-img src = "images/christmas1.jpg" layout = "fill">
</amp-img>
<amp-img src = "images/christmas2.jpg" layout = "fill">
</amp-img>
</amp-image-slider>
<button on = "tap:slider1.seekTo(percent = 1)">
Image 1
</button>
<button on = "tap:slider1.seekTo(percent = 0)">
Image 2
</button>
</body>
</html>เอาต์พุต

คุณสามารถเปลี่ยนภาพได้โดยแตะปุ่ม

<button on = "tap:slider1.seekTo(percent = 1)">Image 1</button>
<button on = "tap:slider1.seekTo(percent = 0)">Image 2</button>
</div>โฆษณามีบทบาทสำคัญสำหรับเพจของผู้เผยแพร่เนื่องจากเป็นแหล่งรายได้สำหรับผู้เผยแพร่โฆษณา ในกรณีของหน้าแอมป์มีการเปลี่ยนแปลงเล็กน้อย ไม่อนุญาตให้เพิ่มไฟล์จาวาสคริปต์ของบุคคลที่สาม ในการแสดงโฆษณาบนหน้าเว็บจะมีส่วนประกอบของแอมป์ที่เรียกว่า amp-ad ซึ่งช่วยในการแสดงโฆษณาบนหน้าเว็บ เครือข่ายโฆษณาส่วนใหญ่ที่แสดงโฆษณาเข้ากันได้กับ amp-ad tag
รายละเอียดเกี่ยวกับการทำงานของโฆษณาจะแสดงในภาพต่อไปนี้ -
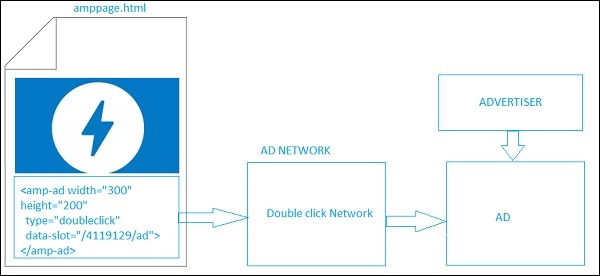
ในการแสดงโฆษณาบนหน้าผู้เผยแพร่โฆษณาเราต้องเพิ่ม <amp-ad> ซึ่งจะทำหน้าที่เป็นตัวยึดตำแหน่งเพื่อแสดงโฆษณาบนหน้าเว็บ <amp-ad> จะเรียกเครือข่ายโฆษณาที่ระบุสำหรับประเภท
เครือข่ายโฆษณาภายในจะเรียกโฆษณาให้กลับมาแสดงบนหน้าเว็บซึ่งได้รับจากผู้ลงโฆษณาซึ่งส่วนใหญ่เป็นโฆษณา html หรือ amphtml
เพื่อให้สามารถใช้งานได้เราต้องเพิ่มสคริปต์ลงในหน้าก่อน
<script async custom-element = "amp-ad" src = "
https://cdn.ampproject.org/v0/amp-ad-0.1.js">
</script>แท็ก amp-ad สำหรับ doubleclick มีลักษณะดังนี้ -
<amp-ad width = "300"
height = "200"
type = "doubleclick"
data-slot = "/4119129/ad">
<div placeholder>
<b>Placeholder here!!!</b>
</div>
</amp-ad>มีเครือข่ายโฆษณามากมายที่รองรับ amp-ad โปรดทราบว่าเราจะดูที่doubleclick amp-ad tag ในตัวอย่างของเราต้องระบุชื่อเครือข่ายโฆษณาในไฟล์type แอตทริบิวต์
ตัวอย่าง
<!doctype html>
<html amp lang = "en">
<head>
<meta charset = "utf-8">
<script async src = "https://cdn.ampproject.org/v0.js">
</script>
<title>Google AMP - AD</title>
<link rel = "canonical" href=
"http://example.ampproject.org/article-metadata.html">
<meta name = "viewport" content = "width = device-width,
minimum-scale = 1,initial-scale = 1">
<style amp-boilerplate>
body{
-webkit-animation:
-amp-start 8s steps(1,end) 0s 1 normal both;-moz-animation:
-amp-start 8s steps(1,end) 0s 1 normal both;-ms-animation:
-amp-start 8s steps(1,end) 0s 1 normal both;animation:
-amp-start 8s steps(1,end) 0s 1 normal both
}
@-webkit-keyframes
-amp-start{from{visibility:hidden}to{visibility:visible}}@-moz-keyframes
-amp-start{from{visibility:hidden}to{visibility:visible}}@-ms-keyframes
-amp-start{from{visibility:hidden}to{visibility:visible}}@-o-keyframes
-amp-start{from{visibility:hidden}to{visibility:visible}}@keyframes
-amp-start{from{visibility:hidden}to{visibility:visible}}
</style>
<noscript>
<style amp-boilerplate>
body{
-webkit-animation:none;
-moz-animation:none;
-ms-animation:none;
animation:none}
</style>
</noscript>
<script async custom-element = "amp-ad" src =
"https://cdn.ampproject.org/v0/amp-ad-0.1.js">
</script>
<style amp-custom>
div {
text-align:center;
}
</style>
</head>
<body>
<h3>Google AMP - AD</h3>
<h3>300x250 - Banner AD</h3>
<p>This is a example of adnetwork doubleclick banner ad</p>
<p>This is a example of adnetwork doubleclick banner ad</p>
<p>This is a example of adnetwork doubleclick banner ad</p>
<p>This is a example of adnetwork doubleclick banner ad</p>
<p>This is a example of adnetwork doubleclick banner ad</p>
<p>This is a example of adnetwork doubleclick banner ad</p>
<div>
<amp-ad
data-slot = /30497360/amp_by_example/AMP_Banner_300x250
height = 250
layout = fixed
style = width:300px;height:250px;
type = doubleclick
width = 300>
</amp-ad>
</div>
<p>This is a example of adnetwork doubleclick banner ad</p>
<p>This is a example of adnetwork doubleclick banner ad</p>
<p>This is a example of adnetwork doubleclick banner ad</p>
<p>This is a example of adnetwork doubleclick banner ad</p>
<p>This is a example of adnetwork doubleclick banner ad</p>
<p>This is a example of adnetwork doubleclick banner ad</p>
<p>This is a example of adnetwork doubleclick banner ad</p>
<p>This is a example of adnetwork doubleclick banner ad</p>
<p>This is a example of adnetwork doubleclick banner ad</p>
</body>
</html>เอาต์พุต
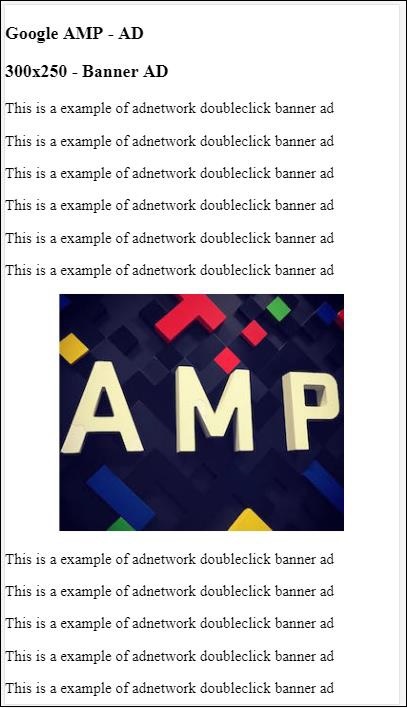
ให้เราดูคุณสมบัติที่สำคัญบางอย่างที่มีอยู่ใน amp-ad ตามที่ระบุไว้ในตารางด้านล่าง -
| ซีเนียร์ No | คุณสมบัติและคำอธิบาย |
|---|---|
| 1 | type ชื่อเครือข่ายโฆษณา |
| 2 | width ความกว้างของโฆษณา |
| 3 | height ความสูงของโฆษณา |
| 4 | placeholder ตัวยึดตำแหน่งที่ใช้เป็นองค์ประกอบลูกและจะแสดงต่อผู้ใช้เมื่อโฆษณายังคงโหลดอยู่โปรดทราบว่าแอตทริบิวต์นี้ต้องได้รับการสนับสนุนโดยส่วนท้ายเครือข่ายโฆษณา |
| 5 | data-* แอตทริบิวต์ข้อมูลที่จะส่งไปยังเครือข่ายโฆษณา ตัวอย่างเช่น doubleclick ad-network ต้องการ data-slot= / 30497360 / amp_by_example / AMP_Banner_300x250 เพื่อแสดงโฆษณาบนหน้า จะมีพารามิเตอร์ข้อมูลที่ระบุโดยเครือข่ายโฆษณาแต่ละเครือข่าย นอกจากนี้เรายังสามารถแทนที่ความกว้างและความสูงที่ใช้โดยใช้ data-override-width และ data-override-height |
| 6 | fallback ทางเลือกใช้เป็นองค์ประกอบลูกของ amp-ad และแสดงเมื่อไม่มีโฆษณาให้แสดง |
ให้เราเข้าใจสิ่งนี้ด้วยความช่วยเหลือของตัวอย่างการทำงานที่ใช้ placeholder ซึ่งจะดำเนินการเมื่อไม่มีโฆษณาให้แสดง
ตัวอย่าง
<!doctype html>
<html amp lang = "en">
<head>
<meta charset = "utf-8">
<script async src = "https://cdn.ampproject.org/v0.js">
</script>
<title>Google AMP - AD</title>
<link rel = "canonical" href =
"http://example.ampproject.org/article-metadata.html">
<meta name = "viewport" content="width = device-width,
minimum-scale = 1,initial-scale = 1">
<style amp-boilerplate>
body{
-webkit-animation:
-amp-start 8s steps(1,end) 0s 1 normal both;-moz-animation:
-amp-start 8s steps(1,end) 0s 1 normal both;-ms-animation:
-amp-start 8s steps(1,end) 0s 1 normal both;animation:
-amp-start 8s steps(1,end) 0s 1 normal both
}
@-webkit-keyframes
-amp-start{from{visibility:hidden}to{visibility:visible}}@-moz-keyframes
-amp-start{from{visibility:hidden}to{visibility:visible}}@-ms-keyframes
-amp-start{from{visibility:hidden}to{visibility:visible}}@-o-keyframes
-amp-start{from{visibility:hidden}to{visibility:visible}}@keyframes
-amp-start{from{visibility:hidden}to{visibility:visible}}
</style>
<noscript>
<style amp-boilerplate>
body{
-webkit-animation:none;
-moz-animation:none;
-ms-animation:none;
animation:none}
</style>
</noscript>
<script async custom-element = "amp-ad" src =
"https://cdn.ampproject.org/v0/amp-ad-0.1.js">
</script>
<style amp-custom>
div {
text-align:center;
}
</style>
</head>
<body>
<h3>Google AMP - AD</h3>
<h3>300x250 - Banner AD</h3>
<p>This is a example of adnetwork doubleclick banner ad</p>
<p>This is a example of adnetwork doubleclick banner ad</p>
<p>This is a example of adnetwork doubleclick banner ad</p>
<p>This is a example of adnetwork doubleclick banner ad</p>
<p>This is a example of adnetwork doubleclick banner ad</p>
<p>This is a example of adnetwork doubleclick banner ad</p>
<div>
<amp-ad
data-slot = /30497360/amp_by_example/AMP_Banner_300x250
height = 250
layout = fixed
style = width:300px;height:250px;
type = doubleclick
width = 300>
<div placeholder>
<b>Placeholder Example : Ad is loading!!!</b>
</div>
</amp-ad>
</div>
<p>This is a example of adnetwork doubleclick banner ad</p>
<p>This is a example of adnetwork doubleclick banner ad</p>
<p>This is a example of adnetwork doubleclick banner ad</p>
<p>This is a example of adnetwork doubleclick banner ad<p>
<p>This is a example of adnetwork doubleclick banner ad</p>
<p>This is a example of adnetwork doubleclick banner ad</p>
</body>
</html>เอาต์พุต

เราสามารถใช้แอตทริบิวต์ทางเลือกซึ่งเป็นองค์ประกอบลูกในการ amp-ad และจะแสดงเมื่อไม่มีโฆษณาให้แสดง
ตัวอย่าง
<!doctype html>
<html amp lang = "en">
<head>
<meta charset = "utf-8">
<script async src = "https://cdn.ampproject.org/v0.js">
</script>
<title>Google AMP - AD</title>
<link rel = "canonical" href =
"http://example.ampproject.org/article-metadata.html">
<meta name = "viewport" content = "width = device-width,
minimum-scale = 1,initial-scale = 1">
<style amp-boilerplate>
body{
-webkit-animation:
-amp-start 8s steps(1,end) 0s 1 normal both;-moz-animation:
-amp-start 8s steps(1,end) 0s 1 normal both;-ms-animation:
-amp-start 8s steps(1,end) 0s 1 normal both;animation:
-amp-start 8s steps(1,end) 0s 1 normal both
}
@-webkit-keyframes
-amp-start{from{visibility:hidden}to{visibility:visible}}@-moz-keyframes
-amp-start{from{visibility:hidden}to{visibility:visible}}@-ms-keyframes
-amp-start{from{visibility:hidden}to{visibility:visible}}@-o-keyframes
-amp-start{from{visibility:hidden}to{visibility:visible}}@keyframes
-amp-start{from{visibility:hidden}to{visibility:visible}}
</style>
<noscript>
<style amp-boilerplate>
body{
-webkit-animation:none;
-moz-animation:none;
-ms-animation:none;
animation:none}
</style>
</noscript>
<script async custom-element = "amp-ad" src =
"https://cdn.ampproject.org/v0/amp-ad-0.1.js">
</script>
<style amp-custom>
div, p{
text-align:center;
}
amp-ad {
border : solid 1px black;
}
</style>
</head>
<body>
<h3>Google AMP - AD</h3>
<h3>300x250 - Banner AD</h3>
<p>This is a example of adnetwork doubleclick banner ad</p>
<p>This is a example of adnetwork doubleclick banner ad</p>
<p>This is a example of adnetwork doubleclick banner ad</p>
<p>This is a example of adnetwork doubleclick banner ad</p>
<p>This is a example of adnetwork doubleclick banner ad</p>
<p>This is a example of adnetwork doubleclick banner ad</p>
<div>
<amp-ad
width = "300"
height = "250"
type = "doubleclick"
data-slot = "/4119129/no-ad">
<div fallback>
<p style = "color:green;font-size:25px;">No ads to Serve!</p>
</div>
</amp-ad>
</div>
<p>This is a example of adnetwork doubleclick banner ad</p>
<p>This is a example of adnetwork doubleclick banner ad</p>
<p>This is a example of adnetwork doubleclick banner ad</p>
<p>This is a example of adnetwork doubleclick banner ad</p>
<p>This is a example of adnetwork doubleclick banner ad</p>
<p>This is a example of adnetwork doubleclick banner ad</p>
</body>
</html>เอาต์พุต
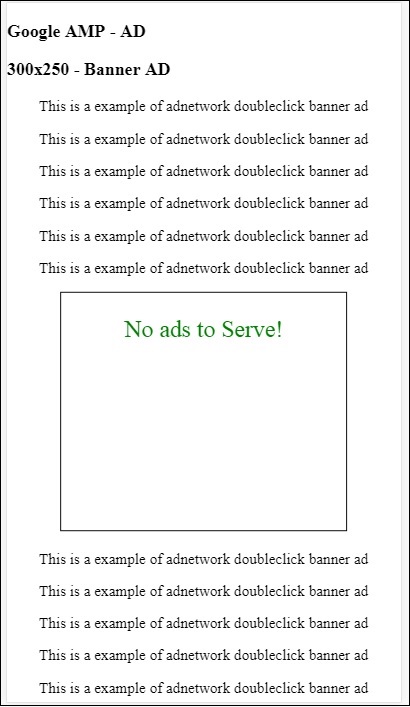
ในกรณีของแอตทริบิวต์ทางเลือกหากโฆษณาอยู่ในวิวพอร์ตโฆษณาจะแสดงข้อความภายในองค์ประกอบทางเลือก
หากส่วนประกอบโฆษณาอยู่ด้านล่างวิวพอร์ตและหากไม่มีโฆษณา amp-ad จะยุบพื้นที่และจะไม่แสดงข้อความสำรอง
หน่วยโฆษณาจะยุบก็ต่อเมื่อไม่มีโฆษณาและหากอยู่ต่ำกว่าวิวพอร์ตดังนั้นผู้ใช้จะไม่ถูกรบกวนขณะอ่านเนื้อหาเนื่องจากการยุบอาจทำให้เนื้อหาเปลี่ยนไป
รายชื่อเครือข่ายโฆษณาที่รองรับมีให้ที่นี่: https://www.ampproject.org/docs/ads/ads_vendors
ในบทนี้เราจะพูดถึงแท็กที่เกี่ยวข้องกับโฆษณาต่อไปนี้ใน amp -
Google AMP - พิกเซลการติดตามเหตุการณ์
Google AMP - โฆษณาติดหนึบ
Google AMP - โฆษณา AMPHTML
พิกเซลการติดตามเหตุการณ์
แอมป์มีแอมป์พิกเซลซึ่งโดยพื้นฐานแล้วจะใช้ในการยิงพิกเซลเพื่อนับจำนวนการดูหน้าเว็บ Amp-pixel คล้ายกับแท็ก img ซึ่งเราจำเป็นต้องให้พิกเซล url ซึ่งกำลังจะเริ่มทำงานและผู้ใช้สามารถเห็น url ที่ใช้ในแท็บเครือข่ายของเบราว์เซอร์ขณะทำการดีบักพิกเซลจะไม่แสดงบนหน้า
ในการทำงานกับ amp-pixel เราไม่จำเป็นต้องเพิ่มสคริปต์เพิ่มเติมใด ๆ เนื่องจากฟังก์ชันการทำงานมีอยู่ในสคริปต์แอมป์หลัก
แท็ก amp-pixel มีลักษณะดังที่แสดงไว้ที่นี่ -
<amp-pixel src = "https://urlhere" layout = "nodisplay">
</amp-pixel>ให้เราเข้าใจการทำงานของ amp-pixel ด้วยตัวอย่างการใช้งาน -
ตัวอย่าง
<!doctype html>
<html amp lang = "en">
<head>
<meta charset = "utf-8">
<script async src = "https://cdn.ampproject.org/v0.js">
</script>
<title>Google AMP - Tracking Pixel</title>
<link rel = "canonical" href =
"http://example.ampproject.org/article-metadata.html">
<meta name = "viewport" content = "width = device-width,
minimum-scale = 1,initial-scale = 1">
<style amp-boilerplate>
body{
-webkit-animation:
-amp-start 8s steps(1,end) 0s 1 normal both;-moz-animation:
-amp-start 8s steps(1,end) 0s 1 normal both;-ms-animation:
-amp-start 8s steps(1,end) 0s 1 normal both;animation:
-amp-start 8s steps(1,end) 0s 1 normal both
}
@-webkit-keyframes
-amp-start{from{visibility:hidden}to{visibility:visible}}@-moz-keyframes
-amp-start{from{visibility:hidden}to{visibility:visible}}@-ms-keyframes
-amp-start{from{visibility:hidden}to{visibility:visible}}@-o-keyframes
-amp-start{from{visibility:hidden}to{visibility:visible}}@keyframes
-amp-start{from{visibility:hidden}to{visibility:visible}}
</style>
<noscript>
<style amp-boilerplate>
body{
-webkit-animation:none;
-moz-animation:none;
-ms-animation:none;
animation:none}
</style>
</noscript>
</head>
<body>
<h3>Google AMP - Tracking Pixel</h3>
<amp-pixel src = "https://www.trackerurlhere.com/tracker/foo"
layout = "nodisplay">
</amp-pixel>
</body>
</html>เอาต์พุต
คุณจะเห็น URL เริ่มทำงานในแท็บเครือข่ายเบราว์เซอร์ ที่นี่เราใช้ดัมมี่พิกเซลเพื่อแสดงการทำงานของแอมป์พิกเซล ในสภาพแวดล้อมแบบสดคุณควรเห็นข้อมูลที่ติดตามเมื่อพิกเซลเริ่มทำงาน ทุกครั้งที่พิกเซลเริ่มทำงานในหน้าเว็บที่ใช้งานอยู่ข้อมูลในส่วนต่างๆจะถูกนับที่ส่วนท้ายของเซิร์ฟเวอร์ ภายหลังสามารถวิเคราะห์ข้อมูลจากมุมมองทางธุรกิจ
โฆษณาติดหนึบ
Sticky AD คือรูปแบบประเภทหนึ่งในการแสดงโฆษณา โฆษณาจะติดอยู่ที่ด้านล่างของหน้าซึ่งจะเรียกไฟล์amp-adส่วนประกอบตอนเป็นเด็ก โดยพื้นฐานแล้วจะเหมือนกับโฆษณาส่วนท้ายซึ่งส่วนใหญ่เราจะเห็นในหน้าเว็บ
ในการทำงานกับ amp-sticky-ad เราต้องเพิ่มสคริปต์ต่อไปนี้ -
<script async custom-element = "amp-sticky-ad" src = "
https://cdn.ampproject.org/v0/amp-sticky-ad-1.0.js">
</script>เงื่อนไขที่เชื่อมโยงกับ amp-sticky-ad มีดังนี้ -
คุณได้รับอนุญาตให้ใช้ amp-Sticky-ad เพียงรายการเดียวบนเพจ
amp-ad ต้องเป็นลูกโดยตรงของ amp-sticky-ad ตัวอย่างเช่น -
<amp-sticky-ad>
<amp-ad></amp-ad>
</amp-sticky-ad>คอมโพเนนต์โฆษณาแบบติดหนึบจะอยู่ที่ด้านล่างของหน้าเสมอ
โฆษณา Sticky จะรับความกว้างเต็มของคอนเทนเนอร์และเติมช่องว่างด้วยความกว้างและความสูงของ amp-ad
ความสูงของโฆษณาแบบติดหนึบคือ 100px หากความสูงของ amp-ad น้อยกว่า 100px Sticky ad จะใช้ความสูงของ amp-ad หากความสูงของ amp-ad มากกว่า 100px ความสูงจะยังคงเป็น 100px ด้วย ซ่อนเนื้อหาล้นจะไม่สามารถเปลี่ยนความสูงของโฆษณาแบบติดหนึบเกิน 100px ได้
สามารถเปลี่ยนสีพื้นหลังของ Sticky-ad ได้ แต่ไม่อนุญาตให้ใช้พื้นหลังแบบโปร่งใส
เมื่อผู้ใช้เลื่อนและมาถึงที่ด้านล่างของหน้าโฆษณาจะปรากฏที่ส่วนท้ายของหน้าเพื่อไม่ให้ซ่อนเนื้อหาด้านล่าง
ในโหมดแนวนอนโฆษณาแบบติดหนึบจะอยู่กึ่งกลาง
หากไม่มีโฆษณาให้แสดงคอนเทนเนอร์ของโฆษณาแบบติดหนึบจะยุบและมองไม่เห็น
ให้เราดูตัวอย่างการทำงานของ amp-sticky-ad ในหน้าดังที่ระบุด้านล่าง -
ตัวอย่าง
<!doctype html>
<html amp lang = "en">
<head>
<meta charset = "utf-8">
<script async src = "https://cdn.ampproject.org/v0.js">
</script>
<title>Google AMP - AD</title>
<link rel = "canonical" href =
"http://example.ampproject.org/article-metadata.html">
<meta name = "viewport" content = "width = device-width,
minimum-scale = 1,initial-scale = 1">
<style amp-boilerplate>
body{
-webkit-animation:
-amp-start 8s steps(1,end) 0s 1 normal both;-moz-animation:
-amp-start 8s steps(1,end) 0s 1 normal both;-ms-animation:
-amp-start 8s steps(1,end) 0s 1 normal both;animation:
-amp-start 8s steps(1,end) 0s 1 normal both
}
@-webkit-keyframes
-amp-start{from{visibility:hidden}to{visibility:visible}}@-moz-keyframes
-amp-start{from{visibility:hidden}to{visibility:visible}}@-ms-keyframes
-amp-start{from{visibility:hidden}to{visibility:visible}}@-o-keyframes
-amp-start{from{visibility:hidden}to{visibility:visible}}@keyframes
-amp-start{from{visibility:hidden}to{visibility:visible}}
</style>
<noscript>
<style amp-boilerplate>
body{
-webkit-animation:none;
-moz-animation:none;
-ms-animation:none;
animation:none}
</style>
</noscript>
<script async custom-element = "amp-sticky-ad" src =
"https://cdn.ampproject.org/v0/amp-sticky-ad-1.0.js">
</script>
<style amp-custom>
div, p{
text-align:center;
}
amp-ad {
border : solid 1px black;
}
</style>
</head>
<body>
<h3>Google AMP - Sticky AD</h3>
<p>This is a example of adnetwork doubleclick banner ad</p>
<p>This is a example of adnetwork doubleclick banner ad</p>
<p>This is a example of adnetwork doubleclick banner ad</p>
<p>This is a example of adnetwork doubleclick banner ad</p>
<p>This is a example of adnetwork doubleclick banner ad</p>
<p>This is a example of adnetwork doubleclick banner ad</p>
<div>
<amp-sticky-ad layout = "nodisplay">
<amp-ad
width = "320"
height = "50"
type = "doubleclick"
data-slot = "/35096353/amptesting/formats/sticky">
</amp-ad>
</amp-sticky-ad>
</div>
<p>This is a example of adnetwork doubleclick banner ad</p>
<p>This is a example of adnetwork doubleclick banner ad</p>
<p>This is a example of adnetwork doubleclick banner ad</p>
<p>This is a example of adnetwork doubleclick banner ad</p>
<p>This is a example of adnetwork doubleclick banner ad</p>
<p>This is a example of adnetwork doubleclick banner ad</p>
<p>This is a example of adnetwork doubleclick banner ad</p>
<p>This is a example of adnetwork doubleclick banner ad</p>
<p>This is a example of adnetwork doubleclick banner ad</p>
<p>This is a example of adnetwork doubleclick banner ad</p>
<p>This is a example of adnetwork doubleclick banner ad</p>
<p>This is a example of adnetwork doubleclick banner ad</p>
<p>This is a example of adnetwork doubleclick banner ad</p>
<p>This is a example of adnetwork doubleclick banner ad</p>
<p>This is a example of adnetwork doubleclick banner ad</p>
<p>This is a example of adnetwork doubleclick banner ad</p>
<p>This is a example of adnetwork doubleclick banner ad</p>
<p>This is a example of adnetwork doubleclick banner ad</p>
<p>This is a example of adnetwork doubleclick banner ad</p>
<p>This is a example of adnetwork doubleclick banner ad</p>
<p>This is a example of adnetwork doubleclick banner ad</p>
<p>This is a example of adnetwork doubleclick banner ad</p>
<p>This is a example of adnetwork doubleclick banner ad</p>
<p>This is a example of adnetwork doubleclick banner ad</p>
<p>This is a example of adnetwork doubleclick banner ad</p>
<p>This is a example of adnetwork doubleclick banner ad</p>
<p>This is a example of adnetwork doubleclick banner ad</p>
<p>This is a example of adnetwork doubleclick banner ad</p>
<p>This is a example of adnetwork doubleclick banner ad</p>
<p>This is a example of adnetwork doubleclick banner ad</p>
<p>This is a example of adnetwork doubleclick banner ad</p>
<p>This is a example of adnetwork doubleclick banner ad</p>
<p>This is a example of adnetwork doubleclick banner ad</p>
<p>This is a example of adnetwork doubleclick banner ad</p>
<p>This is a example of adnetwork doubleclick banner ad</p>
<p>This is a example of adnetwork doubleclick banner ad</p>
<p>This is a example of adnetwork doubleclick banner ad</p>
<p>This is a example of adnetwork doubleclick banner ad</p>
<p>This is a example of adnetwork doubleclick banner ad</p>
<p>This is a example of adnetwork doubleclick banner ad</p>
<p>This is a example of adnetwork doubleclick banner ad</p>
<p>This is a example of adnetwork doubleclick banner ad</p>
<p>This is a example of adnetwork doubleclick banner ad</p>
<p>This is a example of adnetwork doubleclick banner ad</p>
<p>This is a example of adnetwork doubleclick banner ad</p>
<p>This is a example of adnetwork doubleclick banner ad</p>
<p>This is a example of adnetwork doubleclick banner ad</p>
<p>This is a example of adnetwork doubleclick banner ad</p>
<p>This is a example of adnetwork doubleclick banner ad</p>
<p>This is a example of adnetwork doubleclick banner ad</p>
<p>This is a example of adnetwork doubleclick banner ad</p>
<p>This is a example of adnetwork doubleclick banner ad</p>
<p>This is a example of adnetwork doubleclick banner ad</p>
<h2>END OF PAGE IS VISIBLE AND CONTENT IS NOT COVERED</h2>
</body>
</html>เอาต์พุต

นี่คือลักษณะที่ปรากฏเมื่อผู้ใช้เลื่อนไปที่ส่วนท้ายของหน้า -
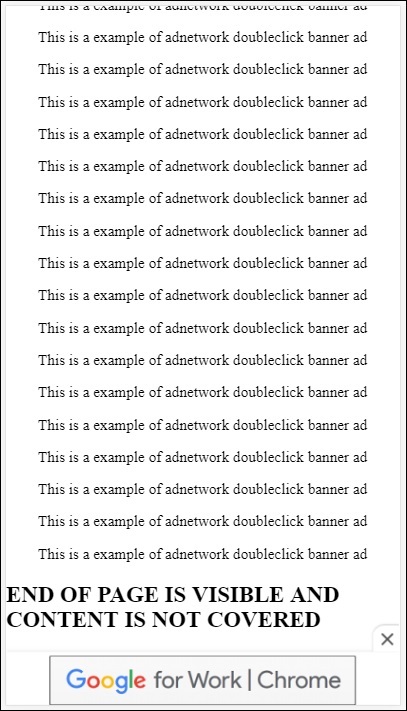
โฆษณาไม่ซ้อนทับเนื้อหาเมื่อคุณไปถึงส่วนท้ายของหน้า มีปุ่มปิดซึ่งช่วยให้ผู้ใช้สามารถปิดโฆษณาได้
หากคุณต้องการเปลี่ยนแปลงสิ่งที่เกี่ยวข้องกับปุ่มปิดเช่นรูปภาพหรือความกว้าง ฯลฯ ก็สามารถทำได้โดยใช้ .amp-sticky-ad-close-button ในองค์ประกอบสไตล์
ตัวอย่างการเปลี่ยนสีพื้นหลังของปุ่มปิด
<!doctype html>
<html amp lang = "en">
<head>
<meta charset = "utf-8">
<script async src = "https://cdn.ampproject.org/v0.js">
</script>
<title>Google AMP - AD</title>
<link rel = "canonical" href =
"http://example.ampproject.org/article-metadata.html">
<meta name = "viewport" content = "width = device-width,
minimum-scale = 1,initial-scale = 1">
<style amp-boilerplate>
body{
-webkit-animation:
-amp-start 8s steps(1,end) 0s 1 normal both;-moz-animation:
-amp-start 8s steps(1,end) 0s 1 normal both;-ms-animation:
-amp-start 8s steps(1,end) 0s 1 normal both;animation:
-amp-start 8s steps(1,end) 0s 1 normal both
}
@-webkit-keyframes
-amp-start{from{visibility:hidden}to{visibility:visible}}@-moz-keyframes
-amp-start{from{visibility:hidden}to{visibility:visible}}@-ms-keyframes
-amp-start{from{visibility:hidden}to{visibility:visible}}@-o-keyframes
-amp-start{from{visibility:hidden}to{visibility:visible}}@keyframes
-amp-start{from{visibility:hidden}to{visibility:visible}}
</style>
<noscript>
<style amp-boilerplate>
body{
-webkit-animation:none;
-moz-animation:none;
-ms-animation:none;
animation:none}
</style>
</noscript>
<script async custom-element = "amp-sticky-ad"
src = "https://cdn.ampproject.org/v0/amp-sticky-ad-1.0.js">
</script>
<style amp-custom>
div, p{
text-align:center;
}
amp-ad {
border : solid 1px black;
}
.amp-sticky-ad-close-button {
background-color: red;
}
</style>
</head>
<body>
<h3>Google AMP - Sticky AD</h3>
<p>This is a example of adnetwork doubleclick banner ad</p>
<p>This is a example of adnetwork doubleclick banner ad</p>
<p>This is a example of adnetwork doubleclick banner ad</p>
<p>This is a example of adnetwork doubleclick banner ad</p>
<p>This is a example of adnetwork doubleclick banner ad</p>
<p>This is a example of adnetwork doubleclick banner ad</p>
<div>
<amp-sticky-ad layout = "nodisplay">
<amp-ad
width = "320"
height = "50"
type = "doubleclick"
data-slot = "/35096353/amptesting/formats/sticky">
</amp-ad>
</amp-sticky-ad>
</div>
<p>This is a example of adnetwork doubleclick banner ad</p>
<p>This is a example of adnetwork doubleclick banner ad</p>
<p>This is a example of adnetwork doubleclick banner ad</p>
<p>This is a example of adnetwork doubleclick banner ad</p>
<p>This is a example of adnetwork doubleclick banner ad</p>
<p>This is a example of adnetwork doubleclick banner ad</p>
<p>This is a example of adnetwork doubleclick banner ad</p>
<p>This is a example of adnetwork doubleclick banner ad</p>
<p>This is a example of adnetwork doubleclick banner ad</p>
<p>This is a example of adnetwork doubleclick banner ad</p>
<p>This is a example of adnetwork doubleclick banner ad</p>
<p>This is a example of adnetwork doubleclick banner ad</p>
<p>This is a example of adnetwork doubleclick banner ad</p>
<p>This is a example of adnetwork doubleclick banner ad</p>
<p>This is a example of adnetwork doubleclick banner ad</p>
<p>This is a example of adnetwork doubleclick banner ad</p>
<p>This is a example of adnetwork doubleclick banner ad</p>
<p>This is a example of adnetwork doubleclick banner ad</p>
<p>This is a example of adnetwork doubleclick banner ad</p>
<p>This is a example of adnetwork doubleclick banner ad</p>
<p>This is a example of adnetwork doubleclick banner ad</p>
<p>This is a example of adnetwork doubleclick banner ad</p>
<p>This is a example of adnetwork doubleclick banner ad</p>
<p>This is a example of adnetwork doubleclick banner ad</p>
<p>This is a example of adnetwork doubleclick banner ad</p>
<p>This is a example of adnetwork doubleclick banner ad</p>
<p>This is a example of adnetwork doubleclick banner ad</p>
<p>This is a example of adnetwork doubleclick banner ad</p>
<p>This is a example of adnetwork doubleclick banner ad</p>
<p>This is a example of adnetwork doubleclick banner ad</p>
<p>This is a example of adnetwork doubleclick banner ad</p>
<p>This is a example of adnetwork doubleclick banner ad</p>
<p>This is a example of adnetwork doubleclick banner ad</p>
<p>This is a example of adnetwork doubleclick banner ad</p>
<p>This is a example of adnetwork doubleclick banner ad</p>
<p>This is a example of adnetwork doubleclick banner ad</p>
<p>This is a example of adnetwork doubleclick banner ad</p>
<p>This is a example of adnetwork doubleclick banner ad</p>
<p>This is a example of adnetwork doubleclick banner ad</p>
<p>This is a example of adnetwork doubleclick banner ad</p>
<p>This is a example of adnetwork doubleclick banner ad</p>
<p>This is a example of adnetwork doubleclick banner ad</p>
<p>This is a example of adnetwork doubleclick banner ad</p>
<p>This is a example of adnetwork doubleclick banner ad</p>
<p>This is a example of adnetwork doubleclick banner ad</p>
<p>This is a example of adnetwork doubleclick banner ad</p>
<p>This is a example of adnetwork doubleclick banner ad</p>
<p>This is a example of adnetwork doubleclick banner ad</p>
<p>This is a example of adnetwork doubleclick banner ad</p>
<p>This is a example of adnetwork doubleclick banner ad</p>
<p>This is a example of adnetwork doubleclick banner ad</p>
<p>This is a example of adnetwork doubleclick banner ad</p>
<p>This is a example of adnetwork doubleclick banner ad</p>
<h2>END OF PAGE IS VISIBLE AND CONTENT IS NOT COVERED</h2>
</body>
</html>เอาต์พุต
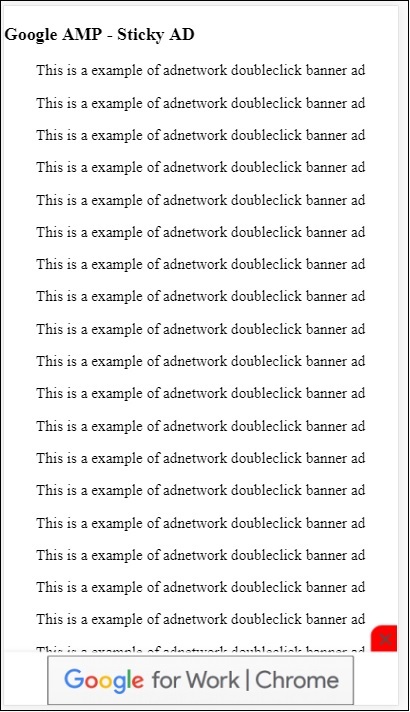
ตัวอย่างโฆษณาแบบติดหนึบบนหน้าผู้เผยแพร่โฆษณา

โฆษณา AMPHTML
เราได้เห็น <amp-ad> ซึ่งใช้ในการโหลดโฆษณา เนื้อหาโฆษณาที่โหลดโดยใช้ <amp-ad> สามารถใช้รูปแบบการโหลดโฆษณาที่ไม่ใช่แอมป์ ในกรณีนี้ <amp-ad> จะโหลดโฆษณาที่ใช้ข้อกำหนดแอมป์สำหรับโฆษณาจากนั้นจึงเรียกว่าโฆษณาแบบ amphtml โฆษณา AmpHTML เร็วกว่าเมื่อเทียบกับโฆษณาที่ไม่ใช่แอมป์เนื่องจากเป็นไปตามข้อกำหนดของแอมป์
การใช้ส่วนประกอบ amp ที่มีให้เช่นไลท์บ็อกซ์และภาพหมุนเราสามารถสร้างรูปแบบโฆษณา amphtml ได้หลายประเภทซึ่งสามารถช่วยในการแสดงโฆษณา
ปัจจุบันโฆษณาต่อไปนี้รองรับโฆษณา amphtml -
DoubleClick for Publishers
TripleLift
Dianomi
Adzerk
Google AdSense
โฆษณา amphtml จะแสดงจากคอมโพเนนต์ <amp-ad> ดังที่แสดงด้านล่าง -
ตัวอย่าง
<!doctype html>
<html amp lang = "en">
<head>
<meta charset = "utf-8">
<script async src = "https://cdn.ampproject.org/v0.js">
</script>
<title>Google AMP - Amp HTMLAds</title>
<link rel = "canonical" href=
"http://example.ampproject.org/article-metadata.html">
<meta name = "viewport" content = "width=device-width,
minimum-scale = 1,initial-scale = 1">
<style amp-boilerplate>
body{
-webkit-animation:
-amp-start 8s steps(1,end) 0s 1 normal both;-moz-animation:
-amp-start 8s steps(1,end) 0s 1 normal both;-ms-animation:
-amp-start 8s steps(1,end) 0s 1 normal both;animation:
-amp-start 8s steps(1,end) 0s 1 normal both
}
@-webkit-keyframes
-amp-start{from{visibility:hidden}to{visibility:visible}}@-moz-keyframes
-amp-start{from{visibility:hidden}to{visibility:visible}}@-ms-keyframes
-amp-start{from{visibility:hidden}to{visibility:visible}}@-o-keyframes
-amp-start{from{visibility:hidden}to{visibility:visible}}@keyframes
-amp-start{from{visibility:hidden}to{visibility:visible}}
</style>
<noscript>
<style amp-boilerplate>
body{
-webkit-animation:none;
-moz-animation:none;
-ms-animation:none;
animation:none}
</style>
</noscript>
<script async custom-element = "amp-ad" src =
"https://cdn.ampproject.org/v0/amp-ad-0.1.js">
</script>
<style amp-custom>
.ad-container {
background: #FFFFFF;
margin: 0;
padding: 0px;
text-align:center;
}
.article-body{
font-family: avenir, Helvetica, arial, serif, sans-serif !important;
font-weight: 400;
text-align:center;
}
.adv {
text-align:center;
}
</style>
</head>
<body>
<div>
<p>Amphtml ads are faster in comparison to the non
amp ones as they follow the amp specification.</p>
<p>Amphtml ads work fine in amp pages as well as non amp pages</p>
<div class = "ad-container">
<div>Advertising</div>
<amp-ad layout = "fixed"
width = "300"
height = "250"
type = "fake"
id = "i-amphtml-demo-fake"
src = "ampimg.html">
</amp-ad>
</div>
<p>Amphtml ads are faster in comparison to the non amp
ones as they follow the amp specification.</p>
<p>Amphtml ads work fine in amp pages as well as non amp pages</p>
</div>
</body>
</html>เรากำลังเรียก amp-ad เพื่อแสดงโฆษณา src ที่ใช้ใน amp-ad คือหน้าแอมป์อื่น เราได้ใช้ type =” fake” และ id =” i-amphtml-demo-fake” รายละเอียดหน้าแอมป์หรือ ampimg.html ที่ใช้ในแท็ก amp-ad แสดงไว้ที่นี่ -
ampimg.html
<!doctype html>
<html amp lang = "en">
<head>
<meta charset = "utf-8">
<script async src = "https://cdn.ampproject.org/v0.js">
</script>
<title>Google AMP - Image</title>
<link rel = "canonical" href =
"http://example.ampproject.org/article-metadata.html">
<meta name = "viewport" content="width = device-width,
minimum-scale = 1,initial-scale = 1">
<style amp-boilerplate>
body{
-webkit-animation:
-amp-start 8s steps(1,end) 0s 1 normal both;-moz-animation:
-amp-start 8s steps(1,end) 0s 1 normal both;-ms-animation:
-amp-start 8s steps(1,end) 0s 1 normal both;animation:
-amp-start 8s steps(1,end) 0s 1 normal both
}
@-webkit-keyframes
-amp-start{from{visibility:hidden}to{visibility:visible}}@-moz-keyframes
-amp-start{from{visibility:hidden}to{visibility:visible}}@-ms-keyframes
-amp-start{from{visibility:hidden}to{visibility:visible}}@-o-keyframes
-amp-start{from{visibility:hidden}to{visibility:visible}}@keyframes
-amp-start{from{visibility:hidden}to{visibility:visible}}
</style>
<noscript>
<style amp-boilerplate>
body{
-webkit-animation:none;
-moz-animation:none;
-ms-animation:none;
animation:none}
</style>
</noscript>
<style amp-custom>
amp-img {
border: 1px solid black;
border-radius: 4px;
padding: 5px;
}
</style>
</head>
<body>
<amp-img alt = "Beautiful Flower"
src = "images/bannerad.png"
width = "246"
height = "205">
</amp-img>
</body>
</html>เอาต์พุต
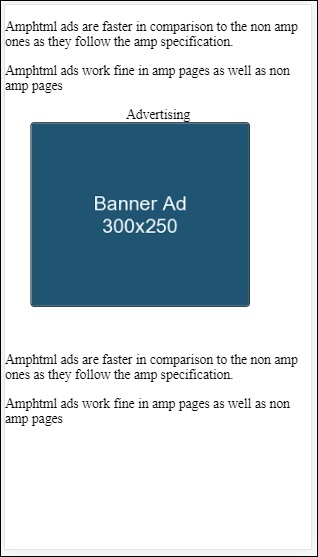
เรากำลังแสดงหน้าแอมป์ภายใน amp-ad ในทำนองเดียวกันเราสามารถใช้ amp-video, amp-carousel เพื่อแสดงโฆษณาในหน้า amp เซิร์ฟเวอร์โฆษณาที่อยู่ในรายการรองรับการเรียกหน้าแอมป์ที่เหมาะสมสำหรับการแสดงโฆษณาภายใต้โฆษณา amphtml
Amp analytics เป็นส่วนประกอบของแอมป์ที่ใช้ในการติดตามข้อมูลบนเพจ สามารถบันทึกและบันทึกการโต้ตอบของผู้ใช้ทั้งหมดในเพจเพื่อวิเคราะห์ข้อมูลเพื่อการปรับปรุงเพิ่มเติมหรือวัตถุประสงค์ทางธุรกิจ
ในการทำงานกับคอมโพเนนต์ amp-analytics เราจำเป็นต้องเพิ่มสคริปต์ต่อไปนี้ในส่วนหัว -
<script async custom-element = "amp-analytics"
src = "https://cdn.ampproject.org/v0/amp-analytics-0.1.js">
</script>ในการบันทึกเหตุการณ์ที่ใช้ใน amp-analytics เราสามารถใช้ผู้ขายบุคคลที่สามหรืออาจมีระบบติดตามภายใน
ตัวอย่างการวิเคราะห์แอมป์โดยใช้ผู้ให้บริการ GoogleAnalytics -
<amp-analytics type = googleanalytics>
<script type = application/json>{
"requests": {
"pageview": "${eventId}"
},
"vars": {
"account": "UA-44450152-1"
},
"triggers": {
"trackPageview" : {
"on": "visible",
"request": "pageview",
"vars": {
"eventId": "pageview"
}
}
}
}
</script>
</amp-analytics>ตัวอย่างของ amp-analytics โดยใช้ comscore vendor
<amp-analytics type = comscore>
<script type = application/json>
{"vars": {"c2":"7922264"}}
</script>
</amp-analytics>ตัวอย่างการวิเคราะห์แอมป์โดยใช้ผู้ให้บริการ chartbeat
<amp-analytics type = chartbeat>
<script type = application/json>{
"vars": {
"uid": "230",
"domain": "dummyurl.com",
"sections": "us",
"authors": "Hello World"
}
}</script>
</amp-analytics>รายการรายละเอียดของผู้ขายที่มีอยู่ที่นี่
ตัวอย่างการใช้งานเกี่ยวกับวิธีใช้ผู้ให้บริการการวิเคราะห์ภายในองค์กรมีให้ด้านล่าง -
ตัวอย่าง
<!doctype html>
<html amp>
<head>
<meta charset = "utf-8">
<title>amp-analytics</title>
<script async src = "https://cdn.ampproject.org/v0.js">
</script>
<script async custom-element = "amp-analytics"
src = "https://cdn.ampproject.org/v0/amp-analytics-0.1.js">
</script>
<link rel = "canonical" href = "ampanalytics.html">
<meta name = "viewport" content = "width = device-width,
minimum-scale = 1,initial-scale = 1">
<style amp-boilerplate>
body{
-webkit-animation:
-amp-start 8s steps(1,end) 0s 1 normal both;-moz-animation:
-amp-start 8s steps(1,end) 0s 1 normal both;-ms-animation:
-amp-start 8s steps(1,end) 0s 1 normal both;animation:
-amp-start 8s steps(1,end) 0s 1 normal both}
@-webkit-keyframes
-amp-start{from{visibility:hidden}to{visibility:visible}}@-moz-keyframes
-amp-start{from{visibility:hidden}to{visibility:visible}}@-ms-keyframes
-amp-start{from{visibility:hidden}to{visibility:visible}}@-o-keyframes
-amp-start{from{visibility:hidden}to{visibility:visible}}@keyframes
-amp-start{from{visibility:hidden}to{visibility:visible}}
</style>
<noscript>
<style amp-boilerplate>
body{
-webkit-animation:none;
-moz-animation:none;
-ms-animation:none;
animation:none}
</style>
</noscript>
</head>
<body>
<h1>Google Amp - Analytics</h1>
<amp-analytics>
<script type = "application/json">
{
"requests": {
"event": "http://localhost:8080/googleamp/tracking.php?
user=test&account=localhost&event=${eventId}"
},
"triggers": {
"trackPageview": {
"on": "visible",
"request": "event",
"vars": {
"eventId": "pageview"
}
}
}
}
</script>
</amp-analytics>
</body>
</html>เมื่อเพจถูกกดในเบราว์เซอร์ตัวติดตามจะเริ่มทำงานสำหรับการดูหน้าเว็บ สามารถดูได้ในแท็บเครือข่ายของ Google ดังที่แสดงด้านล่าง

คุณยังสามารถเริ่มการทำงานของเหตุการณ์การวิเคราะห์แอมป์เมื่อองค์ประกอบบางอย่างปรากฏบนหน้า ตัวอย่างการทำงานของสิ่งเดียวกันแสดงไว้ที่นี่ -
ตัวอย่าง
<!doctype html>
<html amp>
<head>
<meta charset = "utf-8">
<title>amp-analytics</title>
<script async src = "https://cdn.ampproject.org/v0.js">
</script>
<script async custom-element = "amp-analytics"
src = "https://cdn.ampproject.org/v0/amp-analytics-0.1.js">
</script>
<link rel = "canonical" href = "ampanalytics.html">
<meta name = "viewport" content = "width = device-width,
minimum-scale = 1,initial-scale = 1">
<style amp-boilerplate>
body{
-webkit-animation:
-amp-start 8s steps(1,end) 0s 1 normal both;-moz-animation:
-amp-start 8s steps(1,end) 0s 1 normal both;-ms-animation:
-amp-start 8s steps(1,end) 0s 1 normal both;animation:
-amp-start 8s steps(1,end) 0s 1 normal both
}
@-webkit-keyframes
-amp-start{from{visibility:hidden}to{visibility:visible}}@-moz-keyframes
-amp-start{from{visibility:hidden}to{visibility:visible}}@-ms-keyframes
-amp-start{from{visibility:hidden}to{visibility:visible}}@-o-keyframes
-amp-start{from{visibility:hidden}to{visibility:visible}}@keyframes
-amp-start{from{visibility:hidden}to{visibility:visible}}
</style>
<noscript>
<style amp-boilerplate>
body{
-webkit-animation:none;
-moz-animation:none;
-ms-animation:none;
animation:none}
</style>
</noscript>
<script async custom-element = "amp-video"
src = "https://cdn.ampproject.org/v0/amp-video-0.1.js">
</script>
</head>
<body>
<h1>Google Amp - Analytics</h1>
<amp-video controls
id = "videoplayer"
width = "640"
height = "360"
layout = "responsive"
poster = "images/videoposter.png"
autoplay>
<source src = "video/bunny.webm" type = "video/webm" />
<source src = "video/samplevideo.mp4" type = "video/mp4" />
<div fallback>
<p>This browser does not support the video element.</p>
</div>
</amp-video>
<amp-analytics>
<script type = "application/json">
{
"requests": {
"event": "http://localhost:8080/googleamp/tracking.php?
user=test&account=localhost&event=${eventId}"
},
"triggers": {
"trackPageview": {
"on": "visible",
"request": "event",
"visibilitySpec": {
"selector": "#videoplayer",
"visiblePercentageMin": 20,
"totalTimeMin": 2000,
"continuousTimeMin": 200
},
"vars": {
"eventId": "video"
}
}
}
}
</script>
</amp-analytics>
</body>
</html>เอาต์พุต
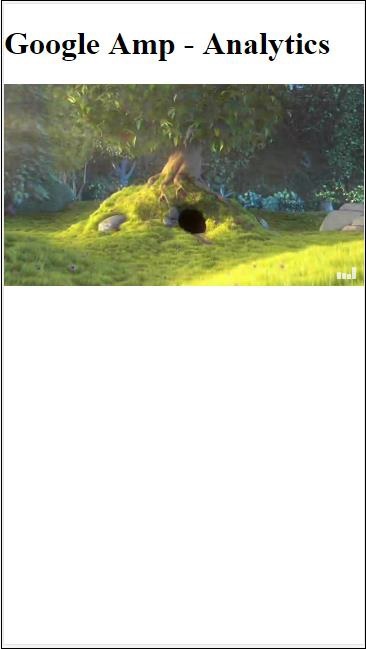
คอมโพเนนต์ Amp-analytics ต้องการอ็อบเจ็กต์ json เพื่อส่งผ่านไปยังแท็กสคริปต์ รูปแบบของ json มีดังนี้ -
{
"requests": {
request-name: request-value,
...
},
"vars": {
var-name: var-value,
...
},
"extraUrlParams": {
extraurlparam-name: extraurlparam-value,
...
},
"triggers": {
trigger-name: trigger-object,
...
},
"transport": {
"beacon": *boolean*,
"xhrpost": *boolean*,
"image": *boolean*,
}
}ออบเจ็กต์ทั้งหมดที่ระบุข้างต้นไม่บังคับให้ส่งต่อไปยัง amp-analytics หากคุณใช้ผู้ขายบุคคลที่สามผู้ขายจะมีรูปแบบและผู้ใช้จะต้องส่งผ่านข้อมูลในลักษณะนั้น
ให้เราเข้าใจรายละเอียดของแต่ละวัตถุ -
คำขอ
อ็อบเจ็กต์การร้องขอมี url ที่ใช้ในการเริ่มทำงานเมื่อตรงตามเงื่อนไข ตัวอย่างของการร้องขอออบเจ็กต์แสดงที่นี่ -
"requests": {
"request-name": "http://localhost:8080/googleamp/tracking.php?
user=test&account=localhost&event=${eventId}"
},ชื่อคำขอจะถูกระบุในวัตถุทริกเกอร์และต้องใช้ชื่อเดียวกัน
Vars
ตัวแปรทั้งหมดที่จะใช้ในออบเจ็กต์คำขอถูกระบุในออบเจ็กต์ vars
"requests": {
"event": "http://localhost:8080/googleamp/tracking.php?
user=test&account=localhost&event=${eventId}"
},
"vars": {
"eventId": "video"
}พารามิเตอร์ URL เพิ่มเติม
พารามิเตอร์เพิ่มเติมใด ๆ ที่จะผนวกเข้ากับ URL คำขอเป็นสตริงการสืบค้นสามารถกำหนดได้ในออบเจ็กต์นี้ สังเกตตัวอย่างต่อไปนี้
"requests": {
"event": "http://localhost:8080/googleamp/tracking.php?
user=test&account=localhost&event=${eventId}&x=1&y=2&z=3"
},
"vars": {
"eventId": "video"
},
"extraUrlParams": {
"x": "1",
"y": "2",
"z": "3"
}ทริกเกอร์
ออบเจ็กต์นี้จะบอกเมื่อต้องเริ่มการทำงานของ url คู่คีย์ - ค่าที่มีอยู่ภายในวัตถุทริกเกอร์มีดังต่อไปนี้ -
on- คุณควรพูดถึงเหตุการณ์ที่จะรับฟัง ค่าที่ใช้ได้สำหรับonคือrender-start, ini-load, click, scroll, timer, visible, hidden, user-error, access- * และ video- *
request- นี่คือชื่อของคำขอ สิ่งนี้ต้องตรงกับชื่อคำขอในออบเจ็กต์คำขอ
vars - นี่คือออบเจ็กต์ที่มีตัวแปรคีย์ - ค่าที่กำหนดให้ใช้ภายในวัตถุทริกเกอร์หรือใช้เพื่อแทนที่คีย์ - ค่า vars ที่กำหนดไว้
selector - แสดงรายละเอียดขององค์ประกอบที่ตั้งค่าทริกเกอร์
scrollSpec - จะมีรายละเอียดของทริกเกอร์เลื่อน
timerSpec - จะมีรายละเอียดของเวลาที่กำหนด
videoSpec - จะมีรายละเอียดที่จะเรียกใช้สำหรับวิดีโอ
นี่คือตัวอย่างที่เราได้เพิ่ม amp-video Amp-analytics จะเริ่มการติดตามเมื่อองค์ประกอบวิดีโอพร้อมใช้งานบนหน้าอย่างน้อย 20% จะปรากฏบนหน้าวิดีโอต้องเล่นอย่างน้อย 2 วินาทีและมีการดูต่อเนื่องเป็นเวลา 200 มิลลิวินาที เมื่อตรงตามเงื่อนไขเหล่านี้ทั้งหมดกว่าตัวติดตามเท่านั้นที่จะถูกไล่ออก รายละเอียดแสดงไว้ด้านล่าง -
หากต้องการเพิ่มเงื่อนไขเกี่ยวกับการมองเห็นขององค์ประกอบและเงื่อนไขอื่น ๆ เช่นองค์ประกอบต้องสามารถดูได้อย่างน้อย 20% วิดีโอควรเล่นเป็นเวลา 2 วินาทีต้องระบุเงื่อนไขเหล่านี้ทั้งหมดภายใน visibilitySpec ดังแสดงด้านล่าง -
<amp-analytics>
<script type = "application/json">
{
"requests": {
"event": "http://localhost:8080/googleamp/tracking.php?
user=test&account=localhost&event=${eventId}"
},
"triggers": {
"trackPageview": {
"on": "visible",
"request": "event",
"visibilitySpec": {
"selector": "#videoplayer",
"visiblePercentageMin": 20,
"totalTimeMin": 2000,
"continuousTimeMin": 200
},
"vars": {
"eventId": "video"
}
}
}
}
</script>
</amp-analytics>videoSpecช่วยให้คุณสามารถกำหนดเงื่อนไขตามที่คุณต้องการให้ตัวติดตามเริ่มทำงาน เงื่อนไขแสดงไว้ที่นี่ -
waitFor
คุณสมบัตินี้ใช้สำหรับทริกเกอร์การมองเห็นเพื่อรอบางกรณีก่อนที่จะเริ่มทำงาน ตัวเลือกสำหรับ waitFor คือnone, ini-load และ render-start. ตามค่าเริ่มต้นค่า waitFor คือ ini-load
reportWhen
คุณสมบัตินี้ใช้สำหรับทริกเกอร์การมองเห็นเพื่อรอบางกรณีก่อนที่จะเริ่มทำงาน ค่าที่รองรับคือ documentExit คุณไม่สามารถใช้reportWhen และ repeat ทรัพย์สินร่วมกันภายใน visibilitySpec
continuousTimeMin and continuousTimeMax
คุณสมบัตินี้บ่งชี้ว่าตัวติดตามการมองเห็นที่จะเริ่มทำงานจำเป็นต้องมีองค์ประกอบในวิวพอร์ตอย่างต่อเนื่องระหว่าง continuousTimeMin และ continuousTimeMax. หากไม่ได้ระบุ ContinousTimeMin ค่าเริ่มต้นจะถูกตั้งค่าเป็น 0 ค่านี้ระบุเป็นมิลลิวินาที
totalTimeMin and totalTimeMin
คุณสมบัตินี้บ่งชี้ว่าตัวติดตามการมองเห็นที่จะเริ่มทำงานจำเป็นต้องมีองค์ประกอบในวิวพอร์ตเป็นเวลารวมระหว่าง totalTimeMin และ totalTimeMin. หากไม่ได้ระบุ totalTimeMin ค่าเริ่มต้นจะเป็น 0 ค่านี้ระบุเป็นมิลลิวินาที
visiblePercentageMin and visiblePercentageMax
คุณสมบัตินี้บ่งชี้ว่าตัวติดตามการมองเห็นเพื่อเริ่มการทำงานของมันจำเป็นต้องให้องค์ประกอบมองเห็นได้ภายในวิวพอร์ตระหว่างเปอร์เซ็นต์ที่กำหนดให้กับ visiblePercetageMin และ visiblePercentageMax ค่าเริ่มต้นสำหรับvisiblePercentageMin คือ 0 และ 100 สำหรับ visibilePercentageMaxทั้งสองมีค่า 0 เกินกว่าที่ทริกเกอร์การมองเห็นจะเริ่มทำงานเมื่อมองไม่เห็นองค์ประกอบและถ้าทั้งคู่มี 100 กว่าองค์ประกอบจะเริ่มทำงานเมื่อมองเห็นองค์ประกอบได้เต็มที่
Repeat
หากตั้งค่าเป็นจริงทริกเกอร์จะเริ่มทำงานทุกครั้งที่ตรงตามเงื่อนไข visibilitySpec โดยค่าเริ่มต้นค่าสำหรับการทำซ้ำจะเป็นเท็จ ไม่สามารถใช้ร่วมกับคุณสมบัติ reportWhen
ตัวอย่างของทริกเกอร์คลิกแสดงไว้ที่นี่ -
<!doctype html>
<html amp>
<head>
<meta charset = "utf-8">
<title>amp-analytics</title>
<script async src = "https://cdn.ampproject.org/v0.js">
</script>
<script async custom-element = "amp-analytics"
src="https://cdn.ampproject.org/v0/amp-analytics-0.1.js">
</script>
<link rel = "canonical" href = "ampanalytics.html">
<meta name = "viewport" content = "width = device-width,
minimum-scale = 1,initial-scale = 1">
<style amp-boilerplate>
body{
-webkit-animation:
-amp-start 8s steps(1,end) 0s 1 normal both;-moz-animation:
-amp-start 8s steps(1,end) 0s 1 normal both;-ms-animation:
-amp-start 8s steps(1,end) 0s 1 normal both;animation:
-amp-start 8s steps(1,end) 0s 1 normal both
}
@-webkit-keyframes
-amp-start{from{visibility:hidden}to{visibility:visible}}@-moz-keyframes
-amp-start{from{visibility:hidden}to{visibility:visible}}@-ms-keyframes
-amp-start{from{visibility:hidden}to{visibility:visible}}@-o-keyframes
-amp-start{from{visibility:hidden}to{visibility:visible}}@keyframes
-amp-start{from{visibility:hidden}to{visibility:visible}}
</style>
<noscript>
<style amp-boilerplate>
body{
-webkit-animation:none;
-moz-animation:none;
-ms-animation:none;
animation:none}
</style>
</noscript>
<script async custom-element = "amp-video"
src = "https://cdn.ampproject.org/v0/amp-video-0.1.js">
</script>
<style amp-custom>
a {
color: blue;
}
</style>
</head>
<body>
<h1>Google Amp - Analytics</h1>
<a>Click Here</a>
<amp-analytics>
<script type = "application/json">
{
"requests": {
"event": "http://localhost:8080/googleamp/tracking.php?
user=test&account=localhost&event=${eventId}"
},
"triggers": {
"trackAnchorClicks": {
"on": "click",
"selector": "a",
"request": "event",
"vars": {
"eventId": "clickonlink"
}
}
}
}
</script>
</amp-analytics>
</body>
</html>เอาต์พุต
คลิกที่ลิงค์กิจกรรมจะเริ่มขึ้นตามที่แสดงด้านล่าง -
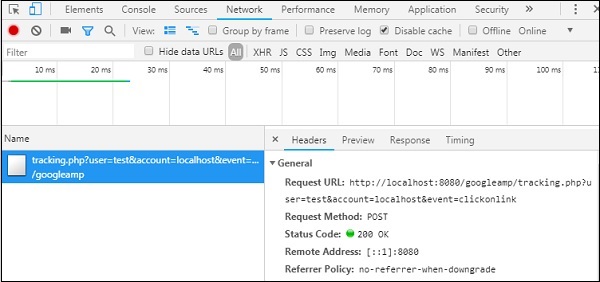
Amp ให้การสนับสนุนเพื่อแสดงวิดเจ็ตโซเชียลบนเพจโดยไม่ต้องโหลดไลบรารีภายนอกใด ๆ ในบทนี้เราจะพูดถึงวิดเจ็ตโซเชียลยอดนิยมที่แสดงไว้ที่นี่ -
Google AMP - Facebook
Google AMP - Twitter
Google AMP - Pinterest
Google Amp - Facebook
โดยใช้คอมโพเนนต์ amp-facebook เราสามารถเชื่อมต่อกับ facebook และแสดงโพสต์วิดีโอแสดงความคิดเห็นในหน้าแอมป์
ในการใช้ amp-facebook เราต้องเพิ่มสคริปต์ต่อไปนี้ในหน้า -
<script async custom-element = "amp-facebook"
src = "https://cdn.ampproject.org/v0/amp-facebook-0.1.js">
</script>รูปแบบแท็ก Amp-facebook
<amp-facebook
width = "552"
height = "310"
layout = "responsive"
data-href = "https://www.facebook.com/tutorialspointindia/
posts/1784197988358159">
</amp-facebook>ตัวอย่างการทำงานของ amp-facebook แสดงไว้ที่นี่ -
ตัวอย่าง: แสดงโพสต์จาก facebook
<!doctype html>
<html amp lang = "en">
<head>
<meta charset = "utf-8">
<script async src = "https://cdn.ampproject.org/v0.js">
</script>
<title>Google AMP - Amp Facebook</title>
<link rel = "canonical" href =
"http://example.ampproject.org/article-metadata.html">
<meta name = "viewport" content = "width = device-width,
minimum-scale = 1,initial-scale = 1">
<style amp-boilerplate>
body{
-webkit-animation:
-amp-start 8s steps(1,end) 0s 1 normal both;-moz-animation:
-amp-start 8s steps(1,end) 0s 1 normal both;-ms-animation:
-amp-start 8s steps(1,end) 0s 1 normal both;animation:
-amp-start 8s steps(1,end) 0s 1 normal both
}
@-webkit-keyframes
-amp-start{from{visibility:hidden}to{visibility:visible}}@-moz-keyframes
-amp-start{from{visibility:hidden}to{visibility:visible}}@-ms-keyframes
-amp-start{from{visibility:hidden}to{visibility:visible}}@-o-keyframes
-amp-start{from{visibility:hidden}to{visibility:visible}}@keyframes
-amp-start{from{visibility:hidden}to{visibility:visible}}
</style>
<noscript>
<style amp-boilerplate>
body{
-webkit-animation:none;
-moz-animation:none;
-ms-animation:none;
animation:none}
</style>
</noscript>
<script async custom-element = "amp-facebook"
src = "https://cdn.ampproject.org/v0/amp-facebook-0.1.js">
</script>
</head>
<body>
<h3>Google AMP - Amp Facebook</h3>
<h2>Learn Python webscrapping</h2>
<amp-facebook
width = "552"
height = "310"
layout = "responsive"
data-href = "https://www.facebook.com/tutorialspointindia/posts/1784197988358159">
</amp-facebook>
</body>
</html>เอาต์พุต
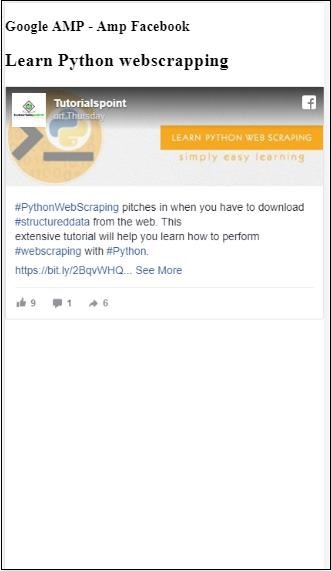
ตัวอย่าง: แสดงวิดีโอจาก facebook
<!doctype html>
<html amp lang = "en">
<head>
<meta charset = "utf-8">
<script async src = "https://cdn.ampproject.org/v0.js">
</script>
<title>Google AMP - Amp Facebook>/title>
<link rel = "canonical" href =
"http://example.ampproject.org/article-metadata.html">
<meta name = "viewport" content = "width = device-width,
minimum-scale = 1,initial-scale = 1">
<style amp-boilerplate>
body{
-webkit-animation:
-amp-start 8s steps(1,end) 0s 1 normal both;-moz-animation:
-amp-start 8s steps(1,end) 0s 1 normal both;-ms-animation:
-amp-start 8s steps(1,end) 0s 1 normal both;animation:
-amp-start 8s steps(1,end) 0s 1 normal both
}
@-webkit-keyframes
-amp-start{from{visibility:hidden}to{visibility:visible}}@-moz-keyframes
-amp-start{from{visibility:hidden}to{visibility:visible}}@-ms-keyframes
-amp-start{from{visibility:hidden}to{visibility:visible}}@-o-keyframes
-amp-start{from{visibility:hidden}to{visibility:visible}}@keyframes
-amp-start{from{visibility:hidden}to{visibility:visible}}
</style>
<noscript>
<style amp-boilerplate>
body{
-webkit-animation:none;
-moz-animation:none;
-ms-animation:none;
animation:none}
</style>
</noscript>
<script async custom-element = "amp-facebook"
src = "https://cdn.ampproject.org/v0/amp-facebook-0.1.js">
</script>
</head>
<body>
<h3<Google AMP - Amp Facebook Video</h3>
<h2<Learn Python</h2>
<amp-facebook
width = "476"
height = "316"
layout = "responsive"
data-embed-as = "video"
data-href = "https://www.facebook.com/thetutorialkings/videos/701545820223256">
</amp-facebook>
</body>
</html>เอาต์พุต
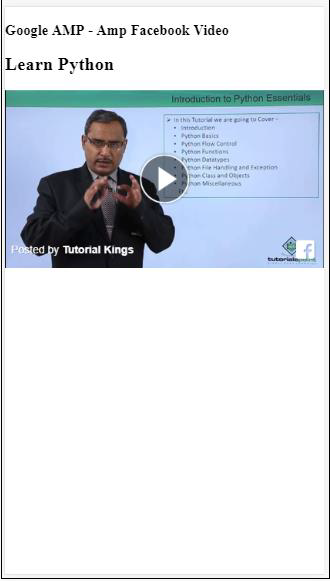
ตัวอย่าง: แสดงความคิดเห็นสำหรับโพสต์ Facebook
<!doctype html>
<html amp lang = "en">
<head>
<meta charset = "utf-8">
<script async src = "https://cdn.ampproject.org/v0.js">
</script>
<title>Google AMP - Amp Facebook</title>
<link rel = "canonical" href =
"http://example.ampproject.org/article-metadata.html">
<meta name = "viewport" content = "width = device-width,
minimum-scale = 1,initial-scale = 1">
<style amp-boilerplate>
body{
-webkit-animation:
-amp-start 8s steps(1,end) 0s 1 normal both;-moz-animation:
-amp-start 8s steps(1,end) 0s 1 normal both;-ms-animation:
-amp-start 8s steps(1,end) 0s 1 normal both;animation:
-amp-start 8s steps(1,end) 0s 1 normal both
}
@-webkit-keyframes
-amp-start{from{visibility:hidden}to{visibility:visible}}@-moz-keyframes
-amp-start{from{visibility:hidden}to{visibility:visible}}@-ms-keyframes
-amp-start{from{visibility:hidden}to{visibility:visible}}@-o-keyframes
-amp-start{from{visibility:hidden}to{visibility:visible}}@keyframes
-amp-start{from{visibility:hidden}to{visibility:visible}}
</style>
<noscript>
<style amp-boilerplate>
body{
-webkit-animation:none;
-moz-animation:none;
-ms-animation:none;
animation:none}
</style>
</noscript>
<script async custom-element = "amp-facebook"
src = "https://cdn.ampproject.org/v0/amp-facebook-0.1.js">
</script>
</head>
<body>
<h3>Google AMP - Amp Facebook comment for post</h3>
<h2>Learn Microprocessor</h2>
<amp-facebook
width = "552"
height = "500"
layout = "responsive"
data-embed-type = "comment"
data-href = "https://www.facebook.com/tutorialspointindia/posts/1744145745696717?
comment_id=1744179789026646&include_parent=false">
</amp-facebook>
</body>
</html>เอาต์พุต

แอตทริบิวต์ที่มีอยู่ใน amp-facebook คือ
data-href (บังคับ) - คุณต้องระบุ URL ของ Facebook ที่นี่
data-embed-as- ตัวเลือกที่มี ได้แก่ โพสต์วิดีโอและแสดงความคิดเห็น โดยค่าเริ่มต้นคือโพสต์
data-locale (บังคับ) - มันแสดงการแสดงผลในภาษาท้องถิ่นคุณสามารถเปลี่ยนได้ตามที่คุณเลือก
data-include-comment-parent- ใช้ค่าจริงหรือเท็จ เป็นเท็จโดยค่าเริ่มต้น เมื่อคุณใช้ตัวเลือก data-embed-as เป็นความคิดเห็นในกรณีที่คุณต้องการให้ผู้ปกครองตอบกลับความคิดเห็นคุณสามารถตั้งค่าตัวเลือกนี้เป็นจริงได้
จนถึงตอนนี้เราได้เห็นวิธีเพิ่มโพสต์ / วิดีโอและแสดงความคิดเห็นในหน้าแอมป์แล้ว ในกรณีที่เราต้องเพิ่มหน้า Facebook แอมป์มีส่วนประกอบที่เรียกว่าamp-facebook-page.
แอมป์ Facebook Page Plugin
คอมโพเนนต์ Amp-facebook-page ให้รายละเอียดเพจ facebook ที่เราต้องการในการทำงานกับ amp-facebook-page เราต้องเพิ่มสคริปต์ต่อไปนี้ -
<script async custom-element = "amp-facebook-page" src = "
https://cdn.ampproject.org/v0/amp-facebook-page-0.1.js">
</script>ตัวอย่างการทำงานโดยใช้ amp-facebook-page แสดงไว้ที่นี่ -
ตัวอย่าง
<!doctype html>
<html amp lang = "en">
<head>
<meta charset = "utf-8">
<script async src = "https://cdn.ampproject.org/v0.js">
</script>
<title>Google AMP - Amp Facebook</title>
<link rel = "canonical" href =
"http://example.ampproject.org/article-metadata.html">
<meta name = "viewport" content = "width = device-width,
minimum-scale = 1,initial-scale = 1">
<style amp-boilerplate>
body{
-webkit-animation:
-amp-start 8s steps(1,end) 0s 1 normal both;-moz-animation:
-amp-start 8s steps(1,end) 0s 1 normal both;-ms-animation:
-amp-start 8s steps(1,end) 0s 1 normal both;animation:
-amp-start 8s steps(1,end) 0s 1 normal both
}
@-webkit-keyframes
-amp-start{from{visibility:hidden}to{visibility:visible}}@-moz-keyframes
-amp-start{from{visibility:hidden}to{visibility:visible}}@-ms-keyframes
-amp-start{from{visibility:hidden}to{visibility:visible}}@-o-keyframes
-amp-start{from{visibility:hidden}to{visibility:visible}}@keyframes
-amp-start{from{visibility:hidden}to{visibility:visible}}
</style>
<noscript>
<style amp-boilerplate>
body{
-webkit-animation:none;
-moz-animation:none;
-ms-animation:none;
animation:none}
</style>
</noscript>
<script async custom-element = "amp-facebook-page"
src = "https://cdn.ampproject.org/v0/amp-facebook-page-0.1.js">
</script>
</head>
<body>
<h3>Google AMP - Amp Facebook Page</h3>
<h3>Welcome to Tutorialspoint Facebook Page</h3>
<amp-facebook-page
width = "340"
height = "130"
layout = "responsive"
data-href = "https://www.facebook.com/tutorialspointindia/">
</amp-facebook-page>
</body>
</html>เอาต์พุต

แอมป์เฟซบุ๊ก
ในการฝังปลั๊กอินปุ่มเช่นหน้า Facebook เราสามารถใช้คอมโพเนนต์ที่คล้ายกับ amp-facebook ในการทำงานกับ amp-facebook-like เราจำเป็นต้องเพิ่มสคริปต์ต่อไปนี้ -
"<script async custom-element = "amp-facebook-like"
src = "https://cdn.ampproject.org/v0/amp-facebook-like-0.1.js">
</script>ตัวอย่าง
<!doctype html>
<html amp lang = "en">
<head>
<meta charset = "utf-8">
<script async src = "https://cdn.ampproject.org/v0.js">
</script>
<title>Google AMP - Amp Facebook</title>
<link rel = "canonical"
href = "http://example.ampproject.org/article-metadata.html">
<meta name = "viewport" content = "width = device-width,
minimum-scale = 1,initial-scale = 1">
<style amp-boilerplate>
body{
-webkit-animation:
-amp-start 8s steps(1,end) 0s 1 normal both;-moz-animation:
-amp-start 8s steps(1,end) 0s 1 normal both;-ms-animation:
-amp-start 8s steps(1,end) 0s 1 normal both;animation:
-amp-start 8s steps(1,end) 0s 1 normal both
}
@-webkit-keyframes
-amp-start{from{visibility:hidden}to{visibility:visible}}@-moz-keyframes
-amp-start{from{visibility:hidden}to{visibility:visible}}@-ms-keyframes
-amp-start{from{visibility:hidden}to{visibility:visible}}@-o-keyframes
-amp-start{from{visibility:hidden}to{visibility:visible}}@keyframes
-amp-start{from{visibility:hidden}to{visibility:visible}}
</style>
<noscript>
<style amp-boilerplate>
body{
-webkit-animation:none;
-moz-animation:none;
-ms-animation:none;
animation:none}
</style>
</noscript>
<script async custom-element = "amp-facebook-like"
src = "https://cdn.ampproject.org/v0/amp-facebook-like-0.1.js">
</script>
<style amp-custom>
amp-facebook-like {
margin: 1rem
}
</style>
</head>
<body>
<h3>Google AMP - Amp Facebook Likes</h3>
<h3>Welcome to Tutorialspoint Facebook Likes</h3>
<amp-facebook-like
width = "110"
height = "20"
layout = "fixed"
data-layout = "button_count"
data-href = "https://www.facebook.com/tutorialspointindia">
</amp-facebook-like>
</body>
</html>เอาต์พุต
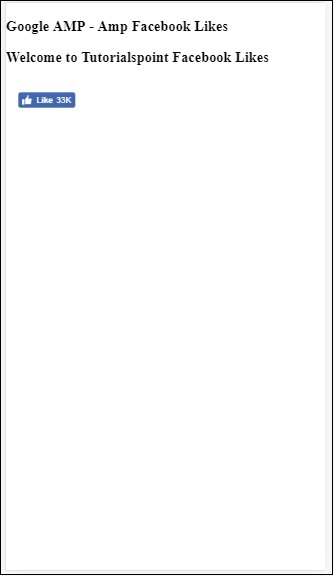
แอมป์ปลั๊กอินความคิดเห็น Facebook
Amp-facebook-comments component จะแสดงความคิดเห็นของเพจที่กำหนด
ในการทำงานกับ amp-facebook-comments เราจำเป็นต้องเพิ่มสคริปต์ต่อไปนี้ -
<script async custom-element = "amp-facebook-comments"
src = "https://cdn.ampproject.org/v0/amp-facebook-comments-0.1.js">
</script>ตัวอย่าง
<!doctype html>
<html amp lang = "en">
<head>
<meta charset = "utf-8">
<script async src = "https://cdn.ampproject.org/v0.js">
</script>
<title>Google AMP - Amp Facebook</title>
<link rel = "canonical" href =
"http://example.ampproject.org/article-metadata.html">
<meta name = "viewport" content = "width = device-width,
minimum-scale = 1,initial-scale = 1">
<style amp-boilerplate>
body{
-webkit-animation:
-amp-start 8s steps(1,end) 0s 1 normal both;-moz-animation:
-amp-start 8s steps(1,end) 0s 1 normal both;-ms-animation:
-amp-start 8s steps(1,end) 0s 1 normal both;animation:
-amp-start 8s steps(1,end) 0s 1 normal both
}
@-webkit-keyframes
-amp-start{from{visibility:hidden}to{visibility:visible}}@-moz-keyframes
-amp-start{from{visibility:hidden}to{visibility:visible}}@-ms-keyframes
-amp-start{from{visibility:hidden}to{visibility:visible}}@-o-keyframes
-amp-start{from{visibility:hidden}to{visibility:visible}}@keyframes
-amp-start{from{visibility:hidden}to{visibility:visible}}
</style>
<noscript>
<style amp-boilerplate>
body{
-webkit-animation:none;
-moz-animation:none;
-ms-animation:none;
animation:none}
</style>
</noscript>
<script async custom-element = "amp-facebook-comments"
src = "https://cdn.ampproject.org/v0/amp-facebook-comments-0.1.js">
</script>
<style amp-custom>
amp-facebook-like {
margin: 1rem
}
</style>
</head>
<body>
<h3>Google AMP - Amp Facebook Likes</h3>
<amp-facebook-comments
width = 486
height = 657
layout = "responsive"
data-numposts = "2"
data-href = "https://developers.facebook.com/docs/plugins/comments">
</amp-facebook-comments>
</body>
</html>เอาต์พุต
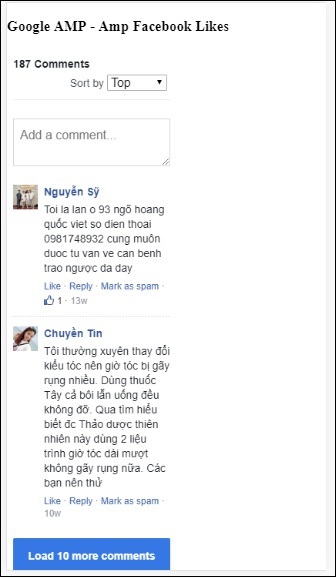
แอตทริบิวต์ data-numpostsกำหนดจำนวนความคิดเห็นที่จะแสดงบนหน้าจอ หากคุณต้องการรับความคิดเห็นทั้งหมดคุณสามารถลบแอตทริบิวต์ได้
Google AMP - Pinterest
แอมป์มีวิดเจ็ต pinterest โดยใช้ส่วนประกอบ amp-pinterest เราสามารถใช้ส่วนประกอบนี้เพื่อแสดงวิดเจ็ต pinterest ปุ่มบันทึก pinterest และปุ่มติดตาม pinterest
ในการเริ่มทำงานกับ amp-pinterest เราต้องเพิ่มสคริปต์ต่อไปนี้ -
<script async custom-element="amp-pinterest" src="https://cdn.ampproject.org/v0/amp-pinterest-0.1.js">
</script>แท็ก Amp-pinterest
<amp-pinterest width = 300 height = 450 data-do = "embedPin"
data-url = "https://in.pinterest.com/pin/856739529089490354/">
</amp-pinterest>วิดเจ็ต Pinterest
Example
ในการแสดงวิดเจ็ต pinterest เราต้องใช้แอตทริบิวต์ data-do = "embedPin" ตัวอย่างการทำงานของสิ่งเดียวกันแสดงไว้ที่นี่ -
<!doctype html>
<html amp lang = "en">
<head>
<meta charset = "utf-8">
<script async src = "https://cdn.ampproject.org/v0.js">
</script>
<title>Google AMP - Amp Pinterest Widget</title>
<link rel = "canonical" href =
"http://example.ampproject.org/article-metadata.html">
<meta name = "viewport" content = "width = device-width,
minimum-scale = 1,initial-scale = 1">
<style amp-boilerplate>
body{
-webkit-animation:
-amp-start 8s steps(1,end) 0s 1 normal both;-moz-animation:
-amp-start 8s steps(1,end) 0s 1 normal both;-ms-animation:
-amp-start 8s steps(1,end) 0s 1 normal both;animation:
-amp-start 8s steps(1,end) 0s 1 normal both}@-webkit-keyframes
-amp-start 8s steps(1,end) 0s 1 normal both
}
@-webkit-keyframes
-amp-start{from{visibility:hidden}to{visibility:visible}}@-moz-keyframes
-amp-start{from{visibility:hidden}to{visibility:visible}}@-ms-keyframes
-amp-start{from{visibility:hidden}to{visibility:visible}}@-o-keyframes
-amp-start{from{visibility:hidden}to{visibility:visible}}@keyframes
-amp-start{from{visibility:hidden}to{visibility:visible}}
</style>
<noscript>
<style amp-boilerplate>
body{
-webkit-animation:none;
-moz-animation:none;
-ms-animation:none;
animation:none}
</style>
</noscript>
<script async custom-element = "amp-pinterest"
src = "https://cdn.ampproject.org/v0/amp-pinterest-0.1.js">
</script>
<style amp-custom>
amp-facebook-like {
margin: 1rem
}
</style>
</head>
<body>
<h3>Google AMP - Amp Pinterest Widget</h3>
<amp-pinterest
width = 300
height = 450
data-do = "embedPin"
data-url = "https://in.pinterest.com/pin/856739529089490354/">
</amp-pinterest>
</body>
</html>Output
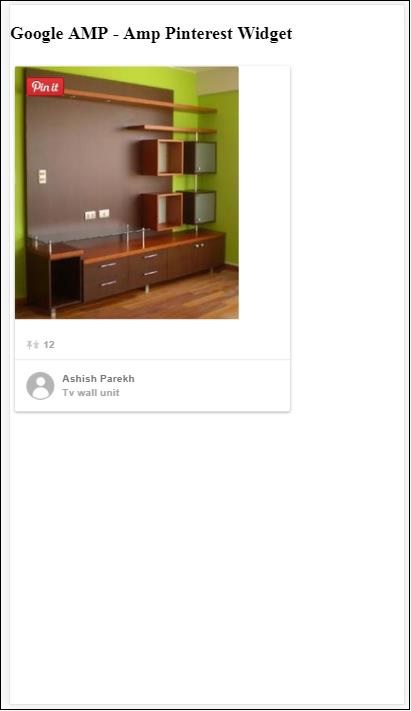
ปุ่มบันทึก Pinterest
ในการแสดงปุ่มบันทึกสำหรับ pinterest เราจำเป็นต้องใช้แอตทริบิวต์ data-do="buttonPin". ตัวอย่างการทำงานของปุ่มบันทึก pinterest แสดงไว้ที่นี่ -
Example
<!doctype html>
<html amp lang = "en">
<head>
<meta charset = "utf-8">
<script async src = "https://cdn.ampproject.org/v0.js">
</script>
<title>Google AMP - Amp Pinterest Widget</title>
<link rel = "canonical" href =
"http://example.ampproject.org/article-metadata.html">
<meta name = "viewport" content = "width = device-width,
minimum-scale = 1,initial-scale = 1">
<style amp-boilerplate>
body{
-webkit-animation:
-amp-start 8s steps(1,end) 0s 1 normal both;-moz-animation:
-amp-start 8s steps(1,end) 0s 1 normal both;-ms-animation:
-amp-start 8s steps(1,end) 0s 1 normal both;animation:
-amp-start 8s steps(1,end) 0s 1 normal both
}
@-webkit-keyframes
-amp-start{from{visibility:hidden}to{visibility:visible}}@-moz-keyframes
-amp-start{from{visibility:hidden}to{visibility:visible}}@-ms-keyframes
-amp-start{from{visibility:hidden}to{visibility:visible}}@-o-keyframes
-amp-start{from{visibility:hidden}to{visibility:visible}}@keyframes
-amp-start{from{visibility:hidden}to{visibility:visible}}
</style>
<noscript>
<style amp-boilerplate>
body{
-webkit-animation:none;
-moz-animation:none;
-ms-animation:none;
animation:none}
</style>
</noscript>
<script async custom-element = "amp-pinterest"
src = "https://cdn.ampproject.org/v0/amp-pinterest-0.1.js">
</script>
<style amp-custom>
amp-facebook-like {
margin: 1rem
}
</style>
</head>
<body>
<h3>Google AMP - Amp Pinterest Save Button</h3>
<h3>TutorialsPoint - ReactJS</h3>
<amp-img
src = "images/reactjs.png"
width = "100"
height = "100"
alt = "blockchain image">
</amp-img>
<amp-pinterest
height = "18"
width = "56"
data-do = "buttonPin"
data-url = "https://www.tutorialspoint.com/"
data-media = "https://www.tutorialspoint.com/images/tp-logo-diamond.png"
data-description = "amp-pinterest in action">
</amp-pinterest>
</body>
</html>Output
ปุ่มติดตาม Pinterest
ในการแสดงปุ่มบันทึกติดตามสำหรับ Pinterest เราจำเป็นต้องใช้แอตทริบิวต์ data-do="buttonFollow". ตัวอย่างการทำงานของปุ่มบันทึก Pinterest แสดงไว้ที่นี่ -
Example
<!doctype html>
<html amp lang = "en">
<head>
<meta charset = "utf-8">
<script async src = "https://cdn.ampproject.org/v0.js">
</script>
<title>Google AMP - Amp Pinterest Widget</title>
<link rel = "canonical" href =
"http://example.ampproject.org/article-metadata.html">
<meta name = "viewport" content = "width = device-width,
minimum-scale = 1,initial-scale = 1">
<style amp-boilerplate>
body{
-webkit-animation:
-amp-start 8s steps(1,end) 0s 1 normal both;-moz-animation:
-amp-start 8s steps(1,end) 0s 1 normal both;-ms-animation:
-amp-start 8s steps(1,end) 0s 1 normal both;animation:
-amp-start 8s steps(1,end) 0s 1 normal both
}
@-webkit-keyframes
-amp-start{from{visibility:hidden}to{visibility:visible}}@-moz-keyframes
-amp-start{from{visibility:hidden}to{visibility:visible}}@-ms-keyframes
-amp-start{from{visibility:hidden}to{visibility:visible}}@-o-keyframes
-amp-start{from{visibility:hidden}to{visibility:visible}}@keyframes
-amp-start{from{visibility:hidden}to{visibility:visible}}
</style>
<noscript>
<style amp-boilerplate>
body{
-webkit-animation:none;
-moz-animation:none;
-ms-animation:none;
animation:none}
</style>
</noscript>
<script async custom-element = "amp-pinterest"
src = "https://cdn.ampproject.org/v0/amp-pinterest-0.1.js">
</script>
<style amp-custom>
amp-facebook-like {
margin: 1rem
}
</style>
</head>
<body>
<h3>Google AMP - Amp Pinterest Follow Button</h3>
<amp-pinterest
height = 50
width = 130
data-do = "buttonFollow"
data-href = "https://in.pinterest.com/wedgehairstyles/"
data-label = "wedgehairstyles">
</amp-pinterest>
</body>
</html>Output

Google Amp - ทวิตเตอร์
แอมป์มีส่วนประกอบในการแสดงฟีดของทวิตเตอร์โดยใช้ amp-twitter
ในการทำงานกับ amp-twitter เราจำเป็นต้องเพิ่มสคริปต์ต่อไปนี้ -
<script async custom-element = "amp-twitter"
src = "https://cdn.ampproject.org/v0/amp-twitter-0.1.js">
</script>แท็กแอมป์ทวิต
<amp-twitter width = "375" height = "472"
layout = "responsive" data-tweetid = "885634330868850689">
</amp-twitter>ตัวอย่างการทำงานที่แสดงทวีตแสดงที่นี่
Example
<!doctype html>
<html amp lang = "en">
<head>
<meta charset = "utf-8">
<script async src = "https://cdn.ampproject.org/v0.js">
</script>
<title>Google AMP - Amp Twitter</title>
<link rel = "canonical" href =
"http://example.ampproject.org/article-metadata.html">
<meta name = "viewport" content = "width = device-width,
minimum-scale = 1,initial-scale = 1">
<style amp-boilerplate>
body{
-webkit-animation:
-amp-start 8s steps(1,end) 0s 1 normal both;-moz-animation:
-amp-start 8s steps(1,end) 0s 1 normal both;-ms-animation:
-amp-start 8s steps(1,end) 0s 1 normal both;animation:
-amp-start 8s steps(1,end) 0s 1 normal both
}
@-webkit-keyframes
-amp-start{from{visibility:hidden}to{visibility:visible}}@-moz-keyframes
-amp-start{from{visibility:hidden}to{visibility:visible}}@-ms-keyframes
-amp-start{from{visibility:hidden}to{visibility:visible}}@-o-keyframes
-amp-start{from{visibility:hidden}to{visibility:visible}}@keyframes
-amp-start{from{visibility:hidden}to{visibility:visible}}
</style>
<noscript>
<style amp-boilerplate>
body{
-webkit-animation:none;
-moz-animation:none;
-ms-animation:none;
animation:none}
</style>
</noscript>
<script async custom-element = "amp-twitter" src =
"https://cdn.ampproject.org/v0/amp-twitter-0.1.js">
</script>
<style amp-custom>
amp-facebook-like {
margin: 1rem
}
</style>
</head>
<body>
<h3>Google AMP - Amp Twitter</h3>
<amp-twitter
width = "375"
height = "472"
layout = "responsive"
data-tweetid = "885634330868850689">
</amp-twitter>
</body>
</html>Output
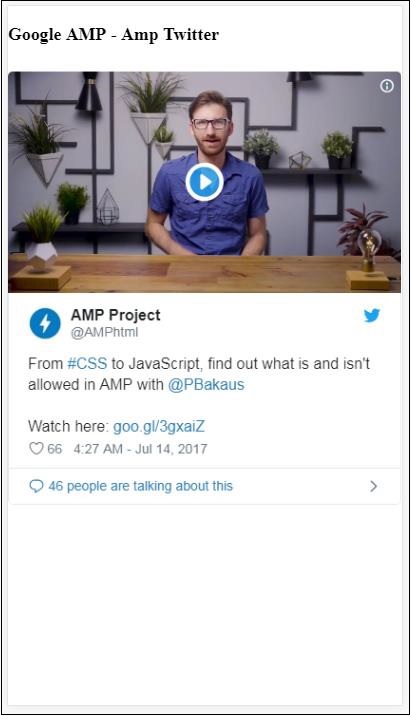
ในบทนี้เราจะพูดถึงวิธีการแสดงวิดีโอและเสียงจากพันธมิตรบุคคลที่สามเช่น jwplayer และ Youtube ให้เราเรียนรู้โดยละเอียดเกี่ยวกับสิ่งต่อไปนี้ -
Google AMP - JwPlayer
Google AMP - YouTube
Google AMP - เสียง
Google AMP - JwPlayer
หากคุณต้องการใช้ jwplayer เพื่อแสดงวิดีโอบนเพจแอมป์มี amp-jwplayer ให้ทำ
ในการทำงานกับ amp-jwplayer ให้ใส่สคริปต์ต่อไปนี้ในเพจของคุณ -
<script async custom-element = "amp-jwplayer" src = "
https://cdn.ampproject.org/v0/amp-jwplayer-0.1.js">
</script>แท็ก Amp-jwplayer
<amp-jwplayer
data-playlist-id = "482jsTAr"
data-player-id = "uoIbMPm3"
layout = "responsive"
width = "16"
height = "9">
</amp-jwplayer>ตัวอย่างการทำงานของ jwplayer ในหน้า amp แสดงไว้ด้านล่าง -
ตัวอย่าง
<!doctype html>
<html amp lang = "en">
<head>
<meta charset = "utf-8">
<script async src = "https://cdn.ampproject.org/v0.js">
</script>
<title>Google AMP - Amp Jwplayer</title>
<link rel = "canonical" href =
"http://example.ampproject.org/article-metadata.html">
<meta name = "viewport" content = "width = device-width,
minimum-scale = 1,initial-scale = 1">
<style amp-boilerplate>
body{
-webkit-animation:
-amp-start 8s steps(1,end) 0s 1 normal both;-moz-animation:
-amp-start 8s steps(1,end) 0s 1 normal both;-ms-animation:
-amp-start 8s steps(1,end) 0s 1 normal both;animation:
-amp-start 8s steps(1,end) 0s 1 normal both
}
@-webkit-keyframes
-amp-start{from{visibility:hidden}to{visibility:visible}}@-moz-keyframes
-amp-start{from{visibility:hidden}to{visibility:visible}}@-ms-keyframes
-amp-start{from{visibility:hidden}to{visibility:visible}}@-o-keyframes
-amp-start{from{visibility:hidden}to{visibility:visible}}@keyframes
-amp-start{from{visibility:hidden}to{visibility:visible}}
</style>
<noscript>
<style amp-boilerplate>
body{
-webkit-animation:none;
-moz-animation:none;
-ms-animation:none;
animation:none}
</style>
</noscript>
<script async custom-element = "amp-jwplayer" src =
"https://cdn.ampproject.org/v0/amp-jwplayer-0.1.js">
</script>
</head>
<body>
<h3>Google AMP - Amp Jwplayer</h3>
<amp-jwplayer
data-playlist-id = "482jsTAr"
data-player-id = "uoIbMPm3"
layout = "responsive"
width = "16"
height = "9">
</amp-jwplayer>
</body>
</html>เอาต์พุต

สำหรับ amp-jwplayer มีคุณลักษณะที่สำคัญสามประการ
data-player-id
data-media-id
data-playlist-id
ในการรับรหัสผู้เล่นสื่อและเพลย์ลิสต์คุณต้องมีการเข้าสู่ระบบใน jwplayer ซึ่งสามารถทำได้จากที่นี่ - https://dashboard.jwplayer.com/#/players
รหัสผู้เล่นจะอยู่ในส่วนผู้เล่น jwplayer รหัสสื่อจะอยู่ในjwplayer playlist section.
Jwplayer ให้รหัสตัวอักษรและตัวเลขแปดหลักซึ่งจำเป็นต้องใช้ใน amp-jwplayer สำหรับแอตทริบิวต์ที่เกี่ยวข้อง
Google AMP - Youtube
หากคุณต้องการแสดงวิดีโอ Youtube บนหน้าแอมป์ของคุณแอมป์มี amp-youtube เพื่อฝังวิดีโอ youtube บนหน้า
ในการใช้ amp-youtube คุณต้องเพิ่มสคริปต์ต่อไปนี้ในเพจของคุณ -
<script async custom-element = "amp-youtube" src = "
https://cdn.ampproject.org/v0/amp-youtube-0.1.js">
</script>แท็กแอมป์ youtube
<amp-youtube
width = "480"
height = "270"
layout = "responsive"
autoplay = "true"
data-videoid = "fWZ6-p7mGK0">
</amp-youtube>ตอนนี้ให้เราดูตัวอย่างที่แสดงการทำงานของ amp-youtube บนหน้า
ตัวอย่าง
<!doctype html>
<html amp lang = "en">
<head>
<meta charset = "utf-8">
<script async src = "https://cdn.ampproject.org/v0.js">
</script>
<title>Google AMP - Youtube</title>
<link rel = "canonical" href =
"http://example.ampproject.org/article-metadata.html">
<meta name = "viewport" content = "width = device-width,
minimum-scale = 1,initial-scale = 1">
<style amp-boilerplate>
body{
-webkit-animation:
-amp-start 8s steps(1,end) 0s 1 normal both;-moz-animation:
-amp-start 8s steps(1,end) 0s 1 normal both;-ms-animation:
-amp-start 8s steps(1,end) 0s 1 normal both;animation:
-amp-start 8s steps(1,end) 0s 1 normal both
}
@-webkit-keyframes
-amp-start{from{visibility:hidden}to{visibility:visible}}@-moz-keyframes
-amp-start{from{visibility:hidden}to{visibility:visible}}@-ms-keyframes
-amp-start{from{visibility:hidden}to{visibility:visible}}@-o-keyframes
-amp-start{from{visibility:hidden}to{visibility:visible}}@keyframes
-amp-start{from{visibility:hidden}to{visibility:visible}}
</style>
<noscript>
<style amp-boilerplate>
body{
-webkit-animation:none;
-moz-animation:none;
-ms-animation:none;
animation:none}
</style>
</noscript>
<script async custom-element = "amp-youtube" src =
"https://cdn.ampproject.org/v0/amp-youtube-0.1.js">
</script>
</head>
<body>
<h3>Google AMP - Youtube</h3>
<h3>Youtube Videos from Tutorialspoint</h3>
<amp-youtube
width = "480"
height = "270"
layout = "responsive"
autoplay = "true"
data-videoid = "fWZ6-p7mGK0">
</amp-youtube>
</body>
</html>เอาต์พุต
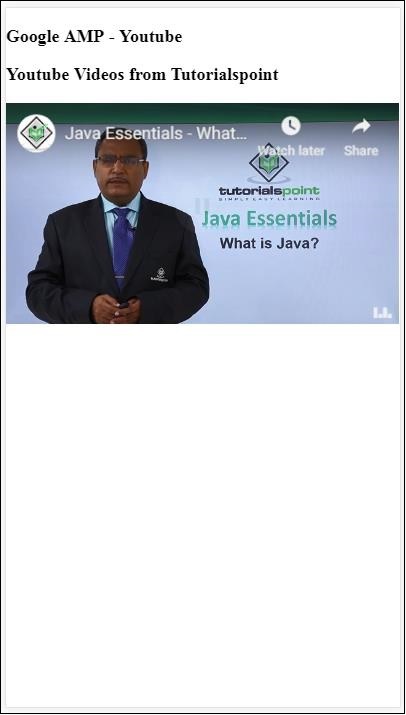
หากต้องการแสดงวิดีโอ youtube คุณต้องให้รหัสวิดีโอกับ amp-youtube ดังที่แสดงด้านล่าง -
<amp-youtube
width = "480"
height = "270"
layout = "responsive"
autoplay = "true"
data-videoid = "fWZ6-p7mGK0">
</amp-youtube>จะรับ data-videoid ได้อย่างไร?
พิจารณา URL ของ Youtube เช่น - https://www.youtube.com/watch?v=fWZ6-p7mGK0. ส่วนที่ไฮไลต์คือ id ที่จะใช้ใน amp-youtube ของคุณ
เราได้ใช้แอตทริบิวต์ autoplayตามความเป็นจริง วิดีโอจะเล่นอัตโนมัติตามที่เบราว์เซอร์รองรับและวิดีโอจะเล่นในโหมดปิดเสียง คุณจะต้องแตะที่วิดีโอเพื่อเปิดเสียง วิดีโอจะหยุดชั่วคราวเมื่ออยู่นอกมุมมองและจะกลับมาเล่นต่อจากสถานะหยุดชั่วคราวเมื่อมีการดู หากผู้ใช้หยุดวิดีโอชั่วคราวและเข้า / ออกจากมุมมองวิดีโอจะยังคงอยู่ในสถานะหยุดชั่วคราวเท่านั้น เช่นเดียวกับการปิดเสียง / เปิดเสียง
Google Amp - เสียง
แอมป์มีแท็กสำหรับเล่นเสียงซึ่งแทนที่แท็กเสียง html5 ในการเล่นเสียงในหน้าแอมป์เราสามารถใช้ amp-audio
ในการทำงานกับ amp-audio เราต้องเพิ่มสคริปต์ต่อไปนี้ -
<script async custom-element = "amp-audio" src = "
https://cdn.ampproject.org/v0/amp-audio-0.1.js">
</script>แอมป์ - แท็กเสียง
<amp-audio
width = "auto"
height = "50"
src = "audio/test.mp3">
<div fallback>
<p>HTML5 audio is not supported on your browser!</p>
</div>
</amp-audio>ดังนั้น amp-audio จะใช้แอตทริบิวต์ src ซึ่งเป็นคำขอ http ไปยังไฟล์เสียง เหตุผลที่เราใช้ amp-audio แทนเสียง html5 มาตรฐานเนื่องจาก amp วางแนวคิดการโหลดแบบขี้เกียจไว้สำหรับองค์ประกอบที่ต้องใช้คำขอ http
จะเริ่มโหลดคำขอตามลำดับความสำคัญโดยจะโหลดก่อนหรือเมื่อกำลังจะถึงวิวพอร์ต
ตัวอย่างการทำงานของการใช้ amp-audio ในเพจของคุณแสดงไว้ที่นี่ -
ตัวอย่าง
<!doctype html>
<html amp lang = "en">
<head>
<meta charset = "utf-8">
<script async src = "https://cdn.ampproject.org/v0.js">
</script>
<title>Google AMP - Audio</title>
<link rel = "canonical" href =
"http://example.ampproject.org/article-metadata.html">
<meta name = "viewport" content = "width = device-width,
minimum-scale = 1,initial-scale = 1">
<style amp-boilerplate>
body{
-webkit-animation:
-amp-start 8s steps(1,end) 0s 1 normal both;-moz-animation:
-amp-start 8s steps(1,end) 0s 1 normal both;-ms-animation:
-amp-start 8s steps(1,end) 0s 1 normal both;animation:
-amp-start 8s steps(1,end) 0s 1 normal both
}
@-webkit-keyframes
-amp-start{from{visibility:hidden}to{visibility:visible}}@-moz-keyframes
-amp-start{from{visibility:hidden}to{visibility:visible}}@-ms-keyframes
-amp-start{from{visibility:hidden}to{visibility:visible}}@-o-keyframes
-amp-start{from{visibility:hidden}to{visibility:visible}}@keyframes
-amp-start{from{visibility:hidden}to{visibility:visible}}
</style>
<noscript>
<style amp-boilerplate>
body{
-webkit-animation:none;
-moz-animation:none;
-ms-animation:none;
animation:none}
</style>
</noscript>
<script async custom-element = "amp-audio"
src = "https://cdn.ampproject.org/v0/amp-audio-0.1.js">
</script>
</head>
<body>
<h3>Google AMP - Audio</h3>
<amp-audio
width = "auto"
height = "50"
src="audio/test.mp3">
<div fallback>
<p>HTML5 audio is not supported on your browser!</p>
</div>
</amp-audio>
</body>
</html>เอาต์พุต
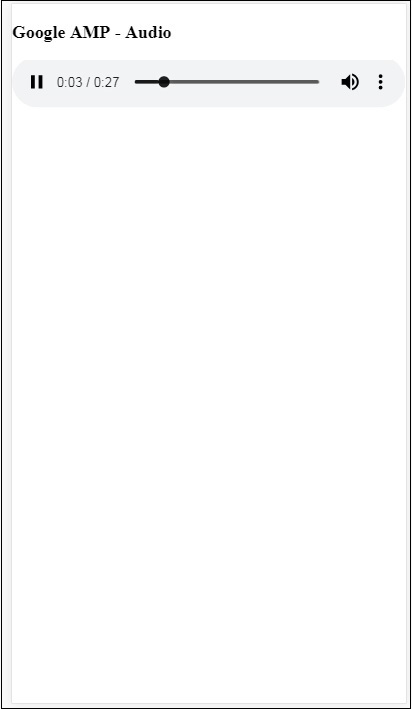
แท็กสำหรับ amp-audio ที่ระบุแอตทริบิวต์เช่น width, height, src จะแสดงที่นี่ เราได้เพิ่ม div ด้วยfallback attribute ซึ่งจะทำหน้าที่เป็นทางเลือกหากเบราว์เซอร์ไม่รองรับ amp-audio
<amp-audio
width = "auto"
height = "50"
src = "audio/test.mp3">
<div fallback>
<p>HTML5 audio is not supported on your browser!</p>
</div>
</amp-audio>โปรดทราบว่าการควบคุมจะถูกเพิ่มโดยค่าเริ่มต้นในแท็กเสียงและสามารถใช้เพื่อเล่น / หยุดชั่วคราวและปิด / เปิดเสียงได้ คุณจะได้รับตัวเลือกการดาวน์โหลดสำหรับแท็กเสียงดังที่แสดงด้านล่าง -
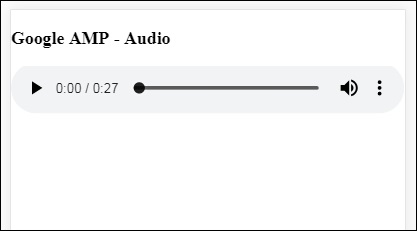

เมื่อคลิกที่ดาวน์โหลดคุณสามารถดาวน์โหลดไฟล์สื่อที่ใช้ หากต้องการปิดการดาวน์โหลดคุณสามารถใช้แอตทริบิวต์ -controlsList="nodownload" ดังแสดงในตัวอย่างด้านล่าง -
ตัวอย่าง
<!doctype html>
<html amp lang = "en">
<head>
<meta charset = "utf-8">
<script async src = "https://cdn.ampproject.org/v0.js">
</script>
<title>Google AMP - Audio</title>
<link rel = "canonical" href =
"http://example.ampproject.org/article-metadata.html">
<meta name = "viewport" content = "width = device-width,
minimum-scale = 1,initial-scale = 1">
<style amp-boilerplate>
body{
-webkit-animation:
-amp-start 8s steps(1,end) 0s 1 normal both;-moz-animation:
-amp-start 8s steps(1,end) 0s 1 normal both;-ms-animation:
-amp-start 8s steps(1,end) 0s 1 normal both;animation:
-amp-start 8s steps(1,end) 0s 1 normal both
}
@-webkit-keyframes
-amp-start{from{visibility:hidden}to{visibility:visible}}@-moz-keyframes
-amp-start{from{visibility:hidden}to{visibility:visible}}@-ms-keyframes
-amp-start{from{visibility:hidden}to{visibility:visible}}@-o-keyframes
-amp-start{from{visibility:hidden}to{visibility:visible}}@keyframes
-amp-start{from{visibility:hidden}to{visibility:visible}}
</style>
<noscript>
<style amp-boilerplate>
body{
-webkit-animation:none;
-moz-animation:none;
-ms-animation:none;
animation:none}
</style>
</noscript>
<script async custom-element = "amp-audio"
src = "https://cdn.ampproject.org/v0/amp-audio-0.1.js">
</script>
</head>
<body>
<h3>Google AMP - Audio</h3>
<amp-audio
width = "auto"
height = "50"
src = "audio/test.mp3"
controlsList = "nodownload">
<div fallback>
<p>HTML5 audio is not supported on your browser!</p>
</div>
</amp-audio>
</body>
</html>เอาต์พุต

การใช้ controlsList="nodownload" จุดแนวตั้งสามจุดทางด้านขวาหายไป
มีคุณลักษณะเช่น preload และ autoplayหากเพิ่มลงในแท็กเสียงไฟล์เสียงจะถูกโหลดเมื่อโหลดหน้าเว็บและจะเล่นอัตโนมัติหากเบราว์เซอร์รองรับ ตัวอย่างต่อไปนี้แสดงการเล่นเสียงอัตโนมัติ
ตัวอย่าง
<!doctype html>
<html amp lang = "en">
<head>
<meta charset="utf-8">
<script async src = "https://cdn.ampproject.org/v0.js">
</script>
<title>Google AMP - Audio</title>
<link rel = "canonical" href =
"http://example.ampproject.org/article-metadata.html">
<meta name = "viewport" content = "width = device-width,
minimum-scale = 1,initial-scale = 1">
<style amp-boilerplate>
body{
-webkit-animation:
-amp-start 8s steps(1,end) 0s 1 normal both;-moz-animation:
-amp-start 8s steps(1,end) 0s 1 normal both;-ms-animation:
-amp-start 8s steps(1,end) 0s 1 normal both;animation:
-amp-start 8s steps(1,end) 0s 1 normal both
}
@-webkit-keyframes
-amp-start{from{visibility:hidden}to{visibility:visible}}@-moz-keyframes
-amp-start{from{visibility:hidden}to{visibility:visible}}@-ms-keyframes
-amp-start{from{visibility:hidden}to{visibility:visible}}@-o-keyframes
-amp-start{from{visibility:hidden}to{visibility:visible}}@keyframes
-amp-start{from{visibility:hidden}to{visibility:visible}}
</style>
<noscript>
<style amp-boilerplate>
body{
-webkit-animation:none;
-moz-animation:none;
-ms-animation:none;
animation:none}
</style>
</noscript>
<script async custom-element = "amp-audio"
src = "https://cdn.ampproject.org/v0/amp-audio-0.1.js">
</script>
</head>
<body>
<h3>Google AMP - Audio</h3>
<amp-audio
width = "auto"
height = "50"
src = "audio/test.mp3" preload autoplay>
<div fallback>
<p>HTML5 audio is not supported on your browser!</p>
</div>
</amp-audio>
</body>
</html>เอาต์พุต

แอตทริบิวต์ loopหากมีอยู่จะทำให้เล่นเสียงอีกครั้งเมื่อเสร็จสมบูรณ์
ตัวอย่าง
<amp-audio
width = "auto"
height = "50"
src = "audio/test.mp3" loop>
<div fallback>
<p>HTML5 audio is not supported on your browser!</p>
</div>
</amp-audio>ในบทนี้เราจะเข้าใจวิธีการแปลงหน้า html ปกติเป็นหน้าแอมป์ นอกจากนี้เราจะตรวจสอบความถูกต้องของหน้าสำหรับ amp และตรวจสอบผลลัพธ์ในตอนท้าย
เริ่มต้นด้วยการให้เราเข้าสู่หน้า html ตามที่แสดงด้านล่าง -
test.html
<!DOCTYPE html>
<html>
<head>
<meta charset = "utf-8">
<title>Tutorials</title>
<link href = "style.css" rel = "stylesheet" />
<meta name = "viewport" content = "width = device-width, initial-scale = 1.0">
<script src = "js/jquery.js"></script>
</head>
<body>
<header role = "banner">
<h2>Tutorials</h2>
</header>
<h2>Some Important Tutorials List</h2>
<article>
<section>
<img src = "images/tut1.png" width="90%" height = "90%"/>
</section>
<section>
<img src = "images/tut2.png" width="90%" height = "90%"/>
</section>
<section>
<img src = "images/tut3.png" width="90%" height = "90%"/>
</section>
<section>
<img src = "images/tut4.png" width="90%" height = "90%"/>
</section>
</article>
<footer>
<p>For More tutorials Visit <a href =
"https://tutorialspoint.com/">Tutorials Point</a></p>
</footer>
</body>
</html>โปรดทราบว่าเราใช้ style.css อยู่และรายละเอียดของไฟล์ css มีดังที่ระบุไว้ที่นี่ -
h1 {color: blue;text-align: center;}
h2 {text-align: center;}
img {
border: 1px solid #ddd;
border-radius: 4px;
padding: 5px;
}
article {
text-align: center;
}
header{
width: 100%;
height: 50px;
margin: 5px auto;
border: 1px solid #000000;
text-align: center;
background-color: #ccc;
}
footer {
width: 100%;
height: 35px;
margin: 5px auto;
border: 1px solid #000000;
text-align: center;
background-color: yellow;
}โปรดทราบว่าเราได้ใช้ไฟล์ jquery.js ใน. html ที่ระบุไว้ด้านบนด้วย
ตอนนี้โฮสต์ test.html ในเครื่องและดูผลลัพธ์ที่เห็นในลิงค์ที่ให้ไว้ที่นี่ -
http://localhost:8080/googleamp/test.html
ตอนนี้ให้เราไปทีละขั้นตอนเพื่อเปลี่ยนไฟล์ test.html ด้านบนเป็นไฟล์ test_amp.html
ขั้นแรกเราต้องบันทึก test.html เป็น test_amp.html และทำตามขั้นตอนที่ระบุด้านล่าง
Step 1 - เพิ่มไลบรารีแอมป์ในส่วนหัวตามที่แสดงด้านล่าง -
<script async src = "https://cdn.ampproject.org/v0.js">
</script>ตัวอย่างเช่นเมื่อเพิ่มเข้าไปใน test_amp.html แล้วจะเป็นดังนี้ -
<head>
<meta charset = "utf-8">
<title>Tutorials</title>
<script async src = "https://cdn.ampproject.org/v0.js">
</script>
<link href = "style.css" rel = "stylesheet" />
<meta name = "viewport" content = "width = device-width, initial-scale = 1.0">
<script src = "js/jquery.js"></script>
</head>ตอนนี้เรียกใช้หน้า test_amp.html ในเบราว์เซอร์และเปิดคอนโซลเบราว์เซอร์ มันจะแสดงข้อความคอนโซลดังที่แสดงด้านล่าง -
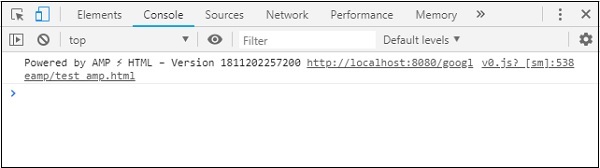
หากต้องการทราบว่าไฟล์ html ของคุณเป็นแอมป์ที่ถูกต้องให้เพิ่ม # development = 1 ลงใน URL หน้า html ของคุณที่ท้ายดังที่แสดงด้านล่าง -
http://localhost:8080/googleamp/test_amp.html#development=1กด url ด้านบนในเบราว์เซอร์และในคอนโซล Google Chrome มันจะแสดงรายการข้อผิดพลาดที่แอมป์คิดว่าไม่ถูกต้องจากมุมมองข้อกำหนดของแอมป์
ข้อผิดพลาดที่เราพบสำหรับ test_amp.html แสดงที่นี่ -
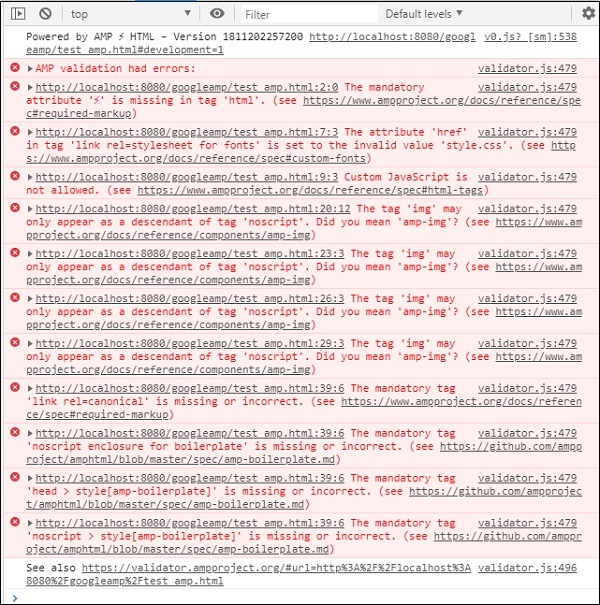
ให้เราแก้ไขทีละรายการจนกว่าเราจะได้รับข้อความที่ประสบความสำเร็จ
Step 2 - เราสามารถเห็นข้อผิดพลาดต่อไปนี้ในคอนโซล -

เราแก้ไขได้โดยเพิ่ม⚡หรือ amp สำหรับแท็ก html เราจะเพิ่ม amp ลงในแท็ก html ตามที่แสดงด้านล่าง -
<html amp>Step 3 - โปรดตรวจสอบให้แน่ใจว่าคุณมีเมตาแท็กที่มี charset และ name =” viewport” ในแท็กส่วนหัวตามที่แสดงด้านล่าง -
<head>
<meta charset = "utf-8">
<meta name = "viewport" content = "width = device-width, initial-scale = 1.0">
</head>Step 4 - ข้อผิดพลาดถัดไปที่เราได้แสดงไว้ที่นี่ -

มันบอกว่า href ในลิงค์ rel = stylesheet นั่นคือลิงค์ต่อไปนี้เกิดข้อผิดพลาด เนื่องจากแอมป์ไม่อนุญาตให้ใส่สไตล์ชีตภายนอกโดยใช้ลิงก์ที่มี href ไว้ในเพจ
<link href = "style.css" rel = "stylesheet" />We can add the all the css in style.css as follows −<style amp-custom>
/*All styles from style.css please add here */
</style>ดังนั้นข้อมูล css ที่มีอยู่ใน style.css จะต้องถูกเพิ่มใน style ด้วย amp-custom attribute
<style amp-custom>
h1 {color: blue;text-align: center;}
h2 {text-align: center;}
img {
border: 1px solid #ddd;
border-radius: 4px;
padding: 5px;
}
article {
text-align: center;
}
header{
width: 100%;
height: 50px;
margin: 5px auto;
border: 1px solid #000000;
text-align: center;
background-color: #ccc;
}
footer {
width: 100%;
height: 35px;
margin: 5px auto;
border: 1px solid #000000;
text-align: center;
background-color: yellow;
}
</style>เพิ่มแท็กสไตล์ในหน้าแอมป์ของคุณ ตอนนี้ให้เราทดสอบสิ่งเดียวกันกับแท็กสไตล์ด้านบนในเบราว์เซอร์ การเปลี่ยนแปลงที่เราทำจนถึง test_amp.html จะแสดงที่นี่ -
<!DOCTYPE html>
<html amp>
<head>
<meta charset = "utf-8">
<title>Tutorials</title>
<script async src = "https://cdn.ampproject.org/v0.js">
</script>
<meta name = "viewport" content = "width = device-width, initial-scale = 1.0">
<script src = "js/jquery.js"></script>
<style amp-custom>
h1 {color: blue;text-align: center;}
h2 {text-align: center;}
img {
border: 1px solid #ddd;
border-radius: 4px;
padding: 5px;
}
article {
text-align: center;
}
header{
width: 100%;
height: 50px;
margin: 5px auto;
border: 1px solid #000000;
text-align: center;
background-color: #ccc;
}
footer {
width: 100%;
height: 35px;
margin: 5px auto;
border: 1px solid #000000;
text-align: center;
background-color: yellow;
}
</style>
</head>
<body>
<header role = "banner">
<h2>Tutorials</h2>
</header>
<h2>Some Important Tutorials List</h2>
<article>
<section>
<img src = "images/tut1.png" width = "90%" height = "90%"/>
</section>
<section>
<img src = "images/tut2.png" width = "90%" height = "90%"/>
</section>
<section>
<img src = "images/tut3.png" width = "90%" height = "90%"/>
</section>
<section>
<img src = "images/tut4.png" width="90%" height = "90%"/>
</section>
</article>
<footer>
<p>For More tutorials Visit <a href =
"https://tutorialspoint.com/">Tutorials Point</a></p>
</footer>
</body>
</html>ให้เราดูผลลัพธ์และข้อผิดพลาดในคอนโซลสำหรับหน้าด้านบน สังเกตภาพหน้าจอต่อไปนี้ -
ข้อผิดพลาดที่แสดงในคอนโซลมีดังนี้ -
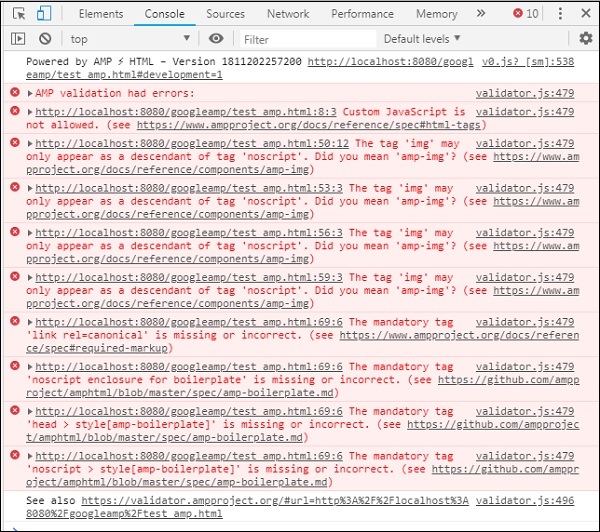
ตอนนี้คุณจะเห็นว่าสำหรับข้อผิดพลาดบางอย่างของแอมป์สไตล์จะถูกลบออก ให้เราแก้ไขข้อผิดพลาดที่เหลือทันที
Step 5 - ข้อผิดพลาดถัดไปที่เราเห็นในรายการมีดังนี้ -

เราได้เพิ่มแท็กสคริปต์ที่เรียกไฟล์ jquery โปรดทราบว่าหน้า amp ไม่อนุญาตให้ใช้ javascript ที่กำหนดเองในหน้า เราจะต้องลบออกและตรวจสอบให้แน่ใจว่าได้ใช้ amp-component ที่มีอยู่
ตัวอย่างเช่นเรามีแอมป์ - แอนิเมชันหากจำเป็นต้องมีแอนิเมชั่นใด ๆ แอมป์วิเคราะห์ในกรณีที่เราต้องการเพิ่มโค้ดวิเคราะห์ของ Google ลงในเพจ ในทำนองเดียวกันเรามีองค์ประกอบ amp-ad เพื่อแสดงโฆษณาที่จะแสดงบนหน้าเว็บ นอกจากนี้ยังมีคอมโพเนนต์ amp-iframe ซึ่งเราสามารถชี้ src ไปยังจุดเริ่มต้นเดียวกันและเรียกใช้ javascript ที่กำหนดเองหากต้องการใน amp-iframe
ตอนนี้ให้เราลบแท็กสคริปต์ออกจากหน้า
Step 6 - แสดงข้อผิดพลาดถัดไปที่นี่ -
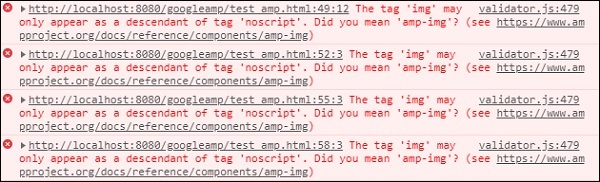
ข้อผิดพลาดข้างต้นกำลังชี้ไปที่แท็กรูปภาพที่เราใช้ในเพจ แอมป์ไม่อนุญาตให้ใช้แท็ก <img src =”” /> ภายในเพจ โปรดทราบว่าเราจำเป็นต้องใช้ amp-img tag แทน
ให้เราแทนที่แท็ก <img> ด้วย <amp-img> ดังที่แสดงไว้ที่นี่ -
<section>
<amp-img alt = "Beautiful Flower"
src = "images/tut1.png"
width = "500"
height = "160"
layout = "responsive">
</amp-img>
</section>
<section>
<amp-img alt = "Beautiful Flower"
src = "images/tut2.png"
width = "500"
height = "160"
layout = "responsive">
</amp-img>
</section>
<section>
<amp-img alt = "Beautiful Flower"
src = "images/tut3.png"
width = "500"
height = "160"
layout = "responsive">
</amp-img>
</section>
<section>
<amp-img alt = "Beautiful Flower"
src = "images/tut4.png"
width = "500"
height = "160"
layout = "responsive">
</amp-img>
</section>เราได้แทนที่แท็ก <img> ทั้งหมดเป็น <amp-img> ดังที่แสดงด้านบน ตอนนี้ให้เราเรียกใช้หน้าในเบราว์เซอร์เพื่อดูผลลัพธ์และข้อผิดพลาด -

ข้อผิดพลาด
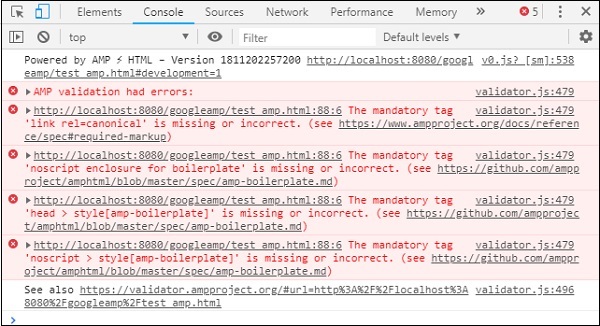
สังเกตว่าตอนนี้ข้อผิดพลาดเริ่มน้อยลง
Step 7 - ข้อผิดพลาดถัดไปที่แสดงในคอนโซลมีดังนี้ -

เราจำเป็นต้องเพิ่มลิงก์ rel = canonical tag ในส่วน head โปรดทราบว่านี่เป็นแท็กบังคับและควรเพิ่มไว้ในส่วนหัวดังนี้ -
<link rel = "canonical" href =
"http://example.ampproject.org/article-metadata.html">Step 8 - ข้อผิดพลาดถัดไปปรากฏขึ้นสำหรับการหายไป noscript tag ในคอนโซลดังแสดงที่นี่ -

เราจำเป็นต้องเพิ่มแท็ก <noscript> ที่ล้อมรอบด้วย amp-boilerplate ในส่วนหัวดังนี้ -
<noscript>
<style amp-boilerplate>
body{
-webkit-animation:none;
-moz-animation:none;
-ms-animation:none;
animation:none}
</style>
</noscript>Step 9 - ข้อผิดพลาดถัดไปที่แสดงอยู่ด้านล่าง -

แท็กบังคับอีกอย่างคือแท็กสไตล์ที่มี amp-boilerplate และต้องวางไว้ก่อนแท็ก noscript แท็กสไตล์พร้อม amp-สำเร็จรูปแสดงไว้ที่นี่ -
<style amp-boilerplate>
body{
-webkit-animation:
-amp-start 8s steps(1,end) 0s 1 normal both;-moz-animation:
-amp-start 8s steps(1,end) 0s 1 normal both;-ms-animation:
-amp-start 8s steps(1,end) 0s 1 normal both;animation:
-amp-start 8s steps(1,end) 0s 1 normal both
}
@-webkit-keyframes
-amp-start{from{visibility:hidden}to{visibility:visible}}@-moz-keyframes
-amp-start{from{visibility:hidden}to{visibility:visible}}@-ms-keyframes
-amp-start{from{visibility:hidden}to{visibility:visible}}@-o-keyframes
-amp-start{from{visibility:hidden}to{visibility:visible}}@keyframes
-amp-start{from{visibility:hidden}to{visibility:visible}}
</style>เพิ่มแท็กลักษณะด้านบนในหน้า test_amp.html
เมื่อทำการทดสอบหน้าในเบราว์เซอร์เพื่อดูผลลัพธ์และคอนโซล -
รายละเอียดคอนโซลแสดงไว้ที่นี่ -
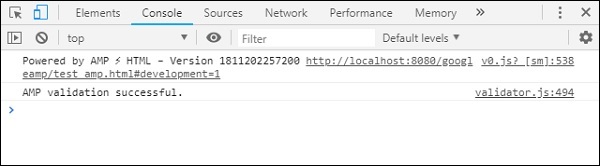
ดังนั้นในที่สุดเราก็ได้แก้ไขข้อผิดพลาดทั้งหมดและตอนนี้หน้า test_amp.html เป็นหน้าแอมป์ที่ถูกต้อง
มีการเพิ่มสไตล์บางอย่างที่จะเพิ่มเข้ามาเนื่องจากส่วนหัวและส่วนท้ายกำลังถูกตัดทอนเราสามารถอัปเดตแบบเดียวกันในสไตล์ที่กำหนดเองที่เราได้เพิ่มเข้าไป ดังนั้นเราจึงลบความกว้าง: 100% ออกจากส่วนหัวและส่วนท้าย
นี่คือผลลัพธ์สุดท้าย -
ไฟล์ test_amp.html ขั้นสุดท้าย
<!DOCTYPE html>
<html amp>
<head>
<meta charset = "utf-8">
<title>Tutorials</title>
<link rel = "canonical" href=
"http://example.ampproject.org/article-metadata.html">
<script async src = "https://cdn.ampproject.org/v0.js">
</script>
<meta name = "viewport" content = "width = device-width,
initial-scale = 1.0">
<style amp-boilerplate>
body{
-webkit-animation:
-amp-start 8s steps(1,end) 0s 1 normal both;-moz-animation:
-amp-start 8s steps(1,end) 0s 1 normal both;-ms-animation:
-amp-start 8s steps(1,end) 0s 1 normal both;animation:
-amp-start 8s steps(1,end) 0s 1 normal both
}
@-webkit-keyframes
-amp-start{from{visibility:hidden}to{visibility:visible}}@-moz-keyframes
-amp-start{from{visibility:hidden}to{visibility:visible}}@-ms-keyframes
-amp-start{from{visibility:hidden}to{visibility:visible}}@-o-keyframes
-amp-start{from{visibility:hidden}to{visibility:visible}}@keyframes
-amp-start{from{visibility:hidden}to{visibility:visible}}
</style>
<noscript>
<style amp-boilerplate>
body{
-webkit-animation:none;
-moz-animation:none;
-ms-animation:none;
animation:none}
</style>
</noscript>
<style amp-custom>
h1 {color: blue;text-align: center;}
h2 {text-align: center;}
amp-img {
border: 1px solid #ddd;
border-radius: 4px;
padding: 5px;
}
article {
text-align: center;
}
header{
height: 50px;
margin: 5px auto;
border: 1px solid #000000;
text-align: center;
background-color: #ccc;
}
footer {
height: 35px;
margin: 5px auto;
border: 1px solid #000000;
text-align: center;
background-color: yellow;
}
</style>
</head>
<body>
<header role = "banner">
<h2>Tutorials</h2>
</header>
<h2>Some Important Tutorials List</h2>
<article>
<section>
<amp-img
alt = "Beautiful Flower"
src = "images/tut1.png"
width = "500"
height = "160"
layout = "responsive">
</amp-img>
</section>
<section>
<amp-img
alt = "Beautiful Flower"
src = "images/tut2.png"
width = "500"
height = "160"
layout = "responsive">
</amp-img>
</section>
<section>
<amp-img
alt = "Beautiful Flower"
src = "images/tut3.png"
width = "500"
height = "160"
layout = "responsive">
</amp-img>
</section>
<section>
<amp-img
alt = "Beautiful Flower"
src = "images/tut4.png"
width = "500"
height = "160"
layout = "responsive">
</amp-img>
</section>
</article>
<footer>
<p>For More tutorials Visit <a href =
"https://tutorialspoint.com/">
Tutorials Point</a>
</p>
</footer>
</body>
</html>ดังนั้นในที่สุดเราก็เสร็จสิ้นด้วยการแปลงไฟล์ html ปกติเป็น amp
ในบทนี้เราจะพูดถึงข้อกำหนดพื้นฐานในการเริ่มต้นใช้งานหน้า AMP ของ Google
ตัวอย่างหน้าแอมป์
ตัวอย่างพื้นฐานสำหรับหน้าแอมป์แสดงอยู่ด้านล่าง -
<!doctype html>
<html amp>
<head>
<meta charset = "utf-8">
<title>Amp Sample Page</title>
<link rel = "canonical" href = "./regular-html-version.html">
<meta name = "viewport" content = "width = device-width,
minimum-scale = 1,initial-scale = 1">
<style amp-custom>
h1 {color: red}
</style>
<style amp-boilerplate>
body{
-webkit-animation:
-amp-start 8s steps(1,end) 0s 1 normal both;-moz-animation:
-amp-start 8s steps(1,end) 0s 1 normal both;-ms-animation:
-amp-start 8s steps(1,end) 0s 1 normal both;animation:
-amp-start 8s steps(1,end) 0s 1 normal both
}
@-webkit-keyframes
-amp-start{from{visibility:hidden}to{visibility:visible}}@-moz-keyframes
-amp-start{from{visibility:hidden}to{visibility:visible}}@-ms-keyframes
-amp-start{from{visibility:hidden}to{visibility:visible}}@-o-keyframes
-amp-start{from{visibility:hidden}to{visibility:visible}}@keyframes
-amp-start{from{visibility:hidden}to{visibility:visible}}
</style>
<noscript>
<style amp-boilerplate>
body{
-webkit-animation:none;
-moz-animation:none;
-ms-animation:none;
animation:none}
</style>
</noscript>
<script async src = "https://cdn.ampproject.org/v0.js">
</script>
</head>
<body>
<h1>Amp Sample Page</h1>
<p>
<amp-img
src = "images/christmas1.jpg"
width = "300"
height = "300"
layout = "responsive">
</amp-img>
</p>
</body>
</html>แท็กบังคับ
มีแท็กที่จำเป็นบางอย่างที่ต้องรวมไว้ในหน้าแอมป์ ส่วนนี้จะกล่าวถึงรายละเอียด -
เราต้องแน่ใจว่าเราเพิ่ม amp หรือ⚡ไปยังแท็ก html ดังที่แสดงด้านล่าง
<html amp>
OR
<html ⚡>เราควรเพิ่มแท็ก <head> และ <body> ในหน้า html
การตรวจสอบความถูกต้องของแอมป์อาจล้มเหลวหากคุณพลาดเมตาแท็กที่จำเป็น แท็กที่จำเป็นบางอย่างที่ต้องเพิ่มส่วนหัวของหน้าจะแสดงที่นี่ -
<meta charset="utf-8">
<meta name = "viewport"
content = "width = device-width,
minimum-scale = 1,
initial-scale = 1">ลิงก์ของ rel = "canonical" ที่จะเพิ่มเข้าไปใน head tag
<link rel = "canonical" href = "./regular-html-version.html">แท็กสไตล์พร้อม amp-boilerplate -
<style amp-boilerplate>
body{
-webkit-animation:
-amp-start 8s steps(1,end) 0s 1 normal both;-moz-animation:
-amp-start 8s steps(1,end) 0s 1 normal both;-ms-animation:
-amp-start 8s steps(1,end) 0s 1 normal both;animation:
-amp-start 8s steps(1,end) 0s 1 normal both
}
@-webkit-keyframes
-amp-start{from{visibility:hidden}to{visibility:visible}}@-moz-keyframes
-amp-start{from{visibility:hidden}to{visibility:visible}}@-ms-keyframes
-amp-start{from{visibility:hidden}to{visibility:visible}}@-o-keyframes
-amp-start{from{visibility:hidden}to{visibility:visible}}@keyframes
-amp-start{from{visibility:hidden}to{visibility:visible}}
</style>แท็ก Noscript พร้อม amp-สำเร็จรูป -
<noscript>
<style amp-boilerplate>
body{
-webkit-animation:none;
-moz-animation:none;
-ms-animation:none;
animation:none}
</style>
</noscript>เพิ่มแท็ก amp script ที่มี async ตามที่แสดงด้านล่าง นี่คือแท็กที่สำคัญที่สุดของทั้งหมด -
<script async src = "https://cdn.ampproject.org/v0.js">
</script>คุณควรใช้แท็กนี้ในกรณีที่คุณต้องการเพิ่ม css ที่กำหนดเองลงในเพจ โปรดจดบันทึกไว้ที่นี่เราไม่สามารถเรียกสไตล์ชีตภายนอกในหน้าแอมป์ได้ ในการเพิ่ม css ที่กำหนดเอง css ทั้งหมดของคุณต้องไปที่นี่ -
<style amp-custom>
   //all your styles here
</style>คุณสามารถตรวจสอบความถูกต้องของหน้าด้านบนในเบราว์เซอร์ของคุณโดยใช้ # developement = 1 ที่ท้าย page-url
ตอนนี้ให้เราทดสอบสิ่งเดียวกันในเบราว์เซอร์ ฉันโฮสต์เพจไว้ในเครื่องและบันทึกเป็น amppage.html
URL สำหรับด้านบนที่จะทดสอบคือ
http://localhost/googleamp/amppage.html#development=1
ตัวอย่าง
<!doctype html>
<html amp>
<head>
<meta charset = "utf-8">
<title>Amp Sample Page</title>
<link rel = "canonical" href = "./regular-html-version.html">
<meta name = "viewport" content = "width=device-width,
minimum-scale = 1,initial-scale = 1">
<style amp-custom>
h1 {color: red}
</style>
<style amp-boilerplate>
body{
-webkit-animation:
-amp-start 8s steps(1,end) 0s 1 normal both;-moz-animation:
-amp-start 8s steps(1,end) 0s 1 normal both;-ms-animation:
-amp-start 8s steps(1,end) 0s 1 normal both;animation:
-amp-start 8s steps(1,end) 0s 1 normal both
}
@-webkit-keyframes
-amp-start{from{visibility:hidden}to{visibility:visible}}@-moz-keyframes
-amp-start{from{visibility:hidden}to{visibility:visible}}@-ms-keyframes
-amp-start{from{visibility:hidden}to{visibility:visible}}@-o-keyframes
-amp-start{from{visibility:hidden}to{visibility:visible}}@keyframes
-amp-start{from{visibility:hidden}to{visibility:visible}}
</style>
<noscript>
<style amp-boilerplate>
body{
-webkit-animation:none;
-moz-animation:none;
-ms-animation:none;
animation:none}
</style>
</noscript>
<script async src = "https://cdn.ampproject.org/v0.js">
</script>
</head>
<body>
<h1>Amp Sample Page</h1>
<p>
<amp-img
src = "images/christmas1.jpg"
width = "300"
height = "250"
layout = "responsive">
</amp-img>
</p>
</body>
</html>เอาต์พุต
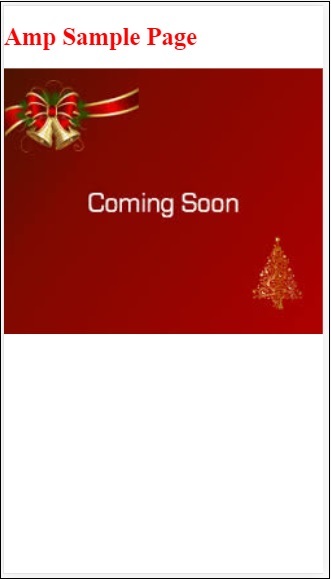
คุณสามารถดูสถานะการตรวจสอบแอมป์ในคอนโซลนักพัฒนาได้ดังนี้ -
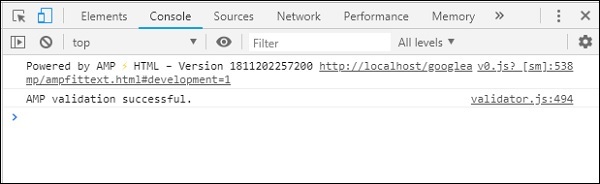
ช่วยให้เราตรวจสอบ AMP ได้สำเร็จเนื่องจากเราได้เพิ่มแท็กบังคับที่จำเป็นทั้งหมดสำหรับหน้า AMP ที่ถูกต้อง
Google AMP เป็นวิธีที่ช่วยให้หน้าเว็บโหลดเร็วขึ้นบนอุปกรณ์ต่างๆ ในการทำงานกับ amp เราสามารถใช้ HTML5, CSS และ amp-components
Google Amp มีหลายวิธีในการตรวจสอบหน้าแอมป์ สิ่งสำคัญบางอย่างที่เราจะพูดถึงในบทนี้ ได้แก่ -
ใช้ # development = 1
ใช้ Amp Validator
ใช้บรรทัดคำสั่ง
ให้เราคุยรายละเอียดแต่ละเรื่อง
ใช้ #development = 1
เมื่อคุณทราบว่าเพจของคุณพร้อมสำหรับการตรวจสอบแล้วเพียงแค่เพิ่ม # development = 1 ต่อท้าย page-url และทดสอบสิ่งเดียวกันในเครื่องมือสำหรับนักพัฒนาของ Chrome
คุณสามารถเพิ่ม #development=1 ไปยัง URL หน้า html ของคุณในตอนท้ายตามที่แสดงในตัวอย่างด้านล่าง -
http://localhost:8080/googleamp/test_amp.html#development=1กด url ด้านบนในเบราว์เซอร์และในคอนโซล Google Chrome มันจะแสดงรายการข้อผิดพลาดที่แอมป์คิดว่าไม่ถูกต้องจากมุมมองข้อกำหนดของแอมป์
นี่คือข้อผิดพลาดที่เราพบสำหรับ test_amp.html

คุณสามารถแก้ไขข้อผิดพลาดที่แสดงและเมื่อแก้ไขข้อผิดพลาดทั้งหมดแล้วจะแสดงดังต่อไปนี้ -

ใช้ Amp Validator
Amp มีเครื่องมือตรวจสอบความถูกต้องซึ่งเราสามารถป้อนเนื้อหา HTML และแสดงสถานะเป็น PASS หรือ ERROR และยังแสดงข้อผิดพลาดบนหน้า ลิงค์คือ -https://validator.ampproject.org/
การแสดงผลสำหรับเครื่องมือตรวจสอบแอมป์มีดังที่แสดงด้านล่าง -
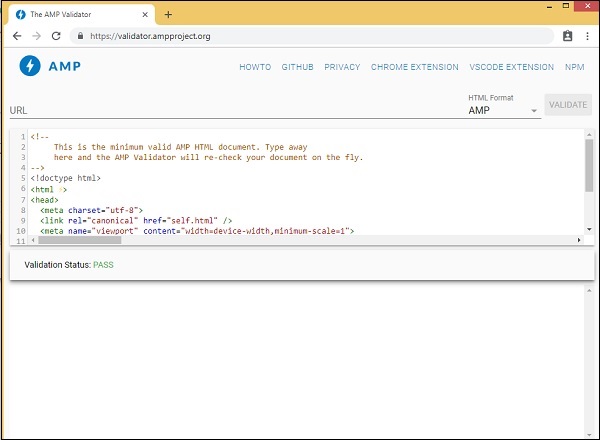
ตัวอย่างข้อผิดพลาดในเนื้อหาของหน้าแสดงอยู่ด้านล่าง -
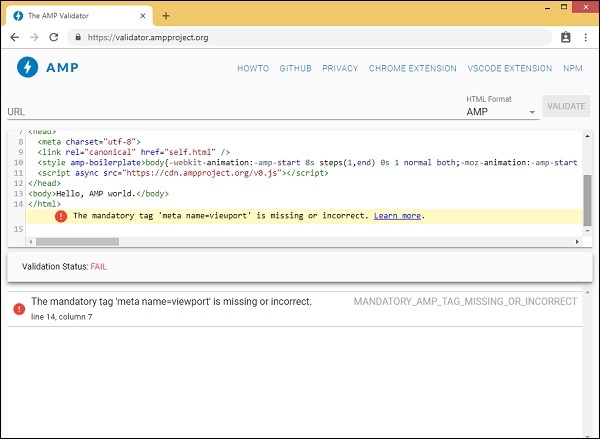
ใช้ Command Line
คุณสามารถติดตั้งแพ็คเกจ npm โดยใช้คำสั่งต่อไปนี้ -
npm install -g amphtml-validator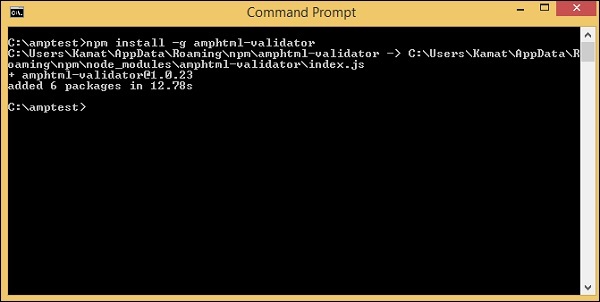
เราได้สร้างโฟลเดอร์ amptest / และบันทึกไฟล์ amp_test.html ไว้ในโฟลเดอร์นั้น ให้เราตรวจสอบความถูกต้อง amp_test.html โดยใช้คำสั่งต่อไปนี้ในบรรทัดคำสั่ง
amphtml-validator youramppage.html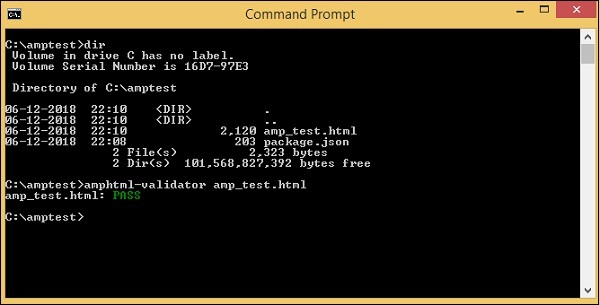
ให้เราลบแท็กบางแท็กออกจากเพจเพื่อดูว่าแสดงข้อผิดพลาดหรือไม่
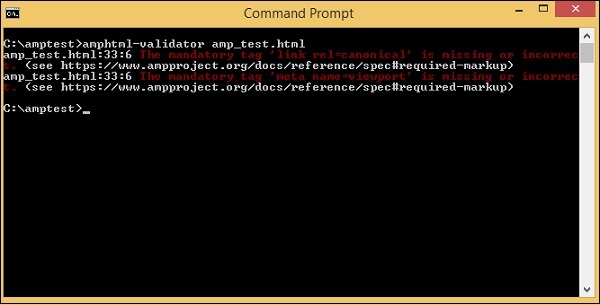
ข้อผิดพลาดที่แสดงสามารถแก้ไขได้จนกว่าเราจะได้รับสถานะเป็น PASS
Google amp มีสิ่งอำนวยความสะดวกในการแคชซึ่งเป็นเครือข่ายการจัดส่งเนื้อหาที่ใช้พร็อกซีเพื่อให้บริการหน้าแอมป์ที่บริสุทธิ์ แอมป์แคชจะพร้อมใช้งานโดยค่าเริ่มต้นสำหรับหน้าแอมป์ที่ถูกต้องทั้งหมด ช่วยในการแสดงผลหน้าเว็บได้เร็วขึ้นเมื่อเทียบกับหน้าที่ไม่ใช่แอมป์
ปัจจุบันมีผู้ให้บริการแคช 2 แอมป์ Google AMP Cache และ Cloudflare AMP Cache. ดังที่ได้กล่าวไว้ก่อนหน้านี้การแคชแอมป์จะพร้อมใช้งานสำหรับหน้าแอมป์ทั้งหมด ในกรณีที่ผู้ใช้ไม่ต้องการใช้คุณสมบัติ amp cache คุณจะต้องทำให้หน้า amp ไม่ถูกต้อง แอมป์แคชไม่ได้ใช้กับเพจแอมป์ที่ไม่ถูกต้อง
ในขณะที่การค้นหาของ Google รวบรวมข้อมูลและพบ amp () สำหรับเนื้อหา html จะพิจารณาสำหรับการแคช
ในส่วนนี้เราจะพูดถึงส่วนประกอบต่างๆของ Google amp cache URL
โดเมนย่อย
Google AMP เพิ่มโดเมนย่อยใน url ที่ร้องขอ มีกฎบางประการสำหรับ URL โดเมนย่อยของ amp cache แสดงไว้ที่นี่ -
กฎสำหรับ URL แคชของโดเมนย่อย
การแปลงโดเมนเอกสาร AMP จาก IDN (Punycode) เป็น UTF-8
ขีดกลาง (-) ใน url จะถูกแทนที่ด้วยสองขีด (-)
จุด (.) ใน url จะถูกแทนที่ด้วยเส้นประ (-)
การแปลงกลับเป็น IDN (Punycode)
ตัวอย่างเช่น pub.mypage จะถูกแทนที่ด้วย pub-mypage.cdn.ampproject.com. ที่นี่ cdn.ampproject.com คือโดเมนย่อยที่เพิ่มโดย google amp ตอนนี้ URL ที่แคชคือ Pub-mypage.cdn.ampproject.com
ชนิดของเนื้อหา
ประเภทเนื้อหาที่ใช้ได้คือ c สำหรับเอกสาร AMP HTML, i สำหรับรูปภาพและ r สำหรับทรัพยากรเช่นแบบอักษรตัวอย่าง คุณจะได้รับข้อผิดพลาด 404 หากประเภทเนื้อหาไม่ตรงกับที่ระบุ
ไม่บังคับ
หากมีอยู่เนื้อหาจะถูกดึงมาจากต้นทาง https: //; มิฉะนั้นจะดึงมาจาก http: //
ตัวอย่างสำหรับคำขอที่สร้างขึ้นในแคชรูปภาพจาก https และ http แสดงไว้ที่นี่ -
ตัวอย่าง
https://pub-mypage-com.cdn.ampproject.org/i/s/examples/images/testimage.pngดังนั้นในตัวอย่างด้านบน url จะมี i ซึ่งหมายถึงรูปภาพและ s สำหรับ https -
ตัวอย่าง
http://pub-mypage-com.cdn.ampproject.org/i/examples/images/testimage.pngดังนั้นในตัวอย่างด้านบน url มี i ซึ่งหมายถึงรูปภาพและไม่มี s ดังนั้น url จะถูกดึงมาจาก http
สำหรับไฟล์แคชแบบอักษร url จะเป็นดังนี้ -
ตัวอย่าง
https://pub-mypage-com.cdn.ampproject.org/r/s/examples/themes/lemon/fonts/Genericons.ttfชนิดของเนื้อหา r ใช้สำหรับทรัพยากรเช่นแบบอักษรและ s สำหรับ URL ที่ปลอดภัย
สำหรับเอกสาร html url มีดังนี้ -
ตัวอย่าง
https://pub-mypage-com.cdn.ampproject.org/c/s/trends/main.htmlมี c ใน url สำหรับเอกสาร HTML ตามด้วย s ซึ่งมีไว้สำหรับ https: //
แคช AMP ของ Google ใช้ส่วนหัว http เช่น Max-age เพื่อตัดสินใจว่าแคชเนื้อหาเก่าหรือใหม่และส่งคำขอใหม่โดยอัตโนมัติและอัปเดตเนื้อหาเพื่อให้ผู้ใช้รายถัดไปได้รับการอัปเดตเนื้อหา
ในบทก่อนหน้านี้เราได้ศึกษาส่วนประกอบของแอมป์หลายตัว เรายังได้เห็นว่าสำหรับแต่ละองค์ประกอบในการทำงานเราต้องเพิ่มไฟล์ javascript
ตัวอย่างเช่นสำหรับ amp-iframe สคริปต์ที่เพิ่มมีดังนี้ -
<script async custom-element="amp-iframe"
src="https://cdn.ampproject.org/v0/amp-iframe-0.1.js">
</script>เรามี asyncเพิ่มลงในแท็กสคริปต์ นี่เป็นมาตรฐานสำหรับแอมป์เนื่องจากโหลดไฟล์จาวาสคริปต์ทั้งหมดแบบอะซิงโครนัส มีcustom-element เพิ่มแอตทริบิวต์ซึ่งมีชื่อของส่วนประกอบที่ใช้
หากต้องการใช้ amp-component ใด ๆ หากไม่ใช่ส่วนหนึ่งของไฟล์ core amp javascript ต้องเพิ่มสคริปต์ดังที่แสดงด้านบน
ส่วนใหญ่เราคุ้นเคยกับการเขียนโค้ดจาวาสคริปต์จำนวนมากภายในหน้าเว็บและรวมไฟล์จาวาสคริปต์โดยใช้แท็กสคริปต์
เราจะทำในแอมป์ได้อย่างไร? ดังนั้น AMP จึงไม่อนุญาตให้เขียนโค้ดสคริปต์หรือโหลดแท็กสคริปต์จากภายนอก
แอมป์มีส่วนประกอบของตัวเองเพื่อดูแลงานซึ่งสมมติว่าต้องทำโดยสคริปต์เพิ่มเติมที่เพิ่มเข้ามาในเพจ โดยพื้นฐานแล้วจะทำด้วยเหตุผลด้านประสิทธิภาพเพื่อให้โหลดเนื้อหาหน้าได้เร็วขึ้นและไม่มีจาวาสคริปต์ทำให้การแสดงผลล่าช้าหรือทำการเปลี่ยนแปลงใด ๆ กับ DOM
นี่คือข้อกำหนดที่ AMP กำหนดตามเว็บไซต์อย่างเป็นทางการสำหรับแท็กสคริปต์ -
ห้ามเว้นเสียแต่ว่าประเภทคือ application / ld + json (อาจเพิ่มค่าอื่นที่ไม่สามารถเรียกใช้งานได้ตามต้องการ) ข้อยกเว้นคือแท็กสคริปต์ที่จำเป็นในการโหลดรันไทม์ AMP และแท็กสคริปต์เพื่อโหลดส่วนประกอบเพิ่มเติม
ตัวอย่างการทำงานที่เราสามารถใช้ได้ application/ld+jsonภายในหน้าแอมป์ของเราจะแสดงที่นี่ โปรดทราบว่าเรากำลังใช้แท็กสคริปต์ที่มี type =” application / ld + json” สำหรับคอมโพเนนต์ amp-analytics เพื่อเริ่มการทำงานของตัวติดตาม
ในทำนองเดียวกันเราสามารถใช้แท็กสคริปต์กับ type =” application / ld + json” บนส่วนประกอบแอมป์อื่น ๆ ได้ทุกที่ที่ต้องการ
ตัวอย่าง
<!doctype html>
<html amp>
<head>
<meta charset = "utf-8">
<title>amp-analytics</title>
<script async src = "https://cdn.ampproject.org/v0.js">
</script>
<script async custom-element = "amp-analytics"
src = "https://cdn.ampproject.org/v0/amp-analytics-0.1.js">
</script>
<link rel = "canonical" href = "ampanalytics.html">
<meta name = "viewport" content = "width=device-width,
minimum-scale = 1,initial-scale = 1">
<style amp-boilerplate>
body{
-webkit-animation:
-amp-start 8s steps(1,end) 0s 1 normal both;-moz-animation:
-amp-start 8s steps(1,end) 0s 1 normal both;-ms-animation:
-amp-start 8s steps(1,end) 0s 1 normal both;animation:
-amp-start 8s steps(1,end) 0s 1 normal both
}
@-webkit-keyframes
-amp-start{from{visibility:hidden}to{visibility:visible}}@-moz-keyframes
-amp-start{from{visibility:hidden}to{visibility:visible}}@-ms-keyframes
-amp-start{from{visibility:hidden}to{visibility:visible}}@-o-keyframes
-amp-start{from{visibility:hidden}to{visibility:visible}}@keyframes
-amp-start{from{visibility:hidden}to{visibility:visible}}
</style>
<noscript>
<style amp-boilerplate>
body{
-webkit-animation:none;
-moz-animation:none;
-ms-animation:none;
animation:none}
</style>
</noscript>
</head>
<body>
<h1>Google Amp - Analytics</h1>
<amp-analytics>
<script type = "application/json">
{
"requests": {
"event": "http://localhost:8080/googleamp/tracking.php?
user=test&account=localhost&event=${eventId}"
},
"triggers": {
"trackPageview": {
"on": "visible",
"request": "event",
"vars": {
"eventId": "pageview"
}
}
}
}
</script>
</amp-analytics>
</body>
</html>เมื่อเพจถูกกดในเบราว์เซอร์ตัวติดตามจะเริ่มทำงานสำหรับการดูหน้าเว็บ สามารถเห็นได้ในแท็บเครือข่ายของ Google ดังที่แสดงด้านล่าง
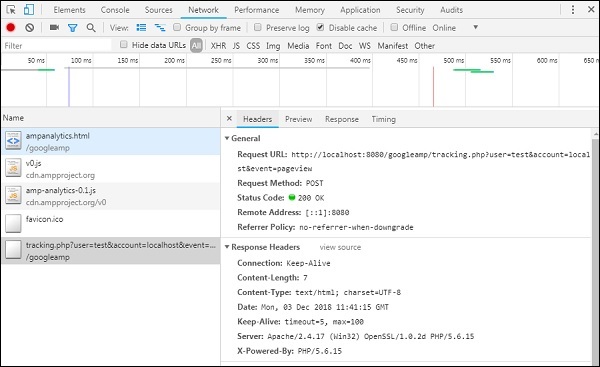
ในบทนี้เราจะพยายามทำความเข้าใจ CORS ใน AMP ก่อนที่เราจะเจาะลึกลงไปในรายละเอียดให้เราเข้าใจพื้นฐานของ CORS และประโยชน์ของมัน
CORS คืออะไร?
CORS ย่อมาจาก Cross Origin Resource Sharing CORS เป็นกระบวนการที่ต้องการข้อมูลส่วนหัว HTTP เพิ่มเติมเพื่อบอกเบราว์เซอร์ว่าคำขอที่ส่งไปยัง url โดยหน้าเว็บที่เรียกว่าxyz.com origin ควรได้รับอนุญาตให้เข้าถึงข้อมูลจาก url ที่ร้องขอหรือไม่ เราทำการร้องขอ http จำนวนมากจากหน้าเว็บและสำหรับสิ่งนั้นเราจำเป็นต้องมี CORS เพื่อให้ได้ข้อมูลที่ต้องการ
เมื่อเราส่งคำขอ http ไปยังเซิร์ฟเวอร์อื่นที่ไม่ใช่โฮสต์เราเรียกสิ่งนี้ว่าคำขอข้ามแหล่งกำเนิดซึ่งหมายความว่าโดเมนโปรโตคอลและพอร์ตต่างจากต้นทางของโฮสต์ ในกรณีเช่นนี้ควรมีการอนุญาตจาก url ที่ร้องขอเพื่อเข้าถึงข้อมูล หมายถึง GET / PUT / POST / DELETE ที่ทำ
ข้อมูลเพิ่มเติมนี้มีอยู่ในส่วนหัวของเบราว์เซอร์สำหรับการเรียกคำขอ http ขั้นตอนการอนุญาตนี้จำเป็นโดยทั่วไปเพื่อเหตุผลด้านความปลอดภัยดังนั้นจึงไม่มีหน้าเว็บใดสามารถสร้างหรือรับข้อมูลจากโดเมนอื่นโดยไม่ได้รับอนุญาตที่จำเป็น
ส่วนหัวของเบราว์เซอร์ควรมีรายละเอียดเช่น Access-Control-Allow-Origin ซึ่งสามารถมีค่าตามที่แสดงด้านล่าง -
Access-Control-Allow-Origin : *การมีค่า * สำหรับส่วนหัวของ URL คำขอหมายความว่าจะบอกให้เบราว์เซอร์อนุญาตให้ขอข้อมูลจากต้นทางใด ๆ เพื่อเข้าถึงทรัพยากรได้
Access-Control-Allow-Origin: https://www.example.comการมีค่าตามด้านบนจะบอกเบราว์เซอร์ว่าคำขอจากหน้าเว็บwww.example.comจะได้รับอนุญาตให้รับข้อมูลสำหรับ url ที่ร้องขอเท่านั้น
ต้องมีการกำหนดค่าเซิร์ฟเวอร์สำหรับ CORS โดยคำนึงถึงวิธีการใช้ข้อมูลที่แชร์ ขึ้นอยู่กับว่าต้องตั้งค่าส่วนหัวที่ต้องการบนฝั่งเซิร์ฟเวอร์
ตอนนี้เรารู้แล้วว่า CORS คืออะไรแล้วให้เราก้าวไปอีกขั้น ในกรณีของแอมป์เรามีส่วนประกอบเช่น amp-form, amp-list ซึ่งใช้ http endpoints เพื่อโหลดข้อมูลแบบไดนามิก
ในกรณีของหน้าแอมป์แม้ว่าคำขอ http จะสร้างขึ้นจากจุดเริ่มต้นเดียวกันเราจำเป็นต้องมีการตั้งค่า CORS คำถามเกิดขึ้นที่นี่ - ทำไมเราจึงควรเปิดใช้งาน CORS แม้ว่าคำขอและการตอบกลับจะมาจากแหล่งกำเนิดเดียวกันก็ตาม ในทางเทคนิคเราไม่จำเป็นต้องเปิดใช้งาน CORS ในกรณีดังกล่าวเนื่องจากเรากำลังร้องขอและแสดงข้อมูลสำหรับโดเมนต้นทางเป็นต้น
แอมป์มีคุณสมบัติที่เรียกว่าแคชซึ่งถูกเพิ่มเข้ามาเพื่อให้ได้ข้อมูลเร็วขึ้นสำหรับผู้ใช้ที่เข้าชมเพจ ในกรณีที่ผู้ใช้เข้าเยี่ยมชมเพจแล้วข้อมูลจะถูกแคชบน google cdn ผู้ใช้รายถัดไปจะได้รับข้อมูลจากแคช
ข้อมูลจะถูกเก็บไว้ที่ส่วนท้ายของแอมป์ซึ่งตอนนี้มีโดเมนที่แตกต่างกัน เมื่อผู้ใช้คลิกปุ่มใด ๆ เพื่อรับข้อมูลใหม่ URL แคชของแอมป์จะถูกเปรียบเทียบกับโดเมนหน้าเว็บเพื่อรับข้อมูลใหม่ ตอนนี้หากไม่ได้เปิดใช้งาน CORS เนื่องจากเกี่ยวข้องกับ amp แคช url และโดเมนของหน้าเว็บคำขอจะไม่ถูกต้องและจะล้มเหลวสำหรับการอนุญาต CORS นี่คือเหตุผลว่าทำไมเราจึงต้องเปิดใช้งาน CORS แม้จะใช้แหล่งกำเนิดเดียวกันในกรณีของหน้าแอมป์
ตัวอย่างการทำงานของการทำงานกับแบบฟอร์มที่เปิดใช้งาน CORS แสดงไว้ที่นี่ -
<!doctype html>
<html amp lang = "en">
<head>
<meta charset = "utf-8">
<script async src = "https://cdn.ampproject.org/v0.js">
</script>
<title>Google AMP - Form</title>
<link rel = "canonical" href = "ampform.html">
<meta name = "viewport" content = "width = device-width,
minimum-scale = 1,initial-scale = 1">
<style amp-boilerplate>
body{
-webkit-animation:
-amp-start 8s steps(1,end) 0s 1 normal both;-moz-animation:
-amp-start 8s steps(1,end) 0s 1 normal both;-ms-animation:
-amp-start 8s steps(1,end) 0s 1 normal both;animation:
-amp-start 8s steps(1,end) 0s 1 normal both
}
@-webkit-keyframes
-amp-start{from{visibility:hidden}to{visibility:visible}}@-moz-keyframes
-amp-start{from{visibility:hidden}to{visibility:visible}}@-ms-keyframes
-amp-start{from{visibility:hidden}to{visibility:visible}}@-o-keyframes
-amp-start{from{visibility:hidden}to{visibility:visible}}@keyframes
-amp-start{from{visibility:hidden}to{visibility:visible}}
</style>
<noscript>
<style amp-boilerplate>
body{
-webkit-animation:none;
-moz-animation:none;
-ms-animation:none;
animation:none}
</style>
</noscript>
<script async custom-element = "amp-form"
src = "https://cdn.ampproject.org/v0/amp-form-0.1.js">
</script>
<script async custom-template = "amp-mustache"
src = "https://cdn.ampproject.org/v0/amp-mustache-0.2.js">
</script>
<style amp-custom>
form.amp-form-submit-success [submit-success],
form.amp-form-submit-error [submit-error]{
margin-top: 16px;
}
form.amp-form-submit-success [submit-success] {
color: white;
background-color:gray;
}
form.amp-form-submit-error [submit-error] {
color: red;
}
form.amp-form-submit-success.hide-inputs > input {
display: none;
}
</style>
</head>
<body>
<h3>Google AMP - Form</h3>
<form
method = "post"
class = "p2"
action-xhr = "submitform.php"
target = "_top">
<p>AMP - Form Example</p>
<div>
<input
type = "text"
name = "name"
placeholder = "Enter Name" required>
<br/>
<br/>
<input
type = "email"
name = "email"
placeholder = "Enter Email"
required>
<br/>
<br/>
</div>
<input type = "submit" value = "Submit">
<div submit-success>
<template type = "amp-mustache">
Form Submitted! Thanks {{name}}.
</template>
</div>
<div submit-error>
<template type = "amp-mustache">
Error! {{name}}, please try again.
</template>
</div>
</form>
</body>
</html>submitform.php
<?php
   if(!empty($_POST)){ $domain_url = (isset($_SERVER['HTTPS']) ? "https" : "http") . "://$_SERVER[HTTP_HOST]";
      header("Content-type: application/json");
      header("AMP-Access-Control-Allow-Source-Origin: " . $domain_url); header("Access-Control-Expose-Headers: AMP-Access-Control-Allow-Source-Origin"); $myJSON = json_encode($_POST); echo $myJSON;
   }
?>เอาต์พุต
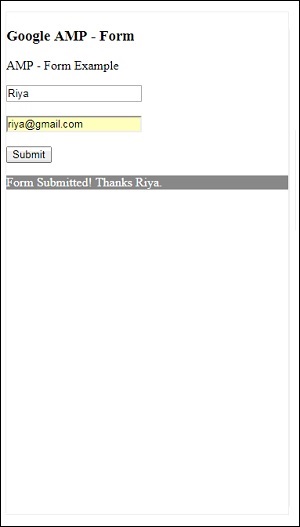
รายละเอียดของส่วนหัวการตอบกลับที่เพิ่มใน submitform.php -
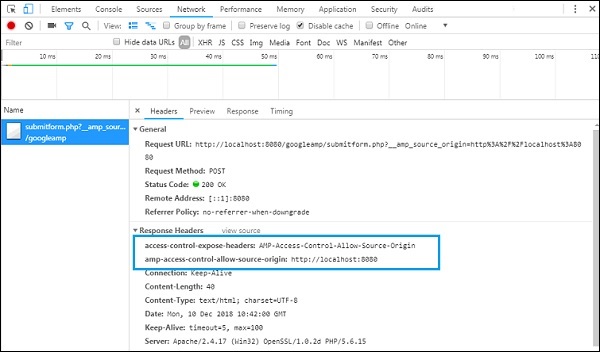
เพื่อให้แบบฟอร์มใช้งานได้เราต้องเพิ่มส่วนหัวเช่น access-control-expose-headers ที่มีค่า AMP-Access-Control-Allow-Source-Origin และ amp-access-control-allow-source-origin - http://localhost:8080.
ที่นี่เราใช้ไฟล์ php และ apache เป็นเซิร์ฟเวอร์ที่ใช้ ในไฟล์ php เราได้เพิ่มส่วนหัวที่ต้องการดังที่แสดงด้านล่าง -
<?php
if(!empty($_POST)){ $domain_url = (isset($_SERVER['HTTPS']) ? "https" : "http") . "://$_SERVER[HTTP_HOST]";
header("Content-type: application/json");
header("AMP-Access-Control-Allow-Source-Origin: " . $domain_url); header("Access-Control-Expose-Headers: AMP-Access-Control-Allow-Source-Origin"); $myJSON = json_encode($_POST); echo $myJSON;
}
?>เมื่อเพิ่มส่วนหัวที่ต้องการจุดเริ่มต้น http://localhost:8080 จะได้รับอนุญาตให้โต้ตอบและรับข้อมูลกลับมา