GWT - Geçmiş Sınıfı
GWT uygulamaları normalde JavaScripts çalıştıran tek sayfalı bir uygulamadır ve çok sayıda sayfa içermez, bu nedenle tarayıcı, Uygulama ile kullanıcı etkileşimini takip etmez. Tarayıcının geçmiş işlevini kullanmak için uygulama, gezilebilir her sayfa için benzersiz bir URL parçası oluşturmalıdır.
GWT sağlar History Mechanism bu durumu halletmek için.
GWT bir terim kullanır tokenbu, uygulamanın belirli bir duruma dönmek için ayrıştırabileceği bir dizedir. Uygulama bu belirteci tarayıcının geçmişine URL parçası olarak kaydedecektir.
Örneğin, "pageIndex1" adlı bir geçmiş jetonu bir URL'ye aşağıdaki gibi eklenir -
http://www.tutorialspoint.com/HelloWorld.html#pageIndex0Geçmiş Yönetimi İş Akışı
Adım 1 - Geçmiş desteğini etkinleştirin
GWT Geçmiş desteğini kullanmak için önce aşağıdaki iframe'i ana HTML sayfamıza yerleştirmeliyiz.
<iframe src = "javascript:''"
   id = "__gwt_historyFrame"
   style = "width:0;height:0;border:0"></iframe>
Adım 2 - Geçmişe jeton ekleyin
Örnek istatistikleri takip ederek tarayıcı geçmişine jeton ekleme
int index = 0;
History.newItem("pageIndex" + index);
Adım 3 - Jetonu Geçmişten geri alın
Kullanıcı tarayıcının geri / ileri düğmesini kullandığında, jetonu geri alacağız ve uygulama durumumuzu buna göre güncelleyeceğiz.
History.addValueChangeHandler(new ValueChangeHandler<String>() {
   @Override
   public void onValueChange(ValueChangeEvent<String> event) {
      String historyToken = event.getValue();
      /* parse the history token */
      try {
         if (historyToken.substring(0, 9).equals("pageIndex")) {
            String tabIndexToken = historyToken.substring(9, 10);
            int tabIndex = Integer.parseInt(tabIndexToken);
            /* select the specified tab panel */
            tabPanel.selectTab(tabIndex);
         } else {
            tabPanel.selectTab(0);
         }
      } catch (IndexOutOfBoundsException e) {
         tabPanel.selectTab(0);
      }
   }
});
Şimdi Tarih Sınıfını İş Başında görelim.
Tarih Sınıfı - Tam Örnek
Bu örnek, bir GWT uygulamasının Geçmiş Yönetimini göstermek için sizi basit adımlardan geçirecektir. GWT - Uygulama Oluştur bölümünde oluşturduğumuz GWT uygulamasını güncellemek için aşağıdaki adımları izleyin -
| Adım | Açıklama |
|---|---|
| 1 | GWT - Uygulama Oluştur bölümünde açıklandığı gibi com.tutorialspoint paketinin altında HelloWorld adıyla bir proje oluşturun . |
| 2 | Değiştir HelloWorld.gwt.xml , HelloWorld.css , HelloWorld.html ve HelloWorld.java olarak aşağıda açıklanmıştır. Geri kalan dosyaları değiştirmeden tutun. |
| 3 | Uygulanan mantığın sonucunu doğrulamak için uygulamayı derleyin ve çalıştırın. |
Değiştirilmiş modül tanımlayıcısının içeriği aşağıdadır src/com.tutorialspoint/HelloWorld.gwt.xml.
<?xml version = "1.0" encoding = "UTF-8"?>
<module rename-to = 'helloworld'>
   <!-- Inherit the core Web Toolkit stuff.                        -->
   <inherits name = 'com.google.gwt.user.User'/>

   <!-- Inherit the default GWT style sheet.                       -->
   <inherits name = 'com.google.gwt.user.theme.clean.Clean'/>

   <!-- Specify the app entry point class.                         -->
   <entry-point class = 'com.tutorialspoint.client.HelloWorld'/>
   <!-- Specify the paths for translatable code                    -->
   <source path = 'client'/>
   <source path = 'shared'/>

</module>
Değiştirilen Stil Sayfası dosyasının içeriği aşağıdadır war/HelloWorld.css.
body {
   text-align: center;
   font-family: verdana, sans-serif;
}

h1 {
   font-size: 2em;
   font-weight: bold;
   color: #777777;
   margin: 40px 0px 70px;
   text-align: center;
}
Aşağıda, değiştirilmiş HTML ana bilgisayar dosyasının içeriği verilmiştir war/HelloWorld.html
<html>
   <head>
      <title>Hello World</title>
      <link rel = "stylesheet" href = "HelloWorld.css"/>
      <script language = "javascript" src = "helloworld/helloworld.nocache.js">
      </script>
   </head>

   <body>
      <iframe src = "javascript:''"id = "__gwt_historyFrame"
         style = "width:0;height:0;border:0"></iframe>
      <h1> History Class Demonstration</h1>
      <div id = "gwtContainer"></div>
   </body>
</html>
Aşağıdaki Java dosyası içeriğine sahip olalım src/com.tutorialspoint/HelloWorld.java kullanarak GWT Kodunda Geçmiş Yönetimini göstereceğiz.
package com.tutorialspoint.client;

import com.google.gwt.core.client.EntryPoint;

import com.google.gwt.event.logical.shared.SelectionEvent;
import com.google.gwt.event.logical.shared.SelectionHandler;
import com.google.gwt.event.logical.shared.ValueChangeEvent;
import com.google.gwt.event.logical.shared.ValueChangeHandler;

import com.google.gwt.user.client.History;
import com.google.gwt.user.client.ui.HTML;
import com.google.gwt.user.client.ui.RootPanel;
import com.google.gwt.user.client.ui.TabPanel;

public class HelloWorld implements EntryPoint {

   /**
    * This is the entry point method.
    */
   public void onModuleLoad() {
      /* create a tab panel to carry multiple pages */
      final TabPanel tabPanel = new TabPanel();

      /* create pages */
      HTML firstPage = new HTML("<h1>We are on first Page.</h1>");
      HTML secondPage = new HTML("<h1>We are on second Page.</h1>");
      HTML thirdPage = new HTML("<h1>We are on third Page.</h1>");

      String firstPageTitle = "First Page";
      String secondPageTitle = "Second Page";
      String thirdPageTitle = "Third Page";
      tabPanel.setWidth("400");

	  /* add pages to tabPanel*/
      tabPanel.add(firstPage, firstPageTitle);
      tabPanel.add(secondPage,secondPageTitle);
      tabPanel.add(thirdPage, thirdPageTitle);

      /* add tab selection handler */
      tabPanel.addSelectionHandler(new SelectionHandler<Integer>() {
         @Override
         public void onSelection(SelectionEvent<Integer> event) {
            /* add a token to history containing pageIndex
             History class will change the URL of application
             by appending the token to it.
            */
            History.newItem("pageIndex" + event.getSelectedItem());
         }
      });

      /* add value change handler to History
       this method will be called, when browser's
       Back button or Forward button are clicked
       and URL of application changes.
       */
      History.addValueChangeHandler(new ValueChangeHandler<String>() {
         @Override
         public void onValueChange(ValueChangeEvent<String> event) {
            String historyToken = event.getValue();
            /* parse the history token */
            try {
               if (historyToken.substring(0, 9).equals("pageIndex")) {
                  String tabIndexToken = historyToken.substring(9, 10);
                  int tabIndex = Integer.parseInt(tabIndexToken);
                  /* select the specified tab panel */
                  tabPanel.selectTab(tabIndex);
               } else {
                  tabPanel.selectTab(0);
               }
            } catch (IndexOutOfBoundsException e) {
               tabPanel.selectTab(0);
            }
         }
      });

      /* select the first tab by default */
      tabPanel.selectTab(0);

      /* add controls to RootPanel */
      RootPanel.get().add(tabPanel);
   }
}
Yapılan tüm değişikliklere hazır olduğunuzda, uygulamayı GWT - Uygulama Oluştur bölümünde yaptığımız gibi geliştirme modunda derleyip çalıştıralım . Başvurunuzda her şey yolundaysa, bu aşağıdaki sonucu verecektir -
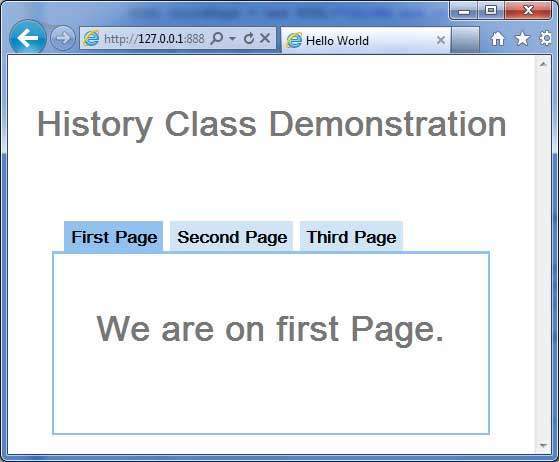
Şimdi farklı sayfalar seçmek için her sekmeye tıklayın.
Her sekme seçildiğinde, uygulama url'sinin değiştiğini ve #pageIndex URL'sine eklendiğini fark etmelisiniz.
Ayrıca tarayıcının geri ve ileri düğmelerinin artık etkinleştirildiğini de görebilirsiniz.
Tarayıcının geri ve ileri düğmesini kullanın ve farklı sekmelerin buna göre seçildiğini göreceksiniz.