Spring MVC - Esempio di gestione dei moduli
Il seguente esempio mostra come scrivere un semplice web based Hello Worldapplicazione utilizzando Spring MVC Framework. Per cominciare, disponiamo di un IDE Eclipse funzionante e seguiamo i passaggi successivi per sviluppare un'applicazione Web dinamica utilizzando Spring Web Framework.
| Passo | Descrizione |
|---|---|
| 1 | Crea un progetto con un nome HelloWeb sotto un pacchetto com.tutorialspoint come spiegato nel capitolo Spring MVC - Hello World. |
| 2 | Crea classi Java Student, StudentController nel pacchetto com.tutorialspoint. |
| 3 | Crea file di visualizzazione student.jsp, result.jsp nella sottocartella jsp. |
| 4 | Il passaggio finale è creare il contenuto dei file sorgente e di configurazione ed esportare l'applicazione come spiegato di seguito. |
Student.java
package com.tutorialspoint;

public class Student {
   private Integer age;
   private String name;
   private Integer id;

   public void setAge(Integer age) {
      this.age = age;
   }
   public Integer getAge() {
      return age;
   }

   public void setName(String name) {
      this.name = name;
   }
   public String getName() {
      return name;
   }

   public void setId(Integer id) {
      this.id = id;
   }
   public Integer getId() {
      return id;
   }
}
StudentController.java
package com.tutorialspoint;

import org.springframework.stereotype.Controller;
import org.springframework.web.bind.annotation.ModelAttribute;
import org.springframework.web.bind.annotation.RequestMapping;
import org.springframework.web.bind.annotation.RequestMethod;
import org.springframework.web.servlet.ModelAndView;
import org.springframework.ui.ModelMap;

@Controller
public class StudentController {

   @RequestMapping(value = "/student", method = RequestMethod.GET)
   public ModelAndView student() {
      return new ModelAndView("student", "command", new Student());
   }

   @RequestMapping(value = "/addStudent", method = RequestMethod.POST)
   public String addStudent(@ModelAttribute("SpringWeb")Student student,
   ModelMap model) {
      model.addAttribute("name", student.getName());
      model.addAttribute("age", student.getAge());
      model.addAttribute("id", student.getId());

      return "result";
   }
}
Ecco, il primo metodo di servizio student(), abbiamo passato uno Studentobject vuoto nell'oggetto ModelAndView con il nome "comando". Questo viene fatto perché il framework spring si aspetta un oggetto con nome "comando", se utilizziamo i tag <form: form> nel file JSP. Quindi, quando viene chiamato il metodo student (), restituisce la vista student.jsp.
Il secondo metodo di servizio addStudent()verrà chiamato contro un metodo POST sull'URL HelloWeb / addStudent. Preparerai il tuo oggetto modello in base alle informazioni inviate. Infine, verrà restituita una vista "risultato" dal metodo del servizio, che risulterà nel rendering di result.jsp.
student.jsp
<%@taglib uri="http://www.springframework.org/tags/form" prefix = "form"%>
<html>
   <head>
      <title>Spring MVC Form Handling</title>
   </head>

   <body>
      <h2>Student Information</h2>
      <form:form method = "POST" action = "/HelloWeb/addStudent">
         <table>
            <tr>
               <td><form:label path = "name">Name</form:label></td>
               <td><form:input path = "name" /></td>
            </tr>
            <tr>
               <td><form:label path = "age">Age</form:label></td>
               <td><form:input path = "age" /></td>
            </tr>
            <tr>
               <td><form:label path = "id">id</form:label></td>
               <td><form:input path = "id" /></td>
            </tr>
            <tr>
               <td colspan = "2">
                  <input type = "submit" value = "Submit"/>
               </td>
            </tr>
         </table>
      </form:form>
   </body>
</html>
result.jsp
<%@taglib uri = "http://www.springframework.org/tags/form" prefix = "form"%>
<html>
   <head>
      <title>Spring MVC Form Handling</title>
   </head>
   <body>

      <h2>Submitted Student Information</h2>
      <table>
         <tr>
            <td>Name</td>
            <td>${name}</td>
         </tr>
         <tr>
            <td>Age</td>
            <td>${age}</td>
         </tr>
         <tr>
            <td>ID</td>
            <td>${id}</td>
         </tr>
      </table>
   </body>
</html>
Una volta che abbiamo finito di creare file sorgente e di configurazione, esporta la tua applicazione. Fare clic con il pulsante destro del mouse sull'applicazione, utilizzare l'opzione Esporta → File WAR e salvare il fileSpringWeb.war file nella cartella webapps di Tomcat.
Ora, avvia il server Tomcat e assicurati di essere in grado di accedere ad altre pagine web dalla cartella webapps utilizzando un browser standard. Ora, prova un URL– http: // localhost: 8080 / SpringWeb / student e dovresti vedere la seguente schermata se tutto va bene con l'applicazione Web Spring.
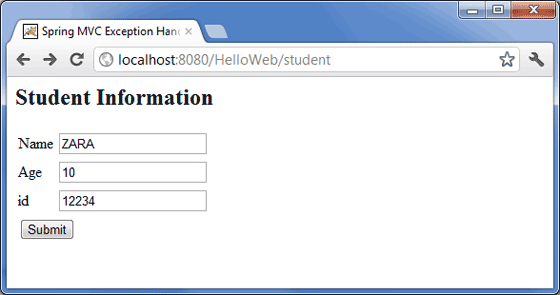
Dopo aver inviato le informazioni richieste, fare clic sul pulsante di invio per inviare il modulo. Dovresti vedere la seguente schermata, se tutto va bene con la tua applicazione Web Spring.
