Spring MVC - Esempio di Resolver vista risorsa interna
Il InternalResourceViewResolverviene utilizzato per risolvere l'URI fornito nell'URI effettivo. L'esempio seguente mostra come utilizzare InternalResourceViewResolver utilizzando Spring Web MVC Framework. InternalResourceViewResolver consente di mappare pagine Web con richieste.
package com.tutorialspoint;

import org.springframework.stereotype.Controller;
import org.springframework.web.bind.annotation.RequestMapping;
import org.springframework.web.bind.annotation.RequestMethod;
import org.springframework.ui.ModelMap;

@Controller
@RequestMapping("/hello")
public class HelloController{

   @RequestMapping(method = RequestMethod.GET)
   public String printHello(ModelMap model) {
      model.addAttribute("message", "Hello Spring MVC Framework!");

      return "hello";
   }
}
<bean class = "org.springframework.web.servlet.view.InternalResourceViewResolver">
<property name = "prefix" value = "/WEB-INF/jsp/"/>
<property name = "suffix" value = ".jsp"/>
</bean>Ad esempio, utilizzando la configurazione precedente, se URI
/ hello è richiesto, DispatcherServlet inoltrerà la richiesta al prefisso + viewname + suffix = /WEB-INF/jsp/hello.jsp.
Per cominciare, disponiamo di un IDE Eclipse funzionante e quindi consideriamo i seguenti passaggi per sviluppare un'applicazione Web basata su modulo dinamico utilizzando Spring Web Framework.
| Passo | Descrizione |
|---|---|
| 1 | Crea un progetto con un nome TestWeb sotto un pacchetto com.tutorialspoint come spiegato nel capitolo Spring MVC - Hello World Example. |
| 2 | Crea un HelloController delle classi Java nel pacchetto com.tutorialspoint. |
| 3 | Crea un file di visualizzazione hello.jsp nella sottocartella jsp. |
| 4 | Il passaggio finale è creare il contenuto dei file sorgente e di configurazione ed esportare l'applicazione come spiegato di seguito. |
HelloController.java
package com.tutorialspoint;

import org.springframework.stereotype.Controller;
import org.springframework.web.bind.annotation.RequestMapping;
import org.springframework.web.bind.annotation.RequestMethod;
import org.springframework.ui.ModelMap;

@Controller
@RequestMapping("/hello")
public class HelloController{

   @RequestMapping(method = RequestMethod.GET)
   public String printHello(ModelMap model) {
      model.addAttribute("message", "Hello Spring MVC Framework!");

      return "hello";
   }

}
TestWeb-servlet.xml
<beans xmlns = "http://www.springframework.org/schema/beans"
   xmlns:context = "http://www.springframework.org/schema/context"
   xmlns:xsi = "http://www.w3.org/2001/XMLSchema-instance"
   xsi:schemaLocation = "
   http://www.springframework.org/schema/beans
   http://www.springframework.org/schema/beans/spring-beans-3.0.xsd
   http://www.springframework.org/schema/context
   http://www.springframework.org/schema/context/spring-context-3.0.xsd">

   <context:component-scan base-package = "com.tutorialspoint" />

   <bean class = "org.springframework.web.servlet.view.InternalResourceViewResolver">
      <property name = "prefix" value = "/WEB-INF/jsp/" />
      <property name = "suffix" value = ".jsp" />
   </bean>

</beans>
hello.jsp
<%@ page contentType = "text/html; charset = UTF-8" %>
<html>
   <head>
      <title>Hello World</title>
   </head>
   <body>
      <h2>${message}</h2>
   </body>
</html>
Una volta terminata la creazione dei file sorgente e di configurazione, esporta la tua applicazione. Fai clic con il tasto destro sulla tua applicazione, usaExport → WAR File opzione e salva il file TestWeb.war file nella cartella webapps di Tomcat.
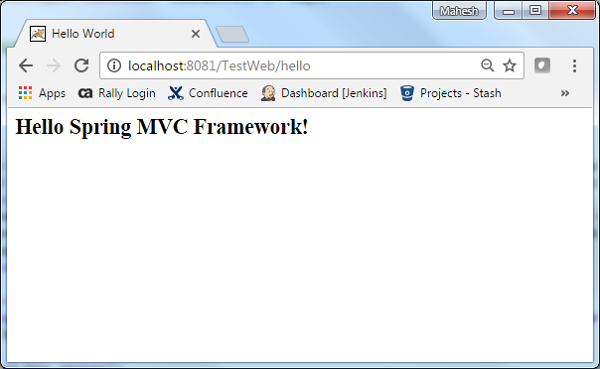
Ora avvia il tuo server Tomcat e assicurati di essere in grado di accedere ad altre pagine web dalla cartella webapps utilizzando un browser standard. Prova ad accedere all'URL -http://localhost:8080/TestWeb/hello e se tutto va bene con l'applicazione Web Spring, vedremo la schermata seguente.
