JOGL - การวาดด้วยเส้น GL
ในบทก่อนหน้านี้เราได้เรียนรู้วิธีวาดเส้นพื้นฐานโดยใช้ JOGL เราวาดเส้นโดยผ่านฟิลด์ที่กำหนดไว้ล่วงหน้าGl_linesเป็นglBegin ()วิธีการ
บทนี้ให้ตัวอย่างการวาดรูปร่างเช่นสามเหลี่ยมสี่เหลี่ยมขนมเปียกปูนและบ้านโดยใช้วิธี glBegin () และ GL_Lines
ให้เราผ่านโปรแกรมเพื่อวาดสามเหลี่ยมโดยใช้ GL_LINES -
import javax.media.opengl.GL2;
import javax.media.opengl.GLAutoDrawable;
import javax.media.opengl.GLCapabilities;
import javax.media.opengl.GLEventListener;
import javax.media.opengl.GLProfile;
import javax.media.opengl.awt.GLCanvas;

import javax.swing.JFrame;

public class Triangle implements GLEventListener {

   @Override
   public void display(GLAutoDrawable drawable) {
      final GL2 gl = drawable.getGL().getGL2();
      gl.glBegin (GL2.GL_LINES);

      //drawing the base
      gl.glBegin (GL2.GL_LINES);
      gl.glVertex3f(-0.50f, -0.50f, 0);
      gl.glVertex3f(0.50f, -0.50f, 0);
      gl.glEnd();

      //drawing the right edge
      gl.glBegin (GL2.GL_LINES);
      gl.glVertex3f(0f, 0.50f, 0);
      gl.glVertex3f(-0.50f, -0.50f, 0);
      gl.glEnd();

      //drawing the lft edge
      gl.glBegin (GL2.GL_LINES);
      gl.glVertex3f(0f, 0.50f, 0);
      gl.glVertex3f(0.50f, -0.50f, 0);
      gl.glEnd();
      gl.glFlush();
   }

   @Override
   public void dispose(GLAutoDrawable arg0) {
      //method body
   }

   @Override
   public void init(GLAutoDrawable arg0) {
      // method body
   }

   @Override
   public void reshape(GLAutoDrawable arg0, int arg1, int arg2, int arg3, int arg4) {
      // method body
   }

   public static void main(String[] args) {

      //getting the capabilities object of GL2 profile
      final GLProfile profile = GLProfile.get(GLProfile.GL2);
      GLCapabilities capabilities = new GLCapabilities(profile);

      // The canvas
      final GLCanvas glcanvas = new GLCanvas(capabilities);
      Triangle l = new Triangle();
      glcanvas.addGLEventListener(l);
      glcanvas.setSize(400, 400);

      //creating frame
      final JFrame frame = new JFrame ("Triangle");

      //adding canvas to frame
      frame.getContentPane().add(glcanvas);

      frame.setSize(frame.getContentPane().getPreferredSize());
      frame.setVisible(true);

   }//end of main

}//end of classimport javax.media.opengl.GL2;
หากคุณคอมไพล์และรันโปรแกรมข้างต้นผลลัพธ์ต่อไปนี้จะถูกสร้างขึ้น แสดงสามเหลี่ยมที่วาดโดยใช้ GL_LINES จากglBegin() วิธี.

ให้เราทำตามโปรแกรมเพื่อวาดรูปสี่เหลี่ยมขนมเปียกปูนโดยใช้ GL_LINES -
import javax.media.opengl.GL2;
import javax.media.opengl.GLAutoDrawable;
import javax.media.opengl.GLCapabilities;
import javax.media.opengl.GLEventListener;
import javax.media.opengl.GLProfile;
import javax.media.opengl.awt.GLCanvas;

import javax.swing.JFrame;

public class Rhombus implements GLEventListener {

   @Override
   public void display( GLAutoDrawable drawable ) {
      final GL2 gl = drawable.getGL().getGL2();

      //edge1
      gl.glBegin( GL2.GL_LINES );
      gl.glVertex3f( 0.0f,0.75f,0 );
      gl.glVertex3f( -0.75f,0f,0 );
      gl.glEnd();

      //edge2
      gl.glBegin( GL2.GL_LINES );
      gl.glVertex3f( -0.75f,0f,0 );
      gl.glVertex3f( 0f,-0.75f, 0 );
      gl.glEnd();

      //edge3
      gl.glBegin( GL2.GL_LINES );
      gl.glVertex3f( 0f,-0.75f, 0 );
      gl.glVertex3f( 0.75f,0f, 0 );
      gl.glEnd();

      //edge4
      gl.glBegin( GL2.GL_LINES );
      gl.glVertex3f( 0.75f,0f, 0 );
      gl.glVertex3f( 0.0f,0.75f,0 );
      gl.glEnd();
      gl.glFlush();
   }

   @Override
   public void dispose( GLAutoDrawable arg0 ) {
      //method body
   }

   @Override
   public void init(GLAutoDrawable arg0 ) {
      // method body
   }

   @Override
   public void reshape( GLAutoDrawable arg0, int arg1, int arg2, int arg3, int arg4 ) {
      // method body
   }

   public static void main( String[] args ) {

      //getting the capabilities object of GL2 profile
      final GLProfile profile = GLProfile.get( GLProfile.GL2 );
      GLCapabilities capabilities = new GLCapabilities(profile);

      // The canvas
      final GLCanvas glcanvas = new GLCanvas( capabilities );
      Rhombus rhombus = new Rhombus();
      glcanvas.addGLEventListener( rhombus );
      glcanvas.setSize( 400, 400 );

      //creating frame
      final JFrame frame = new JFrame ( "Rhombus" );

      //adding canvas to frame
      frame.getContentPane().add( glcanvas );
      frame.setSize(frame.getContentPane().getPreferredSize() );
      frame.setVisible( true );
   }

}
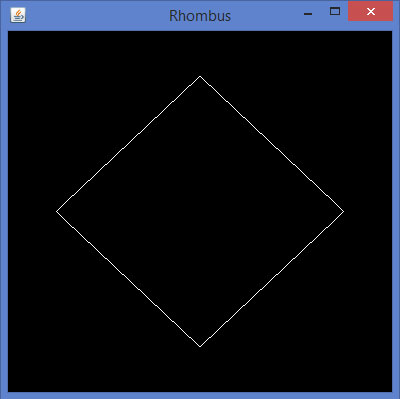
หากคุณคอมไพล์และรันโปรแกรมข้างต้นคุณจะได้ผลลัพธ์ดังต่อไปนี้ แสดงรูปสี่เหลี่ยมขนมเปียกปูนที่สร้างขึ้นโดยใช้ GL_LINES ของglBegin() วิธี.

ให้เราทำตามโปรแกรมวาดบ้านโดยใช้ GL_LINES -
import javax.media.opengl.GL2;
import javax.media.opengl.GLAutoDrawable;
import javax.media.opengl.GLCapabilities;
import javax.media.opengl.GLEventListener;
import javax.media.opengl.GLProfile;
import javax.media.opengl.awt.GLCanvas;

import javax.swing.JFrame;

public class House implements GLEventListener {

   @Override
   public void display( GLAutoDrawable drawable ) {
      final GL2 gl = drawable.getGL().getGL2();

      //drawing top
      gl.glBegin ( GL2.GL_LINES );
      gl.glVertex3f( -0.3f, 0.3f, 0 );
      gl.glVertex3f( 0.3f,0.3f, 0 );
      gl.glEnd();

      //drawing bottom
      gl.glBegin( GL2.GL_LINES );
      gl.glVertex3f( -0.3f,-0.3f, 0 );
      gl.glVertex3f( 0.3f,-0.3f, 0 );
      gl.glEnd();

      //drawing the right edge
      gl.glBegin( GL2.GL_LINES );
      gl.glVertex3f( -0.3f,0.3f, 0 );
      gl.glVertex3f( -0.3f,-0.3f, 0 );
      gl.glEnd();

      //drawing the left edge
      gl.glBegin( GL2.GL_LINES );
      gl.glVertex3f( 0.3f,0.3f,0 );
      gl.glVertex3f( 0.3f,-0.3f,0 );
      gl.glEnd();

      //building roof
      //building lft dia
      gl.glBegin( GL2.GL_LINES );
      gl.glVertex3f( 0f,0.6f, 0 );
      gl.glVertex3f( -0.3f,0.3f, 0 );
      gl.glEnd();

      //building rt dia
      gl.glBegin( GL2.GL_LINES );
      gl.glVertex3f( 0f,0.6f, 0 );
      gl.glVertex3f( 0.3f,0.3f, 0 );
      gl.glEnd();

      //building door
      //drawing top
      gl.glBegin ( GL2.GL_LINES );
      gl.glVertex3f( -0.05f, 0.05f, 0 );
      gl.glVertex3f( 0.05f, 0.05f, 0 );
      gl.glEnd();

      //drawing the left edge
      gl.glBegin ( GL2.GL_LINES );
      gl.glVertex3f( -0.05f, 0.05f, 0 );
      gl.glVertex3f( -0.05f, -0.3f, 0 );
      gl.glEnd();

      //drawing the right edge
      gl.glBegin ( GL2.GL_LINES );
      gl.glVertex3f( 0.05f, 0.05f, 0 );
      gl.glVertex3f( 0.05f, -0.3f, 0 );
      gl.glEnd();
   }

   @Override
   public void dispose( GLAutoDrawable arg0 ) {
      //method body
   }

   @Override
   public void init( GLAutoDrawable arg0 ) {
      // method body
   }

   @Override
   public void reshape( GLAutoDrawable arg0, int arg1, int arg2, int arg3, int arg4 ) {
      // method body
   }

   public static void main( String[] args ) {

      //getting the capabilities object of GL2 profile
      final GLProfile profile = GLProfile.get( GLProfile.GL2 );
      GLCapabilities capabilities = new GLCapabilities(profile);

      // The canvas
      final GLCanvas glcanvas = new GLCanvas( capabilities );
      House house = new House();
      glcanvas.addGLEventListener( house );
      glcanvas.setSize(400, 400);

      //creating frame
      final JFrame frame = new JFrame( "House" );

      //adding canvas to frame
      frame.getContentPane().add( glcanvas );
      frame.setSize(frame.getContentPane().getPreferredSize() );
      frame.setVisible( true );

   }//end of main

}//end of class
หากคุณคอมไพล์และรันโปรแกรมข้างต้นคุณจะได้ผลลัพธ์ดังต่อไปนี้ แสดงแผนผังบ้านที่สร้างขึ้นโดยใช้เมธอด GL_LINES ()
