Angular7-マテリアル
マテリアルは、プロジェクトに多くの組み込みモジュールを提供します。オートコンプリート、日付ピッカー、スライダー、メニュー、グリッド、ツールバーなどの機能は、Angular7のマテリアルで使用できます。
材料を使用するには、パッケージをインポートする必要があります。Angular 2にも上記のすべての機能がありますが、これらはの一部として利用できます。@angular/core module。Angular 4から、Materialsモジュールが別のモジュール@ angular / materialsで利用できるようになりました。これにより、ユーザーはプロジェクトに必要な資料のみをインポートできます。
マテリアルの使用を開始するには、次の2つのパッケージをインストールする必要があります。 materials and cdk。マテリアルコンポーネントは、高度な機能をアニメーションモジュールに依存しています。したがって、同じアニメーションパッケージが必要です。@angular/animations。パッケージは前の章ですでに更新されています。仮想およびドラッグドロップモジュールの前の章で、@ angular / cdkパッケージをすでにインストールしています。
以下は、プロジェクトにマテリアルを追加するコマンドです-
npm install --save @angular/material
package.jsonを見てみましょう。 @angular/material そして @angular/cdk インストールされています。
{
   "name": "angular7-app",
   "version": "0.0.0",
   "scripts": {
      "ng": "ng",
      "start": "ng serve",
      "build": "ng build",
      "test": "ng test",
      "lint": "ng lint",
      "e2e": "ng e2e"
   },
   "private": true,
   "dependencies": {
      "@angular/animations": "~7.2.0",
      "@angular/cdk": "^7.3.4",
      "@angular/common": "~7.2.0",
      "@angular/compiler": "~7.2.0",
      "@angular/core": "~7.2.0",
      "@angular/forms": "~7.2.0",
      "@angular/material": "^7.3.4",
      "@angular/platform-browser": "~7.2.0",
      "@angular/platform-browser-dynamic": "~7.2.0",
      "@angular/router": "~7.2.0",
      "core-js": "^2.5.4",
      "rxjs": "~6.3.3",
      "tslib": "^1.9.0",
      "zone.js": "~0.8.26"
   },
   "devDependencies": {
      "@angular-devkit/build-angular": "~0.13.0",
      "@angular/cli": "~7.3.2",
      "@angular/compiler-cli": "~7.2.0",
      "@angular/language-service": "~7.2.0",
      "@types/node": "~8.9.4",
      "@types/jasmine": "~2.8.8",
      "@types/jasminewd2": "~2.0.3",
      "codelyzer": "~4.5.0",
      "jasmine-core": "~2.99.1",
      "jasmine-spec-reporter": "~4.2.1",
      "karma": "~3.1.1",
      "karma-chrome-launcher": "~2.2.0",
      "karma-coverage-istanbul-reporter": "~2.0.1",
      "karma-jasmine": "~1.1.2",
      "karma-jasmine-html-reporter": "^0.2.2",
      "protractor": "~5.4.0",
      "ts-node": "~7.0.0",
      "tslint": "~5.11.0",
      "typescript": "~3.2.2"
   }
}
マテリアルを処理するためにインストールされるパッケージを強調表示しました。
ここで、親モジュールにモジュールをインポートします- app.module.ts 以下に示すように。
import { BrowserModule } from '@angular/platform-browser';
import { NgModule } from '@angular/core';
import { AppRoutingModule , RoutingComponent} from './app-routing.module';
import { AppComponent } from './app.component';
import { NewCmpComponent } from './new-cmp/new-cmp.component';
import { ChangeTextDirective } from './change-text.directive';
import { SqrtPipe } from './app.sqrt';
import { MyserviceService } from './myservice.service';
import { HttpClientModule } from '@angular/common/http';
import { ScrollDispatchModule } from '@angular/cdk/scrolling';
import { DragDropModule } from '@angular/cdk/drag-drop';
import { ReactiveFormsModule } from '@angular/forms';
import { BrowserAnimationsModule } from '@angular/platform-browser/animations';
import { MatButtonModule, MatMenuModule, MatSidenavModule } from '@angular/material';

@NgModule({
   declarations: [
      SqrtPipe,
      AppComponent,
      NewCmpComponent,
      ChangeTextDirective,
      RoutingComponent
   ],
   imports: [
      BrowserModule,
      AppRoutingModule,
      HttpClientModule,
      ScrollDispatchModule,
      DragDropModule,
      ReactiveFormsModule,
      BrowserAnimationsModule,
      MatButtonModule,
      MatMenuModule,
      MatSidenavModule
   ],
   providers: [MyserviceService],
   bootstrap: [AppComponent]
})
export class AppModule { }
上記のファイルでは、次のモジュールをからインポートしています。 @angular/materials。
import { MatButtonModule, MatMenuModule, MatSidenavModule } from '@angular/material';そして、以下に示すように、同じものがimports配列で使用されます-
imports: [
   BrowserModule,
   AppRoutingModule,
   HttpClientModule,
   ScrollDispatchModule,
   DragDropModule,
   ReactiveFormsModule,
   BrowserAnimationsModule,
   MatButtonModule,
   MatMenuModule,
   MatSidenavModule
],
app.component.tsは以下のとおりです-
import { Component } from '@angular/core';
@Component({
   selector: 'app-root',
   templateUrl: './app.component.html',
   styleUrls: ['./app.component.css']
})
export class AppComponent {
   constructor() {}
}
にmaterial-cssサポートを追加しましょう styles.css。
@import "~@angular/material/prebuilt-themes/indigo-pink.css";app.component.html内にマテリアルを追加しましょう
メニュー
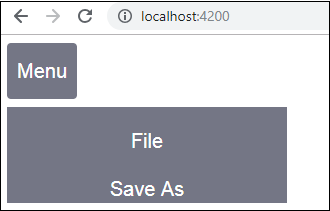
メニューを追加するには、 <mat-menu></mat-menu>使用されている。ザ・file そして Save Asマットメニューの下のボタンにアイテムが追加されます。追加されたメインボタンがありますMenu。同じの参照が与えられます<mat-menu> を使用して [matMenuTriggerFor]="menu" とメニューを使用して # in<mat-menu>。
app.component.html
<button mat-button [matMenuTriggerFor] = "menu">Menu</button>
<mat-menu #menu = "matMenu">
   <button mat-menu-item> File </button>
   <button mat-menu-item> Save As </button>
</mat-menu>
以下の画像がブラウザに表示されます-

メニューをクリックすると、その中のアイテムが表示されます-
SideNav
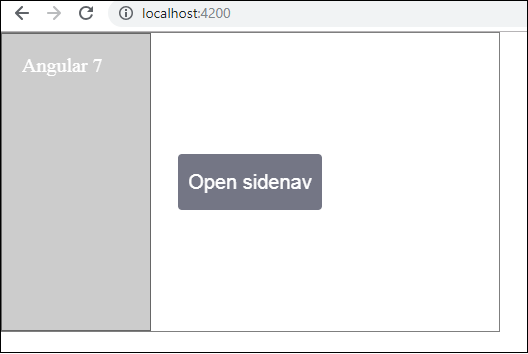
sidenavを追加するには、 <mat-sidenav-container></mat-sidenav-container>。 <mat-sidenav></mat-sidenav>子としてコンテナに追加されます。追加された別のdivがあり、これを使用してsidenavをトリガーします(click)="sidenav.open()"。
app.component.html
<mat-sidenav-container class="example-container" fullscreen>
   <mat-sidenav #sidenav class = "example-sidenav">
      Angular 7
   </mat-sidenav>
   <div class = "example-sidenav-content">
      <button type = "button" mat-button (click) = "sidenav.open()">
         Open sidenav
      </button>
   </div>
</mat-sidenav-container>
app.component.css
.example-container {
   width: 500px;
   height: 300px;
   border: 1px solid rgba(0, 0, 0, 0.5);
}
.example-sidenav {
   padding: 20px;
   width: 150px;
   font-size: 20px;
   border: 1px solid rgba(0, 0, 0, 0.5);
   background-color: #ccc;
   color:white;
}
以下は、ブラウザでのメニューとサイドナビゲーションの表示です-
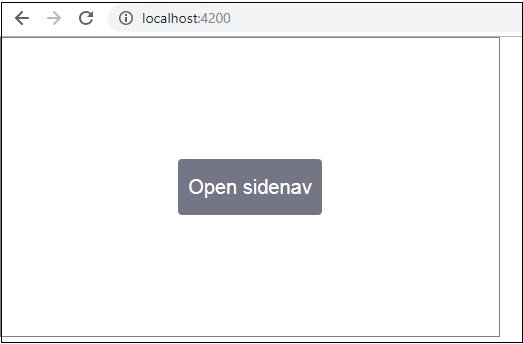
Open Sidenav −をクリックすると、左側に次のパネルが開きます。
デートピッカー
マテリアルを使用して日付ピッカーを追加しましょう。日付ピッカーを追加するには、日付ピッカーを表示するために必要なモジュールをインポートする必要があります。
に app.module.ts、datepicker用に以下に示すように次のモジュールをインポートしました-
import { BrowserModule } from '@angular/platform-browser';
import { NgModule } from '@angular/core';
import { AppRoutingModule , RoutingComponent} from './app-routing.module';
import { AppComponent } from './app.component';
import { NewCmpComponent } from './new-cmp/new-cmp.component';
import { ChangeTextDirective } from './change-text.directive';
import { SqrtPipe } from './app.sqrt';
import { MyserviceService } from './myservice.service';
import { HttpClientModule } from '@angular/common/http';
import { ScrollDispatchModule } from '@angular/cdk/scrolling';
import { DragDropModule } from '@angular/cdk/drag-drop';
import { ReactiveFormsModule } from '@angular/forms';
import { BrowserAnimationsModule } from '@angular/platform-browser/animations';
import { MatDatepickerModule, MatInputModule, MatNativeDateModule } from '@angular/material';

@NgModule({
   declarations: [
      SqrtPipe,
      AppComponent,
      NewCmpComponent,
      ChangeTextDirective,
      RoutingComponent
   ],
   imports: [
      BrowserModule,
      AppRoutingModule,
      HttpClientModule,
      ScrollDispatchModule,
      DragDropModule,
      ReactiveFormsModule,
      BrowserAnimationsModule,
      MatDatepickerModule,
      MatInputModule,
      MatNativeDateModule
   ],
   providers: [MyserviceService],
   bootstrap: [AppComponent]
})
export class AppModule { }
ここでは、MatDatepickerModule、MatInputModule、MatNativeDateModuleなどのモジュールをインポートしました。
これで、app.component.tsは次のようになります-
import { Component } from '@angular/core';
@Component({
   selector: 'app-root',
   templateUrl: './app.component.html', s
   tyleUrls: ['./app.component.css']
})
export class AppComponent {
   constructor() {}
}
ザ・ app.component.html 以下のようになります−
<mat-form-field>
   <input matInput [matDatepicker] = "picker" placeholder = "Choose a date">
   <mat-datepicker-toggle matSuffix [for] = "picker"></mat-datepicker-toggle>
   <mat-datepicker #picker></mat-datepicker>
</mat-form-field>
style.cssに追加されたグローバルcss−
/* You can add global styles to this file, and also
import other style files */
@import '~@angular/material/prebuilt-themes/deeppurple-amber.css';
body {
   font-family: Roboto, Arial, sans-serif;
   margin: 10;
}
.basic-container {
   padding: 30px;
}
.version-info {
   font-size: 8pt;
   float: right;
}
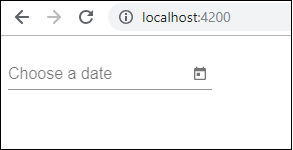
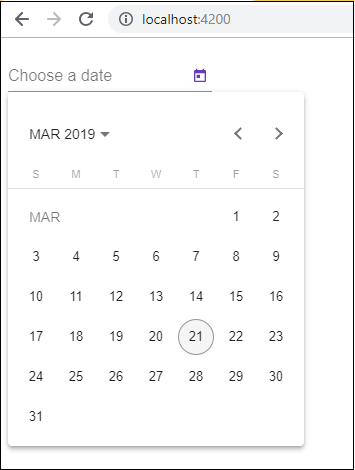
日付ピッカーは、以下に示すようにブラウザに表示されます-
