BabylonJS - Animacje
Animacja sprawia, że scena jest bardziej interaktywna, a także robi wrażenie, nadając jej realistyczny wygląd. Przyjrzyjmy się teraz szczegółowo animacji. Zastosujemy animację do kształtów, aby przenieść je z jednej pozycji do drugiej. Aby użyć animacji, musisz w animacji utworzyć obiekt z wymaganymi parametrami.
Zobaczmy teraz składnię tego samego -
var animationBox = new BABYLON.Animation(
   "myAnimation",
   "scaling.x",
   30,
   BABYLON.Animation.ANIMATIONTYPE_FLOAT,
   BABYLON.Animation.ANIMATIONLOOPMODE_CYCLE
);
Parametry
Rozważ następujące parametry związane z animacjami z BabylonJS -
Nazwa animacji.
Właściwość kształtu - na przykład skalowanie, zmiana pozycji, itp. Skalowanie jest pokazane w składni; tutaj przeskaluje prostokąt wzdłuż osi X.
Żądane klatki na sekundę: najwyższy możliwy klatek na sekundę w tej animacji.
Tutaj decydujesz i wpisujesz, jaki rodzaj wartości będzie modyfikowany: czy jest to liczba zmiennoprzecinkowa (np. Tłumaczenie), wektor (np. Kierunek) czy kwaternion.
Dokładne wartości to -
BABYLON.Animation.ANIMATIONTYPE_FLOAT
BABYLON.Animation.ANIMATIONTYPE_VECTOR2
BABYLON.Animation.ANIMATIONTYPE_VECTOR3
BABYLON.Animation.ANIMATIONTYPE_QUATERNION
BABYLON.Animation.ANIMATIONTYPE_COLOR3
Zachowanie dla animacji - zatrzymanie lub ponowne rozpoczęcie animacji.
Użyj poprzednich wartości i zwiększ je -
BABYLON.Animation.ANIMATIONLOOPMODE_RELATIVE
Uruchom ponownie od wartości początkowej -
BABYLON.Animation.ANIMATIONLOOPMODE_CYCLE
Zachowaj ich ostateczną wartość
BABYLON.Animation.ANIMATIONLOOPMODE_CONSTANT
Utwórzmy teraz obiekt animacji -
var animationBox = new BABYLON.Animation(
   "myAnimation",
   "scaling.x",
   30,
   BABYLON.Animation.ANIMATIONTYPE_FLOAT,
   BABYLON.Animation.ANIMATIONLOOPMODE_CYCLE
);
Demo dla animacji
<!doctype html>
<html>
   <head>
      <meta charset = "utf-8">
      <title>BabylonJs - Basic Element-Creating Scene</title>
      <script src = "babylon.js"></script>
      <style>
         canvas {width: 100%; height: 100%;}
      </style>
   </head>

   <body>
      <canvas id = "renderCanvas"></canvas>
      <script type = "text/javascript">
         var canvas = document.getElementById("renderCanvas");
         var engine = new BABYLON.Engine(canvas, true);

         var createScene  = function() {
            var scene = new BABYLON.Scene(engine);
            scene.clearColor = new BABYLON.Color3(0, 1, 0);

            var camera = new BABYLON.ArcRotateCamera("Camera", 1, 0.8, 10, new BABYLON.Vector3(0, 0, 0), scene);
            camera.attachControl(canvas, true);

            var light = new BABYLON.HemisphericLight("light1", new BABYLON.Vector3(0, 1, 0), scene);
            light.intensity = 0.7;

            var pl = new BABYLON.PointLight("pl", BABYLON.Vector3.Zero(), scene);
            pl.diffuse = new BABYLON.Color3(1, 1, 1);
            pl.specular = new BABYLON.Color3(1, 1, 1);
            pl.intensity = 0.8;

            var box = BABYLON.Mesh.CreateBox("box", '3', scene);
            box.position = new BABYLON.Vector3(-10,0,0);

            var box1 = BABYLON.Mesh.CreateBox("box1", '3', scene);
            box1.position = new BABYLON.Vector3(0,0,0);

            var animationBox = new BABYLON.Animation("myAnimation", "scaling.x", 30, BABYLON.Animation.ANIMATIONTYPE_FLOAT, BABYLON.Animation.ANIMATIONLOOPMODE_CYCLE);

            var animationBox1 = new BABYLON.Animation("myAnimation1", "scaling.z", 10, BABYLON.Animation.ANIMATIONTYPE_FLOAT, BABYLON.Animation.ANIMATIONLOOPMODE_CYCLE);

            // An array with all animation keys
            var keys = [];

            //At the animation key 0, the value of scaling is "1"
            keys.push({
               frame: 0,
               value: 1
            });

            //At the animation key 20, the value of scaling is "0.2"
            keys.push({
               frame: 20,
               value: 0.2
            });

            keys.push({
               frame: 60,
               value: 0.4
            });

            //At the animation key 100, the value of scaling is "1"
            keys.push({
               frame: 100,
               value: 1
            });

            animationBox.setKeys(keys);
            box.animations = [];
            box.animations.push(animationBox);
            scene.beginAnimation(box, 0, 100, true);

            // An array with all animation keys
            var keys = [];

            //At the animation key 0, the value of scaling is "1"
            keys.push({
               frame: 0,
               value: 1
            });

            //At the animation key 20, the value of scaling is "0.2"
            keys.push({
               frame: 60,
               value: 0.2
            });

            //At the animation key 100, the value of scaling is "1"
            keys.push({
               frame: 100,
               value: 1
            });
            animationBox1.setKeys(keys);
            box1.animations = [];
            box1.animations.push(animationBox1);
            scene.beginAnimation(box1, 0, 100, true);
            return scene;
         };
         var scene = createScene();
         engine.runRenderLoop(function() {
            scene.render();
         });
      </script>
   </body>
</html>
Wynik
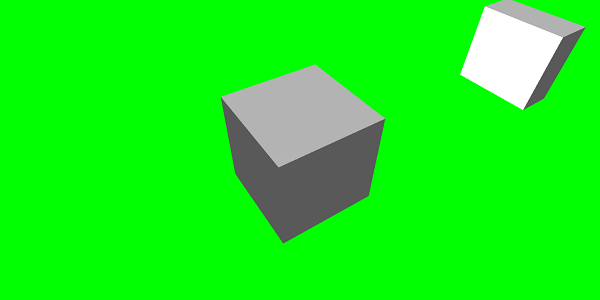
// An array with all animation keys
var keys = [];

//At the animation key 0, the value of scaling is "1"
keys.push({
   frame: 0,
   value: 1
});

//At the animation key 20, the value of scaling is "0.2"
keys.push({
   frame: 20,
   value: 0.2
});

//At the animation key 100, the value of scaling is "1"
keys.push({
   frame: 100,
   value: 1
});

animationBox.setKeys(keys);

box.animations = [];

box.animations.push(animationBox);

scene.beginAnimation(box, 0, 100, true); //defines the start and the end on the target shape box.
Poniżej znajdują się inne funkcje dostępne w obiekcie animacji -
- pause()
- restart()
- stop()
- reset()
Możemy przechowywać beginAnimation odniesienia w zmiennej i użyj odniesienia, aby zatrzymać, wstrzymać lub zresetować animację.
var newAnimation = scene.beginAnimation(box1, 0, 100, true);Na przykład,
newAnimation.pause();Na obiekcie animacji dostępne są funkcje służące do sterowania klatkami kluczowymi.
BABYLON.Animation.prototype.floatInterpolateFunction = function (startValue, endValue, gradient) {
   return startValue + (endValue - startValue) * gradient;
};

BABYLON.Animation.prototype.quaternionInterpolateFunction = function (startValue, endValue, gradient) {
   return BABYLON.Quaternion.Slerp(startValue, endValue, gradient);
};

BABYLON.Animation.prototype.vector3InterpolateFunction = function (startValue, endValue, gradient) {
   return BABYLON.Vector3.Lerp(startValue, endValue, gradient);
};
Oto lista funkcji, które możesz zmienić -
- floatInterpolateFunction
- quaternionInterpolateFunction
- quaternionInterpolateFunctionWithTangents
- vector3InterpolateFunction
- vector3InterpolateFunctionWithTangents
- vector2InterpolateFunction
- vector2InterpolateFunctionWithTangents
- sizeInterpolateFunction
- color3InterpolateFunction
- matrixInterpolateFunction
Aby stworzyć szybką animację, dostępna jest funkcja, której można użyć bezpośrednio.
Na przykład,
Animation.CreateAndStartAnimation = function(name, mesh, tartgetProperty, framePerSecond, totalFrame, from, to, loopMode);Tutaj możesz użyć tylko 2 klatek kluczowych - start i end.
Próbny
<!doctype html>
<html>
   <head>
      <meta charset = "utf-8">
      <title>BabylonJs - Basic Element-Creating Scene</title>
      <script src = "babylon.js"></script>
      <style>
         canvas {width: 100%; height: 100%;}
      </style>
   </head>

   <body>
      <canvas id = "renderCanvas"></canvas>
      <script type = "text/javascript">
         var canvas = document.getElementById("renderCanvas");
         var engine = new BABYLON.Engine(canvas, true);

         var createScene  = function() {
            var scene = new BABYLON.Scene(engine);
            scene.clearColor = new BABYLON.Color3(0, 1, 0);

            var camera = new BABYLON.ArcRotateCamera("Camera", 1, 0.8, 10, new BABYLON.Vector3(0, 0, 0), scene);
            camera.attachControl(canvas, true);

            var light = new BABYLON.HemisphericLight("light1", new BABYLON.Vector3(0, 1, 0), scene);
            light.intensity = 0.7;

            var pl = new BABYLON.PointLight("pl", BABYLON.Vector3.Zero(), scene);
            pl.diffuse = new BABYLON.Color3(1, 1, 1);
            pl.specular = new BABYLON.Color3(1, 1, 1);
            pl.intensity = 0.8;

            var box = BABYLON.Mesh.CreateBox("box", '3', scene);
            box.position = new BABYLON.Vector3(0,0,0);
            BABYLON.Animation.CreateAndStartAnimation('boxscale', box, 'scaling.x', 30, 120, 1.0, 1.5);
            return scene;
         };
         var scene = createScene();
         engine.runRenderLoop(function() {
            scene.render();
         });
      </script>
   </body>
</html>
Wynik
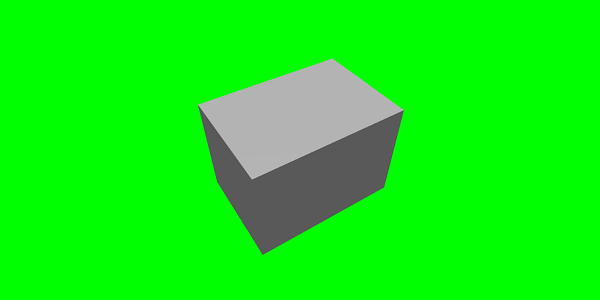
Mieszanie animacji
Możesz osiągnąć mieszanie animacji za pomocą enableBlending = true;
Ta mieszana animacja zmieni się z bieżącego stanu obiektu.
Funkcje ułatwiające
Aby animacja była bardziej imponująca, istnieje kilka funkcji wygładzania, których używaliśmy już wcześniej w css.
Poniżej znajduje się lista funkcji wygładzania -
BABYLON.CircleEase ()
BABYLON.BackEase (amplituda)
BABYLON.BounceEase (bounces, bounciness)
BABYLON.CubicEase ()
BABYLON.ElasticEase (drgania, sprężystość)
BABYLON.ExponentialEase (wykładnik)
BABYLON.PowerEase (moc)
BABYLON.QuadraticEase ()
BABYLON.QuarticEase ()
BABYLON.QuinticEase ()
BABYLON.SineEase ()
Próbny
<!doctype html>
<html>
   <head>
      <meta charset = "utf-8">
      <title>BabylonJs - Basic Element-Creating Scene</title>
      <script src = "babylon.js"></script>
      <style>
         canvas {width: 100%; height: 100%;}
      </style>
   </head>

   <body>
      <canvas id = "renderCanvas"></canvas>
      <script type = "text/javascript">
         var canvas = document.getElementById("renderCanvas");
         var engine = new BABYLON.Engine(canvas, true);
         var createScene  = function() {
            var scene = new BABYLON.Scene(engine);
            scene.clearColor = new BABYLON.Color3(0, 1, 0);

            var camera = new BABYLON.ArcRotateCamera("Camera", 1, 0.8, 10, new BABYLON.Vector3(0, 0, 0), scene);
            camera.attachControl(canvas, true);

            var light = new BABYLON.HemisphericLight("light1", new BABYLON.Vector3(0, 1, 0), scene);
            light.intensity = 0.7;

            var pl = new BABYLON.PointLight("pl", BABYLON.Vector3.Zero(), scene);
            pl.diffuse = new BABYLON.Color3(1, 1, 1);
            pl.specular = new BABYLON.Color3(1, 1, 1);
            pl.intensity = 0.8;

            var box1 = BABYLON.Mesh.CreateTorus("torus", 5, 1, 10, scene, false);
            box1.position = new BABYLON.Vector3(0,0,0);

            var animationBox1 = new BABYLON.Animation("myAnimation1", "scaling.z", 10, BABYLON.Animation.ANIMATIONTYPE_FLOAT, BABYLON.Animation.ANIMATIONLOOPMODE_CYCLE);

            // An array with all animation keys
            var keys = [];

            //At the animation key 0, the value of scaling is "1"
            keys.push({
               frame: 0,
               value: 1
            });

            //At the animation key 20, the value of scaling is "0.2"
            keys.push({
               frame: 60,
               value: 0.2
            });

            //At the animation key 100, the value of scaling is "1"
            keys.push({
               frame: 100,
               value: 1
            });

            animationBox1.setKeys(keys);
            box1.animations = [];
            // box1.animations.push(animationBox1);

            var easingFunction = new BABYLON.QuarticEase();
            easingFunction.setEasingMode(BABYLON.EasingFunction.EASINGMODE_EASEINOUT);

            animationBox1.setEasingFunction(easingFunction);
            box1.animations.push(animationBox1);
            scene.beginAnimation(box1, 0, 100, true);
            return scene;
         };
         var scene = createScene();
         engine.runRenderLoop(function() {
            scene.render();
         });
      </script>
   </body>
</html>
Wynik
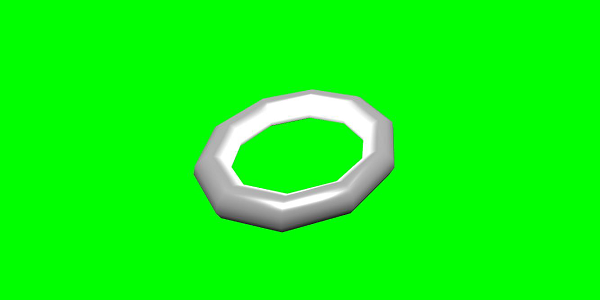
Wydarzenie animacyjne
Możesz przeprowadzić wszystko, co niezbędne na imprezie animacyjnej. Jeśli chcesz coś zmienić po zmianie klatki lub po zakończeniu animacji, możesz to osiągnąć, dodając zdarzenia do animacji.
var event1 = new BABYLON.AnimationEvent(50, function() { console.log("Yeah!"); }, true);
// You will get hte console.log when the frame is changed to 50 using animation.

animation.addEvent(event1); //attaching event to the animation.
BabylonJS - Sprites
Do czego odwołują się duszki w grafice komputerowej? Jest to w zasadzie dwuwymiarowa mapa bitowa, która jest zintegrowana z większą sceną. Gdy wiele mniejszych obrazów jest łączonych w jedną bitmapę w celu zaoszczędzenia pamięci, wynikowy obraz nazywany jest arkuszem sprite. Zacznijmy od duszków i tego, jak ich używać.
Pierwszym krokiem do rozpoczęcia pracy z duszkami jest stworzenie menedżera duszków.
var spriteManagerTrees = new BABYLON.SpriteManager("treesManagr", "Assets/Palm-arecaceae.png", 2000, 800, scene);Rozważ następujące parametry, aby utworzyć menedżera duszków -
Name - Nazwisko tego menedżera.
URL - URL obrazu, który ma zostać użyty.
Capacity of manager - Maksymalna liczba instancji w tym menedżerze.Na przykład powyższa instancja utworzy 2000 drzew.
Cell size - Rozmiar obrazu.
Scene - Scena, do której zostanie dodany menedżer.
var spriteManagerPlayer = new BABYLON.SpriteManager("playerManagr","Assets/Player.png", 2, 64, scene);Przyjrzyj się powyższemu obiektowi. Daliśmy obrazek gracza i teraz tworzymy jego 2 instancje. Rozmiar obrazka to 64. Każdy obrazek duszka musi być zawarty w kwadracie o rozmiarze 64 piksele, ni mniej, ni więcej.
Stwórzmy teraz instancję tego samego powiązanego z menadżerem duszków.
var player = new BABYLON.Sprite("player", spriteManagerPlayer);Możesz bawić się tym obiektem gracza, tak jak innymi kształtami lub siatkami. Możesz przypisać pozycję, rozmiar, kąt itp.
player.size = 0.3;
player.angle = Math.PI/4;
player.invertU = -1;
player.width = 0.3;
player.height = 0.4;
Próbny
<!doctype html>
<html>
   <head>
      <meta charset = "utf-8">
      <title>BabylonJs - Basic Element-Creating Scene</title>
      <script src = "babylon.js"></script>
      <style>
         canvas {width: 100%; height: 100%;}
      </style>
   </head>

   <body>
      <canvas id = "renderCanvas"></canvas>
      <script type = "text/javascript">
         var canvas = document.getElementById("renderCanvas");
         var engine = new BABYLON.Engine(canvas, true);
         var createScene  = function() {
            var scene = new BABYLON.Scene(engine);
            //scene.clearColor = new BABYLON.Color3(0, 1, 0);
            // Create camera and light
            var light = new BABYLON.PointLight("Point", new BABYLON.Vector3(5, 10, 5), scene);

            var camera = new BABYLON.ArcRotateCamera("Camera", 1, 0.8, 8, new BABYLON.Vector3(0, 0, 0), scene);
            camera.attachControl(canvas, true);

            var spriteManagerTrees = new BABYLON.SpriteManager("trees", "images/tree.png", 1000, 400, scene);

            for (var i = 0; i < 1000; i++) {
               var tree = new BABYLON.Sprite("tree", spriteManagerTrees);
               tree.position.x = Math.random() * 100 - 50;
               tree.position.z = Math.random() * 100 - 50;
               tree.isPickable = true;

               //Some "dead" trees
               if (Math.round(Math.random() * 5) === 0) {
                  tree.angle = Math.PI * 90 / 180;
                  tree.position.y = -0.3;
               }
            }

            var spriteManagerTrees1 = new BABYLON.SpriteManager("trees1", "images/tree1.png", 1000,400, scene);

            for (var i = 0; i < 1000; i++) {
               var tree1 = new BABYLON.Sprite("tree1", spriteManagerTrees1);
               if (i %2 == 0) {
               tree1.position.x = Math.random() * 100 - 50;
               } else {
                  tree1.position.z = Math.random() * 100 - 50;
               }
               tree1.isPickable = true;
            }

            spriteManagerTrees.isPickable = true;
            spriteManagerTrees1.isPickable = true;

            var spriteManagerPlayer = new BABYLON.SpriteManager("playerManager", "images/bird.png", 2, 200, scene);

            var player = new BABYLON.Sprite("player", spriteManagerPlayer);
            player.position.x = 2;
            player.position.y = 2;
            player.position.z = 0;


            var spriteManagerPlayer1 = new BABYLON.SpriteManager("playerManager1", "images/bird.png", 2, 200, scene);

            var player1 = new BABYLON.Sprite("player", spriteManagerPlayer1);
            player1.position.x = 1;
            player1.position.y = 2;
            player1.position.z = 0;

            var spriteManagerPlayer2 = new BABYLON.SpriteManager("playerManager2", "images/bird.png", 2, 200, scene);

            var player2 = new BABYLON.Sprite("player", spriteManagerPlayer2);
            player2.position.x = 0;
            player2.position.y = 1;
            player2.position.z = 0;

            scene.onPointerDown = function (evt) {
               var pickResult = scene.pickSprite(this.pointerX, this.pointerY);
               if (pickResult.hit) {
                  pickResult.pickedSprite.angle += 1;
               }
            };
            return scene;
         };
         var scene = createScene();
         engine.runRenderLoop(function() {
            scene.render();
         });
      </script>
   </body>
</html>
Wynik
W tym demo użyliśmy obrazu o nazwie tree.png, tree1.png, aby pokazać drzewa, bird.png, aby pokazać ptaka na scenie. Obrazy te są przechowywane lokalnie w folderach images / folder i są również wklejane poniżej w celach informacyjnych. Możesz pobrać dowolny wybrany obraz i użyć go w linku demonstracyjnym.
Obrazy użyte w drzewie są pokazane poniżej.
images/tree.png

images/tree1.png

images/bird.png

Zobaczmy teraz jeszcze jedno demo ze sprite-balonami.
Demo z balonami-duszkami
<!doctype html>
<html>
   <head>
      <meta charset = "utf-8">
      <title>BabylonJs - Basic Element-Creating Scene</title>
      <script src = "babylon.js"></script>
      <style>
         canvas {width: 100%; height:100%;}
      </style>
   </head>

   <body>
      <canvas id = "renderCanvas"></canvas>
      <script type = "text/javascript">
         var canvas = document.getElementById("renderCanvas");
         var engine = new BABYLON.Engine(canvas, true);

         var createScene  = function() {
            var scene = new BABYLON.Scene(engine);

            var light = new BABYLON.PointLight("Point", new BABYLON.Vector3(5, 10, 5), scene);

            var camera = new BABYLON.ArcRotateCamera("Camera", -3.4, 1.0, 82, new BABYLON.Vector3(0, -15, 0), scene);
            camera.setPosition(new BABYLON.Vector3(30, 0,100));
            camera.attachControl(canvas, true);

            var spriteManagerTrees = new BABYLON.SpriteManager("trees", "images/balloon.png", 50, 450, scene);

            var treearray = [];
            for (var i = 0; i < 50; i++) {
               var tree = new BABYLON.Sprite("tree", spriteManagerTrees);
               tree.position.x = Math.random() * 100 - 10;
               tree.position.z = Math.random() * 100 - 10;
               tree.position.y = -35;
               tree.isPickable = true;
               treearray.push(tree);
            }

            spriteManagerTrees.isPickable = true;
            scene.onPointerDown = function (evt) {
               var pickResult = scene.pickSprite(this.pointerX, this.pointerY);
               if (pickResult.hit) {
                  pickResult.pickedSprite.position.y = -3000;
               }
            };

            k = -35;
            var animate = function() {
               if (k > 3) return;
               k += 0.05;
               for (var i = 0; i < treearray.length; i++) {
                  treearray[i].position.y = k;
               }
            };
            scene.registerBeforeRender(animate);
            return scene;
         };
         var scene = createScene();
         engine.runRenderLoop(function() {
            scene.render();
         });
      </script>
   </body>
</html>
Wynik
W tym demo użyliśmy obrazu o nazwie ballon.png. Obrazy są przechowywane lokalnie w folderach images / folder i są również wklejane poniżej w celach informacyjnych. Możesz pobrać dowolny wybrany obraz i użyć go w linku demonstracyjnym.
images/balloon.png
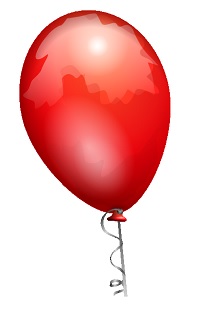
Balony uniosą się na niebie, a gdy się zatrzymają, możesz na nie kliknąć, a znikną. Odbywa się to za pomocą funkcji pickSprite, która podaje szczegóły po kliknięciu utworzonego duszka.
Funkcja onPointerDown jest wywoływana w momencie wykonania akcji myszy i zmiany pozycji duszka.
var animate = function() {
   if (k > 3) return;
   k += 0.05;
   for (var i = 0; i < treearray.length; i++) {
      treearray[i].position.y = k;
   }
};
scene.registerBeforeRender(animate);
W registerBeforeRender wywoływana jest funkcja animate, która zajmuje się przenoszeniem balonów z początkowej wartości -35 do +3. Porusza się powoli, zwiększając ją o 0,05.
BabylonJS - Cząsteczki
System cząstek to technika w grafice komputerowej, która wykorzystuje dużą liczbę bardzo małych duszków, modeli 3D lub innych obiektów graficznych do symulacji pewnych rodzajów „rozmytych” zjawisk, które w innym przypadku są bardzo trudne do odtworzenia przy użyciu konwencjonalnych technik renderowania.
Aby stworzyć system cząstek, musisz wywołać klasę w następujący sposób -
var particleSystem = new BABYLON.ParticleSystem("particles", 2000, scene);//2000 refers to the total number of particles to be produced.Należy wziąć pod uwagę następujące właściwości układu cząstek -
particleSystem.particleTexture = new BABYLON.Texture("Flare.png", scene);
particleSystem.textureMask = new BABYLON.Color4(0.1, 0.8, 0.8, 1.0);
particleSystem.emitter = fountain
particleSystem.color1 = new BABYLON.Color4(0.7, 0.8, 1.0, 1.0);
particleSystem.color2 = new BABYLON.Color4(0.2, 0.5, 1.0, 1.0);
particleSystem.colorDead = new BABYLON.Color4(0, 0, 0.2, 0.0);
Właściwość emiter przyjmuje siatkę, z której cząstka ma zostać wyemitowana. Plikcolor1 i color2 to kolory cząstek.
ColorDead to kolor nałożony na cząstkę tuż przed zniknięciem jej ze sceny, stąd nazywana colorDead.
particleSystem.minSize = 0.1;
particleSystem.maxSize = 0.5;
particleSystem.minLifeTime = 0.3;
particleSystem.maxLifeTime = 1.5;
MinSize i maxSize to rozmiar nadawany cząstkom. MinlifeTime i maxLifeTime to czas życia nadawany cząstkom.
particleSystem.emitRate = 1500;EmitRate to szybkość, z jaką cząsteczki będą emitowane.
W pokazie pokazanym poniżej użyliśmy torusa. Użyliśmy układu cząstek i jego właściwości, aby uzyskać wszystkie cząstki wokół torusa.
Demo 1
<!doctype html>
<html>
   <head>
      <meta charset = "utf-8">
      <title>BabylonJs - Basic Element-Creating Scene</title>
      <script src = "babylon.js"></script>
      <style>
         canvas {width: 100%; height: 100%;}
      </style>
   </head>

   <body>
      <canvas id = "renderCanvas"></canvas>
      <script type = "text/javascript">
         var canvas = document.getElementById("renderCanvas");
         var engine = new BABYLON.Engine(canvas, true);
         var createScene  = function() {
            var scene = new BABYLON.Scene(engine);
            // Setup environment

            var light0 = new BABYLON.PointLight("Omni", new BABYLON.Vector3(0, 2, 8), scene);

            var camera = new BABYLON.ArcRotateCamera("ArcRotateCamera", 1, 0.8, 20, new BABYLON.Vector3(0, 0, 0), scene);
            camera.attachControl(canvas, true);

            var fountain = BABYLON.Mesh.CreateTorus("torus", 2, 1, 8, scene, false);

            var particleSystem = new BABYLON.ParticleSystem("particles", 2000, scene);
            particleSystem.particleTexture = new BABYLON.Texture("images/dot.jpg", scene);

            particleSystem.textureMask = new BABYLON.Color4(0.1, 0.8, 0.8, 1.0);
            particleSystem.emitter = fountain;


            particleSystem.minEmitBox = new BABYLON.Vector3(-1, 0, 0); // Starting all from
            particleSystem.maxEmitBox = new BABYLON.Vector3(1, 0, 0); // To...

            particleSystem.color1 = new BABYLON.Color4(0.7, 0.8, 1.0, 1.0);
            particleSystem.color2 = new BABYLON.Color4(0.2, 0.5, 1.0, 1.0);
            particleSystem.colorDead = new BABYLON.Color4(0, 0, 0.2, 0.0);

            particleSystem.minSize = 0.1;
            particleSystem.maxSize = 0.5;

            particleSystem.minLifeTime = 0.3;
            particleSystem.maxLifeTime = 1.5;

            particleSystem.emitRate = 1500;

            particleSystem.blendMode = BABYLON.ParticleSystem.BLENDMODE_ONEONE;

            particleSystem.gravity = new BABYLON.Vector3(0, -9.81, 0);

            particleSystem.direction1 = new BABYLON.Vector3(-7, 8, 3);
            particleSystem.direction2 = new BABYLON.Vector3(7, 8, -3);


            particleSystem.minAngularSpeed = 0;
            particleSystem.maxAngularSpeed = Math.PI;

            particleSystem.minEmitPower = 1;
            particleSystem.maxEmitPower = 3;
            particleSystem.updateSpeed = 0.005;

            particleSystem.start();
            var keys = [];
            var animation = new BABYLON.Animation("animation", "rotation.x", 30, BABYLON.Animation.ANIMATIONTYPE_FLOAT,
                                   BABYLON.Animation.ANIMATIONLOOPMODE_CYCLE);

            // At the animation key 0, the value of scaling is "1"
            keys.push({
               frame: 0,
               value: 0
            });

            // At the animation key 50, the value of scaling is "0.2"
            keys.push({
               frame: 50,
               value: Math.PI
            });

            // At the animation key 100, the value of scaling is "1"
            keys.push({
               frame: 100,
               value: 0
            });

            // Launch animation
            animation.setKeys(keys);
            fountain.animations.push(animation);
            scene.beginAnimation(fountain, 0, 100, true);
            return scene;
         }
         var scene = createScene();
         engine.runRenderLoop(function() {
            scene.render();
         });
      </script>
   </body>
</html>
Wynik
Powyższy wiersz kodu generuje następujące dane wyjściowe -
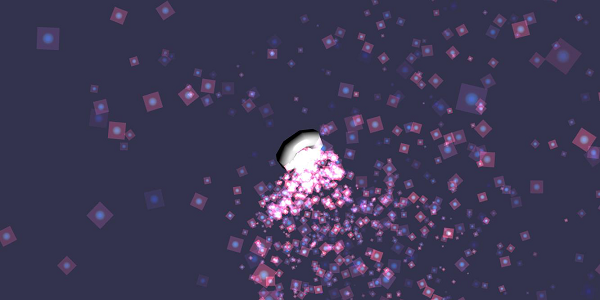
W tym demo użyliśmy obrazu o nazwie dot.jpg. Obrazy są przechowywane lokalnie w folderach images / folder i są również wklejane poniżej w celach informacyjnych. Możesz pobrać dowolny wybrany obraz i użyć go w linku demonstracyjnym.
Poniżej znajduje się obraz używany do tekstury cząstek: images/dot.jpg
Demo 2
<!doctype html>
<html>
   <head>
      <meta charset = "utf-8">
      <title>BabylonJs - Ball/Ground Demo</title>
      <script src = "babylon.js"></script>
      <style>
         canvas {width: 100%; height: 100%;}
      </style>
   </head>

   <body>
      <canvas id = "renderCanvas"></canvas>
      <script type = "text/javascript">
         var canvas = document.getElementById("renderCanvas");
         var engine = new BABYLON.Engine(canvas, true);

         var createScene  = function() {
            var scene = new BABYLON.Scene(engine);
            scene.clearColor = new BABYLON.Color3( .5, .5, .5);

            var camera = new BABYLON.ArcRotateCamera("camera1",  0, 0, 0, new BABYLON.Vector3(0, 0, -0), scene);
            camera.setPosition(new BABYLON.Vector3(-100, 0,-100));
            camera.attachControl(canvas, true);

            var light = new BABYLON.HemisphericLight("light1", new BABYLON.Vector3(1, 0.5, 0), scene);
            var pl = new BABYLON.PointLight("pl", new BABYLON.Vector3(0, 0, 0), scene);

            var gmat = new BABYLON.StandardMaterial("mat1", scene);
            gmat.alpha = 1.0;

            var ground =  BABYLON.Mesh.CreateGround("ground", 100, 100, 20, scene);
            ground.material = gmat;
            gmat.wireframe = true;

            var particleSystem = new BABYLON.ParticleSystem("particles", 2000, scene);
            particleSystem.particleTexture = new BABYLON.Texture("images/dot.jpg", scene);

            particleSystem.textureMask = new BABYLON.Color4(0.1, 0.8, 0.8, 1.0);
            particleSystem.emitter = ground;

            particleSystem.minEmitBox = new BABYLON.Vector3(-1, 0, 0); // Starting all from
            particleSystem.maxEmitBox = new BABYLON.Vector3(1, 0, 0); // To...

            particleSystem.color1 = new BABYLON.Color4(0.7, 0.8, 1.0, 1.0);
            particleSystem.color2 = new BABYLON.Color4(0.2, 0.5, 1.0, 1.0);
            particleSystem.colorDead = new BABYLON.Color4(0, 0, 0.2, 0.0);

            particleSystem.minSize = 0.1;
            particleSystem.maxSize = 0.5;

            particleSystem.minLifeTime = 0.3;
            particleSystem.maxLifeTime = 1.5;

            particleSystem.emitRate = 1500;

            particleSystem.blendMode = BABYLON.ParticleSystem.BLENDMODE_ONEONE;

            particleSystem.gravity = new BABYLON.Vector3(0, -9.81, 0);

            particleSystem.direction1 = new BABYLON.Vector3(-7, 8, 3);
            particleSystem.direction2 = new BABYLON.Vector3(7, 8, -3);

            particleSystem.minAngularSpeed = 0;
            particleSystem.maxAngularSpeed = Math.PI;

            particleSystem.minEmitPower = 1;
            particleSystem.maxEmitPower = 3;
            particleSystem.updateSpeed = 0.005;

            particleSystem.start();


            var keys = [];
            var animation = new BABYLON.Animation("animation", "rotation.x", 30, BABYLON.Animation.ANIMATIONTYPE_FLOAT,
                           BABYLON.Animation.ANIMATIONLOOPMODE_CYCLE);

            // At the animation key 0, the value of scaling is "1"
            keys.push({
               frame: 0,
               value: 0
            });

            // At the animation key 50, the value of scaling is "0.2"
            keys.push({
               frame: 50,
               value: Math.PI
            });

            // At the animation key 100, the value of scaling is "1"
            keys.push({
               frame: 100,
               value: 0
            });

            // Launch animation
            animation.setKeys(keys);
            ground.animations.push(animation);

            //scene.beginAnimation(ground, 0, 100, true);
            return scene;
         };
         var scene = createScene();
         engine.runRenderLoop(function() {
            scene.render();
         });
      </script>
   </body>
</html>
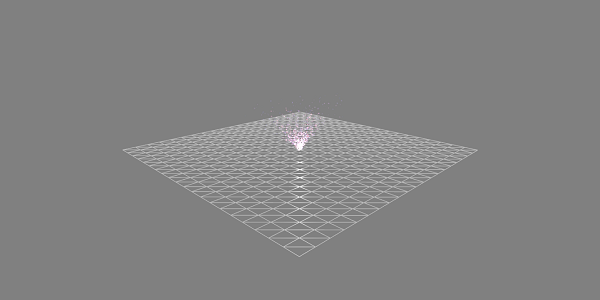
Wynik
Demo z animacją
<!doctype html>
<html>
   <head>
      <meta charset = "utf-8">
      <title>BabylonJs - Ball/Ground Demo</title>
      <script src = "babylon.js"></script>
      <style>
         canvas {width: 100%; height: 100%;}
      </style>
   </head>

   <body>
      <canvas id = "renderCanvas"></canvas>
      <script type = "text/javascript">
         var canvas = document.getElementById("renderCanvas");
         var engine = new BABYLON.Engine(canvas, true);

         var createScene  = function() {
            var scene = new BABYLON.Scene(engine);
            scene.clearColor = new BABYLON.Color3( .5, .5, .5);

            var camera = new BABYLON.ArcRotateCamera("camera1",  0, 0, 0, new BABYLON.Vector3(0, 0, -0), scene);
            camera.setPosition(new BABYLON.Vector3(-100, 0, -100));
            camera.attachControl(canvas, true);

            var light = new BABYLON.HemisphericLight("light1", new BABYLON.Vector3(1, 0.5, 0), scene);
            var pl = new BABYLON.PointLight("pl", new BABYLON.Vector3(0, 0, 0), scene);

            var gmat = new BABYLON.StandardMaterial("mat1", scene);
            gmat.alpha = 1.0;

            var ground =  BABYLON.Mesh.CreateGround("ground", 100, 100, 20, scene);
            ground.material = gmat;
            gmat.wireframe = true;

            var particleSystem = new BABYLON.ParticleSystem("particles", 2000, scene);
            particleSystem.particleTexture = new BABYLON.Texture("images/dot.jpg", scene);

            particleSystem.textureMask = new BABYLON.Color4(0.1, 0.8, 0.8, 1.0);
            particleSystem.emitter = ground;

            particleSystem.minEmitBox = new BABYLON.Vector3(-1, 0, 0); // Starting all from
            particleSystem.maxEmitBox = new BABYLON.Vector3(1, 0, 0); // To...

            particleSystem.color1 = new BABYLON.Color4(0.7, 0.8, 1.0, 1.0);
            particleSystem.color2 = new BABYLON.Color4(0.2, 0.5, 1.0, 1.0);
            particleSystem.colorDead = new BABYLON.Color4(0, 0, 0.2, 0.0);

            particleSystem.minSize = 0.1;
            particleSystem.maxSize = 0.5;

            particleSystem.minLifeTime = 0.3;
            particleSystem.maxLifeTime = 1.5;

            particleSystem.emitRate = 1500;

            particleSystem.blendMode = BABYLON.ParticleSystem.BLENDMODE_ONEONE;

            particleSystem.gravity = new BABYLON.Vector3(0, -9.81, 0);//gravity for the particle.

            particleSystem.direction1 = new BABYLON.Vector3(-7, 8, 3);
            particleSystem.direction2 = new BABYLON.Vector3(7, 8, -3);

            //random direction for the particles on the scene
            particleSystem.minAngularSpeed = 0;
            particleSystem.maxAngularSpeed = Math.PI;
            particleSystem.minEmitPower = 1;
            particleSystem.maxEmitPower = 3;
            particleSystem.updateSpeed = 0.005;

            particleSystem.start();

            var keys = [];
            var animation = new BABYLON.Animation("animation", "rotation.x", 30, BABYLON.Animation.ANIMATIONTYPE_FLOAT,
                           BABYLON.Animation.ANIMATIONLOOPMODE_CYCLE);

            // At the animation key 0, the value of scaling is "1"
            keys.push({
               frame: 0,
               value: 0
            });

            // At the animation key 50, the value of scaling is "0.2"
            keys.push({
               frame: 50,
               value: Math.PI
            });

            // At the animation key 100, the value of scaling is "1"
            keys.push({
               frame: 100,
               value: 0
            });

            // Launch animation
            animation.setKeys(keys);
            ground.animations.push(animation);
            scene.beginAnimation(ground, 0, 100, true);
            return scene;
         };
         var scene = createScene();
         engine.runRenderLoop(function() {
            scene.render();
         });
      </script>
   </body>
</html>
Wynik
Powyższy wiersz kodu generuje następujące dane wyjściowe -
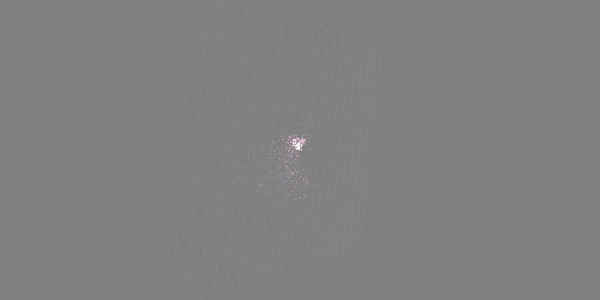
Wyjaśnienie
Powyższe demo pokazuje uziemienie z materiałem szkieletowym, a układ cząstek jest wytwarzany od środka.