Google AMP - Ações e eventos
Para usar ações ou eventos em um componente de amplificador, podemos usar o atributo on. Neste capítulo, vamos discuti-los em detalhes.
Eventos
A sintaxe para trabalhar com eventos é a seguinte -
on = "eventName:elementId[.methodName[(arg1 = value, arg2 = value)]]"Os detalhes passaram para on atributo são os seguintes -
eventName- Leva o nome do evento que está disponível para o componente do amplificador. Por exemplo, para formulários, podemos usar submit-success, submit-error eventNames.
elementId- Isso leva o id do elemento no qual o evento precisa ser chamado. Pode ser o id do formulário para o qual desejamos saber sobre o sucesso ou o erro.
methodName - Leva o nome do método a ser chamado na ocorrência do evento.
arg=value - Isso leva os argumentos com a forma chave = valor passada para o método.
Também é possível passar vários eventos para o atributo on e isso é feito da seguinte forma -
on = "submit-success:lightbox;submit-error:lightbox1"Se houver vários eventos, eles serão passados para o atributo on e separados por ponto e vírgula (;).
Ações
As ações são basicamente usadas com o atributo on e a sintaxe é a seguinte -
on = "tab:elementid.hide;"Podemos passar várias ações da seguinte forma -
on = "tab:elementid.open;tab:elementid.hide;”Elementid é o id do elemento no qual a ação deve ser executada.
O amplificador tem alguns eventos e ações definidos globalmente que podem ser usados em qualquer componente do amplificador e são tap event e as ações são hide, show e togglevisibility.
Se você deseja ocultar / mostrar ou usar a alternância de visibilidade em qualquer html ou componente de amplificador, você pode usar on=”tap:elementid.[hide/show/togglevisibility]”
Vamos ver alguns exemplos de trabalho para eventos e ações.
No elemento de entrada
Vamos entender isso melhor com a ajuda de um exemplo prático -
Exemplo
<!doctype html>
<html amp lang = "en">
   <head>
      <meta charset = "utf-8">
      <script async src = "https://cdn.ampproject.org/v0.js"></script>
      <title>Google AMP - Amp Bind</title>
      <link rel = "canonical" href = "http://example.ampproject.org/article-metadata.html">
      <meta name = "viewport" content = "width = device-width,minimum-scale = 1,initial-scale = 1">

      <style amp-boilerplate>
         body{
            -webkit-animation:
            -amp-start 8s steps(1,end) 0s 1 normal both;-moz-animation:
            -amp-start 8s steps(1,end) 0s 1 normal both;-ms-animation:
            -amp-start 8s steps(1,end) 0s 1 normal both;animation:
            -amp-start 8s steps(1,end) 0s 1 normal both
         }
         @-webkit-keyframes
         -amp-start{from{visibility:hidden}to{visibility:visible}}@-moz-keyframes
         -amp-start{from{visibility:hidden}to{visibility:visible}}@-ms-keyframes
         -amp-start{from{visibility:hidden}to{visibility:visible}}@-o-keyframes
         -amp-start{from{visibility:hidden}to{visibility:visible}}@keyframes
         -amp-start{from{visibility:hidden}to{visibility:visible}}
      </style>

      <noscript>
         <style amp-boilerplate>
            body {
               -webkit-animation:none;
               -moz-animation:none;
               -ms-animation:none;
               animation:none
            }
         </style>
      </noscript>

      <script async custom-element = "amp-bind" src = "
         https://cdn.ampproject.org/v0/amp-bind-0.1.js">
      </script>

      <script async custom-element = "amp-lightbox" src = "
         https://cdn.ampproject.org/v0/amp-lightbox-0.1.js">
      </script>

      <style amp-custom>
         button{
            background-color: #ACAD5C;
            color: white;
            padding: 12px 20px;
            border: none;
            border-radius: 4px;
            cursor: pointer;
            float: left;}

         .lightbox {
            background: rgba(211,211,211,0.8);
            width: 100%;
            height: 100%;
            position: absolute;
            display: flex;
            align-items: center;
            justify-content: center;
         }
         #txtname{
            width: 100%;
            padding: 12px 20px;
            margin: 8px 0;
            display: inline-block;
            border: 1px solid #ccc;
            border-radius: 4px;
            box-sizing: border-box;
         }
         div {
            font-size:25px;
         }
      </style>
   </head>
   <body>
      <h3>Google AMP - Amp Bind</h3>
      <button on = "tap:AMP.setState({displaylightbox: true})">
         Click Here
      </button>
      <br/>
      <br/>

      <h3>AMP - Input Element</h3>
      <input id = "txtname" placeholder = "Type here" on =
         "input-throttled:AMP.setState({name: event.value})">
      <div [text] = "name"></div>
   </body>
</html>
Resultado
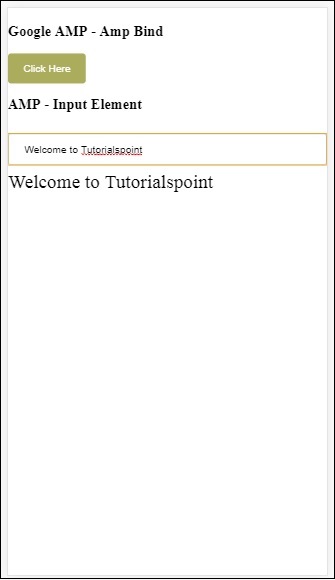
Observe que, no exemplo acima, estamos usando evento no campo de entrada da seguinte forma -
<input id = "txtname" placeholder = "Type here"
on = "input-throttled:AMP.setState({name: event.value})">
O evento usado é input-throlled.
Também podemos usar a mudança da seguinte forma -
<input id = "txtname" placeholder = "Type here" on =
"change:AMP.setState({name: event.value})">
A saída será exibida assim que o usuário sair da caixa de entrada. Podemos usar o evento de mudança no tipo de entrada como rádio, caixa de seleção etc. e também no elemento de seleção.
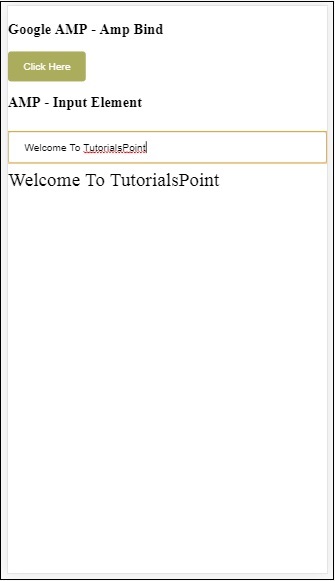
<input id = "txtname" placeholder = "Type here" on =
"input-debounced:AMP.setState({name: event.value})">
Evento input-debounced é o mesmo que changemas a saída é vista após 300ms depois que o usuário digita.
Exemplo
<!doctype html>
<html amp lang = "en">
   <head>
      <meta charset = "utf-8">
      <script async src = "https://cdn.ampproject.org/v0.js"></script>
      <title>Google AMP - Amp Bind</title>
      <link rel = "canonical" href = " http://example.ampproject.org/article-metadata.html">
      <meta name = "viewport" content = "width = device-width,minimum-scale = 1,initial-scale = 1">

      <style amp-boilerplate>
         body{
            -webkit-animation:
            -amp-start 8s steps(1,end) 0s 1 normal both;-moz-animation:
            -amp-start 8s steps(1,end) 0s 1 normal both;-ms-animation:
            -amp-start 8s steps(1,end) 0s 1 normal both;animation:
            -amp-start 8s steps(1,end) 0s 1 normal both
         }
         @-webkit-keyframes
         -amp-start{from{visibility:hidden}to{visibility:visible}}@-moz-keyframes
         -amp-start{from{visibility:hidden}to{visibility:visible}}@-ms-keyframes
         -amp-start{from{visibility:hidden}to{visibility:visible}}@-o-keyframes
         -amp-start{from{visibility:hidden}to{visibility:visible}}@keyframes
         -amp-start{from{visibility:hidden}to{visibility:visible}}
      </style>
      <noscript>
         <style amp-boilerplate>
            body{
            -webkit-animation:none;
            -moz-animation:none;
            -ms-animation:none;
            animation:none}
         </style>
      </noscript>

      <script async custom-element = "amp-bind"
         src = "https://cdn.ampproject.org/v0/amp-bind-0.1.js">
      </script>

      <script async custom-element = "amp-lightbox"
         src = "https://cdn.ampproject.org/v0/amp-lightbox-0.1.js">
      </script>
      <style amp-custom>
         button{
            background-color: #ACAD5C;
            color: white;
            padding: 12px 20px;
            border: none;
            border-radius: 4px;
            cursor: pointer;
            float: left;
         }
         .lightbox {
            background: rgba(211,211,211,0.8);
            width: 100%;
            height: 100%;
            position: absolute;
            display: flex;
            align-items: center;
            justify-content: center;
         }
         #txtname{
            width: 100%;
            padding: 12px 20px;
            margin: 8px 0;
            display: inline-block;
            border: 1px solid #ccc;
            border-radius: 4px;
            box-sizing: border-box;
         }
         div {
            font-size:25px;
         }
      </style>
   </head>
   <body>
      <h3>Google AMP - Amp Bind</h3>
      <button on = "tap:AMP.setState({displaylightbox: true})">
         Click Here
      </button>
      <br/>
      <br/>

      <h3>AMP - Input Element</h3>
         <input id = "txtname" placeholder = "Type here" on =
         "input-debounced:AMP.setState({name: event.value})">
      <div [text] = "name"></div>
   </body>
</html>
Resultado
No Amp Lightbox
Nesta seção, vamos testar os seguintes eventos no lightbox -
- lightboxOpen
- lightboxClose
Exemplo
<!doctype html>
<html amp lang = "en">
   <head>
      <meta charset = "utf-8">
      <script async src = "https://cdn.ampproject.org/v0.js"></script>
      <title>Google AMP - Amp Lightbox</title>
      <link rel = "canonical" href = " http://example.ampproject.org/article-metadata.html">
      <meta name = "viewport" content = "width = device-width,minimum-scale = 1,initial-scale = 1">

      <style amp-boilerplate>
         body{
            -webkit-animation:
            -amp-start 8s steps(1,end) 0s 1 normal both;-moz-animation:
            -amp-start 8s steps(1,end) 0s 1 normal both;-ms-animation:
            -amp-start 8s steps(1,end) 0s 1 normal both;animation:
            -amp-start 8s steps(1,end) 0s 1 normal both
         }
         @-webkit-keyframes
         -amp-start{from{visibility:hidden}to{visibility:visible}}@-moz-keyframes
         -amp-start{from{visibility:hidden}to{visibility:visible}}@-ms-keyframes
         -amp-start{from{visibility:hidden}to{visibility:visible}}@-o-keyframes
         -amp-start{from{visibility:hidden}to{visibility:visible}}@keyframes
         -amp-start{from{visibility:hidden}to{visibility:visible}}
      </style>

      <noscript>
         <style amp-boilerplate>
            body{
               -webkit-animation:none;
               -moz-animation:none;
               -ms-animation:none;
               animation:none}
         </style>
      </noscript>

      <script async custom-element = "amp-bind"
         src = "https://cdn.ampproject.org/v0/amp-bind-0.1.js">
      </script>

      <script async custom-element = "amp-lightbox"
         src = "https://cdn.ampproject.org/v0/amp-lightbox-0.1.js">
      </script>

      <style amp-custom>
         amp-img {
            border: 1px solid #ddd;
            border-radius: 4px;
            padding: 5px;
         }
         button {
            background-color: #ACAD5C;
            color: white;
            padding: 12px 20px;
            border: none;
            border-radius: 4px;
            cursor: pointer;
            float: left;
         }
         .lightbox {
            background: rgba(211,211,211,0.8);
            width: 100%;
            height: 100%;
            position: absolute;
            display: flex;
            align-items: center;
            justify-content: center;
         }
         p{font-size:30px;}
      </style>
   </head>
   <body>
      <h3>Google AMP - Amp Lightbox</h3>
      <p [text] = "'Lightbox is ' + lightboxstatus + '.'">
         Lightbox Event Testing
      </p>
      <button on = "tap:my-lightbox.open">
         Show LightBox
      </button>
      <amp-lightbox id = "my-lightbox" layout = "nodisplay"
      close-button on = "lightboxOpen:AMP.setState({lightboxstatus:'opened'});
      lightboxClose:AMP.setState({lightboxstatus:'closed'});">
         <div class = "lightbox">
            <amp-img alt = "Beautiful Flower" src = "images/loreal.gif"
               width = "246"
               height = "205">
            </amp-img>
         </div>
      </amp-lightbox>
   </body>
</html>
Resultado
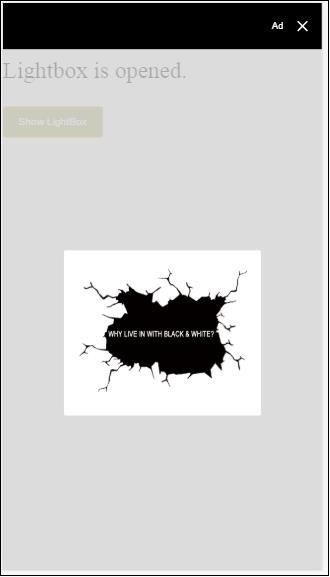
O código a seguir mostra como os eventos de abertura e fechamento são implementados no lightbox -
<p [text]="'Lightbox is ' + lightboxstatus + '.'">Lightbox Event Testing</p>
<button on = "tap:my-lightbox.open">Show LightBox</button>
<amp-lightbox id = "my-lightbox" layout = "nodisplay"
   close-button on = "lightboxOpen:AMP.setState({lightboxstatus:'opened'});
   lightboxClose:AMP.setState({lightboxstatus:'closed'});">

   <div class = "lightbox">
      <amp-img alt = "Beautiful Flower" src = "images/loreal.gif"
         width = "246"
         height = "205">
      </amp-img>
   </div>
</amp-lightbox>
Evento no Amp -Seletor
O evento disponível no seletor de amp é select.
Exemplo
<!doctype html>
<html amp lang = "en">
   <head>
      <meta charset = "utf-8">
      <script async src  = "https://cdn.ampproject.org/v0.js"></script>
      <title>Google AMP - Amp Selector</title>
      <link rel = "canonical" href = "http://example.ampproject.org/article-metadata.html">
      <meta name = "viewport" content = "width = device-width,minimum-scale = 1,initial-scale = 1">

      <style amp-boilerplate>
         body{
            -webkit-animation:
            -amp-start 8s steps(1,end) 0s 1 normal both;-moz-animation:
            -amp-start 8s steps(1,end) 0s 1 normal both;-ms-animation:
            -amp-start 8s steps(1,end) 0s 1 normal both;animation:
            -amp-start 8s steps(1,end) 0s 1 normal both
         }
         @-webkit-keyframes
         -amp-start{from{visibility:hidden}to{visibility:visible}}@-moz-keyframes
         -amp-start{from{visibility:hidden}to{visibility:visible}}@-ms-keyframes
         -amp-start{from{visibility:hidden}to{visibility:visible}}@-o-keyframes
         -amp-start{from{visibility:hidden}to{visibility:visible}}@keyframes
         -amp-start{from{visibility:hidden}to{visibility:visible}}
      </style>

      <noscript>
         <style amp-boilerplate>
            body {
               -webkit-animation:none;
               -moz-animation:none;
               -ms-animation:none;
               animation:none
            }
         </style>
      </noscript>

      <script async custom-element = "amp-bind"
         src = "https://cdn.ampproject.org/v0/amp-bind-0.1.js">
      </script>

      <script async custom-element = "amp-selector"
         src = "https://cdn.ampproject.org/v0/amp-selector-0.1.js">
      </script>

      <style amp-custom>
         .radio-menu {
            list-style: none;
         }
         .radio-menu [option][selected] {
            outline: none;
         }
         .radio-menu [option] {
            display: flex;
            align-items: center;
         }
         .radio-menu [option]:before {
            transition: background 0.25s ease-in-out;
            content: "";
            display: inline-block;
            width: 24px;
            height: 24px;
            margin: 8px;
            border-radius: 100%;
            border: solid 1px black;
         }
         .radio-menu [option = red][selected]:before {
            text-align: center;
            content: "✓";
            color: white;
            background: red;
         }
         .radio-menu [option = green][selected]:before {
            text-align: center;
            content: "✓";
            color: white;
            background: green;
         }
         .radio-menu [option = blue][selected]:before {
            text-align: center;
            content: "✓";
            color: white;
            background: blue;
         }
         p{font-size:30px;}
      </style>
   </head>
   <body>
      <h3>Google AMP - Amp Selector</h3>
      <p [text] = "'Color selected is ' + ampselectorstatus + '.'">
         Amp Selector Event Testing
      <p>
      <amp-selector
         class = "radio-menu"
         layout = "container"
         name = "my-selector"
         on = "select:AMP.setState({ampselectorstatus:event.selectedOptions})">
         <div option = "red">
            Red
         </div>
         <div option = "green">
            Green
         </div>
         <div option = "blue">
            Blue
         </div>
      </amp-selector>
   </body>
</html>
Resultado
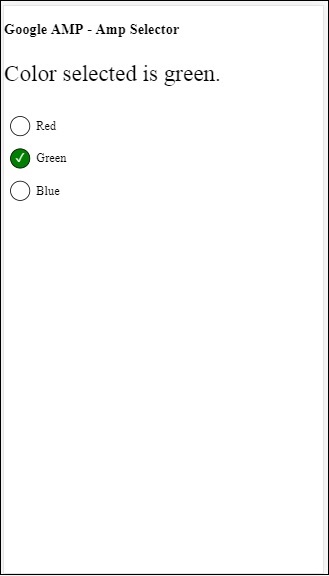
A seleção de evento é usada da seguinte forma -
<p [text]="'Color selected is ' + ampselectorstatus + '.'">
   Amp Selector Event Testing
</p>
<amp-selector
   class = "radio-menu"
   layout  ="container"
   name =" my-selector"
   on = "select:AMP.setState({ampselectorstatus:event.selectedOptions})">
   <div option = "red">
      Red
   </div>
   <div option = "green">
      Green
   </div>
   <div option = "blue">
      Blue
   </div>
</amp-selector>
Evento no Amp-Sidebar
Os eventos disponíveis são sidebarOpen e sidebarClose.
Exemplo
<!doctype html>
<html amp lang = "en">
   <head>
      <meta charset = "utf-8">
      <script async src = "https://cdn.ampproject.org/v0.js"></script>
      <title>Google AMP - Amp Sidebar</title>
      <link rel = "canonical" href = "http://example.ampproject.org/article-metadata.html">
      <meta name = "viewport" content = "width = device-width,minimum-scale = 1,initial-scale = 1">

      <style amp-boilerplate>
         body{
            -webkit-animation:
            -amp-start 8s steps(1,end) 0s 1 normal both;-moz-animation:
            -amp-start 8s steps(1,end) 0s 1 normal both;-ms-animation:
            -amp-start 8s steps(1,end) 0s 1 normal both;animation:
            -amp-start 8s steps(1,end) 0s 1 normal both
         }
         @-webkit-keyframes
         -amp-start{from{visibility:hidden}to{visibility:visible}}@-moz-keyframes
         -amp-start{from{visibility:hidden}to{visibility:visible}}@-ms-keyframes
         -amp-start{from{visibility:hidden}to{visibility:visible}}@-o-keyframes
         -amp-start{from{visibility:hidden}to{visibility:visible}}@keyframes
         -amp-start{from{visibility:hidden}to{visibility:visible}}
      </style>

      <noscript>
         <style amp-boilerplate>
            body{
               -webkit-animation:none;
               -moz-animation:none;
               -ms-animation:none;
               animation:none
            }
         </style>
      </noscript>
      <script async custom-element = "amp-bind"
         src = "https://cdn.ampproject.org/v0/amp-bind-0.1.js">
      </script>
      <script async custom-element = "amp-sidebar"
         src = "https://cdn.ampproject.org/v0/amp-sidebar-0.1.js">
      </script>
      <style amp-custom>
         amp-img {
            border: 1px solid #ddd;
            border-radius: 4px;
            padding: 5px;
         }
         button{
            background-color: #ACAD5C;
            color: white;
            padding: 12px 20px;
            border: none;
            border-radius: 4px;
            cursor: pointer;
            float: left;
         }
         .amp-sidebar-toolbar-target-shown {
            display: none;
         }
         p{font-size:30px;}
      </style>
   </head>
   <body>
      <h3>Google AMP - Amp Sidebar</h3>
      <p [text] = "'Sidebar is ' + ampsidebarstatus + '.'">
         Amp Sidebar Event Testing
      </p>
      <button on = "tap:sidebar1">
         Show Sidebar
      </button>
      <amp-sidebar
         id = "sidebar1"
         layout = "nodisplay"
         side = "right"
         on = "sidebarOpen:AMP.setState({ampsidebarstatus: 'Opened'});
         sidebarClose:AMP.setState({ampsidebarstatus: 'Closed'})">
         <ul>
            <li>Nav item 1</li>
            <li>
               <a href = "#idTwo" on = "tap:idTwo.scrollTo">Nav item 2</a>
            </li>
            <li>Nav item 3</li>
            <li>
               <a href = "#idFour" on="tap:idFour.scrollTo">Nav item 4</a>
            </li>
            <li>Nav item 5</li>
            <li>Nav item 6</li>
         </ul>
      </amp-sidebar>
      <div id = "target-element">
      </div>
   </body>
</html>
Resultado
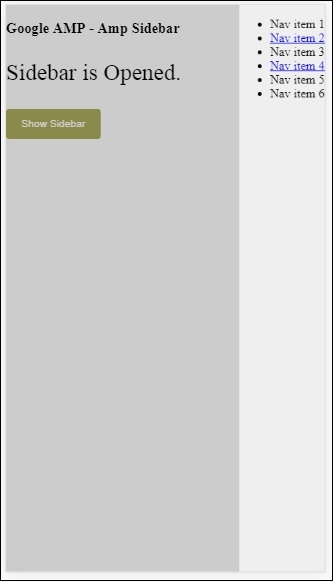
Os eventos são usados da seguinte forma -
<p [text] = "'Sidebar is ' + ampsidebarstatus + '.'">
   Amp Sidebar Event Testing
</p>
<button on = "tap:sidebar1">
   Show Sidebar
</button>
<amp-sidebar
   id = "sidebar1"
   layout = "nodisplay"
   side = "right"
   on = "sidebarOpen:AMP.setState({ampsidebarstatus: 'Opened'});
   sidebarClose:AMP.setState({ampsidebarstatus: 'Closed'})">
   <ul>
      <li>Nav item 1</li>
      <li>
         <a href = "#idTwo" on = "tap:idTwo.scrollTo">Nav item 2</a>
      </li>
      <li>Nav item 3</li>
      <li>
         <a href = "#idFour" on = "tap:idFour.scrollTo">Nav item 4</a>
      </li>
      <li>Nav item 5</li>
      <li>Nav item 6</li>
   </ul>
</amp-sidebar>