Google AMP - mídia
Neste capítulo, discutiremos como exibir vídeo e áudio de terceiros, como jwplayer e Youtube. Vamos aprender em detalhes sobre o seguinte -
Google AMP - JwPlayer
Google AMP - YouTube
Google AMP - Áudio
Google AMP - JwPlayer
Se você quiser usar jwplayer para mostrar vídeos na página, amp tem amp-jwplayer para fazer isso.
Para trabalhar com amp-jwplayer, inclua o seguinte script em sua página -
<script async custom-element = "amp-jwplayer" src = "
   https://cdn.ampproject.org/v0/amp-jwplayer-0.1.js">
</script>
Tag Amp-jwplayer
<amp-jwplayer
   data-playlist-id = "482jsTAr"
   data-player-id = "uoIbMPm3"
   layout = "responsive"
   width = "16"
   height = "9">
</amp-jwplayer>
Um exemplo funcional de jwplayer na página de amp é mostrado abaixo -
Exemplo
<!doctype html>
<html amp lang = "en">
   <head>
      <meta charset = "utf-8">
      <script async src = "https://cdn.ampproject.org/v0.js">
      </script>
      <title>Google AMP - Amp Jwplayer</title>
      <link rel = "canonical" href =
      "http://example.ampproject.org/article-metadata.html">
      <meta name = "viewport" content = "width = device-width,
      minimum-scale = 1,initial-scale = 1">

      <style amp-boilerplate>
         body{
            -webkit-animation:
            -amp-start 8s steps(1,end) 0s 1 normal both;-moz-animation:
            -amp-start 8s steps(1,end) 0s 1 normal both;-ms-animation:
            -amp-start 8s steps(1,end) 0s 1 normal both;animation:
            -amp-start 8s steps(1,end) 0s 1 normal both
         }
         @-webkit-keyframes
         -amp-start{from{visibility:hidden}to{visibility:visible}}@-moz-keyframes
         -amp-start{from{visibility:hidden}to{visibility:visible}}@-ms-keyframes
         -amp-start{from{visibility:hidden}to{visibility:visible}}@-o-keyframes
         -amp-start{from{visibility:hidden}to{visibility:visible}}@keyframes
         -amp-start{from{visibility:hidden}to{visibility:visible}}
      </style>
      <noscript>
         <style amp-boilerplate>
            body{
               -webkit-animation:none;
               -moz-animation:none;
               -ms-animation:none;
               animation:none}
         </style>
      </noscript>
      <script async custom-element = "amp-jwplayer" src =
         "https://cdn.ampproject.org/v0/amp-jwplayer-0.1.js">
      </script>
   </head>
   <body>
      <h3>Google AMP - Amp Jwplayer</h3>
      <amp-jwplayer
         data-playlist-id = "482jsTAr"
         data-player-id = "uoIbMPm3"
         layout = "responsive"
         width = "16"
         height = "9">
      </amp-jwplayer>
   </body>
</html>
Resultado

Para amp-jwplayer, existem três atributos importantes
data-player-id
data-media-id
data-playlist-id
Para obter os ids do player, mídia e lista de reprodução, você precisa ter um login no jwplayer, que pode ser feito aqui - https://dashboard.jwplayer.com/#/players
O ID do jogador estará disponível na seção do jogador jwplayer. O ID da mídia estará disponível emjwplayer content section e id da lista de reprodução em jwplayer playlist section.
Jwplayer fornece um id alfanumérico de oito dígitos que precisa ser usado no amp-jwplayer para o respectivo atributo.
Google AMP - Youtube
Se você quiser mostrar o vídeo do Youtube em sua página de amp, amp tem amp-youtube para incorporar vídeos do youtube na página.
Para usar o amp-youtube, você precisa adicionar o seguinte script à sua página -
<script async custom-element = "amp-youtube" src = "
   https://cdn.ampproject.org/v0/amp-youtube-0.1.js">
</script>
Tag Amp-youtube
<amp-youtube
   width = "480"
   height = "270"
   layout = "responsive"
   autoplay = "true"
   data-videoid = "fWZ6-p7mGK0">
</amp-youtube>
Vamos agora trabalhar em um exemplo que mostra o funcionamento do amp-youtube na página.
Exemplo
<!doctype html>
<html amp lang = "en">
   <head>
      <meta charset = "utf-8">
      <script async src = "https://cdn.ampproject.org/v0.js">
      </script>
      <title>Google AMP - Youtube</title>
      <link rel = "canonical" href =
      "http://example.ampproject.org/article-metadata.html">
      <meta name = "viewport" content = "width = device-width,
      minimum-scale = 1,initial-scale = 1">

      <style amp-boilerplate>
         body{
            -webkit-animation:
            -amp-start 8s steps(1,end) 0s 1 normal both;-moz-animation:
            -amp-start 8s steps(1,end) 0s 1 normal both;-ms-animation:
            -amp-start 8s steps(1,end) 0s 1 normal both;animation:
            -amp-start 8s steps(1,end) 0s 1 normal both
         }
         @-webkit-keyframes
         -amp-start{from{visibility:hidden}to{visibility:visible}}@-moz-keyframes
         -amp-start{from{visibility:hidden}to{visibility:visible}}@-ms-keyframes
         -amp-start{from{visibility:hidden}to{visibility:visible}}@-o-keyframes
         -amp-start{from{visibility:hidden}to{visibility:visible}}@keyframes
         -amp-start{from{visibility:hidden}to{visibility:visible}}
      </style>
      <noscript>
         <style amp-boilerplate>
            body{
               -webkit-animation:none;
               -moz-animation:none;
               -ms-animation:none;
               animation:none}
         </style>
      </noscript>
      <script async custom-element = "amp-youtube" src =
         "https://cdn.ampproject.org/v0/amp-youtube-0.1.js">
      </script>
   </head>
   <body>
      <h3>Google AMP - Youtube</h3>
      <h3>Youtube Videos from Tutorialspoint</h3>
      <amp-youtube
         width = "480"
         height = "270"
         layout = "responsive"
         autoplay = "true"
         data-videoid = "fWZ6-p7mGK0">
      </amp-youtube>
   </body>
</html>
Resultado
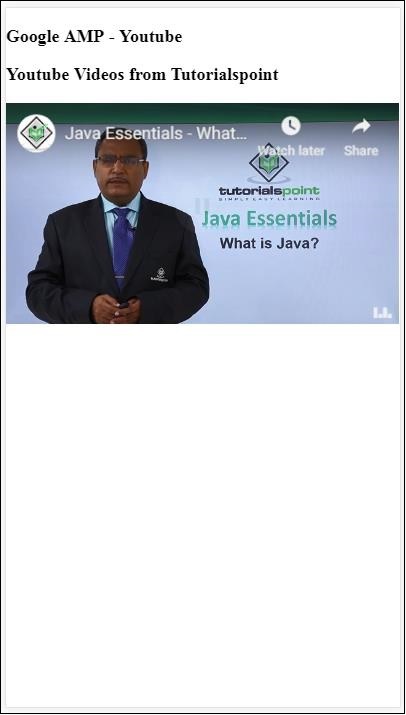
Para mostrar o vídeo do youtube, você precisa fornecer o ID do vídeo ao amp-youtube conforme mostrado abaixo -
<amp-youtube
   width = "480"
   height = "270"
   layout = "responsive"
   autoplay = "true"
   data-videoid = "fWZ6-p7mGK0">
</amp-youtube>
Como obter o data-videoid?
Considere qualquer url do Youtube, por exemplo - https://www.youtube.com/watch?v=fWZ6-p7mGK0. A parte destacada é o id a ser usado em seu amp-youtube.
Nós usamos o atributo autoplaycomo verdade. O vídeo será reproduzido automaticamente conforme compatível com o navegador e também será reproduzido em modo silencioso. Você terá que tocar no vídeo para ativar o som. O vídeo será pausado quando sair da visualização e retomará do estado de pausa quando for visualizado. Se o usuário pausar o vídeo e entrar / sair da visualização, o vídeo permanecerá apenas no estado de pausa. O mesmo é aplicável para mudo / não mudo.
Google Amp - Áudio
O Amp tem uma tag para reproduzir áudio que substitui a tag de áudio html5. Para reproduzir áudio na página do amplificador, podemos usar o amplificador de áudio.
Para trabalhar com amp-audio, precisamos adicionar o seguinte script -
<script async custom-element = "amp-audio" src = "
   https://cdn.ampproject.org/v0/amp-audio-0.1.js">
</script>
Tag Amp-audio
<amp-audio
   width = "auto"
   height = "50"
   src = "audio/test.mp3">
  <div fallback>
     <p>HTML5 audio is not supported on your browser!</p>
   </div>
</amp-audio>
Portanto, amp-audio assumirá o atributo src, que é uma solicitação http para o arquivo de áudio. O motivo pelo qual estamos usando o amp-audio em vez do áudio html5 padrão é porque o amp coloca um conceito de carregamento lento no lugar para elementos que requerem solicitação http.
Ele começará a carregar a solicitação com base na prioridade. Ele será carregado um pouco antes ou quando estiver prestes a alcançar a janela de visualização.
Um exemplo prático do uso de amp-audio em sua página é mostrado aqui -
Exemplo
<!doctype html>
<html amp lang = "en">
   <head>
      <meta charset = "utf-8">
      <script async src = "https://cdn.ampproject.org/v0.js">
      </script>
      <title>Google AMP - Audio</title>
      <link rel = "canonical" href =
      "http://example.ampproject.org/article-metadata.html">
      <meta name = "viewport" content = "width = device-width,
      minimum-scale = 1,initial-scale = 1">

      <style amp-boilerplate>
         body{
            -webkit-animation:
            -amp-start 8s steps(1,end) 0s 1 normal both;-moz-animation:
            -amp-start 8s steps(1,end) 0s 1 normal both;-ms-animation:
            -amp-start 8s steps(1,end) 0s 1 normal both;animation:
            -amp-start 8s steps(1,end) 0s 1 normal both
         }
         @-webkit-keyframes
         -amp-start{from{visibility:hidden}to{visibility:visible}}@-moz-keyframes
         -amp-start{from{visibility:hidden}to{visibility:visible}}@-ms-keyframes
         -amp-start{from{visibility:hidden}to{visibility:visible}}@-o-keyframes
         -amp-start{from{visibility:hidden}to{visibility:visible}}@keyframes
         -amp-start{from{visibility:hidden}to{visibility:visible}}
      </style>
      <noscript>
         <style amp-boilerplate>
            body{
               -webkit-animation:none;
               -moz-animation:none;
               -ms-animation:none;
               animation:none}
         </style>
      </noscript>
      <script async custom-element = "amp-audio"
         src = "https://cdn.ampproject.org/v0/amp-audio-0.1.js">
      </script>
   </head>
   <body>
      <h3>Google AMP - Audio</h3>
      <amp-audio
         width = "auto"
         height = "50"
         src="audio/test.mp3">
            <div fallback>
               <p>HTML5 audio is not supported on your browser!</p>
            </div>
      </amp-audio>
   </body>
</html>
Resultado
A tag para amp-audio onde os atributos como largura, altura, src são especificados é mostrada aqui. Também adicionamos um div comfallback attribute que funcionará como um substituto se o amplificador de áudio não for compatível com o navegador.
<amp-audio
   width = "auto"
   height = "50"
   src = "audio/test.mp3">
   <div fallback>
      <p>HTML5 audio is not supported on your browser!</p>
   </div>
</amp-audio>
Observe que os controles são adicionados por padrão à tag de áudio e podem ser usados para reproduzir / pausar e ativar / desativar o som do áudio. Você obtém a opção de download para a tag de áudio conforme mostrado abaixo -
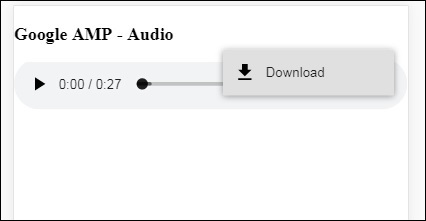
Ao clicar no download, você pode baixar o arquivo de mídia utilizado. Para desativar o download, você pode usar o atributo -controlsList="nodownload" conforme mostrado no exemplo abaixo -
Exemplo
<!doctype html>
<html amp lang = "en">
   <head>
      <meta charset = "utf-8">
      <script async src = "https://cdn.ampproject.org/v0.js">
      </script>
      <title>Google AMP - Audio</title>
      <link rel = "canonical" href =
      "http://example.ampproject.org/article-metadata.html">
      <meta name = "viewport" content = "width = device-width,
      minimum-scale = 1,initial-scale = 1">
         <style amp-boilerplate>
            body{
               -webkit-animation:
               -amp-start 8s steps(1,end) 0s 1 normal both;-moz-animation:
               -amp-start 8s steps(1,end) 0s 1 normal both;-ms-animation:
               -amp-start 8s steps(1,end) 0s 1 normal both;animation:
               -amp-start 8s steps(1,end) 0s 1 normal both
            }
            @-webkit-keyframes
            -amp-start{from{visibility:hidden}to{visibility:visible}}@-moz-keyframes
            -amp-start{from{visibility:hidden}to{visibility:visible}}@-ms-keyframes
            -amp-start{from{visibility:hidden}to{visibility:visible}}@-o-keyframes
            -amp-start{from{visibility:hidden}to{visibility:visible}}@keyframes
            -amp-start{from{visibility:hidden}to{visibility:visible}}
         </style>
         <noscript>
            <style amp-boilerplate>
               body{
                  -webkit-animation:none;
                  -moz-animation:none;
                  -ms-animation:none;
                  animation:none}
            </style>
         </noscript>
         <script async custom-element = "amp-audio"
            src = "https://cdn.ampproject.org/v0/amp-audio-0.1.js">
         </script>
   </head>
   <body>
      <h3>Google AMP - Audio</h3>
      <amp-audio
         width = "auto"
         height = "50"
         src = "audio/test.mp3"
         controlsList = "nodownload">
            <div fallback>
               <p>HTML5 audio is not supported on your browser!</p>
            </div>
      </amp-audio>
   </body>
</html>
Resultado

Usando controlsList="nodownload" os três pontos verticais no lado direito sumiram.
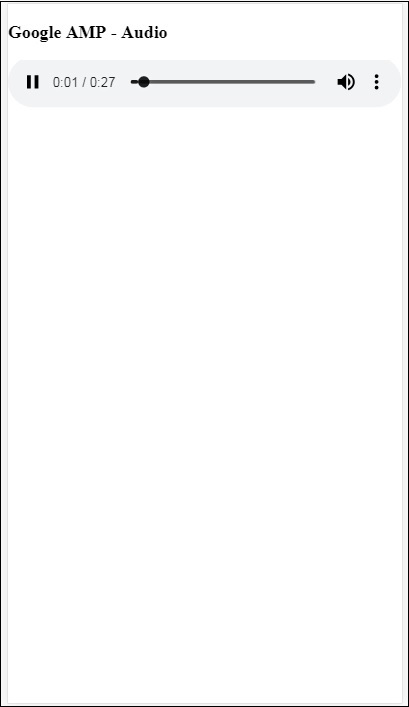
Existem atributos como preload e autoplay, se forem adicionados à tag de áudio, o arquivo de áudio será carregado no carregamento da página e será reproduzido automaticamente se o navegador suportar. O exemplo a seguir mostra a reprodução automática de áudio.
Exemplo
<!doctype html>
<html amp lang = "en">
   <head>
      <meta charset="utf-8">
      <script async src = "https://cdn.ampproject.org/v0.js">
      </script>
      <title>Google AMP - Audio</title>
      <link rel = "canonical" href =
      "http://example.ampproject.org/article-metadata.html">
      <meta name = "viewport" content = "width = device-width,
      minimum-scale = 1,initial-scale = 1">

      <style amp-boilerplate>
         body{
            -webkit-animation:
            -amp-start 8s steps(1,end) 0s 1 normal both;-moz-animation:
            -amp-start 8s steps(1,end) 0s 1 normal both;-ms-animation:
            -amp-start 8s steps(1,end) 0s 1 normal both;animation:
            -amp-start 8s steps(1,end) 0s 1 normal both
         }
         @-webkit-keyframes
         -amp-start{from{visibility:hidden}to{visibility:visible}}@-moz-keyframes
         -amp-start{from{visibility:hidden}to{visibility:visible}}@-ms-keyframes
         -amp-start{from{visibility:hidden}to{visibility:visible}}@-o-keyframes
         -amp-start{from{visibility:hidden}to{visibility:visible}}@keyframes
         -amp-start{from{visibility:hidden}to{visibility:visible}}
      </style>
      <noscript>
         <style amp-boilerplate>
            body{
               -webkit-animation:none;
               -moz-animation:none;
               -ms-animation:none;
               animation:none}
         </style>
      </noscript>
      <script async custom-element = "amp-audio"
         src = "https://cdn.ampproject.org/v0/amp-audio-0.1.js">
      </script>
   </head>
   <body>
      <h3>Google AMP - Audio</h3>
      <amp-audio
         width = "auto"
         height = "50"
         src = "audio/test.mp3" preload autoplay>
            <div fallback>
               <p>HTML5 audio is not supported on your browser!</p>
            </div>
      </amp-audio>
   </body>
</html>
Resultado
O Atributo loop, se estiver presente, o áudio será reproduzido novamente quando estiver concluído.
Exemplo
<amp-audio
   width = "auto"
   height = "50"
   src = "audio/test.mp3" loop>
   <div fallback>
      <p>HTML5 audio is not supported on your browser!</p>
   </div>
</amp-audio>