Spring MVC - คู่มือฉบับย่อ
เฟรมเวิร์ก Spring Web MVC มีสถาปัตยกรรม Model-view-controller และส่วนประกอบที่พร้อมใช้งานเพื่อพัฒนาเว็บแอปพลิเคชันที่ยืดหยุ่นและทำงานร่วมกันอย่างหลวม ๆ รูปแบบ MVC ส่งผลให้เกิดการแยกแง่มุมต่างๆของแอปพลิเคชัน (ตรรกะอินพุตตรรกะทางธุรกิจและตรรกะ UI) ในขณะที่ให้การเชื่อมต่อแบบหลวม ๆ ระหว่างองค์ประกอบเหล่านี้
Model ห่อหุ้มข้อมูลแอปพลิเคชันและโดยทั่วไปแล้วจะประกอบด้วย POJO.
View มีหน้าที่ในการแสดงผลข้อมูลแบบจำลองและโดยทั่วไปจะสร้างขึ้น HTML เอาต์พุตที่เบราว์เซอร์ของลูกค้าสามารถตีความได้
Controller รับผิดชอบในการประมวลผล User Requests และ Building Appropriate Model และส่งไปยังมุมมองสำหรับการแสดงผล
DispatcherServlet
เฟรมเวิร์ก Spring Web model-view-controller (MVC) ได้รับการออกแบบโดยใช้ DispatcherServlet ที่จัดการคำขอและการตอบกลับ HTTP ทั้งหมด ขั้นตอนการประมวลผลคำร้องขอของ Spring Web MVC DispatcherServlet แสดงในภาพประกอบต่อไปนี้
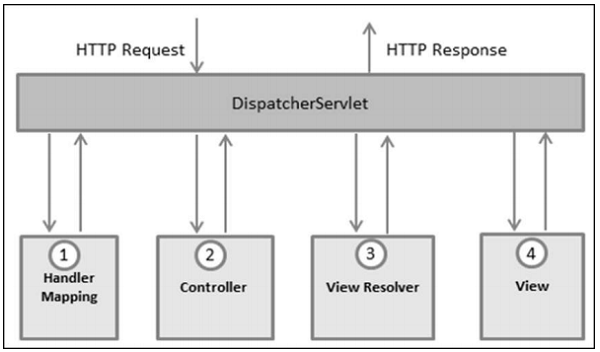
ต่อไปนี้เป็นลำดับของเหตุการณ์ที่สอดคล้องกับคำขอ HTTP ขาเข้าไปยัง DispatcherServlet -
หลังจากได้รับการร้องขอ HTTP DispatcherServlet ให้คำปรึกษา HandlerMapping เพื่อเรียกตัวควบคุมที่เหมาะสม
ผู้ควบคุมรับคำขอและเรียกใช้วิธีการบริการที่เหมาะสมตามที่ใช้ GET หรือ POST method. วิธีการบริการจะตั้งค่าข้อมูลแบบจำลองตามตรรกะทางธุรกิจที่กำหนดไว้และส่งคืนชื่อมุมมองไปยัง DispatcherServlet
DispatcherServlet จะรับความช่วยเหลือจาก ViewResolver เพื่อรับมุมมองที่กำหนดไว้สำหรับคำขอ
เมื่อดูเสร็จสิ้น DispatcherServlet จะส่งข้อมูลโมเดลไปยังมุมมองซึ่งในที่สุดก็แสดงผลบนเบราว์เซอร์
ส่วนประกอบที่กล่าวถึงข้างต้นทั้งหมดเช่น HandlerMapping, Controller และ ViewResolver เป็นส่วนของ WebApplicationContextซึ่งเป็นส่วนขยายของที่ราบ ApplicationContext พร้อมคุณสมบัติพิเศษบางอย่างที่จำเป็นสำหรับเว็บแอปพลิเคชัน
การกำหนดค่าที่จำเป็น
เราจำเป็นต้องแมปคำขอที่คุณต้องการให้ DispatcherServlet จัดการโดยใช้การแมป URL ในไฟล์ web.xmlไฟล์. ต่อไปนี้เป็นตัวอย่างเพื่อแสดงการประกาศและการแมปสำหรับHelloWeb DispatcherServlet -
<web-app id = "WebApp_ID" version = "2.4"
   xmlns = "http://java.sun.com/xml/ns/j2ee"
   xmlns:xsi = "http://www.w3.org/2001/XMLSchema-instance"
   xsi:schemaLocation = "http://java.sun.com/xml/ns/j2ee
   http://java.sun.com/xml/ns/j2ee/web-app_2_4.xsd">

   <display-name>Spring MVC Application</display-name>

   <servlet>
      <servlet-name>HelloWeb</servlet-name>
      <servlet-class>
         org.springframework.web.servlet.DispatcherServlet
      </servlet-class>
      <load-on-startup>1</load-on-startup>
   </servlet>

   <servlet-mapping>
      <servlet-name>HelloWeb</servlet-name>
      <url-pattern>*.jsp</url-pattern>
   </servlet-mapping>
</web-app>
web.xml ไฟล์จะถูกเก็บไว้ในไฟล์ WebContent/WEB-INFไดเรกทอรีของเว็บแอปพลิเคชันของคุณ เมื่อเริ่มต้นไฟล์HelloWeb DispatcherServlet เฟรมเวิร์กจะพยายามโหลดบริบทของแอปพลิเคชันจากไฟล์ชื่อ [servlet-name]-servlet.xmlอยู่ในไดเรกทอรี WebContent / WEB-INF ของแอปพลิเคชัน ในกรณีนี้ไฟล์ของเราจะเป็นHelloWeb-servlet.xml.
ถัดไป <servlet-mapping>แท็กระบุว่า URL ใดที่จะจัดการโดย DispatcherServlet ที่นี่คำขอ HTTP ทั้งหมดที่ลงท้ายด้วย. jsp จะถูกจัดการโดยไฟล์HelloWeb DispatcherServlet
หากคุณไม่ต้องการใช้ชื่อไฟล์เริ่มต้นเป็น [servlet-name]-servlet.xml และตำแหน่งเริ่มต้นเป็น WebContent / WEB-INF คุณสามารถกำหนดชื่อไฟล์และตำแหน่งนี้เองได้โดยการเพิ่มตัวฟัง servlet ContextLoaderListener ในไฟล์ web.xml ของคุณดังนี้ -
<web-app...>

   <!-------- DispatcherServlet definition goes here----->
   ....
   <context-param>
      <param-name>contextConfigLocation</param-name>
      <param-value>/WEB-INF/HelloWeb-servlet.xml</param-value>
   </context-param>

   <listener>
      <listener-class>
         org.springframework.web.context.ContextLoaderListener
      </listener-class>
   </listener>
</web-app>
ตอนนี้ให้เราตรวจสอบการกำหนดค่าที่จำเป็นสำหรับ HelloWeb-servlet.xml วางไว้ในไดเรกทอรี WebContent / WEB-INF ของเว็บแอปพลิเคชันของคุณ
<beans xmlns = "http://www.springframework.org/schema/beans"
   xmlns:context = "http://www.springframework.org/schema/context"
   xmlns:xsi = "http://www.w3.org/2001/XMLSchema-instance"
   xsi:schemaLocation = "
   http://www.springframework.org/schema/beans
   http://www.springframework.org/schema/beans/spring-beans-3.0.xsd
   http://www.springframework.org/schema/context
   http://www.springframework.org/schema/context/spring-context-3.0.xsd">

   <context:component-scan base-package = "com.tutorialspoint" />

   <bean class = "org.springframework.web.servlet.view.InternalResourceViewResolver">
      <property name = "prefix" value = "/WEB-INF/jsp/" />
      <property name = "suffix" value = ".jsp" />
   </bean>

</beans>
ต่อไปนี้เป็นประเด็นสำคัญบางประการเกี่ยวกับ HelloWeb-servlet.xml ไฟล์ -
[servlet-name]-servlet.xml ไฟล์จะถูกใช้เพื่อสร้าง bean ที่กำหนดโดยแทนที่คำจำกัดความของ bean ใด ๆ ที่กำหนดด้วยชื่อเดียวกันในขอบเขตส่วนกลาง
<context:component-scan...> แท็กจะถูกใช้เพื่อเปิดใช้งานความสามารถในการสแกนคำอธิบายประกอบ Spring MVC ซึ่งอนุญาตให้ใช้ประโยชน์จากคำอธิบายประกอบเช่น @Controller และ @RequestMappingฯลฯ
InternalResourceViewResolverจะมีกฎที่กำหนดไว้เพื่อแก้ไขชื่อมุมมอง ตามกฎที่กำหนดไว้ข้างต้นมุมมองเชิงตรรกะที่มีชื่อว่าhello ได้รับมอบหมายให้ใช้มุมมองซึ่งอยู่ที่ /WEB-INF/jsp/hello.jsp.
ตอนนี้ให้เราเข้าใจวิธีการสร้างส่วนประกอบจริงเช่นตัวควบคุมโมเดลและมุมมอง
การกำหนดคอนโทรลเลอร์
DispatcherServlet มอบหมายการร้องขอไปยังคอนโทรลเลอร์เพื่อดำเนินการฟังก์ชันเฉพาะสำหรับมัน @Controllerคำอธิบายประกอบบ่งชี้ว่าคลาสหนึ่ง ๆ ทำหน้าที่เป็นตัวควบคุม @RequestMapping คำอธิบายประกอบใช้เพื่อแมป URL กับทั้งคลาสหรือวิธีการจัดการเฉพาะ
@Controller
@RequestMapping("/hello")
public class HelloController{

   @RequestMapping(method = RequestMethod.GET)
   public String printHello(ModelMap model) {
      model.addAttribute("message", "Hello Spring MVC Framework!");
      return "hello";
   }

}@Controllerคำอธิบายประกอบกำหนดคลาสเป็นตัวควบคุม Spring MVC นี่คือการใช้งานครั้งแรกของ@RequestMapping บ่งชี้ว่าวิธีการจัดการทั้งหมดบนคอนโทรลเลอร์นี้สัมพันธ์กับ /hello เส้นทาง.
คำอธิบายประกอบถัดไป @RequestMapping (method = RequestMethod.GET) ใช้เพื่อประกาศไฟล์ printHello()เป็นวิธีการบริการเริ่มต้นของคอนโทรลเลอร์เพื่อจัดการคำขอ HTTP GET เราสามารถกำหนดวิธีการอื่นเพื่อจัดการคำขอ POST ใด ๆ ที่ URL เดียวกัน
นอกจากนี้เรายังสามารถเขียนตัวควบคุมข้างต้นในรูปแบบอื่นซึ่งเราสามารถเพิ่มแอตทริบิวต์เพิ่มเติมใน @RequestMapping ได้ดังนี้ -
@Controller
public class HelloController{

   @RequestMapping(value = "/hello", method = RequestMethod.GET)
   public String printHello(ModelMap model) {
      model.addAttribute("message", "Hello Spring MVC Framework!");
      return "hello";
   }

}
value แอตทริบิวต์ระบุ URL ที่จะแม็พเมธอดตัวจัดการและ method แอตทริบิวต์กำหนดวิธีการบริการเพื่อจัดการคำขอ HTTP GET
ต่อไปนี้เป็นประเด็นสำคัญที่ควรสังเกตเกี่ยวกับคอนโทรลเลอร์ที่ระบุไว้ข้างต้น -
คุณจะกำหนดตรรกะทางธุรกิจที่จำเป็นภายในวิธีการบริการ คุณสามารถเรียกใช้วิธีอื่นในวิธีนี้ได้ตามข้อกำหนด
ตามตรรกะทางธุรกิจที่กำหนดไว้คุณจะสร้างแบบจำลองภายในวิธีนี้ คุณสามารถตั้งค่าแอตทริบิวต์ของโมเดลที่แตกต่างกันและคุณสมบัติเหล่านี้จะเข้าถึงได้โดยมุมมองเพื่อนำเสนอผลลัพธ์ ตัวอย่างนี้สร้างโมเดลที่มีแอตทริบิวต์ "message"
วิธีการบริการที่กำหนดสามารถส่งคืนสตริงซึ่งมีชื่อของ viewเพื่อใช้ในการแสดงผลแบบจำลอง ตัวอย่างนี้คืนค่า "hello" เป็นชื่อมุมมองตรรกะ
การสร้างมุมมอง JSP
Spring MVC รองรับมุมมองหลายประเภทสำหรับเทคโนโลยีการนำเสนอที่แตกต่างกัน ซึ่ง ได้แก่ -JSPs, HTML, PDF, Excel Worksheets, XML, Velocity Templates, XSLT, JSON, Atom และ RSS ฟีด JasperReportsฯลฯ อย่างไรก็ตามเทมเพลตที่ใช้กันทั่วไปคือเทมเพลต JSP ที่เขียนด้วย JSTL ดังนั้นให้เราเขียนมุมมองสวัสดีง่ายๆใน /WEB-INF/hello/hello.jsp -
<html>
   <head>
      <title>Hello Spring MVC</title>
   </head>
   <body>
      <h2>${message}</h2>
   </body>
</html>
ที่นี่ ${message}นี่คือแอตทริบิวต์ที่เราได้ตั้งค่าไว้ใน Controller คุณสามารถมีแอตทริบิวต์หลายรายการที่จะแสดงในมุมมองของคุณ
บทนี้จะแนะนำเราเกี่ยวกับวิธีการเตรียมสภาพแวดล้อมการพัฒนาเพื่อเริ่มงานของคุณกับ Spring Framework บทนี้จะสอนวิธีการตั้งค่าให้เราด้วยJDK, Tomcat และ Eclipse บนเครื่องของคุณก่อนที่คุณจะติดตั้ง Spring Framework -
ขั้นตอนที่ 1 - ตั้งค่า Java Development Kit (JDK)
คุณสามารถดาวน์โหลดรุ่นล่าสุดจากเว็บไซต์ Java ของออราเคิล - Java SE ดาวน์โหลด คุณจะพบคำแนะนำในการติดตั้ง JDK ในไฟล์ที่ดาวน์โหลดทำตามคำแนะนำที่กำหนดเพื่อติดตั้งและกำหนดค่าการตั้งค่า เมื่อตั้งค่าเสร็จแล้วให้ตั้งค่าตัวแปรสภาพแวดล้อม PATH และ JAVA_HOME เพื่ออ้างถึงไดเร็กทอรีที่มีjava และ javacโดยทั่วไปแล้ว java_install_dir/bin และ java_install_dir ตามลำดับ
หากคุณใช้ Windows และติดตั้ง JDK ใน C:\jdk1.6.0_15คุณจะต้องใส่บรรทัดต่อไปนี้ในไฟล์ C:\autoexec.bat file.
set PATH = C:\jdk1.6.0_15\bin;%PATH%
set JAVA_HOME = C:\jdk1.6.0_15
หรือใน Windows NT / 2000 / XP คุณสามารถคลิกขวาที่ My Computer →เลือก Properties → Advanced → Environment Variables จากนั้นคุณจะอัปเดตค่า PATH และคลิกที่ปุ่ม OK
บน UNIX (Solaris, Linux ฯลฯ ) หากติดตั้ง SDK ในไฟล์ /usr/local/jdk1.6.0_15 และคุณใช้ C เชลล์จากนั้นคุณควรป้อนคำสั่งต่อไปนี้ลงในไฟล์ .cshrc ไฟล์.
setenv PATH /usr/local/jdk1.6.0_15/bin:$PATH
setenv JAVA_HOME /usr/local/jdk1.6.0_15
หรือหากคุณใช้ Integrated Development Environment (IDE) เช่น Borland JBuilder, Eclipse, IntelliJ IDEA หรือ Sun ONE Studioจากนั้นคอมไพล์และรันโปรแกรมง่ายๆเพื่อยืนยันว่า IDE รู้ว่ามีการติดตั้ง Java ไว้ที่ใดมิฉะนั้นทำการตั้งค่าที่เหมาะสมตามที่ระบุในเอกสารของ IDE
ขั้นตอนที่ 2 - ติดตั้ง Apache Common Logging API
คุณสามารถดาวน์โหลด Apache Commons Logging API เวอร์ชันล่าสุดได้จาก https://commons.apache.org/logging/. เมื่อคุณดาวน์โหลดการติดตั้งแล้วให้แกะการกระจายไบนารีลงในตำแหน่งที่สะดวก
ตัวอย่างเช่น - C: \ commons-logging-1.1.1 บน windows หรือ /usr/local/commons-logging1.1.1 บน Linux / Unix ไดเร็กทอรีนี้จะมีไฟล์ jar ต่อไปนี้และเอกสารสนับสนุนอื่น ๆ เป็นต้น

ตรวจสอบให้แน่ใจว่าคุณตั้งค่าตัวแปร CLASSPATH บนไดเร็กทอรีนี้อย่างถูกต้องมิฉะนั้นคุณจะประสบปัญหาขณะเรียกใช้แอปพลิเคชัน
ขั้นตอนที่ 3 - ตั้งค่า Eclipse IDE
ตัวอย่างทั้งหมดในบทช่วยสอนนี้เขียนขึ้นโดยใช้ Eclipse IDE ดังนั้นขอแนะนำว่าเราควรมี Eclipse เวอร์ชันล่าสุดติดตั้งไว้ในเครื่อง
ในการติดตั้ง Eclipse IDE ให้ดาวน์โหลดไบนารี Eclipse ล่าสุดจากลิงค์ต่อไปนี้ https://www.eclipse.org/downloads/. เมื่อดาวน์โหลดการติดตั้งแล้วให้แกะการแจกแจงไบนารีในตำแหน่งที่สะดวก
ตัวอย่างเช่นใน - C: \ eclipse บน windows หรือ / usr / local / eclipse บน Linux / Unix และสุดท้ายตั้งค่าตัวแปร PATH ให้เหมาะสม
Eclipse สามารถเริ่มต้นได้โดยดำเนินการคำสั่งต่อไปนี้บนเครื่อง windows หรือเราสามารถดับเบิลคลิกที่ eclipse.exe
%C:\eclipse\eclipse.exeEclipse สามารถเริ่มต้นได้โดยดำเนินการคำสั่งต่อไปนี้บนเครื่อง UNIX (Solaris, Linux และอื่น ๆ ) -
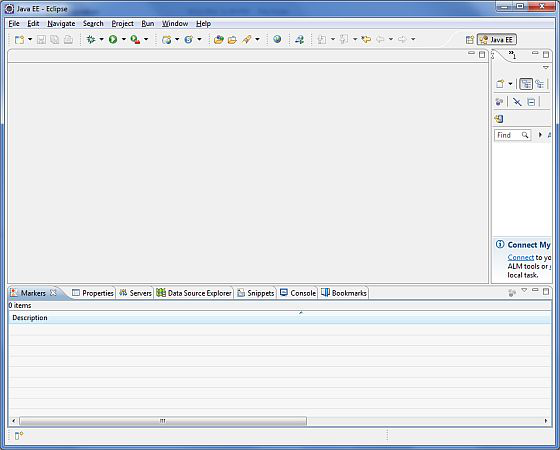
$/usr/local/eclipse/eclipseหลังจากเริ่มต้นสำเร็จหากทุกอย่างเรียบร้อยดีควรแสดงหน้าจอต่อไปนี้
ขั้นตอนที่ 4 - ตั้งค่า Spring Framework Libraries
ตอนนี้ถ้าทุกอย่างเรียบร้อยเราสามารถดำเนินการตั้งค่า Spring Framework ได้ ต่อไปนี้เป็นขั้นตอนในการดาวน์โหลดและติดตั้งเฟรมเวิร์กบนเครื่อง
เลือกว่าคุณต้องการติดตั้ง Spring บน Windows หรือ UNIX จากนั้นดำเนินการในขั้นตอนถัดไปเพื่อดาวน์โหลด .zip file สำหรับ windows และ .tz ไฟล์สำหรับ Unix
ดาวน์โหลดเวอร์ชันล่าสุดของ Spring framework binaries จาก https://repo.spring.io/release/org/springframework/spring.
เราได้ดาวน์โหลดไฟล์ spring-framework-4.3.1.RELEASE-dist.zip บน Windows Machine และเมื่อเราคลายซิปไฟล์ที่ดาวน์โหลดมามันจะให้โครงสร้างไดเร็กทอรีด้านใน - E: \ spring ดังนี้
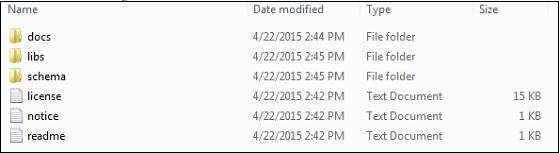
คุณจะพบไลบรารี Spring ทั้งหมดในไดเร็กทอรี E:\spring\libs. ตรวจสอบให้แน่ใจว่าคุณตั้งค่าตัวแปร CLASSPATH ของคุณบนไดเร็กทอรีนี้อย่างถูกต้อง มิฉะนั้นเราจะประสบปัญหาขณะเรียกใช้แอปพลิเคชัน หากเราใช้ Eclipse ก็ไม่จำเป็นต้องตั้งค่า CLASSPATH เนื่องจากการตั้งค่าทั้งหมดจะดำเนินการผ่าน Eclipse
เมื่อคุณทำขั้นตอนสุดท้ายนี้เสร็จแล้วคุณก็พร้อมที่จะดำเนินการสำหรับ Spring Example แรกของคุณซึ่งคุณจะเห็นในบทถัดไป
ตัวอย่างต่อไปนี้แสดงวิธีการเขียนเว็บอย่างง่าย Hello Worldแอปพลิเคชันโดยใช้ Spring MVC Framework ในการเริ่มต้นให้เรามี Eclipse IDE ที่ใช้งานได้และทำตามขั้นตอนต่อไปเพื่อพัฒนา Dynamic Web Application โดยใช้ Spring Web Framework
| ขั้นตอน | คำอธิบาย |
|---|---|
| 1 | สร้างโครงการเว็บแบบไดนามิกด้วยชื่อ HelloWeb และสร้างแพ็คเกจ com.tutorialspoint ภายใต้โฟลเดอร์ src ในโครงการที่สร้างขึ้น |
| 2 | ลากและวาง Spring ต่อไปนี้และไลบรารีอื่น ๆ ลงในโฟลเดอร์ WebContent/WEB-INF/lib.. |
| 3 | สร้างคลาส Java HelloController ภายใต้แพ็คเกจ com.tutorialspoint |
| 4 | สร้างการกำหนดค่า Spring files web.xml และ HelloWeb-servlet.xml ภายใต้โฟลเดอร์ WebContent / WEB-INF |
| 5 | สร้างโฟลเดอร์ย่อยที่มีชื่อ jspภายใต้ WebContent / WEB-INFfolder สร้างไฟล์ดูhello.jsp ภายใต้โฟลเดอร์ย่อยนี้ |
| 6 | ขั้นตอนสุดท้ายคือการสร้างเนื้อหาของไฟล์ต้นทางและการกำหนดค่าและส่งออกแอปพลิเคชันตามที่อธิบายด้านล่าง |
HelloController.java
package com.tutorialspoint;

import org.springframework.stereotype.Controller;
import org.springframework.web.bind.annotation.RequestMapping;
import org.springframework.web.bind.annotation.RequestMethod;
import org.springframework.ui.ModelMap;

@Controller
@RequestMapping("/hello")
public class HelloController{

   @RequestMapping(method = RequestMethod.GET)
   public String printHello(ModelMap model) {
      model.addAttribute("message", "Hello Spring MVC Framework!");

      return "hello";
   }

}
web.xml
<web-app id = "WebApp_ID" version = "2.4"
   xmlns = "http://java.sun.com/xml/ns/j2ee"
   xmlns:xsi = "http://www.w3.org/2001/XMLSchema-instance"
   xsi:schemaLocation = "http://java.sun.com/xml/ns/j2ee
   http://java.sun.com/xml/ns/j2ee/web-app_2_4.xsd">

   <display-name>Spring MVC Application</display-name>

   <servlet>
      <servlet-name>HelloWeb</servlet-name>
      <servlet-class>
         org.springframework.web.servlet.DispatcherServlet
      </servlet-class>
      <load-on-startup>1</load-on-startup>
   </servlet>

   <servlet-mapping>
      <servlet-name>HelloWeb</servlet-name>
      <url-pattern>/</url-pattern>
   </servlet-mapping>

</web-app>
HelloWeb-servlet.xml
<beans xmlns = "http://www.springframework.org/schema/beans"
   xmlns:context = "http://www.springframework.org/schema/context"
   xmlns:xsi = "http://www.w3.org/2001/XMLSchema-instance"
   xsi:schemaLocation = "
   http://www.springframework.org/schema/beans
   http://www.springframework.org/schema/beans/spring-beans-3.0.xsd
   http://www.springframework.org/schema/context
   http://www.springframework.org/schema/context/spring-context-3.0.xsd">

   <context:component-scan base-package = "com.tutorialspoint" />

   <bean class = "org.springframework.web.servlet.view.InternalResourceViewResolver">
      <property name = "prefix" value = "/WEB-INF/jsp/" />
      <property name = "suffix" value = ".jsp" />
   </bean>

</beans>
hello.jsp
<%@ page contentType = "text/html; charset = UTF-8" %>
<html>
   <head>
      <title>Hello World</title>
   </head>
   <body>
      <h2>${message}</h2>
   </body>
</html>
ต่อไปนี้เป็นรายชื่อ Spring และไลบรารีอื่น ๆ ที่จะรวมอยู่ในเว็บแอปพลิเคชัน เราสามารถลากไฟล์เหล่านี้และวางลงใน -WebContent/WEB-INF/lib โฟลเดอร์
servlet-api-x.y.z.jar
commons-logging-x.y.z.jar
spring-aop-x.y.z.jar
spring-beans-x.y.z.jar
spring-context-x.y.z.jar
spring-core-x.y.z.jar
spring-expression-x.y.z.jar
spring-webmvc-x.y.z.jar
spring-web-x.y.z.jar
เมื่อคุณสร้างไฟล์ซอร์สและไฟล์คอนฟิกเสร็จเรียบร้อยแล้วให้ส่งออกแอปพลิเคชันของคุณ คลิกขวาที่แอปพลิเคชันของคุณใช้Export → WAR File ตัวเลือกและบันทึกไฟล์ HelloWeb.war ไฟล์ใน Tomcat's webapps โฟลเดอร์
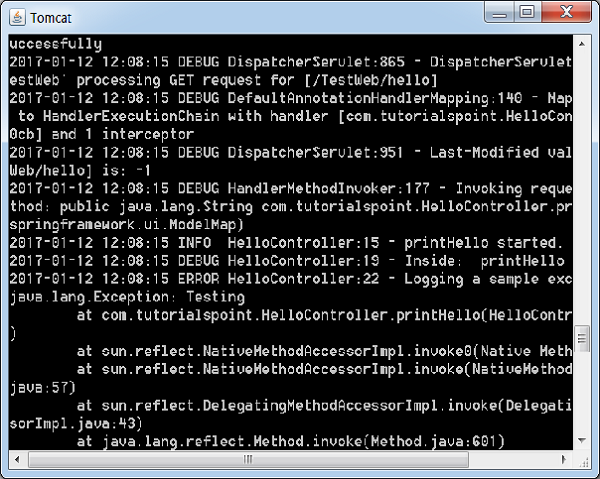
ตอนนี้เริ่มเซิร์ฟเวอร์ Tomcat ของคุณและตรวจสอบให้แน่ใจว่าคุณสามารถเข้าถึงหน้าเว็บอื่น ๆ จากโฟลเดอร์ webapps โดยใช้เบราว์เซอร์มาตรฐาน ตอนนี้พยายามเข้าถึง URL -http://localhost:8080/HelloWeb/hello. หากทุกอย่างเรียบร้อยดีกับ Spring Web Application เราจะเห็นหน้าจอต่อไปนี้
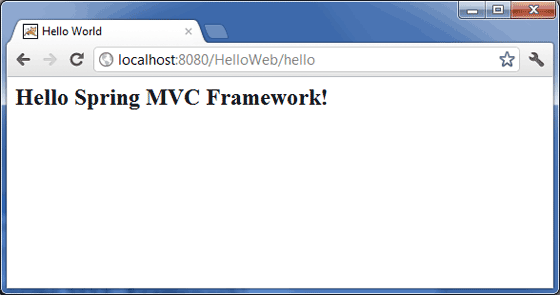
คุณควรทราบว่าใน URL ที่กำหนด HelloWebคือชื่อแอปพลิเคชันและสวัสดีคือโฟลเดอร์ย่อยเสมือนซึ่งเราได้กล่าวถึงในคอนโทรลเลอร์ของเราโดยใช้ @RequestMapping ("/ hello") คุณสามารถใช้รูทโดยตรงขณะแมป URL ของคุณโดยใช้@RequestMapping("/")ในกรณีนี้คุณสามารถเข้าถึงเพจเดียวกันโดยใช้ URL แบบสั้น http://localhost:8080/HelloWeb/แต่ขอแนะนำให้มีฟังก์ชันการทำงานที่แตกต่างกันภายใต้โฟลเดอร์ต่างๆ
ตัวอย่างต่อไปนี้แสดงวิธีการเขียนเว็บอย่างง่าย Hello Worldแอปพลิเคชันโดยใช้ Spring MVC Framework ในการเริ่มต้นให้เรามี Eclipse IDE ที่ใช้งานได้และทำตามขั้นตอนต่อไปเพื่อพัฒนา Dynamic Web Application โดยใช้ Spring Web Framework
| ขั้นตอน | คำอธิบาย |
|---|---|
| 1 | สร้างโปรเจ็กต์ด้วยชื่อ HelloWeb ภายใต้แพ็คเกจ com.tutorialspoint ตามที่อธิบายไว้ในบท Spring MVC - Hello World |
| 2 | สร้างคลาส Java Student, StudentController ภายใต้แพ็คเกจ com.tutorialspoint |
| 3 | สร้างไฟล์มุมมอง student.jsp, result.jsp ภายใต้โฟลเดอร์ย่อย jsp |
| 4 | ขั้นตอนสุดท้ายคือการสร้างเนื้อหาของไฟล์ต้นทางและการกำหนดค่าและส่งออกแอปพลิเคชันตามที่อธิบายด้านล่าง |
Student.java
package com.tutorialspoint;

public class Student {
   private Integer age;
   private String name;
   private Integer id;

   public void setAge(Integer age) {
      this.age = age;
   }
   public Integer getAge() {
      return age;
   }

   public void setName(String name) {
      this.name = name;
   }
   public String getName() {
      return name;
   }

   public void setId(Integer id) {
      this.id = id;
   }
   public Integer getId() {
      return id;
   }
}
StudentController.java
package com.tutorialspoint;

import org.springframework.stereotype.Controller;
import org.springframework.web.bind.annotation.ModelAttribute;
import org.springframework.web.bind.annotation.RequestMapping;
import org.springframework.web.bind.annotation.RequestMethod;
import org.springframework.web.servlet.ModelAndView;
import org.springframework.ui.ModelMap;

@Controller
public class StudentController {

   @RequestMapping(value = "/student", method = RequestMethod.GET)
   public ModelAndView student() {
      return new ModelAndView("student", "command", new Student());
   }

   @RequestMapping(value = "/addStudent", method = RequestMethod.POST)
   public String addStudent(@ModelAttribute("SpringWeb")Student student,
   ModelMap model) {
      model.addAttribute("name", student.getName());
      model.addAttribute("age", student.getAge());
      model.addAttribute("id", student.getId());

      return "result";
   }
}
นี่คือวิธีการบริการแรก student()เราได้ส่ง Studentobject เปล่าในออบเจ็กต์ ModelAndView ด้วยชื่อ "command" สิ่งนี้ทำได้เนื่องจากเฟรมเวิร์กสปริงคาดว่าอ็อบเจ็กต์ที่มีชื่อ "command" ถ้าเราใช้แท็ก <form: form> ในไฟล์ JSP ดังนั้นเมื่อเรียกเมธอด student () จะส่งกลับมุมมอง student.jsp
วิธีการบริการที่สอง addStudent()จะถูกเรียกใช้วิธีการ POST บน HelloWeb / addStudent URL คุณจะเตรียมโมเดลออบเจ็กต์ของคุณตามข้อมูลที่ส่งมา ในที่สุดมุมมอง "ผลลัพธ์" จะถูกส่งกลับจากวิธีการบริการซึ่งจะทำให้เกิดการแสดงผล result.jsp
student.jsp
<%@taglib uri="http://www.springframework.org/tags/form" prefix = "form"%>
<html>
   <head>
      <title>Spring MVC Form Handling</title>
   </head>

   <body>
      <h2>Student Information</h2>
      <form:form method = "POST" action = "/HelloWeb/addStudent">
         <table>
            <tr>
               <td><form:label path = "name">Name</form:label></td>
               <td><form:input path = "name" /></td>
            </tr>
            <tr>
               <td><form:label path = "age">Age</form:label></td>
               <td><form:input path = "age" /></td>
            </tr>
            <tr>
               <td><form:label path = "id">id</form:label></td>
               <td><form:input path = "id" /></td>
            </tr>
            <tr>
               <td colspan = "2">
                  <input type = "submit" value = "Submit"/>
               </td>
            </tr>
         </table>
      </form:form>
   </body>
</html>
result.jsp
<%@taglib uri = "http://www.springframework.org/tags/form" prefix = "form"%>
<html>
   <head>
      <title>Spring MVC Form Handling</title>
   </head>
   <body>

      <h2>Submitted Student Information</h2>
      <table>
         <tr>
            <td>Name</td>
            <td>${name}</td>
         </tr>
         <tr>
            <td>Age</td>
            <td>${age}</td> </tr> <tr> <td>ID</td> <td>${id}</td>
         </tr>
      </table>
   </body>
</html>
เมื่อเราสร้างซอร์สและไฟล์คอนฟิกเสร็จเรียบร้อยแล้วให้ส่งออกแอปพลิเคชันของคุณ คลิกขวาที่แอปพลิเคชันของคุณใช้ตัวเลือกส่งออก→ไฟล์ WAR และบันทึกไฟล์SpringWeb.war ไฟล์ในโฟลเดอร์ webapps ของ Tomcat
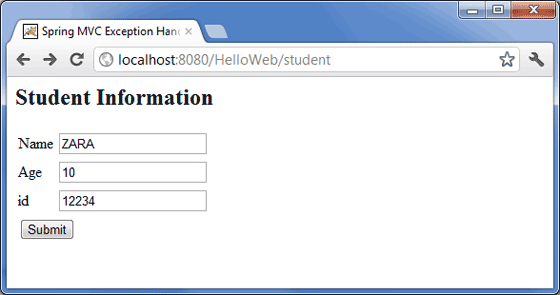
ตอนนี้เริ่มเซิร์ฟเวอร์ Tomcat และตรวจสอบให้แน่ใจว่าคุณสามารถเข้าถึงหน้าเว็บอื่น ๆ จากโฟลเดอร์ webapps โดยใช้เบราว์เซอร์มาตรฐาน ตอนนี้ให้ลองใช้ URL– http: // localhost: 8080 / SpringWeb / student และคุณจะเห็นหน้าจอต่อไปนี้หากทุกอย่างเรียบร้อยดีกับ Spring Web Application
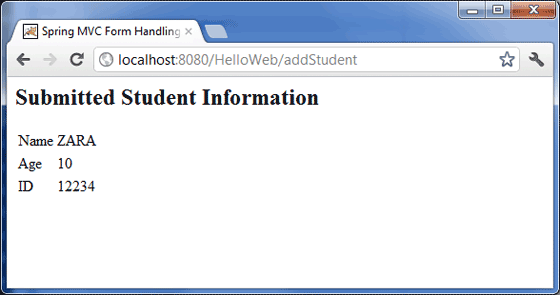
หลังจากส่งข้อมูลที่จำเป็นแล้วให้คลิกที่ปุ่มส่งเพื่อส่งแบบฟอร์ม คุณควรเห็นหน้าจอต่อไปนี้หากทุกอย่างเรียบร้อยดีกับ Spring Web Application ของคุณ

ตัวอย่างต่อไปนี้แสดงวิธีการเขียนแอปพลิเคชันบนเว็บแบบง่ายซึ่งใช้การเปลี่ยนเส้นทางเพื่อถ่ายโอนคำขอ http ไปยังหน้าอื่น ในการเริ่มต้นให้เรามี Eclipse IDE ที่ใช้งานได้และพิจารณาขั้นตอนต่อไปนี้เพื่อพัฒนา Web Application ที่ใช้ Dynamic Form โดยใช้ Spring Web Framework -
| ขั้นตอน | คำอธิบาย |
|---|---|
| 1 | สร้างโปรเจ็กต์ด้วยชื่อ HelloWeb ภายใต้แพ็คเกจ com.tutorialspoint ตามที่อธิบายไว้ในบท Spring MVC - Hello World |
| 2 | สร้างคลาส Java WebController ภายใต้แพ็คเกจ com.tutorialspoint |
| 3 | สร้างไฟล์ดู index.jsp, final.jsp ภายใต้โฟลเดอร์ย่อย jsp |
| 4 | ขั้นตอนสุดท้ายคือการสร้างเนื้อหาของไฟล์ต้นทางและการกำหนดค่าและส่งออกแอปพลิเคชันตามที่อธิบายด้านล่าง |
WebController.java
package com.tutorialspoint;

import org.springframework.stereotype.Controller;
import org.springframework.web.bind.annotation.RequestMapping;
import org.springframework.web.bind.annotation.RequestMethod;

@Controller
public class WebController {

   @RequestMapping(value = "/index", method = RequestMethod.GET)
   public String index() {
	   return "index";
   }

   @RequestMapping(value = "/redirect", method = RequestMethod.GET)
   public String redirect() {

      return "redirect:finalPage";
   }

   @RequestMapping(value = "/finalPage", method = RequestMethod.GET)
   public String finalPage() {

      return "final";
   }
}
ต่อไปนี้เป็นเนื้อหาของไฟล์ Spring view index.jsp. นี่จะเป็นหน้า Landing Page หน้านี้จะส่งคำขอไปยังวิธีการบริการเปลี่ยนเส้นทางการเข้าถึงซึ่งจะเปลี่ยนเส้นทางคำขอนี้ไปยังวิธีการบริการอื่นและสุดท้ายคือfinal.jspหน้าจะปรากฏขึ้น
index.jsp
<%@taglib uri = "http://www.springframework.org/tags/form" prefix = "form"%>
<html>
   <head>
      <title>Spring Page Redirection</title>
   </head>
   <body>
      <h2>Spring Page Redirection</h2>
      <p>Click below button to redirect the result to new page</p>
      <form:form method = "GET" action = "/HelloWeb/redirect">
         <table>
            <tr>
               <td>
                  <input type = "submit" value = "Redirect Page"/>
               </td>
            </tr>
         </table>
      </form:form>
   </body>
</html>
final.jsp
<%@taglib uri = "http://www.springframework.org/tags/form" prefix = "form"%>
<html>

   <head>
      <title>Spring Page Redirection</title>
   </head>

   <body>
      <h2>Redirected Page</h2>
   </body>

</html>
เมื่อคุณสร้างไฟล์ซอร์สและไฟล์คอนฟิกเสร็จเรียบร้อยแล้วให้ส่งออกแอปพลิเคชันของคุณ คลิกขวาที่แอปพลิเคชันของคุณใช้ตัวเลือก Export → WAR File และบันทึกไฟล์ HelloWeb.war ของคุณในโฟลเดอร์ webapps ของ Tomcat
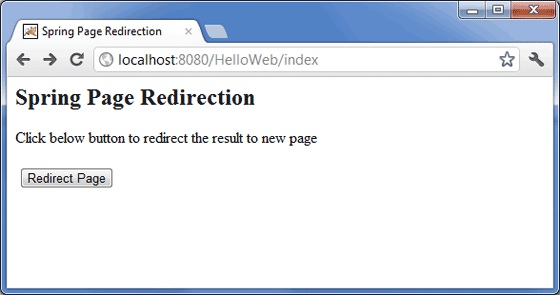
ตอนนี้เริ่มเซิร์ฟเวอร์ Tomcat ของคุณและตรวจสอบให้แน่ใจว่าคุณสามารถเข้าถึงหน้าเว็บอื่น ๆ จากโฟลเดอร์ webapps โดยใช้เบราว์เซอร์มาตรฐาน ลองใช้ URL –http: // localhost: 8080 / HelloWeb / index และคุณจะเห็นหน้าจอต่อไปนี้หากทุกอย่างเรียบร้อยดีกับ Spring Web Application
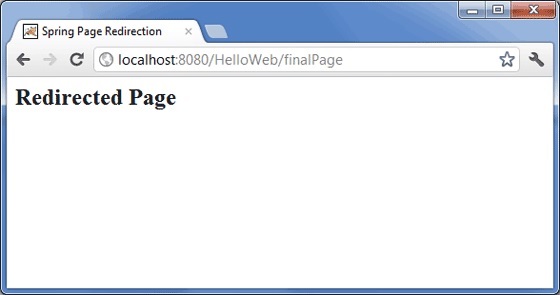
จากนั้นคลิกที่ปุ่ม "หน้าเปลี่ยนเส้นทาง" เพื่อส่งแบบฟอร์มและไปยังหน้าที่เปลี่ยนเส้นทางสุดท้าย เราจะเห็นหน้าจอต่อไปนี้หากทุกอย่างเรียบร้อยดีกับ Spring Web Application ของเรา -
ตัวอย่างต่อไปนี้แสดงวิธีการเขียนแอปพลิเคชันบนเว็บอย่างง่ายโดยใช้ Spring MVC Framework ซึ่งสามารถเข้าถึงเพจแบบคงที่พร้อมกับเพจแบบไดนามิกด้วย <mvc:resources> แท็ก
ในการเริ่มต้นให้เรามี Eclipse IDE ที่ใช้งานได้และปฏิบัติตามขั้นตอนต่อไปนี้เพื่อพัฒนา Web Application ที่ใช้ Dynamic Form โดยใช้ Spring Web Framework
| ขั้นตอน | คำอธิบาย |
|---|---|
| 1 | สร้างโปรเจ็กต์ด้วยชื่อ HelloWeb ภายใต้แพ็คเกจ com.tutorialspoint ตามที่อธิบายไว้ในบท Spring MVC - Hello World |
| 2 | สร้างคลาส Java WebController ภายใต้แพ็คเกจ com.tutorialspoint |
| 3 | สร้างไฟล์แบบคงที่ final.htm ภายใต้โฟลเดอร์ย่อย jsp |
| 4 | อัพเดตไฟล์คอนฟิกูเรชัน Spring HelloWeb-servlet.xml ภายใต้โฟลเดอร์ WebContent / WEB-INF ดังที่แสดงด้านล่าง |
| 5 | ขั้นตอนสุดท้ายคือการสร้างเนื้อหาของแหล่งที่มาและไฟล์การกำหนดค่าและส่งออกแอปพลิเคชันซึ่งอธิบายไว้ด้านล่าง |
WebController.java
package com.tutorialspoint;

import org.springframework.stereotype.Controller;
import org.springframework.web.bind.annotation.RequestMapping;
import org.springframework.web.bind.annotation.RequestMethod;

@Controller
public class WebController {

   @RequestMapping(value = "/index", method = RequestMethod.GET)
   public String index() {
	   return "index";
   }

   @RequestMapping(value = "/staticPage", method = RequestMethod.GET)
   public String redirect() {

      return "redirect:/pages/final.htm";
   }
}
HelloWeb-servlet.xml
<?xml version = "1.0" encoding = "UTF-8"?>
<beans xmlns = "http://www.springframework.org/schema/beans"
   xmlns:xsi = "  http://www.w3.org/2001/XMLSchema-instance"
   xmlns:context = "http://www.springframework.org/schema/context"
   xmlns:mvc = "http://www.springframework.org/schema/mvc"
   xsi:schemaLocation = "http://www.springframework.org/schema/beans
   http://www.springframework.org/schema/beans/spring-beans-2.5.xsd
   http://www.springframework.org/schema/mvc
   http://www.springframework.org/schema/mvc/spring-mvc-3.0.xsd
   http://www.springframework.org/schema/context
   http://www.springframework.org/schema/context/spring-context-3.0.xsd">

   <context:component-scan base-package = "com.tutorialspoint" />

   <bean id = "viewResolver" class = "org.springframework.web.servlet.view.InternalResourceViewResolver">

      <property name = "prefix" value = "/WEB-INF/jsp/" />
      <property name = "suffix" value = ".jsp" />
   </bean>
   <mvc:resources mapping = "/pages/**" location = "/WEB-INF/pages/" />
   <mvc:annotation-driven/>
</beans>
ที่นี่ <mvc:resources..../>กำลังใช้แท็กเพื่อแมปเพจแบบคงที่ แอตทริบิวต์การแมปต้องเป็นไฟล์Ant patternที่ระบุรูปแบบ URL ของคำขอ http แอ็ตทริบิวต์ตำแหน่งต้องระบุตำแหน่งไดเร็กทอรีรีซอร์สที่ถูกต้องตั้งแต่หนึ่งรายการขึ้นไปโดยมีเพจแบบคงที่ซึ่งรวมถึงรูปภาพสไตล์ชีต JavaScript และเนื้อหาสแตติกอื่น ๆ อาจระบุตำแหน่งทรัพยากรหลายรายการโดยใช้รายการค่าที่คั่นด้วยเครื่องหมายจุลภาค
ต่อไปนี้เป็นเนื้อหาของไฟล์ Spring view WEB-INF/jsp/index.jsp. นี่จะเป็นหน้า Landing Page หน้านี้จะส่งคำขอเพื่อเข้าถึงไฟล์staticPage service methodซึ่งจะเปลี่ยนเส้นทางคำขอนี้ไปยังเพจแบบคงที่ที่มีอยู่ในโฟลเดอร์ WEB-INF / pages
index.jsp
<%@taglib uri = "http://www.springframework.org/tags/form" prefix = "form"%>
<html>
   <head>
      <title>Spring Landing Page</title>
   </head>
   <body>
      <h2>Spring Landing Pag</h2>
      <p>Click below button to get a simple HTML page</p>
      <form:form method = "GET" action = "/HelloWeb/staticPage">
         <table>
            <tr>
               <td>
                  <input type = "submit" value = "Get HTML Page"/>
               </td>
            </tr>
         </table>
      </form:form>
   </body>
</html>
final.htm
<html>
<head>
<title>Spring Static Page</title>
</head>
<body>
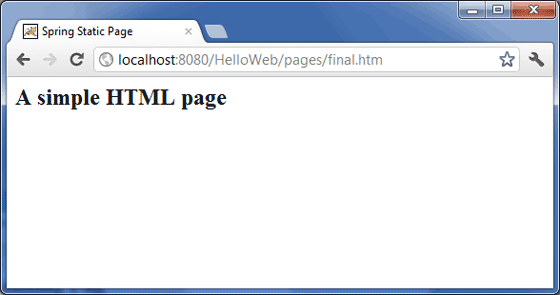
<h2>A simple HTML page</h2>
</body>
</html>เมื่อคุณสร้างไฟล์ซอร์สและไฟล์คอนฟิกเสร็จเรียบร้อยแล้วให้ส่งออกแอปพลิเคชันของคุณ คลิกขวาที่แอปพลิเคชันของคุณใช้ตัวเลือก Export → WAR File และบันทึกไฟล์ HelloWeb.war ของคุณในโฟลเดอร์ webapps ของ Tomcat
ตอนนี้เริ่มเซิร์ฟเวอร์ Tomcat ของคุณและตรวจสอบให้แน่ใจว่าคุณสามารถเข้าถึงหน้าเว็บอื่น ๆ จากโฟลเดอร์ webapps โดยใช้เบราว์เซอร์มาตรฐาน ตอนนี้พยายามเข้าถึง URL - http: // localhost: 8080 / HelloWeb / index หากทุกอย่างเรียบร้อยดีกับ Spring Web Application เราจะเห็นหน้าจอต่อไปนี้

คลิกที่ปุ่ม "รับหน้า HTML" เพื่อเข้าถึงเพจแบบคงที่ที่กล่าวถึงในเมธอดบริการ staticPage หากทุกอย่างเรียบร้อยดีกับ Spring Web Application ของคุณเราจะเห็นหน้าจอต่อไปนี้
ตัวอย่างต่อไปนี้แสดงวิธีใช้กล่องข้อความในแบบฟอร์มโดยใช้กรอบงาน Spring Web MVC ในการเริ่มต้นให้เรามี Eclipse IDE ที่ใช้งานได้และปฏิบัติตามขั้นตอนต่อไปนี้เพื่อพัฒนา Web Application ที่ใช้ Dynamic Form โดยใช้ Spring Web Framework -
| ขั้นตอน | คำอธิบาย |
|---|---|
| 1 | สร้างโปรเจ็กต์ด้วยชื่อ HelloWeb ภายใต้แพ็คเกจ com.tutorialspoint ตามที่อธิบายไว้ในบท Spring MVC - Hello World Example |
| 2 | สร้างคลาส Java Student, StudentController ภายใต้แพ็คเกจ com.tutorialspoint |
| 3 | สร้างไฟล์ view student.jsp, result.jsp ภายใต้โฟลเดอร์ย่อย jsp |
| 4 | ขั้นตอนสุดท้ายคือการสร้างเนื้อหาของไฟล์ต้นทางและการกำหนดค่าและส่งออกแอปพลิเคชันตามที่อธิบายด้านล่าง |
Student.java
package com.tutorialspoint;

public class Student {
   private Integer age;
   private String name;
   private Integer id;

   public void setAge(Integer age) {
      this.age = age;
   }
   public Integer getAge() {
      return age;
   }

   public void setName(String name) {
      this.name = name;
   }
   public String getName() {
      return name;
   }

   public void setId(Integer id) {
      this.id = id;
   }
   public Integer getId() {
      return id;
   }
}
StudentController.java
package com.tutorialspoint;

import org.springframework.stereotype.Controller;
import org.springframework.web.bind.annotation.ModelAttribute;
import org.springframework.web.bind.annotation.RequestMapping;
import org.springframework.web.bind.annotation.RequestMethod;
import org.springframework.web.servlet.ModelAndView;
import org.springframework.ui.ModelMap;

@Controller
public class StudentController {

   @RequestMapping(value = "/student", method = RequestMethod.GET)
   public ModelAndView student() {
      return new ModelAndView("student", "command", new Student());
   }

   @RequestMapping(value = "/addStudent", method = RequestMethod.POST)
   public String addStudent(@ModelAttribute("SpringWeb")Student student,
      ModelMap model) {
      model.addAttribute("name", student.getName());
      model.addAttribute("age", student.getAge());
      model.addAttribute("id", student.getId());

      return "result";
   }
}
นี่คือวิธีการบริการแรก student()เราได้ส่ง Studentobject ว่างในวัตถุ ModelAndView ด้วยชื่อ "คำสั่ง" เนื่องจากกรอบงานสปริงคาดว่าวัตถุที่มีชื่อ "คำสั่ง" หากคุณใช้ <form:form>แท็กในไฟล์ JSP ของคุณ ดังนั้นเมื่อเรียกว่า student () วิธีการส่งกลับstudent.jsp view.
วิธีการบริการที่สอง addStudent() จะถูกเรียกใช้เมธอด POST บนไฟล์ HelloWeb/addStudentURL คุณจะเตรียมโมเดลออบเจ็กต์ของคุณตามข้อมูลที่ส่งมา ในที่สุดมุมมอง "ผลลัพธ์" จะถูกส่งกลับจากวิธีการบริการซึ่งจะทำให้เกิดการแสดงผล result.jsp
student.jsp
<%@taglib uri = "http://www.springframework.org/tags/form" prefix = "form"%>
<html>
   <head>
      <title>Spring MVC Form Handling</title>
   </head>
   <body>

      <h2>Student Information</h2>
      <form:form method = "POST" action = "/HelloWeb/addStudent">
         <table>
            <tr>
               <td><form:label path = "name">Name</form:label></td>
               <td><form:input path = "name" /></td>
            </tr>
            <tr>
               <td><form:label path = "age">Age</form:label></td>
               <td><form:input path = "age" /></td>
            </tr>
            <tr>
               <td><form:label path = "id">id</form:label></td>
               <td><form:input path = "id" /></td>
            </tr>
            <tr>
               <td colspan = "2">
                  <input type = "submit" value = "Submit"/>
               </td>
            </tr>
         </table>
      </form:form>
   </body>
</html>
ที่นี่เรากำลังใช้ <form:input />แท็กเพื่อแสดงกล่องข้อความ HTML ตัวอย่างเช่น -
<form:input path = "name" />มันจะแสดงเนื้อหา HTML ต่อไปนี้
<input id = "name" name = "name" type = "text" value = ""/>result.jsp
<%@taglib uri = "http://www.springframework.org/tags/form" prefix = "form"%>
<html>
   <head>
      <title>Spring MVC Form Handling</title>
   </head>
   <body>

      <h2>Submitted Student Information</h2>
      <table>
         <tr>
            <td>Name</td>
            <td>${name}</td> </tr> <tr> <td>Age</td> <td>${age}</td>
         </tr>
         <tr>
            <td>ID</td>
            <td>${id}</td>
         </tr>
      </table>
   </body>
</html>
เมื่อเราสร้างซอร์สและไฟล์คอนฟิกเสร็จเรียบร้อยแล้วให้ส่งออกแอปพลิเคชันของคุณ คลิกขวาที่แอปพลิเคชันของคุณใช้Export → WAR File และบันทึกไฟล์ HelloWeb.war ไฟล์ในโฟลเดอร์ webapps ของ Tomcat
ตอนนี้เริ่มเซิร์ฟเวอร์ Tomcat และตรวจสอบให้แน่ใจว่าคุณสามารถเข้าถึงหน้าเว็บอื่น ๆ จากโฟลเดอร์ webapps โดยใช้เบราว์เซอร์มาตรฐาน ลองใช้ URL -http://localhost:8080/HelloWeb/student และเราจะเห็นหน้าจอต่อไปนี้หากทุกอย่างเรียบร้อยดีกับ Spring Web Application

หลังจากส่งข้อมูลที่จำเป็นแล้วให้คลิกที่ปุ่มส่งเพื่อส่งแบบฟอร์ม เราจะเห็นหน้าจอต่อไปนี้หากทุกอย่างเรียบร้อยดีกับ Spring Web Application
ตัวอย่างต่อไปนี้อธิบายวิธีใช้รหัสผ่านในแบบฟอร์มโดยใช้กรอบงาน Spring Web MVC ในการเริ่มต้นให้เรามี Eclipse IDE ที่ใช้งานได้และปฏิบัติตามขั้นตอนต่อไปนี้เพื่อพัฒนา Web Application ที่ใช้ Dynamic Form โดยใช้ Spring Web Framework
| ขั้นตอน | คำอธิบาย |
|---|---|
| 1 | สร้างโปรเจ็กต์ด้วยชื่อ HelloWeb ภายใต้แพ็คเกจ com.tutorialspoint ตามที่อธิบายไว้ในบท Spring MVC - Hello World |
| 2 | สร้างคลาส Java User, UserController ภายใต้ com.tutorialspointpackage |
| 3 | สร้างไฟล์มุมมอง user.jsp, users.jsp ภายใต้โฟลเดอร์ย่อย jsp |
| 4 | ขั้นตอนสุดท้ายคือการสร้างเนื้อหาของไฟล์ต้นทางและการกำหนดค่าและส่งออกแอปพลิเคชันตามที่อธิบายด้านล่าง |
User.java
package com.tutorialspoint;

public class User {

   private String username;
   private String password;

   public String getUsername() {
      return username;
   }
   public void setUsername(String username) {
      this.username = username;
   }

   public String getPassword() {
      return password;
   }
   public void setPassword(String password) {
      this.password = password;
   }
}
UserController.java
package com.tutorialspoint;

import org.springframework.stereotype.Controller;
import org.springframework.web.bind.annotation.ModelAttribute;
import org.springframework.web.bind.annotation.RequestMapping;
import org.springframework.web.bind.annotation.RequestMethod;
import org.springframework.web.servlet.ModelAndView;
import org.springframework.ui.ModelMap;

@Controller
public class UserController {

   @RequestMapping(value = "/user", method = RequestMethod.GET)
   public ModelAndView user() {
      return new ModelAndView("user", "command", new User());
   }

   @RequestMapping(value = "/addUser", method = RequestMethod.POST)
   public String addUser(@ModelAttribute("SpringWeb")User user,
      ModelMap model) {
      model.addAttribute("username", user.getUsername());
      model.addAttribute("password", user.getPassword());

      return "users";
   }
}
นี่คือวิธีการบริการแรก user()เราได้ส่งผ่านอ็อบเจ็กต์ User ว่างในอ็อบเจ็กต์ ModelAndView ที่มีชื่อ "command" เนื่องจาก Spring framework ต้องการอ็อบเจ็กต์ที่มีชื่อ "command" หากคุณใช้แท็ก <form: form> ในไฟล์ JSP ของคุณ ดังนั้นเมื่อเรียกว่า user () method จะส่งกลับมุมมอง user.jsp
วิธีการบริการที่สอง addUser()จะถูกเรียกโดยใช้วิธีการ POST บน HelloWeb / addUser URL คุณจะเตรียมโมเดลออบเจ็กต์ของคุณตามข้อมูลที่ส่งมา สุดท้ายมุมมอง "ผู้ใช้" จะถูกส่งกลับจากวิธีการบริการซึ่งจะส่งผลให้มีการแสดงผล users.jsp
user.jsp
<%@taglib uri = "http://www.springframework.org/tags/form" prefix = "form"%>
<html>
   <head>
      <title>Spring MVC Form Handling</title>
   </head>
   <body>

      <h2>User Information</h2>
      <form:form method = "POST" action = "/HelloWeb/addUser">
         <table>
            <tr>
               <td><form:label path = "username">User Name</form:label></td>
               <td><form:input path = "username" /></td>
            </tr>
            <tr>
               <td><form:label path = "password">Age</form:label></td>
               <td><form:password path = "password" /></td>
            </tr>
            <tr>
               <td colspan = "2">
                  <input type = "submit" value = "Submit"/>
               </td>
            </tr>
         </table>
      </form:form>
   </body>
</html>
ที่นี่เรากำลังใช้แท็ก <form: password /> เพื่อสร้างช่องรหัสผ่าน HTML ตัวอย่างเช่น -
<form:password path = "password" />มันจะแสดงเนื้อหา HTML ต่อไปนี้
<input id = "password" name = "password" type = "password" value = ""/>users.jsp
<%@taglib uri = "http://www.springframework.org/tags/form" prefix = "form"%>
<html>
   <head>
      <title>Spring MVC Form Handling</title>
   </head>
   <body>
      <h2>Submitted User Information</h2>
      <table>
         <tr>
            <td>Username</td>
            <td>${username}</td>
         </tr>
         <tr>
            <td>Password</td>
            <td>${password}</td>
         </tr>
      </table>
   </body>
</html>
เมื่อเราสร้างซอร์สและไฟล์คอนฟิกเสร็จเรียบร้อยแล้วให้ส่งออกแอปพลิเคชัน คลิกขวาที่แอปพลิเคชันของคุณใช้ตัวเลือก Export → WAR File และบันทึกไฟล์ HelloWeb.war ของคุณในโฟลเดอร์ webapps ของ Tomcat
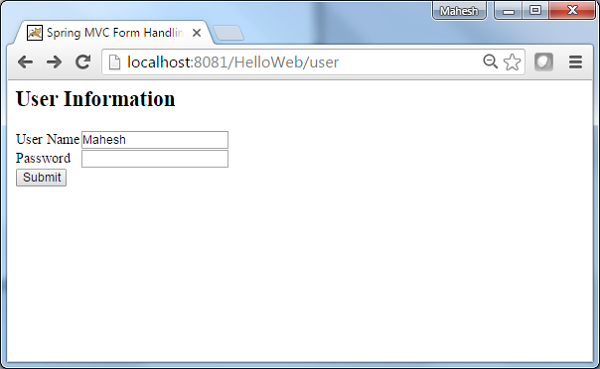
ตอนนี้เริ่มเซิร์ฟเวอร์ Tomcat ของคุณและตรวจสอบให้แน่ใจว่าคุณสามารถเข้าถึงหน้าเว็บอื่น ๆ จากโฟลเดอร์ webapps โดยใช้เบราว์เซอร์มาตรฐาน ลองใช้ URL –http: // localhost: 8080 / HelloWeb / user และเราจะเห็นหน้าจอต่อไปนี้หากทุกอย่างเรียบร้อยดีกับ Spring Web Application
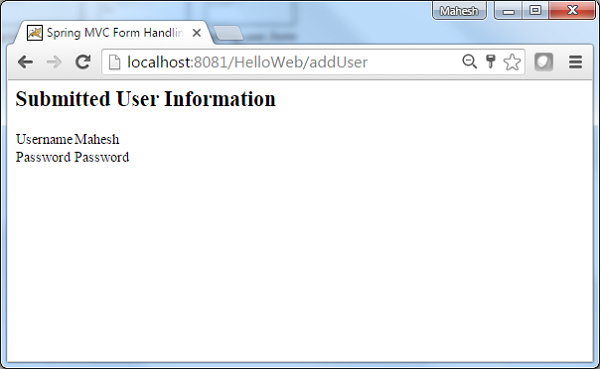
หลังจากส่งข้อมูลที่จำเป็นแล้วให้คลิกที่ปุ่มส่งเพื่อส่งแบบฟอร์ม เราจะเห็นหน้าจอต่อไปนี้หากทุกอย่างเรียบร้อยดีกับ Spring Web Application
ตัวอย่างต่อไปนี้อธิบายวิธีการใช้ TextArea ในฟอร์มโดยใช้ Spring Web MVC framework ในการเริ่มต้นให้เรามี Eclipse IDE ที่ใช้งานได้และทำตามขั้นตอนต่อไปเพื่อพัฒนา Web Application ที่ใช้ Dynamic Form โดยใช้ Spring Web Framework
| ขั้นตอน | คำอธิบาย |
|---|---|
| 1 | สร้างโปรเจ็กต์ด้วยชื่อ HelloWeb ภายใต้แพ็คเกจ com.tutorialspoint ตามที่อธิบายไว้ในบท Spring MVC - Hello World |
| 2 | สร้างคลาส Java User, UserController ภายใต้ com.tutorialspointpackage |
| 3 | สร้างไฟล์มุมมอง user.jsp, users.jsp ภายใต้โฟลเดอร์ย่อย jsp |
| 4 | ขั้นตอนสุดท้ายคือการสร้างเนื้อหาของไฟล์ต้นทางและการกำหนดค่าและส่งออกแอปพลิเคชันตามที่อธิบายด้านล่าง |
User.java
package com.tutorialspoint;

public class User {

   private String username;
   private String password;
   private String address;

   public String getUsername() {
      return username;
   }
   public void setUsername(String username) {
      this.username = username;
   }

   public String getPassword() {
      return password;
   }
   public void setPassword(String password) {
      this.password = password;
   }
   public String getAddress() {
      return address;
   }
   public void setAddress(String address) {
      this.address = address;
   }
}
UserController.java
package com.tutorialspoint;

import org.springframework.stereotype.Controller;
import org.springframework.web.bind.annotation.ModelAttribute;
import org.springframework.web.bind.annotation.RequestMapping;
import org.springframework.web.bind.annotation.RequestMethod;
import org.springframework.web.servlet.ModelAndView;
import org.springframework.ui.ModelMap;

@Controller
public class UserController {

   @RequestMapping(value = "/user", method = RequestMethod.GET)
   public ModelAndView user() {
      return new ModelAndView("user", "command", new User());
   }

   @RequestMapping(value = "/addUser", method = RequestMethod.POST)
   public String addUser(@ModelAttribute("SpringWeb")User user,
      ModelMap model) {
      model.addAttribute("username", user.getUsername());
      model.addAttribute("password", user.getPassword());
      model.addAttribute("address", user.getAddress());

      return "users";
   }
}
ที่นี่สำหรับผู้ใช้วิธีการบริการรายแรก () เราได้ส่งผ่านอ็อบเจ็กต์ User ว่างในอ็อบเจ็กต์ ModelAndView ที่มีชื่อ "command" เนื่องจากเฟรมเวิร์กสปริงคาดว่าอ็อบเจ็กต์ที่มีชื่อ "command" หากคุณใช้ <form: form> แท็กในไฟล์ JSP ของคุณ ดังนั้นเมื่อเรียกใช้ user () เมธอดจะส่งกลับมุมมอง user.jsp
วิธีการบริการที่สอง addUser () จะถูกเรียกใช้กับเมธอด POST บน HelloWeb / addUser URL คุณจะเตรียมโมเดลออบเจ็กต์ของคุณตามข้อมูลที่ส่งมา สุดท้ายมุมมอง "ผู้ใช้" จะถูกส่งกลับจากวิธีการบริการซึ่งจะส่งผลให้มีการแสดงผล users.jsp
user.jsp
<%@taglib uri = "http://www.springframework.org/tags/form" prefix = "form"%>
<html>
   <head>
      <title>Spring MVC Form Handling</title>
   </head>
   <body>

   <h2>User Information</h2>
   <form:form method = "POST" action = "/HelloWeb/addUser">
      <table>
         <tr>
            <td><form:label path = "username">User Name</form:label></td>
            <td><form:input path = "username" /></td>
         </tr>
         <tr>
            <td><form:label path = "password">Age</form:label></td>
            <td><form:password path = "password" /></td>
         </tr>
         <tr>
            <td><form:label path = "address">Address</form:label></td>
            <td><form:textarea path = "address" rows = "5" cols = "30" /></td>
         </tr>
         <tr>
            <td colspan = "2">
               <input type = "submit" value = "Submit"/>
            </td>
         </tr>
      </table>
   </form:form>
   </body>
</html>
ที่นี่เรากำลังใช้ <form:textarea />แท็กเพื่อแสดงกล่อง HTML textarea ตัวอย่างเช่น -
<form:textarea path = "address" rows = "5" cols = "30" />มันจะแสดงเนื้อหา HTML ต่อไปนี้
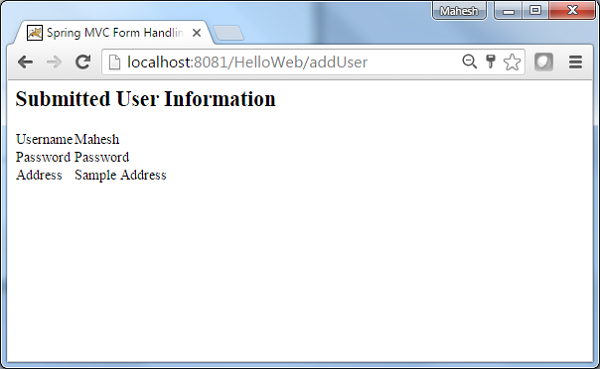
<textarea id = "address" name = "address" rows = "5" cols = "30"></textarea>users.jsp
<%@taglib uri = "http://www.springframework.org/tags/form" prefix = "form"%>
<html>
   <head>
      <title>Spring MVC Form Handling</title>
   </head>
   <body>

      <h2>Submitted User Information</h2>
      <table>
         <tr>
            <td>Username</td>
            <td>${username}</td>
         </tr>
         <tr>
            <td>Password</td>
            <td>${password}</td> </tr> <tr> <td>Address</td> <td>${address}</td>
         </tr>
      </table>
   </body>
</html>
เมื่อคุณสร้างไฟล์ซอร์สและไฟล์คอนฟิกเสร็จเรียบร้อยแล้วให้ส่งออกแอปพลิเคชันของคุณ คลิกขวาที่แอปพลิเคชันของคุณใช้ตัวเลือก Export → WAR File และบันทึกไฟล์ HelloWeb.war ของคุณในโฟลเดอร์ webapps ของ Tomcat
ตอนนี้เริ่มเซิร์ฟเวอร์ Tomcat ของคุณและตรวจสอบให้แน่ใจว่าคุณสามารถเข้าถึงหน้าเว็บอื่น ๆ จากโฟลเดอร์ webapps โดยใช้เบราว์เซอร์มาตรฐาน ลองใช้ URL –http: // localhost: 8080 / HelloWeb / user และเราจะเห็นหน้าจอต่อไปนี้หากทุกอย่างเรียบร้อยดีกับ Spring Web Application
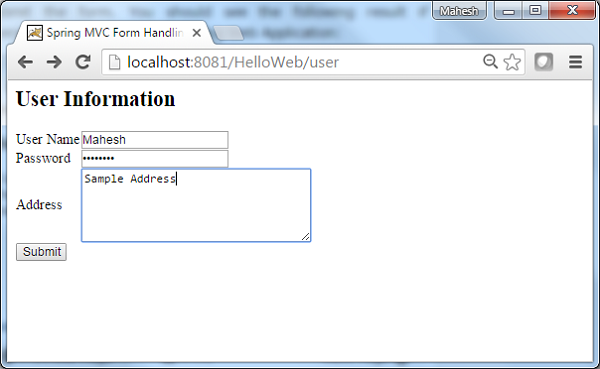
หลังจากส่งข้อมูลที่จำเป็นแล้วให้คลิกที่ปุ่มส่งเพื่อส่งแบบฟอร์ม เราจะเห็นหน้าจอต่อไปนี้หากทุกอย่างเรียบร้อยดีกับ Spring Web Application
ตัวอย่างต่อไปนี้อธิบายวิธีการใช้ช่องทำเครื่องหมายเดียวในแบบฟอร์มโดยใช้กรอบงาน Spring Web MVC ในการเริ่มต้นให้เรามี Eclipse IDE ที่ใช้งานได้และพิจารณาขั้นตอนต่อไปนี้เพื่อพัฒนา Web Application ที่ใช้ Dynamic Form โดยใช้ Spring Web Framework
| ขั้นตอน | คำอธิบาย |
|---|---|
| 1 | สร้างโปรเจ็กต์ด้วยชื่อ HelloWeb ภายใต้แพ็คเกจ com.tutorialspointas ที่อธิบายไว้ใน Spring MVC - Hello World Example Chapter |
| 2 | สร้างคลาส Java User, UserController ภายใต้ com.tutorialspointpackage |
| 3 | สร้างไฟล์วิว user.jsp, users.jsp ภายใต้โฟลเดอร์ย่อย jsp |
| 4 | ขั้นตอนสุดท้ายคือการสร้างเนื้อหาของไฟล์ต้นทางและการกำหนดค่าและส่งออกแอปพลิเคชันตามที่อธิบายด้านล่าง |
User.java
package com.tutorialspoint;

public class User {

   private String username;
   private String password;
   private String address;
   private boolean receivePaper;

   public String getUsername() {
      return username;
   }
   public void setUsername(String username) {
      this.username = username;
   }

   public String getPassword() {
      return password;
   }
   public void setPassword(String password) {
      this.password = password;
   }
   public String getAddress() {
      return address;
   }
   public void setAddress(String address) {
      this.address = address;
   }
   public boolean isReceivePaper() {
      return receivePaper;
   }
   public void setReceivePaper(boolean receivePaper) {
      this.receivePaper = receivePaper;
   }
}
UserController.java
package com.tutorialspoint;

import org.springframework.stereotype.Controller;
import org.springframework.web.bind.annotation.ModelAttribute;
import org.springframework.web.bind.annotation.RequestMapping;
import org.springframework.web.bind.annotation.RequestMethod;
import org.springframework.web.servlet.ModelAndView;
import org.springframework.ui.ModelMap;

@Controller
public class UserController {

   @RequestMapping(value = "/user", method = RequestMethod.GET)
   public ModelAndView user() {
      return new ModelAndView("user", "command", new User());
   }

   @RequestMapping(value = "/addUser", method = RequestMethod.POST)
   public String addUser(@ModelAttribute("SpringWeb")User user,
      ModelMap model) {
      model.addAttribute("username", user.getUsername());
      model.addAttribute("password", user.getPassword());
      model.addAttribute("address", user.getAddress());
      model.addAttribute("receivePaper", user.isReceivePaper());
      return "users";
   }
}
ที่นี่สำหรับผู้ใช้วิธีการบริการรายแรก () เราได้ส่งผ่านอ็อบเจ็กต์ User ว่างในอ็อบเจ็กต์ ModelAndView ที่มีชื่อ "command" เนื่องจากเฟรมเวิร์กสปริงคาดว่าอ็อบเจ็กต์ที่มีชื่อ "command" หากคุณใช้ <form: form> แท็กในไฟล์ JSP ของคุณ ดังนั้นเมื่อเรียกว่า user () method จะส่งกลับมุมมอง user.jsp
วิธีการบริการที่สอง addUser () จะถูกเรียกใช้กับเมธอด POST บน HelloWeb / addUser URL คุณจะเตรียมโมเดลออบเจ็กต์ของคุณตามข้อมูลที่ส่งมา สุดท้ายมุมมอง "ผู้ใช้" จะถูกส่งกลับจากวิธีการบริการซึ่งจะส่งผลให้มีการแสดงผล users.jsp
user.jsp
<%@taglib uri = "http://www.springframework.org/tags/form" prefix = "form"%>
<html>
   <head>
      <title>Spring MVC Form Handling</title>
   </head>
   <body>

      <h2>User Information</h2>
      <form:form method = "POST" action = "/HelloWeb/addUser">
         <table>
            <tr>
               <td><form:label path = "username">User Name</form:label></td>
               <td><form:input path = "username" /></td>
            </tr>
            <tr>
               <td><form:label path = "password">Age</form:label></td>
               <td><form:password path = "password" /></td>
            </tr>
            <tr>
               <td><form:label path = "address">Address</form:label></td>
               <td><form:textarea path = "address" rows = "5" cols = "30" /></td>
            </tr>
            <tr>
               <td><form:label path = "receivePaper">Subscribe Newsletter</form:label></td>
               <td><form:checkbox path = "receivePaper" /></td>
            </tr>
            <tr>
               <td colspan = "2">
                  <input type = "submit" value = "Submit"/>
               </td>
            </tr>
         </table>
      </form:form>
   </body>
</html>
ที่นี่เรากำลังใช้ <form:checkboxes /> แท็กเพื่อแสดงกล่องกาเครื่องหมาย HTML
ตัวอย่างเช่น -
<form:checkbox path="receivePaper" />มันจะแสดงเนื้อหา HTML ต่อไปนี้
<input id="receivePaper1" name = "receivePaper" type = "checkbox" value = "true"/>
<input type = "hidden" name = "_receivePaper" value = "on"/>
users.jsp
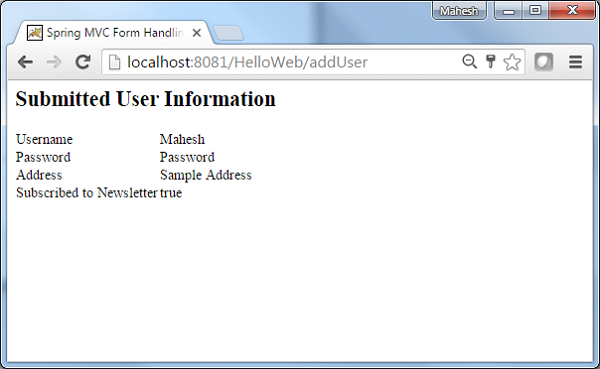
<%@taglib uri = "http://www.springframework.org/tags/form" prefix = "form"%>
<html>
   <head>
      <title>Spring MVC Form Handling</title>
   </head>
   <body>

      <h2>Submitted User Information</h2>
      <table>
         <tr>
            <td>Username</td>
            <td>${username}</td> </tr> <tr> <td>Password</td> <td>${password}</td>
         </tr>
         <tr>
            <td>Address</td>
            <td>${address}</td> </tr> <tr> <td>Subscribed to Newsletter</td> <td>${receivePaper}</td>
         </tr>
      </table>
   </body>
</html>
เมื่อคุณสร้างไฟล์ซอร์สและไฟล์คอนฟิกเสร็จเรียบร้อยแล้วให้ส่งออกแอปพลิเคชันของคุณ คลิกขวาที่แอปพลิเคชันของคุณใช้ตัวเลือก Export → WAR File และบันทึกไฟล์ HelloWeb.war ของคุณในโฟลเดอร์ webapps ของ Tomcat
ตอนนี้เริ่มเซิร์ฟเวอร์ Tomcat ของคุณและตรวจสอบให้แน่ใจว่าคุณสามารถเข้าถึงหน้าเว็บอื่น ๆ จากโฟลเดอร์ webapps โดยใช้เบราว์เซอร์มาตรฐาน ลองใช้ URL - http: // localhost: 8080 / HelloWeb / ผู้ใช้และเราจะเห็นหน้าจอต่อไปนี้หากทุกอย่างเรียบร้อยดีกับ Spring Web Application
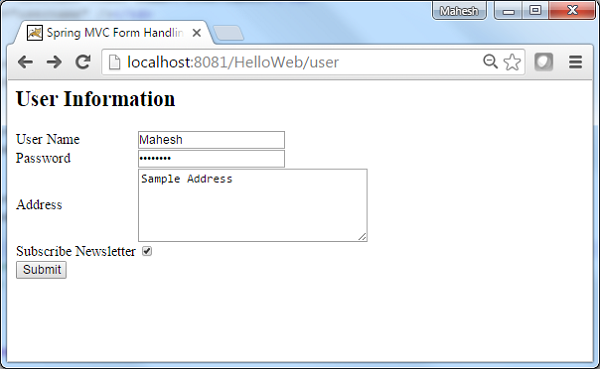
หลังจากส่งข้อมูลที่จำเป็นแล้วให้คลิกที่ปุ่มส่งเพื่อส่งแบบฟอร์ม เราจะเห็นหน้าจอต่อไปนี้หากทุกอย่างเรียบร้อยดีกับ Spring Web Application
ตัวอย่างต่อไปนี้อธิบายวิธีการใช้ช่องทำเครื่องหมายหลายช่องในฟอร์มโดยใช้กรอบงาน Spring Web MVC ในการเริ่มต้นให้เรามี Eclipse IDE ที่ใช้งานได้และปฏิบัติตามขั้นตอนต่อไปนี้เพื่อพัฒนา Web Application ที่ใช้ Dynamic Form โดยใช้ Spring Web Framework
| ขั้นตอน | คำอธิบาย |
|---|---|
| 1 | สร้างโปรเจ็กต์ด้วยชื่อ HelloWeb ภายใต้แพ็คเกจ com.tutorialspoint ตามที่อธิบายไว้ในบท Spring MVC - Hello World |
| 2 | สร้างคลาส Java User, UserController ภายใต้ com.tutorialspointpackage |
| 3 | สร้างไฟล์มุมมอง user.jsp, users.jsp ภายใต้โฟลเดอร์ย่อย jsp |
| 4 | ขั้นตอนสุดท้ายคือการสร้างเนื้อหาของไฟล์ต้นทางและการกำหนดค่าและส่งออกแอปพลิเคชันตามที่อธิบายด้านล่าง |
User.java
package com.tutorialspoint;

public class User {

   private String username;
   private String password;
   private String address;
   private boolean receivePaper;
   private String [] favoriteFrameworks;

   public String getUsername() {
      return username;
   }
   public void setUsername(String username) {
      this.username = username;
   }

   public String getPassword() {
      return password;
   }
   public void setPassword(String password) {
      this.password = password;
   }
   public String getAddress() {
      return address;
   }
   public void setAddress(String address) {
      this.address = address;
   }
   public boolean isReceivePaper() {
      return receivePaper;
   }
   public void setReceivePaper(boolean receivePaper) {
      this.receivePaper = receivePaper;
   }
   public String[] getFavoriteFrameworks() {
      return favoriteFrameworks;
   }
   public void setFavoriteFrameworks(String[] favoriteFrameworks) {
      this.favoriteFrameworks = favoriteFrameworks;
   }
}
UserController.java
package com.tutorialspoint;

import java.util.ArrayList;
import java.util.List;

import org.springframework.stereotype.Controller;
import org.springframework.web.bind.annotation.ModelAttribute;
import org.springframework.web.bind.annotation.RequestMapping;
import org.springframework.web.bind.annotation.RequestMethod;
import org.springframework.web.servlet.ModelAndView;
import org.springframework.ui.ModelMap;

@Controller
public class UserController {

   @RequestMapping(value = "/user", method = RequestMethod.GET)
   public ModelAndView user() {
      User user = new User();
	  user.setFavoriteFrameworks((new String []{"Spring MVC","Struts 2"}));
	  ModelAndView modelAndView = new ModelAndView("user", "command", user);
	  return modelAndView;
   }

   @RequestMapping(value = "/addUser", method = RequestMethod.POST)
   public String addUser(@ModelAttribute("SpringWeb")User user,
      ModelMap model) {
      model.addAttribute("username", user.getUsername());
      model.addAttribute("password", user.getPassword());
      model.addAttribute("address", user.getAddress());
      model.addAttribute("receivePaper", user.isReceivePaper());
	  model.addAttribute("favoriteFrameworks", user.getFavoriteFrameworks());
      return "users";
   }

   @ModelAttribute("webFrameworkList")
   public List<String> getWebFrameworkList() {
      List<String> webFrameworkList = new ArrayList<String>();
      webFrameworkList.add("Spring MVC");
      webFrameworkList.add("Struts 1");
      webFrameworkList.add("Struts 2");
      webFrameworkList.add("Apache Wicket");
      return webFrameworkList;
   }
}
นี่คือวิธีการบริการแรก user()เราได้ผ่านช่องว่าง Userออบเจ็กต์ในออบเจ็กต์ ModelAndView ที่มีชื่อ "command" เนื่องจากสปริงเฟรมเวิร์กต้องการอ็อบเจ็กต์ที่มีชื่อ "command" ถ้าคุณใช้แท็ก <form: form> ในไฟล์ JSP ดังนั้นเมื่อuser() เรียกว่าเมธอดมันจะส่งกลับไฟล์ user.jsp ดู.
วิธีการบริการที่สอง addUser() จะถูกเรียกใช้เมธอด POST บนไฟล์ HelloWeb/addUserURL คุณจะเตรียมโมเดลออบเจ็กต์ของคุณตามข้อมูลที่ส่งมา ในที่สุดมุมมอง "ผู้ใช้" จะถูกส่งกลับจากวิธีการบริการ
user.jsp
<%@taglib uri = "http://www.springframework.org/tags/form" prefix = "form"%>
<html>
   <head>
      <title>Spring MVC Form Handling</title>
   </head>
   <body>

      <h2>User Information</h2>
      <form:form method = "POST" action = "/HelloWeb/addUser">
         <table>
            <tr>
               <td><form:label path = "username">User Name</form:label></td>
               <td><form:input path = "username" /></td>
            </tr>
            <tr>
               <td><form:label path = "password">Age</form:label></td>
               <td><form:password path = "password" /></td>
            </tr>
            <tr>
               <td><form:label path = "address">Address</form:label></td>
               <td><form:textarea path = "address" rows = "5" cols = "30" /></td>
            </tr>
            <tr>
               <td><form:label path = "receivePaper">Subscribe Newsletter</form:label></td>
               <td><form:checkbox path = "receivePaper" /></td>
            </tr>
            <tr>
               <td><form:label path = "favoriteFrameworks">Favorite Web Frameworks</form:label></td>
               <td><form:checkboxes items = "${webFrameworkList}" path = "favoriteFrameworks" /></td>
            </tr>
            <tr>
               <td colspan = "2">
                  <input type = "submit" value = "Submit"/>
               </td>
            </tr>
         </table>
      </form:form>
   </body>
</html>
ที่นี่เรากำลังใช้ <form:checkboxes /> แท็กเพื่อแสดงช่องทำเครื่องหมาย HTML
<form:checkboxes items = "${webFrameworkList}" path = "favoriteFrameworks" />มันจะแสดงเนื้อหา HTML ต่อไปนี้
<span>
<input id = "favoriteFrameworks1" name = "favoriteFrameworks" type = "checkbox" value = "Spring MVC" checked = "checked"/>
<label for = "favoriteFrameworks1">Spring MVC</label>
</span>
<span>
<input id = "favoriteFrameworks2" name = "favoriteFrameworks" type = "checkbox" value = "Struts 1"/>
<label for = "favoriteFrameworks2">Struts 1</label>
</span>
<span>
<input id = "favoriteFrameworks3" name = "favoriteFrameworks" type = "checkbox" value = "Struts 2" checked = "checked"/>
<label for = "favoriteFrameworks3">Struts 2</label>
</span>
<span>
<input id = "favoriteFrameworks4" name = "favoriteFrameworks" type = "checkbox" value = "Apache Wicket"/>
<label for = "favoriteFrameworks4">Apache Wicket</label>
</span>
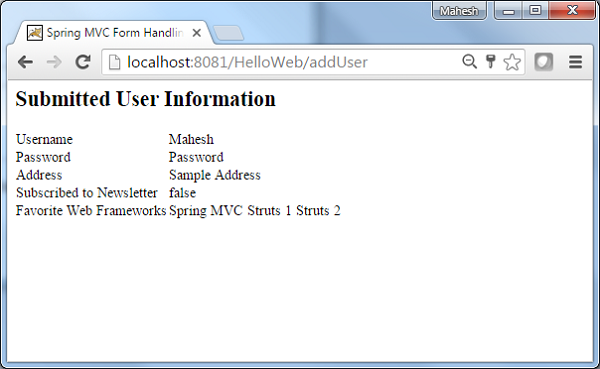
<input type = "hidden" name = "_favoriteFrameworks" value = "on"/>users.jsp
<%@taglib uri = "http://www.springframework.org/tags/form" prefix = "form"%>
<html>
   <head>
      <title>Spring MVC Form Handling</title>
   </head>
   <body>

      <h2>Submitted User Information</h2>
      <table>
         <tr>
            <td>Username</td>
            <td>${username}</td> </tr> <tr> <td>Password</td> <td>${password}</td>
         </tr>
         <tr>
            <td>Address</td>
            <td>${address}</td> </tr> <tr> <td>Subscribed to Newsletter</td> <td>${receivePaper}</td>
         </tr>
         <tr>
            <td>Favorite Web Frameworks</td>
            <td> <% String[] favoriteFrameworks = (String[])request.getAttribute("favoriteFrameworks");
            for(String framework: favoriteFrameworks) {
               out.println(framework);
            }
            %></td>
         </tr>
      </table>
   </body>
</html>
เมื่อคุณสร้างไฟล์ซอร์สและไฟล์คอนฟิกเสร็จเรียบร้อยแล้วให้ส่งออกแอปพลิเคชันของคุณ คลิกขวาที่แอปพลิเคชันของคุณใช้Export → WAR File ตัวเลือกและบันทึกไฟล์ HelloWeb.war ไฟล์ในโฟลเดอร์ webapps ของ Tomcat
ตอนนี้เริ่มเซิร์ฟเวอร์ Tomcat และตรวจสอบให้แน่ใจว่าคุณสามารถเข้าถึงหน้าเว็บอื่น ๆ จากโฟลเดอร์ webapps โดยใช้เบราว์เซอร์มาตรฐาน ลองใช้ URLhttp://localhost:8080/HelloWeb/user และเราจะเห็นหน้าจอต่อไปนี้หากทุกอย่างเรียบร้อยดีกับ Spring Web Application
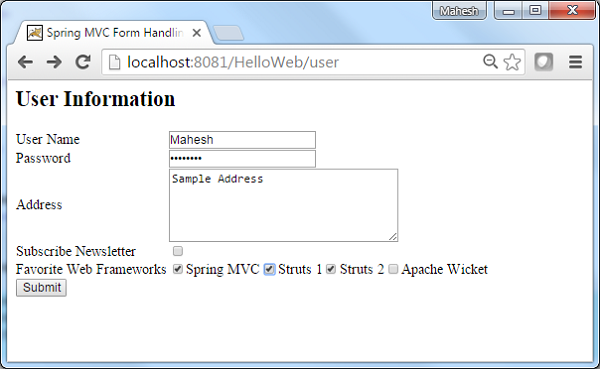
หลังจากส่งข้อมูลที่จำเป็นแล้วให้คลิกที่ปุ่มส่งเพื่อส่งแบบฟอร์ม เราจะเห็นหน้าจอต่อไปนี้หากทุกอย่างเรียบร้อยดีกับ Spring Web Application ของคุณ
ตัวอย่างต่อไปนี้แสดงวิธีใช้ RadioButton ในแบบฟอร์มโดยใช้ Spring Web MVC framework ในการเริ่มต้นให้เรามี Eclipse IDE ที่ใช้งานได้และปฏิบัติตามขั้นตอนต่อไปนี้เพื่อพัฒนา Web Application ที่ใช้ Dynamic Form โดยใช้ Spring Web Framework -
| ขั้นตอน | คำอธิบาย |
|---|---|
| 1 | สร้างโปรเจ็กต์ด้วยชื่อ HelloWeb ภายใต้แพ็คเกจ com.tutorialspoint ตามที่อธิบายไว้ในบท Spring MVC - Hello World |
| 2 | สร้างคลาส Java User, UserController ภายใต้ com.tutorialspointpackage |
| 3 | สร้างไฟล์มุมมอง user.jsp, users.jsp ภายใต้โฟลเดอร์ย่อย jsp |
| 4 | ขั้นตอนสุดท้ายคือการสร้างเนื้อหาของไฟล์ต้นทางและการกำหนดค่าและส่งออกแอปพลิเคชันตามที่อธิบายด้านล่าง |
User.java
package com.tutorialspoint;

public class User {

   private String username;
   private String password;
   private String address;
   private boolean receivePaper;
   private String [] favoriteFrameworks;
   private String gender;

   public String getUsername() {
      return username;
   }
   public void setUsername(String username) {
      this.username = username;
   }

   public String getPassword() {
      return password;
   }
   public void setPassword(String password) {
      this.password = password;
   }
   public String getAddress() {
      return address;
   }
   public void setAddress(String address) {
      this.address = address;
   }
   public boolean isReceivePaper() {
      return receivePaper;
   }
   public void setReceivePaper(boolean receivePaper) {
      this.receivePaper = receivePaper;
   }
   public String[] getFavoriteFrameworks() {
      return favoriteFrameworks;
   }
   public void setFavoriteFrameworks(String[] favoriteFrameworks) {
      this.favoriteFrameworks = favoriteFrameworks;
   }
   public String getGender() {
      return gender;
   }
   public void setGender(String gender) {
      this.gender = gender;
   }
}
UserController.java
package com.tutorialspoint;

import java.util.ArrayList;
import java.util.List;

import org.springframework.stereotype.Controller;
import org.springframework.web.bind.annotation.ModelAttribute;
import org.springframework.web.bind.annotation.RequestMapping;
import org.springframework.web.bind.annotation.RequestMethod;
import org.springframework.web.servlet.ModelAndView;
import org.springframework.ui.ModelMap;

@Controller
public class UserController {

   @RequestMapping(value = "/user", method = RequestMethod.GET)
   public ModelAndView user() {
      User user = new User();
	  user.setFavoriteFrameworks((new String []{"Spring MVC","Struts 2"}));
      user.setGender("M");
	  ModelAndView modelAndView = new ModelAndView("user", "command", user);
	  return modelAndView;
   }

   @RequestMapping(value = "/addUser", method = RequestMethod.POST)
   public String addUser(@ModelAttribute("SpringWeb")User user,
      ModelMap model) {
      model.addAttribute("username", user.getUsername());
      model.addAttribute("password", user.getPassword());
      model.addAttribute("address", user.getAddress());
      model.addAttribute("receivePaper", user.isReceivePaper());
	  model.addAttribute("favoriteFrameworks", user.getFavoriteFrameworks());
      model.addAttribute("gender", user.getGender());
      return "users";
   }

   @ModelAttribute("webFrameworkList")
   public List<String> getWebFrameworkList() {
      List<String> webFrameworkList = new ArrayList<String>();
      webFrameworkList.add("Spring MVC");
      webFrameworkList.add("Struts 1");
      webFrameworkList.add("Struts 2");
      webFrameworkList.add("Apache Wicket");
      return webFrameworkList;
   }
}
นี่คือวิธีการบริการแรก user()เราได้ผ่านช่องว่าง Userออบเจ็กต์ในออบเจ็กต์ ModelAndView ที่มีชื่อ "command" เนื่องจากสปริงเฟรมเวิร์กต้องการอ็อบเจ็กต์ที่มีชื่อ "command" ถ้าคุณใช้แท็ก <form: form> ในไฟล์ JSP ดังนั้นเมื่อuser() เรียกว่าเมธอดมันจะส่งกลับไฟล์ user.jsp ดู.
วิธีการบริการที่สอง addUser() จะถูกเรียกใช้เมธอด POST บนไฟล์ HelloWeb/addUserURL คุณจะเตรียมโมเดลออบเจ็กต์ของคุณตามข้อมูลที่ส่งมา สุดท้ายมุมมอง "ผู้ใช้" จะถูกส่งกลับจากวิธีการบริการซึ่งจะส่งผลให้มีการแสดงผล users.jsp
user.jsp
<%@taglib uri = "http://www.springframework.org/tags/form" prefix = "form"%>
<html>
   <head>
      <title>Spring MVC Form Handling</title>
   </head>
   <body>

      <h2>User Information</h2>
      <form:form method = "POST" action = "/HelloWeb/addUser">
         <table>
            <tr>
               <td><form:label path = "username">User Name</form:label></td>
               <td><form:input path = "username" /></td>
            </tr>
            <tr>
               <td><form:label path = "password">Age</form:label></td>
               <td><form:password path = "password" /></td>
            </tr>
            <tr>
               <td><form:label path = "address">Address</form:label></td>
               <td><form:textarea path = "address" rows = "5" cols = "30" /></td>
            </tr>
            <tr>
               <td><form:label path = "receivePaper">Subscribe Newsletter</form:label></td>
               <td><form:checkbox path = "receivePaper" /></td>
            </tr>
            <tr>
               <td><form:label path = "favoriteFrameworks">Favorite Web Frameworks</form:label></td>
               <td><form:checkboxes items = "${webFrameworkList}" path = "favoriteFrameworks" /></td>
            </tr>
            <tr>
               <td><form:label path = "gender">Gender</form:label></td>
               <td>
                  <form:radiobutton path = "gender" value = "M" label = "Male" />
                  <form:radiobutton path = "gender" value = "F" label = "Female" />
               </td>
            </tr>
            <tr>
               <td colspan = "2">
                  <input type = "submit" value = "Submit"/>
               </td>
            </tr>
         </table>
      </form:form>
   </body>
</html>
ที่นี่เรากำลังใช้ <form:radiobutton /> แท็กเพื่อแสดง HTML radiobutton
<form:radiobutton path = "gender" value = "M" label = "Male" />
<form:radiobutton path = "gender" value = "F" label = "Female" />
มันจะแสดงเนื้อหา HTML ต่อไปนี้
<input id = "gender1" name = "gender" type = "radio" value = "M" checked = "checked"/><label for = "gender1">Male</label>
<input id = "gender2" name = "gender" type = "radio" value = "F"/><label for = "gender2">Female</label>
users.jsp
<%@taglib uri="http://www.springframework.org/tags/form" prefix="form"%>
<html>
<head>
<title>Spring MVC Form Handling</title>
</head>
<body>
<h2>Submitted User Information</h2>
<table>
<tr>
<td>Username</td>
<td>${username}</td>
</tr>
<tr>
<td>Password</td>
<td>${password}</td> </tr> <tr> <td>Address</td> <td>${address}</td>
</tr>
<tr>
<td>Subscribed to Newsletter</td>
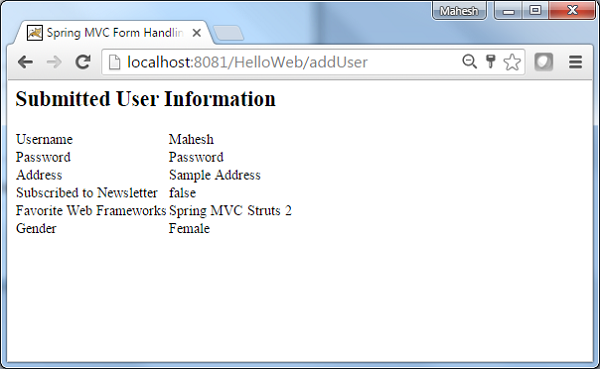
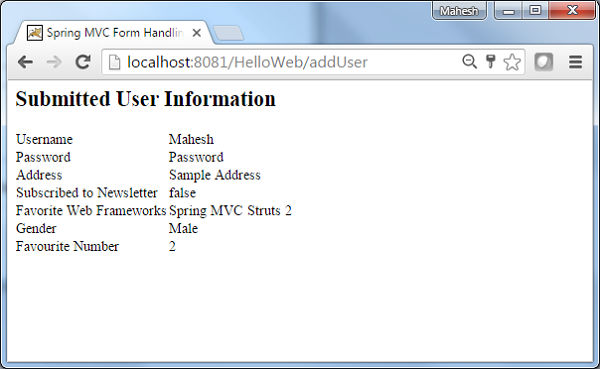
<td>${receivePaper}</td> </tr> <tr> <td>Favorite Web Frameworks</td> <td> <% String[] favoriteFrameworks = (String[])request.getAttribute("favoriteFrameworks"); for(String framework: favoriteFrameworks) { out.println(framework); } %></td> </tr> <tr> <td>Gender</td> <td>${(gender=="M"? "Male" : "Female")}</td>
</tr>
</table>
</body>
</html>เมื่อคุณสร้างไฟล์ซอร์สและไฟล์คอนฟิกเสร็จเรียบร้อยแล้วให้ส่งออกแอปพลิเคชันของคุณ คลิกขวาที่แอปพลิเคชันของคุณใช้Export → WAR File และบันทึกไฟล์ HelloWeb.war ไฟล์ในโฟลเดอร์ webapps ของ Tomcat
ตอนนี้เริ่มเซิร์ฟเวอร์ Tomcat ของคุณและตรวจสอบให้แน่ใจว่าคุณสามารถเข้าถึงหน้าเว็บอื่น ๆ จากโฟลเดอร์ webapps โดยใช้เบราว์เซอร์มาตรฐาน ลองใช้ URL -http://localhost:8080/HelloWeb/user และเราจะเห็นหน้าจอต่อไปนี้หากทุกอย่างเรียบร้อยดีกับ Spring Web Application ของคุณ

หลังจากส่งข้อมูลที่จำเป็นแล้วให้คลิกที่ปุ่มส่งเพื่อส่งแบบฟอร์ม เราจะเห็นหน้าจอต่อไปนี้หากทุกอย่างเรียบร้อยดีกับ Spring Web Application
ตัวอย่างต่อไปนี้อธิบายวิธีใช้ RadioButtons ในแบบฟอร์มโดยใช้กรอบงาน Spring Web MVC ในการเริ่มต้นให้เรามี Eclipse IDE ที่ใช้งานได้และทำตามขั้นตอนต่อไปเพื่อพัฒนา Web Application ที่ใช้ Dynamic Form โดยใช้ Spring Web Framework
| ขั้นตอน | คำอธิบาย |
|---|---|
| 1 | สร้างโปรเจ็กต์ด้วยชื่อ HelloWeb ภายใต้แพ็คเกจ com.tutorialspoint ตามที่อธิบายไว้ในบท Spring MVC - Hello World |
| 2 | สร้างคลาส Java User, UserController ภายใต้ com.tutorialspointpackage |
| 3 | สร้างไฟล์มุมมอง user.jsp, users.jsp ภายใต้โฟลเดอร์ย่อย jsp |
| 4 | ขั้นตอนสุดท้ายคือการสร้างเนื้อหาของไฟล์ต้นทางและการกำหนดค่าและส่งออกแอปพลิเคชันตามที่อธิบายด้านล่าง |
User.java
package com.tutorialspoint;

public class User {

   private String username;
   private String password;
   private String address;
   private boolean receivePaper;
   private String [] favoriteFrameworks;
   private String gender;
   private String favoriteNumber;

   public String getUsername() {
      return username;
   }
   public void setUsername(String username) {
      this.username = username;
   }

   public String getPassword() {
      return password;
   }
   public void setPassword(String password) {
      this.password = password;
   }
   public String getAddress() {
      return address;
   }
   public void setAddress(String address) {
      this.address = address;
   }
   public boolean isReceivePaper() {
      return receivePaper;
   }
   public void setReceivePaper(boolean receivePaper) {
      this.receivePaper = receivePaper;
   }
   public String[] getFavoriteFrameworks() {
      return favoriteFrameworks;
   }
   public void setFavoriteFrameworks(String[] favoriteFrameworks) {
      this.favoriteFrameworks = favoriteFrameworks;
   }
   public String getGender() {
      return gender;
   }
   public void setGender(String gender) {
      this.gender = gender;
   }
   public String getFavoriteNumber() {
      return favoriteNumber;
   }
   public void setFavoriteNumber(String favoriteNumber) {
      this.favoriteNumber = favoriteNumber;
   }
}
UserController.java
package com.tutorialspoint;

import java.util.ArrayList;
import java.util.List;

import org.springframework.stereotype.Controller;
import org.springframework.web.bind.annotation.ModelAttribute;
import org.springframework.web.bind.annotation.RequestMapping;
import org.springframework.web.bind.annotation.RequestMethod;
import org.springframework.web.servlet.ModelAndView;
import org.springframework.ui.ModelMap;

@Controller
public class UserController {

   @RequestMapping(value = "/user", method = RequestMethod.GET)
   public ModelAndView user() {
      User user = new User();
	  user.setFavoriteFrameworks((new String []{"Spring MVC","Struts 2"}));
      user.setGender("M");
	  ModelAndView modelAndView = new ModelAndView("user", "command", user);
	  return modelAndView;
   }

   @RequestMapping(value = "/addUser", method = RequestMethod.POST)
   public String addUser(@ModelAttribute("SpringWeb")User user,
      ModelMap model) {
      model.addAttribute("username", user.getUsername());
      model.addAttribute("password", user.getPassword());
      model.addAttribute("address", user.getAddress());
      model.addAttribute("receivePaper", user.isReceivePaper());
      model.addAttribute("favoriteFrameworks", user.getFavoriteFrameworks());
      model.addAttribute("gender", user.getGender());
      model.addAttribute("favoriteNumber", user.getFavoriteNumber());
      return "users";
   }

   @ModelAttribute("webFrameworkList")
   public List<String> getWebFrameworkList() {
      List<String> webFrameworkList = new ArrayList<String>();
      webFrameworkList.add("Spring MVC");
      webFrameworkList.add("Struts 1");
      webFrameworkList.add("Struts 2");
      webFrameworkList.add("Apache Wicket");
      return webFrameworkList;
   }

   @ModelAttribute("numbersList")
   public List<String> getNumbersList() {
      List<String> numbersList = new ArrayList<String>();
      numbersList.add("1");
      numbersList.add("2");
      numbersList.add("3");
      numbersList.add("4");
      return numbersList;
   }
}
ที่นี่สำหรับผู้ใช้วิธีการบริการรายแรก () เราได้ส่งผ่านอ็อบเจ็กต์ User ว่างในอ็อบเจ็กต์ ModelAndView ที่มีชื่อ "command" เนื่องจากเฟรมเวิร์กสปริงคาดว่าอ็อบเจ็กต์ที่มีชื่อ "command" หากคุณใช้ <form: form> แท็กในไฟล์ JSP ของคุณ ดังนั้นเมื่อเรียกใช้ user () method จะส่งกลับมุมมอง user.jsp
วิธีการบริการที่สอง addUser() จะถูกเรียกใช้เมธอด POST บนไฟล์ HelloWeb/addUserURL คุณจะเตรียมโมเดลออบเจ็กต์ของคุณตามข้อมูลที่ส่งมา สุดท้ายมุมมอง "ผู้ใช้" จะถูกส่งกลับจากวิธีการบริการซึ่งจะส่งผลให้มีการแสดงผล users.jsp
user.jsp
<%@taglib uri = "http://www.springframework.org/tags/form" prefix = "form"%>
<html>
   <head>
      <title>Spring MVC Form Handling</title>
   </head>
   <body>

      <h2>User Information</h2>
      <form:form method = "POST" action = "/HelloWeb/addUser">
         <table>
            <tr>
               <td><form:label path = "username">User Name</form:label></td>
               <td><form:input path = "username" /></td>
            </tr>
            <tr>
               <td><form:label path = "password">Age</form:label></td>
               <td><form:password path = "password" /></td>
            </tr>
            <tr>
               <td><form:label path = "address">Address</form:label></td>
               <td><form:textarea path = "address" rows = "5" cols = "30" /></td>
            </tr>
            <tr>
               <td><form:label path = "receivePaper">Subscribe Newsletter</form:label></td>
               <td><form:checkbox path = "receivePaper" /></td>
            </tr>
            <tr>
               <td><form:label path = "favoriteFrameworks">Favorite Web Frameworks</form:label></td>
               <td><form:checkboxes items = "${webFrameworkList}" path = "favoriteFrameworks" /></td> </tr> <tr> <td><form:label path = "gender">Gender</form:label></td> <td> <form:radiobutton path = "gender" value = "M" label = "Male" /> <form:radiobutton path = "gender" value = "F" label = "Female" /> </td> </tr> <tr> <td><form:label path = "favoriteNumber">Favorite Number</form:label></td> <td> <form:radiobuttons path = "favoriteNumber" items = "${numbersList}" />
               </td>
            </tr>
            <tr>
               <td colspan = "2">
                  <input type = "submit" value = "Submit"/>
               </td>
            </tr>
         </table>
      </form:form>
   </body>
</html>
ที่นี่เรากำลังใช้ <form:radiobuttons />แท็กเพื่อแสดงผล HTML radiobuttons ตัวอย่างเช่น -
<form:radiobuttons path = "favoriteNumber" items="${numbersList}" />มันจะแสดงเนื้อหา HTML ต่อไปนี้
<span>
   <input id = "favoriteNumber1" name = "favoriteNumber" type = "radio" value = "1"/>
   <label for = "favoriteNumber1">1</label>
</span>
<span>
   <input id = "favoriteNumber2" name = "favoriteNumber" type = "radio" value = "2"/>
   <label for = "favoriteNumber2">2</label>
</span>
<span>
   <input id = "favoriteNumber3" name = "favoriteNumber" type = "radio" value = "3"/>
   <label for = "favoriteNumber3">3</label>
</span>
<span>
   <input id = "favoriteNumber4" name = "favoriteNumber" type = "radio" value = "4"/>
   <label for = "favoriteNumber4">4</label>
</span>
users.jsp
<%@taglib uri = "http://www.springframework.org/tags/form" prefix = "form"%>
<html>
   <head>
      <title>Spring MVC Form Handling</title>
   </head>
   <body>
      <h2>Submitted User Information</h2>
      <table>
         <tr>
            <td>Username</td>
            <td>${username}</td>
         </tr>
         <tr>
            <td>Password</td>
            <td>${password}</td> </tr> <tr> <td>Address</td> <td>${address}</td>
         </tr>
         <tr>
            <td>Subscribed to Newsletter</td>
            <td>${receivePaper}</td> </tr> <tr> <td>Favorite Web Frameworks</td> <td> <% String[] favoriteFrameworks = (String[])request.getAttribute("favoriteFrameworks"); for(String framework: favoriteFrameworks) { out.println(framework); } %></td> </tr> <tr> <td>Gender</td> <td>${(gender=="M"? "Male" : "Female")}</td>
         </tr>
         <tr>
            <td>Favourite Number</td>
            <td>${favoriteNumber}</td>
         </tr>
      </table>
   </body>
</html>
เมื่อคุณสร้างไฟล์ซอร์สและไฟล์คอนฟิกเสร็จเรียบร้อยแล้วให้ส่งออกแอปพลิเคชันของคุณ คลิกขวาที่แอปพลิเคชันของคุณใช้Export → WAR File และบันทึกไฟล์ HelloWeb.war ในโฟลเดอร์ webapps ของ Tomcat
ตอนนี้เริ่มเซิร์ฟเวอร์ Tomcat และตรวจสอบให้แน่ใจว่าคุณสามารถเข้าถึงหน้าเว็บอื่น ๆ จากโฟลเดอร์ webapps โดยใช้เบราว์เซอร์มาตรฐาน ลองใช้ URL ต่อไปนี้ -http://localhost:8080/HelloWeb/user และเราจะเห็นหน้าจอต่อไปนี้หากทุกอย่างเรียบร้อยดีกับ Spring Web Application
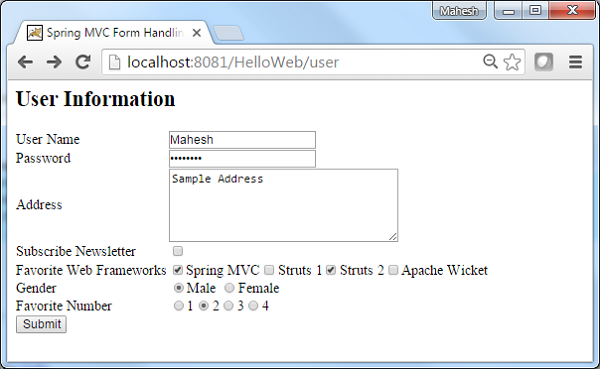
หลังจากส่งข้อมูลที่จำเป็นแล้วให้คลิกที่ปุ่มส่งเพื่อส่งแบบฟอร์ม เราจะเห็นหน้าจอต่อไปนี้หากทุกอย่างเรียบร้อยดีกับ Spring Web Application ของคุณ
ตัวอย่างต่อไปนี้อธิบายวิธีการใช้ Dropdown ในแบบฟอร์มโดยใช้ Spring Web MVC framework ในการเริ่มต้นให้เรามี Eclipse IDE ที่ใช้งานได้และปฏิบัติตามขั้นตอนต่อไปนี้เพื่อพัฒนา Web Application ที่ใช้ Dynamic Form โดยใช้ Spring Web Framework
| ขั้นตอน | คำอธิบาย |
|---|---|
| 1 | สร้างโปรเจ็กต์ด้วยชื่อ HelloWeb ภายใต้แพ็คเกจ com.tutorialspoint ตามที่อธิบายไว้ในบท Spring MVC - Hello World |
| 2 | สร้างคลาส Java User, UserController ภายใต้ com.tutorialspointpackage |
| 3 | สร้างไฟล์มุมมอง user.jsp, users.jsp ภายใต้โฟลเดอร์ย่อย jsp |
| 4 | ขั้นตอนสุดท้ายคือการสร้างเนื้อหาของไฟล์ต้นทางและการกำหนดค่าและส่งออกแอปพลิเคชันตามที่อธิบายด้านล่าง |
User.java
package com.tutorialspoint;

public class User {

   private String username;
   private String password;
   private String address;
   private boolean receivePaper;
   private String [] favoriteFrameworks;
   private String gender;
   private String favoriteNumber;
   private String country;

   public String getUsername() {
      return username;
   }
   public void setUsername(String username) {
      this.username = username;
   }

   public String getPassword() {
      return password;
   }
   public void setPassword(String password) {
      this.password = password;
   }
   public String getAddress() {
      return address;
   }
   public void setAddress(String address) {
      this.address = address;
   }
   public boolean isReceivePaper() {
      return receivePaper;
   }
   public void setReceivePaper(boolean receivePaper) {
      this.receivePaper = receivePaper;
   }
   public String[] getFavoriteFrameworks() {
      return favoriteFrameworks;
   }
   public void setFavoriteFrameworks(String[] favoriteFrameworks) {
      this.favoriteFrameworks = favoriteFrameworks;
   }
   public String getGender() {
      return gender;
   }
   public void setGender(String gender) {
      this.gender = gender;
   }
   public String getFavoriteNumber() {
      return favoriteNumber;
   }
   public void setFavoriteNumber(String favoriteNumber) {
      this.favoriteNumber = favoriteNumber;
   }
   public String getCountry() {
      return country;
   }
   public void setCountry(String country) {
      this.country = country;
   }
}
UserController.java
package com.tutorialspoint;

import java.util.ArrayList;
import java.util.HashMap;
import java.util.List;
import java.util.Map;

import org.springframework.stereotype.Controller;
import org.springframework.web.bind.annotation.ModelAttribute;
import org.springframework.web.bind.annotation.RequestMapping;
import org.springframework.web.bind.annotation.RequestMethod;
import org.springframework.web.servlet.ModelAndView;
import org.springframework.ui.ModelMap;

@Controller
public class UserController {

   @RequestMapping(value = "/user", method = RequestMethod.GET)
   public ModelAndView user() {
      User user = new User();
	  user.setFavoriteFrameworks((new String []{"Spring MVC","Struts 2"}));
      user.setGender("M");
	  ModelAndView modelAndView = new ModelAndView("user", "command", user);
	  return modelAndView;
   }

   @RequestMapping(value = "/addUser", method = RequestMethod.POST)
   public String addUser(@ModelAttribute("SpringWeb")User user,
      ModelMap model) {
      model.addAttribute("username", user.getUsername());
      model.addAttribute("password", user.getPassword());
      model.addAttribute("address", user.getAddress());
      model.addAttribute("receivePaper", user.isReceivePaper());
	  model.addAttribute("favoriteFrameworks", user.getFavoriteFrameworks());
      model.addAttribute("gender", user.getGender());
      model.addAttribute("favoriteNumber", user.getFavoriteNumber());
      model.addAttribute("country", user.getCountry());
      return "users";
   }

   @ModelAttribute("webFrameworkList")
   public List<String> getWebFrameworkList() {
      List<String> webFrameworkList = new ArrayList<String>();
      webFrameworkList.add("Spring MVC");
      webFrameworkList.add("Struts 1");
      webFrameworkList.add("Struts 2");
      webFrameworkList.add("Apache Wicket");
      return webFrameworkList;
   }

   @ModelAttribute("numbersList")
   public List<String> getNumbersList() {
      List<String> numbersList = new ArrayList<String>();
      numbersList.add("1");
      numbersList.add("2");
      numbersList.add("3");
      numbersList.add("4");
      return numbersList;
   }

   @ModelAttribute("countryList")
   public Map<String, String> getCountryList() {
      Map<String, String> countryList = new HashMap<String, String>();
      countryList.put("US", "United States");
      countryList.put("CH", "China");
      countryList.put("SG", "Singapore");
      countryList.put("MY", "Malaysia");
      return countryList;
   }
}
นี่คือวิธีการบริการแรก user()เราได้ผ่านช่องว่าง Userออบเจ็กต์ในออบเจ็กต์ ModelAndView ที่มีชื่อ "command" เนื่องจากสปริงเฟรมเวิร์กต้องการอ็อบเจ็กต์ที่มีชื่อ "command" ถ้าคุณใช้แท็ก <form: form> ในไฟล์ JSP ดังนั้นเมื่อuser() เรียกว่าเมธอดมันจะส่งกลับไฟล์ user.jsp ดู.
วิธีการบริการที่สอง addUser() จะถูกเรียกใช้เมธอด POST บนไฟล์ HelloWeb/addUserURL คุณจะเตรียมโมเดลออบเจ็กต์ของคุณตามข้อมูลที่ส่งมา สุดท้ายมุมมอง "ผู้ใช้" จะถูกส่งกลับจากวิธีการบริการซึ่งจะส่งผลให้มีการแสดงผล users.jsp
user.jsp
<%@taglib uri = "http://www.springframework.org/tags/form" prefix = "form"%>
<html>
   <head>
      <title>Spring MVC Form Handling</title>
   </head>
   <body>

   <h2>User Information</h2>
      <form:form method = "POST" action = "/HelloWeb/addUser">
         <table>
            <tr>
               <td><form:label path = "username">User Name</form:label></td>
               <td><form:input path = "username" /></td>
            </tr>
            <tr>
               <td><form:label path = "password">Age</form:label></td>
               <td><form:password path = "password" /></td>
            </tr>
            <tr>
               <td><form:label path = "address">Address</form:label></td>
               <td><form:textarea path = "address" rows = "5" cols = "30" /></td>
            </tr>
            <tr>
               <td><form:label path = "receivePaper">Subscribe Newsletter</form:label></td>
               <td><form:checkbox path = "receivePaper" /></td>
            </tr>
            <tr>
               <td><form:label path = "favoriteFrameworks">Favorite Web Frameworks</form:label></td>
               <td><form:checkboxes items = "${webFrameworkList}" path = "favoriteFrameworks" /></td>
            </tr>
            <tr>
               <td><form:label path = "gender">Gender</form:label></td>
               <td>
                  <form:radiobutton path = "gender" value = "M" label = "Male" />
                  <form:radiobutton path = "gender" value = "F" label = "Female" />
               </td>
            </tr>
            <tr>
               <td><form:label path = "favoriteNumber">Favorite Number</form:label></td>
               <td>
                  <form:radiobuttons path = "favoriteNumber" items = "${numbersList}" /> </td> </tr> <tr> <td><form:label path = "country">Country</form:label></td> <td> <form:select path = "country"> <form:option value = "NONE" label = "Select"/> <form:options items = "${countryList}" />
                  </form:select>
               </td>
            </tr>
            <tr>
               <td colspan = "2">
                  <input type = "submit" value = "Submit"/>
               </td>
            </tr>
         </table>
      </form:form>
   </body>
</html>
ที่นี่เรากำลังใช้ <form:select /> , <form:option /> และ <form:options />แท็กที่จะแสดง HTML เลือก ตัวอย่างเช่น -
<form:select path = "country">
   <form:option value = "NONE" label = "Select"/>
   <form:options items = "${countryList}" />
</form:select>
มันจะแสดงเนื้อหา HTML ต่อไปนี้
<select id = "country" name = "country">
   <option value = "NONE">Select</option>
   <option value = "US">United States</option>
   <option value = "CH">China</option>
   <option value = "MY">Malaysia</option>
   <option value = "SG">Singapore</option>
</select>
users.jsp
<%@taglib uri = "http://www.springframework.org/tags/form" prefix = "form"%>
<html>
   <head>
      <title>Spring MVC Form Handling</title>
   </head>
   <body>
      <h2>Submitted User Information</h2>
      <table>
         <tr>
            <td>Username</td>
            <td>${username}</td>
         </tr>
         <tr>
            <td>Password</td>
            <td>${password}</td> </tr> <tr> <td>Address</td> <td>${address}</td>
         </tr>
         <tr>
            <td>Subscribed to Newsletter</td>
            <td>${receivePaper}</td> </tr> <tr> <td>Favorite Web Frameworks</td> <td> <% String[] favoriteFrameworks = (String[])request.getAttribute("favoriteFrameworks"); for(String framework: favoriteFrameworks) { out.println(framework); } %></td> </tr> <tr> <td>Gender</td> <td>${(gender=="M"? "Male" : "Female")}</td>
         </tr>
         <tr>
            <td>Favourite Number</td>
            <td>${favoriteNumber}</td> </tr> <tr> <td>Country</td> <td>${country}</td>
         </tr>
      </table>
   </body>
</html>
เมื่อคุณสร้างไฟล์ซอร์สและไฟล์คอนฟิกเสร็จเรียบร้อยแล้วให้ส่งออกแอปพลิเคชันของคุณ คลิกขวาที่แอปพลิเคชันของคุณใช้ไฟล์Export → WAR File และบันทึกไฟล์ HelloWeb.war ของคุณในโฟลเดอร์ webapps ของ Tomcat
ตอนนี้เริ่มเซิร์ฟเวอร์ Tomcat และตรวจสอบให้แน่ใจว่าคุณสามารถเข้าถึงหน้าเว็บอื่น ๆ จากโฟลเดอร์ webapps โดยใช้เบราว์เซอร์มาตรฐาน ลองใช้ URL -http://localhost:8080/HelloWeb/user และเราจะเห็นหน้าจอต่อไปนี้หากทุกอย่างเรียบร้อยดีกับ Spring Web Application
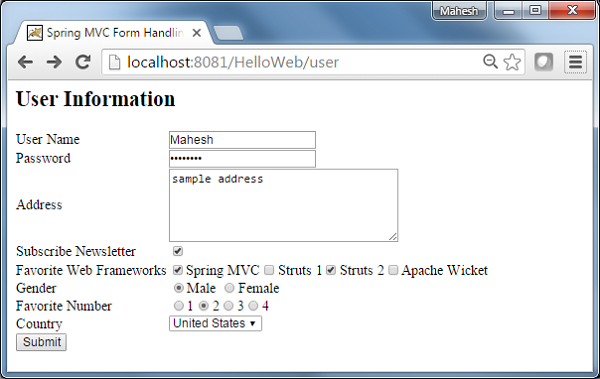
หลังจากส่งข้อมูลที่จำเป็นแล้วให้คลิกที่ปุ่มส่งเพื่อส่งแบบฟอร์ม คุณควรเห็นหน้าจอต่อไปนี้หากทุกอย่างเรียบร้อยดีกับ Spring Web Application ของคุณ
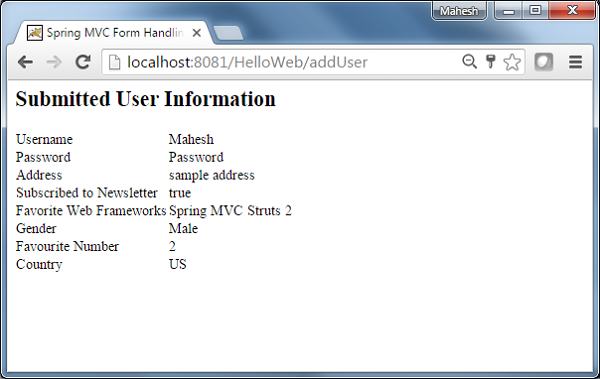
ตัวอย่างต่อไปนี้แสดงวิธีใช้ Listbox ในแบบฟอร์มโดยใช้ Spring Web MVC framework ในการเริ่มต้นให้เรามี Eclipse IDE ที่ใช้งานได้และทำตามขั้นตอนต่อไปเพื่อพัฒนา Web Application ที่ใช้ Dynamic Form โดยใช้ Spring Web Framework
| ขั้นตอน | คำอธิบาย |
|---|---|
| 1 | สร้างโปรเจ็กต์ด้วยชื่อ HelloWeb ภายใต้แพ็คเกจ com.tutorialspoint ตามที่อธิบายไว้ในบท Spring MVC - Hello World |
| 2 | สร้างคลาส Java User, UserController ภายใต้ com.tutorialspointpackage |
| 3 | สร้างไฟล์มุมมอง user.jsp, users.jsp ภายใต้โฟลเดอร์ย่อย jsp |
| 4 | ขั้นตอนสุดท้ายคือการสร้างเนื้อหาของไฟล์ต้นทางและการกำหนดค่าและส่งออกแอปพลิเคชันตามที่อธิบายด้านล่าง |
User.java
package com.tutorialspoint;

public class User {

   private String username;
   private String password;
   private String address;
   private boolean receivePaper;
   private String [] favoriteFrameworks;
   private String gender;
   private String favoriteNumber;
   private String country;
   private String [] skills;

   public String getUsername() {
      return username;
   }
   public void setUsername(String username) {
      this.username = username;
   }

   public String getPassword() {
      return password;
   }
   public void setPassword(String password) {
      this.password = password;
   }
   public String getAddress() {
      return address;
   }
   public void setAddress(String address) {
      this.address = address;
   }
   public boolean isReceivePaper() {
      return receivePaper;
   }
   public void setReceivePaper(boolean receivePaper) {
      this.receivePaper = receivePaper;
   }
   public String[] getFavoriteFrameworks() {
      return favoriteFrameworks;
   }
   public void setFavoriteFrameworks(String[] favoriteFrameworks) {
      this.favoriteFrameworks = favoriteFrameworks;
   }
   public String getGender() {
      return gender;
   }
   public void setGender(String gender) {
      this.gender = gender;
   }
   public String getFavoriteNumber() {
      return favoriteNumber;
   }
   public void setFavoriteNumber(String favoriteNumber) {
      this.favoriteNumber = favoriteNumber;
   }
   public String getCountry() {
      return country;
   }
   public void setCountry(String country) {
      this.country = country;
   }
   public String[] getSkills() {
      return skills;
   }
   public void setSkills(String[] skills) {
      this.skills = skills;
   }
}
UserController.java
package com.tutorialspoint;

import java.util.ArrayList;
import java.util.HashMap;
import java.util.List;
import java.util.Map;

import org.springframework.stereotype.Controller;
import org.springframework.web.bind.annotation.ModelAttribute;
import org.springframework.web.bind.annotation.RequestMapping;
import org.springframework.web.bind.annotation.RequestMethod;
import org.springframework.web.servlet.ModelAndView;
import org.springframework.ui.ModelMap;

@Controller
public class UserController {

   @RequestMapping(value = "/user", method = RequestMethod.GET)
   public ModelAndView user() {
      User user = new User();
	  user.setFavoriteFrameworks((new String []{"Spring MVC","Struts 2"}));
      user.setGender("M");
	  ModelAndView modelAndView = new ModelAndView("user", "command", user);
	  return modelAndView;
   }

   @RequestMapping(value = "/addUser", method = RequestMethod.POST)
   public String addUser(@ModelAttribute("SpringWeb")User user,
      ModelMap model) {
      model.addAttribute("username", user.getUsername());
      model.addAttribute("password", user.getPassword());
      model.addAttribute("address", user.getAddress());
      model.addAttribute("receivePaper", user.isReceivePaper());
	  model.addAttribute("favoriteFrameworks", user.getFavoriteFrameworks());
      model.addAttribute("gender", user.getGender());
      model.addAttribute("favoriteNumber", user.getFavoriteNumber());
      model.addAttribute("country", user.getCountry());
      model.addAttribute("skills", user.getSkills());
      return "users";
   }

   @ModelAttribute("webFrameworkList")
   public List<String> getWebFrameworkList() {
      List<String> webFrameworkList = new ArrayList<String>();
      webFrameworkList.add("Spring MVC");
      webFrameworkList.add("Struts 1");
      webFrameworkList.add("Struts 2");
      webFrameworkList.add("Apache Wicket");
      return webFrameworkList;
   }

   @ModelAttribute("numbersList")
   public List<String> getNumbersList() {
      List<String> numbersList = new ArrayList<String>();
      numbersList.add("1");
      numbersList.add("2");
      numbersList.add("3");
      numbersList.add("4");
      return numbersList;
   }

   @ModelAttribute("countryList")
   public Map<String, String> getCountryList() {
      Map<String, String> countryList = new HashMap<String, String>();
      countryList.put("US", "United States");
      countryList.put("CH", "China");
      countryList.put("SG", "Singapore");
      countryList.put("MY", "Malaysia");
      return countryList;
   }

   @ModelAttribute("skillsList")
   public Map<String, String> getSkillsList() {
      Map<String, String> skillList = new HashMap<String, String>();
      skillList.put("Hibernate", "Hibernate");
      skillList.put("Spring", "Spring");
      skillList.put("Apache Wicket", "Apache Wicket");
      skillList.put("Struts", "Struts");
      return skillList;
   }
}
นี่คือวิธีการบริการแรก user()เราได้ผ่านช่องว่าง Userออบเจ็กต์ในออบเจ็กต์ ModelAndView ที่มีชื่อ "command" เนื่องจากสปริงเฟรมเวิร์กต้องการอ็อบเจ็กต์ที่มีชื่อ "command" ถ้าคุณใช้แท็ก <form: form> ในไฟล์ JSP ดังนั้นเมื่อuser() เรียกว่าเมธอดมันจะส่งกลับไฟล์ user.jsp ดู.
วิธีการบริการที่สอง addUser() จะถูกเรียกใช้เมธอด POST บนไฟล์ HelloWeb/addUserURL คุณจะเตรียมโมเดลออบเจ็กต์ของคุณตามข้อมูลที่ส่งมา สุดท้ายมุมมอง "ผู้ใช้" จะถูกส่งกลับจากวิธีการบริการซึ่งจะส่งผลให้มีการแสดงผล users.jsp
user.jsp
<%@taglib uri = "http://www.springframework.org/tags/form" prefix = "form"%>
<html>
   <head>
      <title>Spring MVC Form Handling</title>
   </head>
   <body>

      <h2>User Information</h2>
      <form:form method = "POST" action = "/HelloWeb/addUser">
         <table>
            <tr>
               <td><form:label path = "username">User Name</form:label></td>
               <td><form:input path = "username" /></td>
            </tr>
            <tr>
               <td><form:label path = "password">Age</form:label></td>
               <td><form:password path = "password" /></td>
            </tr>
            <tr>
               <td><form:label path = "address">Address</form:label></td>
               <td><form:textarea path = "address" rows = "5" cols = "30" /></td>
            </tr>
            <tr>
               <td><form:label path = "receivePaper">Subscribe Newsletter</form:label></td>
               <td><form:checkbox path = "receivePaper" /></td>
            </tr>
            <tr>
               <td><form:label path = "favoriteFrameworks">Favorite Web Frameworks</form:label></td>
               <td><form:checkboxes items = "${webFrameworkList}" path = "favoriteFrameworks" /></td> </tr> <tr> <td><form:label path = "gender">Gender</form:label></td> <td> <form:radiobutton path = "gender" value = "M" label = "Male" /> <form:radiobutton path = "gender" value = "F" label = "Female" /> </td> </tr> <tr> <td><form:label path = "favoriteNumber">Favorite Number</form:label></td> <td> <form:radiobuttons path = "favoriteNumber" items = "${numbersList}" />
               </td>
            </tr>
            <tr>
               <td><form:label path = "country">Country</form:label></td>
               <td>
                  <form:select path = "country">
                     <form:option value = "NONE" label = "Select"/>
                     <form:options items = "${countryList}" /> </form:select> </td> </tr> <tr> <td><form:label path = "skills">Skills</form:label></td> <td> <form:select path = "skills" items = "${skillsList}"
                     multiple = "true" />
               </td>
            </tr>
            <tr>
               <td colspan = "2">
                  <input type = "submit" value = "Submit"/>
               </td>
            </tr>
         </table>
      </form:form>
   </body>
</html>
ที่นี่เรากำลังใช้ไฟล์ <form:select /> พร้อมด้วยแอตทริบิวต์ multiple=trueเพื่อแสดงกล่องรายการ HTML ตัวอย่างเช่น -
<form:select path = "skills" items = "${skillsList}" multiple = "true" />มันจะแสดงเนื้อหา HTML ต่อไปนี้
<select id = "skills" name = "skills" multiple = "multiple">
   <option value = "Struts">Struts</option>
   <option value = "Hibernate">Hibernate</option>
   <option value = "Apache Wicket">Apache Wicket</option>
   <option value = "Spring">Spring</option>
</select>
<input type = "hidden" name = "_skills" value = "1"/>
users.jsp
<%@taglib uri = "http://www.springframework.org/tags/form" prefix = "form"%>
<html>
   <head>
      <title>Spring MVC Form Handling</title>
   </head>
   <body>

      <h2>Submitted User Information</h2>
      <table>
         <tr>
            <td>Username</td>
            <td>${username}</td>
         </tr>
         <tr>
            <td>Password</td>
            <td>${password}</td> </tr> <tr> <td>Address</td> <td>${address}</td>
         </tr>
         <tr>
            <td>Subscribed to Newsletter</td>
            <td>${receivePaper}</td> </tr> <tr> <td>Favorite Web Frameworks</td> <td> <% String[] favoriteFrameworks = (String[])request.getAttribute("favoriteFrameworks"); for(String framework: favoriteFrameworks) { out.println(framework); } %></td> </tr> <tr> <td>Gender</td> <td>${(gender=="M"? "Male" : "Female")}</td>
         </tr>
         <tr>
            <td>Favourite Number</td>
            <td>${favoriteNumber}</td> </tr> <tr> <td>Country</td> <td>${country}</td>
         </tr>
         <tr>
            <td>Skills</td>
            <td> <% String[] skills = (String[])request.getAttribute("skills");
            for(String skill: skills) {
               out.println(skill);
            }
            %></td>
         </tr>
      </table>
   </body>
</html>
เมื่อคุณสร้างไฟล์ซอร์สและไฟล์คอนฟิกเสร็จเรียบร้อยแล้วให้ส่งออกแอปพลิเคชันของคุณ คลิกขวาที่แอปพลิเคชันของคุณใช้Export → WAR File และบันทึกไฟล์ HelloWeb.war ในโฟลเดอร์ webapps ของ Tomcat
ตอนนี้เริ่มเซิร์ฟเวอร์ Tomcat และตรวจสอบให้แน่ใจว่าคุณสามารถเข้าถึงหน้าเว็บอื่น ๆ จากโฟลเดอร์ webapps โดยใช้เบราว์เซอร์มาตรฐาน ลองใช้ URL -http://localhost:8080/HelloWeb/user และเราจะเห็นหน้าจอต่อไปนี้หากทุกอย่างเรียบร้อยดีกับ Spring Web Application
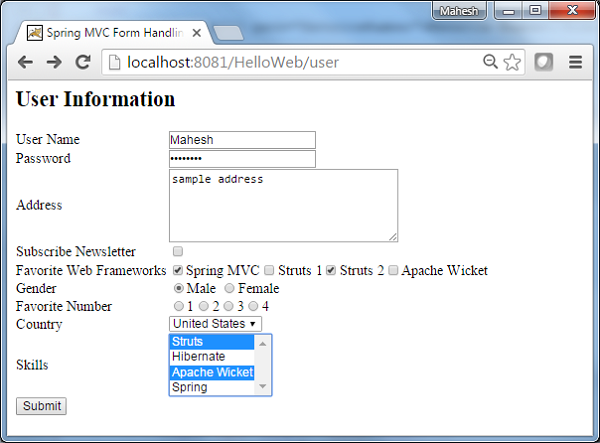
หลังจากส่งข้อมูลที่จำเป็นแล้วให้คลิกที่ปุ่มส่งเพื่อส่งแบบฟอร์ม คุณควรเห็นหน้าจอต่อไปนี้หากทุกอย่างเรียบร้อยดีกับ Spring Web Application ของคุณ
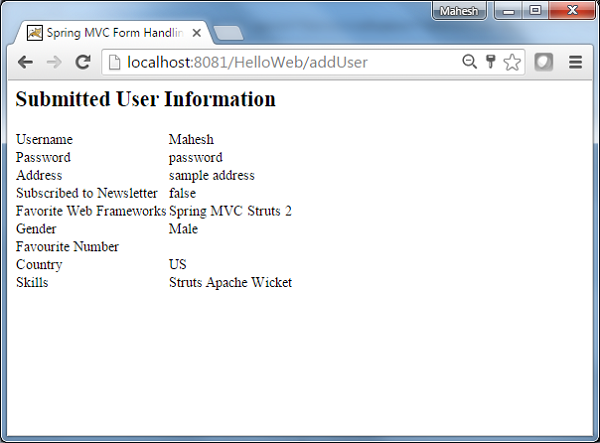
ตัวอย่างต่อไปนี้อธิบายถึงวิธีการใช้ฟิลด์ที่ซ่อนอยู่ในฟอร์มโดยใช้กรอบงาน Spring Web MVC ในการเริ่มต้นให้เรามี Eclipse IDE ที่ใช้งานได้และพิจารณาขั้นตอนต่อไปนี้เพื่อพัฒนา Web Application ที่ใช้ Dynamic Form โดยใช้ Spring Web Framework
| ขั้นตอน | คำอธิบาย |
|---|---|
| 1 | สร้างโปรเจ็กต์ด้วยชื่อ HelloWeb ภายใต้แพ็คเกจ com.tutorialspoint ตามที่อธิบายไว้ในบท Spring MVC - Hello World |
| 2 | สร้างคลาส Java Student, StudentController ภายใต้แพ็คเกจ com.tutorialspoint |
| 3 | สร้างไฟล์มุมมอง student.jsp, result.jsp ภายใต้โฟลเดอร์ย่อย jsp |
| 4 | ขั้นตอนสุดท้ายคือการสร้างเนื้อหาของไฟล์ต้นทางและการกำหนดค่าและส่งออกแอปพลิเคชันตามที่อธิบายด้านล่าง |
Student.java
package com.tutorialspoint;

public class Student {
   private Integer age;
   private String name;
   private Integer id;

   public void setAge(Integer age) {
      this.age = age;
   }
   public Integer getAge() {
      return age;
   }

   public void setName(String name) {
      this.name = name;
   }
   public String getName() {
      return name;
   }

   public void setId(Integer id) {
      this.id = id;
   }
   public Integer getId() {
      return id;
   }
}
StudentController.java
package com.tutorialspoint;

import org.springframework.stereotype.Controller;
import org.springframework.web.bind.annotation.ModelAttribute;
import org.springframework.web.bind.annotation.RequestMapping;
import org.springframework.web.bind.annotation.RequestMethod;
import org.springframework.web.servlet.ModelAndView;
import org.springframework.ui.ModelMap;

@Controller
public class StudentController {

   @RequestMapping(value = "/student", method = RequestMethod.GET)
   public ModelAndView student() {
      return new ModelAndView("student", "command", new Student());
   }

   @RequestMapping(value = "/addStudent", method = RequestMethod.POST)
   public String addStudent(@ModelAttribute("SpringWeb")Student student,
      ModelMap model) {
      model.addAttribute("name", student.getName());
      model.addAttribute("age", student.getAge());
      model.addAttribute("id", student.getId());

      return "result";
   }
}
นี่คือวิธีการบริการแรก student()เราได้ผ่านช่องว่าง Studentobjectในอ็อบเจ็กต์ ModelAndView ที่มีชื่อ "command" เนื่องจากสปริงเฟรมเวิร์กต้องการอ็อบเจ็กต์ที่มีชื่อ "command" หากคุณใช้แท็ก <form: form> ในไฟล์ JSP ของคุณ ดังนั้นเมื่อstudent() เรียกว่าเมธอดมันจะส่งกลับไฟล์ student.jsp ดู.
วิธีการบริการที่สอง addStudent() จะถูกเรียกใช้เมธอด POST บนไฟล์ HelloWeb/addStudentURL คุณจะเตรียมโมเดลออบเจ็กต์ของคุณตามข้อมูลที่ส่งมา ในที่สุดมุมมอง "ผลลัพธ์" จะถูกส่งกลับจากวิธีการบริการซึ่งจะทำให้เกิดการแสดงผล result.jsp
student.jsp
<%@taglib uri = "http://www.springframework.org/tags/form" prefix = "form"%>
<html>
   <head>
      <title>Spring MVC Form Handling</title>
   </head>
   <body>

      <h2>Student Information</h2>
      <form:form method = "POST" action = "/HelloWeb/addStudent">
         <table>
            <tr>
              <td><form:label path = "name">Name</form:label></td>
              <td><form:input path = "name" /></td>
            </tr>
            <tr>
              <td><form:label path = "age">Age</form:label></td>
              <td><form:input path = "age" /></td>
            </tr>
            <tr>
              <td>< </td>
              <td><form:hidden path = "id" value = "1" /></td>
            </tr>
            <tr>
              <td colspan = "2">
                  <input type = "submit" value = "Submit"/>
              </td>
            </tr>
         </table>
      </form:form>
   </body>
</html>
ที่นี่เรากำลังใช้ไฟล์ <form:hidden /> แท็กเพื่อแสดงฟิลด์ที่ซ่อน HTML
ตัวอย่างเช่น -
<form:hidden path = "id" value = "1"/>มันจะแสดงเนื้อหา HTML ต่อไปนี้
<input id = "id" name = "id" type = "hidden" value = "1"/>result.jsp
<%@taglib uri = "http://www.springframework.org/tags/form" prefix = "form"%>
<html>
   <head>
      <title>Spring MVC Form Handling</title>
   </head>
   <body>

      <h2>Submitted Student Information</h2>
      <table>
         <tr>
            <td>Name</td>
            <td>${name}</td> </tr> <tr> <td>Age</td> <td>${age}</td>
         </tr>
         <tr>
            <td>ID</td>
            <td>${id}</td>
         </tr>
      </table>
   </body>
</html>
เมื่อคุณสร้างไฟล์ซอร์สและไฟล์คอนฟิกเสร็จเรียบร้อยแล้วให้ส่งออกแอปพลิเคชันของคุณ คลิกขวาที่แอปพลิเคชันของคุณและใช้งานExport → WAR File ตัวเลือกและบันทึกไฟล์ HelloWeb.war ไฟล์ในโฟลเดอร์ webapps ของ Tomcat
ตอนนี้เริ่มเซิร์ฟเวอร์ Tomcat ของคุณและตรวจสอบให้แน่ใจว่าคุณสามารถเข้าถึงหน้าเว็บอื่น ๆ จากโฟลเดอร์ webapps โดยใช้เบราว์เซอร์มาตรฐาน ลองใช้ URL -http://localhost:8080/HelloWeb/student และเราจะเห็นหน้าจอต่อไปนี้หากทุกอย่างเรียบร้อยดีกับ Spring Web Application
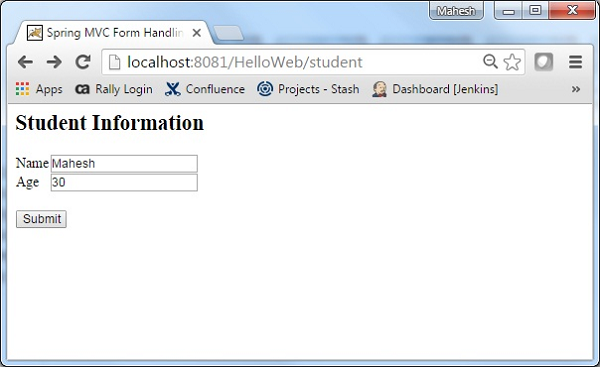
หลังจากส่งข้อมูลที่จำเป็นแล้วให้คลิกที่ปุ่มส่งเพื่อส่งแบบฟอร์ม เราจะเห็นหน้าจอต่อไปนี้หากทุกอย่างเรียบร้อยดีกับ Spring Web Application ของคุณ
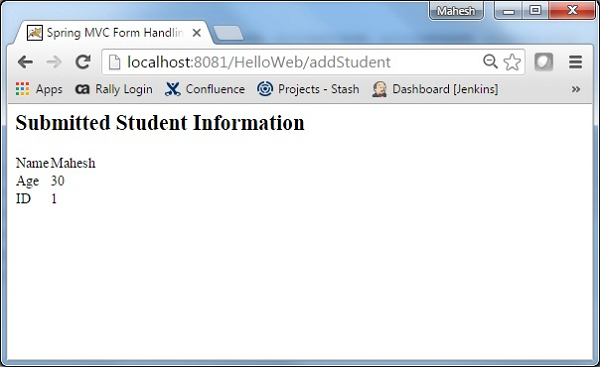
ตัวอย่างต่อไปนี้แสดงวิธีใช้ Error Handling และ Validators ในแบบฟอร์มโดยใช้ Spring Web MVC Framework ในการเริ่มต้นให้เรามี Eclipse IDE ที่ใช้งานได้และพิจารณาขั้นตอนต่อไปนี้เพื่อพัฒนา Web Application ที่ใช้ Dynamic Form โดยใช้ Spring Web Framework
| ขั้นตอน | คำอธิบาย |
|---|---|
| 1 | สร้างโปรเจ็กต์ด้วยชื่อ HelloWeb ภายใต้แพ็คเกจ com.tutorialspoint ตามที่อธิบายไว้ในบท Spring MVC - Hello World |
| 2 | สร้างคลาส Java Student, StudentController และ StudentValidator ภายใต้แพ็คเกจ com.tutorialspoint |
| 3 | สร้างไฟล์มุมมอง addStudent.jsp, result.jsp ภายใต้โฟลเดอร์ย่อย jsp |
| 4 | ขั้นตอนสุดท้ายคือการสร้างเนื้อหาของไฟล์ต้นทางและการกำหนดค่าและส่งออกแอปพลิเคชันตามที่อธิบายด้านล่าง |
Student.java
package com.tutorialspoint;

public class Student {
   private Integer age;
   private String name;
   private Integer id;

   public void setAge(Integer age) {
      this.age = age;
   }
   public Integer getAge() {
      return age;
   }

   public void setName(String name) {
      this.name = name;
   }
   public String getName() {
      return name;
   }

   public void setId(Integer id) {
      this.id = id;
   }
   public Integer getId() {
      return id;
   }
}
StudentValidator.java
package com.tutorialspoint;

import org.springframework.validation.Errors;
import org.springframework.validation.ValidationUtils;
import org.springframework.validation.Validator;

public class StudentValidator implements Validator {

   @Override
   public boolean supports(Class<?> clazz) {
      return Student.class.isAssignableFrom(clazz);
   }

   @Override
   public void validate(Object target, Errors errors) {
      ValidationUtils.rejectIfEmptyOrWhitespace(errors,
         "name", "required.name","Field name is required.");
   }
}
StudentController.java
package com.tutorialspoint;

import org.springframework.beans.factory.annotation.Autowired;
import org.springframework.beans.factory.annotation.Qualifier;
import org.springframework.stereotype.Controller;
import org.springframework.ui.Model;
import org.springframework.validation.BindingResult;
import org.springframework.validation.Validator;
import org.springframework.validation.annotation.Validated;
import org.springframework.web.bind.WebDataBinder;
import org.springframework.web.bind.annotation.InitBinder;
import org.springframework.web.bind.annotation.ModelAttribute;
import org.springframework.web.bind.annotation.RequestMapping;
import org.springframework.web.bind.annotation.RequestMethod;
import org.springframework.web.servlet.ModelAndView;

@Controller
public class StudentController {

   @Autowired
   @Qualifier("studentValidator")
   private Validator validator;

   @InitBinder
   private void initBinder(WebDataBinder binder) {
      binder.setValidator(validator);
   }

   @RequestMapping(value = "/addStudent", method = RequestMethod.GET)
   public ModelAndView student() {
      return new ModelAndView("addStudent", "command", new Student());
   }

   @ModelAttribute("student")
   public Student createStudentModel() {
      return new Student();
   }

   @RequestMapping(value = "/addStudent", method = RequestMethod.POST)
   public String addStudent(@ModelAttribute("student") @Validated Student student,
      BindingResult bindingResult, Model model) {

      if (bindingResult.hasErrors()) {
         return "addStudent";
      }
      model.addAttribute("name", student.getName());
      model.addAttribute("age", student.getAge());
      model.addAttribute("id", student.getId());

      return "result";
   }
}
HelloWeb-servlet.xml
<beans xmlns = "http://www.springframework.org/schema/beans"
   xmlns:context = "http://www.springframework.org/schema/context"
   xmlns:xsi = "http://www.w3.org/2001/XMLSchema-instance"
   xsi:schemaLocation = "
   http://www.springframework.org/schema/beans
   http://www.springframework.org/schema/beans/spring-beans-3.0.xsd
   http://www.springframework.org/schema/context
   http://www.springframework.org/schema/context/spring-context-3.0.xsd">

   <context:component-scan base-package = "com.tutorialspoint" />

   <bean class = "org.springframework.web.servlet.view.InternalResourceViewResolver">
      <property name = "prefix" value = "/WEB-INF/jsp/" />
      <property name = "suffix" value = ".jsp" />
   </bean>

   <bean id = "studentValidator" class = "com.tutorialspoint.StudentValidator" />
</beans>
นี่คือวิธีการบริการแรก student()เราได้ส่ง Studentobject เปล่าในออบเจ็กต์ ModelAndView ที่มีชื่อ "command" เนื่องจาก Spring framework ต้องการอ็อบเจ็กต์ที่มีชื่อ "command" หากคุณใช้แท็ก <form: form> ในไฟล์ JSP ของคุณ ดังนั้นเมื่อเรียกวิธี student () มันจะส่งกลับaddStudent.jsp ดู.
วิธีการบริการที่สอง addStudent() จะถูกเรียกใช้เมธอด POST บนไฟล์ HelloWeb/addStudentURL คุณจะเตรียมโมเดลออบเจ็กต์ของคุณตามข้อมูลที่ส่งมา ในที่สุดมุมมอง "ผลลัพธ์" จะถูกส่งกลับจากวิธีการบริการซึ่งจะส่งผลให้มีการแสดงผล result.jsp ในกรณีที่มีข้อผิดพลาดที่สร้างขึ้นโดยใช้โปรแกรมตรวจสอบความถูกต้องมุมมองเดียวกัน "addStudent" จะถูกส่งกลับ Spring จะฉีดข้อความแสดงข้อผิดพลาดจากBindingResult ในมุมมอง
addStudent.jsp
<%@taglib uri = "http://www.springframework.org/tags/form" prefix = "form"%>
<html>
   <head>
      <title>Spring MVC Form Handling</title>
   </head>
   <style>
      .error {
         color: #ff0000;
      }

      .errorblock {
         color: #000;
         background-color: #ffEEEE;
         border: 3px solid #ff0000;
         padding: 8px;
         margin: 16px;
      }
   </style>

   <body>
      <h2>Student Information</h2>
      <form:form method = "POST" action = "/HelloWeb/addStudent" commandName = "student">
      <form:errors path = "*" cssClass = "errorblock" element = "div" />
         <table>
            <tr>
               <td><form:label path = "name">Name</form:label></td>
               <td><form:input path = "name" /></td>
               <td><form:errors path = "name" cssClass = "error" /></td>
            </tr>
            <tr>
               <td><form:label path = "age">Age</form:label></td>
               <td><form:input path = "age" /></td>
            </tr>
            <tr>
               <td><form:label path = "id">id</form:label></td>
               <td><form:input path = "id" /></td>
            </tr>
            <tr>
               <td colspan = "2">
               <input type = "submit" value = "Submit"/>
               </td>
            </tr>
         </table>
      </form:form>
   </body>
</html>
ที่นี่เรากำลังใช้ <form:errors />แท็กด้วย path = "*" เพื่อแสดงข้อความแสดงข้อผิดพลาด ตัวอย่างเช่น
<form:errors path = "*" cssClass = "errorblock" element = "div" />มันจะแสดงข้อความแสดงข้อผิดพลาดสำหรับการตรวจสอบอินพุตทั้งหมด
เรากำลังใช้ <form:errors />แท็กด้วย path = "name" เพื่อแสดงข้อความแสดงข้อผิดพลาดสำหรับฟิลด์ name ตัวอย่างเช่น
<form:errors path = "name" cssClass = "error" />มันจะแสดงข้อความแสดงข้อผิดพลาดสำหรับการตรวจสอบช่องชื่อ
result.jsp
<%@taglib uri = "http://www.springframework.org/tags/form" prefix = "form"%>
<html>
   <head>
      <title>Spring MVC Form Handling</title>
   </head>
   <body>

      <h2>Submitted Student Information</h2>
      <table>
         <tr>
            <td>Name</td>
            <td>${name}</td>
         </tr>
         <tr>
            <td>Age</td>
            <td>${age}</td> </tr> <tr> <td>ID</td> <td>${id}</td>
         </tr>
      </table>
   </body>
</html>
เมื่อคุณสร้างไฟล์ซอร์สและไฟล์คอนฟิกเสร็จเรียบร้อยแล้วให้ส่งออกแอปพลิเคชันของคุณ คลิกขวาที่แอปพลิเคชันของคุณใช้Export → WAR File และบันทึกไฟล์ HelloWeb.war ไฟล์ในโฟลเดอร์ webapps ของ Tomcat
ตอนนี้เริ่มเซิร์ฟเวอร์ Tomcat ของคุณและตรวจสอบให้แน่ใจว่าคุณสามารถเข้าถึงหน้าเว็บอื่น ๆ จากโฟลเดอร์ webapps โดยใช้เบราว์เซอร์มาตรฐาน ลองใช้ URL -http://localhost:8080/HelloWeb/addStudent และเราจะเห็นหน้าจอต่อไปนี้หากทุกอย่างเรียบร้อยดีกับ Spring Web Application
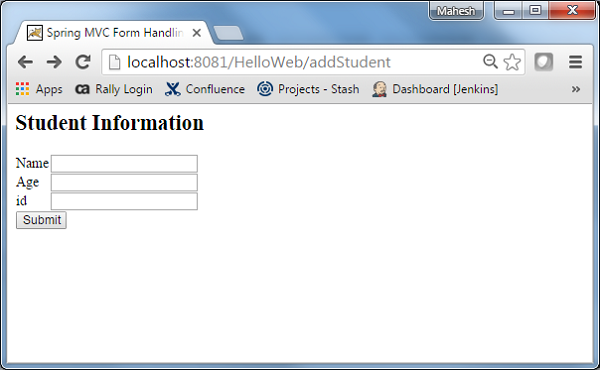
หลังจากส่งข้อมูลที่จำเป็นแล้วให้คลิกที่ปุ่มส่งเพื่อส่งแบบฟอร์ม คุณควรเห็นหน้าจอต่อไปนี้หากทุกอย่างเรียบร้อยดีกับ Spring Web Application
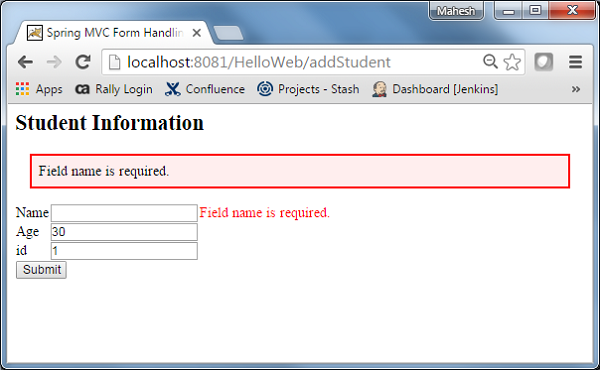
ตัวอย่างต่อไปนี้แสดงวิธีใช้ File Upload Control ในฟอร์มโดยใช้ Spring Web MVC framework ในการเริ่มต้นให้เรามี Eclipse IDE ที่ใช้งานได้และปฏิบัติตามขั้นตอนต่อไปนี้เพื่อพัฒนา Web Application ที่ใช้ Dynamic Form โดยใช้ Spring Web Framework
| ขั้นตอน | คำอธิบาย |
|---|---|
| 1 | สร้างโปรเจ็กต์ด้วยชื่อ HelloWeb ภายใต้แพ็คเกจ com.tutorialspoint ตามที่อธิบายไว้ในบท Spring MVC - Hello World |
| 2 | สร้างคลาส Java FileModel, FileUploadController ภายใต้แพ็กเกจ com.tutorialspoint |
| 3 | สร้างไฟล์ดู fileUpload.jsp, success.jsp ภายใต้โฟลเดอร์ย่อย jsp |
| 4 | สร้างโฟลเดอร์ temp ภายใต้โฟลเดอร์ย่อย WebContent |
| 5 | ดาวน์โหลด Apache Commons FileUpload ห้องสมุดคอมมอน-fileupload.jarและ Apache Commons IO ห้องสมุดคอมมอน-io.jar ใส่ไว้ใน CLASSPATH ของคุณ |
| 6 | ขั้นตอนสุดท้ายคือการสร้างเนื้อหาของไฟล์ต้นทางและการกำหนดค่าและส่งออกแอปพลิเคชันตามที่อธิบายด้านล่าง |
FileModel.java
package com.tutorialspoint;

import org.springframework.web.multipart.MultipartFile;

public class FileModel {
   private MultipartFile file;

   public MultipartFile getFile() {
      return file;
   }

   public void setFile(MultipartFile file) {
      this.file = file;
   }
}
FileUploadController.java
package com.tutorialspoint;

import java.io.File;
import java.io.IOException;

import javax.servlet.ServletContext;

import org.springframework.beans.factory.annotation.Autowired;
import org.springframework.stereotype.Controller;
import org.springframework.ui.ModelMap;
import org.springframework.util.FileCopyUtils;
import org.springframework.validation.BindingResult;
import org.springframework.validation.annotation.Validated;
import org.springframework.web.bind.annotation.RequestMapping;
import org.springframework.web.bind.annotation.RequestMethod;
import org.springframework.web.multipart.MultipartFile;
import org.springframework.web.servlet.ModelAndView;

@Controller
public class FileUploadController {

   @Autowired
   ServletContext context;

   @RequestMapping(value = "/fileUploadPage", method = RequestMethod.GET)
   public ModelAndView fileUploadPage() {
      FileModel file = new FileModel();
      ModelAndView modelAndView = new ModelAndView("fileUpload", "command", file);
      return modelAndView;
   }

   @RequestMapping(value="/fileUploadPage", method = RequestMethod.POST)
   public String fileUpload(@Validated FileModel file, BindingResult result, ModelMap model) throws IOException {
      if (result.hasErrors()) {
         System.out.println("validation errors");
         return "fileUploadPage";
      } else {
         System.out.println("Fetching file");
         MultipartFile multipartFile = file.getFile();
         String uploadPath = context.getRealPath("") + File.separator + "temp" + File.separator;
         //Now do something with file...
         FileCopyUtils.copy(file.getFile().getBytes(), new File(uploadPath+file.getFile().getOriginalFilename()));
         String fileName = multipartFile.getOriginalFilename();
         model.addAttribute("fileName", fileName);
         return "success";
      }
   }
}
HelloWeb-servlet.xml
<beans xmlns = "http://www.springframework.org/schema/beans"
   xmlns:context = "http://www.springframework.org/schema/context"
   xmlns:xsi = "http://www.w3.org/2001/XMLSchema-instance"
   xsi:schemaLocation = "
   http://www.springframework.org/schema/beans
   http://www.springframework.org/schema/beans/spring-beans-3.0.xsd
   http://www.springframework.org/schema/context
   http://www.springframework.org/schema/context/spring-context-3.0.xsd">

   <context:component-scan base-package = "com.tutorialspoint" />

   <bean class = "org.springframework.web.servlet.view.InternalResourceViewResolver">
      <property name = "prefix" value = "/WEB-INF/jsp/" />
      <property name = "suffix" value = ".jsp" />
   </bean>

   <bean id = "multipartResolver"
      class = "org.springframework.web.multipart.commons.CommonsMultipartResolver" />
</beans>
นี่คือวิธีการบริการแรก fileUploadPage()เราได้ผ่านช่องว่าง FileModelออบเจ็กต์ในออบเจ็กต์ ModelAndView ที่มีชื่อ "command" เนื่องจากสปริงเฟรมเวิร์กต้องการอ็อบเจ็กต์ที่มีชื่อ "command" ถ้าคุณใช้แท็ก <form: form> ในไฟล์ JSP ดังนั้นเมื่อfileUploadPage() เรียกว่าเมธอดมันส่งกลับ fileUpload.jsp ดู.
วิธีการบริการที่สอง fileUpload() จะถูกเรียกใช้เมธอด POST บนไฟล์ HelloWeb/fileUploadPageURL คุณจะเตรียมไฟล์ที่จะอัปโหลดตามข้อมูลที่ส่งมา สุดท้ายมุมมอง "ความสำเร็จ" จะถูกส่งกลับจากวิธีการบริการซึ่งจะส่งผลให้การแสดงผล success.jsp
fileUpload.jsp
<%@ page contentType="text/html; charset = UTF-8" %>
<%@ taglib prefix = "form" uri = "http://www.springframework.org/tags/form"%>
<html>
   <head>
      <title>File Upload Example</title>
   </head>

   <body>
      <form:form method = "POST" modelAttribute = "fileUpload"
         enctype = "multipart/form-data">
         Please select a file to upload :
         <input type = "file" name = "file" />
         <input type = "submit" value = "upload" />
      </form:form>
   </body>
</html>
ที่นี่เรากำลังใช้ modelAttribute แอตทริบิวต์ที่มีค่า = "fileUpload" เพื่อแมปการควบคุมการอัปโหลดไฟล์กับโมเดลเซิร์ฟเวอร์
success.jsp
<%@ page contentType = "text/html; charset = UTF-8" %>
<html>
   <head>
      <title>File Upload Example</title>
   </head>
   <body>
      FileName :
      lt;b> ${fileName} </b> - Uploaded Successfully.
   </body>
</html>
เมื่อคุณสร้างไฟล์ซอร์สและไฟล์คอนฟิกเสร็จเรียบร้อยแล้วให้ส่งออกแอปพลิเคชันของคุณ คลิกขวาที่แอปพลิเคชันของคุณใช้Export → WAR File และบันทึกไฟล์ HelloWeb.war ในโฟลเดอร์ webapps ของ Tomcat
ตอนนี้เริ่มเซิร์ฟเวอร์ Tomcat ของคุณและตรวจสอบให้แน่ใจว่าคุณสามารถเข้าถึงหน้าเว็บอื่น ๆ จากโฟลเดอร์ webapps โดยใช้เบราว์เซอร์มาตรฐาน ลองใช้ URL–http://localhost:8080/HelloWeb/fileUploadPage และเราจะเห็นหน้าจอต่อไปนี้หากทุกอย่างเรียบร้อยดีกับ Spring Web Application
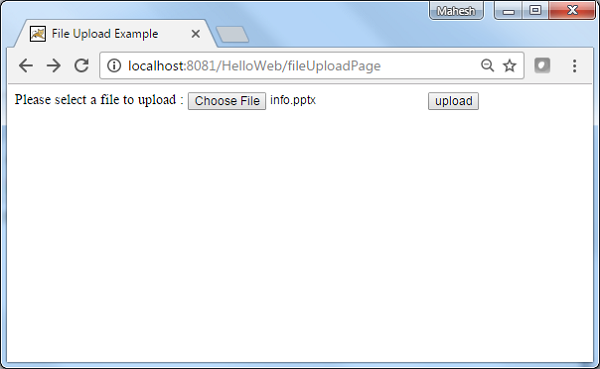
หลังจากส่งข้อมูลที่จำเป็นแล้วให้คลิกที่ปุ่มส่งเพื่อส่งแบบฟอร์ม คุณควรเห็นหน้าจอต่อไปนี้หากทุกอย่างเรียบร้อยดีกับ Spring Web Application
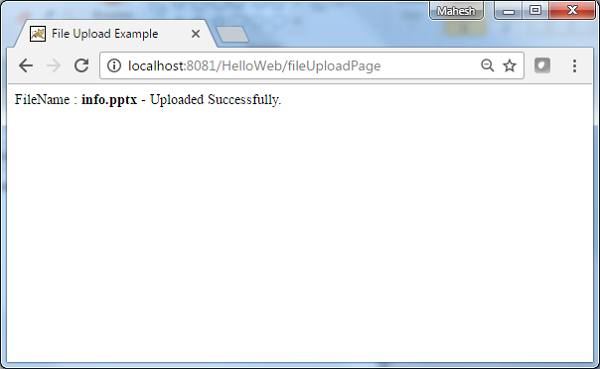
ตัวอย่างต่อไปนี้แสดงวิธีการใช้ Bean Name URL Handler Mapping โดยใช้ Spring Web MVC Framework BeanNameUrlHandlerMapping คลาสคือคลาสการแมปตัวจัดการเริ่มต้นซึ่งแมปคำขอ URL กับชื่อของ bean ที่กล่าวถึงในคอนฟิกูเรชัน
<beans>
   <bean class = "org.springframework.web.servlet.view.InternalResourceViewResolver">
      <property name = "prefix" value = "/WEB-INF/jsp/"/>
      <property name = "suffix" value = ".jsp"/>
   </bean>

   <bean class = "org.springframework.web.servlet.handler.BeanNameUrlHandlerMapping"/>

   <bean name = "/helloWorld.htm"
      class = "com.tutorialspoint.HelloController" />

   <bean name = "/hello*"
      class = "com.tutorialspoint.HelloController" />

   <bean name = "/welcome.htm"
      class = "com.tutorialspoint.WelcomeController"/>
</beans>
ตัวอย่างเช่นการใช้การกำหนดค่าข้างต้นหาก URI
/helloWorld.htm หรือ / hello {any letter} มีการร้องขอ .htm DispatcherServlet จะส่งต่อคำขอไปยัง HelloController.
/welcome.htm ถูกร้องขอ DispatcherServlet จะส่งต่อคำขอไปยังไฟล์ WelcomeController.
/welcome1.htm ถูกร้องขอ DispatcherServlet จะไม่พบคอนโทรลเลอร์ใด ๆ และเซิร์ฟเวอร์จะแสดงข้อผิดพลาดสถานะ 404
ในการเริ่มต้นให้เรามี Eclipse IDE ที่ใช้งานได้และพิจารณาขั้นตอนต่อไปนี้เพื่อพัฒนา Web Application ที่ใช้ Dynamic Form โดยใช้ Spring Web Framework
| ขั้นตอน | คำอธิบาย |
|---|---|
| 1 | สร้างโปรเจ็กต์ด้วยชื่อ TestWeb ภายใต้แพ็คเกจ com.tutorialspoint ตามที่อธิบายไว้ในบท Spring MVC - Hello World |
| 2 | สร้างคลาส Java HelloController, WelcomeController ภายใต้แพ็คเกจ com.tutorialspoint |
| 3 | สร้างไฟล์มุมมอง hello.jsp, welcome.jsp ภายใต้โฟลเดอร์ย่อย jsp |
| 4 | ขั้นตอนสุดท้ายคือการสร้างเนื้อหาของไฟล์ต้นทางและไฟล์การกำหนดค่าทั้งหมดและส่งออกแอปพลิเคชันตามที่อธิบายด้านล่าง |
HelloController.java
package com.tutorialspoint;

import javax.servlet.http.HttpServletRequest;
import javax.servlet.http.HttpServletResponse;

import org.springframework.web.servlet.ModelAndView;
import org.springframework.web.servlet.mvc.AbstractController;

public class HelloController extends AbstractController{

   @Override
   protected ModelAndView handleRequestInternal(HttpServletRequest request,
      HttpServletResponse response) throws Exception {
      ModelAndView model = new ModelAndView("hello");
      model.addObject("message", "Hello World!");
      return model;
   }
}
WelcomeController.java
package com.tutorialspoint;

import javax.servlet.http.HttpServletRequest;
import javax.servlet.http.HttpServletResponse;

import org.springframework.web.servlet.ModelAndView;
import org.springframework.web.servlet.mvc.AbstractController;

public class WelcomeController extends AbstractController{

   @Override
   protected ModelAndView handleRequestInternal(HttpServletRequest request,
      HttpServletResponse response) throws Exception {
      ModelAndView model = new ModelAndView("welcome");
      model.addObject("message", "Welcome!");
      return model;
   }
}
TestWeb-servlet.xml
<beans xmlns = "http://www.springframework.org/schema/beans"
   xmlns:context = "http://www.springframework.org/schema/context"
   xmlns:xsi = "http://www.w3.org/2001/XMLSchema-instance"
   xsi:schemaLocation = "
   http://www.springframework.org/schema/beans
   http://www.springframework.org/schema/beans/spring-beans-3.0.xsd
   http://www.springframework.org/schema/context
   http://www.springframework.org/schema/context/spring-context-3.0.xsd">

   <bean class = "org.springframework.web.servlet.view.InternalResourceViewResolver">
      <property name = "prefix" value = "/WEB-INF/jsp/"/>
      <property name = "suffix" value = ".jsp"/>
   </bean>

   <bean class = "org.springframework.web.servlet.handler.BeanNameUrlHandlerMapping"/>

   <bean name = "/helloWorld.htm"
      class = "com.tutorialspoint.HelloController" />

   <bean name = "/hello*"
      class = "com.tutorialspoint.HelloController" />

   <bean name = "/welcome.htm"
      class = "com.tutorialspoint.WelcomeController"/>
</beans>
hello.jsp
<%@ page contentType = "text/html; charset = UTF-8" %>
<html>
   <head>
      <title>Hello World</title>
   </head>
   <body>
      <h2>${message}</h2>
   </body>
</html>
welcome.jsp
<%@ page contentType = "text/html; charset = UTF-8" %>
<html>
   <head>
      <title>Welcome</title>
   </head>
   <body>
      <h2>${message}</h2>
   </body>
</html>
เมื่อคุณสร้างไฟล์ซอร์สและไฟล์คอนฟิกเสร็จเรียบร้อยแล้วให้ส่งออกแอปพลิเคชันของคุณ คลิกขวาที่แอปพลิเคชันของคุณใช้Export → WAR File และบันทึกไฟล์ TestWeb.war ไฟล์ในโฟลเดอร์ webapps ของ Tomcat
ตอนนี้เริ่มเซิร์ฟเวอร์ Tomcat ของคุณและตรวจสอบให้แน่ใจว่าคุณสามารถเข้าถึงหน้าเว็บอื่น ๆ จากโฟลเดอร์ webapps โดยใช้เบราว์เซอร์มาตรฐาน ลองใช้ URL -http://localhost:8080/TestWeb/helloWorld.htm และเราจะเห็นหน้าจอต่อไปนี้หากทุกอย่างเรียบร้อยดีกับ Spring Web Application
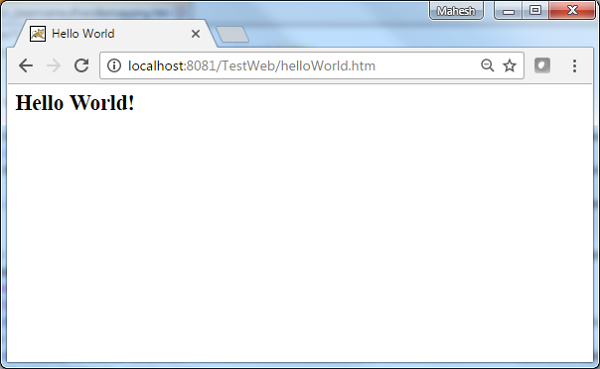
ลองใช้ URL - http://localhost:8080/TestWeb/hello.htm และเราจะเห็นหน้าจอต่อไปนี้หากทุกอย่างเรียบร้อยดีกับ Spring Web Application
ลองใช้ URL http://localhost:8080/TestWeb/welcome.htm และเราจะเห็นหน้าจอต่อไปนี้หากทุกอย่างเรียบร้อยดีกับ Spring Web Application
ลองใช้ URL http://localhost:8080/TestWeb/welcome1.htm และเราจะเห็นหน้าจอต่อไปนี้หากทุกอย่างเรียบร้อยดีกับ Spring Web Application
ตัวอย่างต่อไปนี้แสดงวิธีการใช้ Controller Class Name Handler Mapping โดยใช้ Spring Web MVC framework ControllerClassNameHandlerMappingคลาสคือคลาสการแมปตัวจัดการที่อิงตามแบบแผนซึ่งแมปคำขอ URL กับชื่อของคอนโทรลเลอร์ที่กล่าวถึงในคอนฟิกูเรชัน คลาสนี้ใช้ชื่อ Controller และแปลงเป็นตัวพิมพ์เล็กโดยมี "/" นำหน้า
ตัวอย่างเช่น HelloController แมปกับ URL "/ hello *"
<beans>
   <bean class="org.springframework.web.servlet.view.InternalResourceViewResolver">
      <property name = "prefix" value = "/WEB-INF/jsp/"/>
      <property name = "suffix" value = ".jsp"/>
   </bean>

   <bean class = "org.springframework.web.servlet.mvc.support.ControllerClassNameHandlerMapping"/>

   <bean class = "com.tutorialspoint.HelloController" />

   <bean class = "com.tutorialspoint.WelcomeController"/>
</beans>
ตัวอย่างเช่นการใช้การกำหนดค่าด้านบนหาก URI
/helloWorld.htm หรือ / hello {any letter} มีการร้องขอ .htm DispatcherServlet จะส่งต่อคำขอไปยัง HelloController.
/welcome.htm ถูกร้องขอ DispatcherServlet จะส่งต่อคำขอไปยังไฟล์ WelcomeController.
/Welcome.htm ถูกร้องขอโดยที่ W เป็นตัวพิมพ์ใหญ่ DispatcherServlet จะไม่พบตัวควบคุมใด ๆ และเซิร์ฟเวอร์จะแสดงข้อผิดพลาดสถานะ 404
ในการเริ่มต้นให้เรามี Eclipse IDE ที่ใช้งานได้และทำตามขั้นตอนต่อไปเพื่อพัฒนา Web Application ที่ใช้ Dynamic Form โดยใช้ Spring Web Framework
| ขั้นตอน | คำอธิบาย |
|---|---|
| 1 | สร้างโปรเจ็กต์ด้วยชื่อ TestWeb ภายใต้แพ็คเกจ com.tutorialspoint ตามที่อธิบายไว้ในบท Spring MVC - Hello World |
| 2 | สร้างคลาส Java HelloController และ WelcomeController ภายใต้แพ็คเกจ com.tutorialspoint |
| 3 | สร้างไฟล์มุมมอง hello.jsp, welcome.jsp ภายใต้โฟลเดอร์ย่อย jsp |
| 4 | ขั้นตอนสุดท้ายคือการสร้างเนื้อหาของไฟล์ต้นทางและการกำหนดค่าและส่งออกแอปพลิเคชันตามที่อธิบายด้านล่าง |
HelloController.java
package com.tutorialspoint;

import javax.servlet.http.HttpServletRequest;
import javax.servlet.http.HttpServletResponse;

import org.springframework.web.servlet.ModelAndView;
import org.springframework.web.servlet.mvc.AbstractController;

public class HelloController extends AbstractController{

   @Override
   protected ModelAndView handleRequestInternal(HttpServletRequest request,
      HttpServletResponse response) throws Exception {
      ModelAndView model = new ModelAndView("hello");
      model.addObject("message", "Hello World!");
      return model;
   }
}
WelcomeController.java
package com.tutorialspoint;

import javax.servlet.http.HttpServletRequest;
import javax.servlet.http.HttpServletResponse;

import org.springframework.web.servlet.ModelAndView;
import org.springframework.web.servlet.mvc.AbstractController;

public class WelcomeController extends AbstractController{

   @Override
   protected ModelAndView handleRequestInternal(HttpServletRequest request,
      HttpServletResponse response) throws Exception {
      ModelAndView model = new ModelAndView("welcome");
      model.addObject("message", "Welcome!");
      return model;
   }
}
TestWeb-servlet.xml
<beans xmlns = "http://www.springframework.org/schema/beans"
   xmlns:context = "http://www.springframework.org/schema/context"
   xmlns:xsi = "http://www.w3.org/2001/XMLSchema-instance"
   xsi:schemaLocation = "
   http://www.springframework.org/schema/beans
   http://www.springframework.org/schema/beans/spring-beans-3.0.xsd
   http://www.springframework.org/schema/context
   http://www.springframework.org/schema/context/spring-context-3.0.xsd">

   <bean class = "org.springframework.web.servlet.view.InternalResourceViewResolver">
      <property name = "prefix" value = "/WEB-INF/jsp/"/>
      <property name = "suffix" value = ".jsp"/>
   </bean>

   <bean class = "org.springframework.web.servlet.mvc.support.ControllerClassNameHandlerMapping"/>

   <bean class = "com.tutorialspoint.HelloController" />

   <bean class = "com.tutorialspoint.WelcomeController"/>
</beans>
hello.jsp
<%@ page contentType="text/html; charset = UTF-8" %>
<html>
   <head>
      <title>Hello World</title>
   </head>
   <body>
      <h2>${message}</h2>
   </body>
</html>
welcome.jsp
<%@ page contentType = "text/html; charset=UTF-8" %>
<html>
   <head>
      <title>Welcome</title>
   </head>
   <body>
      <h2>${message}</h2>
   </body>
</html>
เมื่อคุณสร้างไฟล์ซอร์สและไฟล์คอนฟิกเสร็จเรียบร้อยแล้วให้ส่งออกแอปพลิเคชันของคุณ คลิกขวาที่แอปพลิเคชันใช้ไฟล์Export → WAR File และบันทึกไฟล์ TestWeb.war ไฟล์ในโฟลเดอร์ webapps ของ Tomcat
ตอนนี้เริ่มเซิร์ฟเวอร์ Tomcat ของคุณและตรวจสอบให้แน่ใจว่าคุณสามารถเข้าถึงหน้าเว็บอื่น ๆ จากโฟลเดอร์ webapps โดยใช้เบราว์เซอร์มาตรฐาน ลองใช้ URL -http://localhost:8080/TestWeb/helloWorld.htm และเราจะเห็นหน้าจอต่อไปนี้หากทุกอย่างเรียบร้อยดีกับ Spring Web Application
ลองใช้ URL http://localhost:8080/TestWeb/hello.htm และเราจะเห็นหน้าจอต่อไปนี้หากทุกอย่างเรียบร้อยดีกับ Spring Web Application
ลองใช้ URL http://localhost:8080/TestWeb/welcome.htm และเราจะเห็นหน้าจอต่อไปนี้หากทุกอย่างเรียบร้อยดีกับ Spring Web Application
ลองใช้ URL http://localhost:8080/TestWeb/Welcome.htm และเราจะเห็นหน้าจอต่อไปนี้หากทุกอย่างเรียบร้อยดีกับ Spring Web Application
ตัวอย่างต่อไปนี้แสดงวิธีใช้ Simple URL Handler Mapping โดยใช้ Spring Web MVC framework คลาส SimpleUrlHandlerMapping ช่วยในการแมป URL อย่างชัดเจนกับคอนโทรลเลอร์ตามลำดับ
<beans>
   <bean class = "org.springframework.web.servlet.view.InternalResourceViewResolver">
      <property name = "prefix" value = "/WEB-INF/jsp/"/>
      <property name = "suffix" value = ".jsp"/>
   </bean>

   <bean class = "org.springframework.web.servlet.handler.SimpleUrlHandlerMapping">
      <property name = "mappings">
         <props>
            <prop key = "/welcome.htm">welcomeController</prop>
            <prop key = "/helloWorld.htm">helloController</prop>
         </props>
      </property>
   </bean>

   <bean id = "helloController" class = "com.tutorialspoint.HelloController" />

   <bean id = "welcomeController" class = "com.tutorialspoint.WelcomeController"/>
</beans>
ตัวอย่างเช่นการใช้การกำหนดค่าด้านบนหาก URI
/helloWorld.htm ถูกร้องขอ DispatcherServlet จะส่งต่อคำขอไปยังไฟล์ HelloController.
/welcome.htm ถูกร้องขอ DispatcherServlet จะส่งต่อคำขอไปยังไฟล์ WelcomeController.
ในการเริ่มต้นให้เรามี Eclipse IDE ที่ใช้งานได้และพิจารณาขั้นตอนต่อไปนี้เพื่อพัฒนา Web Application ที่ใช้ Dynamic Form โดยใช้ Spring Web Framework
| ขั้นตอน | คำอธิบาย |
|---|---|
| 1 | สร้างโครงการด้วยชื่อ TestWeb ภายใต้แพ็คเกจ com.tutorialspoint ตามที่อธิบายไว้ใน Spring MVC - Hello World |
| 2 | สร้างคลาส Java HelloController และ WelcomeController ภายใต้แพ็คเกจ com.tutorialspoint |
| 3 | สร้างไฟล์มุมมอง hello.jsp และ welcome.jsp ภายใต้โฟลเดอร์ย่อย jsp |
| 4 | ขั้นตอนสุดท้ายคือการสร้างเนื้อหาของไฟล์ต้นทางและการกำหนดค่าและส่งออกแอปพลิเคชันตามที่อธิบายด้านล่าง |
HelloController.java
package com.tutorialspoint;

import javax.servlet.http.HttpServletRequest;
import javax.servlet.http.HttpServletResponse;

import org.springframework.web.servlet.ModelAndView;
import org.springframework.web.servlet.mvc.AbstractController;

public class HelloController extends AbstractController{

   @Override
   protected ModelAndView handleRequestInternal(HttpServletRequest request,
      HttpServletResponse response) throws Exception {
      ModelAndView model = new ModelAndView("hello");
      model.addObject("message", "Hello World!");
      return model;
   }
}
WelcomeController.java
package com.tutorialspoint;

import javax.servlet.http.HttpServletRequest;
import javax.servlet.http.HttpServletResponse;

import org.springframework.web.servlet.ModelAndView;
import org.springframework.web.servlet.mvc.AbstractController;

public class WelcomeController extends AbstractController{

   @Override
   protected ModelAndView handleRequestInternal(HttpServletRequest request,
      HttpServletResponse response) throws Exception {
      ModelAndView model = new ModelAndView("welcome");
      model.addObject("message", "Welcome!");
      return model;
   }
}
TestWeb-servlet.xml
<beans xmlns = "http://www.springframework.org/schema/beans"
   xmlns:context = "http://www.springframework.org/schema/context"
   xmlns:xsi = "http://www.w3.org/2001/XMLSchema-instance"
   xsi:schemaLocation = "
   http://www.springframework.org/schema/beans
   http://www.springframework.org/schema/beans/spring-beans-3.0.xsd
   http://www.springframework.org/schema/context
   http://www.springframework.org/schema/context/spring-context-3.0.xsd">

   <bean class = "org.springframework.web.servlet.view.InternalResourceViewResolver">
      <property name = "prefix" value = "/WEB-INF/jsp/"/>
      <property name = "suffix" value = ".jsp"/>
   </bean>

   <bean class = "org.springframework.web.servlet.handler.SimpleUrlHandlerMapping">
      <property name = "mappings">
         <props>
            <prop key = "/welcome.htm">welcomeController</prop>
            <prop key = "/helloWorld.htm">helloController</prop>
         </props>
      </property>
   </bean>

   <bean id = "helloController" class = "com.tutorialspoint.HelloController" />

   <bean id = "welcomeController" class = "com.tutorialspoint.WelcomeController"/>
</beans>
hello.jsp
<%@ page contentType = "text/html; charset = UTF-8" %>
<html>
   <head>
      <title>Hello World</title>
   </head>
   <body>
      <h2>${message}</h2>
   </body>
</html>
welcome.jsp
<%@ page contentType = "text/html; charset = UTF-8" %>
<html>
   <head>
      <title>Welcome</title>
   </head>
   <body>
      <h2>${message}</h2>
   </body>
</html>
เมื่อคุณสร้างไฟล์ซอร์สและไฟล์คอนฟิกเสร็จเรียบร้อยแล้วให้ส่งออกแอปพลิเคชันของคุณ คลิกขวาที่แอปพลิเคชันของคุณใช้ไฟล์Export → WAR File ตัวเลือกและบันทึกไฟล์ TestWeb.war ไฟล์ในโฟลเดอร์ webapps ของ Tomcat
ตอนนี้เริ่มเซิร์ฟเวอร์ Tomcat ของคุณและตรวจสอบให้แน่ใจว่าคุณสามารถเข้าถึงหน้าเว็บอื่น ๆ จากโฟลเดอร์ webapps โดยใช้เบราว์เซอร์มาตรฐาน ลองใช้ URL -http://localhost:8080/TestWeb/helloWorld.htm และเราจะเห็นหน้าจอต่อไปนี้หากทุกอย่างเรียบร้อยดีกับ Spring Web Application
ลองใช้ URL http://localhost:8080/TestWeb/welcome.htm และคุณจะเห็นผลลัพธ์ต่อไปนี้หากทุกอย่างเรียบร้อยดีกับ Spring Web Application ของคุณ
ตัวอย่างต่อไปนี้แสดงวิธีการใช้ Multi Action Controller โดยใช้ Spring Web MVC framework MultiActionController คลาสช่วยในการแมป URL หลายรายการด้วยวิธีการในตัวควบคุมเดียวตามลำดับ
package com.tutorialspoint;

import javax.servlet.http.HttpServletRequest;
import javax.servlet.http.HttpServletResponse;

import org.springframework.web.servlet.ModelAndView;
import org.springframework.web.servlet.mvc.multiaction.MultiActionController;

public class UserController extends MultiActionController{

   public ModelAndView home(HttpServletRequest request,
      HttpServletResponse response) throws Exception {
      ModelAndView model = new ModelAndView("home");
      model.addObject("message", "Home");
      return model;
   }

   public ModelAndView add(HttpServletRequest request,
      HttpServletResponse response) throws Exception {
      ModelAndView model = new ModelAndView("user");
      model.addObject("message", "Add");
      return model;
   }

   public ModelAndView remove(HttpServletRequest request,
      HttpServletResponse response) throws Exception {
      ModelAndView model = new ModelAndView("user");
      model.addObject("message", "Remove");
      return model;
   }
}
<bean class = "org.springframework.web.servlet.handler.BeanNameUrlHandlerMapping"/>
<bean name = "/home.htm" class = "com.tutorialspoint.UserController" />
<bean name = "/user/*.htm" class = "com.tutorialspoint.UserController" />ตัวอย่างเช่นการใช้การกำหนดค่าข้างต้นหาก URI -
/home.htm ถูกร้องขอ DispatcherServlet จะส่งต่อการร้องขอไปยัง UserController home() วิธี.
มีการร้องขอ user / add.htm DispatcherServlet จะส่งต่อคำขอไปยัง UserController add() วิธี.
มีการร้องขอ user / remove.htm DispatcherServlet จะส่งต่อการร้องขอไปยัง UserController remove() วิธี.
ในการเริ่มต้นให้เรามี Eclipse IDE ที่ใช้งานได้และปฏิบัติตามขั้นตอนต่อไปนี้เพื่อพัฒนา Web Application ที่ใช้ Dynamic Form โดยใช้ Spring Web Framework
| ขั้นตอน | คำอธิบาย |
|---|---|
| 1 | สร้างโครงการด้วยชื่อ TestWeb ภายใต้แพ็คเกจ com.tutorialspoint ตามที่อธิบายไว้ใน Spring MVC - Hello World |
| 2 | สร้างคลาส Java UserController ภายใต้แพ็คเกจ com.tutorialspoint |
| 3 | สร้างไฟล์วิว home.jsp และ user.jsp ภายใต้โฟลเดอร์ย่อย jsp |
| 4 | ขั้นตอนสุดท้ายคือการสร้างเนื้อหาของไฟล์ต้นทางและการกำหนดค่าและส่งออกแอปพลิเคชันตามที่อธิบายด้านล่าง |
UserController.java
package com.tutorialspoint;
import javax.servlet.http.HttpServletRequest;
import javax.servlet.http.HttpServletResponse;
import org.springframework.web.servlet.ModelAndView;
import org.springframework.web.servlet.mvc.multiaction.MultiActionController;
public class UserController extends MultiActionController{
public ModelAndView home(HttpServletRequest request,
HttpServletResponse response) throws Exception {
ModelAndView model = new ModelAndView("home");
model.addObject("message", "Home");
return model;
}
public ModelAndView add(HttpServletRequest request,
HttpServletResponse response) throws Exception {
ModelAndView model = new ModelAndView("user");
model.addObject("message", "Add");
return model;
}
public ModelAndView remove(HttpServletRequest request,
HttpServletResponse response) throws Exception {
ModelAndView model = new ModelAndView("user");
model.addObject("message", "Remove");
return model;
}
}TestWeb-servlet.xml
<beans xmlns = "http://www.springframework.org/schema/beans"
xmlns:context = "http://www.springframework.org/schema/context"
xmlns:xsi = "http://www.w3.org/2001/XMLSchema-instance"
xsi:schemaLocation = "
http://www.springframework.org/schema/beans
http://www.springframework.org/schema/beans/spring-beans-3.0.xsd
http://www.springframework.org/schema/context
http://www.springframework.org/schema/context/spring-context-3.0.xsd">
<bean class = "org.springframework.web.servlet.view.InternalResourceViewResolver">
<property name = "prefix" value = "/WEB-INF/jsp/"/>
<property name = "suffix" value = ".jsp"/>
</bean>
<bean class = "org.springframework.web.servlet.handler.BeanNameUrlHandlerMapping"/>
<bean name = "/home.htm" class = "com.tutorialspoint.UserController" />
<bean name = "/user/*.htm" class = "com.tutorialspoint.UserController" />
</beans>home.jsp
<%@ page contentType = "text/html; charset = UTF-8" %>
<html>
   <head>
      <meta http-equiv = "Content-Type" content = "text/html; charset = ISO-8859-1">
      <title>Home</title>
   </head>

   <body>
      <a href = "user/add.htm" >Add</a> <br>
      <a href = "user/remove.htm" >Remove</a>
   </body>
</html>
user.jsp
<%@ page contentType = "text/html; charset = UTF-8" %>
<html>
   <head>
      <title>Hello World</title>
   </head>
   <body>
      <h2>${message}</h2>
   </body>
</html>
เมื่อคุณสร้างไฟล์ซอร์สและไฟล์คอนฟิกเสร็จเรียบร้อยแล้วให้ส่งออกแอปพลิเคชันของคุณ คลิกขวาที่แอปพลิเคชันของคุณใช้Export → WAR File และบันทึกไฟล์ TestWeb.war ไฟล์ในโฟลเดอร์ webapps ของ Tomcat
ตอนนี้เริ่มเซิร์ฟเวอร์ Tomcat ของคุณและตรวจสอบให้แน่ใจว่าคุณสามารถเข้าถึงหน้าเว็บอื่น ๆ จากโฟลเดอร์ webapps โดยใช้เบราว์เซอร์มาตรฐาน ตอนนี้ลอง URL -http://localhost:8080/TestWeb/home.htm และเราจะเห็นหน้าจอต่อไปนี้หากทุกอย่างเรียบร้อยดีกับ Spring Web Application
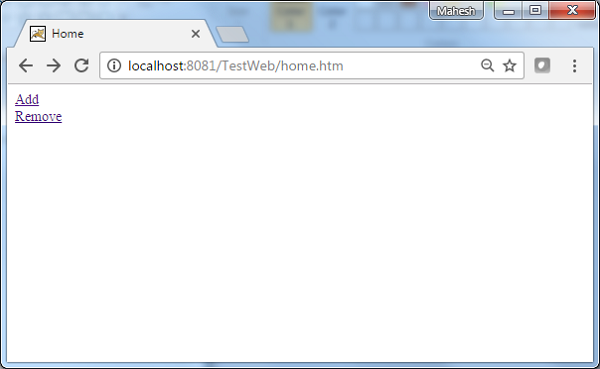
ลองใช้ URL http://localhost:8080/TestWeb/user/add.htm และเราจะเห็นหน้าจอต่อไปนี้หากทุกอย่างเรียบร้อยดีกับ Spring Web Application
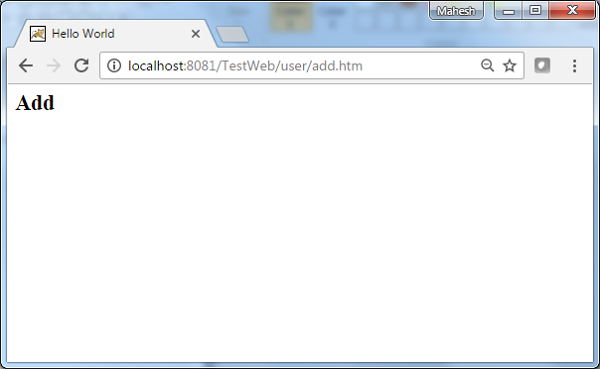
ตัวอย่างต่อไปนี้แสดงวิธีใช้เมธอด Properties Method Name Resolver ของ Multi Action Controller โดยใช้ Spring Web MVC framework MultiActionController คลาสช่วยในการแมป URL หลายรายการด้วยวิธีการในตัวควบคุมเดียวตามลำดับ
package com.tutorialspoint;

import javax.servlet.http.HttpServletRequest;
import javax.servlet.http.HttpServletResponse;

import org.springframework.web.servlet.ModelAndView;
import org.springframework.web.servlet.mvc.multiaction.MultiActionController;

public class UserController extends MultiActionController{

   public ModelAndView home(HttpServletRequest request,
      HttpServletResponse response) throws Exception {
      ModelAndView model = new ModelAndView("user");
      model.addObject("message", "Home");
      return model;
   }

   public ModelAndView add(HttpServletRequest request,
      HttpServletResponse response) throws Exception {
      ModelAndView model = new ModelAndView("user");
      model.addObject("message", "Add");
      return model;
   }

   public ModelAndView remove(HttpServletRequest request,
      HttpServletResponse response) throws Exception {
      ModelAndView model = new ModelAndView("user");
      model.addObject("message", "Remove");
      return model;
   }
}
<bean class = "com.tutorialspoint.UserController">
<property name = "methodNameResolver">
<bean class = "org.springframework.web.servlet.mvc.multiaction.PropertiesMethodNameResolver">
<property name = "mappings">
<props>
<prop key = "/user/home.htm">home</prop>
<prop key = "/user/add.htm">add</prop>
<prop key = "/user/remove.htm">update</prop>
</props>
</property>
</bean>
</property>
</bean>ตัวอย่างเช่นการใช้การกำหนดค่าข้างต้นหาก URI -
/user/home.htm ถูกร้องขอ DispatcherServlet จะส่งต่อการร้องขอไปยัง UserController home() วิธี.
/user/add.htm ถูกร้องขอ DispatcherServlet จะส่งต่อการร้องขอไปยัง UserController add() วิธี.
/user/remove.htm ถูกร้องขอ DispatcherServlet จะส่งต่อการร้องขอไปยัง UserController remove() วิธี.
ในการเริ่มต้นให้เรามี Eclipse IDE ที่ใช้งานได้และพิจารณาขั้นตอนต่อไปนี้เพื่อพัฒนา Web Application ที่ใช้ Dynamic Form โดยใช้ Spring Web Framework
| ขั้นตอน | คำอธิบาย |
|---|---|
| 1 | สร้างโปรเจ็กต์ด้วยชื่อ TestWeb ภายใต้แพ็คเกจ com.tutorialspoint ตามที่อธิบายไว้ในบท Spring MVC - Hello World |
| 2 | สร้างคลาส Java UserController ภายใต้แพ็คเกจ com.tutorialspoint |
| 3 | สร้างไฟล์วิว user.jsp ภายใต้โฟลเดอร์ย่อย jsp |
| 4 | ขั้นตอนสุดท้ายคือการสร้างเนื้อหาของไฟล์ต้นทางและการกำหนดค่าและส่งออกแอปพลิเคชันตามที่อธิบายด้านล่าง |
UserController.java
package com.tutorialspoint;
import javax.servlet.http.HttpServletRequest;
import javax.servlet.http.HttpServletResponse;
import org.springframework.web.servlet.ModelAndView;
import org.springframework.web.servlet.mvc.multiaction.MultiActionController;
public class UserController extends MultiActionController{
public ModelAndView home(HttpServletRequest request,
HttpServletResponse response) throws Exception {
ModelAndView model = new ModelAndView("user");
model.addObject("message", "Home");
return model;
}
public ModelAndView add(HttpServletRequest request,
HttpServletResponse response) throws Exception {
ModelAndView model = new ModelAndView("user");
model.addObject("message", "Add");
return model;
}
public ModelAndView remove(HttpServletRequest request,
HttpServletResponse response) throws Exception {
ModelAndView model = new ModelAndView("user");
model.addObject("message", "Remove");
return model;
}
}TestWeb-servlet.xml
<beans xmlns = "http://www.springframework.org/schema/beans"
xmlns:context = "http://www.springframework.org/schema/context"
xmlns:xsi = "http://www.w3.org/2001/XMLSchema-instance"
xsi:schemaLocation = "
http://www.springframework.org/schema/beans
http://www.springframework.org/schema/beans/spring-beans-3.0.xsd
http://www.springframework.org/schema/context
http://www.springframework.org/schema/context/spring-context-3.0.xsd">
<bean class = "org.springframework.web.servlet.view.InternalResourceViewResolver">
<property name = "prefix" value = "/WEB-INF/jsp/"/>
<property name = "suffix" value = ".jsp"/>
</bean>
<bean class = "org.springframework.web.servlet.mvc.support.ControllerClassNameHandlerMapping">
<property name = "caseSensitive" value = "true" />
</bean>
<bean class = "com.tutorialspoint.UserController">
   <property name = "methodNameResolver">
      <bean class = "org.springframework.web.servlet.mvc.multiaction.PropertiesMethodNameResolver">
         <property name = "mappings">
            <props>
               <prop key = "/user/home.htm">home</prop>
               <prop key = "/user/add.htm">add</prop>
               <prop key = "/user/remove.htm">update</prop>
            </props>
         </property>
      </bean>
   </property>
</bean>
</beans>user.jsp
<%@ page contentType = "text/html; charset = UTF-8" %>
<html>
<head>
<title>Hello World</title>
</head>
<body>
<h2>${message}</h2>
</body>
</html>เมื่อคุณสร้างไฟล์ซอร์สและไฟล์คอนฟิกเสร็จเรียบร้อยแล้วให้ส่งออกแอปพลิเคชันของคุณ คลิกขวาที่แอปพลิเคชันของคุณใช้Export → WAR File และบันทึกไฟล์ TestWeb.war ไฟล์ในโฟลเดอร์ webapps ของ Tomcat
ตอนนี้เริ่มเซิร์ฟเวอร์ Tomcat ของคุณและตรวจสอบให้แน่ใจว่าคุณสามารถเข้าถึงหน้าเว็บอื่น ๆ จากโฟลเดอร์ webapps โดยใช้เบราว์เซอร์มาตรฐาน ตอนนี้ลอง URL -http://localhost:8080/TestWeb/user/add.htm และเราจะเห็นหน้าจอต่อไปนี้หากทุกอย่างเรียบร้อยดีกับ Spring Web Application
ตัวอย่างต่อไปนี้แสดงวิธีการใช้ Parameter Method Name Resolver ของ Multi Action Controller โดยใช้ Spring Web MVC framework MultiActionController คลาสช่วยในการแมป URL หลายรายการด้วยวิธีการในตัวควบคุมเดียวตามลำดับ
package com.tutorialspoint;

import javax.servlet.http.HttpServletRequest;
import javax.servlet.http.HttpServletResponse;

import org.springframework.web.servlet.ModelAndView;
import org.springframework.web.servlet.mvc.multiaction.MultiActionController;

public class UserController extends MultiActionController{

   public ModelAndView home(HttpServletRequest request,
      HttpServletResponse response) throws Exception {
      ModelAndView model = new ModelAndView("user");
      model.addObject("message", "Home");
      return model;
   }

   public ModelAndView add(HttpServletRequest request,
      HttpServletResponse response) throws Exception {
      ModelAndView model = new ModelAndView("user");
      model.addObject("message", "Add");
      return model;
   }

   public ModelAndView remove(HttpServletRequest request,
      HttpServletResponse response) throws Exception {
      ModelAndView model = new ModelAndView("user");
      model.addObject("message", "Remove");
      return model;
   }
}<bean class = "com.tutorialspoint.UserController">
<property name = "methodNameResolver">
<bean class = "org.springframework.web.servlet.mvc.multiaction.ParameterMethodNameResolver">
<property name = "paramName" value = "action"/>
</bean>
</property>
</bean>ตัวอย่างเช่นการใช้การกำหนดค่าข้างต้นหาก URI -
/user/*.htm?action=home ถูกร้องขอ DispatcherServlet จะส่งต่อการร้องขอไปยัง UserController home() วิธี.
/user/*.htm?action=add ถูกร้องขอ DispatcherServlet จะส่งต่อการร้องขอไปยัง UserController add() วิธี.
/user/*.htm?action=remove ถูกร้องขอ DispatcherServlet จะส่งต่อคำขอไปยัง UserController remove() วิธี.
ในการเริ่มต้นให้เรามี Eclipse IDE ที่ใช้งานได้และปฏิบัติตามขั้นตอนต่อไปนี้เพื่อพัฒนา Web Application ที่ใช้ Dynamic Form โดยใช้ Spring Web Framework
| ขั้นตอน | คำอธิบาย |
|---|---|
| 1 | สร้างโปรเจ็กต์ด้วยชื่อ TestWeb ภายใต้แพ็คเกจ com.tutorialspoint ตามที่อธิบายไว้ในบท Spring MVC - Hello World |
| 2 | สร้างคลาส Java UserController ภายใต้แพ็คเกจ com.tutorialspoint |
| 3 | สร้างไฟล์วิว user.jsp ภายใต้โฟลเดอร์ย่อย jsp |
| 4 | ขั้นตอนสุดท้ายคือการสร้างเนื้อหาของไฟล์ต้นทางและการกำหนดค่าและส่งออกแอปพลิเคชันตามที่อธิบายด้านล่าง |
UserController.java
package com.tutorialspoint;
import javax.servlet.http.HttpServletRequest;
import javax.servlet.http.HttpServletResponse;
import org.springframework.web.servlet.ModelAndView;
import org.springframework.web.servlet.mvc.multiaction.MultiActionController;
public class UserController extends MultiActionController{
public ModelAndView home(HttpServletRequest request,
HttpServletResponse response) throws Exception {
ModelAndView model = new ModelAndView("user");
model.addObject("message", "Home");
return model;
}
public ModelAndView add(HttpServletRequest request,
HttpServletResponse response) throws Exception {
ModelAndView model = new ModelAndView("user");
model.addObject("message", "Add");
return model;
}
public ModelAndView remove(HttpServletRequest request,
HttpServletResponse response) throws Exception {
ModelAndView model = new ModelAndView("user");
model.addObject("message", "Remove");
return model;
}
}TestWeb-servlet.xml
<beans xmlns = "http://www.springframework.org/schema/beans"
xmlns:context = "http://www.springframework.org/schema/context"
xmlns:xsi = "http://www.w3.org/2001/XMLSchema-instance"
xsi:schemaLocation = "
http://www.springframework.org/schema/beans
http://www.springframework.org/schema/beans/spring-beans-3.0.xsd
http://www.springframework.org/schema/context
http://www.springframework.org/schema/context/spring-context-3.0.xsd">
<bean class = "org.springframework.web.servlet.view.InternalResourceViewResolver">
<property name = "prefix" value = "/WEB-INF/jsp/"/>
<property name = "suffix" value = ".jsp"/>
</bean>
<bean class = "org.springframework.web.servlet.mvc.support.ControllerClassNameHandlerMapping">
<property name = "caseSensitive" value = "true" />
</bean>
<bean class = "com.tutorialspoint.UserController">
<property name = "methodNameResolver">
<bean class = "org.springframework.web.servlet.mvc.multiaction.ParameterMethodNameResolver">
<property name = "paramName" value = "action"/>
</bean>
</property>
</bean>
</beans>user.jsp
<%@ page contentType="text/html; charset=UTF-8" %>
<html>
<head>
<title>Hello World</title>
</head>
<body>
<h2>${message}</h2>
</body>
</html>เมื่อคุณสร้างไฟล์ซอร์สและไฟล์คอนฟิกเสร็จเรียบร้อยแล้วให้ส่งออกแอปพลิเคชันของคุณ คลิกขวาที่แอปพลิเคชันของคุณใช้Export → WAR File และบันทึกไฟล์ TestWeb.war ไฟล์ในโฟลเดอร์ webapps ของ Tomcat
ตอนนี้เริ่มเซิร์ฟเวอร์ Tomcat ของคุณและตรวจสอบให้แน่ใจว่าคุณสามารถเข้าถึงหน้าเว็บอื่น ๆ จากโฟลเดอร์ webapps โดยใช้เบราว์เซอร์มาตรฐาน ตอนนี้ลอง URL -http://localhost:8080/TestWeb/user/test.htm?action=home และเราจะเห็นหน้าจอต่อไปนี้หากทุกอย่างเรียบร้อยดีกับ Spring Web Application

ตัวอย่างต่อไปนี้แสดงวิธีใช้วิธีการควบคุมมุมมองพารามิเตอร์ของ Multi Action Controller โดยใช้กรอบ Spring Web MVC มุมมองที่ปรับเปลี่ยนได้ช่วยให้สามารถทำแผนที่หน้าเว็บกับคำขอได้
package com.tutorialspoint;
import javax.servlet.http.HttpServletRequest;
import javax.servlet.http.HttpServletResponse;
import org.springframework.web.servlet.ModelAndView;
import org.springframework.web.servlet.mvc.multiaction.MultiActionController;
public class UserController extends MultiActionController{
public ModelAndView home(HttpServletRequest request,
HttpServletResponse response) throws Exception {
ModelAndView model = new ModelAndView("user");
model.addObject("message", "Home");
return model;
}
}<bean class="org.springframework.web.servlet.handler.SimpleUrlHandlerMapping">
<property name="mappings">
<value>
index.htm=userController
</value>
</property>
</bean>
<bean id="userController" class="org.springframework.web.servlet.mvc.ParameterizableViewController">
<property name="viewName" value="user"/>
</bean>ตัวอย่างเช่นการใช้การกำหนดค่าข้างต้นหาก URI
/index.htm ถูกร้องขอ DispatcherServlet จะส่งต่อคำขอไปยังไฟล์ UserController คอนโทรลเลอร์ที่มี viewName ตั้งเป็น user.jsp
ในการเริ่มต้นให้เรามี Eclipse IDE ที่ใช้งานได้และปฏิบัติตามขั้นตอนต่อไปนี้เพื่อพัฒนา Web Application ที่ใช้ Dynamic Form โดยใช้ Spring Web Framework
| ขั้นตอน | คำอธิบาย |
|---|---|
| 1 | สร้างโปรเจ็กต์ด้วยชื่อ TestWeb ภายใต้แพ็คเกจ com.tutorialspoint ตามที่อธิบายไว้ในบท Spring MVC - Hello World |
| 2 | สร้างคลาส Java UserController ภายใต้แพ็คเกจ com.tutorialspoint |
| 3 | สร้างไฟล์วิว user.jsp ภายใต้โฟลเดอร์ย่อย jsp |
| 4 | ขั้นตอนสุดท้ายคือการสร้างเนื้อหาของไฟล์ต้นทางและการกำหนดค่าและส่งออกแอปพลิเคชันตามที่อธิบายด้านล่าง |
UserController.java
package com.tutorialspoint;
import javax.servlet.http.HttpServletRequest;
import javax.servlet.http.HttpServletResponse;
import org.springframework.web.servlet.ModelAndView;
import org.springframework.web.servlet.mvc.multiaction.MultiActionController;
public class UserController extends MultiActionController{
public ModelAndView home(HttpServletRequest request,
HttpServletResponse response) throws Exception {
ModelAndView model = new ModelAndView("user");
model.addObject("message", "Home");
return model;
}
}TestWeb-servlet.xml
<beans xmlns = "http://www.springframework.org/schema/beans"
xmlns:context = "http://www.springframework.org/schema/context"
xmlns:xsi = "http://www.w3.org/2001/XMLSchema-instance"
xsi:schemaLocation = "
http://www.springframework.org/schema/beans
http://www.springframework.org/schema/beans/spring-beans-3.0.xsd
http://www.springframework.org/schema/context
http://www.springframework.org/schema/context/spring-context-3.0.xsd">
<bean class = "org.springframework.web.servlet.view.InternalResourceViewResolver">
<property name = "prefix" value = "/WEB-INF/jsp/"/>
<property name = "suffix" value = ".jsp"/>
</bean>
<bean class = "org.springframework.web.servlet.handler.SimpleUrlHandlerMapping">
<property name = "mappings">
<value>
index.htm = userController
</value>
</property>
</bean>
<bean id = "userController" class = "org.springframework.web.servlet.mvc.ParameterizableViewController">
<property name = "viewName" value="user"/>
</bean>
</beans>user.jsp
<%@ page contentType="text/html; charset=UTF-8" %>
<html>
<head>
<title>Hello World</title>
</head>
<body>
<h2>Hello World</h2>
</body>
</html>เมื่อคุณสร้างไฟล์ซอร์สและไฟล์คอนฟิกเสร็จเรียบร้อยแล้วให้ส่งออกแอปพลิเคชันของคุณ คลิกขวาที่แอปพลิเคชันของคุณใช้Export → WAR File และบันทึกไฟล์ TestWeb.war ไฟล์ในโฟลเดอร์ webapps ของ Tomcat
ตอนนี้เริ่มเซิร์ฟเวอร์ Tomcat ของคุณและตรวจสอบให้แน่ใจว่าคุณสามารถเข้าถึงหน้าเว็บอื่น ๆ จากโฟลเดอร์ webapps โดยใช้เบราว์เซอร์มาตรฐาน ตอนนี้ลอง URL -http://localhost:8080/TestWeb/index.htm และคุณจะเห็นหน้าจอต่อไปนี้หากทุกอย่างเรียบร้อยดีกับ Spring Web Application
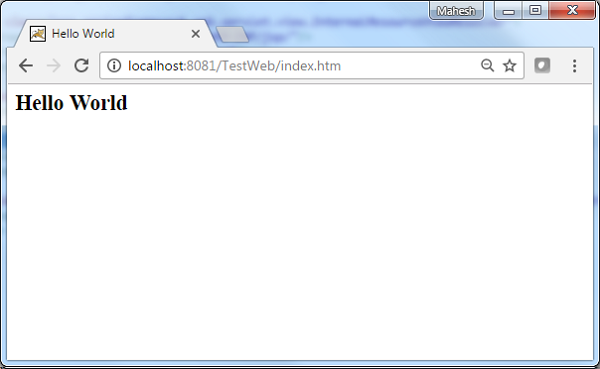
InternalResourceViewResolverใช้เพื่อแก้ไข URI ที่ให้มาเป็น URI จริง ตัวอย่างต่อไปนี้แสดงวิธีการใช้ InternalResourceViewResolver โดยใช้ Spring Web MVC Framework InternalResourceViewResolver ช่วยให้การแมปหน้าเว็บกับคำขอ
package com.tutorialspoint;
import org.springframework.stereotype.Controller;
import org.springframework.web.bind.annotation.RequestMapping;
import org.springframework.web.bind.annotation.RequestMethod;
import org.springframework.ui.ModelMap;
@Controller
@RequestMapping("/hello")
public class HelloController{
@RequestMapping(method = RequestMethod.GET)
public String printHello(ModelMap model) {
model.addAttribute("message", "Hello Spring MVC Framework!");
return "hello";
}
}<bean class = "org.springframework.web.servlet.view.InternalResourceViewResolver">
<property name = "prefix" value = "/WEB-INF/jsp/"/>
<property name = "suffix" value = ".jsp"/>
</bean>ตัวอย่างเช่นการใช้การกำหนดค่าข้างต้นหาก URI
/ hello ถูกร้องขอ DispatcherServlet จะส่งต่อคำขอไปยังคำนำหน้า + viewname + ต่อท้าย = /WEB-INF/jsp/hello.jsp
ในการเริ่มต้นให้เรามี Eclipse IDE ที่ใช้งานได้จากนั้นพิจารณาขั้นตอนต่อไปนี้เพื่อพัฒนา Web Application ที่ใช้ Dynamic Form โดยใช้ Spring Web Framework
| ขั้นตอน | คำอธิบาย |
|---|---|
| 1 | สร้างโปรเจ็กต์ด้วยชื่อ TestWeb ภายใต้แพ็คเกจ com.tutorialspointas ที่อธิบายไว้ใน Spring MVC - Hello World Example Chapter |
| 2 | สร้างคลาส Java HelloController ภายใต้ com.tutorialspointpackage |
| 3 | สร้างไฟล์มุมมอง hello.jsp ภายใต้โฟลเดอร์ย่อย jsp |
| 4 | ขั้นตอนสุดท้ายคือการสร้างเนื้อหาของไฟล์ต้นทางและการกำหนดค่าและส่งออกแอปพลิเคชันตามที่อธิบายด้านล่าง |
HelloController.java
package com.tutorialspoint;
import org.springframework.stereotype.Controller;
import org.springframework.web.bind.annotation.RequestMapping;
import org.springframework.web.bind.annotation.RequestMethod;
import org.springframework.ui.ModelMap;
@Controller
@RequestMapping("/hello")
public class HelloController{
@RequestMapping(method = RequestMethod.GET)
public String printHello(ModelMap model) {
model.addAttribute("message", "Hello Spring MVC Framework!");
return "hello";
}
}TestWeb-servlet.xml
<beans xmlns = "http://www.springframework.org/schema/beans"
xmlns:context = "http://www.springframework.org/schema/context"
xmlns:xsi = "http://www.w3.org/2001/XMLSchema-instance"
xsi:schemaLocation = "
http://www.springframework.org/schema/beans
http://www.springframework.org/schema/beans/spring-beans-3.0.xsd
http://www.springframework.org/schema/context
http://www.springframework.org/schema/context/spring-context-3.0.xsd">
<context:component-scan base-package = "com.tutorialspoint" />
<bean class = "org.springframework.web.servlet.view.InternalResourceViewResolver">
<property name = "prefix" value = "/WEB-INF/jsp/" />
<property name = "suffix" value = ".jsp" />
</bean>
</beans>hello.jsp
<%@ page contentType = "text/html; charset = UTF-8" %>
<html>
   <head>
      <title>Hello World</title>
   </head>
   <body>
      <h2>${message}</h2>
   </body>
</html>
เมื่อคุณสร้างไฟล์ซอร์สและไฟล์คอนฟิกเสร็จเรียบร้อยแล้วให้ส่งออกแอปพลิเคชันของคุณ คลิกขวาที่แอปพลิเคชันของคุณใช้Export → WAR File และบันทึกไฟล์ TestWeb.war ไฟล์ในโฟลเดอร์ webapps ของ Tomcat
ตอนนี้เริ่มเซิร์ฟเวอร์ Tomcat ของคุณและตรวจสอบให้แน่ใจว่าคุณสามารถเข้าถึงหน้าเว็บอื่น ๆ จากโฟลเดอร์ webapps โดยใช้เบราว์เซอร์มาตรฐาน พยายามเข้าถึง URL -http://localhost:8080/TestWeb/hello และหากทุกอย่างเรียบร้อยดีกับ Spring Web Application เราจะเห็นหน้าจอต่อไปนี้
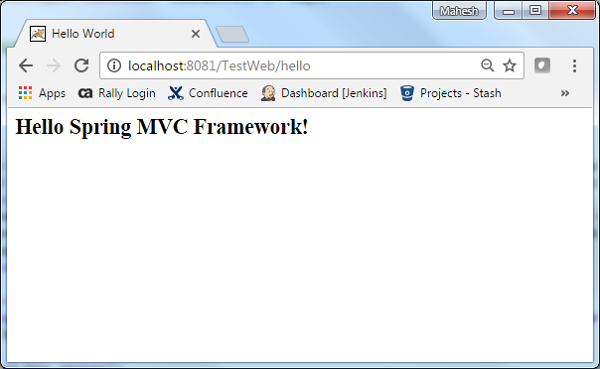
XmlViewResolver ถูกใช้เพื่อแก้ไขชื่อมุมมองโดยใช้มุมมองถั่วที่กำหนดในไฟล์ xml ตัวอย่างต่อไปนี้แสดงวิธีการใช้ XmlViewResolver โดยใช้ Spring Web MVC framework
TestWeb-servlet.xml
<bean class = "org.springframework.web.servlet.view.XmlViewResolver">
<property name = "location">
<value>/WEB-INF/views.xml</value>
</property>
</bean>views.xml
<bean id = "hello"
class = "org.springframework.web.servlet.view.JstlView">
<property name = "url" value = "/WEB-INF/jsp/hello.jsp" />
</bean>ตัวอย่างเช่นการใช้การกำหนดค่าข้างต้นหาก URI -
/ hello ถูกร้องขอ DispatcherServlet จะส่งต่อคำขอไปยัง hello.jsp ที่กำหนดโดย bean hello ใน view.xml
ในการเริ่มต้นให้เรามี Eclipse IDE ที่ใช้งานได้และปฏิบัติตามขั้นตอนต่อไปนี้เพื่อพัฒนา Web Application ที่ใช้ Dynamic Form โดยใช้ Spring Web Framework
| ขั้นตอน | คำอธิบาย |
|---|---|
| 1 | สร้างโปรเจ็กต์ด้วยชื่อ TestWeb ภายใต้แพ็คเกจ com.tutorialspoint ตามที่อธิบายไว้ในบท Spring MVC - Hello World |
| 2 | สร้างคลาส Java HelloController ภายใต้ com.tutorialspointpackage |
| 3 | สร้างไฟล์มุมมอง hello.jsp ภายใต้โฟลเดอร์ย่อย jsp |
| 4 | ดาวน์โหลดห้องสมุด JSTL jstl.jar ใส่ไว้ใน CLASSPATH ของคุณ |
| 5 | ขั้นตอนสุดท้ายคือการสร้างเนื้อหาของไฟล์ต้นทางและการกำหนดค่าและส่งออกแอปพลิเคชันตามที่อธิบายด้านล่าง |
HelloController.java
package com.tutorialspoint;
import org.springframework.stereotype.Controller;
import org.springframework.web.bind.annotation.RequestMapping;
import org.springframework.web.bind.annotation.RequestMethod;
import org.springframework.ui.ModelMap;
@Controller
@RequestMapping("/hello")
public class HelloController{
@RequestMapping(method = RequestMethod.GET)
public String printHello(ModelMap model) {
model.addAttribute("message", "Hello Spring MVC Framework!");
return "hello";
}
}TestWeb-servlet.xml
<beans xmlns = "http://www.springframework.org/schema/beans"
xmlns:context = "http://www.springframework.org/schema/context"
xmlns:xsi = "http://www.w3.org/2001/XMLSchema-instance"
xsi:schemaLocation = "
http://www.springframework.org/schema/beans
http://www.springframework.org/schema/beans/spring-beans-3.0.xsd
http://www.springframework.org/schema/context
http://www.springframework.org/schema/context/spring-context-3.0.xsd">
<context:component-scan base-package = "com.tutorialspoint" />
<bean class = "org.springframework.web.servlet.view.XmlViewResolver">
<property name = "location">
<value>/WEB-INF/views.xml</value>
</property>
</bean>
</beans>views.xml
<beans xmlns = "http://www.springframework.org/schema/beans"
xmlns:context = "http://www.springframework.org/schema/context"
xmlns:xsi = "http://www.w3.org/2001/XMLSchema-instance"
xsi:schemaLocation = "
http://www.springframework.org/schema/beans
http://www.springframework.org/schema/beans/spring-beans-3.0.xsd
http://www.springframework.org/schema/context
http://www.springframework.org/schema/context/spring-context-3.0.xsd">
<bean id = "hello"
class = "org.springframework.web.servlet.view.JstlView">
<property name = "url" value = "/WEB-INF/jsp/hello.jsp" />
</bean>
</beans>hello.jsp
<%@ page contentType = "text/html; charset = UTF-8" %>
<html>
<head>
<title>Hello World</title>
</head>
<body>
<h2>${message}</h2>
</body>
</html>เมื่อคุณสร้างไฟล์ซอร์สและไฟล์คอนฟิกเสร็จเรียบร้อยแล้วให้ส่งออกแอปพลิเคชันของคุณ คลิกขวาที่แอปพลิเคชันของคุณใช้Export → WAR File และบันทึกไฟล์ HelloWeb.war ไฟล์ในโฟลเดอร์ webapps ของ Tomcat
ตอนนี้เริ่มเซิร์ฟเวอร์ Tomcat ของคุณและตรวจสอบให้แน่ใจว่าคุณสามารถเข้าถึงหน้าเว็บอื่น ๆ จากโฟลเดอร์ webapps โดยใช้เบราว์เซอร์มาตรฐาน พยายามเข้าถึง URL -http://localhost:8080/HelloWeb/hello และหากทุกอย่างเรียบร้อยดีกับ Spring Web Application เราจะเห็นหน้าจอต่อไปนี้
ResourceBundleViewResolverใช้เพื่อแก้ไขชื่อมุมมองโดยใช้มุมมองถั่วที่กำหนดในไฟล์คุณสมบัติ ตัวอย่างต่อไปนี้แสดงวิธีการใช้ ResourceBundleViewResolver โดยใช้ Spring Web MVC Framework
TestWeb-servlet.xml
<bean class = "org.springframework.web.servlet.view.ResourceBundleViewResolver">
<property name = "basename" value = "views" />
</bean>ที่นี่ basenameหมายถึงชื่อของบันเดิลทรัพยากรซึ่งมีมุมมอง ชื่อเริ่มต้นของบันเดิลทรัพยากรคือviews.propertiesซึ่งสามารถแทนที่ได้โดยใช้คุณสมบัติชื่อฐาน
views.properties
hello.(class) = org.springframework.web.servlet.view.JstlView
hello.url = /WEB-INF/jsp/hello.jspตัวอย่างเช่นการใช้การกำหนดค่าข้างต้นหาก URI -
/ hello ถูกร้องขอ DispatcherServlet จะส่งต่อการร้องขอไปยัง hello.jsp ที่กำหนดโดย bean hello ใน views.properties
ที่นี่ "สวัสดี" คือชื่อมุมมองที่จะจับคู่ ในขณะที่class หมายถึงประเภทมุมมองและ URL คือตำแหน่งของมุมมอง
ในการเริ่มต้นให้เรามี Eclipse IDE ที่ใช้งานได้และพิจารณาขั้นตอนต่อไปนี้เพื่อพัฒนา Web Application ที่ใช้ Dynamic Form โดยใช้ Spring Web Framework
| ขั้นตอน | คำอธิบาย |
|---|---|
| 1 | สร้างโปรเจ็กต์ด้วยชื่อ TestWeb ภายใต้แพ็คเกจ com.tutorialspoint ตามที่อธิบายไว้ในบท Spring MVC - Hello World |
| 2 | สร้างคลาส Java HelloController ภายใต้ com.tutorialspointpackage |
| 3 | สร้างไฟล์มุมมอง hello.jsp ภายใต้โฟลเดอร์ย่อย jsp |
| 4 | สร้างไฟล์คุณสมบัติ views.properties ภายใต้โฟลเดอร์ src |
| 5 | ดาวน์โหลดห้องสมุด JSTL jstl.jar ใส่ไว้ใน CLASSPATH ของคุณ |
| 6 | ขั้นตอนสุดท้ายคือการสร้างเนื้อหาของไฟล์ต้นทางและการกำหนดค่าและส่งออกแอปพลิเคชันตามที่อธิบายด้านล่าง |
HelloController.java
package com.tutorialspoint;
import org.springframework.stereotype.Controller;
import org.springframework.web.bind.annotation.RequestMapping;
import org.springframework.web.bind.annotation.RequestMethod;
import org.springframework.ui.ModelMap;
@Controller
@RequestMapping("/hello")
public class HelloController{
@RequestMapping(method = RequestMethod.GET)
public String printHello(ModelMap model) {
model.addAttribute("message", "Hello Spring MVC Framework!");
return "hello";
}
}TestWeb-servlet.xml
<beans xmlns = "http://www.springframework.org/schema/beans"
xmlns:context = "http://www.springframework.org/schema/context"
xmlns:xsi = "http://www.w3.org/2001/XMLSchema-instance"
xsi:schemaLocation = "
http://www.springframework.org/schema/beans
http://www.springframework.org/schema/beans/spring-beans-3.0.xsd
http://www.springframework.org/schema/context
http://www.springframework.org/schema/context/spring-context-3.0.xsd">
<context:component-scan base-package = "com.tutorialspoint" />
<bean class = "org.springframework.web.servlet.view.ResourceBundleViewResolver">
<property name = "basename" value = "views" />
</bean>
</beans>views.properties
hello.(class) = org.springframework.web.servlet.view.JstlView
hello.url = /WEB-INF/jsp/hello.jsphello.jsp
<%@ page contentType="text/html; charset=UTF-8" %>
<html>
   <head>
      <title>Hello World</title>
   </head>
   <body>
      <h2>${message}</h2>
   </body>
</html>
เมื่อคุณสร้างไฟล์ซอร์สและไฟล์คอนฟิกเสร็จเรียบร้อยแล้วให้ส่งออกแอปพลิเคชันของคุณ คลิกขวาที่แอปพลิเคชันของคุณใช้Export → WAR File และบันทึกไฟล์ HelloWeb.war ของคุณในโฟลเดอร์ webapps ของ Tomcat
ตอนนี้เริ่มเซิร์ฟเวอร์ Tomcat ของคุณและตรวจสอบให้แน่ใจว่าคุณสามารถเข้าถึงหน้าเว็บอื่น ๆ จากโฟลเดอร์ webapps โดยใช้เบราว์เซอร์มาตรฐาน พยายามเข้าถึง URL -http://localhost:8080/HelloWeb/hello และหากทุกอย่างเรียบร้อยดีกับ Spring Web Application เราจะเห็นหน้าจอต่อไปนี้
ในกรณีที่คุณต้องการใช้ Multiple View Resolver ในแอปพลิเคชัน Spring MVC สามารถกำหนดลำดับความสำคัญได้โดยใช้คุณสมบัติคำสั่งซื้อ ตัวอย่างต่อไปนี้แสดงวิธีการใช้ResourceBundleViewResolver และ InternalResourceViewResolver ใน Spring Web MVC Framework
TestWeb-servlet.xml
<bean class = "org.springframework.web.servlet.view.ResourceBundleViewResolver">
<property name = "basename" value = "views" />
<property name = "order" value = "0" />
</bean>
<bean class = "org.springframework.web.servlet.view.InternalResourceViewResolver">
<property name = "prefix" value = "/WEB-INF/jsp/" />
<property name = "suffix" value = ".jsp" />
<property name = "order" value = "1" />
</bean>ที่นี่คุณสมบัติการสั่งซื้อกำหนดการจัดอันดับของตัวแก้ไขมุมมอง ในสิ่งนี้ 0 คือตัวแก้ไขตัวแรกและ 1 คือตัวแก้ไขถัดไปและอื่น ๆ
views.properties
hello.(class) = org.springframework.web.servlet.view.JstlView
hello.url = /WEB-INF/jsp/hello.jspตัวอย่างเช่นการใช้การกำหนดค่าข้างต้นหาก URI -
/ hello ถูกร้องขอ DispatcherServlet จะส่งต่อการร้องขอไปยัง hello.jsp ที่กำหนดโดย bean hello ใน views.properties
ในการเริ่มต้นให้เรามี Eclipse IDE ที่ใช้งานได้และพิจารณาขั้นตอนต่อไปนี้เพื่อพัฒนา Web Application ที่ใช้ Dynamic Form โดยใช้ Spring Web Framework
| ขั้นตอน | คำอธิบาย |
|---|---|
| 1 | สร้างโปรเจ็กต์ด้วยชื่อ TestWeb ภายใต้แพ็คเกจ com.tutorialspoint ตามที่อธิบายไว้ในบท Spring MVC - Hello World |
| 2 | สร้างคลาส Java HelloController ภายใต้ com.tutorialspointpackage |
| 3 | สร้างไฟล์มุมมอง hello.jsp ภายใต้โฟลเดอร์ย่อย jsp |
| 4 | สร้างไฟล์คุณสมบัติ views.properties ภายใต้โฟลเดอร์ SRC |
| 5 | ดาวน์โหลดห้องสมุด JSTL jstl.jar ใส่ไว้ใน CLASSPATH ของคุณ |
| 6 | ขั้นตอนสุดท้ายคือการสร้างเนื้อหาของไฟล์ต้นทางและการกำหนดค่าและส่งออกแอปพลิเคชันตามที่อธิบายด้านล่าง |
HelloController.java
package com.tutorialspoint;

import org.springframework.stereotype.Controller;
import org.springframework.web.bind.annotation.RequestMapping;
import org.springframework.web.bind.annotation.RequestMethod;
import org.springframework.ui.ModelMap;

@Controller
@RequestMapping("/hello")
public class HelloController{

   @RequestMapping(method = RequestMethod.GET)
   public String printHello(ModelMap model) {
      model.addAttribute("message", "Hello Spring MVC Framework!");

      return "hello";
   }
}TestWeb-servlet.xml
<beans xmlns = "http://www.springframework.org/schema/beans"
xmlns:context = "http://www.springframework.org/schema/context"
xmlns:xsi = "http://www.w3.org/2001/XMLSchema-instance"
xsi:schemaLocation = "
http://www.springframework.org/schema/beans
http://www.springframework.org/schema/beans/spring-beans-3.0.xsd
http://www.springframework.org/schema/context
http://www.springframework.org/schema/context/spring-context-3.0.xsd">
<context:component-scan base-package = "com.tutorialspoint" />
<bean class = "org.springframework.web.servlet.view.ResourceBundleViewResolver">
<property name = "basename" value = "views" />
<property name = "order" value = "0" />
</bean>
<bean class = "org.springframework.web.servlet.view.InternalResourceViewResolver">
<property name = "prefix" value = "/WEB-INF/jsp/" />
<property name = "suffix" value = ".jsp" />
<property name = "order" value = "1" />
</bean>
</beans>views.properties
hello.(class) = org.springframework.web.servlet.view.JstlView
hello.url = /WEB-INF/jsp/hello.jsphello.jsp
<%@ page contentType = "text/html; charset = UTF-8" %>
<html>
   <head>
      <title>Hello World</title>
   </head>
   <body>
      <h2>${message}</h2>
   </body>
</html>
เมื่อคุณสร้างไฟล์ซอร์สและไฟล์คอนฟิกเสร็จเรียบร้อยแล้วให้ส่งออกแอปพลิเคชันของคุณ คลิกขวาที่แอปพลิเคชันของคุณใช้Export → WAR File ตัวเลือกและบันทึกไฟล์ HelloWeb.war ไฟล์ในโฟลเดอร์ webapps ของ Tomcat
ตอนนี้เริ่มเซิร์ฟเวอร์ Tomcat และตรวจสอบให้แน่ใจว่าคุณสามารถเข้าถึงหน้าเว็บอื่น ๆ จากโฟลเดอร์ webapps โดยใช้เบราว์เซอร์มาตรฐาน พยายามเข้าถึง URL -http://localhost:8080/HelloWeb/helloหากทุกอย่างเรียบร้อยดีกับ Spring Web Application เราจะเห็นหน้าจอต่อไปนี้
ตัวอย่างต่อไปนี้แสดงวิธีใช้ Error Handling และ Validators ในแบบฟอร์มโดยใช้ Spring Web MVC framework ในการเริ่มต้นให้เรามี Eclipse IDE ที่ใช้งานได้และปฏิบัติตามขั้นตอนต่อไปนี้เพื่อพัฒนา Web Application ที่ใช้ Dynamic Form โดยใช้ Spring Web Framework
| ขั้นตอน | คำอธิบาย |
|---|---|
| 1 | สร้างโครงการด้วยชื่อ TestWeb ภายใต้แพ็คเกจ com.tutorialspoint ตามที่อธิบายไว้ใน Spring MVC - Hello World |
| 2 | สร้างคลาส Java Student, StudentController และ StudentValidator ภายใต้แพ็คเกจ com.tutorialspoint |
| 3 | สร้างไฟล์มุมมอง addStudent.jsp และ result.jsp ภายใต้โฟลเดอร์ย่อย jsp |
| 4 | ดาวน์โหลด Hibernate Validator ห้องสมุดHibernate ตรวจสอบ แยก hibernate-validator-5.3.4.Final.jar และการอ้างอิงที่จำเป็นซึ่งแสดงอยู่ภายใต้โฟลเดอร์ที่ต้องการของไฟล์ zip ที่ดาวน์โหลดมา ใส่ไว้ใน CLASSPATH ของคุณ |
| 5 | สร้างไฟล์คุณสมบัติ messages.properties ภายใต้โฟลเดอร์ SRC |
| 6 | ขั้นตอนสุดท้ายคือการสร้างเนื้อหาของไฟล์ต้นทางและการกำหนดค่าและส่งออกแอปพลิเคชันตามที่อธิบายด้านล่าง |
Student.java
package com.tutorialspoint;
import org.hibernate.validator.constraints.NotEmpty;
import org.hibernate.validator.constraints.Range;
public class Student {
@Range(min = 1, max = 150)
private Integer age;
@NotEmpty
private String name;
private Integer id;
public void setAge(Integer age) {
this.age = age;
}
public Integer getAge() {
return age;
}
public void setName(String name) {
this.name = name;
}
public String getName() {
return name;
}
public void setId(Integer id) {
this.id = id;
}
public Integer getId() {
return id;
}
}StudentController.java
package com.tutorialspoint;
import org.springframework.stereotype.Controller;
import org.springframework.ui.Model;
import org.springframework.validation.BindingResult;
import org.springframework.validation.annotation.Validated;
import org.springframework.web.bind.annotation.ModelAttribute;
import org.springframework.web.bind.annotation.RequestMapping;
import org.springframework.web.bind.annotation.RequestMethod;
import org.springframework.web.servlet.ModelAndView;
@Controller
public class StudentController {
@RequestMapping(value = "/addStudent", method = RequestMethod.GET)
public ModelAndView student() {
return new ModelAndView("addStudent", "command", new Student());
}
@ModelAttribute("student")
public Student createStudentModel() {
return new Student();
}
@RequestMapping(value = "/addStudent", method = RequestMethod.POST)
public String addStudent(@ModelAttribute("student") @Validated Student student,
BindingResult bindingResult, Model model) {
if (bindingResult.hasErrors()) {
return "addStudent";
}
model.addAttribute("name", student.getName());
model.addAttribute("age", student.getAge());
model.addAttribute("id", student.getId());
return "result";
}
}Messages.properties
NotEmpty.student.name = Name is required!
Range.student.age = Age value must be between 1 and 150!ที่นี่คีย์คือ <Annotation>. <object-name>. <attribute> ค่าคือข้อความที่จะแสดง
TestWeb-servlet.xml
<beans xmlns = "http://www.springframework.org/schema/beans"
xmlns:context = "http://www.springframework.org/schema/context"
xmlns:mvc = "http://www.springframework.org/schema/mvc"
xmlns:xsi = "http://www.w3.org/2001/XMLSchema-instance"
xsi:schemaLocation = "
http://www.springframework.org/schema/beans
http://www.springframework.org/schema/beans/spring-beans-3.0.xsd
http://www.springframework.org/schema/context
http://www.springframework.org/schema/context/spring-context-3.0.xsd
http://www.springframework.org/schema/mvc
http://www.springframework.org/schema/mvc/spring-mvc-3.0.xsd">
<context:component-scan base-package = "com.tutorialspoint" />
<mvc:annotation-driven />
<bean class = "org.springframework.context.support.ResourceBundleMessageSource"
id = "messageSource">
<property name = "basename" value = "messages" />
</bean>
<bean class = "org.springframework.web.servlet.view.InternalResourceViewResolver">
<property name = "prefix" value = "/WEB-INF/jsp/" />
<property name = "suffix" value = ".jsp" />
</bean>
</beans>นี่คือวิธีการบริการแรก student()เราได้ผ่านช่องว่าง Studentobject>ในอ็อบเจ็กต์ ModelAndView ที่มีชื่อ "command" เนื่องจากสปริงเฟรมเวิร์กต้องการอ็อบเจ็กต์ที่มีชื่อ "command" หากคุณใช้แท็ก <form: form> ในไฟล์ JSP ของคุณ ดังนั้นเมื่อstudent() เรียกว่าเมธอดมันส่งกลับ addStudent.jsp ดู.
วิธีการบริการที่สอง addStudent() จะถูกเรียกใช้เมธอด POST บนไฟล์ HelloWeb/addStudentURL คุณจะเตรียมโมเดลออบเจ็กต์ของคุณตามข้อมูลที่ส่งมา ในที่สุดมุมมอง "ผลลัพธ์" จะถูกส่งกลับจากวิธีการบริการซึ่งจะส่งผลให้มีการแสดงผล result.jsp ในกรณีที่มีข้อผิดพลาดที่สร้างขึ้นโดยใช้โปรแกรมตรวจสอบความถูกต้องมุมมองเดียวกัน "addStudent" จะถูกส่งกลับ Spring จะฉีดข้อความแสดงข้อผิดพลาดจากBindingResult ในมุมมอง
addStudent.jsp
<%@taglib uri = "http://www.springframework.org/tags/form" prefix = "form"%>
<html>
<head>
<title>Spring MVC Form Handling</title>
</head>
<style>
.error {
color: #ff0000;
}
.errorblock {
color: #000;
background-color: #ffEEEE;
border: 3px solid #ff0000;
padding: 8px;
margin: 16px;
}
</style>
<body>
<h2>Student Information</h2>
<form:form method = "POST" action = "/TestWeb/addStudent" commandName = "student">
<form:errors path = "*" cssClass = "errorblock" element = "div" />
<table>
<tr>
<td><form:label path = "name">Name</form:label></td>
<td><form:input path = "name" /></td>
<td><form:errors path = "name" cssClass = "error" /></td>
</tr>
<tr>
<td><form:label path = "age">Age</form:label></td>
<td><form:input path = "age" /></td>
<td><form:errors path = "age" cssClass = "error" /></td>
</tr>
<tr>
<td><form:label path = "id">id</form:label></td>
<td><form:input path = "id" /></td>
</tr>
<tr>
<td colspan = "2">
<input type = "submit" value = "Submit"/>
</td>
</tr>
</table>
</form:form>
</body>
</html>ที่นี่เรากำลังใช้แท็ก <form: error /> กับ path = "*" เพื่อแสดงข้อความแสดงข้อผิดพลาด ตัวอย่างเช่น -
<form:errors path = "*" cssClass = "errorblock" element = "div" />มันจะแสดงข้อความแสดงข้อผิดพลาดสำหรับการตรวจสอบอินพุตทั้งหมด เรากำลังใช้แท็ก <form: error /> ที่มี path = "name" เพื่อแสดงข้อความแสดงข้อผิดพลาดสำหรับฟิลด์ชื่อ
ตัวอย่างเช่น -
<form:errors path = "name" cssClass = "error" />
<form:errors path = "age" cssClass = "error" />จะแสดงข้อความแสดงข้อผิดพลาดสำหรับการตรวจสอบชื่อและฟิลด์อายุ
result.jsp
<%@taglib uri = "http://www.springframework.org/tags/form" prefix = "form"%>
<html>
<head>
<title>Spring MVC Form Handling</title>
</head>
<body>
<h2>Submitted Student Information</h2>
<table>
<tr>
<td>Name</td>
<td>${name}</td> </tr> <tr> <td>Age</td> <td>${age}</td>
</tr>
<tr>
<td>ID</td>
<td>${id}</td>
</tr>
</table>
</body>
</html>เมื่อคุณสร้างไฟล์ซอร์สและไฟล์คอนฟิกเสร็จเรียบร้อยแล้วให้ส่งออกแอปพลิเคชันของคุณ คลิกขวาที่แอปพลิเคชันของคุณใช้Export → WAR File และบันทึกไฟล์ HelloWeb.war ไฟล์ในโฟลเดอร์ webapps ของ Tomcat
ตอนนี้เริ่มเซิร์ฟเวอร์ Tomcat และตรวจสอบให้แน่ใจว่าคุณสามารถเข้าถึงหน้าเว็บอื่น ๆ จากโฟลเดอร์ webapps โดยใช้เบราว์เซอร์มาตรฐาน ลองใช้ URL -http://localhost:8080/TestWeb/addStudent และเราจะเห็นหน้าจอต่อไปนี้หากคุณป้อนค่าที่ไม่ถูกต้อง
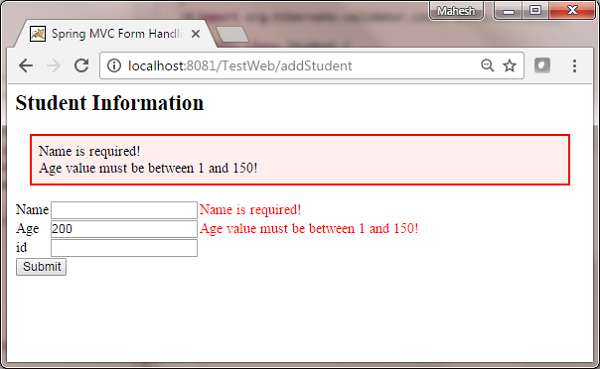
ตัวอย่างต่อไปนี้แสดงวิธีสร้าง RSS Feed โดยใช้ Spring Web MVC Framework ในการเริ่มต้นให้เรามี Eclipse IDE ที่ใช้งานได้จากนั้นพิจารณาขั้นตอนต่อไปนี้เพื่อพัฒนา Web Application ที่ใช้ Dynamic Form โดยใช้ Spring Web Framework
| ขั้นตอน | คำอธิบาย |
|---|---|
| 1 | สร้างโปรเจ็กต์ด้วยชื่อ TestWeb ภายใต้แพ็คเกจ com.tutorialspoint ตามที่อธิบายไว้ในบท Spring MVC - Hello World |
| 2 | สร้างคลาส Java RSSMessage, RSSFeedViewer และ RSSController ภายใต้แพ็คเกจ com.tutorialspoint |
| 3 | ดาวน์โหลด Rome library Romeและการอ้างอิง rome-utils, jdom และ slf4j จากเพจที่เก็บ maven เดียวกัน ใส่ไว้ใน CLASSPATH ของคุณ |
| 4 | สร้างไฟล์คุณสมบัติ messages.properties ภายใต้โฟลเดอร์ SRC |
| 5 | ขั้นตอนสุดท้ายคือการสร้างเนื้อหาของไฟล์ต้นทางและการกำหนดค่าและส่งออกแอปพลิเคชันตามที่อธิบายด้านล่าง |
RSSMessage.java
package com.tutorialspoint;
import java.util.Date;
public class RSSMessage {
String title;
String url;
String summary;
Date createdDate;
public String getTitle() {
return title;
}
public void setTitle(String title) {
this.title = title;
}
public String getUrl() {
return url;
}
public void setUrl(String url) {
this.url = url;
}
public String getSummary() {
return summary;
}
public void setSummary(String summary) {
this.summary = summary;
}
public Date getCreatedDate() {
return createdDate;
}
public void setCreatedDate(Date createdDate) {
this.createdDate = createdDate;
}
}RSSFeedViewer.java
package com.tutorialspoint;
import java.util.ArrayList;
import java.util.List;
import java.util.Map;
import javax.servlet.http.HttpServletRequest;
import javax.servlet.http.HttpServletResponse;
import org.springframework.web.servlet.view.feed.AbstractRssFeedView;
import com.rometools.rome.feed.rss.Channel;
import com.rometools.rome.feed.rss.Content;
import com.rometools.rome.feed.rss.Item;
public class RSSFeedViewer extends AbstractRssFeedView {
@Override
protected void buildFeedMetadata(Map<String, Object> model, Channel feed,
HttpServletRequest request) {
feed.setTitle("TutorialsPoint Dot Com");
feed.setDescription("Java Tutorials and Examples");
feed.setLink("http://www.tutorialspoint.com");
super.buildFeedMetadata(model, feed, request);
}
@Override
protected List<Item> buildFeedItems(Map<String, Object> model,
HttpServletRequest request, HttpServletResponse response) throws Exception {
List<RSSMessage> listContent = (List<RSSMessage>) model.get("feedContent");
List<Item> items = new ArrayList<Item>(listContent.size());
for(RSSMessage tempContent : listContent ){
Item item = new Item();
Content content = new Content();
content.setValue(tempContent.getSummary());
item.setContent(content);
item.setTitle(tempContent.getTitle());
item.setLink(tempContent.getUrl());
item.setPubDate(tempContent.getCreatedDate());
items.add(item);
}
return items;
}
}RSSController.java
package com.tutorialspoint;
import java.util.ArrayList;
import java.util.Date;
import java.util.List;
import org.springframework.stereotype.Controller;
import org.springframework.web.bind.annotation.RequestMapping;
import org.springframework.web.bind.annotation.RequestMethod;
import org.springframework.web.servlet.ModelAndView;
@Controller
public class RSSController {
@RequestMapping(value="/rssfeed", method = RequestMethod.GET)
public ModelAndView getFeedInRss() {
List<RSSMessage> items = new ArrayList<RSSMessage>();
RSSMessage content = new RSSMessage();
content.setTitle("Spring Tutorial");
content.setUrl("http://www.tutorialspoint/spring");
content.setSummary("Spring tutorial summary...");
content.setCreatedDate(new Date());
items.add(content);
RSSMessage content2 = new RSSMessage();
content2.setTitle("Spring MVC");
content2.setUrl("http://www.tutorialspoint/springmvc");
content2.setSummary("Spring MVC tutorial summary...");
content2.setCreatedDate(new Date());
items.add(content2);
ModelAndView mav = new ModelAndView();
mav.setViewName("rssViewer");
mav.addObject("feedContent", items);
return mav;
}
}TestWeb-servlet.xml
<beans xmlns = "http://www.springframework.org/schema/beans"
xmlns:context = "http://www.springframework.org/schema/context"
xmlns:xsi = "http://www.w3.org/2001/XMLSchema-instance"
xsi:schemaLocation = "
http://www.springframework.org/schema/beans
http://www.springframework.org/schema/beans/spring-beans-3.0.xsd
http://www.springframework.org/schema/context
http://www.springframework.org/schema/context/spring-context-3.0.xsd">
<context:component-scan base-package = "com.tutorialspoint" />
<bean class = "org.springframework.web.servlet.view.BeanNameViewResolver" />
<bean id = "rssViewer" class = "com.tutorialspoint.RSSFeedViewer" />
</beans>ที่นี่เราได้สร้าง RSS feed POJO RSSMessage และ RSS Message Viewer ซึ่งขยาย AbstractRssFeedViewและแทนที่วิธีการของมัน ใน RSSController เราได้สร้าง RSS Feed ตัวอย่าง
เมื่อคุณสร้างไฟล์ซอร์สและไฟล์คอนฟิกเสร็จเรียบร้อยแล้วให้ส่งออกแอปพลิเคชันของคุณ คลิกขวาที่แอปพลิเคชันของคุณใช้Export → WAR File และบันทึกไฟล์ TestWeb.war ไฟล์ในโฟลเดอร์ webapps ของ Tomcat
ตอนนี้เริ่มเซิร์ฟเวอร์ Tomcat ของคุณและตรวจสอบให้แน่ใจว่าคุณสามารถเข้าถึงหน้าเว็บอื่น ๆ จากโฟลเดอร์ webapps โดยใช้เบราว์เซอร์มาตรฐาน ลองใช้ URL -http://localhost:8080/TestWeb/rssfeed และเราจะเห็นหน้าจอต่อไปนี้
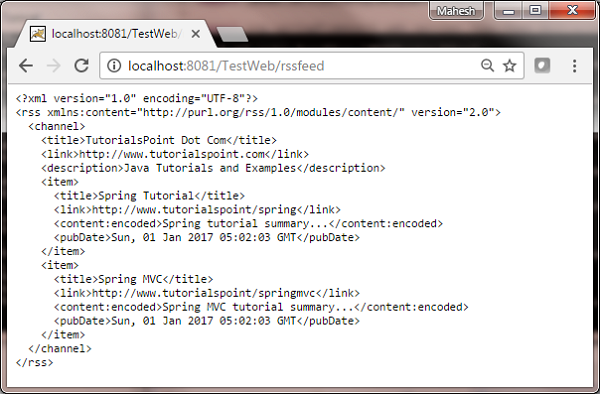
ตัวอย่างต่อไปนี้แสดงวิธีสร้าง XML โดยใช้ Spring Web MVC Framework ในการเริ่มต้นให้เรามี Eclipse IDE ที่ใช้งานได้และปฏิบัติตามขั้นตอนต่อไปนี้เพื่อพัฒนา Web Application ที่ใช้ Dynamic Form โดยใช้ Spring Web Framework
| ขั้นตอน | คำอธิบาย |
|---|---|
| 1 | สร้างโปรเจ็กต์ด้วยชื่อ TestWeb ภายใต้แพ็คเกจ com.tutorialspoint ตามที่อธิบายไว้ในบท Spring MVC - Hello World |
| 2 | สร้างคลาส Java User และ UserController ภายใต้ com.tutorialspointpackage |
| 3 | ขั้นตอนสุดท้ายคือการสร้างเนื้อหาของไฟล์ต้นทางและการกำหนดค่าและส่งออกแอปพลิเคชันตามที่อธิบายด้านล่าง |
User.java
package com.tutorialspoint;
import javax.xml.bind.annotation.XmlElement;
import javax.xml.bind.annotation.XmlRootElement;
@XmlRootElement(name = "user")
public class User {
private String name;
private int id;
public String getName() {
return name;
}
@XmlElement
public void setName(String name) {
this.name = name;
}
public int getId() {
return id;
}
@XmlElement
public void setId(int id) {
this.id = id;
}
}UserController.java
package com.tutorialspoint;
import org.springframework.stereotype.Controller;
import org.springframework.web.bind.annotation.PathVariable;
import org.springframework.web.bind.annotation.RequestMapping;
import org.springframework.web.bind.annotation.RequestMethod;
import org.springframework.web.bind.annotation.ResponseBody;
@Controller
@RequestMapping("/user")
public class UserController {
@RequestMapping(value="{name}", method = RequestMethod.GET)
public @ResponseBody User getUser(@PathVariable String name) {
User user = new User();
user.setName(name);
user.setId(1);
return user;
}
}TestWeb-servlet.xml
<beans xmlns = "http://www.springframework.org/schema/beans"
xmlns:context = "http://www.springframework.org/schema/context"
xmlns:xsi = "http://www.w3.org/2001/XMLSchema-instance"
xmlns:mvc = "http://www.springframework.org/schema/mvc"
xsi:schemaLocation = "
http://www.springframework.org/schema/beans
http://www.springframework.org/schema/beans/spring-beans-3.0.xsd
http://www.springframework.org/schema/context
http://www.springframework.org/schema/context/spring-context-3.0.xsd
http://www.springframework.org/schema/mvc
http://www.springframework.org/schema/mvc/spring-mvc-3.0.xsd">
<context:component-scan base-package = "com.tutorialspoint" />
<mvc:annotation-driven />
</beans>ที่นี่เราได้สร้างผู้ใช้ POJO ที่แมป XML และใน UserController เราได้ส่งคืนผู้ใช้ Spring จัดการการแปลง XML โดยอัตโนมัติตามRequestMapping.
เมื่อคุณสร้างไฟล์ซอร์สและไฟล์คอนฟิกเสร็จเรียบร้อยแล้วให้ส่งออกแอปพลิเคชันของคุณ คลิกขวาที่แอปพลิเคชันของคุณใช้Export → WAR File ตัวเลือกและบันทึกไฟล์ TestWeb.war ไฟล์ในโฟลเดอร์ webapps ของ Tomcat
ตอนนี้เริ่มเซิร์ฟเวอร์ Tomcat และตรวจสอบให้แน่ใจว่าคุณสามารถเข้าถึงหน้าเว็บอื่น ๆ จากโฟลเดอร์ webapps โดยใช้เบราว์เซอร์มาตรฐาน ลองใช้ URL -http://localhost:8080/TestWeb/mahesh และเราจะเห็นหน้าจอต่อไปนี้
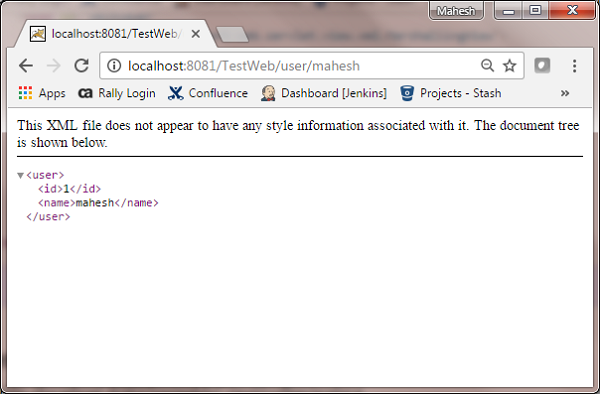
ตัวอย่างต่อไปนี้แสดงวิธีสร้าง JSON โดยใช้ Spring Web MVC Framework ในการเริ่มต้นให้เรามี Eclipse IDE ที่ใช้งานได้และพิจารณาขั้นตอนต่อไปนี้เพื่อพัฒนา Web Application ที่ใช้ Dynamic Form โดยใช้ Spring Web Framework -
| ขั้นตอน | คำอธิบาย |
|---|---|
| 1 | สร้างโปรเจ็กต์ด้วยชื่อ TestWeb ภายใต้แพ็คเกจ com.tutorialspoint ตามที่อธิบายไว้ในบท Spring MVC - Hello World |
| 2 | สร้างคลาส Java User , UserControllerภายใต้แพ็คเกจcom.tutorialspoint |
| 3 | ดาวน์โหลดห้องสมุดJackson Jackson Core, Jackson Databind และ Jackson Annotationsจากหน้าพื้นที่เก็บข้อมูล maven ใส่ไว้ใน CLASSPATH ของคุณ |
| 4 | ขั้นตอนสุดท้ายคือการสร้างเนื้อหาของแหล่งที่มาและไฟล์การกำหนดค่าทั้งหมดและส่งออกแอปพลิเคชันตามที่อธิบายด้านล่าง |
User.java
package com.tutorialspoint;
public class User {
private String name;
private int id;
public String getName() {
return name;
}
public void setName(String name) {
this.name = name;
}
public int getId() {
return id;
}
public void setId(int id) {
this.id = id;
}
}UserController.java
package com.tutorialspoint;
import org.springframework.stereotype.Controller;
import org.springframework.web.bind.annotation.PathVariable;
import org.springframework.web.bind.annotation.RequestMapping;
import org.springframework.web.bind.annotation.RequestMethod;
import org.springframework.web.bind.annotation.ResponseBody;
@Controller
@RequestMapping("/user")
public class UserController {
@RequestMapping(value="{name}", method = RequestMethod.GET)
public @ResponseBody User getUser(@PathVariable String name) {
User user = new User();
user.setName(name);
user.setId(1);
return user;
}
}TestWeb-servlet.xml
<beans xmlns = http://www.springframework.org/schema/beans"
xmlns:context = http://www.springframework.org/schema/context"
xmlns:xsi = http://www.w3.org/2001/XMLSchema-instance"
xmlns:mvc = http://www.springframework.org/schema/mvc"
xsi:schemaLocation =
http://www.springframework.org/schema/beans
http://www.springframework.org/schema/beans/spring-beans-3.0.xsd
http://www.springframework.org/schema/context
http://www.springframework.org/schema/context/spring-context-3.0.xsd
http://www.springframework.org/schema/mvc
http://www.springframework.org/schema/mvc/spring-mvc-3.0.xsd">
<context:component-scan base-package = com.tutorialspoint" />
<mvc:annotation-driven />
</beans>ที่นี่เราได้สร้าง Simple POJO User และใน UserController เราได้ส่งคืน User Spring จัดการการแปลง JSON โดยอัตโนมัติตาม RequestMapping และโถ Jackson ที่มีอยู่ใน classpath
เมื่อคุณสร้างไฟล์ซอร์สและไฟล์คอนฟิกเสร็จเรียบร้อยแล้วให้ส่งออกแอปพลิเคชันของคุณ คลิกขวาที่แอปพลิเคชันของคุณใช้Export → WAR File ตัวเลือกและบันทึกไฟล์ TestWeb.war ไฟล์ในโฟลเดอร์ webapps ของ Tomcat
ตอนนี้เริ่มเซิร์ฟเวอร์ Tomcat และตรวจสอบให้แน่ใจว่าคุณสามารถเข้าถึงหน้าเว็บอื่น ๆ จากโฟลเดอร์ webapps โดยใช้เบราว์เซอร์มาตรฐาน ลองใช้ URL -http://localhost:8080/TestWeb/mahesh และเราจะเห็นหน้าจอต่อไปนี้
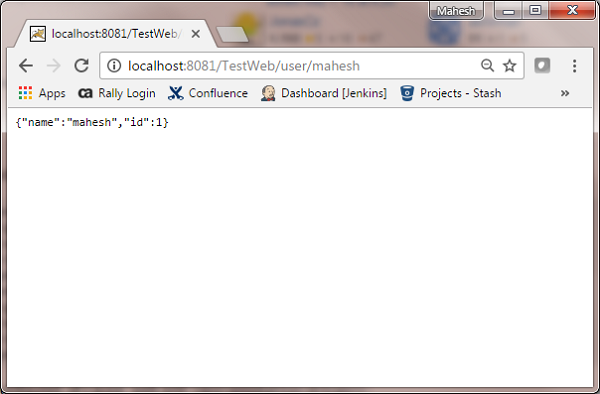
ตัวอย่างต่อไปนี้แสดงวิธีสร้าง Excel โดยใช้ Spring Web MVC Framework ในการเริ่มต้นให้เรามี Eclipse IDE ที่ใช้งานได้และปฏิบัติตามขั้นตอนต่อไปนี้เพื่อพัฒนา Web Application ที่ใช้ Dynamic Form โดยใช้ Spring Web Framework
| ขั้นตอน | คำอธิบาย |
|---|---|
| 1 | สร้างโปรเจ็กต์ด้วยชื่อ TestWeb ภายใต้แพ็คเกจ com.tutorialspoint ตามที่อธิบายไว้ในบท Spring MVC - Hello World |
| 2 | สร้างคลาส Java UserExcelView และ ExcelController ภายใต้แพ็คเกจ com.tutorialspoint |
| 3 | ดาวน์โหลด Apache POI library Apache POIจากเพจ maven repository ใส่ไว้ใน CLASSPATH ของคุณ |
| 4 | ขั้นตอนสุดท้ายคือการสร้างเนื้อหาของไฟล์ต้นทางและการกำหนดค่าและส่งออกแอปพลิเคชันตามที่อธิบายด้านล่าง |
ExcelController.java
package com.tutorialspoint;
import java.util.HashMap;
import java.util.Map;
import javax.servlet.http.HttpServletRequest;
import javax.servlet.http.HttpServletResponse;
import org.springframework.web.servlet.ModelAndView;
import org.springframework.web.servlet.mvc.AbstractController;
public class ExcelController extends AbstractController {
@Override
protected ModelAndView handleRequestInternal(HttpServletRequest request,
HttpServletResponse response) throws Exception {
//user data
Map<String,String> userData = new HashMap<String,String>();
userData.put("1", "Mahesh");
userData.put("2", "Suresh");
userData.put("3", "Ramesh");
userData.put("4", "Naresh");
return new ModelAndView("UserSummary","userData",userData);
}
}UserExcelView.java
package com.tutorialspoint;
import java.util.Map;
import javax.servlet.http.HttpServletRequest;
import javax.servlet.http.HttpServletResponse;
import org.apache.poi.hssf.usermodel.HSSFRow;
import org.apache.poi.hssf.usermodel.HSSFSheet;
import org.apache.poi.hssf.usermodel.HSSFWorkbook;
import org.springframework.web.servlet.view.document.AbstractExcelView;
public class UserExcelView extends AbstractExcelView {
@Override
protected void buildExcelDocument(Map<String, Object> model,
HSSFWorkbook workbook, HttpServletRequest request, HttpServletResponse response)
throws Exception {
Map<String,String> userData = (Map<String,String>) model.get("userData");
//create a wordsheet
HSSFSheet sheet = workbook.createSheet("User Report");
HSSFRow header = sheet.createRow(0);
header.createCell(0).setCellValue("Roll No");
header.createCell(1).setCellValue("Name");
int rowNum = 1;
for (Map.Entry<String, String> entry : userData.entrySet()) {
//create the row data
HSSFRow row = sheet.createRow(rowNum++);
row.createCell(0).setCellValue(entry.getKey());
row.createCell(1).setCellValue(entry.getValue());
}
}
}TestWeb-servlet.xml
<beans xmlns = "http://www.springframework.org/schema/beans"
xmlns:context = "http://www.springframework.org/schema/context"
xmlns:xsi = "http://www.w3.org/2001/XMLSchema-instance"
xmlns:mvc = "http://www.springframework.org/schema/mvc"
xsi:schemaLocation = "
http://www.springframework.org/schema/beans
http://www.springframework.org/schema/beans/spring-beans-3.0.xsd
http://www.springframework.org/schema/context
http://www.springframework.org/schema/context/spring-context-3.0.xsd
http://www.springframework.org/schema/mvc
http://www.springframework.org/schema/mvc/spring-mvc-3.0.xsd">
<bean class = "org.springframework.web.servlet.mvc.support.ControllerClassNameHandlerMapping" />
<bean class = "com.tutorialspoint.ExcelController" />
<bean class = "org.springframework.web.servlet.view.XmlViewResolver">
   <property name = "location">
      <value>/WEB-INF/views.xml</value>
   </property>
</bean>
</beans>views.xml
<beans xmlns = "http://www.springframework.org/schema/beans"
xmlns:context = "http://www.springframework.org/schema/context"
xmlns:xsi = "http://www.w3.org/2001/XMLSchema-instance"
xsi:schemaLocation = "
http://www.springframework.org/schema/beans
http://www.springframework.org/schema/beans/spring-beans-3.0.xsd
http://www.springframework.org/schema/context
http://www.springframework.org/schema/context/spring-context-3.0.xsd">
<bean id = "UserSummary" class = "com.tutorialspoint.UserExcelView"></bean>
</beans>ที่นี่เราได้สร้าง ExcelController และ ExcelView ไลบรารี Apache POI เกี่ยวข้องกับรูปแบบไฟล์ Microsoft Office และจะแปลงข้อมูลเป็นเอกสาร excel
เมื่อคุณสร้างไฟล์ซอร์สและไฟล์คอนฟิกเสร็จเรียบร้อยแล้วให้ส่งออกแอปพลิเคชันของคุณ คลิกขวาที่แอปพลิเคชันของคุณใช้Export → WAR File และบันทึกไฟล์ TestWeb.war ไฟล์ในโฟลเดอร์ webapps ของ Tomcat
ตอนนี้เริ่มเซิร์ฟเวอร์ Tomcat และตรวจสอบให้แน่ใจว่าคุณสามารถเข้าถึงหน้าเว็บอื่น ๆ จากโฟลเดอร์ webapps โดยใช้เบราว์เซอร์มาตรฐาน ลองใช้ URL -http://localhost:8080/TestWeb/excel และเราจะเห็นหน้าจอต่อไปนี้
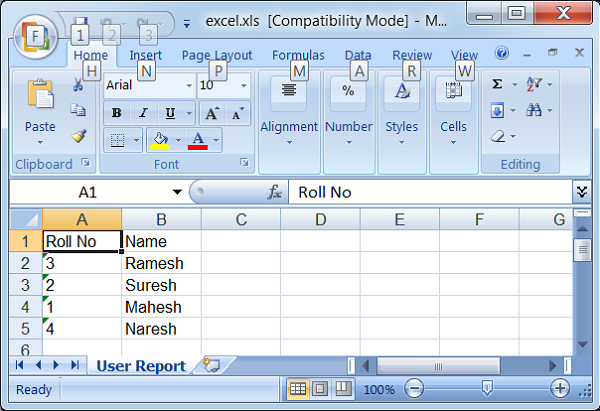
ตัวอย่างต่อไปนี้แสดงวิธีสร้าง PDF โดยใช้ Spring Web MVC Framework ในการเริ่มต้นให้เรามี Eclipse IDE ที่ใช้งานได้และปฏิบัติตามขั้นตอนต่อไปนี้เพื่อพัฒนา Web Application ที่ใช้ Dynamic Form โดยใช้ Spring Web Framework
| ขั้นตอน | คำอธิบาย |
|---|---|
| 1 | สร้างโปรเจ็กต์ด้วยชื่อ TestWeb ภายใต้แพ็คเกจ com.tutorialspoint ตามที่อธิบายไว้ในบท Spring MVC - Hello World |
| 2 | สร้างคลาส Java UserPDFView และ PDFController ภายใต้แพ็คเกจ com.tutorialspoint |
| 3 | ดาวน์โหลดไลบรารี iText - iTextจากเพจที่เก็บ maven ใส่ไว้ใน CLASSPATH ของคุณ |
| 4 | ขั้นตอนสุดท้ายคือการสร้างเนื้อหาของไฟล์ต้นทางและการกำหนดค่าและส่งออกแอปพลิเคชันตามที่อธิบายด้านล่าง |
PDFController.java
package com.tutorialspoint;
import java.util.HashMap;
import java.util.Map;
import javax.servlet.http.HttpServletRequest;
import javax.servlet.http.HttpServletResponse;
import org.springframework.web.servlet.ModelAndView;
import org.springframework.web.servlet.mvc.AbstractController;
public class PDFController extends AbstractController {
@Override
protected ModelAndView handleRequestInternal(HttpServletRequest request,
HttpServletResponse response) throws Exception {
//user data
Map<String,String> userData = new HashMap<String,String>();
userData.put("1", "Mahesh");
userData.put("2", "Suresh");
userData.put("3", "Ramesh");
userData.put("4", "Naresh");
return new ModelAndView("UserSummary","userData",userData);
}
}UserExcelView.java
package com.tutorialspoint;
import java.util.Map;
import javax.servlet.http.HttpServletRequest;
import javax.servlet.http.HttpServletResponse;
import org.springframework.web.servlet.view.document.AbstractPdfView;
import com.lowagie.text.Document;
import com.lowagie.text.Table;
import com.lowagie.text.pdf.PdfWriter;
public class UserPDFView extends AbstractPdfView {
protected void buildPdfDocument(Map<String, Object> model, Document document,
PdfWriter pdfWriter, HttpServletRequest request, HttpServletResponse response)
throws Exception {
Map<String,String> userData = (Map<String,String>) model.get("userData");
Table table = new Table(2);
table.addCell("Roll No");
table.addCell("Name");
for (Map.Entry<String, String> entry : userData.entrySet()) {
table.addCell(entry.getKey());
table.addCell(entry.getValue());
}
document.add(table);
}
}TestWeb-servlet.xml
<beans xmlns = "http://www.springframework.org/schema/beans"
xmlns:context = "http://www.springframework.org/schema/context"
xmlns:xsi = "http://www.w3.org/2001/XMLSchema-instance"
xmlns:mvc = "http://www.springframework.org/schema/mvc"
xsi:schemaLocation = "
http://www.springframework.org/schema/beans
http://www.springframework.org/schema/beans/spring-beans-3.0.xsd
http://www.springframework.org/schema/context
http://www.springframework.org/schema/context/spring-context-3.0.xsd
http://www.springframework.org/schema/mvc
http://www.springframework.org/schema/mvc/spring-mvc-3.0.xsd">
<bean class = "org.springframework.web.servlet.mvc.support.ControllerClassNameHandlerMapping" />
<bean class = "com.tutorialspoint.PDFController" />
<bean class = "org.springframework.web.servlet.view.XmlViewResolver">
<property name = "location">
<value>/WEB-INF/views.xml</value>
</property>
</bean>
</beans>views.xml
<beans xmlns = "http://www.springframework.org/schema/beans"
xmlns:context = "http://www.springframework.org/schema/context"
xmlns:xsi = "http://www.w3.org/2001/XMLSchema-instance"
xsi:schemaLocation = "
http://www.springframework.org/schema/beans
http://www.springframework.org/schema/beans/spring-beans-3.0.xsd
http://www.springframework.org/schema/context
http://www.springframework.org/schema/context/spring-context-3.0.xsd">
<bean id = "UserSummary" class = "com.tutorialspoint.UserPDFView"></bean>
</beans>ที่นี่เราได้สร้าง PDFController และ UserPDFView คลัง iText เกี่ยวข้องกับรูปแบบไฟล์ PDF และจะแปลงข้อมูลเป็นเอกสาร PDF
เมื่อคุณสร้างไฟล์ซอร์สและไฟล์คอนฟิกเสร็จเรียบร้อยแล้วให้ส่งออกแอปพลิเคชันของคุณ คลิกขวาที่แอปพลิเคชันของคุณใช้Export → WAR File และบันทึกไฟล์ TestWeb.war ไฟล์ในโฟลเดอร์ webapps ของ Tomcat
ตอนนี้เริ่มเซิร์ฟเวอร์ Tomcat และตรวจสอบให้แน่ใจว่าคุณสามารถเข้าถึงหน้าเว็บอื่น ๆ จากโฟลเดอร์ webapps โดยใช้เบราว์เซอร์มาตรฐาน เราสามารถลองใช้ URL ต่อไปนี้ -http://localhost:8080/TestWeb/pdf และหากทุกอย่างเป็นไปตามแผนที่วางไว้เราจะเห็นหน้าจอต่อไปนี้
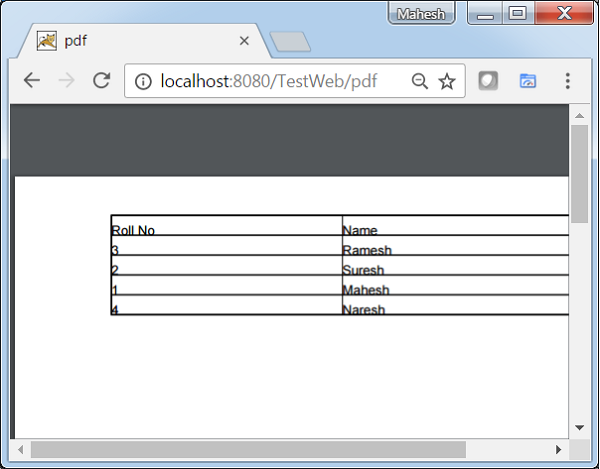
ตัวอย่างต่อไปนี้แสดงวิธีการรวม LOG4J โดยใช้ Spring Web MVC Framework ในการเริ่มต้นให้เรามี Eclipse IDE ที่ใช้งานได้และปฏิบัติตามขั้นตอนต่อไปนี้เพื่อพัฒนา Web Application ที่ใช้ Dynamic Form โดยใช้ Spring Web Framework
| ขั้นตอน | คำอธิบาย |
|---|---|
| 1 | สร้างโปรเจ็กต์ด้วยชื่อ TestWeb ภายใต้แพ็คเกจ com.tutorialspoint ตามที่อธิบายไว้ในบท Spring MVC - Hello World |
| 2 | สร้างคลาส Java HelloController ภายใต้ com.tutorialspointpackage |
| 3 | ดาวน์โหลดไลบรารี log4j LOG4Jจากเพจที่เก็บ maven ใส่ไว้ใน CLASSPATH ของคุณ |
| 4 | สร้าง log4j.properties ภายใต้โฟลเดอร์ SRC |
| 5 | ขั้นตอนสุดท้ายคือการสร้างเนื้อหาของไฟล์ต้นทางและการกำหนดค่าและส่งออกแอปพลิเคชันตามที่อธิบายด้านล่าง |
HelloController.java
package com.tutorialspoint;
import org.apache.log4j.Logger;
import org.springframework.stereotype.Controller;
import org.springframework.web.bind.annotation.RequestMapping;
import org.springframework.web.bind.annotation.RequestMethod;
import org.springframework.ui.ModelMap;
@Controller
@RequestMapping("/hello")
public class HelloController{
private static final Logger LOGGER = Logger.getLogger(HelloController.class);
@RequestMapping(method = RequestMethod.GET)
public String printHello(ModelMap model) {
LOGGER.info("printHello started.");
//logs debug message
if(LOGGER.isDebugEnabled()){
LOGGER.debug("Inside: printHello");
}
//logs exception
LOGGER.error("Logging a sample exception", new Exception("Testing"));
model.addAttribute("message", "Hello Spring MVC Framework!");
LOGGER.info("printHello ended.");
return "hello";
}
}log4j.properties
# Root logger option
log4j.rootLogger = DEBUG, stdout, file
# Redirect log messages to console
log4j.appender.stdout = org.apache.log4j.ConsoleAppender
log4j.appender.stdout.Target = System.out
log4j.appender.stdout.layout = org.apache.log4j.PatternLayout
log4j.appender.stdout.layout.ConversionPattern = %d{yyyy-MM-dd HH:mm:ss} %-5p %c{1}:%L - %m%n
# Redirect log messages to a log file
log4j.appender.file = org.apache.log4j.RollingFileAppender
#outputs to Tomcat home
log4j.appender.file.File = ${catalina.home}/logs/myapp.log
log4j.appender.file.MaxFileSize = 5MB
log4j.appender.file.MaxBackupIndex = 10
log4j.appender.file.layout = org.apache.log4j.PatternLayout
log4j.appender.file.layout.ConversionPattern = %d{yyyy-MM-dd HH:mm:ss} %-5p %c{1}:%L - %m%nTestWeb-servlet.xml
<beans xmlns = "http://www.springframework.org/schema/beans"
xmlns:context = "http://www.springframework.org/schema/context"
xmlns:xsi = "http://www.w3.org/2001/XMLSchema-instance"
xmlns:mvc = "http://www.springframework.org/schema/mvc"
xsi:schemaLocation = "
http://www.springframework.org/schema/beans
http://www.springframework.org/schema/beans/spring-beans-3.0.xsd
http://www.springframework.org/schema/context
http://www.springframework.org/schema/context/spring-context-3.0.xsd
http://www.springframework.org/schema/mvc
http://www.springframework.org/schema/mvc/spring-mvc-3.0.xsd">
<context:component-scan base-package = "com.tutorialspoint" />
<bean class = "org.springframework.web.servlet.view.InternalResourceViewResolver">
<property name = "prefix" value = "/WEB-INF/jsp/" />
<property name = "suffix" value = ".jsp" />
</bean>
</beans>hello.jsp
<%@ page contentType = "text/html; charset = UTF-8" %>
<html>
   <head>
      <title>Hello World</title>
   </head>
   <body>
      <h2>${message}</h2>
   </body>
</html>ที่นี่เราได้กำหนดค่า LOG4J เพื่อบันทึกรายละเอียดบนคอนโซล Tomcat และในไฟล์ที่อยู่ใน & t; บ้าน tomcat →บันทึกเป็น myapp.log
เมื่อคุณสร้างไฟล์ซอร์สและไฟล์คอนฟิกเสร็จเรียบร้อยแล้วให้ส่งออกแอปพลิเคชันของคุณ คลิกขวาที่แอปพลิเคชันของคุณใช้Export → WAR File ตัวเลือกและบันทึกไฟล์ TestWeb.war ไฟล์ในโฟลเดอร์ webapps ของ Tomcat
ตอนนี้เริ่มเซิร์ฟเวอร์ Tomcat และตรวจสอบให้แน่ใจว่าคุณสามารถเข้าถึงหน้าเว็บอื่น ๆ จากโฟลเดอร์ webapps โดยใช้เบราว์เซอร์มาตรฐาน ลองใช้ URL -http://localhost:8080/TestWeb/hello และเราจะเห็นหน้าจอต่อไปนี้ในบันทึกของ Tomcat