Spring MVC - ตัวอย่างหน้าคงที่
ตัวอย่างต่อไปนี้แสดงวิธีการเขียนแอปพลิเคชันบนเว็บอย่างง่ายโดยใช้ Spring MVC Framework ซึ่งสามารถเข้าถึงเพจแบบคงที่พร้อมกับเพจแบบไดนามิกด้วย <mvc:resources> แท็ก
ในการเริ่มต้นให้เรามี Eclipse IDE ที่ใช้งานได้และปฏิบัติตามขั้นตอนต่อไปนี้เพื่อพัฒนา Web Application ที่ใช้ Dynamic Form โดยใช้ Spring Web Framework
| ขั้นตอน | คำอธิบาย |
|---|---|
| 1 | สร้างโปรเจ็กต์ด้วยชื่อ HelloWeb ภายใต้แพ็คเกจ com.tutorialspoint ตามที่อธิบายไว้ในบท Spring MVC - Hello World |
| 2 | สร้างคลาส Java WebController ภายใต้แพ็คเกจ com.tutorialspoint |
| 3 | สร้างไฟล์แบบคงที่ final.htm ภายใต้โฟลเดอร์ย่อย jsp |
| 4 | อัพเดตไฟล์คอนฟิกูเรชัน Spring HelloWeb-servlet.xml ภายใต้โฟลเดอร์ WebContent / WEB-INF ดังที่แสดงด้านล่าง |
| 5 | ขั้นตอนสุดท้ายคือการสร้างเนื้อหาของแหล่งที่มาและไฟล์การกำหนดค่าและส่งออกแอปพลิเคชันซึ่งอธิบายไว้ด้านล่าง |
WebController.java
package com.tutorialspoint;

import org.springframework.stereotype.Controller;
import org.springframework.web.bind.annotation.RequestMapping;
import org.springframework.web.bind.annotation.RequestMethod;

@Controller
public class WebController {

   @RequestMapping(value = "/index", method = RequestMethod.GET)
   public String index() {
	   return "index";
   }

   @RequestMapping(value = "/staticPage", method = RequestMethod.GET)
   public String redirect() {

      return "redirect:/pages/final.htm";
   }
}
HelloWeb-servlet.xml
<?xml version = "1.0" encoding = "UTF-8"?>
<beans xmlns = "http://www.springframework.org/schema/beans"
   xmlns:xsi = "  http://www.w3.org/2001/XMLSchema-instance"
   xmlns:context = "http://www.springframework.org/schema/context"
   xmlns:mvc = "http://www.springframework.org/schema/mvc"
   xsi:schemaLocation = "http://www.springframework.org/schema/beans
   http://www.springframework.org/schema/beans/spring-beans-2.5.xsd
   http://www.springframework.org/schema/mvc
   http://www.springframework.org/schema/mvc/spring-mvc-3.0.xsd
   http://www.springframework.org/schema/context
   http://www.springframework.org/schema/context/spring-context-3.0.xsd">

   <context:component-scan base-package = "com.tutorialspoint" />

   <bean id = "viewResolver" class = "org.springframework.web.servlet.view.InternalResourceViewResolver">

      <property name = "prefix" value = "/WEB-INF/jsp/" />
      <property name = "suffix" value = ".jsp" />
   </bean>
   <mvc:resources mapping = "/pages/**" location = "/WEB-INF/pages/" />
   <mvc:annotation-driven/>
</beans>
ที่นี่ <mvc:resources..../>กำลังใช้แท็กเพื่อแมปเพจแบบคงที่ แอตทริบิวต์การแมปต้องเป็นไฟล์Ant patternที่ระบุรูปแบบ URL ของคำขอ http แอ็ตทริบิวต์ตำแหน่งต้องระบุตำแหน่งไดเร็กทอรีรีซอร์สที่ถูกต้องตั้งแต่หนึ่งรายการขึ้นไปโดยมีเพจแบบคงที่ซึ่งรวมถึงรูปภาพสไตล์ชีต JavaScript และเนื้อหาสแตติกอื่น ๆ อาจระบุตำแหน่งทรัพยากรหลายรายการโดยใช้รายการค่าที่คั่นด้วยเครื่องหมายจุลภาค
ต่อไปนี้เป็นเนื้อหาของไฟล์ Spring view WEB-INF/jsp/index.jsp. นี่จะเป็นหน้า Landing Page หน้านี้จะส่งคำขอเพื่อเข้าถึงไฟล์staticPage service methodซึ่งจะเปลี่ยนเส้นทางคำขอนี้ไปยังเพจแบบคงที่ที่มีอยู่ในโฟลเดอร์ WEB-INF / pages
index.jsp
<%@taglib uri = "http://www.springframework.org/tags/form" prefix = "form"%>
<html>
   <head>
      <title>Spring Landing Page</title>
   </head>
   <body>
      <h2>Spring Landing Pag</h2>
      <p>Click below button to get a simple HTML page</p>
      <form:form method = "GET" action = "/HelloWeb/staticPage">
         <table>
            <tr>
               <td>
                  <input type = "submit" value = "Get HTML Page"/>
               </td>
            </tr>
         </table>
      </form:form>
   </body>
</html>
final.htm
<html>
   <head>
      <title>Spring Static Page</title>
   </head>
   <body>
      <h2>A simple HTML page</h2>
   </body>
</html>
เมื่อคุณสร้างไฟล์ซอร์สและไฟล์คอนฟิกเสร็จเรียบร้อยแล้วให้ส่งออกแอปพลิเคชันของคุณ คลิกขวาที่แอปพลิเคชันของคุณใช้ตัวเลือก Export → WAR File และบันทึกไฟล์ HelloWeb.war ของคุณในโฟลเดอร์ webapps ของ Tomcat
ตอนนี้เริ่มเซิร์ฟเวอร์ Tomcat ของคุณและตรวจสอบให้แน่ใจว่าคุณสามารถเข้าถึงหน้าเว็บอื่น ๆ จากโฟลเดอร์ webapps โดยใช้เบราว์เซอร์มาตรฐาน ตอนนี้พยายามเข้าถึง URL - http: // localhost: 8080 / HelloWeb / index หากทุกอย่างเรียบร้อยดีกับ Spring Web Application เราจะเห็นหน้าจอต่อไปนี้

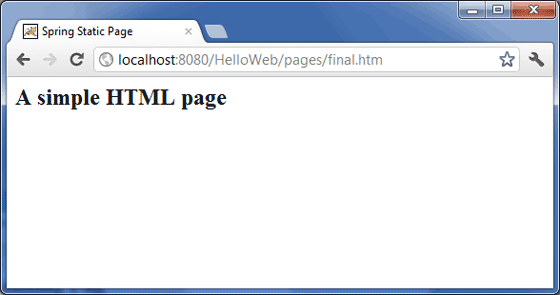
คลิกที่ปุ่ม "รับหน้า HTML" เพื่อเข้าถึงเพจแบบคงที่ที่กล่าวถึงในเมธอดบริการ staticPage หากทุกอย่างเรียบร้อยดีกับ Spring Web Application ของคุณเราจะเห็นหน้าจอต่อไปนี้
