Google AMP - Hành động và Sự kiện
Để sử dụng các hành động hoặc sự kiện trên thành phần amp, chúng ta có thể sử dụng thuộc tính on. Trong chương này, chúng ta hãy thảo luận chi tiết về chúng.
Sự kiện
Cú pháp để làm việc với các sự kiện như sau:
on = "eventName:elementId[.methodName[(arg1 = value, arg2 = value)]]"Các chi tiết được chuyển đến on thuộc tính như sau:
eventName- Điều này lấy tên của sự kiện có sẵn cho thành phần amp. Ví dụ: đối với các biểu mẫu, chúng tôi có thể sử dụng eventNames gửi thành công, gửi lỗi.
elementId- Điều này lấy id của phần tử mà sự kiện cần được gọi. Nó có thể là id của biểu mẫu mà chúng tôi muốn biết về thành công hay lỗi.
methodName - Điều này lấy tên của phương thức được gọi khi sự kiện xảy ra.
arg=value - Điều này nhận các đối số có dạng key = value được truyền vào phương thức.
Cũng có thể chuyển nhiều sự kiện cho thuộc tính on và nó được thực hiện như sau:
on = "submit-success:lightbox;submit-error:lightbox1"Nếu có nhiều sự kiện, chúng được chuyển cho thuộc tính on và được phân tách bằng dấu chấm phẩy (;).
Hành động
Về cơ bản, các hành động được sử dụng với thuộc tính on và cú pháp như sau:
on = "tab:elementid.hide;"Chúng ta có thể chuyển nhiều hành động như sau:
on = "tab:elementid.open;tab:elementid.hide;”Elementid là id của phần tử mà hành động sẽ được thực hiện.
Amp có một số sự kiện và hành động được xác định toàn cầu có thể được sử dụng trên bất kỳ thành phần amp nào và chúng tap event và các hành động là hide, show và togglevisibility.
Nếu bạn muốn ẩn / hiện hoặc sử dụng chế độ ẩn trên bất kỳ thành phần html hoặc amp nào, bạn có thể sử dụng on=”tap:elementid.[hide/show/togglevisibility]”
Hãy để chúng tôi xem một số ví dụ làm việc cho các sự kiện và hành động.
Trên phần tử đầu vào
Hãy để chúng tôi hiểu điều này tốt hơn với sự trợ giúp của một ví dụ làm việc -
Thí dụ
<!doctype html>
<html amp lang = "en">
   <head>
      <meta charset = "utf-8">
      <script async src = "https://cdn.ampproject.org/v0.js"></script>
      <title>Google AMP - Amp Bind</title>
      <link rel = "canonical" href = "http://example.ampproject.org/article-metadata.html">
      <meta name = "viewport" content = "width = device-width,minimum-scale = 1,initial-scale = 1">

      <style amp-boilerplate>
         body{
            -webkit-animation:
            -amp-start 8s steps(1,end) 0s 1 normal both;-moz-animation:
            -amp-start 8s steps(1,end) 0s 1 normal both;-ms-animation:
            -amp-start 8s steps(1,end) 0s 1 normal both;animation:
            -amp-start 8s steps(1,end) 0s 1 normal both
         }
         @-webkit-keyframes
         -amp-start{from{visibility:hidden}to{visibility:visible}}@-moz-keyframes
         -amp-start{from{visibility:hidden}to{visibility:visible}}@-ms-keyframes
         -amp-start{from{visibility:hidden}to{visibility:visible}}@-o-keyframes
         -amp-start{from{visibility:hidden}to{visibility:visible}}@keyframes
         -amp-start{from{visibility:hidden}to{visibility:visible}}
      </style>

      <noscript>
         <style amp-boilerplate>
            body {
               -webkit-animation:none;
               -moz-animation:none;
               -ms-animation:none;
               animation:none
            }
         </style>
      </noscript>

      <script async custom-element = "amp-bind" src = "
         https://cdn.ampproject.org/v0/amp-bind-0.1.js">
      </script>

      <script async custom-element = "amp-lightbox" src = "
         https://cdn.ampproject.org/v0/amp-lightbox-0.1.js">
      </script>

      <style amp-custom>
         button{
            background-color: #ACAD5C;
            color: white;
            padding: 12px 20px;
            border: none;
            border-radius: 4px;
            cursor: pointer;
            float: left;}

         .lightbox {
            background: rgba(211,211,211,0.8);
            width: 100%;
            height: 100%;
            position: absolute;
            display: flex;
            align-items: center;
            justify-content: center;
         }
         #txtname{
            width: 100%;
            padding: 12px 20px;
            margin: 8px 0;
            display: inline-block;
            border: 1px solid #ccc;
            border-radius: 4px;
            box-sizing: border-box;
         }
         div {
            font-size:25px;
         }
      </style>
   </head>
   <body>
      <h3>Google AMP - Amp Bind</h3>
      <button on = "tap:AMP.setState({displaylightbox: true})">
         Click Here
      </button>
      <br/>
      <br/>

      <h3>AMP - Input Element</h3>
      <input id = "txtname" placeholder = "Type here" on =
         "input-throttled:AMP.setState({name: event.value})">
      <div [text] = "name"></div>
   </body>
</html>
Đầu ra
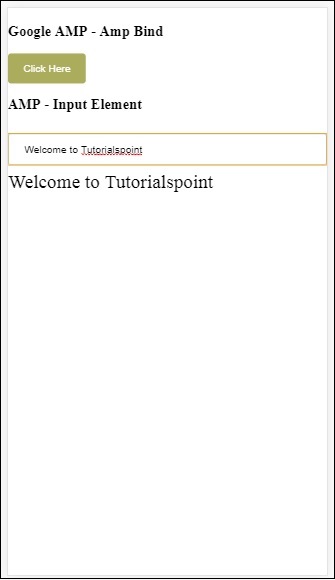
Lưu ý rằng trong ví dụ trên, chúng tôi đang sử dụng sự kiện trên trường đầu vào như sau:
<input id = "txtname" placeholder = "Type here"
on = "input-throttled:AMP.setState({name: event.value})">
Sự kiện được sử dụng là input-throlled.
Chúng tôi cũng có thể sử dụng thay đổi như sau:
<input id = "txtname" placeholder = "Type here" on =
"change:AMP.setState({name: event.value})">
Đầu ra sẽ được hiển thị sau khi người dùng ra khỏi hộp nhập. Chúng tôi có thể sử dụng sự kiện thay đổi trên loại đầu vào là radio, hộp kiểm, v.v. và cả trên phần tử được chọn.
<input id = "txtname" placeholder = "Type here" on =
"input-debounced:AMP.setState({name: event.value})">
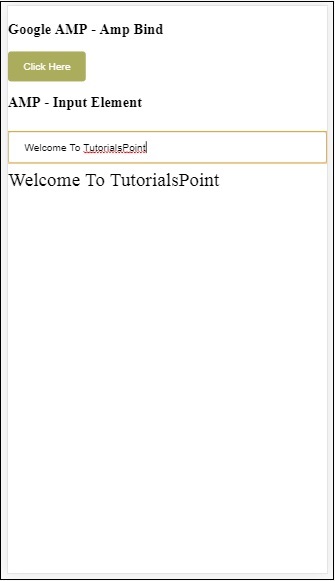
Biến cố input-debounced giống như changenhưng kết quả được nhìn thấy sau 300ms sau khi người dùng nhập.
Thí dụ
<!doctype html>
<html amp lang = "en">
   <head>
      <meta charset = "utf-8">
      <script async src = "https://cdn.ampproject.org/v0.js"></script>
      <title>Google AMP - Amp Bind</title>
      <link rel = "canonical" href = " http://example.ampproject.org/article-metadata.html">
      <meta name = "viewport" content = "width = device-width,minimum-scale = 1,initial-scale = 1">

      <style amp-boilerplate>
         body{
            -webkit-animation:
            -amp-start 8s steps(1,end) 0s 1 normal both;-moz-animation:
            -amp-start 8s steps(1,end) 0s 1 normal both;-ms-animation:
            -amp-start 8s steps(1,end) 0s 1 normal both;animation:
            -amp-start 8s steps(1,end) 0s 1 normal both
         }
         @-webkit-keyframes
         -amp-start{from{visibility:hidden}to{visibility:visible}}@-moz-keyframes
         -amp-start{from{visibility:hidden}to{visibility:visible}}@-ms-keyframes
         -amp-start{from{visibility:hidden}to{visibility:visible}}@-o-keyframes
         -amp-start{from{visibility:hidden}to{visibility:visible}}@keyframes
         -amp-start{from{visibility:hidden}to{visibility:visible}}
      </style>
      <noscript>
         <style amp-boilerplate>
            body{
            -webkit-animation:none;
            -moz-animation:none;
            -ms-animation:none;
            animation:none}
         </style>
      </noscript>

      <script async custom-element = "amp-bind"
         src = "https://cdn.ampproject.org/v0/amp-bind-0.1.js">
      </script>

      <script async custom-element = "amp-lightbox"
         src = "https://cdn.ampproject.org/v0/amp-lightbox-0.1.js">
      </script>
      <style amp-custom>
         button{
            background-color: #ACAD5C;
            color: white;
            padding: 12px 20px;
            border: none;
            border-radius: 4px;
            cursor: pointer;
            float: left;
         }
         .lightbox {
            background: rgba(211,211,211,0.8);
            width: 100%;
            height: 100%;
            position: absolute;
            display: flex;
            align-items: center;
            justify-content: center;
         }
         #txtname{
            width: 100%;
            padding: 12px 20px;
            margin: 8px 0;
            display: inline-block;
            border: 1px solid #ccc;
            border-radius: 4px;
            box-sizing: border-box;
         }
         div {
            font-size:25px;
         }
      </style>
   </head>
   <body>
      <h3>Google AMP - Amp Bind</h3>
      <button on = "tap:AMP.setState({displaylightbox: true})">
         Click Here
      </button>
      <br/>
      <br/>

      <h3>AMP - Input Element</h3>
         <input id = "txtname" placeholder = "Type here" on =
         "input-debounced:AMP.setState({name: event.value})">
      <div [text] = "name"></div>
   </body>
</html>
Đầu ra
Trên hộp đèn Amp
Trong phần này, chúng tôi sẽ kiểm tra các sự kiện sau trên hộp đèn:
- lightboxOpen
- lightboxClose
Thí dụ
<!doctype html>
<html amp lang = "en">
   <head>
      <meta charset = "utf-8">
      <script async src = "https://cdn.ampproject.org/v0.js"></script>
      <title>Google AMP - Amp Lightbox</title>
      <link rel = "canonical" href = " http://example.ampproject.org/article-metadata.html">
      <meta name = "viewport" content = "width = device-width,minimum-scale = 1,initial-scale = 1">

      <style amp-boilerplate>
         body{
            -webkit-animation:
            -amp-start 8s steps(1,end) 0s 1 normal both;-moz-animation:
            -amp-start 8s steps(1,end) 0s 1 normal both;-ms-animation:
            -amp-start 8s steps(1,end) 0s 1 normal both;animation:
            -amp-start 8s steps(1,end) 0s 1 normal both
         }
         @-webkit-keyframes
         -amp-start{from{visibility:hidden}to{visibility:visible}}@-moz-keyframes
         -amp-start{from{visibility:hidden}to{visibility:visible}}@-ms-keyframes
         -amp-start{from{visibility:hidden}to{visibility:visible}}@-o-keyframes
         -amp-start{from{visibility:hidden}to{visibility:visible}}@keyframes
         -amp-start{from{visibility:hidden}to{visibility:visible}}
      </style>

      <noscript>
         <style amp-boilerplate>
            body{
               -webkit-animation:none;
               -moz-animation:none;
               -ms-animation:none;
               animation:none}
         </style>
      </noscript>

      <script async custom-element = "amp-bind"
         src = "https://cdn.ampproject.org/v0/amp-bind-0.1.js">
      </script>

      <script async custom-element = "amp-lightbox"
         src = "https://cdn.ampproject.org/v0/amp-lightbox-0.1.js">
      </script>

      <style amp-custom>
         amp-img {
            border: 1px solid #ddd;
            border-radius: 4px;
            padding: 5px;
         }
         button {
            background-color: #ACAD5C;
            color: white;
            padding: 12px 20px;
            border: none;
            border-radius: 4px;
            cursor: pointer;
            float: left;
         }
         .lightbox {
            background: rgba(211,211,211,0.8);
            width: 100%;
            height: 100%;
            position: absolute;
            display: flex;
            align-items: center;
            justify-content: center;
         }
         p{font-size:30px;}
      </style>
   </head>
   <body>
      <h3>Google AMP - Amp Lightbox</h3>
      <p [text] = "'Lightbox is ' + lightboxstatus + '.'">
         Lightbox Event Testing
      </p>
      <button on = "tap:my-lightbox.open">
         Show LightBox
      </button>
      <amp-lightbox id = "my-lightbox" layout = "nodisplay"
      close-button on = "lightboxOpen:AMP.setState({lightboxstatus:'opened'});
      lightboxClose:AMP.setState({lightboxstatus:'closed'});">
         <div class = "lightbox">
            <amp-img alt = "Beautiful Flower" src = "images/loreal.gif"
               width = "246"
               height = "205">
            </amp-img>
         </div>
      </amp-lightbox>
   </body>
</html>
Đầu ra
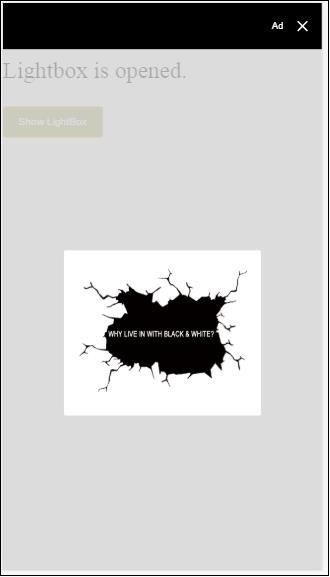
Đoạn mã sau cho biết cách các sự kiện mở và đóng được triển khai trên hộp đèn:
<p [text]="'Lightbox is ' + lightboxstatus + '.'">Lightbox Event Testing</p>
<button on = "tap:my-lightbox.open">Show LightBox</button>
<amp-lightbox id = "my-lightbox" layout = "nodisplay"
   close-button on = "lightboxOpen:AMP.setState({lightboxstatus:'opened'});
   lightboxClose:AMP.setState({lightboxstatus:'closed'});">

   <div class = "lightbox">
      <amp-img alt = "Beautiful Flower" src = "images/loreal.gif"
         width = "246"
         height = "205">
      </amp-img>
   </div>
</amp-lightbox>
Sự kiện trên Amp -Selector
Sự kiện có sẵn trên amp-selector là select.
Thí dụ
<!doctype html>
<html amp lang = "en">
   <head>
      <meta charset = "utf-8">
      <script async src  = "https://cdn.ampproject.org/v0.js"></script>
      <title>Google AMP - Amp Selector</title>
      <link rel = "canonical" href = "http://example.ampproject.org/article-metadata.html">
      <meta name = "viewport" content = "width = device-width,minimum-scale = 1,initial-scale = 1">

      <style amp-boilerplate>
         body{
            -webkit-animation:
            -amp-start 8s steps(1,end) 0s 1 normal both;-moz-animation:
            -amp-start 8s steps(1,end) 0s 1 normal both;-ms-animation:
            -amp-start 8s steps(1,end) 0s 1 normal both;animation:
            -amp-start 8s steps(1,end) 0s 1 normal both
         }
         @-webkit-keyframes
         -amp-start{from{visibility:hidden}to{visibility:visible}}@-moz-keyframes
         -amp-start{from{visibility:hidden}to{visibility:visible}}@-ms-keyframes
         -amp-start{from{visibility:hidden}to{visibility:visible}}@-o-keyframes
         -amp-start{from{visibility:hidden}to{visibility:visible}}@keyframes
         -amp-start{from{visibility:hidden}to{visibility:visible}}
      </style>

      <noscript>
         <style amp-boilerplate>
            body {
               -webkit-animation:none;
               -moz-animation:none;
               -ms-animation:none;
               animation:none
            }
         </style>
      </noscript>

      <script async custom-element = "amp-bind"
         src = "https://cdn.ampproject.org/v0/amp-bind-0.1.js">
      </script>

      <script async custom-element = "amp-selector"
         src = "https://cdn.ampproject.org/v0/amp-selector-0.1.js">
      </script>

      <style amp-custom>
         .radio-menu {
            list-style: none;
         }
         .radio-menu [option][selected] {
            outline: none;
         }
         .radio-menu [option] {
            display: flex;
            align-items: center;
         }
         .radio-menu [option]:before {
            transition: background 0.25s ease-in-out;
            content: "";
            display: inline-block;
            width: 24px;
            height: 24px;
            margin: 8px;
            border-radius: 100%;
            border: solid 1px black;
         }
         .radio-menu [option = red][selected]:before {
            text-align: center;
            content: "✓";
            color: white;
            background: red;
         }
         .radio-menu [option = green][selected]:before {
            text-align: center;
            content: "✓";
            color: white;
            background: green;
         }
         .radio-menu [option = blue][selected]:before {
            text-align: center;
            content: "✓";
            color: white;
            background: blue;
         }
         p{font-size:30px;}
      </style>
   </head>
   <body>
      <h3>Google AMP - Amp Selector</h3>
      <p [text] = "'Color selected is ' + ampselectorstatus + '.'">
         Amp Selector Event Testing
      <p>
      <amp-selector
         class = "radio-menu"
         layout = "container"
         name = "my-selector"
         on = "select:AMP.setState({ampselectorstatus:event.selectedOptions})">
         <div option = "red">
            Red
         </div>
         <div option = "green">
            Green
         </div>
         <div option = "blue">
            Blue
         </div>
      </amp-selector>
   </body>
</html>
Đầu ra
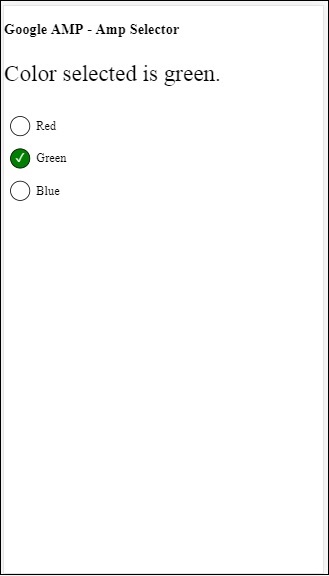
Lựa chọn sự kiện được sử dụng như sau:
<p [text]="'Color selected is ' + ampselectorstatus + '.'">
   Amp Selector Event Testing
</p>
<amp-selector
   class = "radio-menu"
   layout  ="container"
   name =" my-selector"
   on = "select:AMP.setState({ampselectorstatus:event.selectedOptions})">
   <div option = "red">
      Red
   </div>
   <div option = "green">
      Green
   </div>
   <div option = "blue">
      Blue
   </div>
</amp-selector>
Sự kiện trên Amp-Sidebar
Các sự kiện có sẵn là sidebarOpen và sidebarClose.
Thí dụ
<!doctype html>
<html amp lang = "en">
   <head>
      <meta charset = "utf-8">
      <script async src = "https://cdn.ampproject.org/v0.js"></script>
      <title>Google AMP - Amp Sidebar</title>
      <link rel = "canonical" href = "http://example.ampproject.org/article-metadata.html">
      <meta name = "viewport" content = "width = device-width,minimum-scale = 1,initial-scale = 1">

      <style amp-boilerplate>
         body{
            -webkit-animation:
            -amp-start 8s steps(1,end) 0s 1 normal both;-moz-animation:
            -amp-start 8s steps(1,end) 0s 1 normal both;-ms-animation:
            -amp-start 8s steps(1,end) 0s 1 normal both;animation:
            -amp-start 8s steps(1,end) 0s 1 normal both
         }
         @-webkit-keyframes
         -amp-start{from{visibility:hidden}to{visibility:visible}}@-moz-keyframes
         -amp-start{from{visibility:hidden}to{visibility:visible}}@-ms-keyframes
         -amp-start{from{visibility:hidden}to{visibility:visible}}@-o-keyframes
         -amp-start{from{visibility:hidden}to{visibility:visible}}@keyframes
         -amp-start{from{visibility:hidden}to{visibility:visible}}
      </style>

      <noscript>
         <style amp-boilerplate>
            body{
               -webkit-animation:none;
               -moz-animation:none;
               -ms-animation:none;
               animation:none
            }
         </style>
      </noscript>
      <script async custom-element = "amp-bind"
         src = "https://cdn.ampproject.org/v0/amp-bind-0.1.js">
      </script>
      <script async custom-element = "amp-sidebar"
         src = "https://cdn.ampproject.org/v0/amp-sidebar-0.1.js">
      </script>
      <style amp-custom>
         amp-img {
            border: 1px solid #ddd;
            border-radius: 4px;
            padding: 5px;
         }
         button{
            background-color: #ACAD5C;
            color: white;
            padding: 12px 20px;
            border: none;
            border-radius: 4px;
            cursor: pointer;
            float: left;
         }
         .amp-sidebar-toolbar-target-shown {
            display: none;
         }
         p{font-size:30px;}
      </style>
   </head>
   <body>
      <h3>Google AMP - Amp Sidebar</h3>
      <p [text] = "'Sidebar is ' + ampsidebarstatus + '.'">
         Amp Sidebar Event Testing
      </p>
      <button on = "tap:sidebar1">
         Show Sidebar
      </button>
      <amp-sidebar
         id = "sidebar1"
         layout = "nodisplay"
         side = "right"
         on = "sidebarOpen:AMP.setState({ampsidebarstatus: 'Opened'});
         sidebarClose:AMP.setState({ampsidebarstatus: 'Closed'})">
         <ul>
            <li>Nav item 1</li>
            <li>
               <a href = "#idTwo" on = "tap:idTwo.scrollTo">Nav item 2</a>
            </li>
            <li>Nav item 3</li>
            <li>
               <a href = "#idFour" on="tap:idFour.scrollTo">Nav item 4</a>
            </li>
            <li>Nav item 5</li>
            <li>Nav item 6</li>
         </ul>
      </amp-sidebar>
      <div id = "target-element">
      </div>
   </body>
</html>
Đầu ra
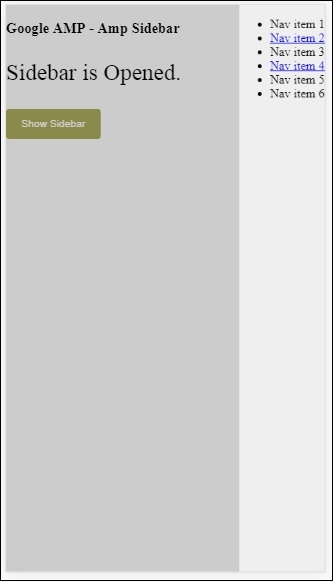
Các sự kiện được sử dụng như sau:
<p [text] = "'Sidebar is ' + ampsidebarstatus + '.'">
   Amp Sidebar Event Testing
</p>
<button on = "tap:sidebar1">
   Show Sidebar
</button>
<amp-sidebar
   id = "sidebar1"
   layout = "nodisplay"
   side = "right"
   on = "sidebarOpen:AMP.setState({ampsidebarstatus: 'Opened'});
   sidebarClose:AMP.setState({ampsidebarstatus: 'Closed'})">
   <ul>
      <li>Nav item 1</li>
      <li>
         <a href = "#idTwo" on = "tap:idTwo.scrollTo">Nav item 2</a>
      </li>
      <li>Nav item 3</li>
      <li>
         <a href = "#idFour" on = "tap:idFour.scrollTo">Nav item 4</a>
      </li>
      <li>Nav item 5</li>
      <li>Nav item 6</li>
   </ul>
</amp-sidebar>