Google AMP - Liên kết dữ liệu
Amp-bind giúp thêm tính tương tác vào các thành phần amp và thẻ html dựa trên một hành động sử dụng các biểu thức liên kết dữ liệu và giống JS. Chương này thảo luận chi tiết về ràng buộc dữ liệu.
Để làm việc với amp-bind, chúng tôi cần thêm tập lệnh sau vào trang của mình -
<script async custom-element = "amp-bind"
   src = "https://cdn.ampproject.org/v0/amp-bind-0.1.js">
</script>
Hãy để chúng tôi hiểu điều này đầy đủ với sự trợ giúp của một ví dụ hoạt động như được minh họa -
Thí dụ
<!doctype html>
<html amp lang = "en">
   <head>
      <meta charset = "utf-8">
      <script async src = "https://cdn.ampproject.org/v0.js"></script>
      <title>Google AMP - Amp Bind</title>
      <link rel = "canonical" href =
         "http://example.ampproject.org/article-metadata.html">
      <meta name = "viewport" content = "width = device-width,
         minimum-scale = 1,initial-scale = 1">
      <style amp-boilerplate>
         body{
            -webkit-animation:
            -amp-start 8s steps(1,end) 0s 1 normal both;-moz-animation:
            -amp-start 8s steps(1,end) 0s 1 normal both;-ms-animation:
            -amp-start 8s steps(1,end) 0s 1 normal both;animation:
            -amp-start 8s steps(1,end) 0s 1 normal both
         }
         @-webkit-keyframes
         -amp-start{from{visibility:hidden}to{visibility:visible}}@-moz-keyframes
         -amp-start{from{visibility:hidden}to{visibility:visible}}@-ms-keyframes
         -amp-start{from{visibility:hidden}to{visibility:visible}}@-o-keyframes
         -amp-start{from{visibility:hidden}to{visibility:visible}}@keyframes
         -amp-start{from{visibility:hidden}to{visibility:visible}}
      </style>
      <noscript>
         <style amp-boilerplate>
            body{
               -webkit-animation:none;
               -moz-animation:none;
               -ms-animation:none;
               animation:none
            }
         </style>
      </noscript>
      <script async custom-element = "amp-bind"
         src = "https://cdn.ampproject.org/v0/amp-bind-0.1.js"></script>
      <style amp-custom>
         button{
            background-color: #ACAD5C;
            color: white;
            padding: 12px 20px;
            border: none;
            border-radius: 4px;
         }
      </style>
   </head>
   <body>
      <h3>Google AMP - Amp Bind</h3>
      <p [text] = "'Hello ' + world + '.'">
         Click on the button to change the text
      </p>
      <button on = "tap:AMP.setState({world: 'This is amp-bind example'})">
      Click Here
      </button>
   </body>
</html>
Đầu ra
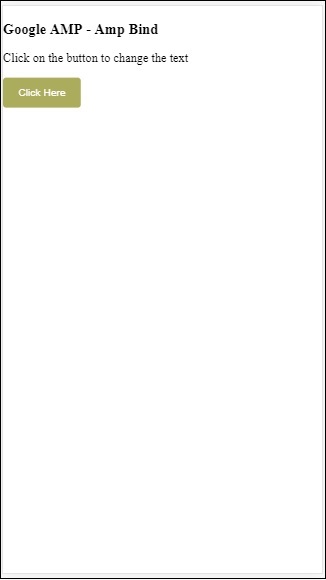
Nhấp vào nút để xem văn bản thay đổi như hình dưới đây -
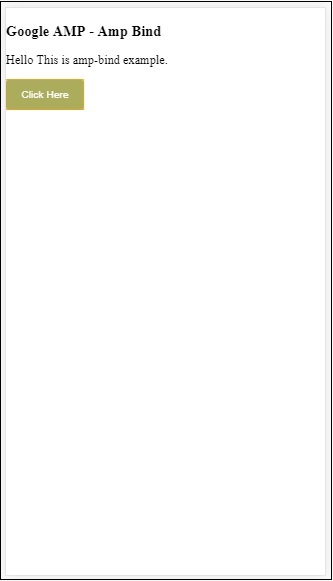
Vì vậy, trong ví dụ hiển thị ở trên, chúng tôi đã sử dụng amp-bind để thay đổi văn bản khi nhấp vào nút.
Amp-bind có ba thành phần:
State- Ban đầu trạng thái trống. Khi bạn nhấp vào nút, trạng thái sẽ được thay đổi. Ví dụ,
<button on = "tap:AMP.setState({world: 'This is amp-bind example'})">
   Click Here
</button>
Phương thức AMP.setState được sử dụng để thay đổi trạng thái. Biếnworld được gán giá trị This is amp-bind example. Biếnworld được sử dụng bên trong thẻ html -
<p [text] = "'Hello ' + world + '.'">
   Click on the button to change the text
</p>
Khi nhấp vào nút, world được gán một giá trị mới: Đây là ví dụ về amp-bind.
Chúng ta cũng có thể sử dụng trạng thái amp với ràng buộc như hình dưới đây -
<amp-state id = "myState">
   <script type = "application/json">
      {
         "foo": "bar"
      }
   </script>
</amp-state>
Biểu thức sẽ được chỉ định bmyState.foo trong quá trình ràng buộc.
Expressions - Các biểu thức cho amp-bind hoạt động được đưa ra như sau:
'Hello ' + worldworld được cho là một state variable.
Bindings- Ràng buộc được áp dụng cho các thuộc tính đặc biệt ở dạng [thuộc tính]. Ví dụ -
<p [text] = "'Hello ' + world + '.'">
   Click on the button to change the text
</p>
Trong ví dụ trên, [text] có biểu thức được sử dụng để ràng buộc p nhãn.
Chúng ta có thể sử dụng thuộc tính sau cho các ràng buộc:
- [text]
- [class]
- [hidden]
- [width]
- [height]
Liên kết cũng có thể được thực hiện trên các thành phần amp và chỉ các thuộc tính cụ thể mới được phép. Danh sách sau đây hiển thị các thành phần và thuộc tính suh:
| Sr.No | Thành phần khuếch đại | Thuộc tính & Mô tả |
|---|---|---|
| 1 | <amp-carousel type = slides> | [slide]*
Thay đổi trang trình bày bằng cách sử dụng hành vi liên kết này |
| 2 | <amp-date-picker> | [min]
min -> Đặt ngày có thể chọn sớm nhất [max]max -> Đặt ngày có thể chọn mới nhất |
| 3 | <amp-iframe> | [src]
Thay đổi src của iframe |
| 4 | <amp-img> | [alt]
[attribution]
[src]
[srcset]
Chúng ta có thể thay đổi alt, ghi công, src và srcset. Nếu thay đổi src, hãy thay đổi srcset vì nó được sử dụng để lưu vào bộ nhớ đệm |
| 5 | <amp-lightbox> | [open]*
Bạn có thể hiển thị / ẩn hộp đèn bằng cách liên kết để mở |
| 6 | <amp-list> | [src]
Nếu biểu thức là một chuỗi, tìm nạp và hiển thị JSON từ URL chuỗi. Nếu biểu thức là một đối tượng hoặc mảng, hãy hiển thị dữ liệu biểu thức. |
| 7 | <amp-selector> | [selected]*
[disabled]
Thay đổi (các) phần tử con hiện được chọn được xác định bằng các giá trị thuộc tính tùy chọn của chúng. Hỗ trợ danh sách giá trị được phân tách bằng dấu phẩy cho nhiều lựa chọn |
Ràng buộc bằng Amp-State
Chúng tôi có thể xác định trạng thái amp với tất cả dữ liệu mà chúng tôi muốn sử dụng trên phần tử html hoặc thành phần amp.
Dữ liệu được sử dụng bên trong trạng thái amp phải ở định dạng json như hình dưới đây:
<amp-state id = "myCarsList">
   <script type = "application/json">
      {
         "currentcar" : "bmw",
         "audi": {
            "imageUrl": "images/audi.jpg"
         },
         "bmw": {
            "imageUrl": "images/bmw.jpg"
         }
      }
   </script>
</amp-state>
Như vậy, chúng ta đã xác định được các cặp khóa-giá trị với tên xe và hình ảnh được sử dụng cho xe.
Amp-bind trên văn bản và Amp-Image
Dưới đây là một ví dụ làm việc bằng cách sử dụng trạng thái amp với amp-bind:
<!doctype html>
<html amp lang = "en">
   <head>
      <meta charset = "utf-8">
      <script async src = "https://cdn.ampproject.org/v0.js"></script>
      <title>Google AMP - Amp Bind</title>
      <link rel = "canonical" href =
         "http://example.ampproject.org/article-metadata.html">
      <meta name = "viewport" content = "width = device-width,
         minimum-scale = 1,initial-scale = 1">
      <style amp-boilerplate>
         body{
            -webkit-animation:
            -amp-start 8s steps(1,end) 0s 1 normal both;-moz-animation:
            -amp-start 8s steps(1,end) 0s 1 normal both;-ms-animation:
            -amp-start 8s steps(1,end) 0s 1 normal both;animation:
            -amp-start 8s steps(1,end) 0s 1 normal both
         }
         @-webkit-keyframes
         -amp-start{from{visibility:hidden}to{visibility:visible}}@-moz-keyframes
         -amp-start{from{visibility:hidden}to{visibility:visible}}@-ms-keyframes
         -amp-start{from{visibility:hidden}to{visibility:visible}}@-o-keyframes
         -amp-start{from{visibility:hidden}to{visibility:visible}}@keyframes
         -amp-start{from{visibility:hidden}to{visibility:visible}
         }
      </style>
      <noscript>
         <style amp-boilerplate>
            body{
               -webkit-animation:none;
               -moz-animation:none;
               -ms-animation:none;
               animation:none
            }
         </style>
      </noscript>
      <script async custom-element = "amp-bind" src =
         "https://cdn.ampproject.org/v0/amp-bind-0.1.js"></script>
      <style amp-custom>
         button{
            background-color: #ACAD5C;
            color: white;
            padding: 12px 20px;
            border: none;
            border-radius: 4px;
            cursor: pointer;
            float: left;
         }
      </style>
   </head>
   <body>
      <h3>Google AMP - Amp Bind</h3>
      <amp-state id = "myCarsList">
         <script type = "application/json">
            {
               "currentcar" : "bmw",
               "audi": {
               "imageUrl": "images/audi.jpg",
               "style": "greenBackground"
               },
               "bmw": {
               "imageUrl": "images/bmw.jpg",
               "style": "redBackground"
               }
            }
         </script>
      </amp-state>
      <amp-img
         width = "300"
         height = "200"
         src = "images/bmw.jpg"
         [src] = "myCarsList[currentcar].imageUrl">
      </amp-img>
      <p [text] = "'This is a ' + currentcar + '.'">
         This is a BMW.
      </p>
      <br/>
      <button on = "tap:AMP.setState({currentcar: 'audi'})">
         Change Car
      </button>
   </body>
</html>
Đầu ra
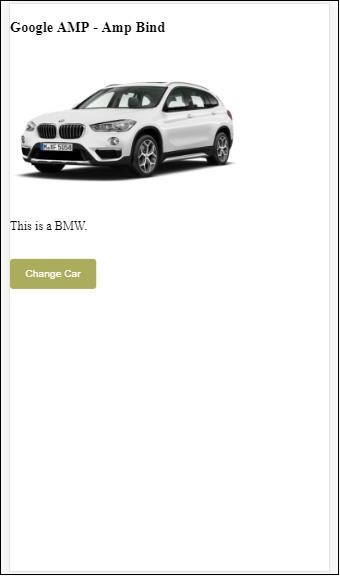
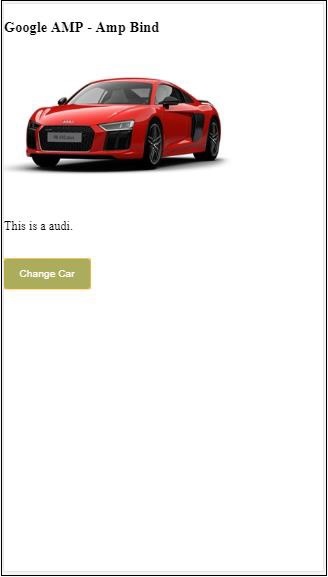
Bấm vào nút để xem hình ảnh thay đổi xe và cả dòng chữ bên dưới.
Amp-bind trên Video và IFrame
Bây giờ chúng ta sẽ thấy một ví dụ làm việc sẽ thay đổi amp-iframe và amp-video src.
<!doctype html>
<html amp lang = "en">
   <head>
      <meta charset = "utf-8">
      <script async src = "https://cdn.ampproject.org/v0.js"></script>
      <title>Google AMP - Amp Bind</title>
      <link rel = "canonical" href =
         "http://example.ampproject.org/article-metadata.html">
      <meta name = "viewport" content = "width = device-width,
         minimum-scale = 1,initial-scale = 1">
      <style amp-boilerplate>
         body{
            -webkit-animation:
            -amp-start 8s steps(1,end) 0s 1 normal both;-moz-animation:
            -amp-start 8s steps(1,end) 0s 1 normal both;-ms-animation:
            -amp-start 8s steps(1,end) 0s 1 normal both;animation:
            -amp-start 8s steps(1,end) 0s 1 normal both
         }
         @-webkit-keyframes
         -amp-start{from{visibility:hidden}to{visibility:visible}}@-moz-keyframes
         -amp-start{from{visibility:hidden}to{visibility:visible}}@-ms-keyframes
         -amp-start{from{visibility:hidden}to{visibility:visible}}@-o-keyframes
         -amp-start{from{visibility:hidden}to{visibility:visible}}@keyframes
         -amp-start{from{visibility:hidden}to{visibility:visible}}
      </style>
      <noscript>
         <style amp-boilerplate>
            body{
               -webkit-animation:none;
               -moz-animation:none;
               -ms-animation:none;
               animation:none
            }
         </style>
      </noscript>
      <script async custom-element = "amp-bind" src =
         "https://cdn.ampproject.org/v0/amp-bind-0.1.js"></script>
      <script async custom-element = "amp-video" src =
         "https://cdn.ampproject.org/v0/amp-video-0.1.js"></script>
      <script async custom-element = "amp-iframe" src =
         "https://cdn.ampproject.org/v0/amp-iframe-0.1.js"></script>
      <style amp-custom>
         button{
            background-color: #ACAD5C;
            color: white;
            padding: 12px 20px;
            border: none;
            border-radius: 4px;
            cursor: pointer;
            float: left;
         }
      </style>
   </head>
   <body>
      <h3>Google AMP - Amp Bind</h3>
      <button on = "tap:AMP.setState({currentlist: 'list1'})">
      Click Here
      </button>
      <br/>
      <br/>
      <amp-state id = "myList">
         <script type = "application/json">
            {
               "currentlist" : "",
               "list1": {
                  "url": "video/m.mp4",
                  "style": "greenBackground",
                  "iframeurl":"https://maps.google.com/maps?q=hyderabad&t=&z=13&ie=UTF8&iwloc=&output=embed"
               }
            }
         </script>
      </amp-state>
      <h3>AMP - IFRAME</h3>
      <amp-iframe
         width = "600"
         title = "Google map"
         height = "400"
         layout = "responsive"
         sandbox = "allow-scripts allow-same-origin allow-popups"
         frameborder = "0"
         src = "https://maps.google.com/maps?q=telangana&t=&z=13&ie=UTF8&iwloc=&output=embed"
         [src] = "myList[currentlist].iframeurl">
         <amp-img
            layout = "fill"
            src = "images/loading.jpg"
            placeholder
            >
         /amp-img>
      </amp-iframe>
      <h3>AMP - VIDEO</h3>
      <amp-video
         id = "amp-video"
         src = "video/samplevideo.mp4"
         layout="responsive"
         [src] = "myList[currentlist].url"
         width = "300"
         height = "170" autoplay controls>
      </amp-video>
   </body>
</html>
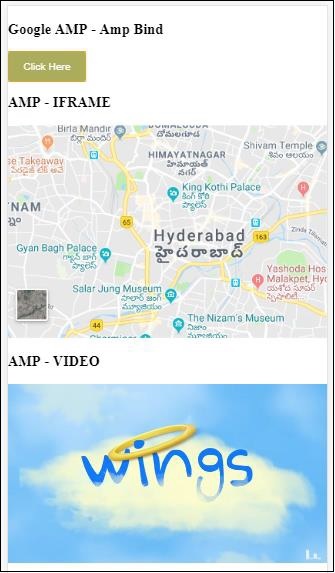
Lưu ý rằng ở đây chúng tôi đã sử dụng trạng thái amp với iframesrc và video src.
<amp-state id = "myList">
   <script type = "application/json">
      {
         "currentlist" : "",
         "list1": {
            "url": "video/m.mp4",
            "style": "greenBackground",
            "iframeurl":"
            https://maps.google.com/maps?q=hyderabad&t=&z=13&ie=UTF8&iwloc=&output=embed"
         }
      }
   </script>
</amp-state>
Danh sách hiện tại được đặt thành trống và khi chạm vào nút, nó được đặt thành danh sách1. Danh sách hiện tại có thể truy cập được sử dụng cho src của iframe và video như được hiển thị bên dưới:
<amp-iframe width="600"
   title = "Google map"
   height = "400"
   layout = "responsive"
   sandbox = "allow-scripts allow-same-origin allow-popups"
   frameborder = "0" src = "https://maps.google.com/maps?q=telangana&t=&z=13&ie=UTF8&iwloc=&output=embed"
   [src] = "myList[currentlist].iframeurl">
      <amp-img layout = "fill" src = "images/loading.jpg" placeholder>
      </amp-img>
</amp-iframe>
<amp-video id = "amp-video" src = "video/samplevideo.mp4"
   layout = "responsive" [src] = "myList[currentlist].url" width = "300"
   height = "170" autoplay controls>
</amp-video>
Đầu ra
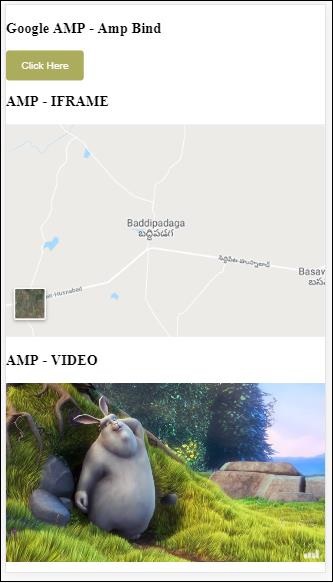
Nhấp vào nút để xem video và iframe src thay đổi.
Amp-bind với amp-lightbox
Bây giờ, chúng ta hãy xem hoạt động của hộp liên kết và amp-lightbox khi được sử dụng cùng nhau.
Thí dụ
<!doctype html>
<html amp lang = "en">
   <head>
      <meta charset = "utf-8">
      <script async src="https://cdn.ampproject.org/v0.js"></script>
      <title>Google AMP - Amp Bind</title>
      <link rel = "canonical" href =
         "http://example.ampproject.org/article-metadata.html">
      <meta name = "viewport" content = "width = device-width,
         minimum-scale = 1,initial-scale = 1">
      <style amp-boilerplate>
         body{
            -webkit-animation:
            -amp-start 8s steps(1,end) 0s 1 normal both;-moz-animation:
            -amp-start 8s steps(1,end) 0s 1 normal both;-ms-animation:
            -amp-start 8s steps(1,end) 0s 1 normal both;animation:
            -amp-start 8s steps(1,end) 0s 1 normal both
         }
         @-webkit-keyframes
         -amp-start{from{visibility:hidden}to{visibility:visible}}@-moz-keyframes
         -amp-start{from{visibility:hidden}to{visibility:visible}}@-ms-keyframes
         -amp-start{from{visibility:hidden}to{visibility:visible}}@-o-keyframes
         -amp-start{from{visibility:hidden}to{visibility:visible}}@keyframes
         -amp-start{from{visibility:hidden}to{visibility:visible}}
      </style>
      <noscript>
         <style amp-boilerplate>
            body{
               -webkit-animation:none;
               -moz-animation:none;
               -ms-animation:none;
               animation:none
            }
         </style>
      </noscript>
      <script async custom-element = "amp-bind" src =
         "https://cdn.ampproject.org/v0/amp-bind-0.1.js"></script>
      <script async custom-element = "amp-lightbox" src =
         "https://cdn.ampproject.org/v0/amp-lightbox-0.1.js"></script>
      <style amp-custom>
         button{
            background-color: #ACAD5C;
            color: white;
            padding: 12px 20px;
            border: none;
            border-radius: 4px;
            cursor: pointer;
            float: left;
         }
         .lightbox {
            background: rgba(211,211,211,0.8);
            width: 100%;
            height: 100%;
            position: absolute;
            display: flex;
            align-items: center;
            justify-content: center;
         }
      </style>
   </head>
   <body>
      <h3>Google AMP - Amp Bind</h3>
      <button on = "tap:AMP.setState({displaylightbox: true})">
      Click Here
      </button>
      <br/>
      <br/>
      <h3>AMP - Lightbox</h3>
      <amp-lightbox
         id = "my-lightbox"
         [open] = "displaylightbox"
         layout = "nodisplay"
         close-button>
         <div class = "lightbox" on = "tap:AMP.setState({displaylightbox: false})">
            <amp-img alt = "Beautiful Flower"
               src = "images/loreal.gif"
               width = "246"
               height = "205">
            </amp-img>
         </div>
      </amp-lightbox>
   </body>
</html>
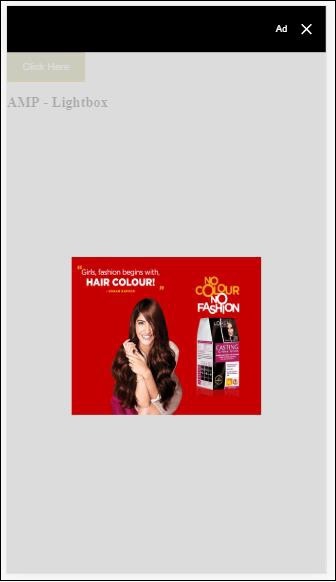
Để sử dụng liên kết trên amp-lightbox, chúng tôi đã sử dụng [open] trên amp-lightbox như hình dưới đây -
<amp-lightbox id = "my-lightbox" [open] = "displaylightbox"
   layout = "nodisplay" close-button>
   <div class = "lightbox" on="tap:AMP.setState({displaylightbox: false})">
      <amp-img alt = "Beautiful Flower"
         src = "images/loreal.gif"
         width = "246"
         height = "205">
      </amp-img>
   </div>
</amp-lightbox>
[Open] = “displaylightbox” là một trạng thái biến được thay đổi khi nhấp vào nút và khi chạm vào div hộp đèn thành true / false -
<button on = "tap:AMP.setState({displaylightbox: true})">
   Click Here
</button>

<div class = "lightbox" on = "tap:AMP.setState({displaylightbox: false})">
   <amp-img alt = "Beautiful Flower"
      src = "images/loreal.gif"
      width = "246"
      height = "205">
   </amp-img>
</div>
Đầu ra
Liên kết Amp với phần tử đầu vào
Hãy để chúng tôi hiểu hoạt động của liên kết amp với phần tử đầu vào với sự trợ giúp của một ví dụ hoạt động như được hiển thị:
<!doctype html>
<html amp lang = "en">
   <head>
      <meta charset = "utf-8">
      <script async src = "https://cdn.ampproject.org/v0.js"></script>
      <title>Google AMP - Amp Bind</title>
      <link rel = "canonical" href=
         "http://example.ampproject.org/article-metadata.html">
      <meta name = "viewport" content = "width = device-width,
         minimum-scale = 1,initial-scale = 1">
      <style amp-boilerplate>
         body{
            -webkit-animation:
            -amp-start 8s steps(1,end) 0s 1 normal both;-moz-animation:
            -amp-start 8s steps(1,end) 0s 1 normal both;-ms-animation:
            -amp-start 8s steps(1,end) 0s 1 normal both;animation:
            -amp-start 8s steps(1,end) 0s 1 normal both
         }
         @-webkit-keyframes
         -amp-start{from{visibility:hidden}to{visibility:visible}}@-moz-keyframes
         -amp-start{from{visibility:hidden}to{visibility:visible}}@-ms-keyframes
         -amp-start{from{visibility:hidden}to{visibility:visible}}@-o-keyframes
         -amp-start{from{visibility:hidden}to{visibility:visible}}@keyframes
         -amp-start{from{visibility:hidden}to{visibility:visible}}
      </style>
      <noscript>
      <style amp-boilerplate>
         body{
            -webkit-animation:none;
            -moz-animation:none;
            -ms-animation:none;
            animation:none
         }
      </style>
      <noscript>
      <script async custom-element = "amp-bind"
         src = "https://cdn.ampproject.org/v0/amp-bind-0.1.js">
         <script>
         <script async custom-element = "amp-lightbox"
            src = "https://cdn.ampproject.org/v0/amp-lightbox-0.1.js">
      </script>
      <style amp-custom>
         button{
            background-color: #ACAD5C;
            color: white;
            padding: 12px 20px;
            border: none;
            border-radius: 4px;
            cursor: pointer;
            float: left;
         }
         .lightbox {
            background: rgba(211,211,211,0.8);
            width: 100%;
            height: 100%;
            position: absolute;
            display: flex;
            align-items: center;
            justify-content: center;
         }
         #txtname{
            width: 100%;
            padding: 12px 20px;
            margin: 8px 0;
            display: inline-block;
            border: 1px solid #ccc;
            border-radius: 4px;
            box-sizing: border-box;
         }
         div {
            font-size:25px;
         }
      </style>
   </head>
   <body>
      <h3>Google AMP - Amp Bind</h3>
      <button on = "tap:AMP.setState({displaylightbox: true})">
         Click Here
      </button>
      <br/>
      <br/>
      <h3>
         AMP - Input Element
      <h3>
      <input id = "txtname" placeholder = "Type here"
         on = "input-throttled:AMP.setState({name: event.value})">
      <div [text] = "name">
      </div>
   </body>
</html>
Đầu ra
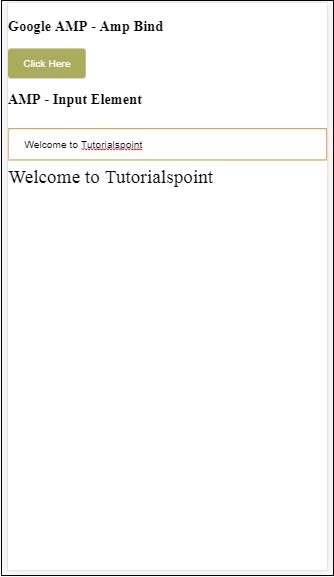
Dữ liệu được nhập bên trong hộp văn bản được hiển thị ở dưới cùng. Nó có thể được thực hiện bằng cách thay đổi biến trạng tháiname trên sự kiện đầu vào như được hiển thị -
<input id = "txtname" placeholder = "Type here" on =
"input-throttled:AMP.setState({name: event.value})">
<div [text] = "name">
</div>