Google एएमपी - सामाजिक विजेट
एम्प किसी भी बाहरी पुस्तकालय को लोड किए बिना पृष्ठ पर सामाजिक विगेट्स दिखाने के लिए समर्थन प्रदान करता है। इस अध्याय में, हम यहाँ सूचीबद्ध कुछ लोकप्रिय सामाजिक विगेट्स पर चर्चा करने जा रहे हैं -
Google AMP - फेसबुक
Google AMP - Twitter
Google AMP - Pinterest
Google Amp - फेसबुक
Amp-facebook घटक का उपयोग करके, हम फेसबुक से जुड़ सकते हैं और एक amp पृष्ठ में पोस्ट, वीडियो, टिप्पणी प्रदर्शित कर सकते हैं।
Amp-facebook का उपयोग करने के लिए, हमें निम्नलिखित स्क्रिप्ट को पृष्ठ पर जोड़ना होगा -
<script async custom-element = "amp-facebook"
   src = "https://cdn.ampproject.org/v0/amp-facebook-0.1.js">
</script>
Amp-facebook टैग प्रारूप
<amp-facebook
   width = "552"
   height = "310"
   layout = "responsive"
   data-href = "https://www.facebook.com/tutorialspointindia/
   posts/1784197988358159">
</amp-facebook>
Amp- फेसबुक के लिए एक कार्य उदाहरण यहाँ दिखाया गया है -
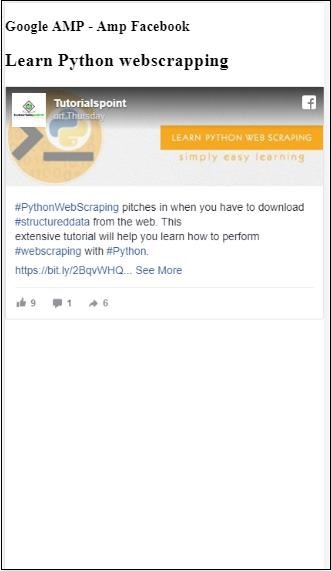
उदाहरण: फेसबुक से पोस्ट दिखा रहा है
<!doctype html>
<html amp lang = "en">
   <head>
      <meta charset = "utf-8">
      <script async src = "https://cdn.ampproject.org/v0.js">
      </script>
      <title>Google AMP - Amp Facebook</title>
      <link rel = "canonical" href =
      "http://example.ampproject.org/article-metadata.html">
      <meta name = "viewport" content = "width = device-width,
      minimum-scale = 1,initial-scale = 1">

      <style amp-boilerplate>
         body{
            -webkit-animation:
            -amp-start 8s steps(1,end) 0s 1 normal both;-moz-animation:
            -amp-start 8s steps(1,end) 0s 1 normal both;-ms-animation:
            -amp-start 8s steps(1,end) 0s 1 normal both;animation:
            -amp-start 8s steps(1,end) 0s 1 normal both
         }
         @-webkit-keyframes
         -amp-start{from{visibility:hidden}to{visibility:visible}}@-moz-keyframes
         -amp-start{from{visibility:hidden}to{visibility:visible}}@-ms-keyframes
         -amp-start{from{visibility:hidden}to{visibility:visible}}@-o-keyframes
         -amp-start{from{visibility:hidden}to{visibility:visible}}@keyframes
         -amp-start{from{visibility:hidden}to{visibility:visible}}
      </style>
      <noscript>
         <style amp-boilerplate>
            body{
               -webkit-animation:none;
               -moz-animation:none;
               -ms-animation:none;
               animation:none}
         </style>
      </noscript>
      <script async custom-element = "amp-facebook"
         src = "https://cdn.ampproject.org/v0/amp-facebook-0.1.js">
      </script>
   </head>
   <body>
      <h3>Google AMP - Amp Facebook</h3>
      <h2>Learn Python webscrapping</h2>
      <amp-facebook
         width = "552"
         height = "310"
         layout = "responsive"
         data-href = "https://www.facebook.com/tutorialspointindia/posts/1784197988358159">
      </amp-facebook>
   </body>
</html>
उत्पादन
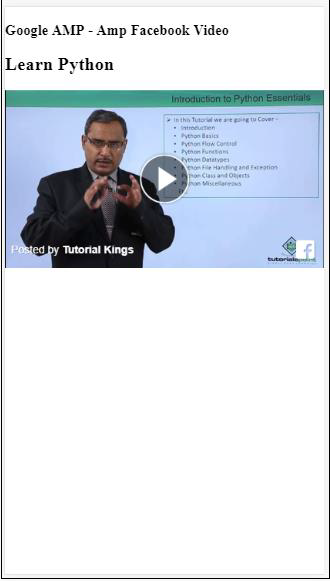
उदाहरण: फेसबुक से वीडियो दिखाना
<!doctype html>
<html amp lang = "en">
   <head>
      <meta charset = "utf-8">
      <script async src = "https://cdn.ampproject.org/v0.js">
      </script>
      <title>Google AMP - Amp Facebook>/title>
      <link rel = "canonical" href =
      "http://example.ampproject.org/article-metadata.html">
      <meta name = "viewport" content = "width = device-width,
      minimum-scale = 1,initial-scale = 1">

      <style amp-boilerplate>
         body{
            -webkit-animation:
            -amp-start 8s steps(1,end) 0s 1 normal both;-moz-animation:
            -amp-start 8s steps(1,end) 0s 1 normal both;-ms-animation:
            -amp-start 8s steps(1,end) 0s 1 normal both;animation:
            -amp-start 8s steps(1,end) 0s 1 normal both
         }
         @-webkit-keyframes
         -amp-start{from{visibility:hidden}to{visibility:visible}}@-moz-keyframes
         -amp-start{from{visibility:hidden}to{visibility:visible}}@-ms-keyframes
         -amp-start{from{visibility:hidden}to{visibility:visible}}@-o-keyframes
         -amp-start{from{visibility:hidden}to{visibility:visible}}@keyframes
         -amp-start{from{visibility:hidden}to{visibility:visible}}
      </style>
      <noscript>
         <style amp-boilerplate>
            body{
               -webkit-animation:none;
               -moz-animation:none;
               -ms-animation:none;
               animation:none}
         </style>
      </noscript>
      <script async custom-element = "amp-facebook"
         src = "https://cdn.ampproject.org/v0/amp-facebook-0.1.js">
      </script>
   </head>
   <body>
      <h3<Google AMP - Amp Facebook Video</h3>
      <h2<Learn Python</h2>
      <amp-facebook
         width = "476"
         height = "316"
         layout = "responsive"
         data-embed-as = "video"
         data-href = "https://www.facebook.com/thetutorialkings/videos/701545820223256">
      </amp-facebook>
   </body>
</html>
उत्पादन
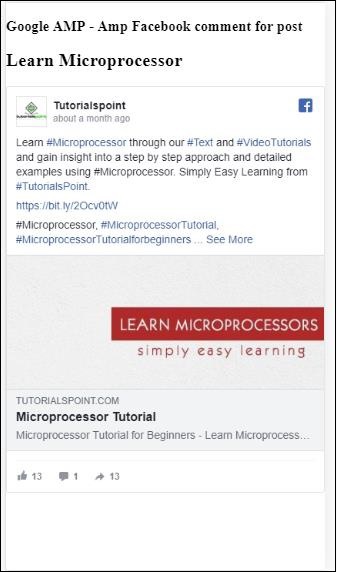
उदाहरण: फेसबुक पोस्ट के लिए टिप्पणियां दिखाना
<!doctype html>
<html amp lang = "en">
   <head>
      <meta charset = "utf-8">
      <script async src = "https://cdn.ampproject.org/v0.js">
      </script>
      <title>Google AMP - Amp Facebook</title>
      <link rel = "canonical" href =
      "http://example.ampproject.org/article-metadata.html">
      <meta name = "viewport" content = "width = device-width,
      minimum-scale = 1,initial-scale = 1">

      <style amp-boilerplate>
         body{
            -webkit-animation:
            -amp-start 8s steps(1,end) 0s 1 normal both;-moz-animation:
            -amp-start 8s steps(1,end) 0s 1 normal both;-ms-animation:
            -amp-start 8s steps(1,end) 0s 1 normal both;animation:
            -amp-start 8s steps(1,end) 0s 1 normal both
         }
         @-webkit-keyframes
         -amp-start{from{visibility:hidden}to{visibility:visible}}@-moz-keyframes
         -amp-start{from{visibility:hidden}to{visibility:visible}}@-ms-keyframes
         -amp-start{from{visibility:hidden}to{visibility:visible}}@-o-keyframes
         -amp-start{from{visibility:hidden}to{visibility:visible}}@keyframes
         -amp-start{from{visibility:hidden}to{visibility:visible}}
      </style>
      <noscript>
         <style amp-boilerplate>
            body{
               -webkit-animation:none;
               -moz-animation:none;
               -ms-animation:none;
               animation:none}
         </style>
      </noscript>
      <script async custom-element = "amp-facebook"
         src = "https://cdn.ampproject.org/v0/amp-facebook-0.1.js">
      </script>
   </head>
   <body>
      <h3>Google AMP - Amp Facebook comment for post</h3>
      <h2>Learn Microprocessor</h2>
      <amp-facebook
         width = "552"
         height = "500"
         layout = "responsive"
         data-embed-type = "comment"
         data-href = "https://www.facebook.com/tutorialspointindia/posts/1744145745696717?
         comment_id=1744179789026646&include_parent=false">
      </amp-facebook>
   </body>
</html>
उत्पादन
पर उपलब्ध विशेषताएँ amp-facebook कर रहे हैं
data-href (अनिवार्य) - यहां आपको फेसबुक यूआरएल को निर्दिष्ट करने की आवश्यकता है।
data-embed-as- उपलब्ध विकल्प पोस्ट, वीडियो और टिप्पणी हैं। डिफ़ॉल्ट रूप से, यह पोस्ट है।
data-locale (अनिवार्य) - यह स्थानीय भाषा में प्रदर्शन दिखाता है, आप इसे अपनी पसंद के अनुसार बदल सकते हैं।
data-include-comment-parent- यह मूल्यों को सही या गलत लगता है। यह डिफ़ॉल्ट रूप से गलत है। जब आप टिप्पणी के रूप में डेटा-एंबेड-अस विकल्प का उपयोग करते हैं, तो मान लें कि आपको टिप्पणी के लिए मूल उत्तर की आवश्यकता है, आप इस विकल्प को सही मान सकते हैं।
अब तक हमने पोस्ट / वीडियो को जोड़ने और amp पेज पर टिप्पणी करने का तरीका देखा है। Incase में हमें facebook पेज जोड़ने की जरूरत है, amp में एक कंपोनेंट हैamp-facebook-page।
Amp फेसबुक पेज प्लगइन
Amp-facebook-page घटक हमें वह फेसबुक पेज विवरण देता है जो हम चाहते हैं। amp-facebook-page के साथ काम करने के लिए हमें निम्न स्क्रिप्ट जोड़ने की आवश्यकता है -
<script async custom-element = "amp-facebook-page" src = "
   https://cdn.ampproject.org/v0/amp-facebook-page-0.1.js">
</script>
एम्पी-फेसबुक-पेज का उपयोग करके एक कार्य उदाहरण यहाँ दिखाया गया है -
उदाहरण
<!doctype html>
<html amp lang = "en">
   <head>
      <meta charset = "utf-8">
      <script async src = "https://cdn.ampproject.org/v0.js">
      </script>
      <title>Google AMP - Amp Facebook</title>
      <link rel = "canonical" href =
      "http://example.ampproject.org/article-metadata.html">
      <meta name = "viewport" content = "width = device-width,
      minimum-scale = 1,initial-scale = 1">

      <style amp-boilerplate>
         body{
            -webkit-animation:
            -amp-start 8s steps(1,end) 0s 1 normal both;-moz-animation:
            -amp-start 8s steps(1,end) 0s 1 normal both;-ms-animation:
            -amp-start 8s steps(1,end) 0s 1 normal both;animation:
            -amp-start 8s steps(1,end) 0s 1 normal both
         }
         @-webkit-keyframes
         -amp-start{from{visibility:hidden}to{visibility:visible}}@-moz-keyframes
         -amp-start{from{visibility:hidden}to{visibility:visible}}@-ms-keyframes
         -amp-start{from{visibility:hidden}to{visibility:visible}}@-o-keyframes
         -amp-start{from{visibility:hidden}to{visibility:visible}}@keyframes
         -amp-start{from{visibility:hidden}to{visibility:visible}}
      </style>
      <noscript>
         <style amp-boilerplate>
            body{
               -webkit-animation:none;
               -moz-animation:none;
               -ms-animation:none;
               animation:none}
         </style>
      </noscript>
      <script async custom-element = "amp-facebook-page"
         src = "https://cdn.ampproject.org/v0/amp-facebook-page-0.1.js">
      </script>
   </head>
   <body>
      <h3>Google AMP - Amp Facebook Page</h3>
      <h3>Welcome to Tutorialspoint Facebook Page</h3>
      <amp-facebook-page
         width = "340"
         height = "130"
         layout = "responsive"
         data-href = "https://www.facebook.com/tutorialspointindia/">
      </amp-facebook-page>
   </body>
</html>
उत्पादन

एम्प-फेसबुक की तरह
बटन प्लगइन जैसे फेसबुक पेज को एम्बेड करने के लिए, हम amp- फेसबुक जैसे घटक का उपयोग कर सकते हैं। Amp-facebook की तरह काम करने के लिए, हमें निम्नलिखित स्क्रिप्ट जोड़ने की आवश्यकता है -
"<script async custom-element = "amp-facebook-like"
   src = "https://cdn.ampproject.org/v0/amp-facebook-like-0.1.js">
</script>
उदाहरण
<!doctype html>
<html amp lang = "en">
   <head>
      <meta charset = "utf-8">
      <script async src = "https://cdn.ampproject.org/v0.js">
      </script>
      <title>Google AMP - Amp Facebook</title>
      <link rel = "canonical"
      href = "http://example.ampproject.org/article-metadata.html">
      <meta name = "viewport" content = "width = device-width,
      minimum-scale = 1,initial-scale = 1">

      <style amp-boilerplate>
         body{
            -webkit-animation:
            -amp-start 8s steps(1,end) 0s 1 normal both;-moz-animation:
            -amp-start 8s steps(1,end) 0s 1 normal both;-ms-animation:
            -amp-start 8s steps(1,end) 0s 1 normal both;animation:
            -amp-start 8s steps(1,end) 0s 1 normal both
         }
         @-webkit-keyframes
         -amp-start{from{visibility:hidden}to{visibility:visible}}@-moz-keyframes
         -amp-start{from{visibility:hidden}to{visibility:visible}}@-ms-keyframes
         -amp-start{from{visibility:hidden}to{visibility:visible}}@-o-keyframes
         -amp-start{from{visibility:hidden}to{visibility:visible}}@keyframes
         -amp-start{from{visibility:hidden}to{visibility:visible}}
      </style>
      <noscript>
         <style amp-boilerplate>
            body{
               -webkit-animation:none;
               -moz-animation:none;
               -ms-animation:none;
               animation:none}
         </style>
      </noscript>
      <script async custom-element = "amp-facebook-like"
         src = "https://cdn.ampproject.org/v0/amp-facebook-like-0.1.js">
      </script>
      <style amp-custom>
         amp-facebook-like {
            margin: 1rem
         }
      </style>
   </head>
   <body>
      <h3>Google AMP - Amp Facebook Likes</h3>
      <h3>Welcome to Tutorialspoint Facebook Likes</h3>
      <amp-facebook-like
         width = "110"
         height = "20"
         layout = "fixed"
         data-layout = "button_count"
         data-href = "https://www.facebook.com/tutorialspointindia">
      </amp-facebook-like>
   </body>
</html>
उत्पादन
Amp facebook comments plugin
Amp-facebook-comments घटक दिए गए पृष्ठ की टिप्पणी देगा।
Amp- फेसबुक-टिप्पणियों के साथ काम करने के लिए, हमें निम्नलिखित स्क्रिप्ट जोड़ने की आवश्यकता है -
<script async custom-element = "amp-facebook-comments"
   src = "https://cdn.ampproject.org/v0/amp-facebook-comments-0.1.js">
</script>
उदाहरण
<!doctype html>
<html amp lang = "en">
   <head>
      <meta charset = "utf-8">
      <script async src = "https://cdn.ampproject.org/v0.js">
      </script>
      <title>Google AMP - Amp Facebook</title>
      <link rel = "canonical" href =
      "http://example.ampproject.org/article-metadata.html">
      <meta name = "viewport" content = "width = device-width,
      minimum-scale = 1,initial-scale = 1">

      <style amp-boilerplate>
         body{
            -webkit-animation:
            -amp-start 8s steps(1,end) 0s 1 normal both;-moz-animation:
            -amp-start 8s steps(1,end) 0s 1 normal both;-ms-animation:
            -amp-start 8s steps(1,end) 0s 1 normal both;animation:
            -amp-start 8s steps(1,end) 0s 1 normal both
         }
         @-webkit-keyframes
         -amp-start{from{visibility:hidden}to{visibility:visible}}@-moz-keyframes
         -amp-start{from{visibility:hidden}to{visibility:visible}}@-ms-keyframes
         -amp-start{from{visibility:hidden}to{visibility:visible}}@-o-keyframes
         -amp-start{from{visibility:hidden}to{visibility:visible}}@keyframes
         -amp-start{from{visibility:hidden}to{visibility:visible}}
      </style>
      <noscript>
         <style amp-boilerplate>
            body{
               -webkit-animation:none;
               -moz-animation:none;
               -ms-animation:none;
               animation:none}
         </style>
      </noscript>
      <script async custom-element = "amp-facebook-comments"
         src = "https://cdn.ampproject.org/v0/amp-facebook-comments-0.1.js">
      </script>
      <style amp-custom>
         amp-facebook-like {
            margin: 1rem
         }
      </style>
   </head>
   <body>
      <h3>Google AMP - Amp Facebook Likes</h3>
      <amp-facebook-comments
         width = 486
         height = 657
         layout = "responsive"
         data-numposts = "2"
         data-href = "https://developers.facebook.com/docs/plugins/comments">
      </amp-facebook-comments>
   </body>
</html>
उत्पादन
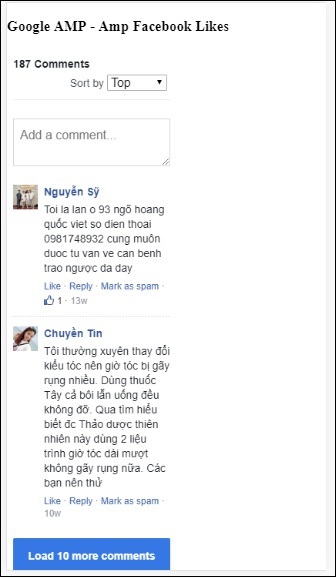
गुण data-numpostsस्क्रीन पर प्रदर्शित होने वाली टिप्पणियों की संख्या तय करता है। यदि आप सभी टिप्पणियाँ प्राप्त करना चाहते हैं, तो आप विशेषता को हटा सकते हैं।
Google AMP - Pinterest
Amp amp-pinterest घटक का उपयोग करके एक pinterest विजेट प्रदान करता है। हम pinterest विजेट, pinterest save बटन और pinterest फॉलो बटन दिखाने के लिए इस घटक का उपयोग कर सकते हैं।
Amp-pinterest के साथ काम करना शुरू करने के लिए, हमें निम्नलिखित स्क्रिप्ट जोड़ने की आवश्यकता है -
<script async custom-element="amp-pinterest" src="https://cdn.ampproject.org/v0/amp-pinterest-0.1.js">
</script>
Amp-pinterest टैग
<amp-pinterest width = 300 height = 450 data-do = "embedPin"
   data-url = "https://in.pinterest.com/pin/856739529089490354/">
</amp-pinterest>
Pinterest विजेट
Example
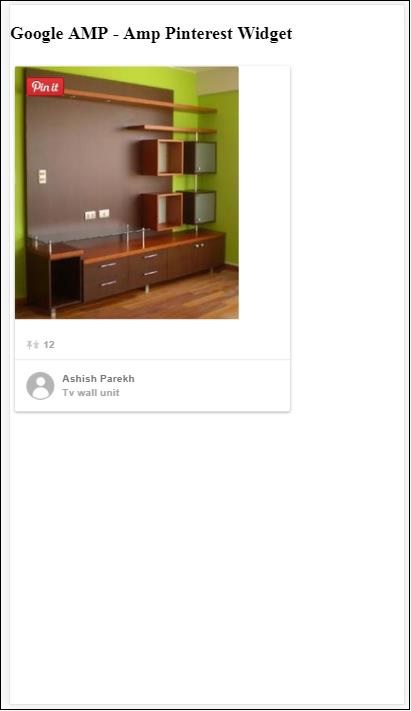
Pinterest विजेट दिखाने के लिए, हमें विशेषता डेटा-डू = "एम्बेडपिन" का उपयोग करना होगा। उसी के लिए एक कार्य उदाहरण यहाँ दिखाया गया है -
<!doctype html>
<html amp lang = "en">
   <head>
      <meta charset = "utf-8">
      <script async src = "https://cdn.ampproject.org/v0.js">
      </script>
      <title>Google AMP - Amp Pinterest Widget</title>
      <link rel = "canonical" href =
      "http://example.ampproject.org/article-metadata.html">
      <meta name = "viewport" content = "width = device-width,
      minimum-scale = 1,initial-scale = 1">

      <style amp-boilerplate>
         body{
            -webkit-animation:
            -amp-start 8s steps(1,end) 0s 1 normal both;-moz-animation:
            -amp-start 8s steps(1,end) 0s 1 normal both;-ms-animation:
            -amp-start 8s steps(1,end) 0s 1 normal both;animation:
            -amp-start 8s steps(1,end) 0s 1 normal both}@-webkit-keyframes
            -amp-start 8s steps(1,end) 0s 1 normal both
         }
         @-webkit-keyframes
         -amp-start{from{visibility:hidden}to{visibility:visible}}@-moz-keyframes
         -amp-start{from{visibility:hidden}to{visibility:visible}}@-ms-keyframes
         -amp-start{from{visibility:hidden}to{visibility:visible}}@-o-keyframes
         -amp-start{from{visibility:hidden}to{visibility:visible}}@keyframes
         -amp-start{from{visibility:hidden}to{visibility:visible}}
      </style>
      <noscript>
         <style amp-boilerplate>
            body{
            -webkit-animation:none;
            -moz-animation:none;
            -ms-animation:none;
            animation:none}
         </style>
      </noscript>
      <script async custom-element = "amp-pinterest"
         src = "https://cdn.ampproject.org/v0/amp-pinterest-0.1.js">
      </script>
      <style amp-custom>
         amp-facebook-like {
            margin: 1rem
         }
      </style>
   </head>
   <body>
      <h3>Google AMP - Amp Pinterest Widget</h3>
      <amp-pinterest
         width = 300
         height = 450
         data-do = "embedPin"
         data-url = "https://in.pinterest.com/pin/856739529089490354/">
      </amp-pinterest>
   </body>
</html>
Output
Pinterest सेव बटन
Pinterest के लिए सेव बटन को दिखाने के लिए हमें विशेषता का उपयोग करना होगा data-do="buttonPin"। Pinterest save बटन का एक कार्य उदाहरण यहाँ दिखाया गया है -
Example
<!doctype html>
<html amp lang = "en">
   <head>
      <meta charset = "utf-8">
      <script async src = "https://cdn.ampproject.org/v0.js">
      </script>
      <title>Google AMP - Amp Pinterest Widget</title>
      <link rel = "canonical" href =
      "http://example.ampproject.org/article-metadata.html">
      <meta name = "viewport" content = "width = device-width,
      minimum-scale = 1,initial-scale = 1">

      <style amp-boilerplate>
         body{
            -webkit-animation:
            -amp-start 8s steps(1,end) 0s 1 normal both;-moz-animation:
            -amp-start 8s steps(1,end) 0s 1 normal both;-ms-animation:
            -amp-start 8s steps(1,end) 0s 1 normal both;animation:
            -amp-start 8s steps(1,end) 0s 1 normal both
         }
         @-webkit-keyframes
         -amp-start{from{visibility:hidden}to{visibility:visible}}@-moz-keyframes
         -amp-start{from{visibility:hidden}to{visibility:visible}}@-ms-keyframes
         -amp-start{from{visibility:hidden}to{visibility:visible}}@-o-keyframes
         -amp-start{from{visibility:hidden}to{visibility:visible}}@keyframes
         -amp-start{from{visibility:hidden}to{visibility:visible}}
      </style>
      <noscript>
         <style amp-boilerplate>
            body{
               -webkit-animation:none;
               -moz-animation:none;
               -ms-animation:none;
               animation:none}
         </style>
      </noscript>
      <script async custom-element = "amp-pinterest"
         src = "https://cdn.ampproject.org/v0/amp-pinterest-0.1.js">
      </script>
      <style amp-custom>
         amp-facebook-like {
            margin: 1rem
         }
      </style>
   </head>
   <body>
      <h3>Google AMP - Amp Pinterest Save Button</h3>
      <h3>TutorialsPoint - ReactJS</h3>
      <amp-img
         src = "images/reactjs.png"
         width = "100"
         height = "100"
         alt = "blockchain image">
      </amp-img>
      <amp-pinterest
         height = "18"
         width = "56"
         data-do = "buttonPin"
         data-url = "https://www.tutorialspoint.com/"
         data-media = "https://www.tutorialspoint.com/images/tp-logo-diamond.png"
         data-description = "amp-pinterest in action">
      </amp-pinterest>
   </body>
</html>
Output
Pinterest फॉलो बटन
Pinterest के लिए फॉलो बटन को दिखाने के लिए, हमें विशेषता का उपयोग करने की आवश्यकता है data-do="buttonFollow"। Pinterest save बटन का एक कार्य उदाहरण यहाँ दिखाया गया है -
Example
<!doctype html>
<html amp lang = "en">
   <head>
      <meta charset = "utf-8">
      <script async src = "https://cdn.ampproject.org/v0.js">
      </script>
      <title>Google AMP - Amp Pinterest Widget</title>
      <link rel = "canonical" href =
      "http://example.ampproject.org/article-metadata.html">
      <meta name = "viewport" content = "width = device-width,
      minimum-scale = 1,initial-scale = 1">

      <style amp-boilerplate>
         body{
            -webkit-animation:
            -amp-start 8s steps(1,end) 0s 1 normal both;-moz-animation:
            -amp-start 8s steps(1,end) 0s 1 normal both;-ms-animation:
            -amp-start 8s steps(1,end) 0s 1 normal both;animation:
            -amp-start 8s steps(1,end) 0s 1 normal both
         }
         @-webkit-keyframes
         -amp-start{from{visibility:hidden}to{visibility:visible}}@-moz-keyframes
         -amp-start{from{visibility:hidden}to{visibility:visible}}@-ms-keyframes
         -amp-start{from{visibility:hidden}to{visibility:visible}}@-o-keyframes
         -amp-start{from{visibility:hidden}to{visibility:visible}}@keyframes
         -amp-start{from{visibility:hidden}to{visibility:visible}}
      </style>
       <noscript>
         <style amp-boilerplate>
            body{
               -webkit-animation:none;
               -moz-animation:none;
               -ms-animation:none;
               animation:none}
         </style>
      </noscript>
      <script async custom-element = "amp-pinterest"
         src = "https://cdn.ampproject.org/v0/amp-pinterest-0.1.js">
      </script>
      <style amp-custom>
         amp-facebook-like {
            margin: 1rem
         }
      </style>
   </head>
   <body>
      <h3>Google AMP - Amp Pinterest Follow Button</h3>
      <amp-pinterest
         height = 50
         width = 130
         data-do = "buttonFollow"
         data-href = "https://in.pinterest.com/wedgehairstyles/"
         data-label = "wedgehairstyles">
      </amp-pinterest>
   </body>
</html>
Output

Google Amp - ट्विटर
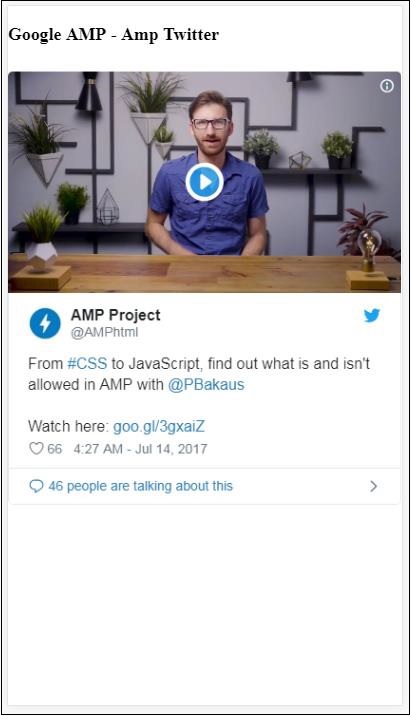
एम्पी में amp- ट्विटर का उपयोग करके ट्विटर फीड दिखाने के लिए एक घटक है।
Amp- ट्विटर के साथ काम करने के लिए हमें निम्नलिखित स्क्रिप्ट जोड़ने की आवश्यकता है -
<script async custom-element = "amp-twitter"
src = "https://cdn.ampproject.org/v0/amp-twitter-0.1.js">
</script>
Amp- ट्विटर टैग
<amp-twitter width = "375" height = "472"
   layout = "responsive" data-tweetid = "885634330868850689">
</amp-twitter>
ट्वीट दिखाने वाला एक कार्य उदाहरण यहां दिखाया गया है
Example
<!doctype html>
<html amp lang = "en">
   <head>
      <meta charset = "utf-8">
      <script async src = "https://cdn.ampproject.org/v0.js">
      </script>
      <title>Google AMP - Amp Twitter</title>
      <link rel = "canonical" href =
      "http://example.ampproject.org/article-metadata.html">
      <meta name = "viewport" content = "width = device-width,
      minimum-scale = 1,initial-scale = 1">

      <style amp-boilerplate>
         body{
            -webkit-animation:
            -amp-start 8s steps(1,end) 0s 1 normal both;-moz-animation:
            -amp-start 8s steps(1,end) 0s 1 normal both;-ms-animation:
            -amp-start 8s steps(1,end) 0s 1 normal both;animation:
            -amp-start 8s steps(1,end) 0s 1 normal both
         }
         @-webkit-keyframes
         -amp-start{from{visibility:hidden}to{visibility:visible}}@-moz-keyframes
         -amp-start{from{visibility:hidden}to{visibility:visible}}@-ms-keyframes
         -amp-start{from{visibility:hidden}to{visibility:visible}}@-o-keyframes
         -amp-start{from{visibility:hidden}to{visibility:visible}}@keyframes
         -amp-start{from{visibility:hidden}to{visibility:visible}}
      </style>
      <noscript>
         <style amp-boilerplate>
            body{
               -webkit-animation:none;
               -moz-animation:none;
               -ms-animation:none;
               animation:none}
         </style>
      </noscript>
      <script async custom-element = "amp-twitter" src =
         "https://cdn.ampproject.org/v0/amp-twitter-0.1.js">
      </script>
      <style amp-custom>
         amp-facebook-like {
            margin: 1rem
         }
      </style>
   </head>
   <body>
      <h3>Google AMP - Amp Twitter</h3>
      <amp-twitter
         width = "375"
         height = "472"
         layout = "responsive"
         data-tweetid = "885634330868850689">
      </amp-twitter>
   </body>
</html>
Output
