Windows10 Dev-앱 커뮤니케이션
앱 간 통신은 응용 프로그램이 동일한 장치에 설치된 다른 응용 프로그램과 대화하거나 통신 할 수 있음을 의미합니다. 이는 UWP (유니버설 Windows 플랫폼) 애플리케이션의 새로운 기능이 아니며 Windows 8.1에서도 사용할 수 있습니다.
Windows 10에는 동일한 장치의 응용 프로그램간에 쉽게 통신 할 수있는 몇 가지 새롭고 향상된 방법이 도입되었습니다. 두 앱 간의 통신은 다음과 같은 방법으로 가능합니다.
- 일부 데이터를 사용하여 다른 앱을 시작하는 한 애플리케이션.
- 앱은 아무것도 실행하지 않고 단순히 데이터를 교환합니다.
앱 간 통신의 가장 큰 장점은 애플리케이션을 더 작은 단위로 나눌 수 있다는 것입니다. 이렇게하면 쉽게 유지 관리, 업데이트 및 사용할 수 있습니다.
앱 준비
아래 단계를 따르면 다른 응용 프로그램에서 응용 프로그램을 시작할 수 있습니다.
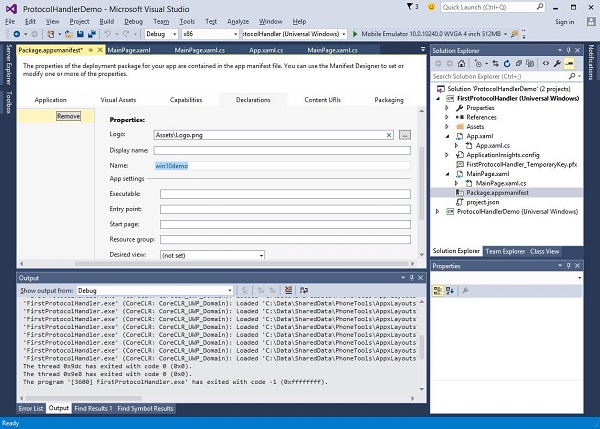
애플리케이션 패키지 매니페스트에 프로토콜 선언을 추가합니다.
더블 클릭 Package.appxmanifest 아래 그림과 같이 솔루션 탐색기에서 사용할 수있는 파일입니다.
다음으로 이동 Declaration 탭을 클릭하고 아래와 같이 프로토콜의 이름을 씁니다.
다음 단계는 activation 앱이 다른 애플리케이션에서 실행될 때 적절하게 응답 할 수 있도록합니다.
프로토콜 활성화에 응답하려면 OnActivated활성화 클래스의 메서드. 따라서 다음 코드를App.xaml.cs 파일.
protected override void OnActivated(IActivatedEventArgs args) {

   ProtocolActivatedEventArgs protocolArgs = args as ProtocolActivatedEventArgs;

   if (args != null){

      Frame rootFrame = Window.Current.Content as Frame;

      // Do not repeat app initialization when the Window already has content,
      // just ensure that the window is active

      if (rootFrame == null){

         // Create a Frame to act as the navigation context and navigate to the first page
         rootFrame = new Frame();

         // Set the default language
         rootFrame.Language = Windows.Globalization.ApplicationLanguages.Languages[0];
         rootFrame.NavigationFailed += OnNavigationFailed;

         // Place the frame in the current Window
         Window.Current.Content = rootFrame;
      }

      if (rootFrame.Content == null){

         // When the navigation stack isn't restored, navigate to the
         // first page, configuring the new page by passing required
         // information as a navigation parameter

         rootFrame.Navigate(typeof(MainPage), null);
      }

      // Ensure the current window is active
      Window.Current.Activate();

   }
}
응용 프로그램을 시작하려면 간단히 Launcher.LaunchUriAsync 이 메서드에 지정된 프로토콜로 응용 프로그램을 시작합니다.
await Windows.System.Launcher.LaunchUriAsync(new Uri("win10demo:?SomeData=123"));두 개의 UWP 애플리케이션이있는 간단한 예제를 통해이를 이해하겠습니다. ProtocolHandlerDemo 과 FirstProtocolHandler.
이 예에서 ProtocolHandlerDemo 응용 프로그램에는 하나의 버튼이 포함되어 있으며 버튼을 클릭하면 FirstProtocolHandler 신청.
하나의 버튼을 포함하는 ProtocolHandlerDemo 애플리케이션의 XAML 코드는 아래와 같습니다.
<Page
   x:Class = "ProtocolHandlerDemo.MainPage"
   xmlns = "http://schemas.microsoft.com/winfx/2006/xaml/presentation"
   xmlns:x = "http://schemas.microsoft.com/winfx/2006/xaml"
   xmlns:local = "using:ProtocolHandlerDemo"
   xmlns:d = "http://schemas.microsoft.com/expression/blend/2008"
   xmlns:mc = "http://schemas.openxmlformats.org/markup-compatibility/2006"
   mc:Ignorable = "d">

   <Grid Background = "{ThemeResource ApplicationPageBackgroundThemeBrush}">
      <Button x:Name = "LaunchButton" Content = " Launch First Protocol App"
         FontSize = "24" HorizontalAlignment = "Center"
         Click = "LaunchButton_Click"/>
   </Grid>

</Page>
다음은 버튼 클릭 이벤트가 구현 된 C # 코드입니다.
using System;
using Windows.UI.Xaml;
using Windows.UI.Xaml.Controls;

// The Blank Page item template is documented at
   http://go.microsoft.com/fwlink/?LinkId=402352&clcid=0x409

namespace ProtocolHandlerDemo {

   /// <summary>
      /// An empty page that can be used on its own or navigated to within a Frame.
   /// </summary>

   public sealed partial class MainPage : Page {

      public MainPage(){
         this.InitializeComponent();
      }

      private async void LaunchButton_Click(object sender, RoutedEventArgs e) {
         await Windows.System.Launcher.LaunchUriAsync(new
            Uri("win10demo:?SomeData=123"));
      }

   }
}
이제 우리는 FirstProtocolHandler응용 프로그램 테이블. 다음은 일부 속성을 사용하여 텍스트 블록이 생성되는 XAML 코드입니다.
<Page
x:Class = "FirstProtocolHandler.MainPage"
xmlns = "http://schemas.microsoft.com/winfx/2006/xaml/presentation"
xmlns:x = "http://schemas.microsoft.com/winfx/2006/xaml"
xmlns:local = "using:FirstProtocolHandler"
xmlns:d = "http://schemas.microsoft.com/expression/blend/2008"
xmlns:mc = "http://schemas.openxmlformats.org/markup-compatibility/2006"
mc:Ignorable = "d">
<Grid Background = "{ThemeResource ApplicationPageBackgroundThemeBrush}">
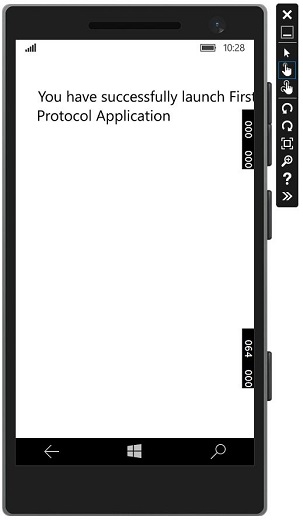
<TextBlock Text = "You have successfully launch First Protocol Application"
TextWrapping = "Wrap" Style = "{StaticResource SubtitleTextBlockStyle}"
Margin = "30,39,0,0" VerticalAlignment = "Top" HorizontalAlignment = "Left"
Height = "100" Width = "325"/>
</Grid>
</Page>의 C # 구현 App.xaml.cs 파일 OnActicated재정의는 아래와 같습니다. App 클래스 내부에 다음 코드를 추가하십시오.App.xaml.cs 파일.
protected override void OnActivated(IActivatedEventArgs args) {
ProtocolActivatedEventArgs protocolArgs = args as ProtocolActivatedEventArgs;
if (args != null) {
Frame rootFrame = Window.Current.Content as Frame;
// Do not repeat app initialization when the Window already has content,
// just ensure that the window is active
if (rootFrame == null) {
// Create a Frame to act as the navigation context and navigate to
the first page
rootFrame = new Frame();
// Set the default language
rootFrame.Language = Windows.Globalization.ApplicationLanguages.Languages[0];
rootFrame.NavigationFailed += OnNavigationFailed;
// Place the frame in the current Window
Window.Current.Content = rootFrame;
}
if (rootFrame.Content == null) {
// When the navigation stack isn't restored navigate to the
// first page, configuring the new page by passing required
// information as a navigation parameter
rootFrame.Navigate(typeof(MainPage), null);
}
// Ensure the current window is active
Window.Current.Activate();
}
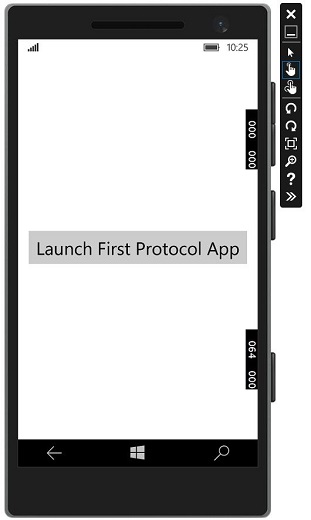
}컴파일하고 실행할 때 ProtocolHandlerDemo 에뮬레이터에서 응용 프로그램을 실행하면 다음 창이 표시됩니다.
이제 버튼을 클릭하면 FirstProtocolHandler 아래와 같이 응용 프로그램.