BabylonJS - Animações
A animação torna a cena mais interativa e também a torna impressionante, dando uma aparência realista a ela. Vamos agora entender a animação em detalhes. Vamos aplicar animação em formas para movê-lo de uma posição para outra. Para usar animação, você precisa criar um objeto na animação com os parâmetros necessários.
Vamos agora ver a sintaxe para o mesmo -
var animationBox = new BABYLON.Animation(
   "myAnimation",
   "scaling.x",
   30,
   BABYLON.Animation.ANIMATIONTYPE_FLOAT,
   BABYLON.Animation.ANIMATIONLOOPMODE_CYCLE
);
Parâmetros
Considere os seguintes parâmetros relacionados a animações com BabylonJS -
Nome da animação.
Propriedade da forma - por exemplo, escala, mudança de posição, etc. A escala é o que é mostrado na sintaxe; aqui, ele escalará a caixa ao longo do eixo x.
Quadros por segundo solicitados: o maior FPS possível nesta animação.
Aqui você decide e insere que tipo de valor será modificado: é um float (por exemplo, uma tradução), um vetor (por exemplo, uma direção) ou um quaternion.
Os valores exatos são -
BABYLON.Animation.ANIMATIONTYPE_FLOAT
BABYLON.Animation.ANIMATIONTYPE_VECTOR2
BABYLON.Animation.ANIMATIONTYPE_VECTOR3
BABYLON.Animation.ANIMATIONTYPE_QUATERNION
BABYLON.Animation.ANIMATIONTYPE_COLOR3
Comportamento para animação - parar ou iniciar a animação novamente.
Use os valores anteriores e aumente-os -
BABYLON.Animation.ANIMATIONLOOPMODE_RELATIVE
Reiniciar do valor inicial -
BABYLON.Animation.ANIMATIONLOOPMODE_CYCLE
Mantenha seu valor final
BABYLON.Animation.ANIMATIONLOOPMODE_CONSTANT
Vamos agora criar o objeto de animação -
var animationBox = new BABYLON.Animation(
   "myAnimation",
   "scaling.x",
   30,
   BABYLON.Animation.ANIMATIONTYPE_FLOAT,
   BABYLON.Animation.ANIMATIONLOOPMODE_CYCLE
);
Demo para animação
<!doctype html>
<html>
   <head>
      <meta charset = "utf-8">
      <title>BabylonJs - Basic Element-Creating Scene</title>
      <script src = "babylon.js"></script>
      <style>
         canvas {width: 100%; height: 100%;}
      </style>
   </head>

   <body>
      <canvas id = "renderCanvas"></canvas>
      <script type = "text/javascript">
         var canvas = document.getElementById("renderCanvas");
         var engine = new BABYLON.Engine(canvas, true);

         var createScene  = function() {
            var scene = new BABYLON.Scene(engine);
            scene.clearColor = new BABYLON.Color3(0, 1, 0);

            var camera = new BABYLON.ArcRotateCamera("Camera", 1, 0.8, 10, new BABYLON.Vector3(0, 0, 0), scene);
            camera.attachControl(canvas, true);

            var light = new BABYLON.HemisphericLight("light1", new BABYLON.Vector3(0, 1, 0), scene);
            light.intensity = 0.7;

            var pl = new BABYLON.PointLight("pl", BABYLON.Vector3.Zero(), scene);
            pl.diffuse = new BABYLON.Color3(1, 1, 1);
            pl.specular = new BABYLON.Color3(1, 1, 1);
            pl.intensity = 0.8;

            var box = BABYLON.Mesh.CreateBox("box", '3', scene);
            box.position = new BABYLON.Vector3(-10,0,0);

            var box1 = BABYLON.Mesh.CreateBox("box1", '3', scene);
            box1.position = new BABYLON.Vector3(0,0,0);

            var animationBox = new BABYLON.Animation("myAnimation", "scaling.x", 30, BABYLON.Animation.ANIMATIONTYPE_FLOAT, BABYLON.Animation.ANIMATIONLOOPMODE_CYCLE);

            var animationBox1 = new BABYLON.Animation("myAnimation1", "scaling.z", 10, BABYLON.Animation.ANIMATIONTYPE_FLOAT, BABYLON.Animation.ANIMATIONLOOPMODE_CYCLE);

            // An array with all animation keys
            var keys = [];

            //At the animation key 0, the value of scaling is "1"
            keys.push({
               frame: 0,
               value: 1
            });

            //At the animation key 20, the value of scaling is "0.2"
            keys.push({
               frame: 20,
               value: 0.2
            });

            keys.push({
               frame: 60,
               value: 0.4
            });

            //At the animation key 100, the value of scaling is "1"
            keys.push({
               frame: 100,
               value: 1
            });

            animationBox.setKeys(keys);
            box.animations = [];
            box.animations.push(animationBox);
            scene.beginAnimation(box, 0, 100, true);

            // An array with all animation keys
            var keys = [];

            //At the animation key 0, the value of scaling is "1"
            keys.push({
               frame: 0,
               value: 1
            });

            //At the animation key 20, the value of scaling is "0.2"
            keys.push({
               frame: 60,
               value: 0.2
            });

            //At the animation key 100, the value of scaling is "1"
            keys.push({
               frame: 100,
               value: 1
            });
            animationBox1.setKeys(keys);
            box1.animations = [];
            box1.animations.push(animationBox1);
            scene.beginAnimation(box1, 0, 100, true);
            return scene;
         };
         var scene = createScene();
         engine.runRenderLoop(function() {
            scene.render();
         });
      </script>
   </body>
</html>
Resultado
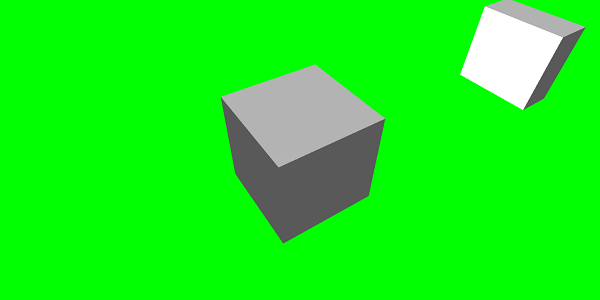
// An array with all animation keys
var keys = [];

//At the animation key 0, the value of scaling is "1"
keys.push({
   frame: 0,
   value: 1
});

//At the animation key 20, the value of scaling is "0.2"
keys.push({
   frame: 20,
   value: 0.2
});

//At the animation key 100, the value of scaling is "1"
keys.push({
   frame: 100,
   value: 1
});

animationBox.setKeys(keys);

box.animations = [];

box.animations.push(animationBox);

scene.beginAnimation(box, 0, 100, true); //defines the start and the end on the target shape box.
A seguir estão as outras funções disponíveis no objeto de animação -
- pause()
- restart()
- stop()
- reset()
Podemos armazenar o beginAnimation referência em uma variável e usa a referência para parar, pausar ou redefinir a animação.
var newAnimation = scene.beginAnimation(box1, 0, 100, true);Por exemplo,
newAnimation.pause();Existem funções disponíveis no objeto de animação para controlar os quadros-chave.
BABYLON.Animation.prototype.floatInterpolateFunction = function (startValue, endValue, gradient) {
   return startValue + (endValue - startValue) * gradient;
};

BABYLON.Animation.prototype.quaternionInterpolateFunction = function (startValue, endValue, gradient) {
   return BABYLON.Quaternion.Slerp(startValue, endValue, gradient);
};

BABYLON.Animation.prototype.vector3InterpolateFunction = function (startValue, endValue, gradient) {
   return BABYLON.Vector3.Lerp(startValue, endValue, gradient);
};
Aqui está a lista de funções que você pode alterar -
- floatInterpolateFunction
- quaternionInterpolateFunction
- quaternionInterpolateFunctionWithTangents
- vector3InterpolateFunction
- vector3InterpolateFunctionWithTangents
- vector2InterpolateFunction
- vector2InterpolateFunctionWithTangents
- sizeInterpolateFunction
- color3InterpolateFunction
- matrixInterpolateFunction
Para criar uma animação rápida, existe uma função disponível que pode ser usada diretamente.
Por exemplo,
Animation.CreateAndStartAnimation = function(name, mesh, tartgetProperty, framePerSecond, totalFrame, from, to, loopMode);Aqui você pode usar apenas 2 frames-chave - start e end.
Demo
<!doctype html>
<html>
   <head>
      <meta charset = "utf-8">
      <title>BabylonJs - Basic Element-Creating Scene</title>
      <script src = "babylon.js"></script>
      <style>
         canvas {width: 100%; height: 100%;}
      </style>
   </head>

   <body>
      <canvas id = "renderCanvas"></canvas>
      <script type = "text/javascript">
         var canvas = document.getElementById("renderCanvas");
         var engine = new BABYLON.Engine(canvas, true);

         var createScene  = function() {
            var scene = new BABYLON.Scene(engine);
            scene.clearColor = new BABYLON.Color3(0, 1, 0);

            var camera = new BABYLON.ArcRotateCamera("Camera", 1, 0.8, 10, new BABYLON.Vector3(0, 0, 0), scene);
            camera.attachControl(canvas, true);

            var light = new BABYLON.HemisphericLight("light1", new BABYLON.Vector3(0, 1, 0), scene);
            light.intensity = 0.7;

            var pl = new BABYLON.PointLight("pl", BABYLON.Vector3.Zero(), scene);
            pl.diffuse = new BABYLON.Color3(1, 1, 1);
            pl.specular = new BABYLON.Color3(1, 1, 1);
            pl.intensity = 0.8;

            var box = BABYLON.Mesh.CreateBox("box", '3', scene);
            box.position = new BABYLON.Vector3(0,0,0);
            BABYLON.Animation.CreateAndStartAnimation('boxscale', box, 'scaling.x', 30, 120, 1.0, 1.5);
            return scene;
         };
         var scene = createScene();
         engine.runRenderLoop(function() {
            scene.render();
         });
      </script>
   </body>
</html>
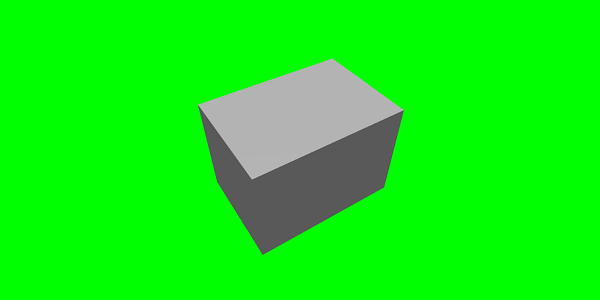
Resultado
Mistura de animação
Você pode obter a combinação da animação com a ajuda de enableBlending = true;
Esta animação combinada mudará do estado atual do objeto.
Funções de atenuação
Para tornar a animação mais impressionante, existem algumas funções de atenuação que já usamos com css anteriormente.
A seguir está uma lista de funções de easing -
BABYLON.CircleEase ()
BABYLON.BackEase (amplitude)
BABYLON.BounceEase (bounces, bounciness)
BABYLON.CubicEase ()
BABYLON.ElasticEase (oscilações, elasticidade)
BABYLON.ExponentialEase (expoente)
BABYLON.PowerEase (poder)
BABYLON.QuadraticEase ()
BABYLON.QuarticEase ()
BABYLON.QuinticEase ()
BABYLON.SineEase ()
Demo
<!doctype html>
<html>
   <head>
      <meta charset = "utf-8">
      <title>BabylonJs - Basic Element-Creating Scene</title>
      <script src = "babylon.js"></script>
      <style>
         canvas {width: 100%; height: 100%;}
      </style>
   </head>

   <body>
      <canvas id = "renderCanvas"></canvas>
      <script type = "text/javascript">
         var canvas = document.getElementById("renderCanvas");
         var engine = new BABYLON.Engine(canvas, true);
         var createScene  = function() {
            var scene = new BABYLON.Scene(engine);
            scene.clearColor = new BABYLON.Color3(0, 1, 0);

            var camera = new BABYLON.ArcRotateCamera("Camera", 1, 0.8, 10, new BABYLON.Vector3(0, 0, 0), scene);
            camera.attachControl(canvas, true);

            var light = new BABYLON.HemisphericLight("light1", new BABYLON.Vector3(0, 1, 0), scene);
            light.intensity = 0.7;

            var pl = new BABYLON.PointLight("pl", BABYLON.Vector3.Zero(), scene);
            pl.diffuse = new BABYLON.Color3(1, 1, 1);
            pl.specular = new BABYLON.Color3(1, 1, 1);
            pl.intensity = 0.8;

            var box1 = BABYLON.Mesh.CreateTorus("torus", 5, 1, 10, scene, false);
            box1.position = new BABYLON.Vector3(0,0,0);

            var animationBox1 = new BABYLON.Animation("myAnimation1", "scaling.z", 10, BABYLON.Animation.ANIMATIONTYPE_FLOAT, BABYLON.Animation.ANIMATIONLOOPMODE_CYCLE);

            // An array with all animation keys
            var keys = [];

            //At the animation key 0, the value of scaling is "1"
            keys.push({
               frame: 0,
               value: 1
            });

            //At the animation key 20, the value of scaling is "0.2"
            keys.push({
               frame: 60,
               value: 0.2
            });

            //At the animation key 100, the value of scaling is "1"
            keys.push({
               frame: 100,
               value: 1
            });

            animationBox1.setKeys(keys);
            box1.animations = [];
            // box1.animations.push(animationBox1);

            var easingFunction = new BABYLON.QuarticEase();
            easingFunction.setEasingMode(BABYLON.EasingFunction.EASINGMODE_EASEINOUT);

            animationBox1.setEasingFunction(easingFunction);
            box1.animations.push(animationBox1);
            scene.beginAnimation(box1, 0, 100, true);
            return scene;
         };
         var scene = createScene();
         engine.runRenderLoop(function() {
            scene.render();
         });
      </script>
   </body>
</html>
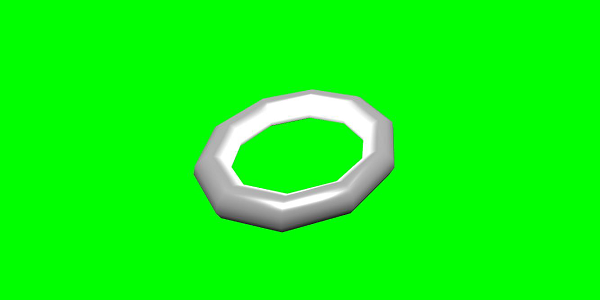
Resultado
Evento de Animação
Você pode realizar qualquer coisa necessária no evento de animação. Se você quiser mudar alguma coisa quando o quadro for alterado ou quando a animação for concluída, isso pode ser feito adicionando eventos à animação.
var event1 = new BABYLON.AnimationEvent(50, function() { console.log("Yeah!"); }, true);
// You will get hte console.log when the frame is changed to 50 using animation.

animation.addEvent(event1); //attaching event to the animation.
BabylonJS - Sprites
A que os sprites se referem na computação gráfica? É basicamente um bitmap bidimensional integrado em uma cena maior. Quando várias imagens menores são combinadas em um único bitmap para economizar memória, a imagem resultante é chamada de folha de sprite. Vamos começar com sprites e como usá-los.
O primeiro passo para começar a trabalhar com sprites é criar um gerenciador de sprites.
var spriteManagerTrees = new BABYLON.SpriteManager("treesManagr", "Assets/Palm-arecaceae.png", 2000, 800, scene);Considere os seguintes parâmetros para criar o gerenciador de sprite -
Name - O nome deste gerente.
URL - O url da imagem a ser usado.
Capacity of manager - O número máximo de instâncias neste gerenciador. Por exemplo, a instância acima criará 2.000 árvores.
Cell size - O tamanho obtido pela imagem.
Scene - A cena à qual o gerente será adicionado.
var spriteManagerPlayer = new BABYLON.SpriteManager("playerManagr","Assets/Player.png", 2, 64, scene);Dê uma olhada no objeto acima. Nós fornecemos uma imagem de jogador e agora estamos criando 2 instâncias dela. O tamanho da imagem é 64. Cada imagem de um sprite deve estar contida em um quadrado de 64 pixels, nem mais nem menos.
Vamos agora criar uma instância do mesmo vinculado ao gerenciador de sprites.
var player = new BABYLON.Sprite("player", spriteManagerPlayer);Você pode brincar com este objeto do jogador como qualquer outra forma ou malha. Você pode atribuir posição, tamanho, ângulo, etc.
player.size = 0.3;
player.angle = Math.PI/4;
player.invertU = -1;
player.width = 0.3;
player.height = 0.4;
Demo
<!doctype html>
<html>
   <head>
      <meta charset = "utf-8">
      <title>BabylonJs - Basic Element-Creating Scene</title>
      <script src = "babylon.js"></script>
      <style>
         canvas {width: 100%; height: 100%;}
      </style>
   </head>

   <body>
      <canvas id = "renderCanvas"></canvas>
      <script type = "text/javascript">
         var canvas = document.getElementById("renderCanvas");
         var engine = new BABYLON.Engine(canvas, true);
         var createScene  = function() {
            var scene = new BABYLON.Scene(engine);
            //scene.clearColor = new BABYLON.Color3(0, 1, 0);
            // Create camera and light
            var light = new BABYLON.PointLight("Point", new BABYLON.Vector3(5, 10, 5), scene);

            var camera = new BABYLON.ArcRotateCamera("Camera", 1, 0.8, 8, new BABYLON.Vector3(0, 0, 0), scene);
            camera.attachControl(canvas, true);

            var spriteManagerTrees = new BABYLON.SpriteManager("trees", "images/tree.png", 1000, 400, scene);

            for (var i = 0; i < 1000; i++) {
               var tree = new BABYLON.Sprite("tree", spriteManagerTrees);
               tree.position.x = Math.random() * 100 - 50;
               tree.position.z = Math.random() * 100 - 50;
               tree.isPickable = true;

               //Some "dead" trees
               if (Math.round(Math.random() * 5) === 0) {
                  tree.angle = Math.PI * 90 / 180;
                  tree.position.y = -0.3;
               }
            }

            var spriteManagerTrees1 = new BABYLON.SpriteManager("trees1", "images/tree1.png", 1000,400, scene);

            for (var i = 0; i < 1000; i++) {
               var tree1 = new BABYLON.Sprite("tree1", spriteManagerTrees1);
               if (i %2 == 0) {
               tree1.position.x = Math.random() * 100 - 50;
               } else {
                  tree1.position.z = Math.random() * 100 - 50;
               }
               tree1.isPickable = true;
            }

            spriteManagerTrees.isPickable = true;
            spriteManagerTrees1.isPickable = true;

            var spriteManagerPlayer = new BABYLON.SpriteManager("playerManager", "images/bird.png", 2, 200, scene);

            var player = new BABYLON.Sprite("player", spriteManagerPlayer);
            player.position.x = 2;
            player.position.y = 2;
            player.position.z = 0;


            var spriteManagerPlayer1 = new BABYLON.SpriteManager("playerManager1", "images/bird.png", 2, 200, scene);

            var player1 = new BABYLON.Sprite("player", spriteManagerPlayer1);
            player1.position.x = 1;
            player1.position.y = 2;
            player1.position.z = 0;

            var spriteManagerPlayer2 = new BABYLON.SpriteManager("playerManager2", "images/bird.png", 2, 200, scene);

            var player2 = new BABYLON.Sprite("player", spriteManagerPlayer2);
            player2.position.x = 0;
            player2.position.y = 1;
            player2.position.z = 0;

            scene.onPointerDown = function (evt) {
               var pickResult = scene.pickSprite(this.pointerX, this.pointerY);
               if (pickResult.hit) {
                  pickResult.pickedSprite.angle += 1;
               }
            };
            return scene;
         };
         var scene = createScene();
         engine.runRenderLoop(function() {
            scene.render();
         });
      </script>
   </body>
</html>
Resultado
Nesta demonstração, usamos uma imagem chamada tree.png, tree1.png para mostrar árvores, bird.png para mostrar o pássaro na cena. Essas imagens são armazenadas em imagens / pasta localmente e também são coladas abaixo para referência. Você pode baixar qualquer imagem de sua escolha e usar no link de demonstração.
As imagens usadas para Tree são mostradas abaixo.
images/tree.png

images/tree1.png

images/bird.png

Vamos agora ver mais uma demonstração com balões de sprites.
Demonstração com sprites-balões
<!doctype html>
<html>
   <head>
      <meta charset = "utf-8">
      <title>BabylonJs - Basic Element-Creating Scene</title>
      <script src = "babylon.js"></script>
      <style>
         canvas {width: 100%; height:100%;}
      </style>
   </head>

   <body>
      <canvas id = "renderCanvas"></canvas>
      <script type = "text/javascript">
         var canvas = document.getElementById("renderCanvas");
         var engine = new BABYLON.Engine(canvas, true);

         var createScene  = function() {
            var scene = new BABYLON.Scene(engine);

            var light = new BABYLON.PointLight("Point", new BABYLON.Vector3(5, 10, 5), scene);

            var camera = new BABYLON.ArcRotateCamera("Camera", -3.4, 1.0, 82, new BABYLON.Vector3(0, -15, 0), scene);
            camera.setPosition(new BABYLON.Vector3(30, 0,100));
            camera.attachControl(canvas, true);

            var spriteManagerTrees = new BABYLON.SpriteManager("trees", "images/balloon.png", 50, 450, scene);

            var treearray = [];
            for (var i = 0; i < 50; i++) {
               var tree = new BABYLON.Sprite("tree", spriteManagerTrees);
               tree.position.x = Math.random() * 100 - 10;
               tree.position.z = Math.random() * 100 - 10;
               tree.position.y = -35;
               tree.isPickable = true;
               treearray.push(tree);
            }

            spriteManagerTrees.isPickable = true;
            scene.onPointerDown = function (evt) {
               var pickResult = scene.pickSprite(this.pointerX, this.pointerY);
               if (pickResult.hit) {
                  pickResult.pickedSprite.position.y = -3000;
               }
            };

            k = -35;
            var animate = function() {
               if (k > 3) return;
               k += 0.05;
               for (var i = 0; i < treearray.length; i++) {
                  treearray[i].position.y = k;
               }
            };
            scene.registerBeforeRender(animate);
            return scene;
         };
         var scene = createScene();
         engine.runRenderLoop(function() {
            scene.render();
         });
      </script>
   </body>
</html>
Resultado
Nesta demonstração, usamos uma imagem chamada ballon.png. As imagens são armazenadas em imagens / pasta localmente e também são coladas abaixo para referência. Você pode baixar qualquer imagem de sua escolha e usar no link de demonstração.
images/balloon.png
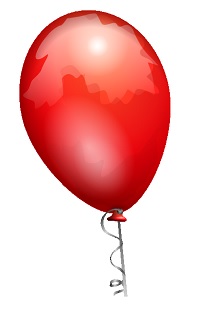
Balões vão subir no céu e assim que pararem, você pode clicar neles e eles vão desaparecer. Isso é feito usando a função pickSprite que fornece detalhes quando clicada no sprite criado.
A função onPointerDown é chamada quando a ação do mouse ocorre e a posição do sprite é alterada.
var animate = function() {
   if (k > 3) return;
   k += 0.05;
   for (var i = 0; i < treearray.length; i++) {
      treearray[i].position.y = k;
   }
};
scene.registerBeforeRender(animate);
A função animate é chamada em registerBeforeRender, que se encarrega de mover os balões do -35 inicial para +3. Ele é movido lentamente, incrementando-o em 0,05.
BabylonJS - Partículas
Um sistema de partículas é uma técnica em computação gráfica que faz uso de um grande número de sprites muito pequenos, modelos 3D ou outros objetos gráficos para simular certos tipos de fenômenos "difusos", que de outra forma são muito difíceis de reproduzir com técnicas de renderização convencionais.
Para criar um sistema de partículas, você deve chamar a classe da seguinte maneira -
var particleSystem = new BABYLON.ParticleSystem("particles", 2000, scene);//2000 refers to the total number of particles to be produced.As seguintes propriedades precisam ser consideradas para o sistema de partículas -
particleSystem.particleTexture = new BABYLON.Texture("Flare.png", scene);
particleSystem.textureMask = new BABYLON.Color4(0.1, 0.8, 0.8, 1.0);
particleSystem.emitter = fountain
particleSystem.color1 = new BABYLON.Color4(0.7, 0.8, 1.0, 1.0);
particleSystem.color2 = new BABYLON.Color4(0.2, 0.5, 1.0, 1.0);
particleSystem.colorDead = new BABYLON.Color4(0, 0, 0.2, 0.0);
A propriedade emissor obtém a malha da qual a partícula deve ser emitida. ocolor1 e color2 são as cores das partículas.
ColorDead é a cor aplicada à partícula pouco antes de ela desaparecer da cena, portanto chamada de colorDead.
particleSystem.minSize = 0.1;
particleSystem.maxSize = 0.5;
particleSystem.minLifeTime = 0.3;
particleSystem.maxLifeTime = 1.5;
MinSize e maxSize é o tamanho dado às partículas. MinlifeTime e maxLifeTime é o tempo de vida dado às partículas.
particleSystem.emitRate = 1500;O emitRate é a taxa na qual as partículas serão emitidas.
Usamos o toro na demonstração abaixo. Usamos o sistema de partículas e suas propriedades para obter todas as partículas ao redor do toro.
Demo 1
<!doctype html>
<html>
   <head>
      <meta charset = "utf-8">
      <title>BabylonJs - Basic Element-Creating Scene</title>
      <script src = "babylon.js"></script>
      <style>
         canvas {width: 100%; height: 100%;}
      </style>
   </head>

   <body>
      <canvas id = "renderCanvas"></canvas>
      <script type = "text/javascript">
         var canvas = document.getElementById("renderCanvas");
         var engine = new BABYLON.Engine(canvas, true);
         var createScene  = function() {
            var scene = new BABYLON.Scene(engine);
            // Setup environment

            var light0 = new BABYLON.PointLight("Omni", new BABYLON.Vector3(0, 2, 8), scene);

            var camera = new BABYLON.ArcRotateCamera("ArcRotateCamera", 1, 0.8, 20, new BABYLON.Vector3(0, 0, 0), scene);
            camera.attachControl(canvas, true);

            var fountain = BABYLON.Mesh.CreateTorus("torus", 2, 1, 8, scene, false);

            var particleSystem = new BABYLON.ParticleSystem("particles", 2000, scene);
            particleSystem.particleTexture = new BABYLON.Texture("images/dot.jpg", scene);

            particleSystem.textureMask = new BABYLON.Color4(0.1, 0.8, 0.8, 1.0);
            particleSystem.emitter = fountain;


            particleSystem.minEmitBox = new BABYLON.Vector3(-1, 0, 0); // Starting all from
            particleSystem.maxEmitBox = new BABYLON.Vector3(1, 0, 0); // To...

            particleSystem.color1 = new BABYLON.Color4(0.7, 0.8, 1.0, 1.0);
            particleSystem.color2 = new BABYLON.Color4(0.2, 0.5, 1.0, 1.0);
            particleSystem.colorDead = new BABYLON.Color4(0, 0, 0.2, 0.0);

            particleSystem.minSize = 0.1;
            particleSystem.maxSize = 0.5;

            particleSystem.minLifeTime = 0.3;
            particleSystem.maxLifeTime = 1.5;

            particleSystem.emitRate = 1500;

            particleSystem.blendMode = BABYLON.ParticleSystem.BLENDMODE_ONEONE;

            particleSystem.gravity = new BABYLON.Vector3(0, -9.81, 0);

            particleSystem.direction1 = new BABYLON.Vector3(-7, 8, 3);
            particleSystem.direction2 = new BABYLON.Vector3(7, 8, -3);


            particleSystem.minAngularSpeed = 0;
            particleSystem.maxAngularSpeed = Math.PI;

            particleSystem.minEmitPower = 1;
            particleSystem.maxEmitPower = 3;
            particleSystem.updateSpeed = 0.005;

            particleSystem.start();
            var keys = [];
            var animation = new BABYLON.Animation("animation", "rotation.x", 30, BABYLON.Animation.ANIMATIONTYPE_FLOAT,
                                   BABYLON.Animation.ANIMATIONLOOPMODE_CYCLE);

            // At the animation key 0, the value of scaling is "1"
            keys.push({
               frame: 0,
               value: 0
            });

            // At the animation key 50, the value of scaling is "0.2"
            keys.push({
               frame: 50,
               value: Math.PI
            });

            // At the animation key 100, the value of scaling is "1"
            keys.push({
               frame: 100,
               value: 0
            });

            // Launch animation
            animation.setKeys(keys);
            fountain.animations.push(animation);
            scene.beginAnimation(fountain, 0, 100, true);
            return scene;
         }
         var scene = createScene();
         engine.runRenderLoop(function() {
            scene.render();
         });
      </script>
   </body>
</html>
Resultado
A linha de código acima gera a seguinte saída -
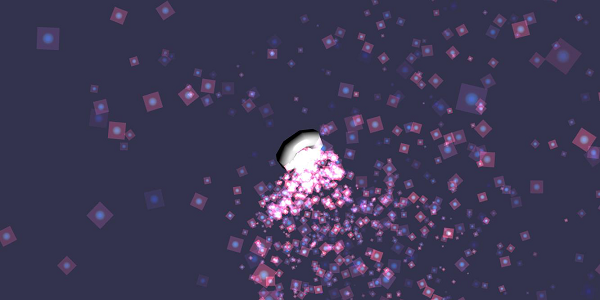
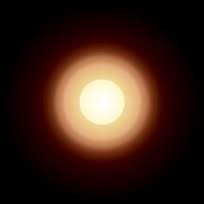
Nesta demonstração, usamos uma imagem chamada dot.jpg. As imagens são armazenadas em imagens / pasta localmente e também são coladas abaixo para referência. Você pode baixar qualquer imagem de sua escolha e usar no link de demonstração.
A seguir está a imagem usada para textura de partícula: images/dot.jpg
Demo 2
<!doctype html>
<html>
   <head>
      <meta charset = "utf-8">
      <title>BabylonJs - Ball/Ground Demo</title>
      <script src = "babylon.js"></script>
      <style>
         canvas {width: 100%; height: 100%;}
      </style>
   </head>

   <body>
      <canvas id = "renderCanvas"></canvas>
      <script type = "text/javascript">
         var canvas = document.getElementById("renderCanvas");
         var engine = new BABYLON.Engine(canvas, true);

         var createScene  = function() {
            var scene = new BABYLON.Scene(engine);
            scene.clearColor = new BABYLON.Color3( .5, .5, .5);

            var camera = new BABYLON.ArcRotateCamera("camera1",  0, 0, 0, new BABYLON.Vector3(0, 0, -0), scene);
            camera.setPosition(new BABYLON.Vector3(-100, 0,-100));
            camera.attachControl(canvas, true);

            var light = new BABYLON.HemisphericLight("light1", new BABYLON.Vector3(1, 0.5, 0), scene);
            var pl = new BABYLON.PointLight("pl", new BABYLON.Vector3(0, 0, 0), scene);

            var gmat = new BABYLON.StandardMaterial("mat1", scene);
            gmat.alpha = 1.0;

            var ground =  BABYLON.Mesh.CreateGround("ground", 100, 100, 20, scene);
            ground.material = gmat;
            gmat.wireframe = true;

            var particleSystem = new BABYLON.ParticleSystem("particles", 2000, scene);
            particleSystem.particleTexture = new BABYLON.Texture("images/dot.jpg", scene);

            particleSystem.textureMask = new BABYLON.Color4(0.1, 0.8, 0.8, 1.0);
            particleSystem.emitter = ground;

            particleSystem.minEmitBox = new BABYLON.Vector3(-1, 0, 0); // Starting all from
            particleSystem.maxEmitBox = new BABYLON.Vector3(1, 0, 0); // To...

            particleSystem.color1 = new BABYLON.Color4(0.7, 0.8, 1.0, 1.0);
            particleSystem.color2 = new BABYLON.Color4(0.2, 0.5, 1.0, 1.0);
            particleSystem.colorDead = new BABYLON.Color4(0, 0, 0.2, 0.0);

            particleSystem.minSize = 0.1;
            particleSystem.maxSize = 0.5;

            particleSystem.minLifeTime = 0.3;
            particleSystem.maxLifeTime = 1.5;

            particleSystem.emitRate = 1500;

            particleSystem.blendMode = BABYLON.ParticleSystem.BLENDMODE_ONEONE;

            particleSystem.gravity = new BABYLON.Vector3(0, -9.81, 0);

            particleSystem.direction1 = new BABYLON.Vector3(-7, 8, 3);
            particleSystem.direction2 = new BABYLON.Vector3(7, 8, -3);

            particleSystem.minAngularSpeed = 0;
            particleSystem.maxAngularSpeed = Math.PI;

            particleSystem.minEmitPower = 1;
            particleSystem.maxEmitPower = 3;
            particleSystem.updateSpeed = 0.005;

            particleSystem.start();


            var keys = [];
            var animation = new BABYLON.Animation("animation", "rotation.x", 30, BABYLON.Animation.ANIMATIONTYPE_FLOAT,
                           BABYLON.Animation.ANIMATIONLOOPMODE_CYCLE);

            // At the animation key 0, the value of scaling is "1"
            keys.push({
               frame: 0,
               value: 0
            });

            // At the animation key 50, the value of scaling is "0.2"
            keys.push({
               frame: 50,
               value: Math.PI
            });

            // At the animation key 100, the value of scaling is "1"
            keys.push({
               frame: 100,
               value: 0
            });

            // Launch animation
            animation.setKeys(keys);
            ground.animations.push(animation);

            //scene.beginAnimation(ground, 0, 100, true);
            return scene;
         };
         var scene = createScene();
         engine.runRenderLoop(function() {
            scene.render();
         });
      </script>
   </body>
</html>
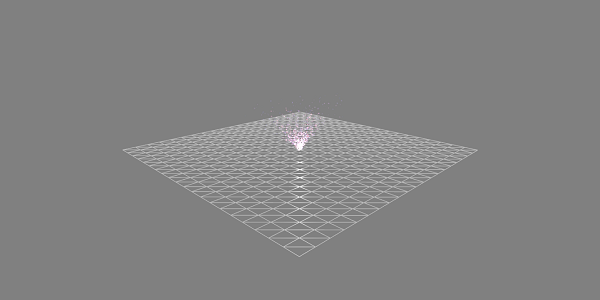
Resultado
Demonstração com Animação
<!doctype html>
<html>
   <head>
      <meta charset = "utf-8">
      <title>BabylonJs - Ball/Ground Demo</title>
      <script src = "babylon.js"></script>
      <style>
         canvas {width: 100%; height: 100%;}
      </style>
   </head>

   <body>
      <canvas id = "renderCanvas"></canvas>
      <script type = "text/javascript">
         var canvas = document.getElementById("renderCanvas");
         var engine = new BABYLON.Engine(canvas, true);

         var createScene  = function() {
            var scene = new BABYLON.Scene(engine);
            scene.clearColor = new BABYLON.Color3( .5, .5, .5);

            var camera = new BABYLON.ArcRotateCamera("camera1",  0, 0, 0, new BABYLON.Vector3(0, 0, -0), scene);
            camera.setPosition(new BABYLON.Vector3(-100, 0, -100));
            camera.attachControl(canvas, true);

            var light = new BABYLON.HemisphericLight("light1", new BABYLON.Vector3(1, 0.5, 0), scene);
            var pl = new BABYLON.PointLight("pl", new BABYLON.Vector3(0, 0, 0), scene);

            var gmat = new BABYLON.StandardMaterial("mat1", scene);
            gmat.alpha = 1.0;

            var ground =  BABYLON.Mesh.CreateGround("ground", 100, 100, 20, scene);
            ground.material = gmat;
            gmat.wireframe = true;

            var particleSystem = new BABYLON.ParticleSystem("particles", 2000, scene);
            particleSystem.particleTexture = new BABYLON.Texture("images/dot.jpg", scene);

            particleSystem.textureMask = new BABYLON.Color4(0.1, 0.8, 0.8, 1.0);
            particleSystem.emitter = ground;

            particleSystem.minEmitBox = new BABYLON.Vector3(-1, 0, 0); // Starting all from
            particleSystem.maxEmitBox = new BABYLON.Vector3(1, 0, 0); // To...

            particleSystem.color1 = new BABYLON.Color4(0.7, 0.8, 1.0, 1.0);
            particleSystem.color2 = new BABYLON.Color4(0.2, 0.5, 1.0, 1.0);
            particleSystem.colorDead = new BABYLON.Color4(0, 0, 0.2, 0.0);

            particleSystem.minSize = 0.1;
            particleSystem.maxSize = 0.5;

            particleSystem.minLifeTime = 0.3;
            particleSystem.maxLifeTime = 1.5;

            particleSystem.emitRate = 1500;

            particleSystem.blendMode = BABYLON.ParticleSystem.BLENDMODE_ONEONE;

            particleSystem.gravity = new BABYLON.Vector3(0, -9.81, 0);//gravity for the particle.

            particleSystem.direction1 = new BABYLON.Vector3(-7, 8, 3);
            particleSystem.direction2 = new BABYLON.Vector3(7, 8, -3);

            //random direction for the particles on the scene
            particleSystem.minAngularSpeed = 0;
            particleSystem.maxAngularSpeed = Math.PI;
            particleSystem.minEmitPower = 1;
            particleSystem.maxEmitPower = 3;
            particleSystem.updateSpeed = 0.005;

            particleSystem.start();

            var keys = [];
            var animation = new BABYLON.Animation("animation", "rotation.x", 30, BABYLON.Animation.ANIMATIONTYPE_FLOAT,
                           BABYLON.Animation.ANIMATIONLOOPMODE_CYCLE);

            // At the animation key 0, the value of scaling is "1"
            keys.push({
               frame: 0,
               value: 0
            });

            // At the animation key 50, the value of scaling is "0.2"
            keys.push({
               frame: 50,
               value: Math.PI
            });

            // At the animation key 100, the value of scaling is "1"
            keys.push({
               frame: 100,
               value: 0
            });

            // Launch animation
            animation.setKeys(keys);
            ground.animations.push(animation);
            scene.beginAnimation(ground, 0, 100, true);
            return scene;
         };
         var scene = createScene();
         engine.runRenderLoop(function() {
            scene.render();
         });
      </script>
   </body>
</html>
Resultado
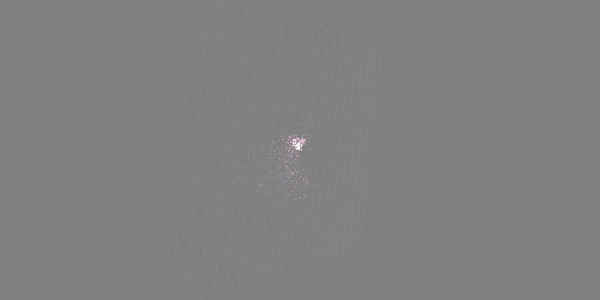
A linha de código acima gera a seguinte saída -
Explicação
A demonstração acima mostra um terreno com material wireframe e o sistema de partículas é produzido a partir do centro.