Google AMP - wiązanie danych
Amp-bind pomaga dodać interaktywność do komponentów amp i znaczników HTML w oparciu o akcję używającą wiązania danych i wyrażeń podobnych do JS. W tym rozdziale szczegółowo omówiono powiązanie danych.
Aby pracować z amp-bind, musimy dodać następujący skrypt do naszej strony -
<script async custom-element = "amp-bind"
   src = "https://cdn.ampproject.org/v0/amp-bind-0.1.js">
</script>
Zrozummy to w pełni na przykładzie roboczym, jak pokazano -
Przykład
<!doctype html>
<html amp lang = "en">
<head>
<meta charset = "utf-8">
<script async src = "https://cdn.ampproject.org/v0.js"></script>
<title>Google AMP - Amp Bind</title>
<link rel = "canonical" href =
"http://example.ampproject.org/article-metadata.html">
<meta name = "viewport" content = "width = device-width,
minimum-scale = 1,initial-scale = 1">
<style amp-boilerplate>
body{
-webkit-animation:
-amp-start 8s steps(1,end) 0s 1 normal both;-moz-animation:
-amp-start 8s steps(1,end) 0s 1 normal both;-ms-animation:
-amp-start 8s steps(1,end) 0s 1 normal both;animation:
-amp-start 8s steps(1,end) 0s 1 normal both
}
@-webkit-keyframes
-amp-start{from{visibility:hidden}to{visibility:visible}}@-moz-keyframes
-amp-start{from{visibility:hidden}to{visibility:visible}}@-ms-keyframes
-amp-start{from{visibility:hidden}to{visibility:visible}}@-o-keyframes
-amp-start{from{visibility:hidden}to{visibility:visible}}@keyframes
-amp-start{from{visibility:hidden}to{visibility:visible}}
</style>
<noscript>
<style amp-boilerplate>
body{
-webkit-animation:none;
-moz-animation:none;
-ms-animation:none;
animation:none
}
</style>
</noscript>
<script async custom-element = "amp-bind"
src = "https://cdn.ampproject.org/v0/amp-bind-0.1.js"></script>
<style amp-custom>
button{
background-color: #ACAD5C;
color: white;
padding: 12px 20px;
border: none;
border-radius: 4px;
}
</style>
</head>
<body>
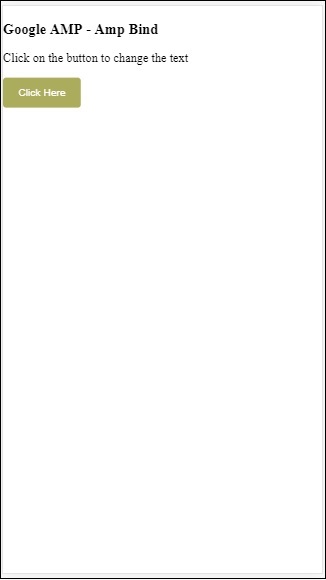
<h3>Google AMP - Amp Bind</h3>
<p [text] = "'Hello ' + world + '.'">
Click on the button to change the text
</p>
<button on = "tap:AMP.setState({world: 'This is amp-bind example'})">
Click Here
</button>
</body>
</html>Wynik
Kliknij przycisk, aby zobaczyć zmianę tekstu, jak pokazano poniżej -
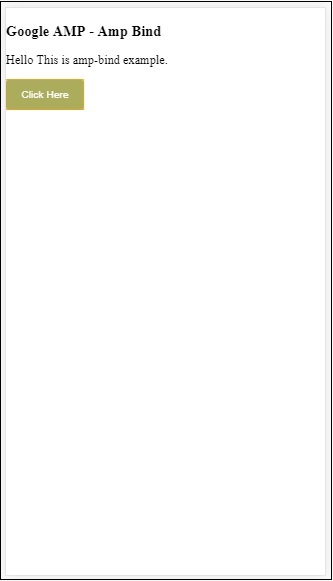
Dlatego w powyższym przykładzie użyliśmy amp-bind do zmiany tekstu po kliknięciu przycisku.
Amp-bind ma trzy składniki -
State- Początkowo stan jest pusty. Po kliknięciu przycisku stan zostanie zmieniony. Na przykład,
<button on = "tap:AMP.setState({world: 'This is amp-bind example'})">
   Click Here
</button>
Do zmiany stanu służy metoda AMP.setState. Zmiennaworld ma przypisaną wartość This is amp-bind example. Zmiennaworld jest używany wewnątrz tagu html -
<p [text] = "'Hello ' + world + '.'">
   Click on the button to change the text
</p>
Po kliknięciu przycisku światu zostaje przypisana nowa wartość: To jest przykład amp-bind.
Możemy również użyć stanu wzmacniacza z wiązaniem, jak pokazano poniżej -
<amp-state id = "myState">
   <script type = "application/json">
      {
         "foo": "bar"
      }
   </script>
</amp-state>
Wyrażenie zostanie przypisane bmyState.foo podczas wiązania.
Expressions - Wyrażenia dla amp-bind to work są podane w następujący sposób -
'Hello ' + worldworld mówi się, że jest state variable.
Bindings- Wiązania są stosowane do atrybutów specjalnych w postaci [atrybuty]. Na przykład -
<p [text] = "'Hello ' + world + '.'">
   Click on the button to change the text
</p>
W powyższym przykładzie [text] ma wyrażenie, które jest używane do wiązania pliku p etykietka.
Możemy użyć następującego atrybutu dla powiązań -
- [text]
- [class]
- [hidden]
- [width]
- [height]
Wiązania można również wykonać na komponentach wzmacniacza i dozwolone są tylko określone atrybuty. Poniższa lista przedstawia komponenty i atrybuty suh -
| Sr.No | Komponent wzmacniacza | Atrybuty i opis |
|---|---|---|
| 1 | <amp-carousel type = slides> | [slide]* Zmień slajd przy użyciu tego zachowania powiązania |
| 2 | <amp-date-picker> | [min] min -> Ustawia najwcześniejszą możliwą do wybrania datę [max]max -> Ustawia ostatnią wybraną datę |
| 3 | <amp-iframe> | [src] Zmień źródło iframe |
| 4 | <amp-img> | [alt] [attribution] [src] [srcset] Możemy zmienić alt, atrybucję, src i srcset.Jeśli src zostanie zmienione, zmień srcset tak, jak jest używane do buforowania |
| 5 | <amp-lightbox> | [open]* Możesz pokazać / ukryć lightbox, wiążąc, aby otworzyć |
| 6 | <amp-list> | [src] Jeśli wyrażenie jest ciągiem, pobiera i renderuje JSON z adresu URL ciągu. Jeśli wyrażenie jest obiektem lub tablicą, renderuje dane wyrażenia. |
| 7 | <selektor-amp> | [selected]* [disabled] Zmienia aktualnie wybrane elementy potomne identyfikowane przez ich wartości atrybutów opcji. Obsługuje listę wartości oddzielonych przecinkami dla wielokrotnego wyboru |
Wiązanie przy użyciu stanu Amp
Możemy zdefiniować stan amp ze wszystkimi danymi, których chcielibyśmy użyć w elemencie html lub komponencie amp.
Dane używane w stanie amp muszą być w formacie json, jak pokazano poniżej -
<amp-state id = "myCarsList">
   <script type = "application/json">
      {
         "currentcar" : "bmw",
         "audi": {
            "imageUrl": "images/audi.jpg"
         },
         "bmw": {
            "imageUrl": "images/bmw.jpg"
         }
      }
   </script>
</amp-state>
W ten sposób zdefiniowaliśmy pary klucz-wartość z nazwą samochodu i obrazem samochodu.
Amp-bind na tekście i Amp-Image
Działający przykład wykorzystujący stan wzmacniacza z wiązaniem wzmacniacza pokazano poniżej -
<!doctype html>
<html amp lang = "en">
<head>
<meta charset = "utf-8">
<script async src = "https://cdn.ampproject.org/v0.js"></script>
<title>Google AMP - Amp Bind</title>
<link rel = "canonical" href =
"http://example.ampproject.org/article-metadata.html">
<meta name = "viewport" content = "width = device-width,
minimum-scale = 1,initial-scale = 1">
<style amp-boilerplate>
body{
-webkit-animation:
-amp-start 8s steps(1,end) 0s 1 normal both;-moz-animation:
-amp-start 8s steps(1,end) 0s 1 normal both;-ms-animation:
-amp-start 8s steps(1,end) 0s 1 normal both;animation:
-amp-start 8s steps(1,end) 0s 1 normal both
}
@-webkit-keyframes
-amp-start{from{visibility:hidden}to{visibility:visible}}@-moz-keyframes
-amp-start{from{visibility:hidden}to{visibility:visible}}@-ms-keyframes
-amp-start{from{visibility:hidden}to{visibility:visible}}@-o-keyframes
-amp-start{from{visibility:hidden}to{visibility:visible}}@keyframes
-amp-start{from{visibility:hidden}to{visibility:visible}
}
</style>
<noscript>
<style amp-boilerplate>
body{
-webkit-animation:none;
-moz-animation:none;
-ms-animation:none;
animation:none
}
</style>
</noscript>
<script async custom-element = "amp-bind" src =
"https://cdn.ampproject.org/v0/amp-bind-0.1.js"></script>
<style amp-custom>
button{
background-color: #ACAD5C;
color: white;
padding: 12px 20px;
border: none;
border-radius: 4px;
cursor: pointer;
float: left;
}
</style>
</head>
<body>
<h3>Google AMP - Amp Bind</h3>
<amp-state id = "myCarsList">
<script type = "application/json">
{
"currentcar" : "bmw",
"audi": {
"imageUrl": "images/audi.jpg",
"style": "greenBackground"
},
"bmw": {
"imageUrl": "images/bmw.jpg",
"style": "redBackground"
}
}
</script>
</amp-state>
<amp-img
width = "300"
height = "200"
src = "images/bmw.jpg"
[src] = "myCarsList[currentcar].imageUrl">
</amp-img>
<p [text] = "'This is a ' + currentcar + '.'">
This is a BMW.
</p>
<br/>
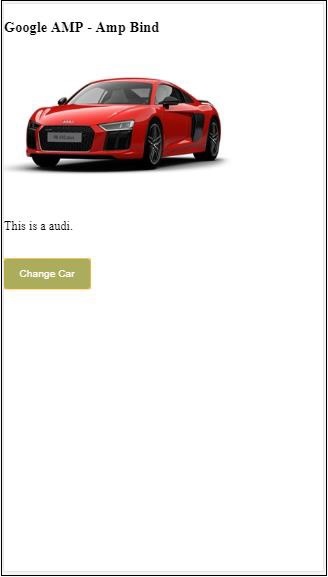
<button on = "tap:AMP.setState({currentcar: 'audi'})">
Change Car
</button>
</body>
</html>Wynik
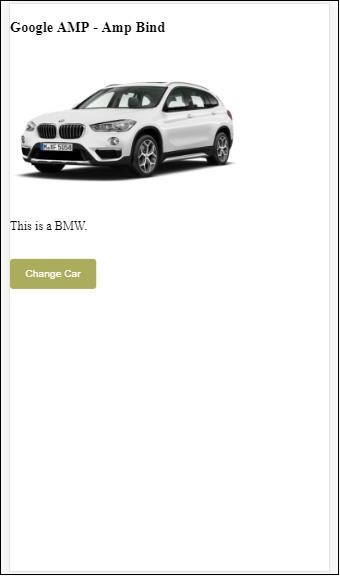
Kliknij przycisk, aby zobaczyć zdjęcie zmieniającego się samochodu oraz tekst poniżej.
Amp-bind na wideo i ramce IFrame
Zobaczymy teraz działający przykład, który zmieni amp-iframe i amp-video src.
<!doctype html>
<html amp lang = "en">
   <head>
      <meta charset = "utf-8">
      <script async src = "https://cdn.ampproject.org/v0.js"></script>
      <title>Google AMP - Amp Bind</title>
      <link rel = "canonical" href =
         "http://example.ampproject.org/article-metadata.html">
      <meta name = "viewport" content = "width = device-width,
         minimum-scale = 1,initial-scale = 1">
      <style amp-boilerplate>
         body{
            -webkit-animation:
            -amp-start 8s steps(1,end) 0s 1 normal both;-moz-animation:
            -amp-start 8s steps(1,end) 0s 1 normal both;-ms-animation:
            -amp-start 8s steps(1,end) 0s 1 normal both;animation:
            -amp-start 8s steps(1,end) 0s 1 normal both
         }
         @-webkit-keyframes
         -amp-start{from{visibility:hidden}to{visibility:visible}}@-moz-keyframes
         -amp-start{from{visibility:hidden}to{visibility:visible}}@-ms-keyframes
         -amp-start{from{visibility:hidden}to{visibility:visible}}@-o-keyframes
         -amp-start{from{visibility:hidden}to{visibility:visible}}@keyframes
         -amp-start{from{visibility:hidden}to{visibility:visible}}
      </style>
      <noscript>
         <style amp-boilerplate>
            body{
               -webkit-animation:none;
               -moz-animation:none;
               -ms-animation:none;
               animation:none
            }
         </style>
      </noscript>
      <script async custom-element = "amp-bind" src =
         "https://cdn.ampproject.org/v0/amp-bind-0.1.js"></script>
      <script async custom-element = "amp-video" src =
         "https://cdn.ampproject.org/v0/amp-video-0.1.js"></script>
      <script async custom-element = "amp-iframe" src =
         "https://cdn.ampproject.org/v0/amp-iframe-0.1.js"></script>
      <style amp-custom>
         button{
            background-color: #ACAD5C;
            color: white;
            padding: 12px 20px;
            border: none;
            border-radius: 4px;
            cursor: pointer;
            float: left;
         }
      </style>
   </head>
   <body>
      <h3>Google AMP - Amp Bind</h3>
      <button on = "tap:AMP.setState({currentlist: 'list1'})">
      Click Here
      </button>
      <br/>
      <br/>
      <amp-state id = "myList">
         <script type = "application/json">
            {
               "currentlist" : "",
               "list1": {
                  "url": "video/m.mp4",
                  "style": "greenBackground",
                  "iframeurl":"https://maps.google.com/maps?q=hyderabad&t=&z=13&ie=UTF8&iwloc=&output=embed"
               }
            }
         </script>
      </amp-state>
      <h3>AMP - IFRAME</h3>
      <amp-iframe
         width = "600"
         title = "Google map"
         height = "400"
         layout = "responsive"
         sandbox = "allow-scripts allow-same-origin allow-popups"
         frameborder = "0"
         src = "https://maps.google.com/maps?q=telangana&t=&z=13&ie=UTF8&iwloc=&output=embed"
         [src] = "myList[currentlist].iframeurl">
         <amp-img
            layout = "fill"
            src = "images/loading.jpg"
            placeholder
            >
         /amp-img>
      </amp-iframe>
      <h3>AMP - VIDEO</h3>
      <amp-video
         id = "amp-video"
         src = "video/samplevideo.mp4"
         layout="responsive"
         [src] = "myList[currentlist].url"
         width = "300"
         height = "170" autoplay controls>
      </amp-video>
   </body>
</html>
Zauważ, że tutaj użyliśmy stanu amp z iframesrc i video src.
<amp-state id = "myList">
<script type = "application/json">
{
"currentlist" : "",
"list1": {
"url": "video/m.mp4",
"style": "greenBackground",
"iframeurl":"
https://maps.google.com/maps?q=hyderabad&t=&z=13&ie=UTF8&iwloc=&output=embed"
}
}
</script>
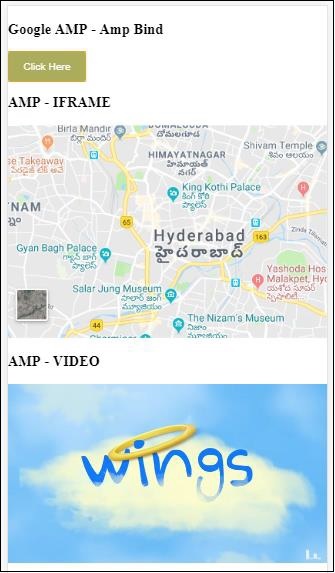
</amp-state>Bieżąca lista jest pusta, a po naciśnięciu przycisku ustawia się na listę1. Zmienna currentlist jest używana do src elementu iframe i wideo, jak pokazano poniżej -
<amp-iframe width="600"
   title = "Google map"
   height = "400"
   layout = "responsive"
   sandbox = "allow-scripts allow-same-origin allow-popups"
   frameborder = "0" src = "https://maps.google.com/maps?q=telangana&t=&z=13&ie=UTF8&iwloc=&output=embed"
   [src] = "myList[currentlist].iframeurl">
      <amp-img layout = "fill" src = "images/loading.jpg" placeholder>
      </amp-img>
</amp-iframe>
<amp-video id = "amp-video" src = "video/samplevideo.mp4"
   layout = "responsive" [src] = "myList[currentlist].url" width = "300"
   height = "170" autoplay controls>
</amp-video>
Wynik
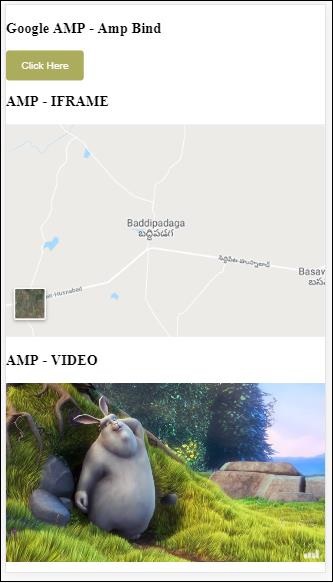
Kliknij przycisk, aby zobaczyć, jak zmienia się źródło wideo i iframe src.
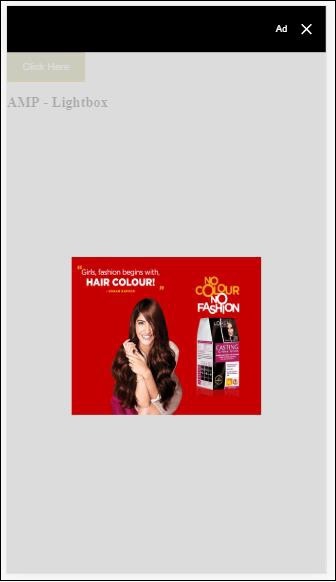
Amp-bind z amp-lightbox
Zobaczmy teraz, jak działa oprawa i amp-lightbox, gdy są używane razem.
Przykład
<!doctype html>
<html amp lang = "en">
   <head>
      <meta charset = "utf-8">
      <script async src="https://cdn.ampproject.org/v0.js"></script>
      <title>Google AMP - Amp Bind</title>
      <link rel = "canonical" href =
         "http://example.ampproject.org/article-metadata.html">
      <meta name = "viewport" content = "width = device-width,
         minimum-scale = 1,initial-scale = 1">
      <style amp-boilerplate>
         body{
            -webkit-animation:
            -amp-start 8s steps(1,end) 0s 1 normal both;-moz-animation:
            -amp-start 8s steps(1,end) 0s 1 normal both;-ms-animation:
            -amp-start 8s steps(1,end) 0s 1 normal both;animation:
            -amp-start 8s steps(1,end) 0s 1 normal both
         }
         @-webkit-keyframes
         -amp-start{from{visibility:hidden}to{visibility:visible}}@-moz-keyframes
         -amp-start{from{visibility:hidden}to{visibility:visible}}@-ms-keyframes
         -amp-start{from{visibility:hidden}to{visibility:visible}}@-o-keyframes
         -amp-start{from{visibility:hidden}to{visibility:visible}}@keyframes
         -amp-start{from{visibility:hidden}to{visibility:visible}}
      </style>
      <noscript>
         <style amp-boilerplate>
            body{
               -webkit-animation:none;
               -moz-animation:none;
               -ms-animation:none;
               animation:none
            }
         </style>
      </noscript>
      <script async custom-element = "amp-bind" src =
         "https://cdn.ampproject.org/v0/amp-bind-0.1.js"></script>
      <script async custom-element = "amp-lightbox" src =
         "https://cdn.ampproject.org/v0/amp-lightbox-0.1.js"></script>
      <style amp-custom>
         button{
            background-color: #ACAD5C;
            color: white;
            padding: 12px 20px;
            border: none;
            border-radius: 4px;
            cursor: pointer;
            float: left;
         }
         .lightbox {
            background: rgba(211,211,211,0.8);
            width: 100%;
            height: 100%;
            position: absolute;
            display: flex;
            align-items: center;
            justify-content: center;
         }
      </style>
   </head>
   <body>
      <h3>Google AMP - Amp Bind</h3>
      <button on = "tap:AMP.setState({displaylightbox: true})">
      Click Here
      </button>
      <br/>
      <br/>
      <h3>AMP - Lightbox</h3>
      <amp-lightbox
         id = "my-lightbox"
         [open] = "displaylightbox"
         layout = "nodisplay"
         close-button>
         <div class = "lightbox" on = "tap:AMP.setState({displaylightbox: false})">
            <amp-img alt = "Beautiful Flower"
               src = "images/loreal.gif"
               width = "246"
               height = "205">
            </amp-img>
         </div>
      </amp-lightbox>
   </body>
</html>
Aby użyć wiązania w amp-lightbox, użyliśmy [open] na amp-lightbox, jak pokazano poniżej -
<amp-lightbox id = "my-lightbox" [open] = "displaylightbox"
   layout = "nodisplay" close-button>
   <div class = "lightbox" on="tap:AMP.setState({displaylightbox: false})">
      <amp-img alt = "Beautiful Flower"
         src = "images/loreal.gif"
         width = "246"
         height = "205">
      </amp-img>
   </div>
</amp-lightbox>
[Open] = „displaylightbox” to zmienny stan, który zmienia się po kliknięciu przycisku i stuknięciu elementu div lightbox na true / false -
<button on = "tap:AMP.setState({displaylightbox: true})">
   Click Here
</button>

<div class = "lightbox" on = "tap:AMP.setState({displaylightbox: false})">
   <amp-img alt = "Beautiful Flower"
      src = "images/loreal.gif"
      width = "246"
      height = "205">
   </amp-img>
</div>
Wynik
Powiązanie Amp z elementem wejściowym
Zrozummy działanie wiązania wzmacniacza do elementu wejściowego za pomocą działającego przykładu, jak pokazano -
<!doctype html>
<html amp lang = "en">
   <head>
      <meta charset = "utf-8">
      <script async src = "https://cdn.ampproject.org/v0.js"></script>
      <title>Google AMP - Amp Bind</title>
      <link rel = "canonical" href=
         "http://example.ampproject.org/article-metadata.html">
      <meta name = "viewport" content = "width = device-width,
         minimum-scale = 1,initial-scale = 1">
      <style amp-boilerplate>
         body{
            -webkit-animation:
            -amp-start 8s steps(1,end) 0s 1 normal both;-moz-animation:
            -amp-start 8s steps(1,end) 0s 1 normal both;-ms-animation:
            -amp-start 8s steps(1,end) 0s 1 normal both;animation:
            -amp-start 8s steps(1,end) 0s 1 normal both
         }
         @-webkit-keyframes
         -amp-start{from{visibility:hidden}to{visibility:visible}}@-moz-keyframes
         -amp-start{from{visibility:hidden}to{visibility:visible}}@-ms-keyframes
         -amp-start{from{visibility:hidden}to{visibility:visible}}@-o-keyframes
         -amp-start{from{visibility:hidden}to{visibility:visible}}@keyframes
         -amp-start{from{visibility:hidden}to{visibility:visible}}
      </style>
      <noscript>
      <style amp-boilerplate>
         body{
            -webkit-animation:none;
            -moz-animation:none;
            -ms-animation:none;
            animation:none
         }
      </style>
      <noscript>
      <script async custom-element = "amp-bind"
         src = "https://cdn.ampproject.org/v0/amp-bind-0.1.js">
         <script>
         <script async custom-element = "amp-lightbox"
            src = "https://cdn.ampproject.org/v0/amp-lightbox-0.1.js">
      </script>
      <style amp-custom>
         button{
            background-color: #ACAD5C;
            color: white;
            padding: 12px 20px;
            border: none;
            border-radius: 4px;
            cursor: pointer;
            float: left;
         }
         .lightbox {
            background: rgba(211,211,211,0.8);
            width: 100%;
            height: 100%;
            position: absolute;
            display: flex;
            align-items: center;
            justify-content: center;
         }
         #txtname{
            width: 100%;
            padding: 12px 20px;
            margin: 8px 0;
            display: inline-block;
            border: 1px solid #ccc;
            border-radius: 4px;
            box-sizing: border-box;
         }
         div {
            font-size:25px;
         }
      </style>
   </head>
   <body>
      <h3>Google AMP - Amp Bind</h3>
      <button on = "tap:AMP.setState({displaylightbox: true})">
         Click Here
      </button>
      <br/>
      <br/>
      <h3>
         AMP - Input Element
      <h3>
      <input id = "txtname" placeholder = "Type here"
         on = "input-throttled:AMP.setState({name: event.value})">
      <div [text] = "name">
      </div>
   </body>
</html>
Wynik
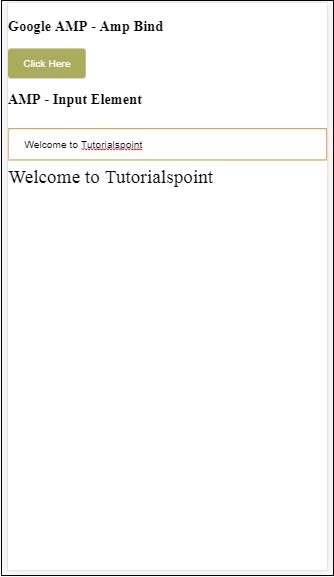
Dane wprowadzone w polu tekstowym są wyświetlane na dole. Można to zrobić zmieniając zmienną stanuname na zdarzeniu wejściowym, jak pokazano -
<input id = "txtname" placeholder = "Type here" on =
"input-throttled:AMP.setState({name: event.value})">
<div [text] = "name">
</div>